Amazon Workspaces Core (WSC) Managed Instances (Early Access)
Overview
Amazon WorkSpaces Core Managed Instances (WCMI - Workspace Core v2) offer maximum flexibility, supporting customer-supplied Windows 11 images, persistent or non-persistent desktops, and Microsoft 365 Apps via BYOL. The pricing model is usage-based, allowing customers to choose from a wide range of EC2 instance types, including GPU-enabled options. Designed for organizations that want to run Windows 11 and/or Microsoft 365 under their own licenses, this model offers a managed yet flexible way to deploy desktops on Amazon WorkSpaces Core while leveraging Dizzion’s DaaS platform for orchestration, security, and user access. It enables license portability and ensures compliance with existing Microsoft agreements.
Prerequisites
Before registering workloads, ensure the following conditions are met:
- The AWS cloud account has been imported into Frame using the standard AWS Cloud Account creation procedure. For detailed instructions, see AWS Add Cloud Account.
- WorkSpaces V2 supports only Windows 11 and operates under a Bring Your Own License (BYOL) model.
- Both persistent and non-persistent workloads are supported.
- You have granted permission for the creation of the required service-linked role (workspaces-instances.amazonaws.com), as described in the Workflow section.
Important Note!
The sandbox runs as an EC2 instance on Dedicated Instances, as required for Windows 11 licensing compliance. This setup also enables platform features like publish, backup, and clone which are mandatory. Production desktops, however, run as WorkSpaces Core Managed Instances, optimized for scalability and end-user performance.
Workflow
Step 1 – Add AWS Cloud Account
If you have not already done so, follow the instructions in AWS Add Cloud Account to connect your own AWS account.
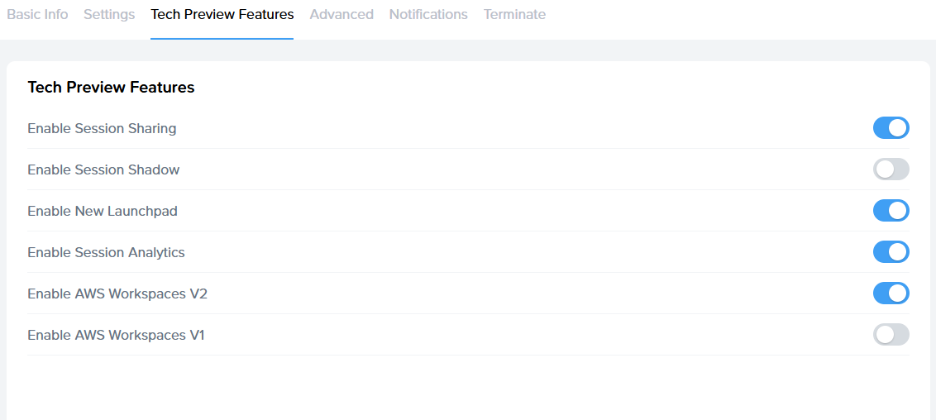
Step 2 – Enable Workspace v2
Since AWS WorkSpaces Core Managed Instances (WCMI) V2 is currently a Tech Preview feature, you will need to contact Dizzion Support to have this feature enabled for your account.
Step 3 – Initialize AWS permissions
Once the feature is enabled, navigate to Cloud Accounts, locate your AWS cloud account, select the three-dot menu, and choose Update. Then, open the WorkSpaces Core V2 tab and click Initialize environment for WorkSpaces Managed Instances.
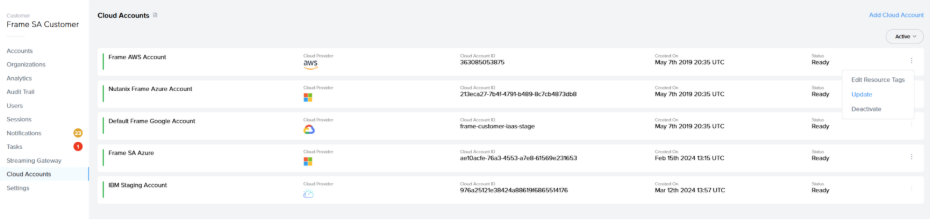
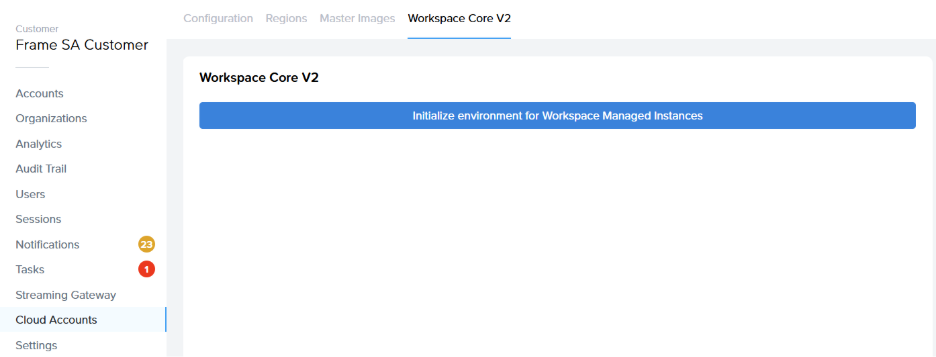
This action is required by AWS and creates a service-linked role for the service workspaces-instances.amazonaws.com, which is necessary for managing WorkSpaces.
Step 4 – Create Account using Workspace Core Managed Instances
You are now ready to create a Frame Account using WorkSpaces Managed Instances.
When selecting AWS as the cloud provider, two options will be available: EC2 and WorkSpaces Core V2. 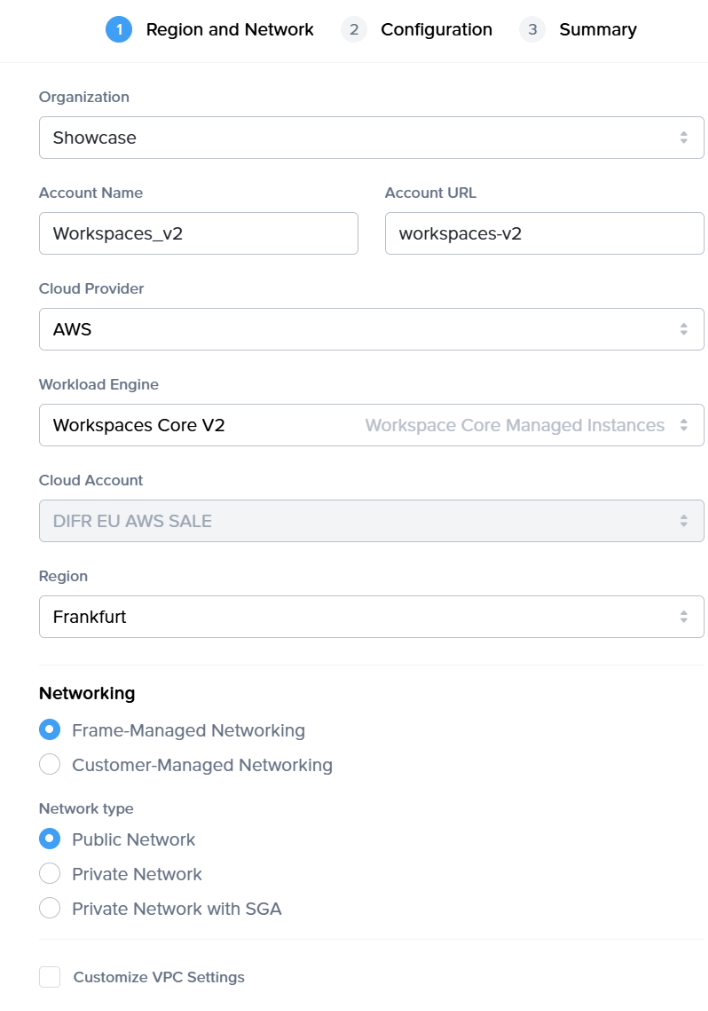
The created account will have all the same functionalities as any other Frame non-persistent or persistent account.
Limitations
Please note that:
-
This feature only works for Windows 11 and Bring-Your-Own-Licensing model (BYOL)
- Flow for changing the instance type of assigned persistent desktop is specific: the Workspace will be backed up and restored with desired instance type because AWS does not support in-place modification of Workspace Managed Instances.
- Not all regions are supported - check the available regions within console UI.
- Not all instance types are supported either, but most of them are already added.