Cloud Providers - DaaS Only
Infrastructure, Cost Management, Supported Instance Types, Cloud Account, BYO, AWS, Azure, GCP, IBM, Nutanix, Amazon Workspaces Core
- Infrastructure
- Cost Management
- DaaS Supported Instance Types
- Cloud Accounts
- Bring Your Own
- Amazon Web Services
- Microsoft Azure
- Google Cloud Platform
- IBM Cloud
- Nutanix AHV
- Amazon Workspaces Core (WSC) Managed Instances (Early Access)
- GCP Sole-Tenant Nodes - Windows 11 on GCP
Infrastructure
This next portion of our documentation describes the Frame-supported infrastructure options and detailed guides for bringing your own (BYO) infrastructure to the platform.
BYO Infrastructure and Monitoring Responsibility
When you add your own BYO infrastructure (AHV Cluster or public cloud account), you acknowledge and agree that you are configuring your infrastructure(s) for use by Frame services. For public cloud accounts, this will incur costs for infrastructure regardless of whether end users are using the infrastructure or not and whether the usage is intentionally, unintentionally, or accidentally consumed.
While Frame provides automated orchestration of Frame resources within your BYO infrastructure, per Frame EULA, you are ultimately responsible for ensuring that any resources deployed within your BYO infrastructure(s) are accurately maintained (Your Content). Frame strongly recommends that proper monitoring and alerting of your BYO infrastructure(s) is implemented and utilized on a regular basis. Any inaccuracies should be reported to Frame via a support case as soon as possible.
Frame recommends customers review our Microsoft Licensing Guide for Frame as part of the infrastructure selection and configuration process.
Cost Management
Infrastructure as a Service (IaaS) providers supply the underlying infrastructure (compute, storage, network) resources that power Frame accounts. You are expected to understand when and under what conditions you are charged for use of these resources. The primary cost drivers for IaaS usage are described in the following table.
| Public Cloud Resource | Cost | Cost Best Practices |
|---|---|---|
| Virtual machines | Charged when VM instances are powered on | Keep VMs off unless absolutely needed. Use Frame Active Capacity min and buffer or Frame Admin API endpoints to manage when VMs are powered on. |
| Storage | Charged when storage is used | Keep Sandbox disk size small unless there is a need to increase disk size for applications and user files. Regularly review the number of Sandbox, Utility server, profile disk, and personal drive backups to keep what is absolutely necessary. |
See also
- Our Capacity Management documentation provides more information about managing your usage and conserving infrastructure costs.
- Our Analytics documentation discusses how to interpret usage trends through the Frame interface.
DaaS Supported Instance Types
This table provides a comprehensive overview of the instance types that are currently supported on our DaaS platform. Each row details specific characteristics, including the provider, instance name, family, number of virtual CPUs (vCPUs), RAM allocation, and GPU availability. Notes on specific capabilities or limitations, like unlimited bursting, are also included.
To request support for new instance types, please submit a support ticket detailing the requested instances and your use case. Support for new instance types will be added based on demand, availability, performance, and compatibility.
AWS (EC2)
| Dizzion
Instance Name |
Cloud
Instance Name |
vCPU | RAM | GPU Model | GPU RAM | IaaS Credits | Notes |
|---|---|---|---|---|---|---|---|
| Air 4GB (T2) | t2.medium | 1 | 4 GB | N/A | N/A | 12 | |
| Air 4GB (T3) | t3.medium | 1 | 4 GB | N/A | N/A | 20 | unlimited bursting |
| Air 8GB (T2 | t2.large | 2 | 8 GB | N/A | N/A | 24 | |
| Air 8GB (T3) | t3.large | 2 | 8 GB | N/A | N/A | 32 | unlimited bursting |
| Air 16GB (T3) | t3.xlarge | 4 | 16 GB | N/A | N/A | 54 | unlimited bursting |
| Air 32GB (T3) | t3.2xlarge | 8 | 32 GB | N/A | N/A | 54 | unlimited bursting |
| Air 4GB (T3A) | t3a.medium | 1 | 4 GB | N/A | N/A | 20 | unlimited bursting |
| Air 8GB (T3A) | t3a.large | 2 | 8 GB | N/A | N/A | 28 | unlimited bursting |
| Air 16GB (T3A) | t3a.xlarge | 4 | 16 GB | N/A | N/A | 50 | unlimited bursting |
| Air 32GB (T3A) | t3a.2xlarge | 8 | 32 GB | N/A | N/A | 90 | unlimited bursting |
| Edge 8GB | c4.xlarge | 4 | 7.5 GB | N/A | N/A | 60 | compute-optimized |
| Edge 16GB | m4.xlarge | 4 | 16 GB | N/A | N/A | 60 | memory-optimized |
| Edge 32GB | c4.4xlarge | 16 | 32 GB | N/A | N/A | 240 | compute-optimized |
| Edge 32GB (R5) | r5.xlarge | 4 | 32 GB | N/A | N/A | 70 | memory-optimized |
| Edge 64GB (Z1D) | z1d.2xlarge | 8 | 64 GB | N/A | N/A | 160 | compute-optimized |
| Edge 64GB | m5a.4xlarge | 16 | 64 GB | N/A | N/A | 220 | memory-optimized |
| Edge 8GB (M6) | m6i.large | 2 | 8 GB | N/A | N/A | 28 | |
| Edge 16GB (M6) | m6i.xlarge | 4 | 16 GB | N/A | N/A | 56 | |
| Edge 32GB (M6) | m6i.2xlarge | 8 | 32 GB | N/A | N/A | 112 | |
| Edge 64GB (M6) | m6i.4xlarge | 16 | 64 GB | N/A | N/A | 224 | |
| Edge 4GB (C6) | c6i.large | 2 | 4 GB | N/A | N/A | 28 | |
| Edge 8GB (C6) | c6i.xlarge | 4 | 8 GB | N/A | N/A | 56 | |
| Edge 16GB (C6) | c6i.2xlarge | 8 | 16 GB | N/A | N/A | 112 | |
| Edge 32GB (C6) | c6i.4xlarge | 16 | 32 GB | N/A | N/A | 224 | |
| Edge 64GB (C6) | c6i.8xlarge | 32 | 64 GB | N/A | N/A | 448 | |
| Edge 4GB (C7) | c7i.large | 2 | 4 GB | N/A | N/A | 30 | |
| Edge 8GB (C7) | c7i.xlarge | 4 | 8 GB | N/A | N/A | 60 | |
| Edge 16GB (C7) | c7i.2xlarge | 8 | 16 GB | N/A | N/A | 120 | |
| Edge 32GB (C7) | c7i.4xlarge | 16 | 32 GB | N/A | N/A | 240 | |
| Edge 64GB (C7) | c7i.8xlarge | 32 | 64 GB | N/A | N/A | 480 | |
| Edge 8GB (M7) | m7i.large | 2 | 8 GB | N/A | N/A | 30 | |
| Edge 16GB (M7) | m7i.xlarge | 4 | 16 GB | N/A | N/A | 60 | |
| Edge 32GB (M7) | m7i.2xlarge | 8 | 32 GB | N/A | N/A | 120 | |
| Edge 64GB (M7) | m7i.4xlarge | 16 | 64 GB | N/A | N/A | 240 | |
| Pro 16GB | g2.2xlarge | 8 | 16 GB | NVIDIA K520 | 4 GB | ||
| Pro 32GB | g2.4xlarge | 16 | 32 GB | NVIDIA K520 | 4 GB | ||
| Pro 16GB (G4) | g4dn.xlarge | 4 | 16 GB | NVIDIA T4 | 16 GB | 125 | |
| Pro 32GB | g3s.xlarge | 4 | 32 GB | NVIDIA M60 | 8 GB | 170 | |
| Pro 32GB (G4) | g4dn.2xlarge | 8 | 32 GB | NVIDIA T4 | 16 GB | 170 | |
| Pro 122GB | g3.4xlarge | 8 | 122 GB | NVIDIA M60 | 8 GB | 340 | |
| Pro 64GB (G4) | g4dn.4xlarge | 16 | 64 GB | NVIDIA T4 | 16 GB | 340 | |
| Pro 128GB (G4) | g4dn.8xlarge | 32 | 128 GB | NVIDIA T4 | 16 GB | 680 | |
| Pro 16GB (AMD) | g4ad.xlarge | 4 | 16 GB | AMD V520 | 32 GB | 80 | |
| Pro 32GB (AMD) | g4ad.2xlarge | 8 | 32 GB | AMD V520 | 32 GB | 110 | |
| Pro 64GB (AMD) | g4ad.4xlarge | 16 | 64 GB | AMD V520 | 32 GB | 220 | |
| Pro 128GB (AMD) | g4ad.8xlarge | 32 | 128 GB | AMD V520 | 32 GB | 440 | |
| Pro 256GB (AMD) | g4ad.16xlarge | 64 | 256 GB | **4 x** AMD V520 | 4 x 32 GB | 880 | |
| Pro 192GB (G4) | g4dn.12xlarge | 24 | 192 GB | **4 x** NVIDIA T4 | 4 x 16 GB | 1150 | |
| Pro 256GB (G4) | g4dn.16xlarge | 32 | 256 GB | NVIDIA T4 | 16 GB | 1350 | |
| Pro 16GB (G5) | g5.xlarge | 4 | 16 GB | NVIDIA A10G | 24 GB | 170 | |
| Pro 32GB (G5) | g5.2xlarge | 8 | 32 GB | NVIDIA A10G | 24 GB | 220 | |
| Pro 64GB (G5) | g5.4xlarge | 16 | 64 GB | NVIDIA A10G | 24 GB | 340 | |
| Pro 128GB (G5) | g5.8xlarge | 32 | 128 GB | NVIDIA A10G | 24 GB | 560 | |
| Pro 192GB (G5) | g5.12xlarge | 48 | 192 GB | **4 x** NVIDIA A10G | 24 GB | 1300 | |
| Pro 256GB (G5) | g5.16xlarge | 64 | 256 GB | NVIDIA A10G | 24 GB | 1550 | |
| Pro 16GB (G6) | g6.xlarge | 4 | 16 GB | NVIDIA L4 | 24 GB | 190 | |
| Pro 32GB (G6) | g6.2xlarge | 8 | 32 GB | NVIDIA L4 | 24 GB | 220 | |
| Pro 64GB (G6) | g6.4xlarge | 16 | 64 GB | NVIDIA L4 | 24 GB | 360 | |
| Pro 128GB (G6) | g6.8xlarge | 32 | 128 GB | NVIDIA L4 | 24 GB | 580 | |
| Pro 192GB (G6) | g6.12xlarge | 48 | 192 GB | 4 x NVIDIA L4 | 4 x 24 GB | 1300 | |
| Pro 256GB (G6) | g6.16xlarge | 64 | 256 GB | 1 GPU | g6 | 1150 | |
| Pro 8GB (G6f) | g6f.large | 2 | 8 GB | 1/8 NVIDIA L4 | 3 GB | 60 | |
| Pro 16GB (G6f) | g6f.xlarge | 4 | 16 GB | 1/8 NVIDIA L4 | 3 GB | 80 | |
| Pro 32GB (G6f) | g6f.2xlarge | 8 | 32 GB | 1/4 NVIDIA L4 | 6 GB | 160 | |
| Pro 64GB (G6f) | g6f.4xlarge | 16 | 64 | 1/2 NVIDIA L4 | 12 GB | 310 | |
| Pro 128GB (GR6) | gr6f.4xlarge | 16 | 64 | 1/2 NVIDIA L4 | 12 GB | 340 | |
| Pro 256GB (GR6) | gr6.8xlarge | 32 | 256 | 1 NVIDIA L4 | 24 GB | 700 |
Azure
| Dizzion
Instance Name |
Cloud
Instance Name |
vCPU | RAM | GPU Model | GPU RAM | IaaS Credits | Notes |
|---|---|---|---|---|---|---|---|
| Air 8GB (Dsv3) | D2s\_v3 | 2 | 8 GB | N/A | N/A | 30 | |
| Air 8GB (Ddsv5) | D2ds\_v5 | 2 | 8 GB | N/A | N/A | 32 | |
| Air 8GB (Dsv5) | D2s\_v5 | 2 | 8 GB | N/A | N/A | 35 | |
| Air 8GB (Dv5) | D2\_v5 | 2 | 8 GB | N/A | N/A | 30 | |
| Air 16GB | D4\_v3 | 4 | 16 GB | N/A | N/A | 60 | |
| Air 16GB (Dsv3) | D4s\_v3 | 4 | 16 GB | N/A | N/A | 60 | |
| Air4GB (Dv4) | D4\_v4 | 4 | 16 GB | N/A | N/A | 60 | |
| Air 16GB (Dv5) | D4ds\_v5 | 4 | 16 GB | N/A | N/A | 64 | |
| Air 16GB (Dv5) | D4ds\_v5 | 4 | 16 GB | N/A | N/A | 64 | |
| Air 16GB (Dv5) | D4\_v5 | 4 | 16 GB | N/A | N/A | 64 | |
| Edge 8GB (Fsv2) | F4s\_v2 | N/A | N/A | 60 | |||
| Edge 32GB (DS8 v3) | D8s\_v3 | 8 | 32 GB | N/A | N/A | 110 | |
| Edge 128GB (Ev4) | E16\_v4 | 16 | 128 GB | N/A | N/A | 320 | |
| Edge 256GB (Ev4) | E32\_v4 | 32 | 256 GB | N/A | N/A | 640 | |
| Edge 32GB (Ev5) | E4\_v4 | N/A | N/A | 55 | |||
| Edge 64GB (Ev4) | E8\_v4 | 8 | 64 GB | N/A | N/A | 160 | |
| Pro 28GB (NCasv3) | NC4as\_T4\_v3 | 4 | 28 GB | NVIDIA T4 | 16 GB | 140 | |
| Pro 56GB (NCasv3) | NC8as\_T4\_v3 | 8 | 56 GB | NVIDIA T4 | 16 GB | 220 | |
| Pro 110GB (NCasv3) | NC16as\_T4\_v3 | 16 | 110 GB | NVIDIA T4 | 16 GB | 360 | |
| Pro 440GB (NCasv3) | NC64as\_T4\_v3 | 64 | 448 GB | NVIDIA T4 | 16 GB | 1440 | |
| Pro 14GB (NVasv4) | NV4as\_v4 | 4 | 148 | 1/8 AMD MI25 | 2 GB | 70 | |
| Pro 28GB (NVasv4) | NV8as\_v4 | 8 | 28 GB | 1/4 AMD MI25 | 4 GB | 140 | |
| Pro 56GB (NVasv4) | NV16as\_v4 | 16 | 56 GB | 1/2 AMD MI25 | 8 GB | 280 | |
| Pro 112GB (NVasv4) | NV32as\_v4 | 32 | 112 GB | AMD MI25 | 16 GB | 560 | |
| Pro 112GB (NVsv3) | NV12s\_v3 | 12 | 112 GB | NVIDIA M60 | 16 GB | 300 | [Retire Sept 2026 ](https://learn.microsoft.com/en-us/azure/virtual-machines/sizes/gpu-accelerated/nvv3-series?tabs=sizebasic) |
| Pro 224GB (NVsv3) | NV24s\_v3 | 24 | 224 GB | **2 x** NVIDIA M60 | 2 x 16 GB | 600 | [Retire Sept 2026 ](https://learn.microsoft.com/en-us/azure/virtual-machines/sizes/gpu-accelerated/nvv3-series?tabs=sizebasic) |
| Pro 448GB (NVsv3) | NV48s\_v3 | 48 | 448 GB | **4 x** NVIDIA M60 | 4 x 16 GB | 1200 | [Retire Sept 2026 ](https://learn.microsoft.com/en-us/azure/virtual-machines/sizes/gpu-accelerated/nvv3-series?tabs=sizebasic) |
| Pro 55GB (NVadsv5) | NV6ads\_A10\_v5 | 6 | 55 GB | 1/6 NVIDIA A10 | 4 GB | 125 | |
| Pro 110GB (NVasdv5) | NV12ads\_A10\_v5 | 12 | 110 GB | 1/3 NVIDIA A10 | 8 GB | 250 | |
| Pro 220GB (NVasdv5) | NV18ads\_A10\_v5 | 18 | 220 GB | 1/2 NVIDIA A10 | 12 GB | 450 | |
| Pro 440GB (NVasdv5) | NV36ads\_A10\_v5 | 36 | 440 GB | NVIDIA A10 | 24 GB | 850 | |
| Pro 16GB (NV4ads\_V710) | NV4ads\_V710\_v5 | 4 | 16 GB | 1/6 AMD V720 | 4 GB | 60 | |
| Pro 32GB (NV4ads\_V710) | NV8ads\_V710\_v5 | 8 | 32 GB | 1/3 AMD V720 | 8 GB | 120 | |
| Pro 64GB (NV4ads\_V710) | NV12ads\_V710\_v5 | 16 | 64 GB | 1/2 AMD V720 | 12 GB | 180 | |
| Pro 128GB (NV4ads\_V710) | NV24ads\_V710\_v5 | 24 | 128 GB | AMD V720 | 24 GB | 340 |
GCP
| Dizzion
Instance Name |
Cloud
Instance Name |
vCPU | RAM | GPU Model | GPU RAM | IaaS Credits | Notes |
|---|---|---|---|---|---|---|---|
| Air 4GB | custom-2-4096-Windows | 2 | 4 GB | N/A | N/A | ||
| Air 8GB (N1) | n1-standard-2-Windows | 2 | 8 GB | N/A | N/A | 30 | |
| Air 8GB (E2) | e2-standard-2-Windows | 2 | 8 GB | N/A | N/A | 24 | |
| Air 8GB (N2D) | n2d-standard-2-Windows | 2 | 8 GB | N/A | N/A | 28 | |
| Air 16GB (N1) | n1-standard-4-Windows | 4 | 15 GB | N/A | N/A | 60 | |
| Air 16GB (N2) | n2-standard-4-Windows | 4 | 15 GB | N/A | N/A | 40 | |
| Air 16GB (E2) | e2-standard-4-Windows | 4 | 16 GB | N/A | N/A | 48 | |
| Air 16GB (N2D) | n2d-standard-4-Windows | 4 | 15 GB | N/A | N/A | 56 | |
| Air 30GB (N2D) | n2d-standard-8-Windows | 8 | 30 GB | N/A | N/A | 112 | |
| Edge 8GB (N1) | n1-highcpu-8-Windows | 8 | 7.2 GB | N/A | N/A | 100 | |
| Edge 26GB (N1) | n1-highmem-4-Windows | 4 | 26 GB | N/A | N/A | 70 | |
| Edge 104GB (N1) | n1-highmem-16-Windows | 16 | 104 GB | N/A | N/A | 280 | |
| Edge 208GB (N1) | n1-highmem-32-Windows | 32 | 208 GB | N/A | N/A | 560 | |
| Pro 16GB (P4) | n1-standard-4-GPU-P4-Windows | 4 | 15 GB | NVIDIA P4 | 8 GB | 150 | |
| Pro 30GB (P4) | n1-standard-8-GPU-P4-Windows | 8 | 30 GB | NVIDIA P4 | 8 GB | ||
| Pro 60GB (P4) | n1-standard-16-GPU-P4-Windows | 16 | 60 GB | NVIDIA P4 | 8 GB | 300 | |
| Pro 8GB (T4) | n1-standard-2-GPU-T4-Windows | 2 | 8 GB | NVIDIA T4 | 16 GB | 105 | |
| Pro 16GB (T4) | n1-standard-4-GPU-T4-Windows | 4 | 30 GB | NVIDIA T4 | 16 GB | 130 | |
| Pro 30GB (T4) | n1-standard-8-GPU-T4-Windows | 8 | 30 GB | NVIDIA T4 | 16 GB | 185 | |
| Pro 60GB (T4) | n1-standard-16-GPU-T4-Windows | 16 | 60 GB | NVIDIA T4 | 16 GB | 240 | |
| Pro 240GB (4xT4) | n1-standard-64-GPU-4-T4-Windows | 64 | 240 GB | **4 x** NVIDIA T4 | **4 x** 16 GB | 1250 | |
| Pro 16GB (L4) | g2-standard-4-Windows | 4 | 16 GB | NVIDIA L4 | 24 GB | 140 | |
| Pro 32GB (L4) | g2-standard-8-Windows | 8 | 32 GB | NVIDIA L4 | 24 GB | 180 | |
| Pro 64GB (L4) | g2-standard-16-Windows | 16 | 64 GB | NVIDIA L4 | 24 GB | 250 |
IBM Cloud VPC
| Dizzion
Instance Name |
Cloud
Instance Name |
vCPU | RAM | GPU Model | GPU RAM | IaaS Credits | Notes |
|---|---|---|---|---|---|---|---|
| Air 10GB (BX3D) | bx3d-2x10 | 2 | 10 GB | N/A | N/A | 25 | |
| Air 20GB (BX3D) | bx3d-4x20 | 4 | 20 GB | N/A | N/A | 45 | |
| Air 40GB (BX3D) | bx3d-8x40 | 8 | 40 GB | N/A | N/A | 90 | |
| Air 5GB (CX3D) | cx3d-2x5 | 2 | 5 GB | N/A | N/A | 25 | |
| Air 10GB (CX3D) | cx3d-4x10 | 4 | 10 GB | N/A | N/A | 45 | |
| Air 20GB (CX3D) | cx3d-8x20 | 8 | 20 GB | N/A | N/A | 85 | |
| Pro 80GB (GX3) | gx3-16x80x1l4 | 16 | 80 GB | NVIDIA L4\* | 24 GB | 250 | BYO NVIDIA license |
| Pro 120GB (GX3) | gx3-24x120x1l40s | 24 | 120 GB | NVIDIA L40S\* | 48 GB | 565 | BYO NVIDIA license |
| Air 8GB (CX2) | cx2-4x8 | 4 | 8 GB | N/A | N/A | 40 | |
| Air 16GB (CX2) | cx2-8x16 | 8 | 16 GB | N/A | N/A | 80 | |
| Air 32GB (CX2) | cx2-16x32 | 16 | 32 GB | N/A | N/A | 155 | |
| Air 8GB (BX2) | bx2-2x8 | 2 | 8 GB | N/A | N/A | 25 | |
| Air 16GB (BX2) | bx2-4x16 | 4 | 16 GB | N/A | N/A | 45 | |
| Air 32GB (BX2) | bx2-8x32 | 8 | 32 GB | N/A | N/A | 85 | |
| Air 64GB (BX2) | bx2-16x64 | 16 | 64 GB | N/A | N/A | 165 | |
| Air 8GB (BX2A) | bx2a-2x8 | 2 | 8 GB | N/A | N/A | 25 | |
| Air 16GB (BX2A) | bx2a-4x16 | 4 | 16 GB | N/A | N/A | 45 | |
| Air 32GB (BX2A) | bx2a-8x32 | 8 | 32 GB | N/A | N/A | 85 | |
| Air 64GB (BX2A) | bx2a-16x64 | 16 | 64 GB | N/A | N/A | 165 |
Cloud Accounts
Frame provides administrators with the ability to manage various components of their cloud accounts easily from the Frame console. This guide discusses how administrators can manage their virtual networks, master images, and instance types associated with each of their cloud accounts.
Administrators with the appropriate role can add new public cloud accounts and review the list and status of existing cloud accounts by navigating to the Customer or Organization Dashboard in the Admin Console and selecting Cloud Accounts in the left-hand menu.
To inspect or manage a specific cloud account, click on adjacent kebab menu icon of a specific cloud account and select Update.
Options by Infrastructure
The tabs you see at the top of the Cloud Account page will vary depending on the type of cloud account (infrastructure) you are accessing.
| Infrastructure | Configuration | Master/Template Images | Virtual Networks | Shared VPCs |
|---|---|---|---|---|
| AWS | X | X | ||
| GCP | X | X | ||
| IBM Cloud | X | X | ||
| Microsoft Azure | X | X | ||
| Nutanix AHV | X | X |
Backplane Separation and Cloud Account Usage
Dizzion Platform runs in two geographical backplanes: U.S. and EMEA (DEU).
This separation exists for data protection, compliance, and disaster recovery (DR) reasons.Customers should never reuse or connect the same cloud environment across multiple backplanes.
For example:
- Do not use the same AWS Account in both U.S. and DEU backplanes.
- Do not reuse one Azure Subscription for different backplanes.
- Do not connect the same GCP Project to more than one backplane.
- Do not reuse the same IBM Cloud Resource Group (or IBM Account, depending on setup).
Each backplane must have its own cloud account. Using the same cloud account in multiple backplanes may cause unexpected issues, including problems with VM deletion and synchronization.
Always create a new cloud account per backplane to ensure proper operation, separation, and compliance.
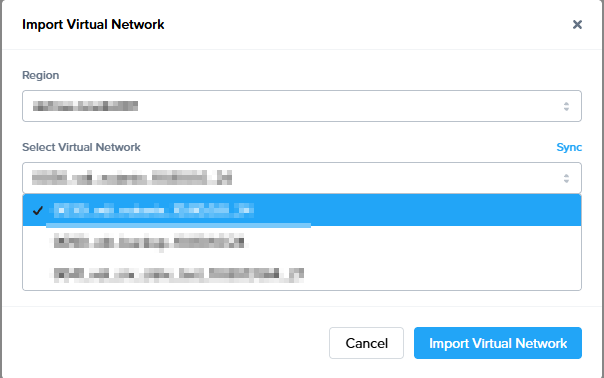
Virtual Networks (AHV only)
The Virtual Networks tab is available for AHV cloud accounts. Under Virtual Networks, administrators can see which virtual networks have already been used to create Frame accounts with Frame workload VMs.
Each time you go to this tab, Frame control plane will retrieve the list of VLANs from your AHV cluster and display them in this tab.

If you would like to make another virtual network available to chose from when creating a new Frame account, you can click on "Import Virtual Network" from there you can sync to get the latest list of available networks to import
Instance Types (AHV only)
Administrators can add and remove custom instance types for AHV from the Instance Types tab by following the instructions below.
Add an Instance Type
1. Select the Instance Types tab at the top of the page and then click the blue Add instance type link.

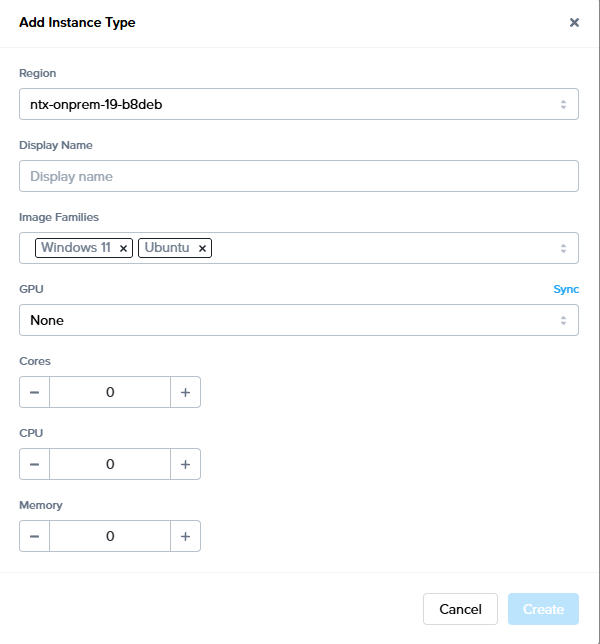
- Display Name: Name of the instance type that will appear to administrators and users within Frame Console and Launchpad, respectively.
- Image Families: The operating systems that can run on this instance type.
- GPU: If you have NVIDIA vGPUs configured in Prism, the list of vGPU profiles will be displayed. You may pick a vGPU profile if you wish for the instance type to have a vGPU when VMs of this instance type are provisioned.
- Cores: : Number of cores for each vCPU.
- CPU : Number of vCPUs for this instance type.
- Memory : Amount of memory in GiB.
Frame recommends giving the instance type a name (e.g., "Air 2vCPU 8GB") that provides sizing information at-a-glance.
3 . Click Create at the bottom of the window when you are done.
Once you have defined the instance type under your AHV Cloud Account, you can go to Capacity of your Frame account(s) to add a test pool and/or production pool of this instance type.
Remove an Instance Type
If all pools using an instance type have been deleted from your Frame accounts, you can fully remove the instance type from the Cloud Accounts page.
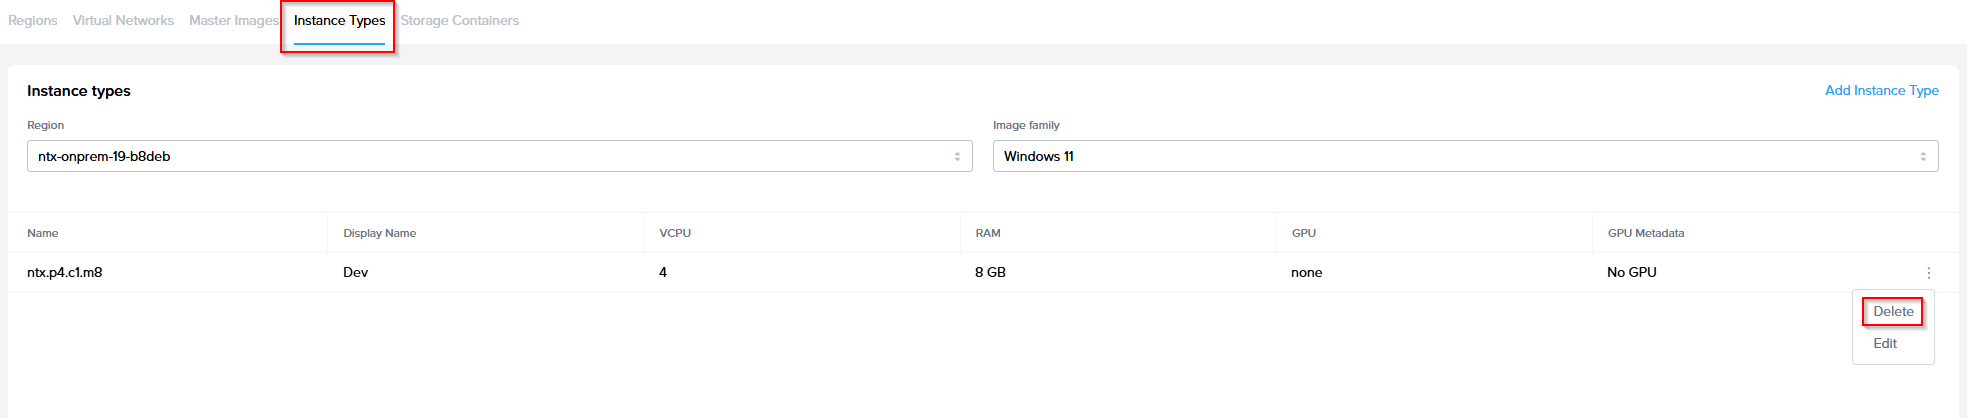
5. Click Remove in the bottom corner of the prompt that appears to confirm your choice.
Notification Center will notify you when the instance type has successfully been removed from your cloud account.
Update Configuration
The Configuration tab is available on the cloud account management page for AWS, Azure, IBM Cloud, and Nutanix AHV. The sections below discuss what is provided for each provider.
AWS
For an AWS cloud account, there are two sub-tabs: Update Stack and Recreate Stack.
Update Stack
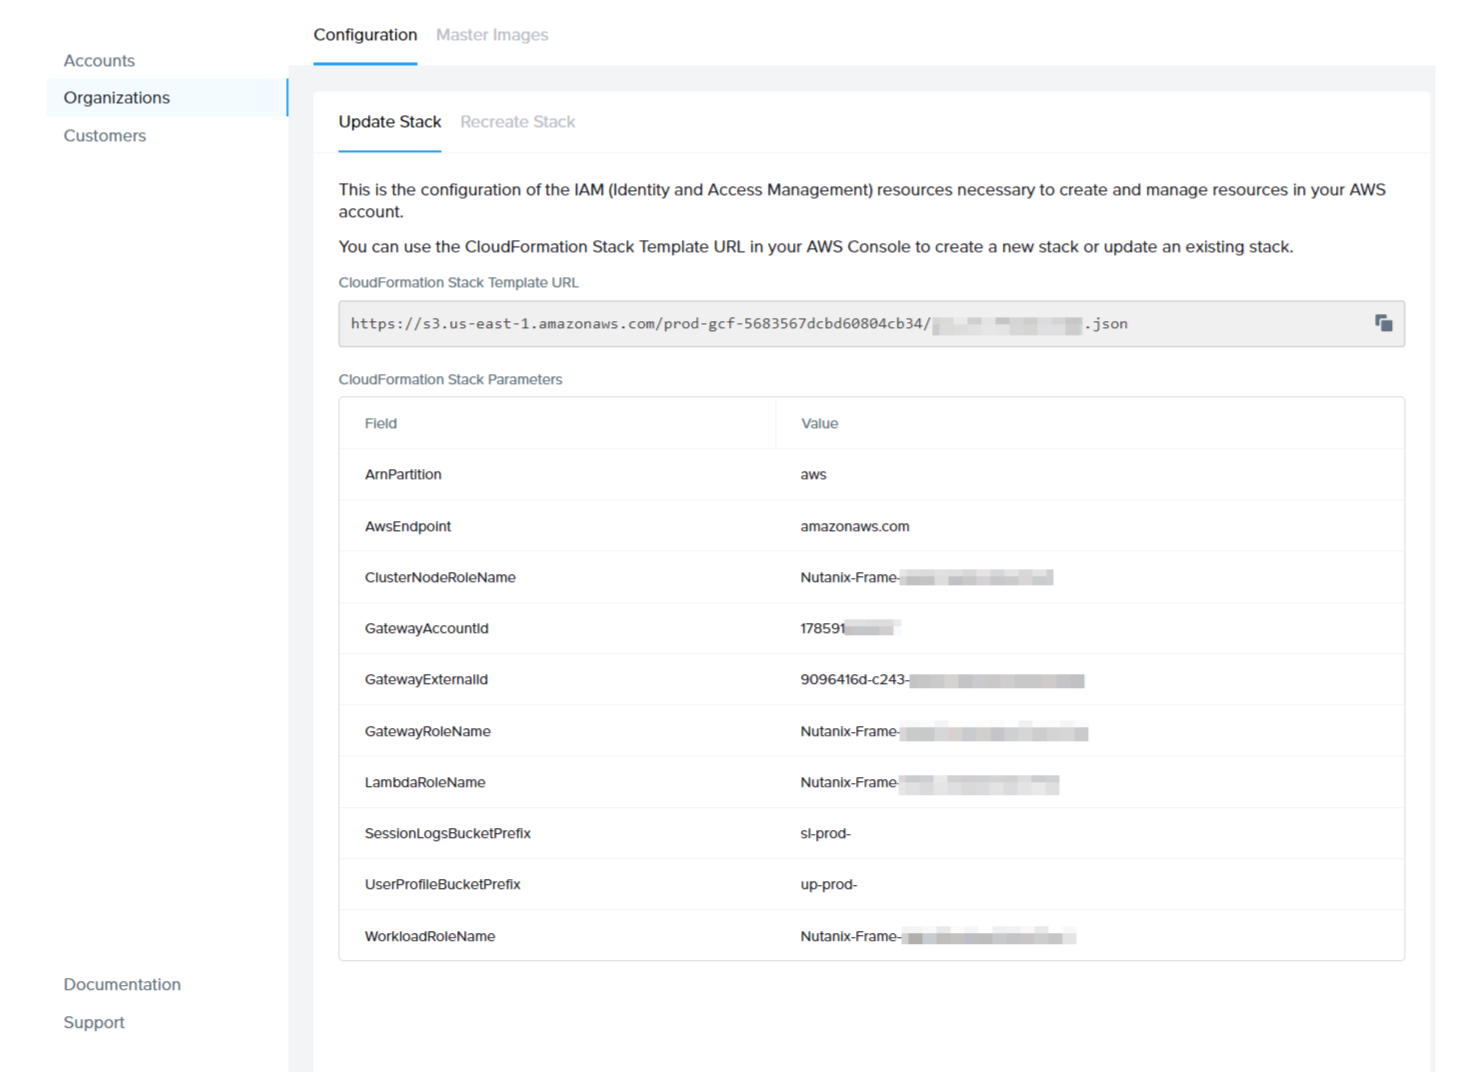
The Update Stack tab provides you with your CloudFormation Stack template URL and Stack parameters, as shown above. These details can be used to update IAM (Identity and Access Management) roles as needed. As an example, you may need to use the CloudFormation Stack template URL to expand your IAM permissions after a Frame product update in order to use new product features.
Recreate Stack
Use the Recreate Stack sub-tab to recreate your CloudFormation stack to a known good state and verify the connection. Typically, most administrators will access this page when troubleshooting permissions/account setup issues.

In order to recreate your CloudFormation stack, you must delete the existing stack in your AWS Console which you can access directly from the Recreate Stack sub-tab.
Azure
The configuration tab for Azure can be used to update your Azure credentials found in the Azure Portal. Most administrators will need to access this page in order to update the client secret before it expires. Microsoft Azure limits client secrets to expire 2 years or less after their creation date.
The client secret is used by Frame to manage your BYO Azure account. Microsoft implemented a maximum expiration date of 2 years from the client secret creation date. When your key expires, you will need to re-enter your cloud account credentials registration) from the cloud account management view of your Frame console. If you fail to update your client secret before it expires, Frame will no longer be able to manage your Azure account and you will likely experience an outage.
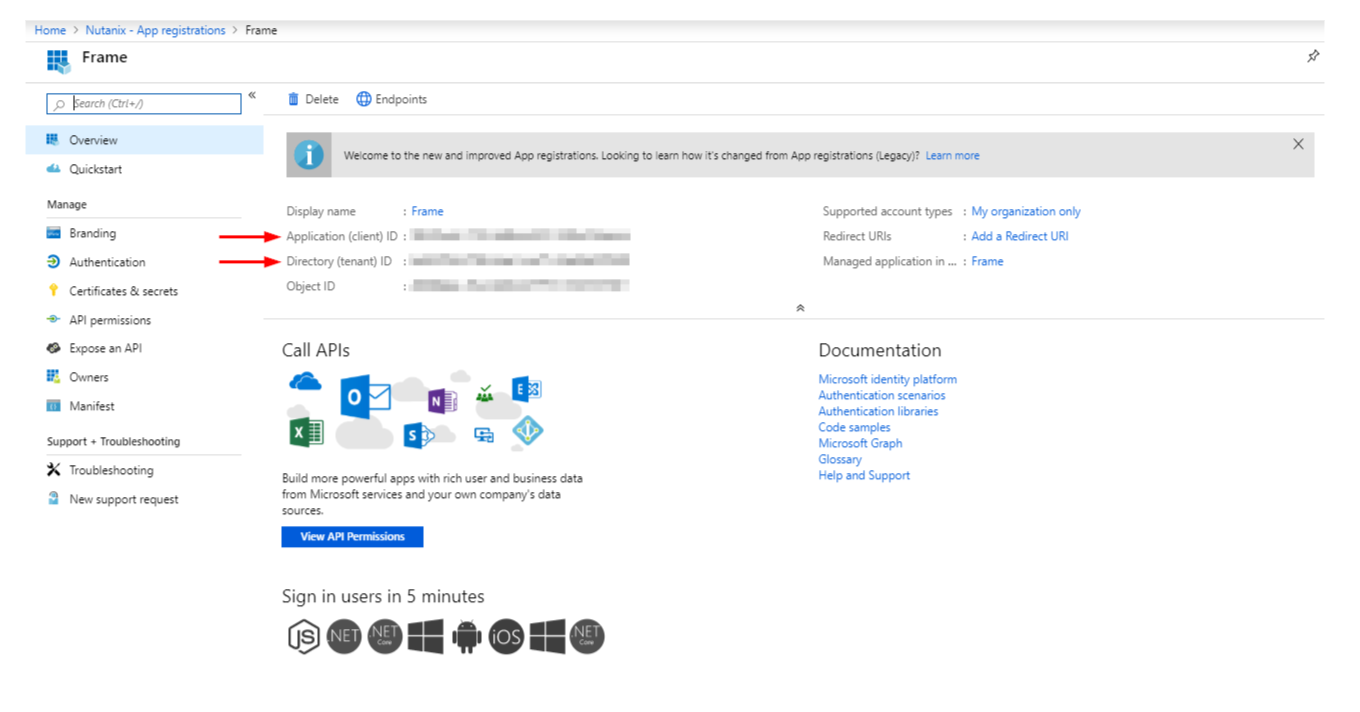
If your client secret has expired, you can simply re-enter your cloud credentials here and click the Verify Connection button. Your Application ID and Directory ID can be found in the Overview section of your Frame app registration in the Azure Portal.
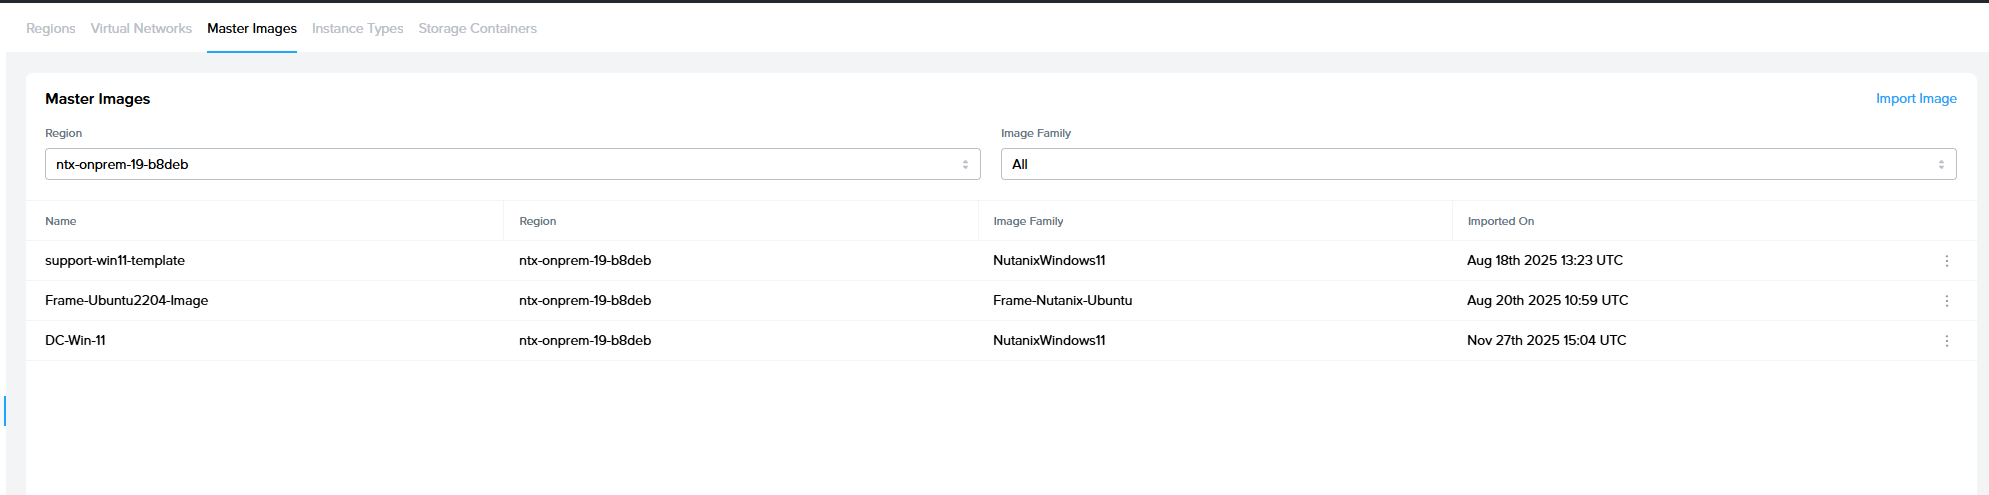
The Template Image (aka Master Images) tab enables administrators to select the desired images they would like to use as the base images for Frame account Sandboxes. Please refer to the BYO OS Images of our documentation for detailed instructions on how to prepare and add your own template images to your infrastructure. The guides outline how to add your desired template images through your infrastructure provider and then make them visible in the Frame Console. Once they are added to your cloud account using the Master images tab, you can then use them to create a new Frame account or to reset the Sandbox image of an existing Frame account. You can also remove the template image from the list of template images.
Add a Template Image (AHV)
To add a new template image that has already been prepared and uploaded to your AHV cluster, perform the following steps:
- Navigate to the Customer or Organization Dashboard in the Admin Console where the cloud account is registered.
- Select Cloud Accounts in the left-hand menu.
- Navigate to the cloud account you will be managing. Click on the adjacent kebab menu and select Update.
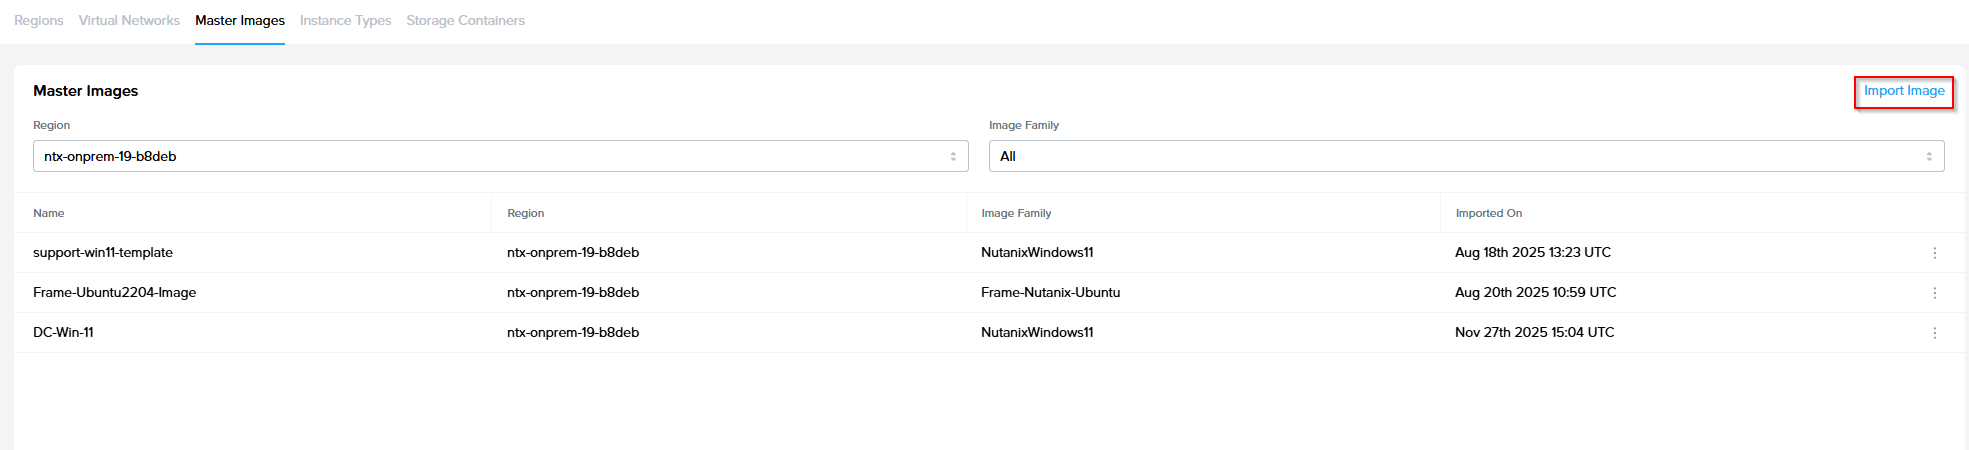
- From there, navigate to the Master Images tab at the top of the page. There you can select "Import Image" in the upper right corner

5. Click sync to get the latest available images, select the desired image and select Import.
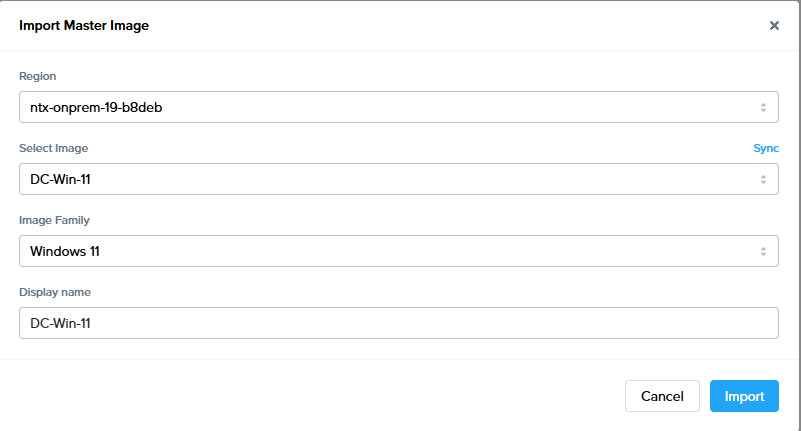
6. If your template image has not been imported into Frame before, click \*\*Sync\*\* so Frame Platform will query your infrastructure for the list of available images. Then, complete the remainder of the form:
- Region: Select the Region/Cluster from which you want to select the image
- Select Image: Select the image to import from the picklist.
- Image Family: Specify the OS type for this image.
- Display Name: Enter the display name of image.
Click Import for Frame Platform to import your template image to your Cloud Account.
Add a Template Image (Public Cloud)
To add a new template image that has already been prepared and uploaded to a specific region in your public cloud infrastructure, perform the following steps:
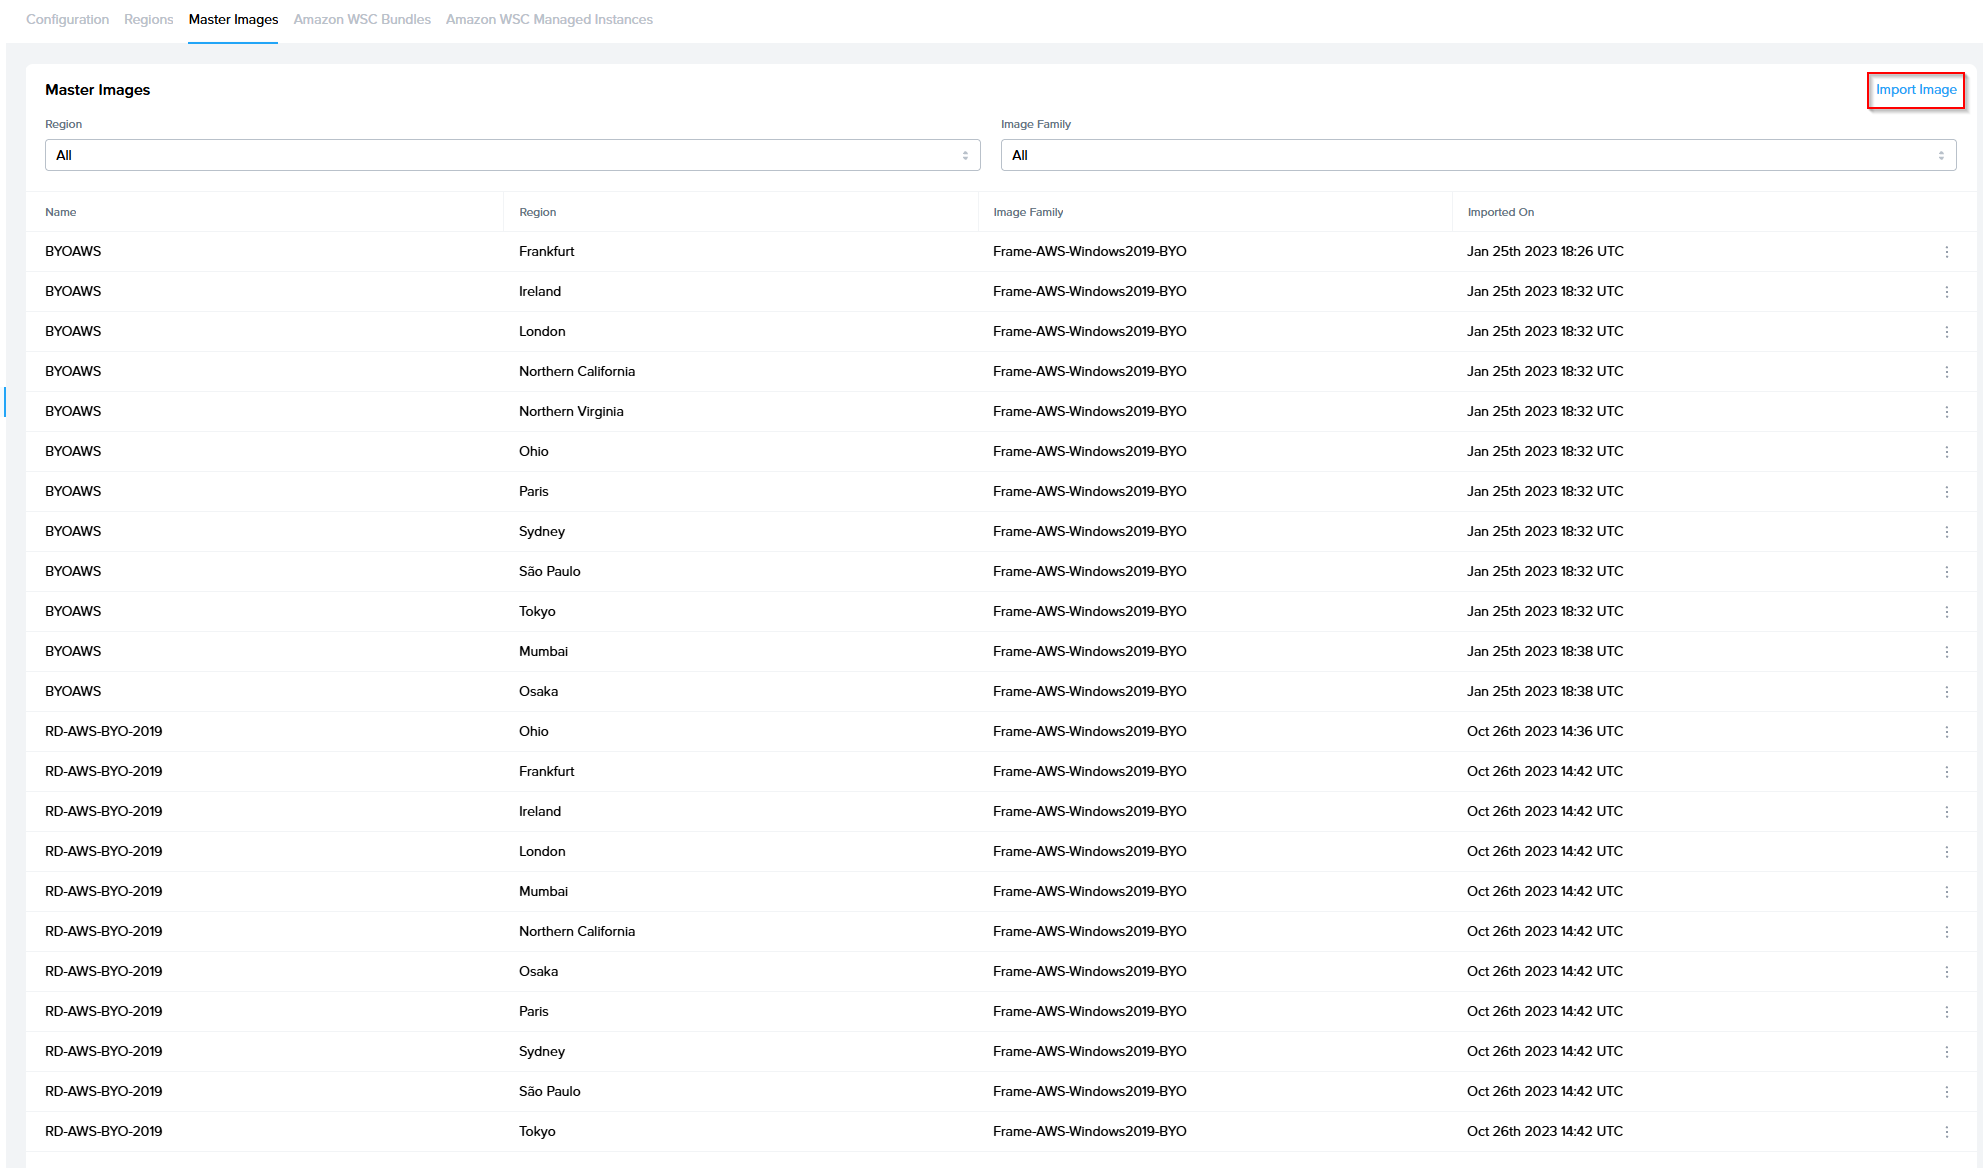
5. Click sync to get the latest available images, select the desired image and select Import.
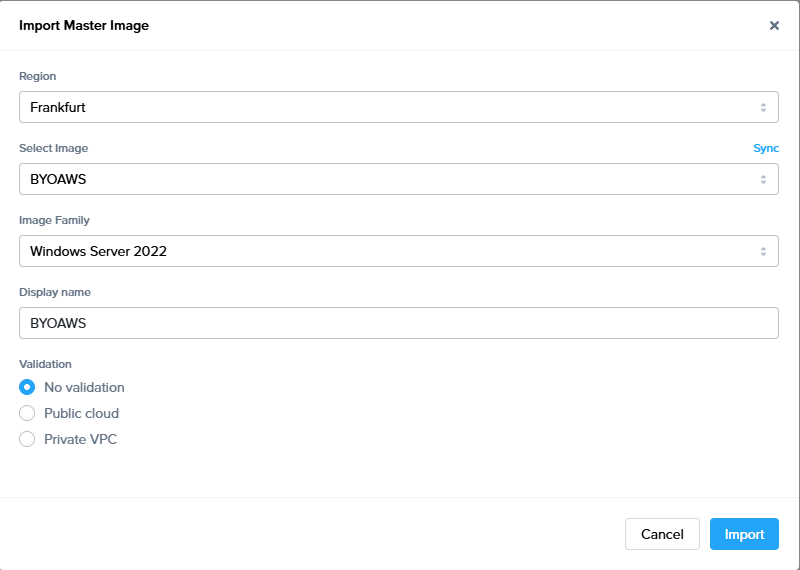
Then, complete the remainder of the form:
- Select Image: Select the image to import from the picklist.
- Image Family: Specify the OS type for this image
- Display Name: Enter the display name of image.
- No validation: The image will be added to your cloud account, but will not be verified. There is no guarantee that this image will work.
- Public cloud: The image will be used to create a new test Frame account with a standalone VPC and Sandbox. The Frame platform will then verify that the Sandbox can communicate with the Frame Platform before terminating the test Frame account and deleting all associated cloud resources created by Frame.
- Private VPC: After you specify an existing VPC/VNET ID, the Frame platform will use the image to create a new test Frame account in the specified VPC/VNET. Frame will then verify that the Sandbox can communicate with Frame Platform before terminating the Frame account and deleting all associated cloud resources created by Frame.
During the validation process, you will see an active task running in the Notification Center. However, the test Frame Account will not be visible within the Frame Admin user interface. Depending on the public cloud provider, this validation process may take 30 minutes to an hour to complete.
7. Once registration and validation (optional) of the image is complete, you can create new Frame accounts using your new template image or reset an existing Frame account Sandbox to the new template image.
You can check your infrastructure console to monitor the provisioning and de-provisioning of resources during the validation process.
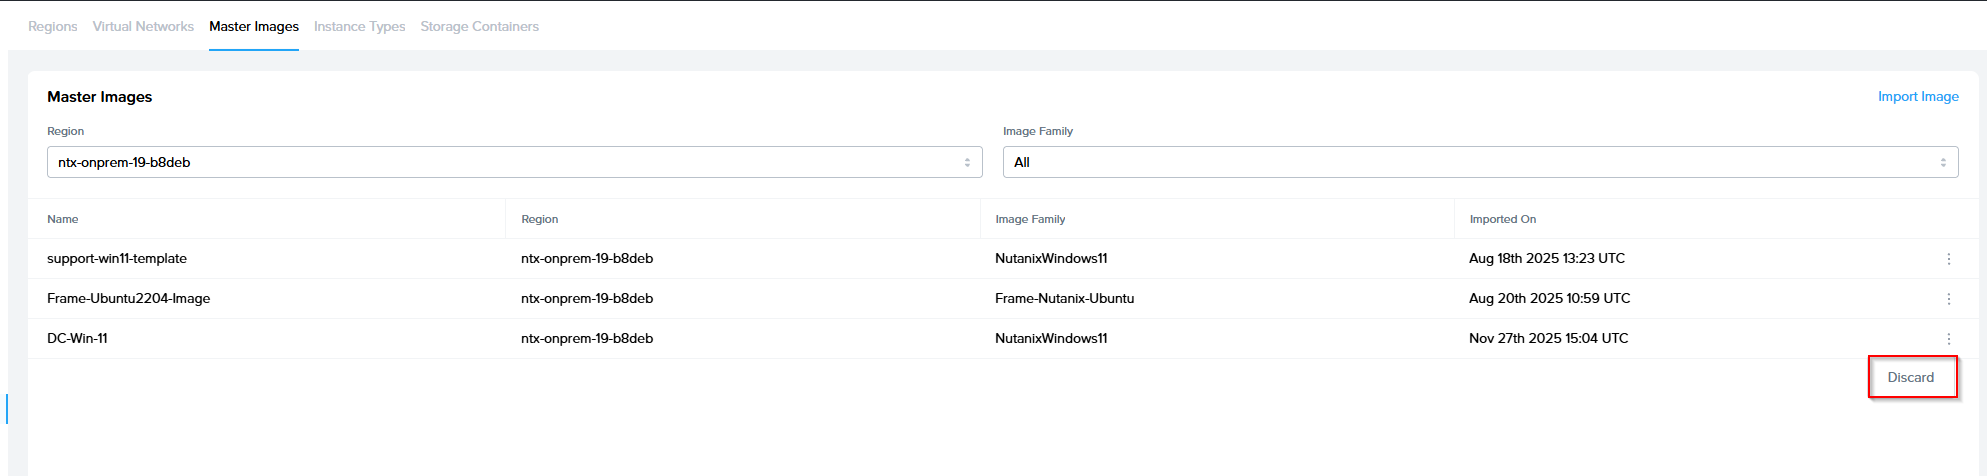
Discard a Template Image
1. Before you remove an unnecessary template image from your cloud account, you must ensure that there are no Frame accounts using that template image.
2. Discarding an imported template image simply unregisters the template image from your cloud account.
This action does not delete the source template image within your infrastructure.
- Navigate to the Customer or Organization Dashboard in the Admin Console where the cloud account is registered.
- Select Cloud Accounts in the left-hand menu.
- Navigate to the cloud account you will be managing. Click on the adjacent kebab menu and select Update.
- From there, navigate to the Master Images tab at the top of the page.

- Identify the image you wish to remove and select the kebab menu to the right of the image.

- Click on Discard and Frame Platform will remove the imported template image from your cloud account.
Shared VPCs (GCP only)
Frame supports the ability for customers to use Google Cloud Platform's Shared VPCs, where a Google Host Project owns a VPC with specific subnets shared with other Google Service Projects. Once the GCP administrator has configured the GCP Host and Service Projects, the Frame administrators can follow the procedure below to set up the GCP Cloud Accounts in Frame to create Frame accounts in a Google Service Project.
Prerequisites
Before the Frame administrator can specify within Frame Console the Shared VPC subnets to use in a Google Service Project, the following conditions must be satisfied:
- The GCP Host Project has been configured in GCP to have shared one or more subnets in the Shared VPC with the GCP Service Project.
- The GCP Host and Service Projects are registered in Frame as separate GCP Cloud Accounts at the same level in the Frame Platform Hierarchy.
Share a Subnet
Once the two projects are registered in Frame, the Frame administrator can share the subnet(s) from the Shared VPC in the Google Host Project by doing the following:
A new entry in the Shared Subnets list will appear. These Shared VPC subnets are now visible in the Account Creation workflow when you create the Frame Account using the Destination GCP Cloud Account and customer-managed networking.
Revoke a Shared Subnet
If you wish to stop using a shared subnet, you will need to ensure that the shared subnet is no longer has Frame-managed workload VMs (e.g,. terminate Frame accounts using that shared subnet) and then:
Add a Cloud Account Region
Administrators can add additional regions after their cloud account has been setup using the Add Regions function.
Administrators should ensure they have sufficient resource limits in the regions they decide to add before adding them through the Frame Console.
4 . A new window will appear. You have two options to choose from:
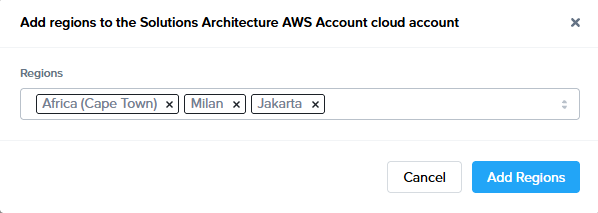
- All supported regions: Select this option if you would like to add all other supported regions aside from the ones you have already specified.
- Specify regions: Select this option if you would like to add just a few additional supported regions to your cloud account. Simply click inside the regions field and select as many regions as you wish from the drop-down menu.
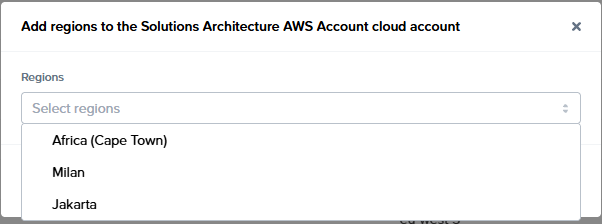
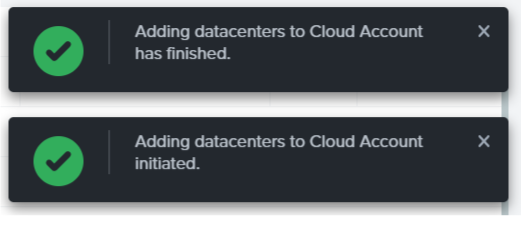
5. Once you have made your selection, click Save in the bottom right corner of the window. You will receive updates in your notification center regarding the status.
Deactivate a Cloud Account
A cloud account that has existing Frame accounts cannot be deactivated. You must terminate all Frame accounts using the cloud account resources first.
For AHV, once the AHV Cloud Account is deactivated, the Cloud Connector Appliance (CCA) VM(s) and Streaming Gateway Appliance (SGA) VMs can be terminated in Prism Element and categories removed from Prism Central.
Reconnect Cloud Account
When the Frame control plane is unable to communicate with the cloud account infrastructure, the status for the cloud account in the Cloud Accounts list will be displayed as "U" for Unavailable (instead of "R" for Ready). The administrator will need to correct the issue and may need to manually trigger a reconnection of the cloud account.
Common reasons for an unavailable cloud account are:
AHV:
- Prism Element service account username/password was changed or expired
- Cloud Connector Appliance (CCA) VMs are unresponsive or powered off
- Cloud Connector Appliance (CCA) is unable to connect to the Frame control plane (cch.console.nutanix.com)
Public cloud:
When a Cloud Account becomes unavailable, Frame will not reboot any workload VM if that workload has an active user session once the Cloud Account becomes available. Frame will also queue any session close requests when Cloud Account is unavailable and process those requests once the Cloud Account becomes available. This behavior ensures sessions will not be left incorrectly in an active state.
CCA Dashboard - Change

If you need to update your Prism Central or Prism Element credentials, you will need to:
- Go to the CCA Dashboard by specifying in your browser:
https://<CCA VM IP address>/ - Log in with your current Prism Central credentials.
- Click Profile in the top right menu and launch the update password wizard. The CCA wizard allows you to change Prism Central user and password and click save.
Bring Your Own
You can register your Amazon Web Services (AWS), Google Cloud Platform (GCP), IBM Cloud, Microsoft Azure, and/or Nutanix AHV infrastructure in your Frame tenant and use one or more of these infrastructures to deliver your virtualized applications and desktops.
Common reasons why you would bring your own public cloud or on-premises Nutanix AHV infrastructure are:
- You wish to take advantage of existing billing arrangements with your cloud provider for convenience and/or pricing. For example, your organization may already have certain consumption commitments or pre-payments – you can use Frame to consume those public cloud resources associated with your subscription.
- You want to have additional administrative control over your Frame workloads for more detailed monitoring and metrics.
- You want to configure other network integrations (VPN gateways, Direct Connects, ExpressRoutes, Interconnects, SD-WAN gateways, peering to existing VPCs or VNETs) which you cannot do using Frame-managed public cloud subscriptions.
- You must meet industry-specific compliance regimes (e.g., HIPAA, PCI) that require you to fully manage and control your cloud resources.
The guides in this section of our documentation are for customers who choose to bring their own public cloud or on-premises Nutanix AHV infrastructure. The guides provide detailed instructions on how to configure your existing cloud infrastructure to host your Frame workload virtual machines. You may choose to use one or more cloud infrastructures with Frame.
NOTE: For public cloud infrastructure (AWS, Azure, GCP, or IBM Cloud), Dizzion does offer customers the option to use a Dizzion-managed public cloud subscription that Dizzion controls and manages.
You must purchase Dizzion IaaS credits in order to use Dizzion-managed public cloud subscriptions.
Registering your Infrastructure
BYO public cloud accounts can be created either at the "customer" or "organization" tiers of Frame's logical hierarchy. More information about Frame's hierarchy concepts can be referenced here.
A BYO cloud account created at the "customer" (highest) tier will be accessible to all hierarchical children ("organizations" and their accounts). If you choose to add the BYO cloud account at the “organization” tier, the BYO cloud account will only be available to the chosen organization and any accounts underneath it. Customer Administrators can add a BYO cloud account at the Customer or Organization level while Organization Administrators may only add a BYO cloud account at the Organization tier.
NOTE: A particular cloud subscription can only be associated with a single entity on the Frame platform. If you associate your cloud subscription to one Organization, it cannot be associated with another Organization or Customer. If your use case requires that multiple Organizations will have access to your public cloud subscription, you must associate the cloud account to your Customer entity.
Supported Infrastructure
Use the links below to navigate to the infrastructure you wish to bring.
Once you have registered your infrastructure with Frame, check out the “Manage Cloud Accounts” guide to learn more about managing your cloud account, adding template images, defining instance types (for Nutanix AHV), etc.
Additional Infrastructure Guides
Amazon Web Services
Overview
The Bring Your Own AWS (BYO AWS) feature allows customers to seamlessly connect their AWS account with the Frame Platform, enabling full control over infrastructure while leveraging Frame’s virtual desktop and application delivery capabilities. With BYO AWS, customers can deploy Windows and Linux workloads directly into their own cloud environment, customize virtual machines to meet specific needs, and manage resource consumption according to their business goals. This flexibility provides the benefits of cloud infrastructure alongside the simplicity of Frame's remote desktop solution.
The following AWS infrastructure deployment models are supported for DaaS:
- AWS EC2
- AWS WorkSpaces Core Managed Instances (v2)
For more information on the deployment models, see Dizzion DaaS on AWS: Compare EC2, WorkSpaces Core Bundles & Managed Instances
Setup
Requirements
In order to register your AWS or AWS GovCloud account with Frame, you need to ensure that you have addressed the following before proceeding:
- IAM user who can create the CloudFormation stack with the Frame-provided CloudFormation script. The IAM user must have, at a minimum, the following permissions:
- AWS Console login
- AmazonEC2FullAccess
- IAMFullAccess
- AWS_ConfigRole
- AWSCloudFormationFullAccess
Due to the way that AWS CloudFormation Stacks operate, the orchestration of Frame resources in your AWS subscription is not tied to a particular IAM user account. Frame Platform does not rely on the IAM user that was used to associate your AWS subscription to the Frame Platform. The IAM user can be deleted or disabled at any time without disabling your integration with Frame. If you do wish to disable your integration with Frame manually, please delete the Nutanix-Frame- High-Cloud-Stack-Prod CloudFormation``` stack, as well as the FrameGatewayRole, FrameLambdaRole IAM Roles
-
You know your AWS Account ID that will be registered with Frame. The AWS Account ID can be found by going to your “My Account” page in your AWS Console. Click on the drop down menu next to your account name in the upper right corner of your AWS Console to access this page.

-
Determine whether you are registering your cloud subscription on your Frame Customer Entity or an Organization entity.
-
Streaming Gateway Appliance: If you plan to deploy Streaming Gateway Appliances in AWS (either during the Frame account creation process or manually after the Frame account is created), you will need to accept the CentOS 7 license terms in the AWS Marketplace first. Visit https://aws.amazon.com/marketplace/pp/B00O7WM7QW/ and subscribe to CentOS 7 (x86_64).
Costs may begin to accrue immediately after completing the CloudFormation Stack creation.
You will need to be logged in to the AWS console with your IAM user in a separate tab or window in order to complete the CloudFormation Stack creation. Frame Platform will not have access to your AWS user credentials.
AWS Dedicated Instances
When deploying Windows 10 or 11 VMs using your BYO AWS account, Frame now leverages AWS Dedicated Instances by default. Dedicated Instances provide isolated hardware environments to ensure compliance with Microsoft’s EULA for virtualized desktops. This feature helps maintain licensing integrity for both Frame-provided and customer-provided Windows images. More details around licensing with AWS Dedicated Instances can be found in our Microsoft Licensing Guide
Note
Pricing Reminder
AWS Dedicated Instances follow a pay-as-you-go model, with an additional regional fee (per hour, per region) applied whenever a dedicated instance is active. You can find more information about regional fees in the AWS Dedicated Instance Pricing Guide.
Adding your Cloud Account
Procedure
- Go to your Frame Admin Console.
- Navigate to the Customer or the Organization Dashboard (depending on where you wish to add the cloud account).
- Click on Cloud Accounts in the left-hand menu.
- Click the Add Cloud Account button on the top-right corner of the page.
- Select the Cloud Provider that should be added

- A new window will appear prompting you for the following information:

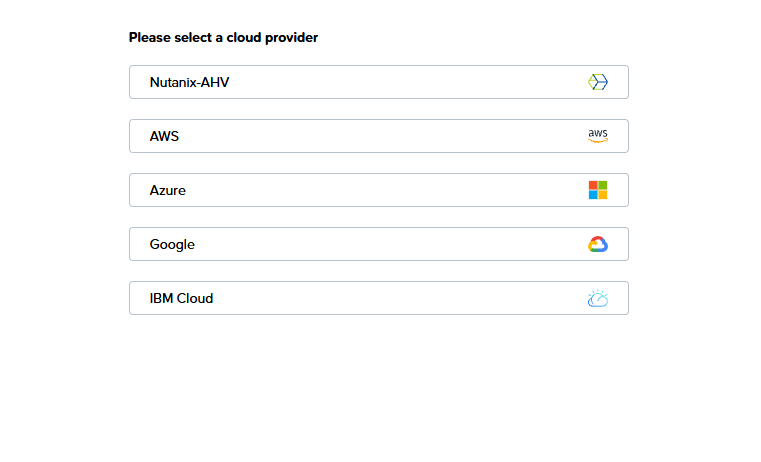
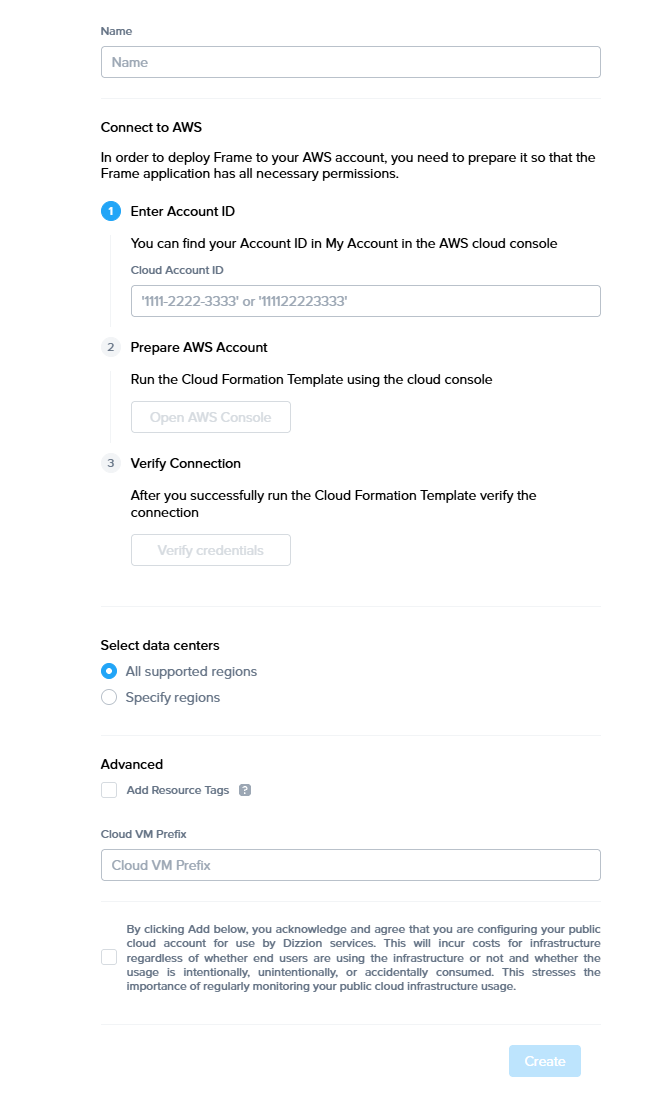
- Cloud Provider: Select AWS.
- Name: Enter the desired name of your cloud service. This will be the name of the Cloud Account in Frame Console.
- Cloud Account ID: Enter your AWS Account ID (without dashes) in this field.
- Once you have entered the information, click the “Open AWS Console” button.
- At this point, your browser will be redirected to the AWS console in a new tab. If you are not logged in to AWS with the desired BYO AWS account, you will be prompted for credentials.
- Make sure you are logged in with the correct AWS account you wish to use (if you have multiple AWS accounts).
- The first page you will be taken to is the CloudFormation Stack Quick Stack Creation page. All information should be automatically filled out for you.

Caution
Deploying Windows 10 or 11 VMs in AWS When deploying Windows 10 or 11 VMs using your BYO AWS account, Frame now leverages AWS Dedicated Instances by default. Dedicated Instances provide isolated hardware environments to ensure compliance with Microsoft’s EULA for virtualized desktops. This feature helps maintain licensing integrity for both Frame-provided and customer-provided Windows images. More details around licensing with AWS Dedicated Instances can be found in our Microsoft Licensing Guide
-
Simply scroll to the bottom and check the box to allow CloudFormation to create IAM resources for you, then click “Create stack”

-
Once the above process is complete, you will be directed to a page which lists the events for this CloudFormation Stack. The creation process will proceed automatically. You may need to refresh the page to see new events. Once events appear named
Nutanix-Frame-High-Orchestrator-Role-Prod,Nutanix-Frame-High-Lambda-Role-Prod, andNutanix-Frame-High-Workload-Role-Prodand are marked as status “CREATE_COMPLETE”, the stack creation has completed. This typically takes less than two minutes.
-
Once the stack has been created, navigate back to your Frame tab and select “Verify Credentials”.
-
Once your credentials are verified, you can select the data centers (AWS regions) for your Frame accounts. You may add additional data centers in the future.
-
Check the box at the bottom informing you of possible resource usage on your AWS cloud infrastructure and then click "Add Account". After a few minutes, you will see your AWS Cloud Account listed as "Ready".

Now that your AWS Cloud Account is created and accessible within Frame, you will be able to create Frame accounts using this BYO cloud account.
Resources Created During BYO AWS Cloud Account Creation
During the creation of a BYO AWS or BYO AWS GovCloud Cloud Account, the Cloud Formation template creates three IAM Roles.
- FrameGatewayRole allows Frame Platform to provision and deprovision AWS resources for Frame-managed workloads.
- FrameLambdaRole allows log entries to be captured by Frame Platform.
- FrameWorkloadRole enables Frame Platform to store and retrieve Dizzion-provided OS images in an S3 bucket in each of the AWS regions where you create Frame accounts.
Service Limits
By default, a newly created AWS account will impose certain service limits on available resources. Depending on the number of the Frame workload VMs required of a given machine type (e.g., number of concurrent users on g4dn.2xlarge), how the Frame account is created (e.g., Frame networking with or without an SGA), and whether you use Publish or Quick Publish, you will likely need to adjust the default limits imposed on the AWS account. If these limits are set to values that are lower than what is required by the Frame platform, you can expect certain functions to either fail, or be substantially delayed. The requirements by Frame for these service limits depends on the desired workload and required resources. The recommended service limit increases include the following:
| AWS Resource | Recommendation |
|---|---|
| EC2 (CPU-only and GPU instance types) | AWS has service quotas on the total number of vCPUs for any given instance family, on a per-region basis. We recommend you first determine the expected max number of instances by instance type (per Frame account) for your needs. Next, calculate the required number of instance family-specific vCPUs based on the expected max number of instances and the required number of vCPUs per instance type (for that family). If you use Publish, set your vCPU quota to 2.2 times the number of instance family-specific vCPUs. The additional 20% will accommodate any additional resources such as Sandboxes, Utility servers, etc. If you use Quick Publish, you can use a minimum factor of 1.X times to calculate the required number of instance family-specific vCPUs. X is computed as the “Number of production instances created on publish” divided by expected max instances. By default, the “Number of production instances created on publish” value is configured to be 10 VMs. A factor of 1.3-1.5 should be sufficient to account for typical Quick Publishes and overhead. |
| EBS | Typically, this resource does not need to be modified. To estimate total disk storage consumption, multiply the total number of VMs you expect to provision by the size of the Sandbox VM (e.g., 80 GiB) across all Frame accounts you plan to provision. Number and size of any utility servers, number of Sandbox image backups, number and size of personal drives, and number and size of enterprise profile disks would be additional storage to consider. |
| IP Addresses | AWS does not have any service quotas on public or private IP addresses that are assigned when an EC2 instance is powered on and removed when an EC2 instance is powered off. If a Frame account is created with Frame public networking, each workload VM will have both a public and private IP address. If the Frame account is created using Frame private networking, all workload VMs will only have private IP addresses. If the Frame account is created using Frame private networking with Streaming Gateway Appliance (SGA), then Frame will provision 1 public IP address for each SGA VM and 1 public IP address for the load balancer in front of the SGA VMs. All of the workload VMs will only have private IP addresses. You will also need to account for the temporary increase of in-use IP addresses during a Publish or Quick Publish when the new production VMs are created and before the old production VMs are terminated. |
| Elastic IP Addresses | Elastic IP addresses are static, public IPv4 addresses. Frame does not provision Elastic IP addresses. However, if you plan to use VPN endpoints, you will need to factor into your service quota calculations the 1 or 2 Elastic IP Addresses needed for configuring the VPN gateway. |
| Network interfaces | By default, you should have 5,000 network interfaces per region. If a Frame account is created with Frame public networking, you will have need 2 network interfaces (private IP address and public IP address) per workload VM. If a Frame account is created with Frame private networking with SGA, you will have need 1 network interfaces (private IP address) per workload VM. |
| VPCs | If Frame public networking or Frame private networking is used to create Frame accounts, the number of VPCs equals the number of Frame accounts. If Frame private networking with SGA is used to create Frame accounts, the required number of VPCs is two times the number of Frame accounts. For BYO networking, no new networks are created. |
To modify service limits on your AWS account, you will need to click on the “Limits” link in the navigation panel on the left of the AWS console (pictured below): 
Service limit increases may not be necessary for smaller production environments or trial accounts.
Tips
- If possible, group your service limit increases by geographic region. Each geographic region has its own approval team. A limit increase across multiple regions can take multiple weeks.
- Approval time can vary by the size of the request. For instance, two or three small service limit increase requests are generally approved more quickly than one large request.
- Since capacity is limited, increasing service limits on GPU-backed instances generally takes longer than general purpose limit increases.
- T3 instance limit increase requests are usually approved and implemented within 24 hours of the request. G4/G5 instance limit increases take longer (especially for larger quantities).
Instance Types
Each IaaS provider has a unique naming scheme for their instance types. AWS categorizes their “Elastic Cloud Compute instances” (a.k.a. “EC2 instances”) based on compute, memory, and GPU configuration. More information about Amazon EC2 instances can be found in their official AWS documentation.
For the latest AWS instances supported by Frame, refer to our Supported Instance Types table.
Resource Naming
Frame provisions the resources below based on a specific naming convention. The resource name value is also saved as value for the tag Name.
| Resource | Resource Name | Example |
|---|---|---|
| Workload VM | prod:v\{vendor_id}:s\{server.id} | prod:v53209:s8059811 |
| Workload VM root volume | prod:v\{vendor_id}:s\{server.id}:root | prod:v53209:s8059811:root |
| User Volume | prod:v\{vendor_id}:\{random 8 character}:\{type} | prod:v48287:8206856b:profile |
| User Volume backup (Snapshot) | prod:v\{vendor_id}:d\{user_volume_id} | prod:v48287:d169928 |
| Image | prod-v\{vendor_id}-s\{server_id}-\{image_type}-\{random 5 characters} OR prod-v\{vendor_id}-\{image_type}-\{random 5 characters} | prod-v53209-s8059811-publish-64d3d or prod-v48287-manual-8e750 |
| Master Image | prod-master_image-src-\{source_image_id}-\{random 5 characters} | prod-master_image-src-239323-d06e8 |
| VPC | prod:v\{vendor.id}:vpc\{vendor.vpc_set.count()} | prod:v7538:vpc0 |
| Subnet | prod:v\{vendor.id}:sn\{idx} | prod:v53209:sn3 |
| Security group | prod:v\{vendor.id}:sg-default | prod:v53209:sg-default |
| Static Public IP | prod:v\{vendor.id}:sg-default | prod:v53242:sg-default |
| NAT Gateway | prod:v\{vendor.id}:sg-default | prod:v53242:sg-default |
| Routing table | prod:v\{vendor.id}:sg-default | prod:v53242:sg-default |
| SGA VPC | prod:sga:\{streaming_configuration_id}:vpc | prod:sga:2425:vpc |
| SGA subnet | prod:sga:\{streaming_configuration_id}:vpc\{vpc.id}:sn\{str(i)} | prod:sga:2425:vpc69807:sn1 |
| SGA security group | prod:sga:\{streaming_configuration_id}:vpc:\{vpc.id}:sg-default | prod:sga:2420:vpc:69784:sg-default |
| SGA VM | prod:sga:\{streaming_configuration_id}:s\{server.id} | prod:sga:2420:s1f175e3d |
| SGA VM root disk | prod:sga:\{streaming_configuration_id}:s\{server.id} | prod:sga:2425:sc95b63e7 |
| SGA load balancer | prod:sga:\{streaming_configuration_id}:nlb | prod:sga:2425:nlb |
{image_type} can be one of the following values:
manual- for manual backupspublish- for backups created for publishing purposetest_publish- for backups created for test publishauto- for scheduled backupssystem- for backups created internally in various processes (e.g. cloning, generalization)master- from a master image
{disk_type} can be one of the following values:
profile- Enterprise profile diskpersonal- Personal drive
Note
The Streaming Gateway Appliance (SGA) resource naming applies only to Frame-provisioned and managed SGAs.
Microsoft Azure
Overview
The Bring Your Own Azure (BYO Azure) capability allows customers to connect their Microsoft Azure cloud environment directly to the Frame Platform, enabling seamless deployment of virtual desktops and applications within their own Azure subscription. With BYO Azure, customers maintain full control over their infrastructure and resource management while leveraging Frame’s powerful orchestration tools. This flexibility ensures organizations can dynamically scale their workloads, optimize cloud spending, and deliver high-performance virtual workspaces to meet their evolving business needs.
Setup
Requirements
In order to register your Azure account with Frame, ensure that you have the met the following requirements before proceeding:
-
Microsoft Azure account with a valid Azure subscription
-
Permissions to add and modify role assignments for the Azure Subscription ID.
-
The Azure subscription has the following Resource Providers registered.
- Microsoft.Compute
- Microsoft.Network
- Microsoft.Storage
Costs (e.g., storage) may begin to accrue immediately after completing the registration of your Azure account on your Frame Customer or Organization entity.
Preparation
Before your Azure account can be registered with Frame, you will need to complete two tasks:
- Create an Azure application registration
- Add Azure subscription owner permissions to your Azure application registration
Create an Azure Application Registration
You will need to create an Azure app registration for Frame. The app registration is the mechanism by which you'll give Frame access to create and manage network, virtual machines, and storage resources in your Azure subscription.
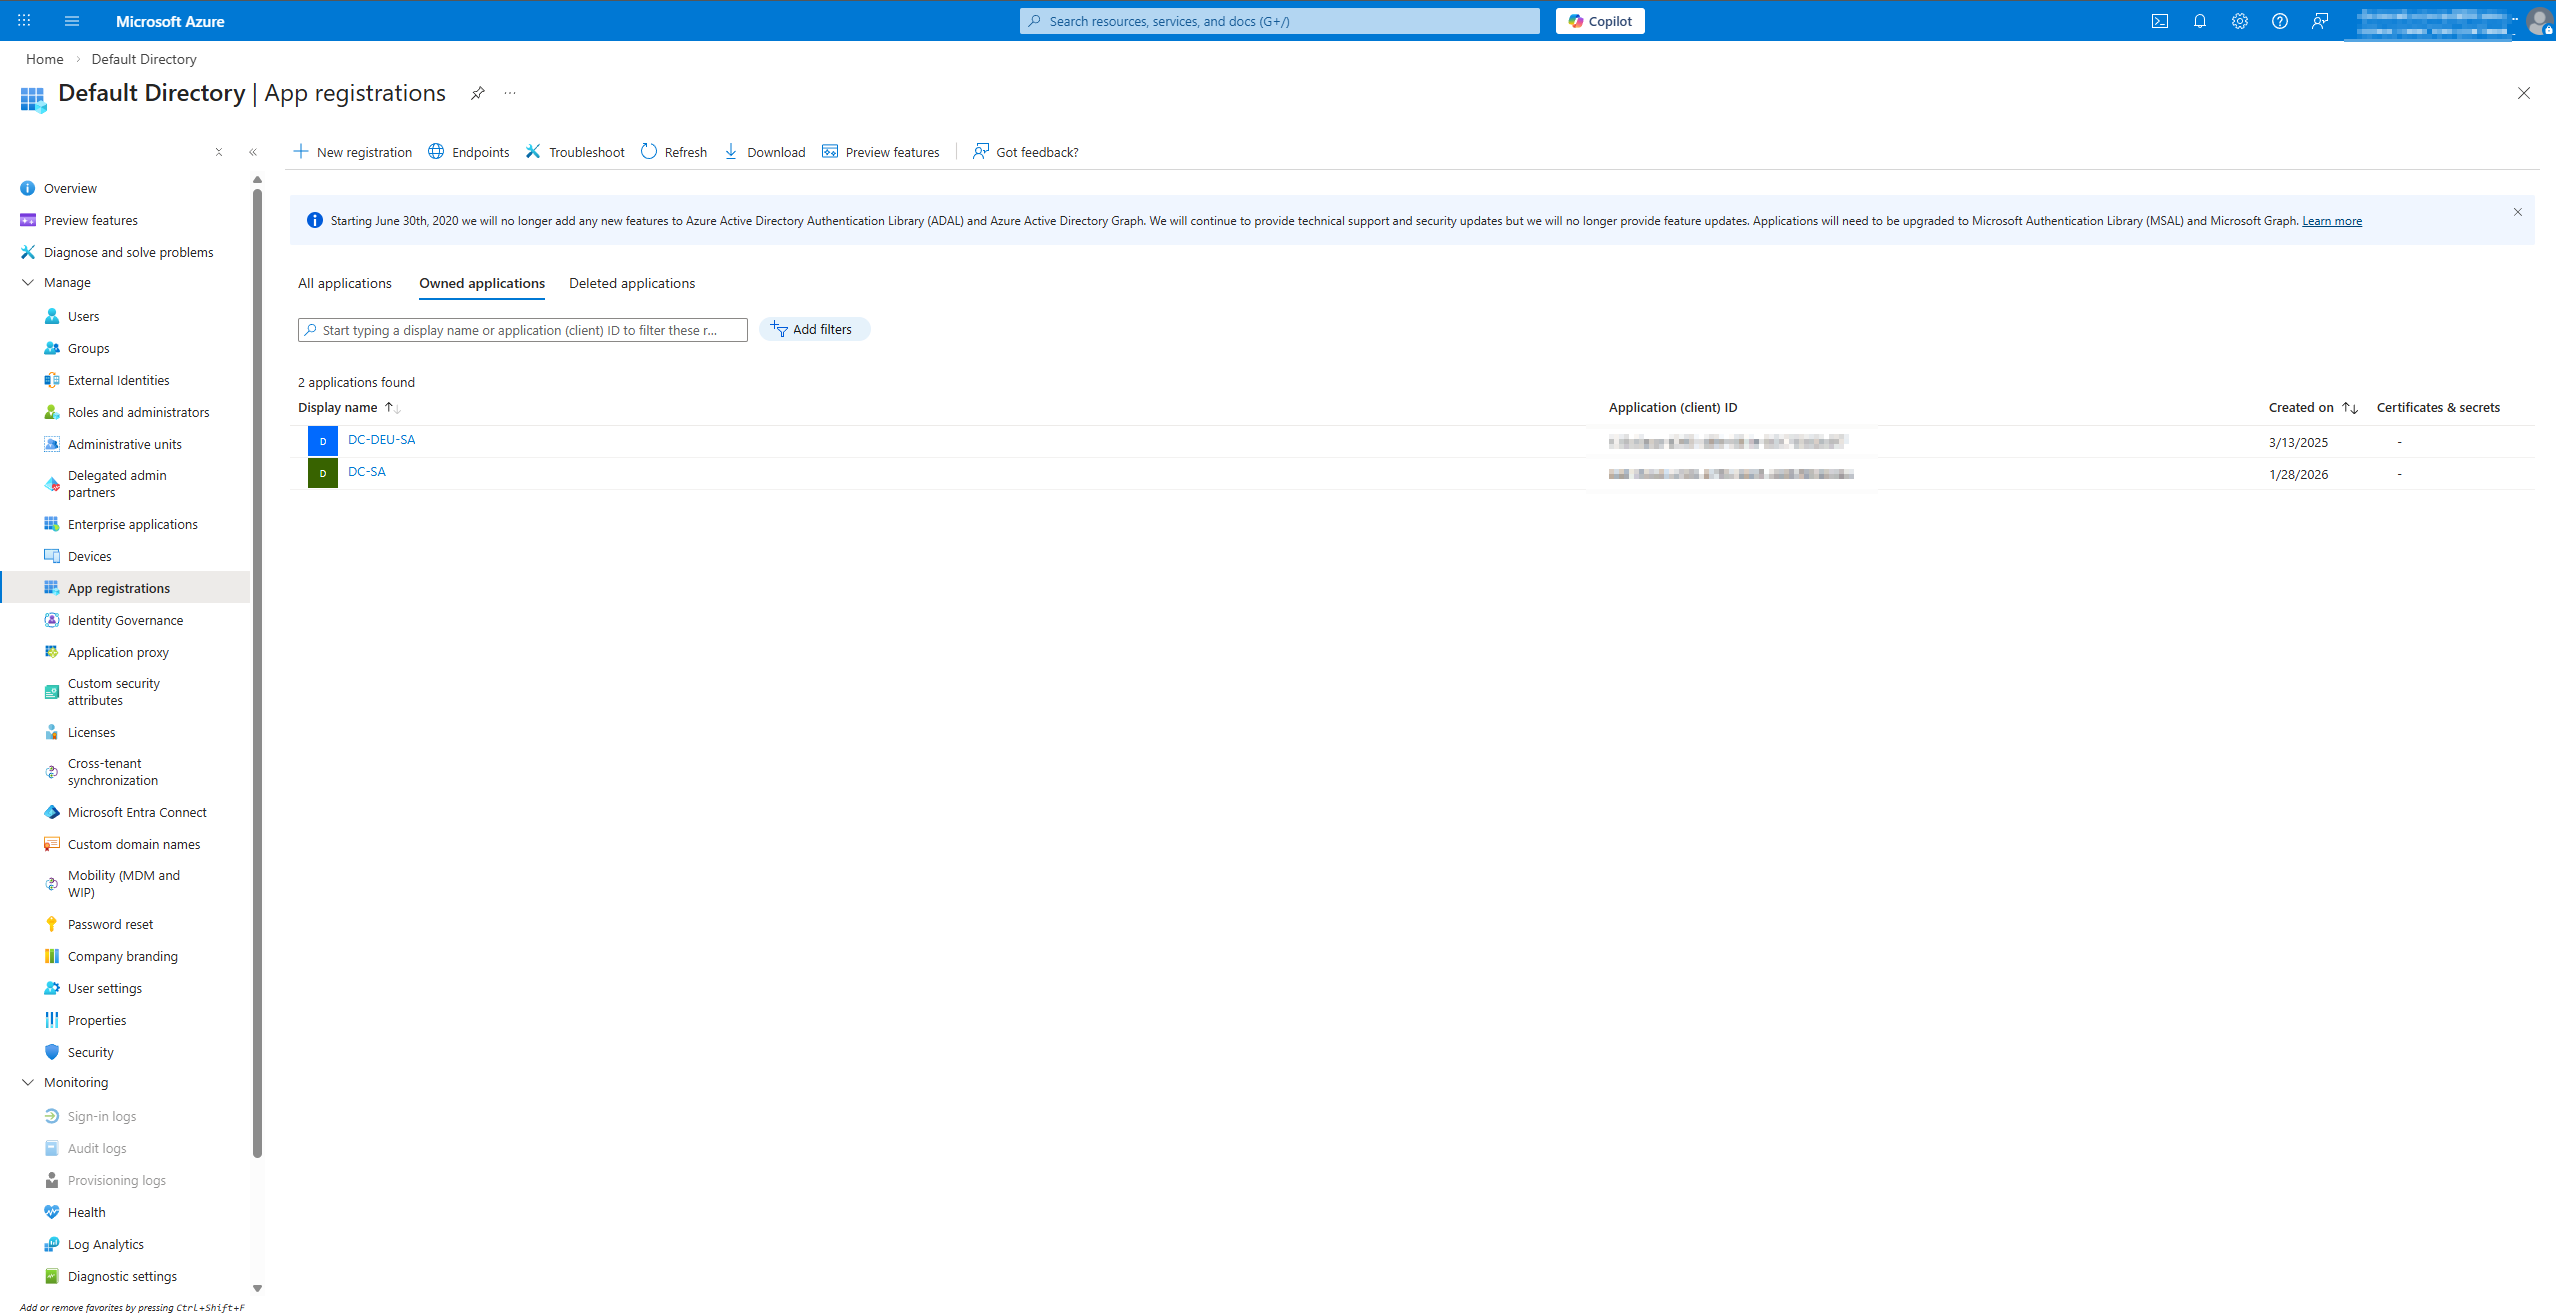
- Open the Microsoft Entra ID (formerly Azure Active Directory) option and App registration section. From there, click on the "Add" button and select "App registration” to create a new app.
-
You'll see a panel titled “Register an application.” You'll be asked for the following information:
- Name: you can choose any name. Some customers simply use the name "Frame". Others will append some identifying information for internal reporting purposes to "Frame". This name will appear in the list of Application Registrations.
- Supported account types: Specify who has access to the application. "Accounts in this organization directory only" is the standard selection for customers.
- Redirect URI (Optional): This value can be left blank.

-
Click “Register” at the bottom of the "Register an Application" page.
-
A notification will appear informing you that your application has been created successfully. It should now be available in your “App registrations” list.
-
Next, select your new application from the list and copy or write down the values for the “Application (client) ID” and “Directory (tenant) ID.” These IDs are two of the four values you will need for setting up your Frame integration (note that you do NOT need the “Object ID”).
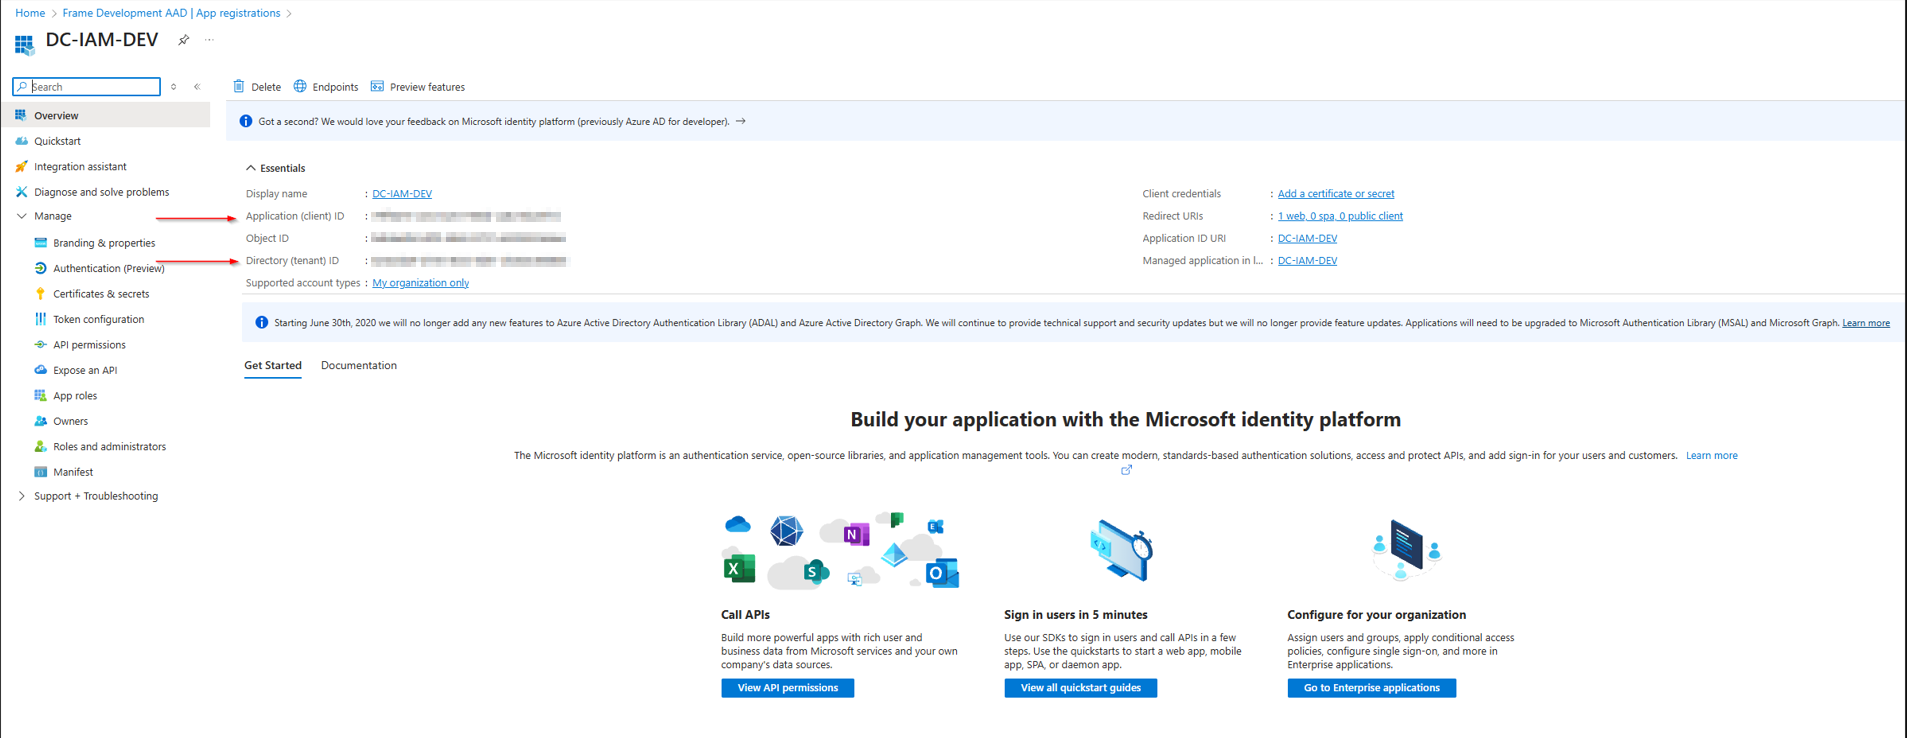
- Once you have written down the Application (client) ID, navigate to the “Branding” page listed in the menu on the left side of your Azure portal.
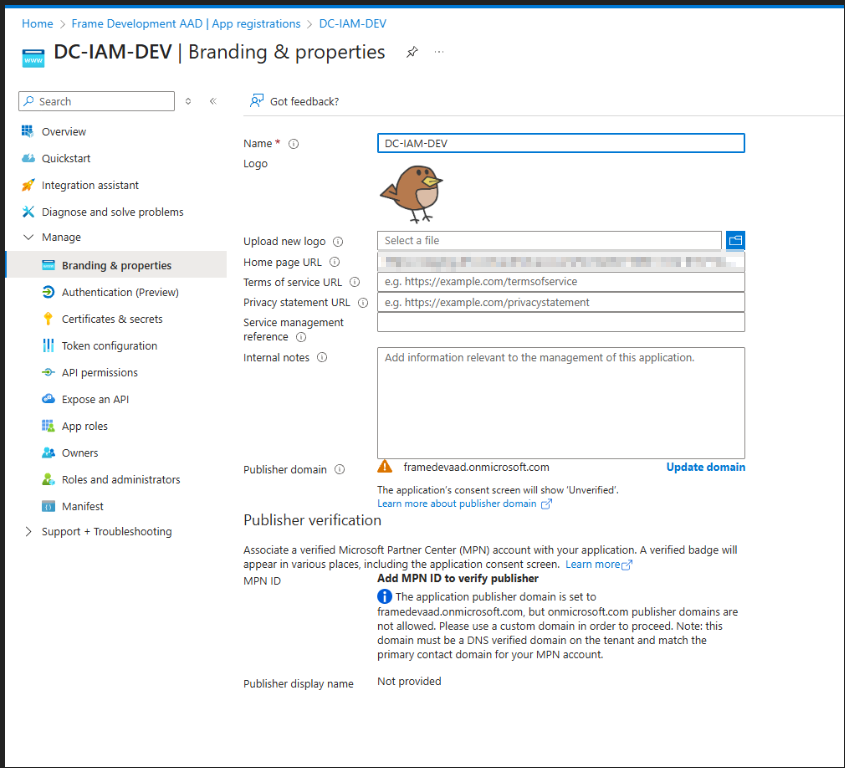
- Download the application icon shown below and upload the Frame logo file to Azure by clicking on the folder browser icon to the right of Upload new logo and selecting the Frame logo file you downloaded. Click “Save” to save the Frame logo for your App Registration.
 Azure Portal - Frame Logo
-
Next, you'll need to create a “Client Secret” for Frame to use as a password to manage your Azure resources. Click “Certificates & secrets” under your application's management options. Click the “New client secret” button under “Client secrets”.
-
You will be prompted to add a new client secret. Simply add a description and select the desired expiration duration from the drop-down menu next to “Expires.” Click “Add.”
 Azure Portal - Certificates & secrets
- On the “Client secrets” page, copy your newly-created client secret. Your client secret can only be copied right after the secret is created. You will need this value when you add your Azure subscription to Frame.
 Azure Portal - Client secrets
The client secret is used by Frame to manage your BYO Azure account. Microsoft Azure has a maximum expiration date of 2 years from the client secret creation date. If you fail to update your client secret before it expires, Frame will no longer be able to manage the resources in your Azure account and you will likely experience a service outage.
Before your client secret expires, you will need to generate a new client secret (following Steps 9 and 10 above) and re-enter your cloud account secret in the Configuration tab of your Azure Cloud Account.
Configuring your Azure Subscription
This section assumes that you already have an active Azure account with a subscription that can be used for Frame workloads. At this point, you should have also set the resource limits for your subscription to levels high enough to accommodate your expected loads. To confirm your subscription status, login to the Azure web portal, navigate to your subscription, and confirm that its status is “active”:
 Azure Portal - Active Subscription
Before registering your Azure account with Frame, you will grant owner permissions to your new Azure App Registration.
- At the top of your Azure portal, search for “Subscriptions” and click on the first option that appears.

- Find the subscription that you will use with Frame. Copy the Subscription ID and set it aside to be used in the final steps of this guide.

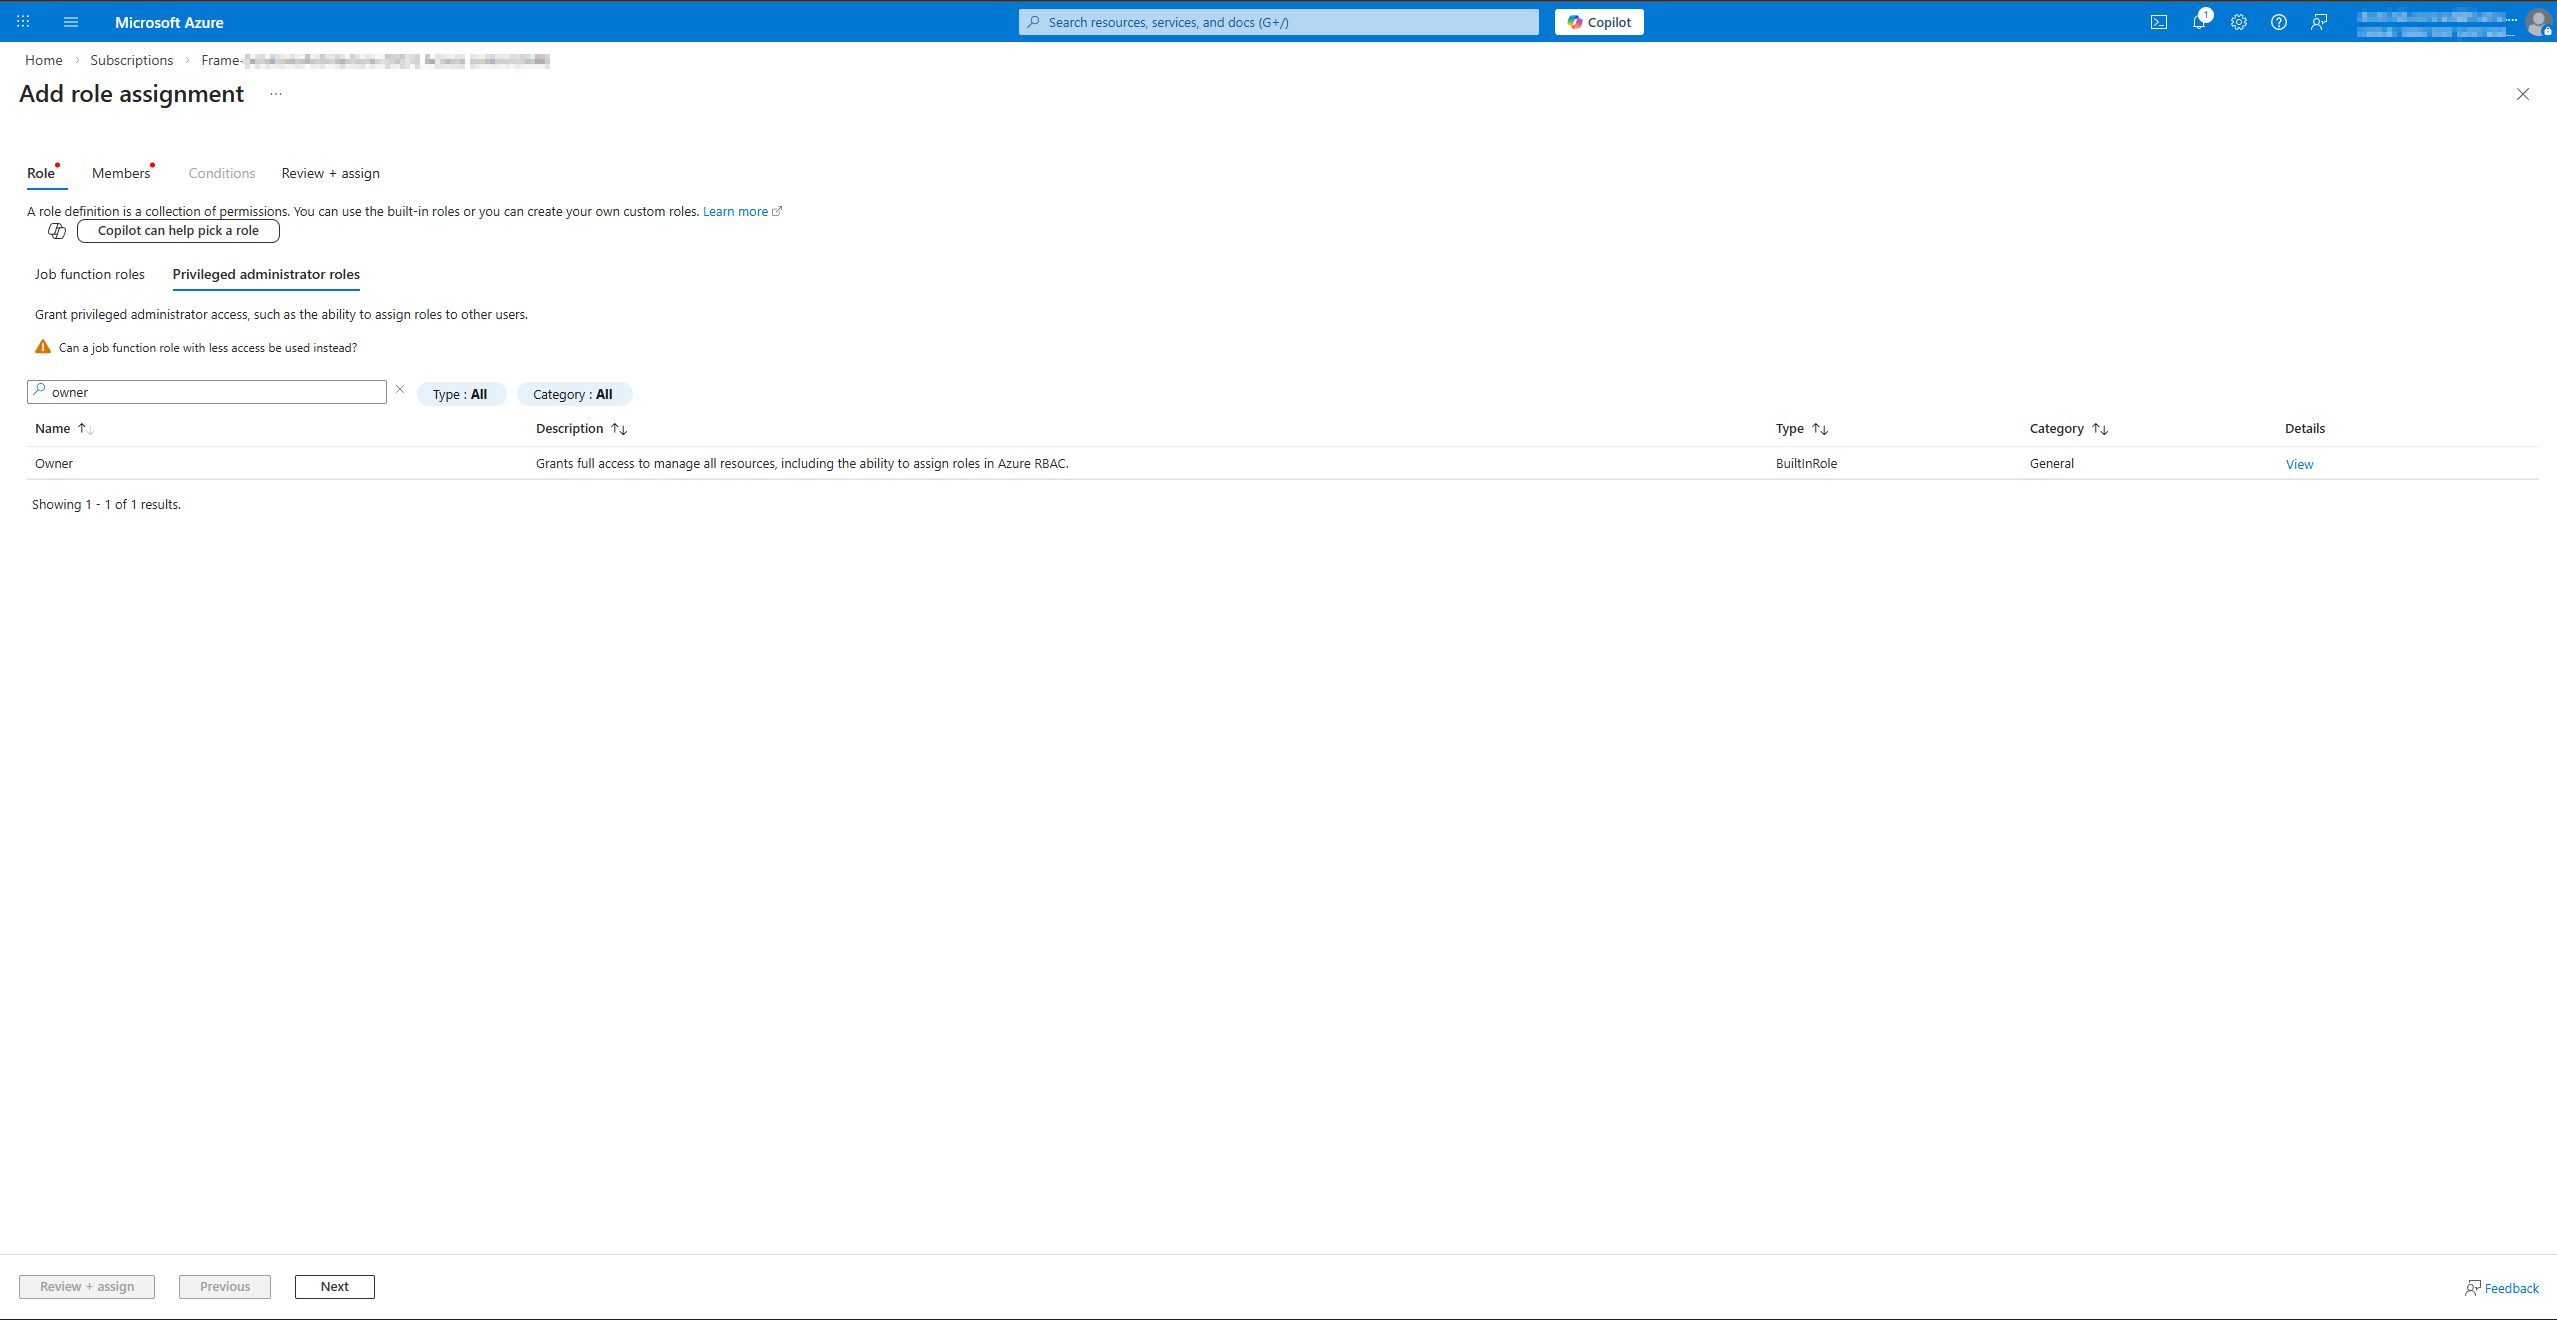
- Now, click on the subscription to open its properties. Click on the "Access Control (IAM)" page, and then click the "Add" button on the top of the Access Control panel. Select "Add role assignment."
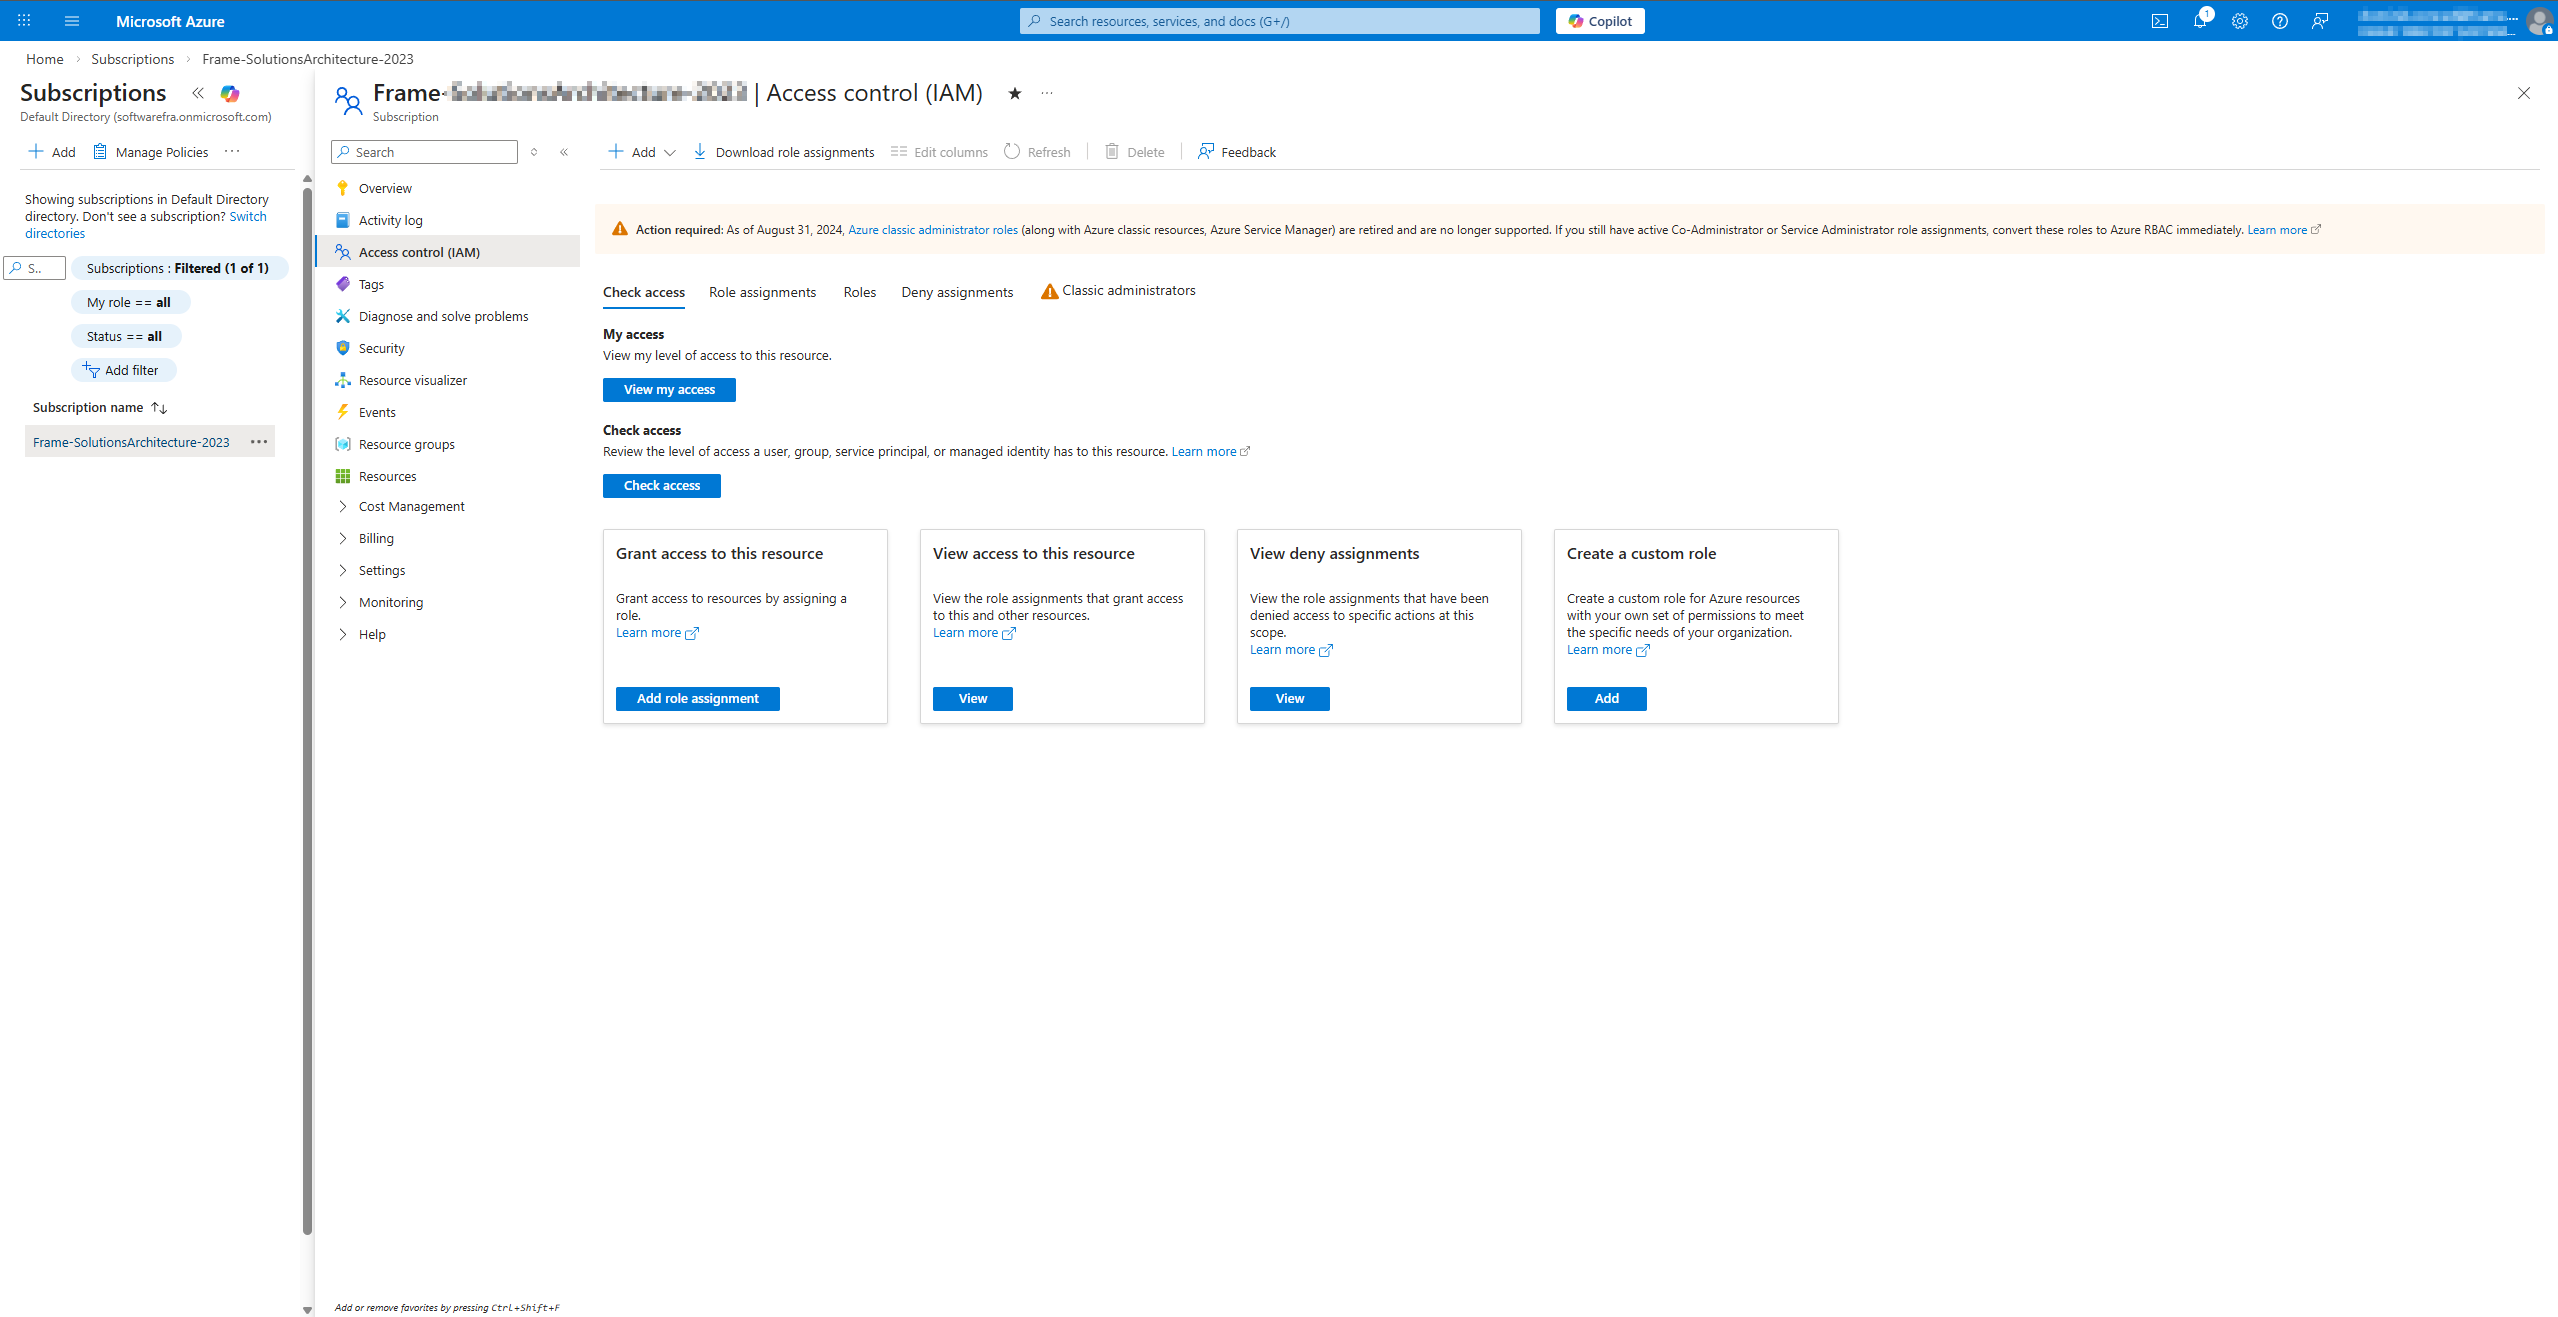
- A new window will appear. On the Role tab, select “Owner” or “Contributor” from the Privileged administrator roles tab.
- Go to the Members tab.
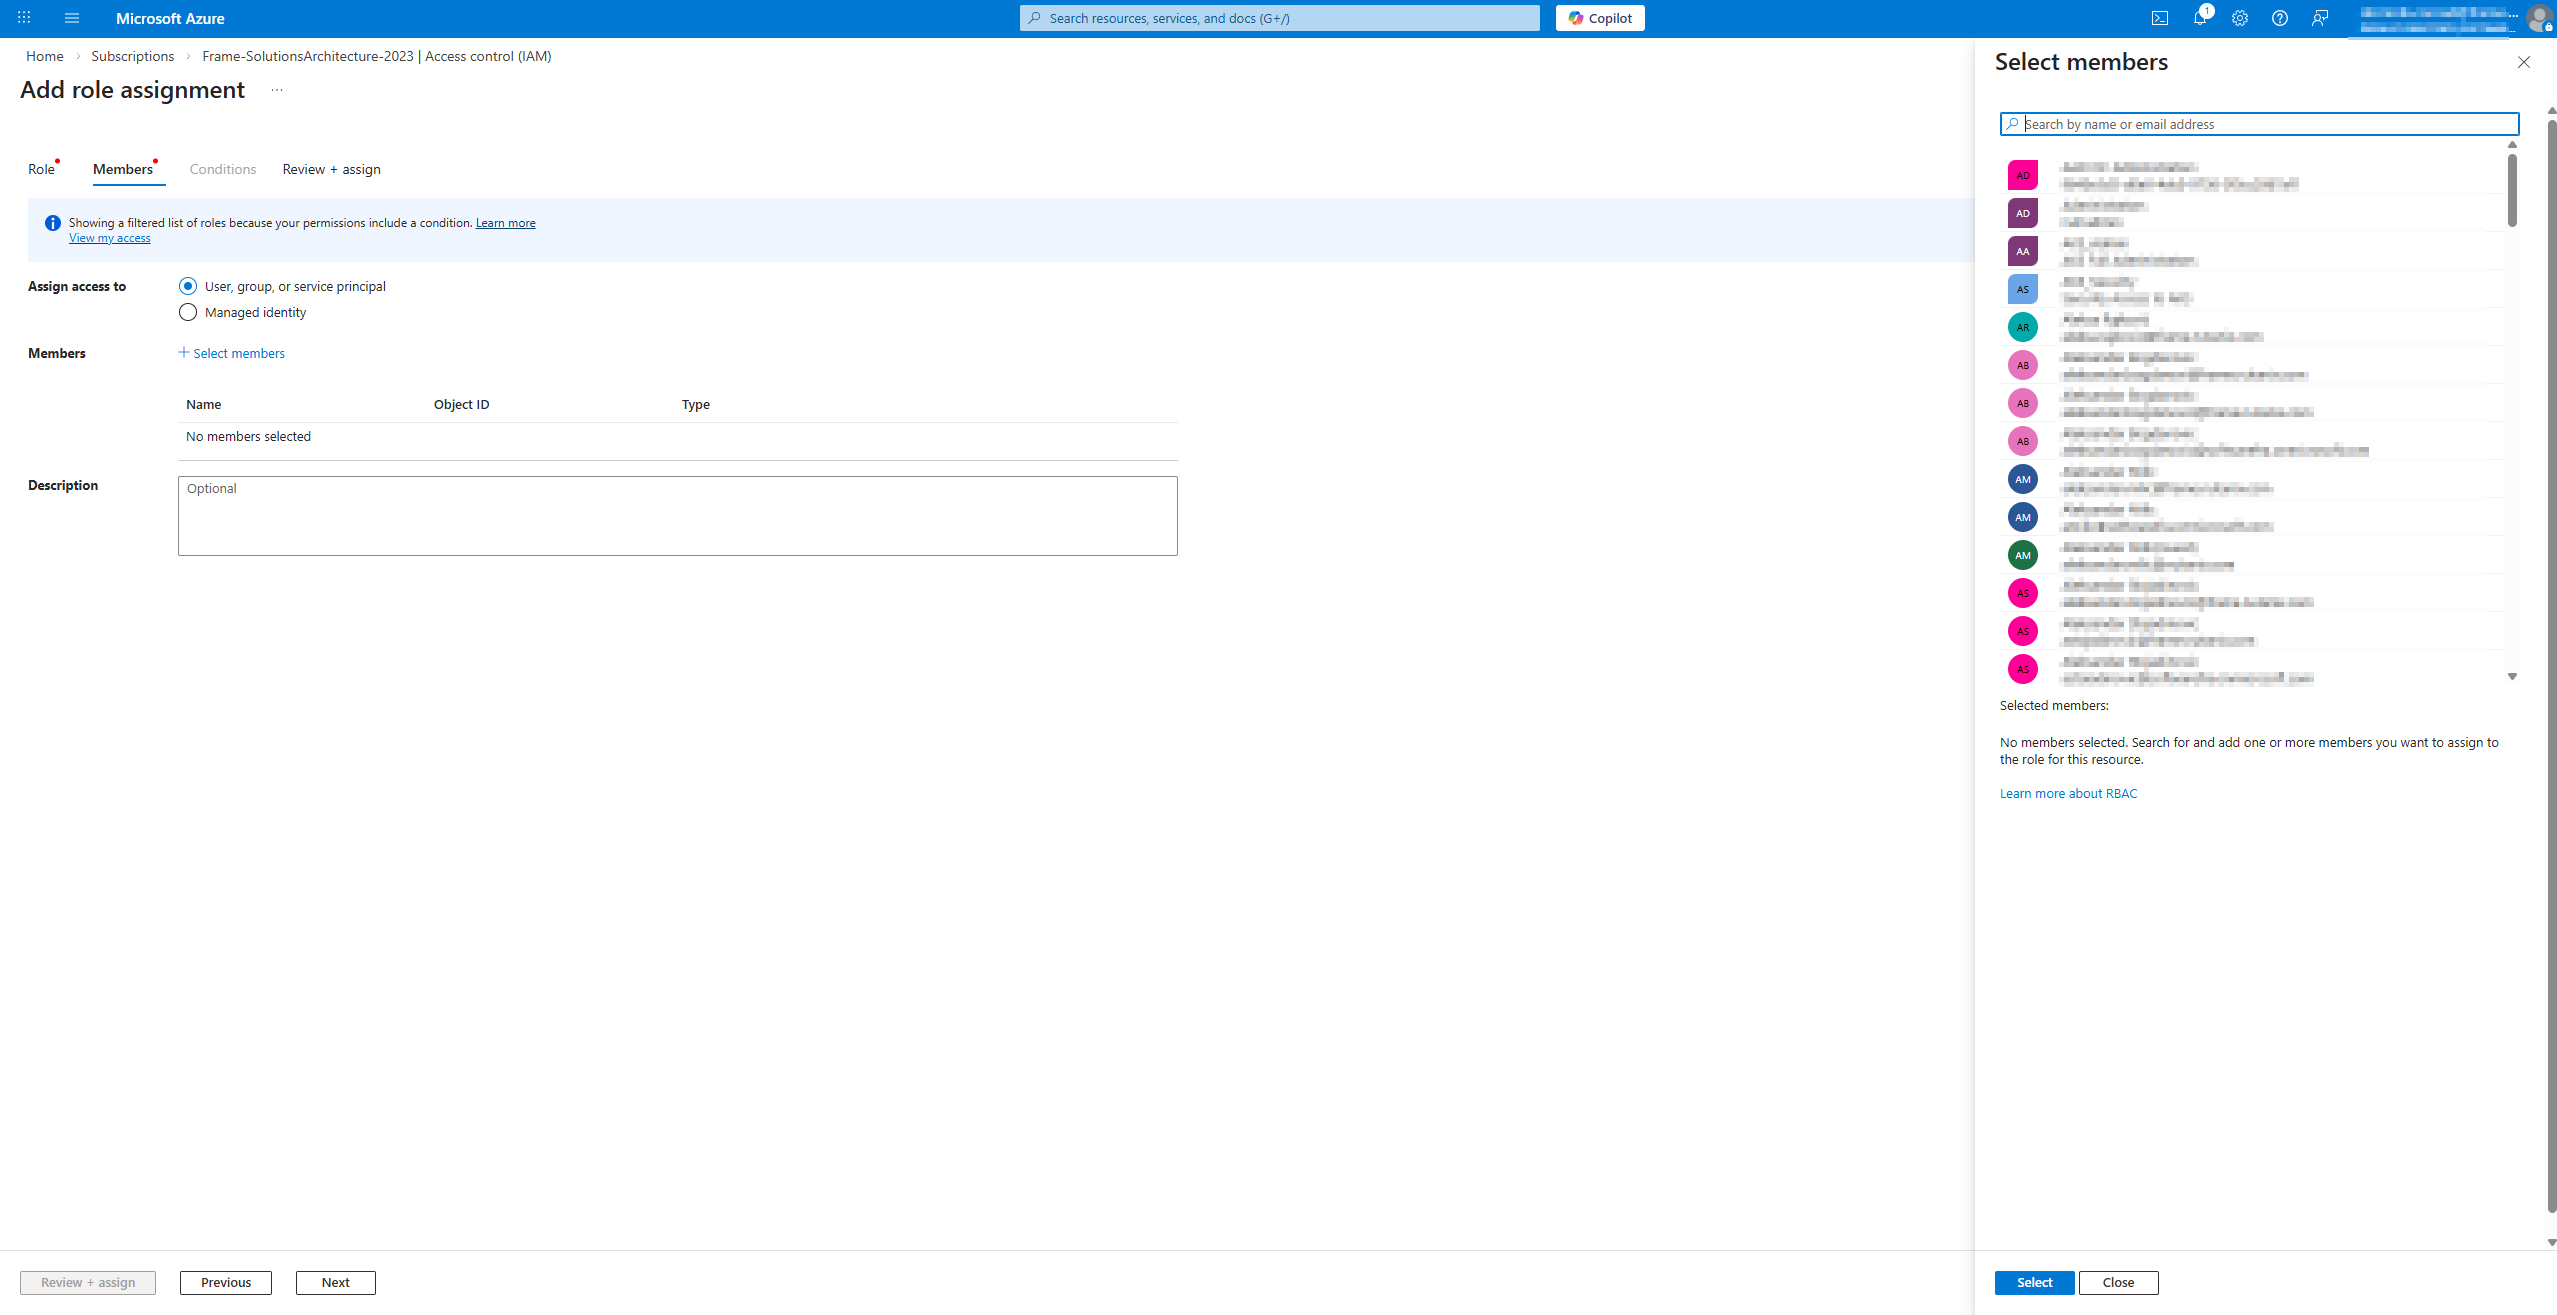
Azure Portal - Specify Members
- Assign access to: Select "User, groups or service principals"
- Members: Click on "+Select members", search for the name of app registration (in this example, it starts with Frame), and then select the app registration and click on the Select button.
- Go to Review + assign tab and finish the process of assigning role to app registration by clicking on the "Review + assign" button.
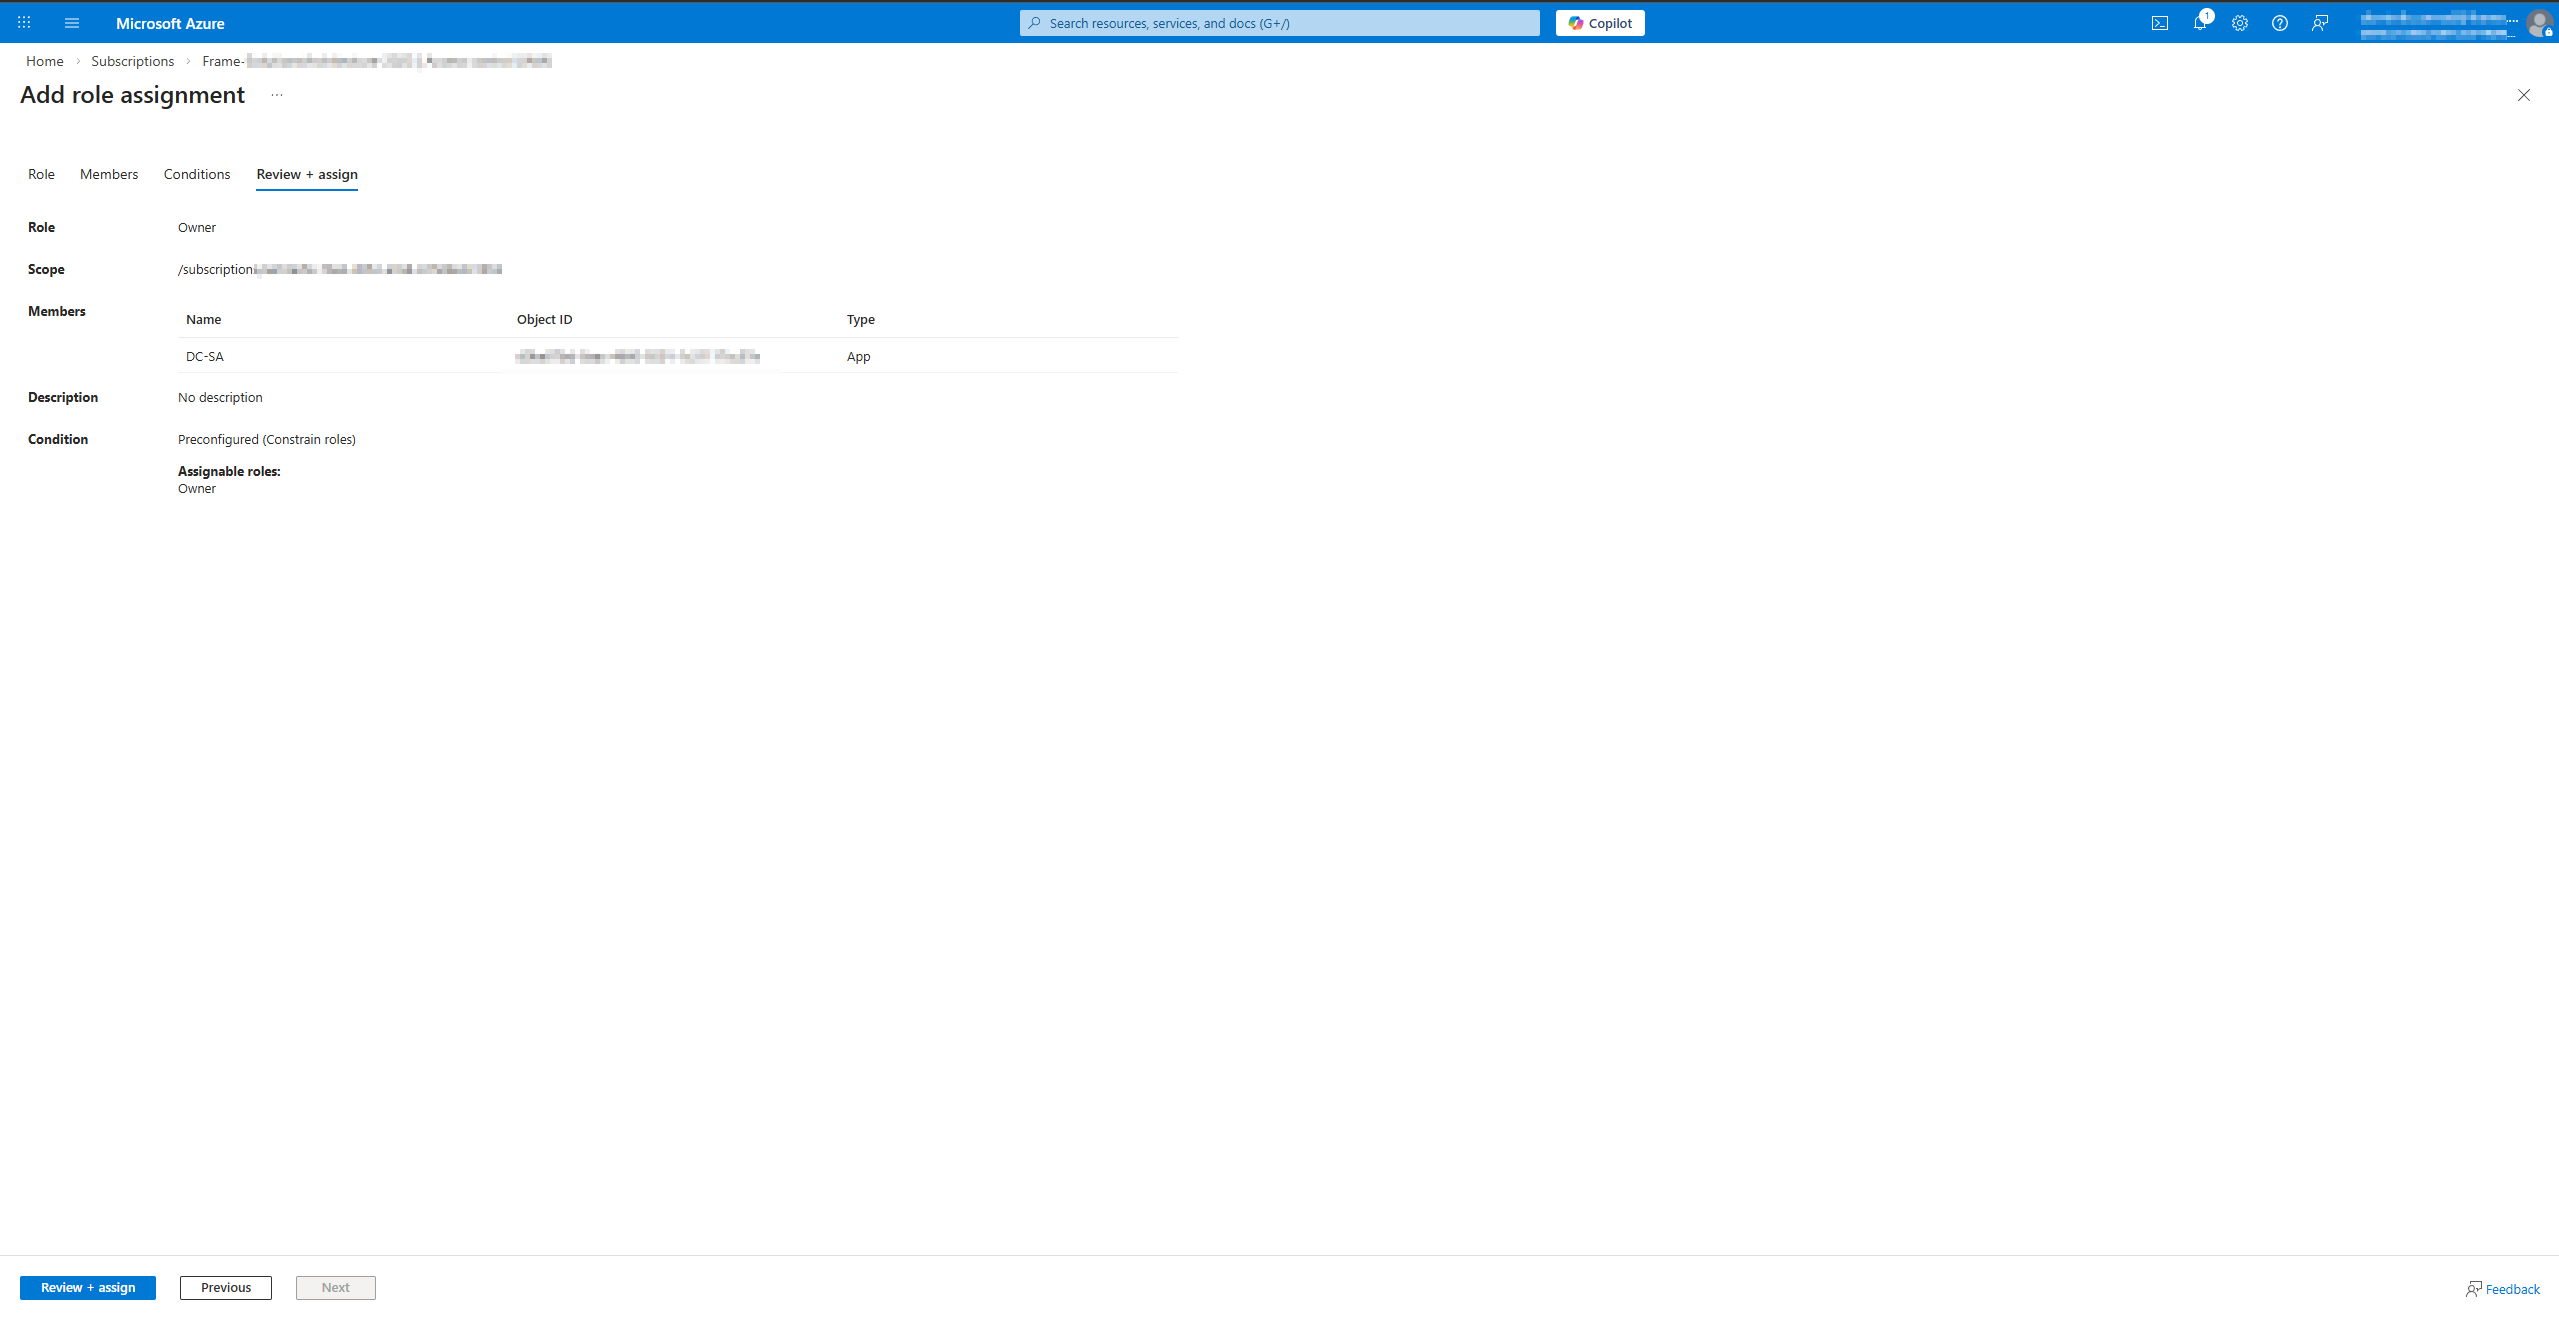
Azure Portal - Review and Assign
-
Before moving on, ensure you have obtained the following values.
- Azure Application ID
- Azure Directory ID
- Azure Subscription ID
- Azure Client Secret
You will use these values for the Frame setup below.
Adding your Cloud Account
Procedure
- Go to your Frame Admin Console.
- Navigate to the Customer or the Organization page (depending on where you wish to add the cloud account).
- Click on Cloud Accounts in the left-hand menu.
- Click the Add Cloud Account button on the top-right corner of the page.
- A new window will appear prompting you for the following information:
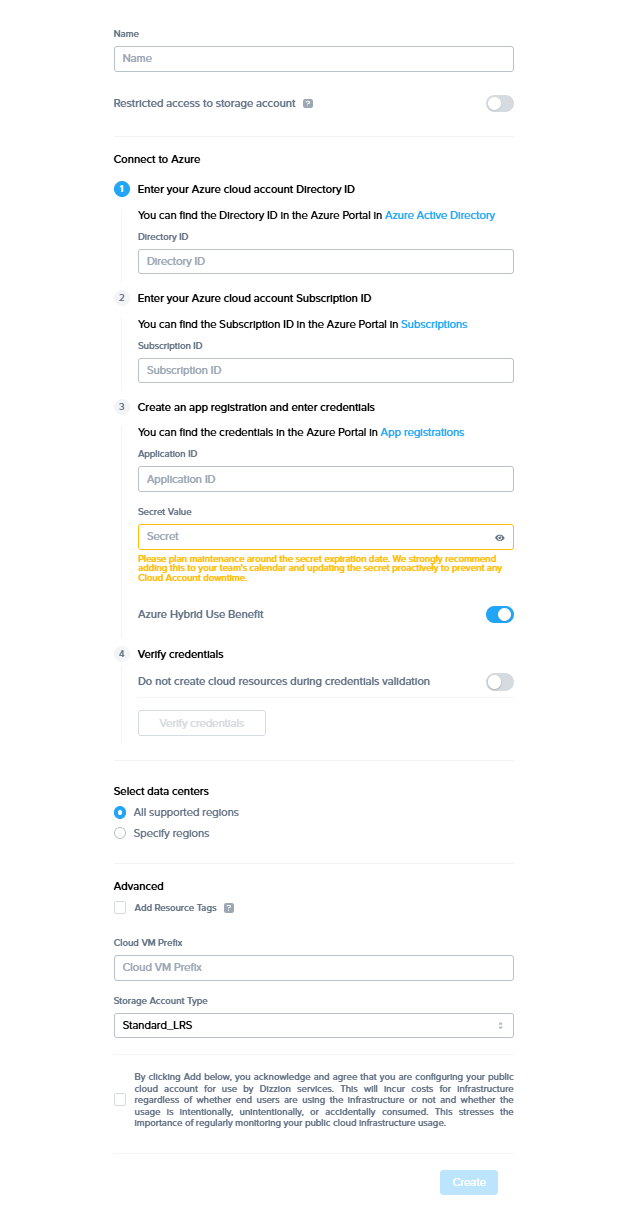
Frame Console - Add Cloud Account
- Cloud Provider: Select Azure.
- Name: Enter the desired name of your cloud service. This will be the name of the Cloud Account in Frame Console.
- Restricted access to storage account: Enable slider to restrict Azure storage container access to only Frame Platform public IP addresses.
- Directory ID: Enter the Azure Directory ID.
- Subscription ID: Enter the Azure Subscription ID.
- Application ID: Enter the Azure Application ID.
- Secret: Enter the Azure Secret key value.
-
Note:
Under the Secret section, you will see the following message:“Please plan maintenance around the secret expiration date. We strongly recommend adding this to your team's calendar and updating the secret proactively to prevent any Cloud Account downtime.”
This note is included because the current Microsoft Azure UI only allows you to create secrets with a maximum validity of 2 years. Once the secret expires, you will need to renew it in the Azure Portal and update the new secret in the Dizzion Console. Therefore, please plan maintenance activities before the expiration date to ensure uninterrupted access.
There are unofficial methods to create App Registration secrets through the Azure CLI with expiration periods of up to 99 years. However, this approach is not officially documented by Microsoft, and its usage should depend on your organization’s internal security policy. Dizzion does not recommend this method.
-
- Azure Hybrid Use Benefit: Enable if your Microsoft Azure Agreement entitles you to have Azure Hybrid Use Benefit.
- Do not create cloud resources during credentials validation: Enable to skip the test where Frame Platform verifies it can create Azure resources during the credential validation process.
-
Once you have entered the above information, click the “Verify credentials” button.
What's happening behind the scenes?
When you click the "verify credentials" button in Step 6, our system performs a series of actions to ensure that the API credentials you provided have the necessary permissions to orchestrate resources within your Azure Subscription. Specifically, the system will:
- Create a temporary resource group named
frame-cred-test*to verify initial API credentials. - Attempt to create the following resources within this resource group:
- A disk
- A public IP address
- A storage account
These resources are created and then promptly deleted to confirm that the credentials provided have the appropriate permissions for our platform to function correctly in your Azure environment. This process ensures that your credentials can manage and orchestrate the necessary resources for the Frame platform.
-
Once your credentials are verified, you can select the data centers (Azure regions) for your Frame accounts. You may add additional data centers in the future.
 Frame Console - Verify Credentials
- Finally, acknowledge the statement informing you of possible resource usage on your Azure cloud infrastructure and then click Create. After a few minutes, you will see your Azure Cloud Account listed as "Ready".
Now that your Azure Cloud Account is created and accessible within Frame, you will be able to create Frame accounts using this BYO cloud account. Be aware that the first Frame account created in an Azure datacenter region may take 30+ minutes as Frame Platform must copy the Dizzion-provided OS images to the Azure datacenter before the Frame account is created.
Subscription Configurations
Resources Created During BYO Azure Cloud Account Creation
Frame provisions a single storage account for every datacenter region selected upon cloud account creation. The Frame-provided OS master images (Windows 10, Windows Server 2016, Windows Server 2019, Ubuntu 20.04, etc.) are copied to each storage account and will be used when the first Frame account is created in that region.
Service Limits
By default, a newly created Azure account will impose certain service limits on available resources. Depending on the number of the Frame workload VMs required of a given machine family (e.g., number of concurrent users on NV6), how the Frame account is created (e.g., Frame networking with or without an SGA), and whether you use Publish or Quick Publish, you will likely need to adjust the default limits imposed by Microsoft on the Azure account. If these limits are set to values that are lower than what is required by the Frame platform, you can expect certain functions to either fail, or be substantially delayed. The requirements by Frame for these service limits depends on the desired workload and required resources. The recommended service limit increases include the following:
| Azure Resource | Recommendation |
|---|---|
| Virtual Machines-Family vCPUs (CPU-only and GPU instance types) | Azure has quotas on the total number of vCPUs and the total number of family-specific vCPUs, on a per-location basis. We recommend you first determine the expected max number of instances by instance type (per Frame account) for your needs. Next, calculate the number of vCPUs and family-specific vCPUs based on the expected max number of instances and the required number of vCPUs per instance type (for that family). If you use Publish, set your vCPU quota to 2.2 times the required number of vCPUs and specific family-specific vCPUs quotas to 2.2 times your expected max number of instances. The additional 20% will accommodate any additional resources such as Sandboxes, Utility servers, etc. If you use Quick Publish, you can use a minimum factor of 1.X times to calculate the required number of vCPUs and family-specific vCPUs. X is computed as the “Number of production instances created on publish” divided by expected max instances. By default, the “Number of production instances created on publish” value is configured to be 10 VMs. A factor of 1.3-1.5 should be sufficient to account for typical Quick Publishes and overhead. |
| Azure Managed Disks | Typically, this resource quota does not need to be modified. To estimate total disk storage consumption, multiply the total number of VMs you expect to provision by the size of the Sandbox VM (e.g., Windows 10 images 128 GiB; Windows Server images 64 GiB) across all Frame accounts you plan to provision. Number and size of any utility servers, number of Sandbox image backups, number and size of personal drives, and number and size of enterprise profile disks would be additional storage to consider. |
| Public IPs | If a Frame account is created with Frame public networking, each workload VM will have both a public and private IP address. If the Frame account is created using Frame private networking, all workload VMs will only have private IP addresses. If the Frame account is created using Frame private networking with Streaming Gateway Appliance (SGA), then you will need 1 public IP address for each SGA VM (and 1 public IP address for the load balancer in front of the SGA VMs). All of the workload VMs will only have private IP addresses. You will also need to account for the temporary increase of public IP addresses during a Publish or Quick Publish when the new production VMs are created and before the old production VMs are terminated. |
| VNets | If Frame public networking or Frame private networking is used to create Frame accounts, the number of VNets equals the number of Frame accounts. If Frame private networking with SGA is used to create Frame accounts, the required number of VNets is two times the number of Frame accounts. For BYO networking, no new networks are created. |
note
Service limit increases may not be necessary for smaller production environments or trial accounts. :::
Instance Types
Each IaaS provider has a unique naming scheme for their instance types. Azure names their instance types based on the "virtual machine type" Microsoft has created for specific workload use cases. More information about virtual machine types can be found in Microsoft's official documentation.
For the latest Azure instances supported by Frame, refer to Supported Instance Types.
:::danger Attention
Promotional instances provided by Microsoft by default are not supported by Frame. If you wish to use an account with an existing promotion, you will need to either exhaust promotional hours first or contact Azure support to remove those instances. :::
Resource Naming
Frame provisions the resources below based on a specific naming convention. The resource name value is also saved as value for the tag Name.
| Resource | Resource Name | Example |
|---|---|---|
| Vendor resource group | azr-prod-v{vendor_id}-instances-{3_digits} | azr-prod-v53273-instances-001 |
| Workload VM | azr-prod-v{server.vendor_id}-s{server.id} | azr-prod-v53209-s8059811 |
| Workload VM root volume | azr-prod-v{server.vendor_id}-s{server.id}-root | azr-prod-v53209-s8059811-root |
| User Volume | azr-prod-v{server.vendor_id}-d{disk.id}-{random 5 characters}-{disk_type} | azr-prod-v53273-d170923-857e4-profile |
| User Volume backup (Snapshot) | azr-prod-v{vendor_id}-{user_volume_id}-{snapshot_type}-{random 5 characters} | azr-prod-v53273-6f4ee921-profile-d1101 |
| Image (Snapshot) | azr-prod-v{vendor_id}-s{server_id}-{random 5 characters}-{snapshot_type} | azr-prod-v53273-s8066212-6afc7-publish |
| Master Image | azr-prod-v{vendor_id}-s{server_id}-{random 5 characters}-{snapshot_type} | azr-prod-v53273-s8066212-6afc7-publish |
| VNET | azr-prod-v{vendor_id}-vnet-{random 5 characters} | azr-prod-v53273-vnet-c56be |
| VNET resource group | prod-vnets-{azure_region} | prod-vnets-eastus |
| Subnet | azr-prod-v{vendor_id}-sn-{random 5 characters} | azr-prod-v53273-sn-42423 |
| Security group | azr-prod-v{vendor_id}-sn-{random 5 characters} | azr-prod-v53273-sg-da34f |
| SGA resource group | azr-prod-sga-{random 4 characters} | azr-prod-sga-2431 |
| SGA availability set | sga-availability-set-c{streaming_configuration_id} | sga-availability-set-c2431 |
| SGA load balancer | azr-prod-sga-{streaming_configuration_id}-lb | azr-prod-sga-2431-lb |
| SGA load balancer public IP | azr-prod-sga-{streaming_configuration_id}-lb-ip | azr-prod-sga-2431-lb-ip |
| SGA VNET | azr-prod-sga-{streaming_configuration_id}-vpc | azr-prod-sga-2431-vpc |
| SGA security group | azr-prod-sga-{streaming_configuration_id}-vpc-sg-default | azr-prod-sga-2431-vpc-sg-default |
| SGA VM | azr-prod-sga-{workload_streaming_configuration_id}-s{random 8 characters} | azr-prod-sga-2431-s0f532a75 |
| SGA VM root disk | azr-prod-sga-{workload_streaming_configuration_id}-s{random 8 characters} | azr-prod-sga-2431-s0f532a75 |
{snapshot_type} can be one of the following values:
manual- for manual backupspublish- for backups created for publishing purposetest_publish- for backups created for test publishauto- for scheduled backupssystem- for backups created internally in various processes (e.g. cloning, generalization)master- from a master image
{disk_type} can be one of the following values:
profile- Enterprise profile diskpersonal- Personal drive
The Streaming Gateway Appliance (SGA) resource naming applies only to Frame-provisioned and managed SGAs.
Disk Options
Frame supports two types of Azure-managed disk types. By default, Frame provisions Standard SSD-managed disks for VM boot disks and user volumes.
If a customer needs higher performing, low-latency disks for a given Frame account, the customer can contact Support and request that the Frame account be re-configured to use Premium SSD managed disks for VM boot disks and user volumes. Azure Premium SSDs do cost more than Standard SSDs.
Disks of a particular type that were provisioned prior to the disk type configuration change will remain as they were provisioned. Therefore, customers are advised to create the Frame account, request Support update the disk type to the desired disk type, and terminate the Sandbox, in order for the Sandbox disk to be re-created with the newly-configured disk type. Then, verify the Sandbox disk was provisioned with the desired disk type before continuing on to configure the Frame account, including installing applications in the Sandbox and publishing.
Google Cloud Platform
Overview
The Bring Your Own Google Cloud Platform (BYO GCP) feature allows customers to integrate their GCP environment with the Frame Platform, enabling direct deployment of virtual desktops and applications within their own GCP infrastructure. With BYO GCP, customers retain complete control over their cloud resources while leveraging Frame’s orchestration capabilities for seamless workload management. This approach ensures organizations can optimize performance, control costs, and scale their virtual workspaces efficiently to meet evolving business needs.
Setup
Requirements
In order to register your GCP Project (account) with Frame, ensure that you have addressed the following before proceeding:
-
The GCP Project principal who will execute the Frame-provided script has the role of “Owner” or has sufficient permissions to grant the required GCP roles to the Frame Platform service user . Once the deploy.sh script is executed, the principal who executed the script is no longer needed for Frame.
-
The specific GCP roles granted to the Frame Platform service user will depend on the desired Frame functionality to be used with your GCP Project.
-
To use all Frame features, the Frame Platform service user must have the following roles, which are granted when the default script is executed:
- compute.instanceAdmin
- compute.networkAdmin
- compute.securityAdmin
- compute.storageAdmin
- dns.admin
-
For customers who must control and manage all GCP networking resources and will only use Frame accounts deployed using customer-managed private networking, the Frame Platform service user must have the following roles, at a minimum. The script will need to be modified before the script is executed:
- compute/instanceAdmin
- compute.networks.getEffectiveFirewalls
-
For customers who want to use their own OS images (BYO OS image), rather than Frame-provided images, Frame must be able to list the images in the project, read those images, and create instances from those images. Frame will not delete, tag, or create BYO images. The operations necessitates the Frame Platform service user being granted the role:
- compute.imageUser
-
-
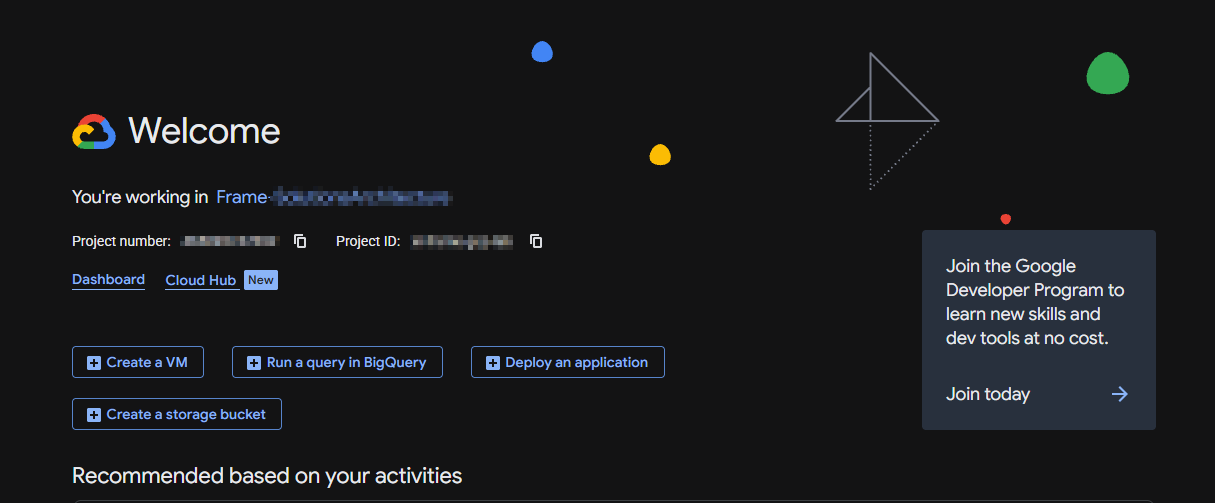
You know your GCP Account ID that will be registered with Frame. The GCP Account ID can be found by going to the Dashboard of your GCP console.
Shared VPC
For customers who wish to use GCP Shared VPCs, you will need to register both your GCP Host and Service Projects in Frame.
- GCP Host Project: After the GCP Host Project has been added as a Cloud Account in Frame, the GCP Administrator can remove assigned roles described above and assign the role.
- GCP Service Project: The GCP Service Project which will use the Shared VPC and specific subnets within the Shared VPC must then be added as a second Cloud Account in Frame.
Once you have registered the two GCP projects, you can configure Frame to share specific subnets from your Shared VPC in your GCP Host Project Cloud Acount with your GCP Service Project Cloud Account.
Both the GCP Host and Service Projects should only be registered (imported) once, even if additional subnets are created later in the Host Project and shared with one or more Service Projects.
Workload VM Service Account
Frame allows customers to attach a GCP service account to each workload VM Frame Platform provisions. The GCP service account can be specified at the Frame Cloud Account level (by default, all VMs created within the Cloud Account will have this service account assigned) or for a specific Frame Account. The service account specified for an Account takes precedence over the service account specified for the Cloud Account.
Once the GCP Cloud Account is registered in Frame, open a support case and specify the name of your Frame Customer (or Organization) entity, name of the GCP Cloud Account, and the GCP service account (email address).
If you want to use a different GCP service account with the specific Frame Account, create the Frame Account and then open a support case with the name of the Frame Account, Frame Vendor ID, and the GCP service account (email address). Once the GCP service account is attached to your Frame Account, you will need to terminate the Sandbox (and any other workload VMs) in the Frame Account in order for Frame Platform to reprovision the workload VMs with the GCP service account.
Before a GCP service account can be attached to each workload VM, the customer must add the role to the Frame Platform service user .
Customer-Managed Encryption Keys
Frame allows customers to specify a customer-managed encryption key (CMEK) for encryption of persistent disks at the GCP Cloud Account level or at the Frame Account level. The CMEK specified at the Frame Account level will take precedence over the CMEK specified at the GCP Cloud Account level.
You must open a support case with the name of the GCP Cloud Account or Frame Account and the name of the key used to encrypt the persistent disks.
Adding your Cloud Acount
Procedure
- Go to your Frame Admin Console.
- Navigate to the Customer or the Organization page (depending on where you wish to add the cloud account).
- Click on Cloud Accounts in the left-hand menu.
- Click the Add Cloud Account button on the top-right corner of the page.
- A new window will appear prompting you for the following information:
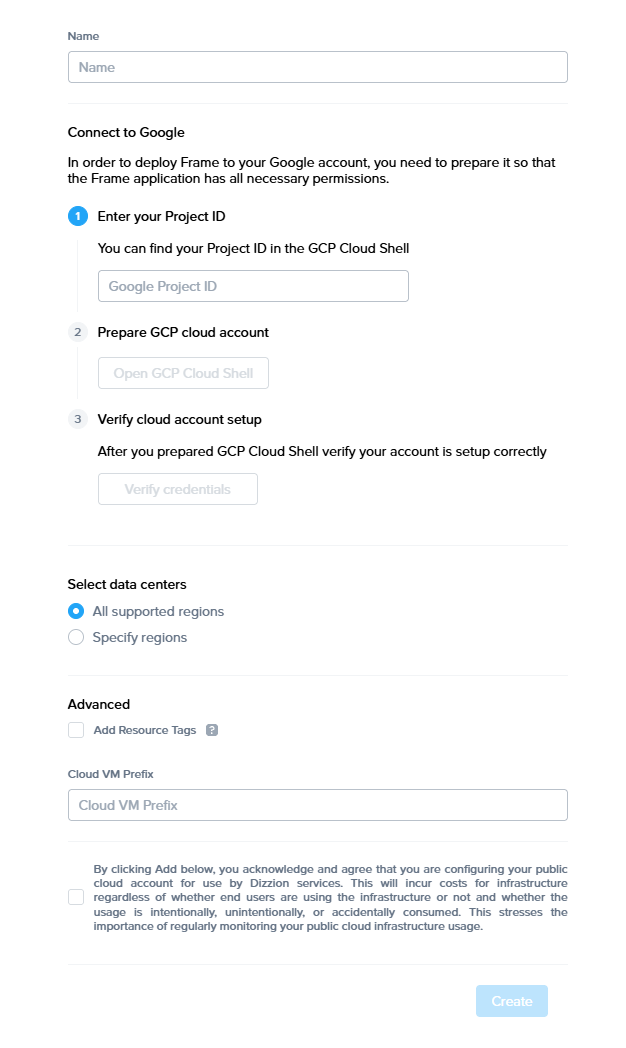
- Cloud Provider: Select GCP.
- Name: Enter the desired name of your cloud service. This will be the name of the Cloud Account in Frame Console.
- Cloud Project ID: Enter your GCP Project ID in this field.
- Once you have entered the information, click the “Open GCP Cloud Shell" button. A new tab will open, taking you to your GCP Console.
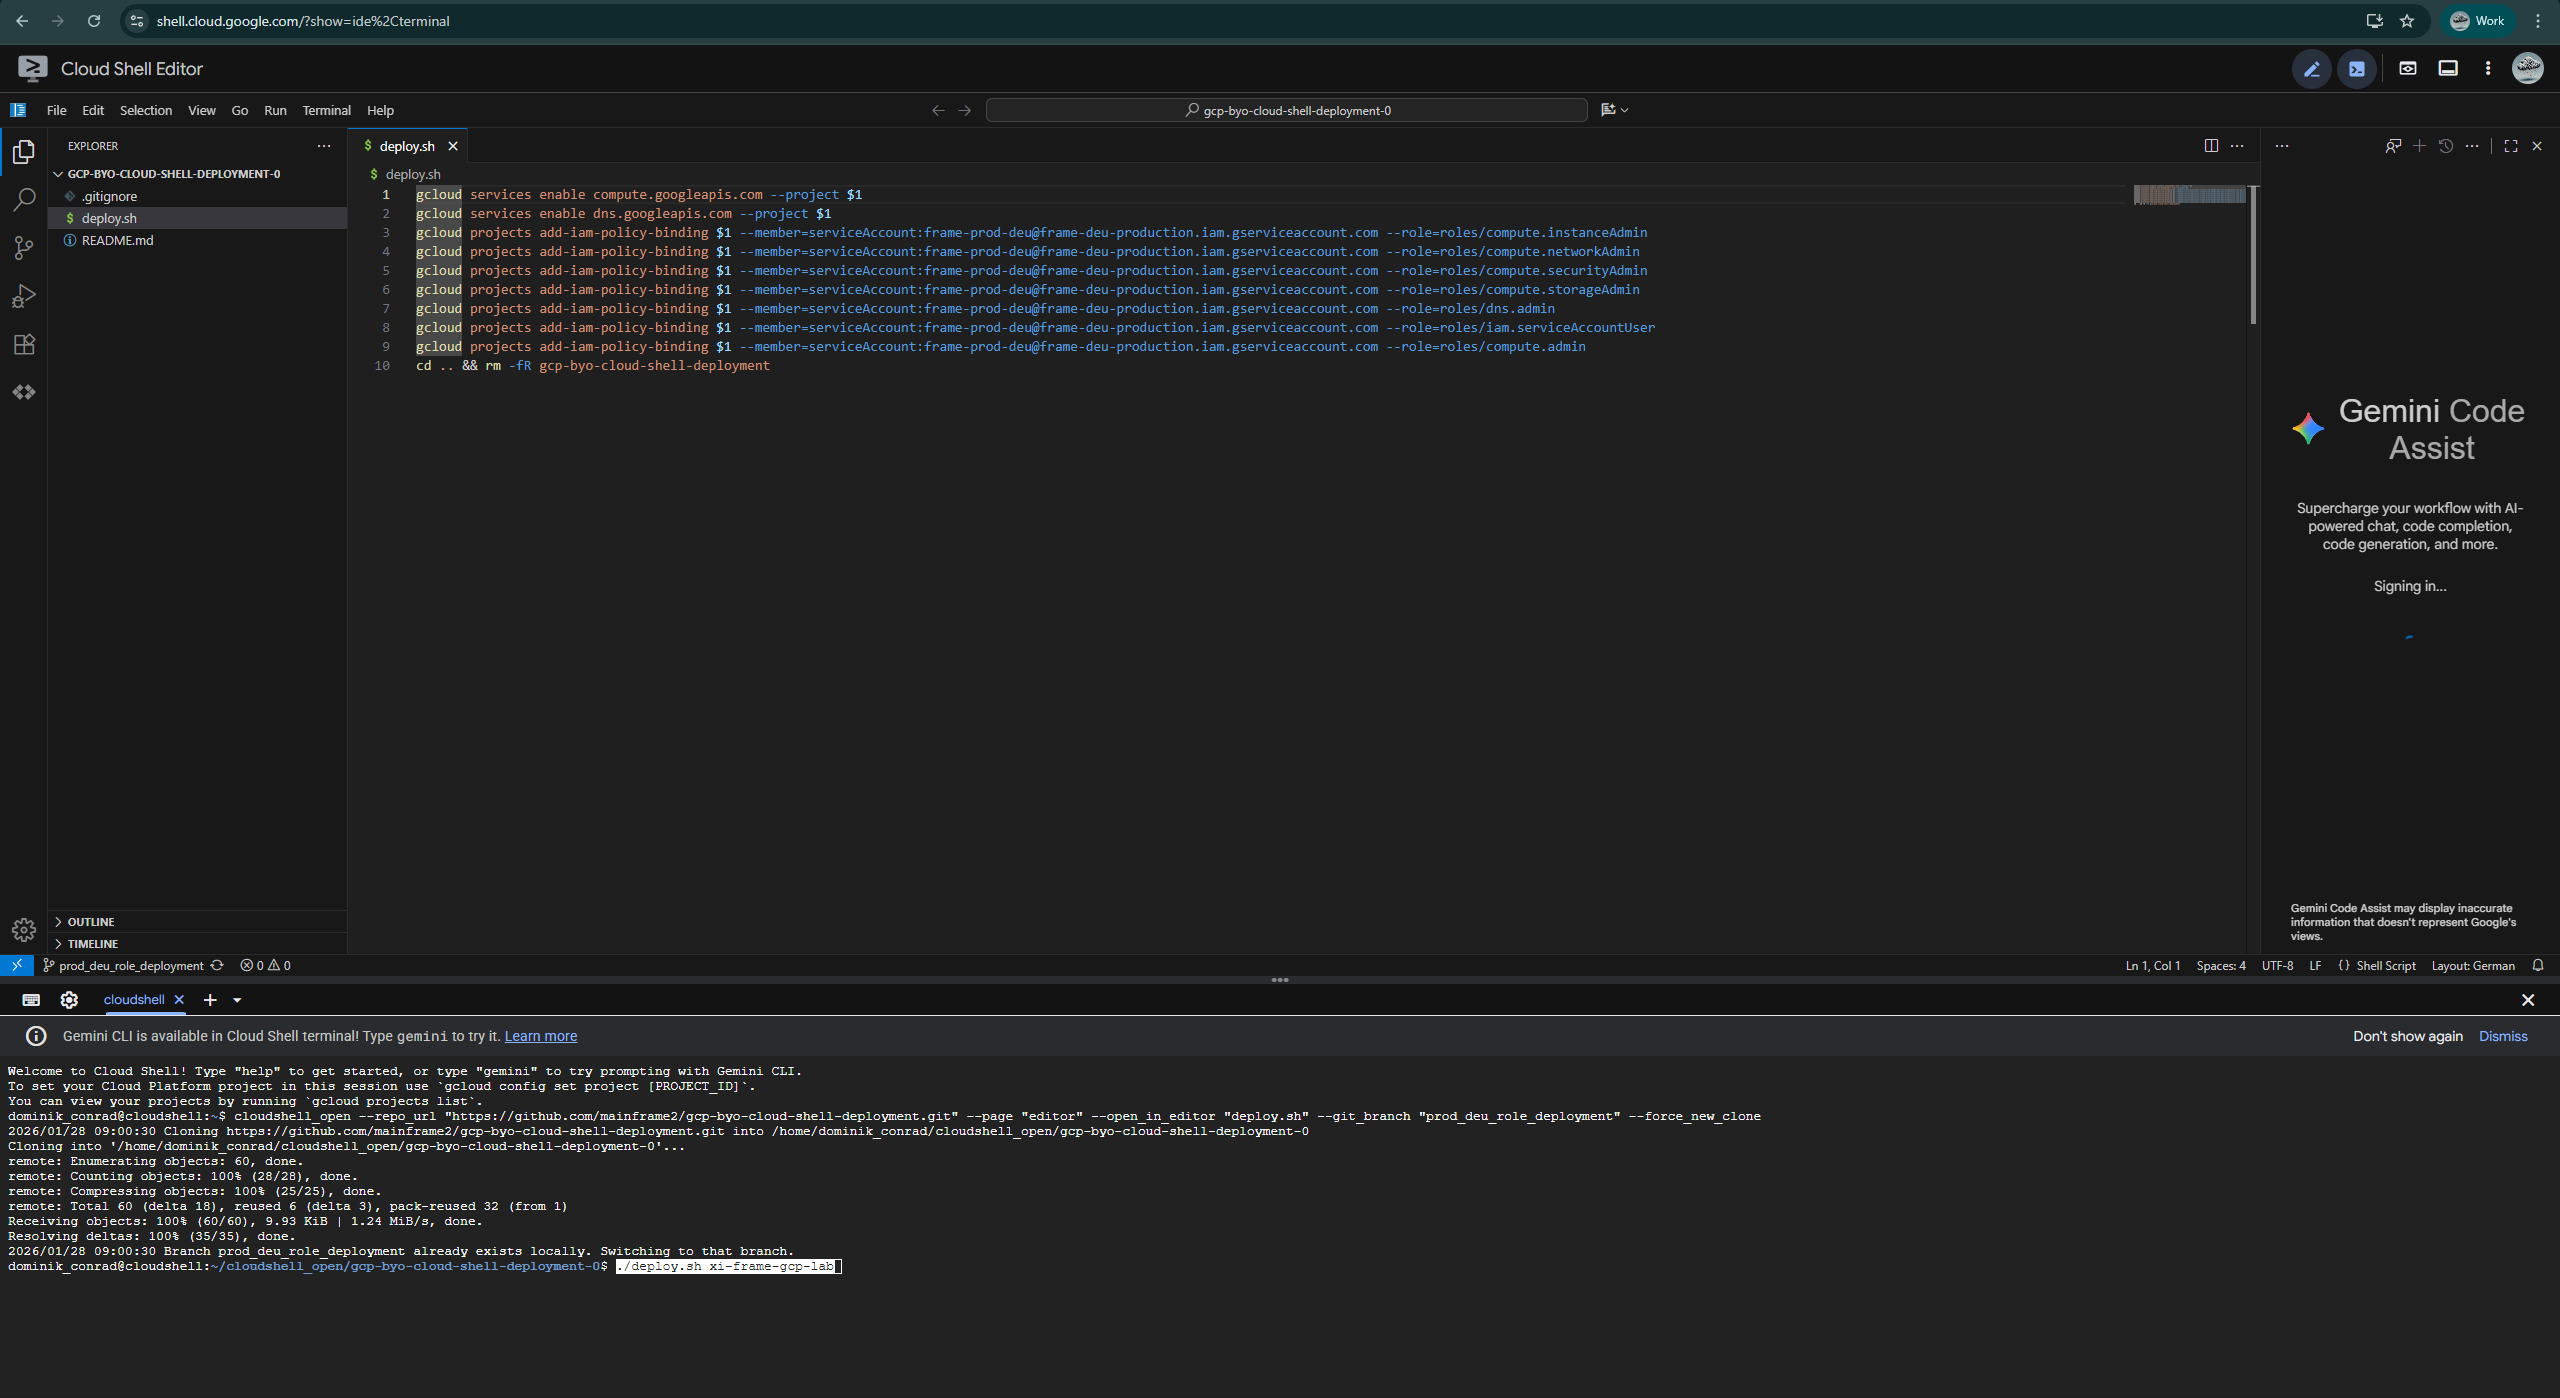
- A prompt will appear asking you to confirm that you trust the Github repo storing the deploy.sh file. Select the Trust checkbox and click “Confirm.”
The GCP Project principal who will execute the Frame-provided deploy.sh script has the role of “Owner” or has sufficient permissions to grant the required GCP roles to the Frame Platform service user . Once the deploy.sh script is executed, the principal who executed the script is no longer needed for Frame.
If required, you can modify the deploy.sh script to remove or add specific GCP IAM role/permission lines to grant the required roles, based on your use case (as described in the Requirements).

- After the Cloud Shell has initialized, paste the deployment command into the cloud shell and press “Enter.” You will be asked to authorize the use of your credentials to make a GCP API call. Once the command has completed successfully, you can close the Google Cloud Shell tab.
Now that your GCP Cloud Account is created and accessible within Frame, you will be able to create Frame accounts using this BYO cloud account.
Resources Created During BYO GCP Cloud Account Creation
During the creation of a BYO GCP Cloud Account, Frame will immediately create multiple roles comprised of the minimum required permissions for Frame Platform communication and orchestration with Google API Gateway on behalf of your Google Project. Frame also enables Google's Compute Engine and Cloud DNS APIs.
Service Limits
By default, a newly created GCP account will impose certain service limits on available resources. Depending on the number of the Frame workload VMs required of a given machine type (e.g., number of concurrent users on n1-standard-4-GPU-P4-Windows), how the Frame account is created (e.g., Frame networking with or without an SGA), and whether you use Publish or Quick Publish, you will likely need to adjust the default limits imposed on the GCP account. If these limits are set to values that are lower than what is required by the Frame platform, you can expect certain functions to either fail, or be substantially delayed. The requirements by Frame for these service limits depends on the desired workload and required resources. The recommended service limit increases include the following:
| GCP Resource | Recommendation |
|---|---|
| CPUs and Machine Types | GCP has quota metrics on the total number of CPUs and number of CPUs for specific machine types, on a per-location basis. We recommend you first determine the expected max number of instances by machine type (per Frame account) for your needs. Next, calculate the total number of CPUs based on the expected max number of instances and the required number of CPUs for a specific machine type. If you use Publish, set your CPU quota to 2.2 times the required number of CPUs and specific machine type quotas to 2.2 times your expected max number of instances. The additional 20% will accommodate any additional resources such as Sandboxes, Utility servers, etc. If you use Quick Publish, you can use a minimum factor of 1.X times to calculate the required number of CPUs and the max instances. X is computed as the “Number of production instances created on publish” divided by expected max instances. By default, the “Number of production instances created on publish” value is configured to be 10 VMs. A factor of 1.3-1.5 should be sufficient to account for typical Quick Publishes and overhead. |
| Persistent Disk SSD | Frame provisions Persistent Disks for all workload VM disks. These persistent disks are zonal SSDs. Typically, this resource does not need to be modified. To estimate total disk storage consumption, multiply the total number of VMs you expect to provision by the size of the Sandbox VM (e.g., 80 GiB) across all Frame accounts you plan to provision. Number and size of any utility servers, number of Sandbox image backups, number and size of personal drives, and number and size of enterprise profile disks would be additional storage to consider. |
| GPU-backed Instances | If you plan to use GPU-backed instances, you will need to increase the specific Virtual Workstation GPU (e.g., “NVIDIA T4 Virtual Workstation GPUs”) quota to the maximum number of workload VMs that will be provisioned. As was discussed in the CPU recommendation, make sure to account for the temporary increase of GPU VMs during a Publish or Quick Publish when the new production VMs with attached GPUs are created and before the old production VMs with attached GPUs are terminated. |
| IP Addresses | If a Frame account is created with Frame public networking, each workload VM will have both an ephemeral external IP address and a private IP address. If the Frame account is created using Frame private networking, all workload VMs will only have private IP addresses. If the Frame account is created using Frame private networking with Streaming Gateway Appliance (SGA), then Frame will provision 1 ephemeral external IP address and 1 private IP address for each SGA VM as well as 1 ephemeral external IP address and 1 private IP address for the load balancer in front of the SGA VMs. All of the workload VMs will only have private IP addresses. You will also need to account for the temporary increase of in-use IP addresses during a Publish or Quick Publish when the new production VMs are created and before the old production VMs are terminated. |
| Networks | If Frame public networking or Frame private networking is used to create Frame accounts, the number of VPC networks equals the number of Frame accounts. If Frame private networking with SGA is used to create Frame accounts, the required number of VPC networks is two times the number of Frame accounts. For BYO networking, no new networks are created. |
| Subnetworks | If Frame networking is used to create Frame accounts, the number of subnetworks equals the number of Frame accounts. For BYO networking, no new subnetworks are created. |
To review all of your quota metrics and current usage on your GCP account, you will need to click on the “IAM & Admin” link in the navigation panel on the left of the GCP console and select “Quotas” at the bottom of the IAM & Admin navigation panel.
Instance Types
Each IaaS provider has a unique naming scheme for their instance types. GCP names their instance types (or “machine types”) based on the “machine type families” they have created for specific workload use cases. More information about machine types and machine type families can be found in GCP's official documentation.
For the latest GCP instances supported by Frame, refer to our Supported Instance Types table.
Resource Naming
Frame provisions the resources below based on a specific naming convention. The resource name value is also saved as value for the tag .
| Resource | Resource Name | Example |
|---|---|---|
| Workload VM | ins-prod-v{vendor_id}-s{server.id} | |
| Workload VM root volume | ins-prod-v{vendor_id}-s{server.id} | |
| User Volume | usrd-prod-v{vendor_id}-{random 8 characters}-{disk_type} | |
| User Volume backup (Snapshot) | usrd-snp-prod-v{vendor_id}-d{user_volume_id}-{random 5 characters} | |
| Image | img-prod-v{vendor_id}-s{server_id}-{image_type}-{random 5 characters} OR img-prod-v{vendor_id}-{image_type}-{random 5 characters} | |
| Master Image | img-prod-master_image-src-{source_image_id}-{random 5 characters} | |
| VPC | vpc-prod-v{vendor.id}-i{index} | |
| Subnet | vpc-prod-v{vendor.id}-i{index}-sn | |
| NAT router | vpc-prod-v{vendor.id}-i{index}-nat-router | |
| NAT gateway | vpc-prod-v{vendor.id}-i{index}-nat-gateway | |
| SGA VPC | sga-vpc-prod-{streaming_configuration_id} | |
| SGA subnet | sga-vpc-prod-{streaming_configuration_id}-sn | |
| SGA VM | sga-vpc-prod-{streaming_configuration_id}-s{sga_server_id} | |
| SGA VM root disk | sga-vpc-prod-{streaming_configuration_id}-s{sga_server_id} | |
| SGA load balancer static public IP | sga-{sga_vpc_id}-static-ip | |
| SGA load balancer target pool | sga-{sga_vpc_id}-target-pool | |
| SGA load balancer forward rule | sga-{sga_vpc_id}-forwarding-rule |
{image_type} can be one of the following values:
- for manual backups
- for backups created for publishing purpose
- for backups created for test publish
- for scheduled backups
- for backups created internally in various processes (e.g. cloning, generalization)
- from a master image
{disk_type} can be one of the following values:
- Enterprise profile disk
- Personal drive
The Streaming Gateway Appliance (SGA) resource naming applies only to Frame-provisioned and managed SGAs.
Disk Options
Frame supports two types of GCP persistent disk types. By default, Frame provisions zonal performance (SSD) persistent disks (pd-ssd) for VM boot disks and user volumes.
If a customer needs lower cost, albeit slower performing disks, for a given Frame account, the customer can contact Support and request that the Frame account be configured to use zonal balanced persistent disks (pd-balanced) for VM boot disks and user volumes.
Disks of a particular disk type that were provisioned prior to the disk type configuration change will remain as they were provisioned. Therefore, customers are advised to create the Frame account, request Support update the disk type to the desired disk type and terminate the Sandbox, in order for the Sandbox disk to be re-created with the newly configured disk type. Then, verify the Sandbox disk was provisioned with the desired disk type before continuing on to configure the Frame account, including installing applications in the Sandbox and publishing.
IBM Cloud
Frame supports the orchestration of IBM Cloud Virtual Private Cloud (VPC) and virtual server resources in the customer's own IBM Cloud account.
Requirements
In order to register your IBM Cloud account with Frame, ensure that you have the met the following requirements before proceeding:
- Valid IBM Cloud account
- Permissions to add and modify role assignments for the IBM Cloud account.
Costs (e.g., storage) may begin to accrue immediately after completing the registration of your IBM Cloud account on your Frame Customer or Organization entity.
Preparation
Before your IBM Cloud account can be registered with Frame, you will need to complete two tasks:
- Obtain your IBM Cloud Account ID.
- Create an IBM Cloud Service ID for the Dizzion DaaS Service.
- Generate an IBM Cloud API key for your IBM Cloud Account ID.
Obtain your IBM Cloud Account ID
You will need to obtain your IBM Cloud Account ID for the IBM Cloud Account you wish to register in your Frame tenant.
-
Open the IBM Cloud Console and navigate to Manage > Account > Account settings.

IBM Cloud Console - Account Settings -
Copy the Account ID and save the value.
Create a Service ID
In order to programmatically provision and access resources in your IBM Cloud account, you will need to create a Service ID that identifies the Dizzion DaaS service within IBM Cloud. You will be able to assign specific access policies to the Dizzion DaaS-specific Service ID so that the Frame control plane can only use specific IBM Cloud services.
-
In the IBM Cloud Console, go to the IAM page (Manage > Access (IAM)) and select Service IDs in the menu.

IBM Cloud Console - Service IDs -
Click on the blue button "Create +". Enter a name and description for this Service ID.

IBM Cloud Console - Create Service ID -
Assign to your Service ID the following IBM Cloud service access with the specified access levels (Roles and Actions). This will allow Dizzion Frame control plane to orchestrate and manage the IBM Cloud resources in your IBM Cloud account that are required to deliver virtual applications and desktops.
| Service | Roles and Actions |
|---|---|
| All IAM Account Management Services | Administrator |
| Cloud Object Storage | Editor, Manager |
| VPC Infrastructure Services | Administrator |
| Key Protect | Editor, Reader |
| Transit Gateway | Editor |
| All Account Management | Administrator |

Generate your API Key
Next, you will need to generate an API key. You will enter this API key, in conjunction with the IBM Cloud Account ID, into Frame to register your IBM Cloud account.
-
On the Service IDs page, select API Keys tab.

IBM Cloud Console - API Key -
Click on the blue button "Create +". Enter a name and description for this API key.

IBM Cloud Console - Create API Key -
Once the API key is generated, be sure to copy or download the key immediately. This key will not be shown again.

IBM Cloud Console - Copy API Key -
Before moving on, ensure you have obtained the following values.
- IBM Cloud Account ID
- IBM Cloud Account API Key
You will use these values for the Frame setup below.
Adding your Cloud Acount
Procedure
-
Go to your Frame Admin Console.
-
Navigate to the Customer or the Organization page (depending on where you wish to add the cloud account).
-
Click on Cloud Accounts in the left-hand menu.
-
Click the Add Cloud Account button on the top-right corner of the page.
-
Select IBM Cloud.
-
A new window will appear prompting you for the following information:

Frame Console - Add Cloud Account - Name: Enter the desired name of your cloud service. This will be the name of the Cloud Account in Frame Console.
- Account ID: Enter the IBM Cloud Account ID.
- API Key: Enter the IBM Cloud API key.
-
Once you have entered the information, click the “Verify credentials” button.
-
Once your credentials are verified, you can select the data centers (IBM Cloud Multi-Zone Regions) for your Frame accounts. You may add additional data centers in the future.
-
Check the box at the bottom informing you of possible resource usage on your IBM Cloud infrastructure and then click "Add Account". After a few minutes, you will see your IBM Cloud Account listed as "Ready".
Now that your IBM Cloud Account is created and accessible within Frame, you will be able to create Frame accounts using this BYO cloud account. Be aware that the first Frame account created in an IBM Cloud region may take 30+ minutes as Frame Platform must copy the Dizzion-provided OS images to the IBM Cloud datacenter before the Frame account is created.
Resources Created During BYO IBM Cloud Account Creation
Once the API Key has been validated, Frame provisions the following IBM Cloud Account resources for each multi-zone region added.
- Resource group
- SSH Key
Quotas and Service Limits
By default, a newly created IBM Cloud account will impose certain service limits on available resources. Depending on the number of the Frame workload VMs required of a given instance profile, how the Frame account is created (e.g., Frame-managed networking with or without an SGA), and whether you use Publish or Quick Publish, you will likely need to request increases to the default quotas and service limits imposed by IBM on your IBM Cloud account. If these limits are set to values that are lower than what is required by the Frame platform, you can expect certain functions to either fail, or be substantially delayed. The requirements by Frame for these service limits depends on the desired workload and required resources.
Further documentation on IBM Quotas and Service Limits can be found in official IBM Cloud VPC documentation.
The recommended service limit increases include the following:
| IBM Cloud VPC Resource | Recommendation |
|---|---|
| vCPU | IBM has a default quota of 200 vCPUs per region. We recommend you first determine the expected max number of instances by instance profile across all Frame accounts for each region. Next, calculate the number of vCPUs based on the expected max number of instances and the required number of vCPUs per instance profile. If you use Publish, set your vCPU quota to 2.2 times the required number of vCPUs. The additional 20% will accommodate any additional resources such as Sandboxes, Utility servers, etc. If you use Quick Publish, you can use a minimum factor of 1.X times to calculate the required number of vCPUs. X is computed as the “Number of production instances created on publish” divided by expected max instances. By default, the “Number of production instances created on publish” value is configured to be 10 VMs. A factor of 1.3-1.5 should be sufficient to account for typical Quick Publishes and overhead. |
| RAM | IBM has a default quota of 5600 GB per region. We recommend you first determine the expected max number of instances, by instance profile, across all Frame accounts for each region. Next, calculate the total amount of RAM by summing the products of the max number of instances and the memory for each instance profile. |
| Instance Storage | IBM has a default quota of 18 TB per region. Typically, this resource quota does not need to be modified. To estimate total disk storage consumption, multiply the total number of VMs you expect to provision by the size of the Sandbox VM (e.g., Windows 10/11 images 128 GiB; Windows Server images 64 GiB) across all Frame accounts you plan to provision. Number and size of any utility servers, number of Sandbox image backups, number and size of personal drives, and number and size of enterprise profile disks would be additional storage to consider. |
| Floating IPs | If a Frame account is created with Frame public networking, each workload VM will have both a public and private IP address. If the Frame account is created using Frame private networking, all workload VMs will only have private IP addresses. If the Frame account is created using Frame private networking with Streaming Gateway Appliance (SGA), version 3, then you will need 1 Floating IP address for each SGA VM (and 1 Floating IP address for the load balancer in front of the SGA VMs). For SGA 4, you will need 1 Floating IP address for each SGA VM. All of the workload VMs will only have private IP addresses. You will also need to account for the temporary increase of public IP addresses during a Publish or Quick Publish when the new production VMs are created and before the old production VMs are terminated. |
| GPU | IBM has a default quota of 16 per IBM Cloud account. If you plan to use GPU-backed instance profiles, you will need to request an increase to this quota. |
| VPCs | IBM has a default quota of 10 VPCs per region. If Frame public networking or Frame private networking is used to create Frame accounts, the number of VPCs equals the number of Frame accounts. If Frame private networking with SGA is used to create Frame accounts, then the SGA cluster will require its own VPC (independent of the number of Frame accounts attached to the SGA cluster). For customer-managed networking, no new networks are created. |
Instance Profiles
Dizzion supports both 2nd and 3rd generation IBM Cloud Virtual Servers for VPC. For Windows 10/11 desktops requiring UEFI, only 3rd generation IBM profiles are supported.
More information about IBM Cloud VPC instance profiles can be found in IBM Cloud's official documentation.
For the latest IBM Cloud VPC instance profiles supported by Dizzion, refer to Supported Instance Types.
Resource Naming
Frame provisions the resources below based on a specific naming convention. The resource name value is also saved as value for the tag Name.
| Resource | Resource Name | Example |
|---|---|---|
| Workload VM | prod-v{server.vendor_id}-s{server.id} | prod-v53209-s8059811 |
| Workload VM root volume | prod-v{server.vendor_id}-s{server.id}-root | prod-v53209-s8059811-root |
| User Volume | prod-v{server.vendor_id}-d{disk.id}-{random 5 characters}-{disk_type} | prod-v53273-d170923-857e4-profile |
| User Volume backup (Snapshot) | prod-v{vendor_id}-{user_volume_id}-{snapshot_type}-{random 5 characters} | prod-v53273-6f4ee921-profile-d1101 |
| Image (Snapshot) | prod-v{vendor_id}-s{server_id}-{random 5 characters}-{snapshot_type} or prod-v{vendor_id}-{image_type}-{random 5 characters} | prod-v53273-s8066212-6afc7-publish or prod-v48287-manual-8e750 |
| Master Image | prod-master-image-src-{source_image_id}-{random 5 characters} | prod-master-image-src-239323-d06e8 |
| VPC | prod-v{vendor_id}-vpc{index} | prod-v53273-vpc0 |
| Subnet | prod-v{vendor_id}-sn{index} | prod-v53273-sn1 |
| Security group | prod-v{vendor_id}-sn{index} | prod-v53273-sg0 |
| Static Public IP address | prod-v{server.vendor_id}-s{server.id} or prod-v{vendor_id}-vpc{index}-natgw-{index} | prod-v53209-s8059811 or prod-v7538-vpc0-natgw-0 |
| NAT Gateway | prod-v{vendor.id}-vpc{vpc_idx}-natgw-{idx} | prod-v7538-vpc0-natgw-0 |
| Routing table | frame-prod-{random words separated by ‘-’}-{rtb_db_id} | frame-prod-remold-daffy-unmarked--01hrywf31kevm2k2rp9vn2sv5z |
| SGA VPC | prod-sga-{streaming_configuration_id}-vpc | prod-sga-2431-vpc |
| SGA subnet | prod-sga-{streaming_configuration_id}-vpc{index} | prod-sga-2425-vpc3 |
| SGA security group | prod-sga-{streaming_configuration_id}-vpc-sg-default | prod-sga-2431-vpc-sg-default |
| SGA VM | prod-sga-{workload_streaming_configuration_id}-s{random 8 characters} | prod-sga-2431-s0f532a75 |
| SGA VM root disk | prod-sga-{workload_streaming_configuration_id}-s{random 8 characters} | prod-sga-2431-s0f532a75 |
| Resource group | frame-prod-mr-{random 25 characters} | frame-prod-mr-01hybt5xcqyp1x4q3jvdmyd5ah |
{snapshot_type} can be one of the following values:
manual- for manual backupspublish- for backups created for publishing purposetest_publish- for backups created for test publishauto- for scheduled backupssystem- for backups created internally in various processes (e.g. cloning, generalization)master- from a master image
{disk_type} can be one of the following values:
profile- Enterprise profile diskpersonal- Personal drive
The Streaming Gateway Appliance (SGA) resource naming applies only to Frame-provisioned and managed SGAs.
Nutanix AHV
Overview
Frame's integration with Nutanix AHV allows customers to seamlessly connect their AHV clusters to the Frame Platform, enabling them to run virtual desktops and applications directly within their on-premises infrastructure. By registering their AHV cluster with their Frame tenant, customers gain the flexibility to manage workloads locally while leveraging Frame’s remote desktop delivery and orchestration capabilities. This hybrid model empowers organizations to maintain full control over their virtual environment while offering end-users a high-performance experience across any device.
Setup
Requirements
In order to register your AHV cluster with Frame, you need to ensure that you have addressed the following before proceeding:
-
The Nutanix hyperconverged cluster must have:
- Acropolis Operating System (AOS) 7.0.0.5 (minimum) or newer
- Acropolis Hypervisor (AHV) compatible with the cluster hardware and AOS version
- Prism Central 2024.3 or newer, with your Prism Central VM configured with at least 26 GB of RAM
For further details on the supported combinations of AOS, AHV, and Prism Central for a given Ubuntu or Windows guest OS, consult with Nutanix's AOS Software Interoperability Matrix and AHV Guest OS Compatability and Interoperability Matrix.
Frame, unlike other Nutanix services hosted on a Prism Central-managed cluster, does not require any additional compute resources for Prism Central. Frame uses:
- Prism Central APIs to query categories, obtain the list of template images tagged with Frame-specific categories, and query for the list of available VLANs in the AHV cluster as well as AHV cluster-based resources (e.g., provision/deprovision VMs/storage, power on/off VMs, attach/detach disks, replicate backups, etc.)
For sizing the Prism Central VM, consider your specific number of virtual machines across your AHV cluster(s). Refer to the Nutanix KB article as a reference for right sizing your Prism Central VM.
-
If vGPUs are to be used, then the following NVIDIA components must be installed, as documented in the Nutanix AHV Administration Guide:
- NVIDIA vGPU Software License Server with a valid NVIDIA license file
- NVIDIA GRID vGPU Host drivers
- NVIDIA GRID vGPU Guest OS drivers
AHV-compatible host drivers are available for download from Nutanix Portal. All other NVIDIA components are obtained via NVIDIA Licensing Software Downloads site.
-
Network has been configured for the AHV cluster to communicate with the Frame control plane and for users to access the workload VMs on the AHV cluster following one of two network deployment models, as described in Private Networking or Private Networking with SGA.
-
DHCP must be available for the Frame workload VMs.
-
At least one template OS image installed with Frame Agent.
Supported NVIDIA GPUs
A list of supported NVIDIA GPUs can be found in official Nutanix AHV documentation.
Note
Depending on the specific HCI hardware model and the Nutanix AHV/AOS version to be used, the hardware and/or AHV version may or may not support all of the GPU cards above.
Preparation
Adding your AHV cluster to your Frame customer or organization entity in order for you to create Frame account(s) on your AHV cluster requires the following 3 tasks:
- Preparing your Nutanix AHV cluster
- Preparing at least one template image
- Connecting your AHV cluster to Frame
This section discusses the two preparation tasks that are required before you can connect your AHV cluster to Frame.
Nutanix Cluster
You will start by creating one (1) Prism Central user account, and one (1) Prism Central category to be used by Frame for provisioning and infrastructure management.
- Save your Prism Element user name and password. You will need this Prism Element user name and password later on in the process.
Prism Central service user
-
Log in to your Prism Central Management Console and go to your Prism Central settings by clicking on the "Admin Center" drop down menu in the top left corner of the management console.

-
Click on “IAM” from the menu on the left-hand side and then "Identities". Click the "+ Add Local User” button.

-
Fill out the "Add Local User” form that appears and click on the "Create" button.

-
Save your Prism Central user name and password. You will need this Prism Central user name and password later on in the process.
-
Next, create a new Authorization Policy for this service user by navigating from "IAM" to "Authorization Policies". Click on the "+ Create new Authorization Policy" button.
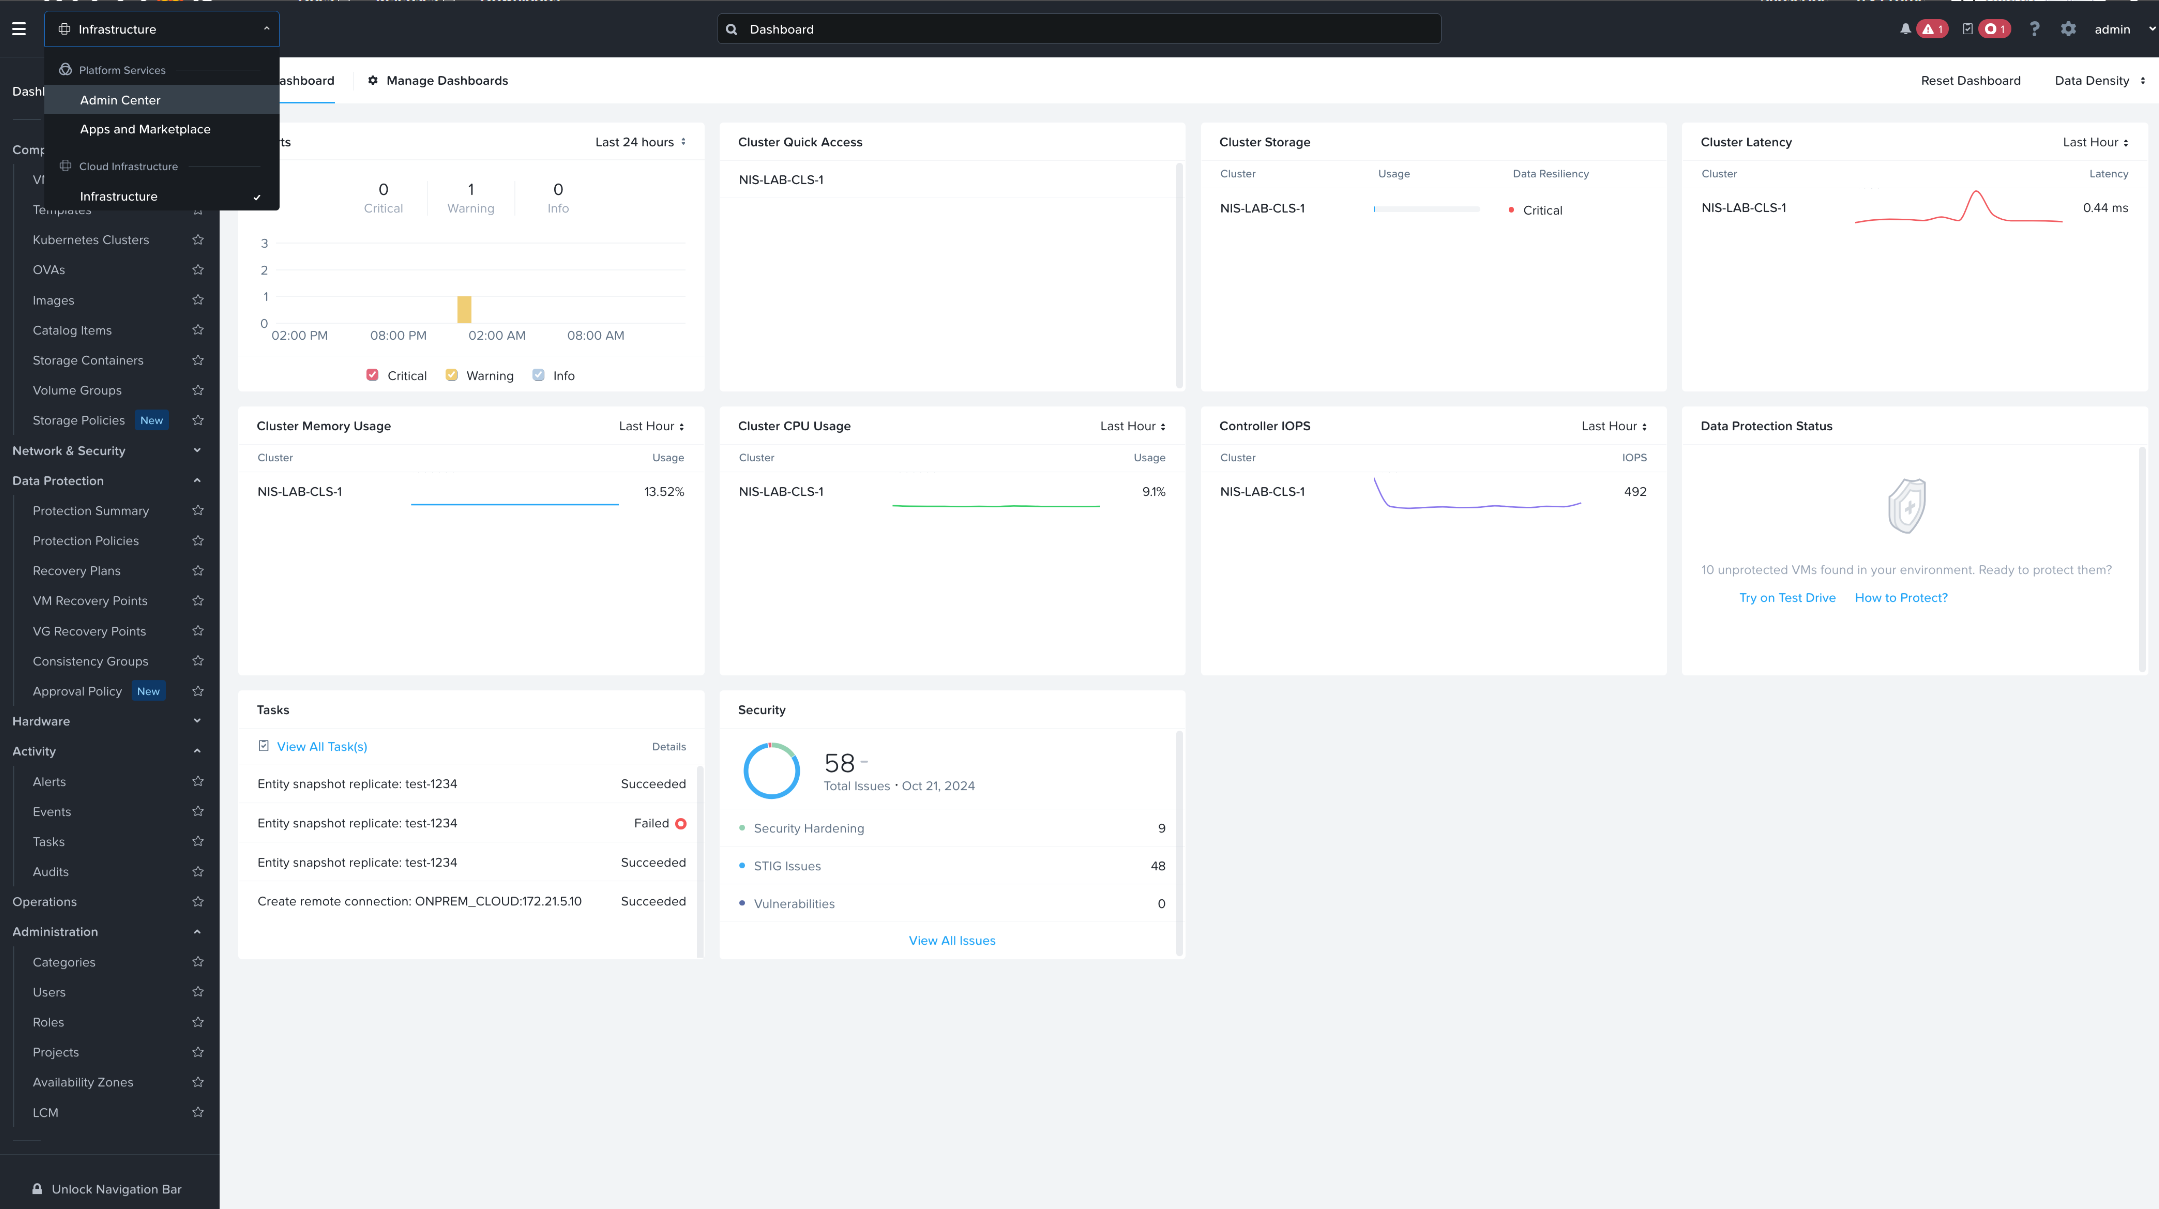
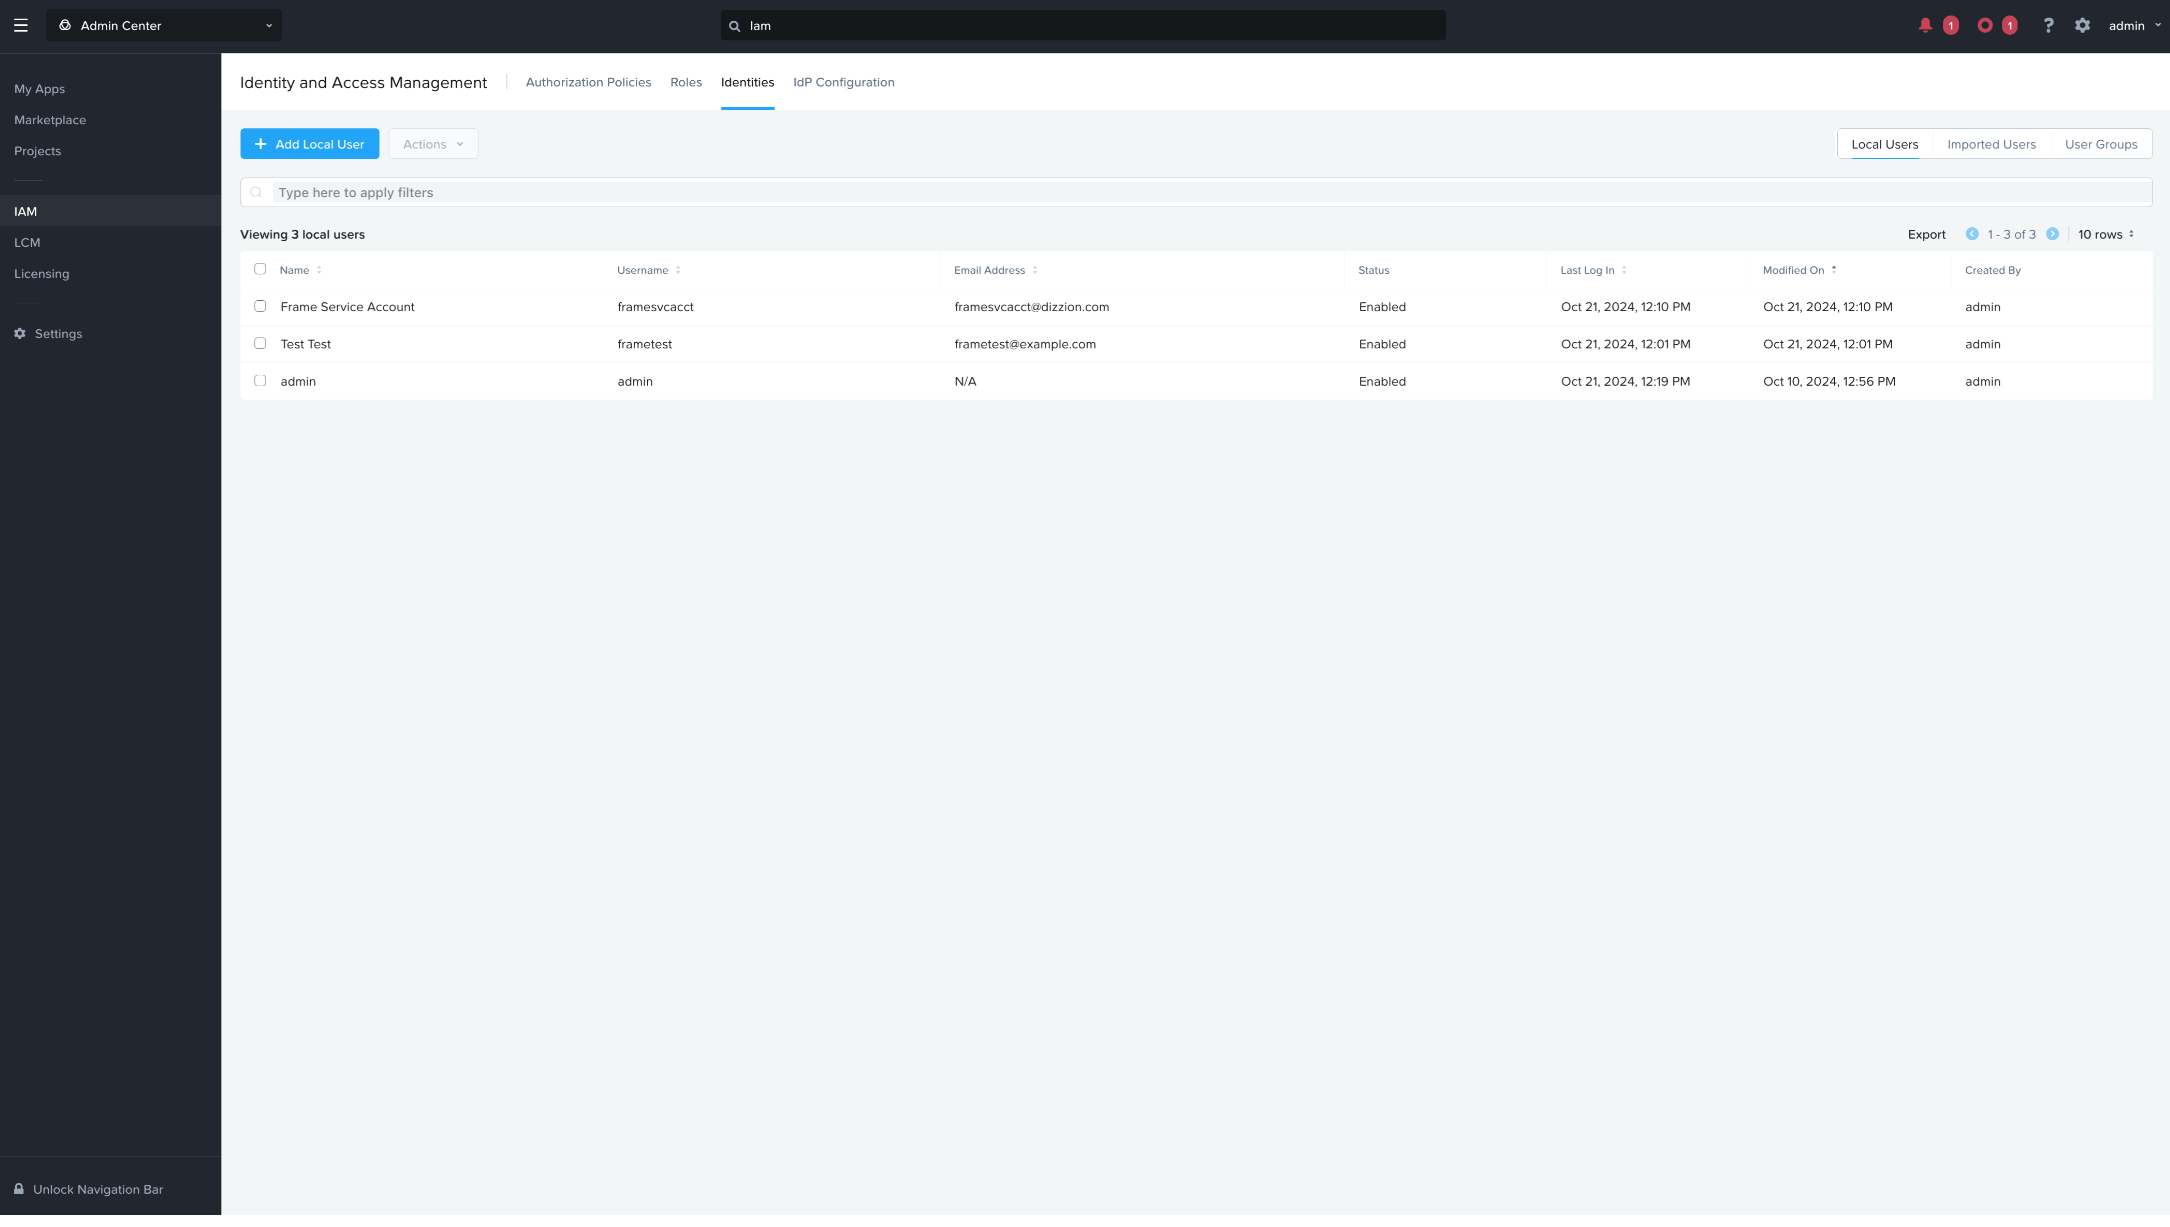
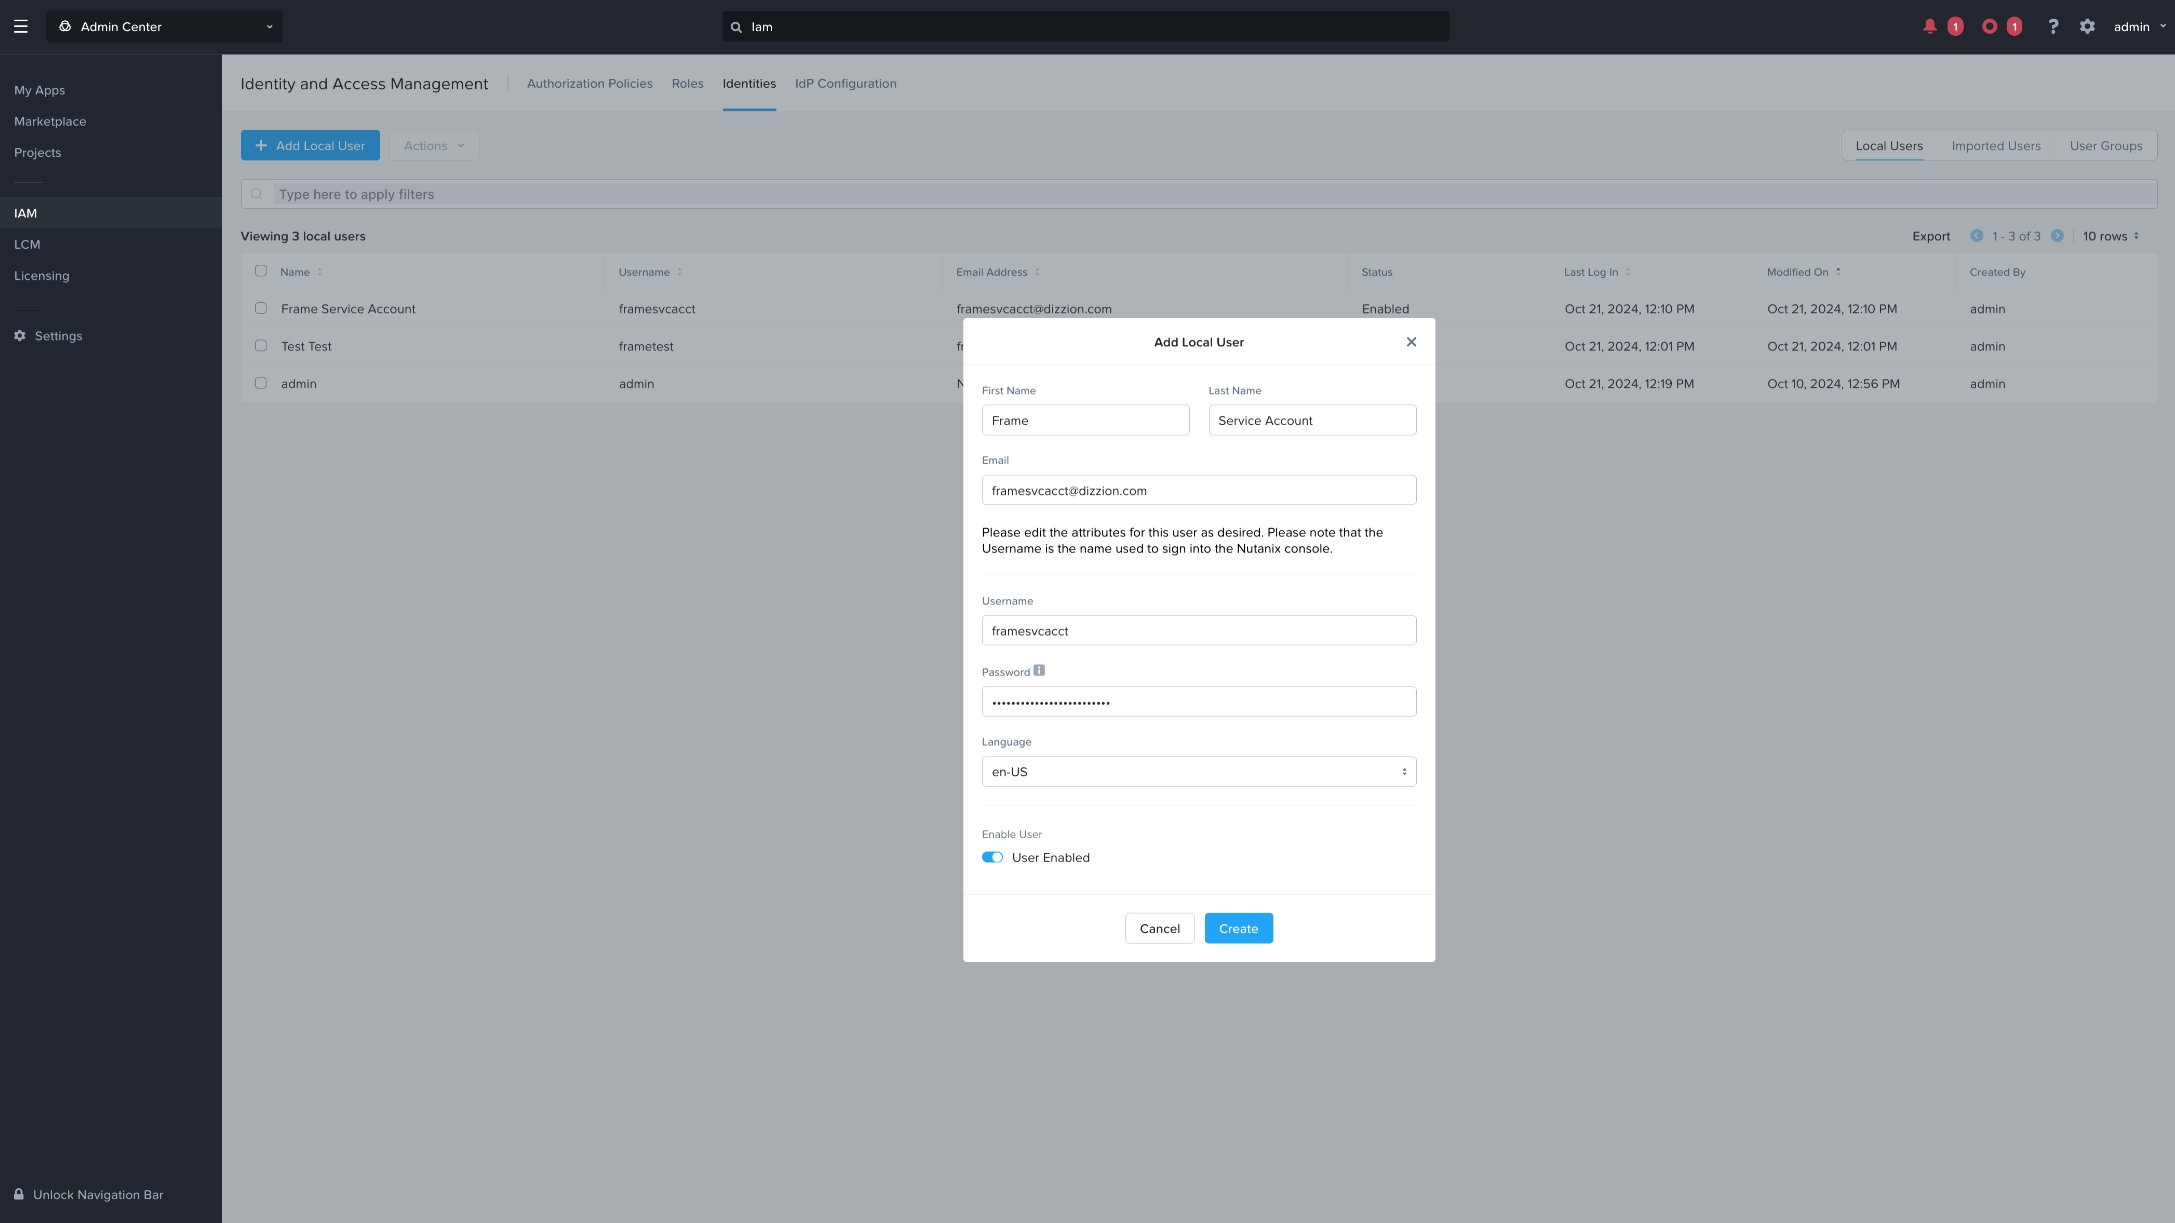
a. In the Choose Role step, enter "Super Admin" for the role to add to this policy.
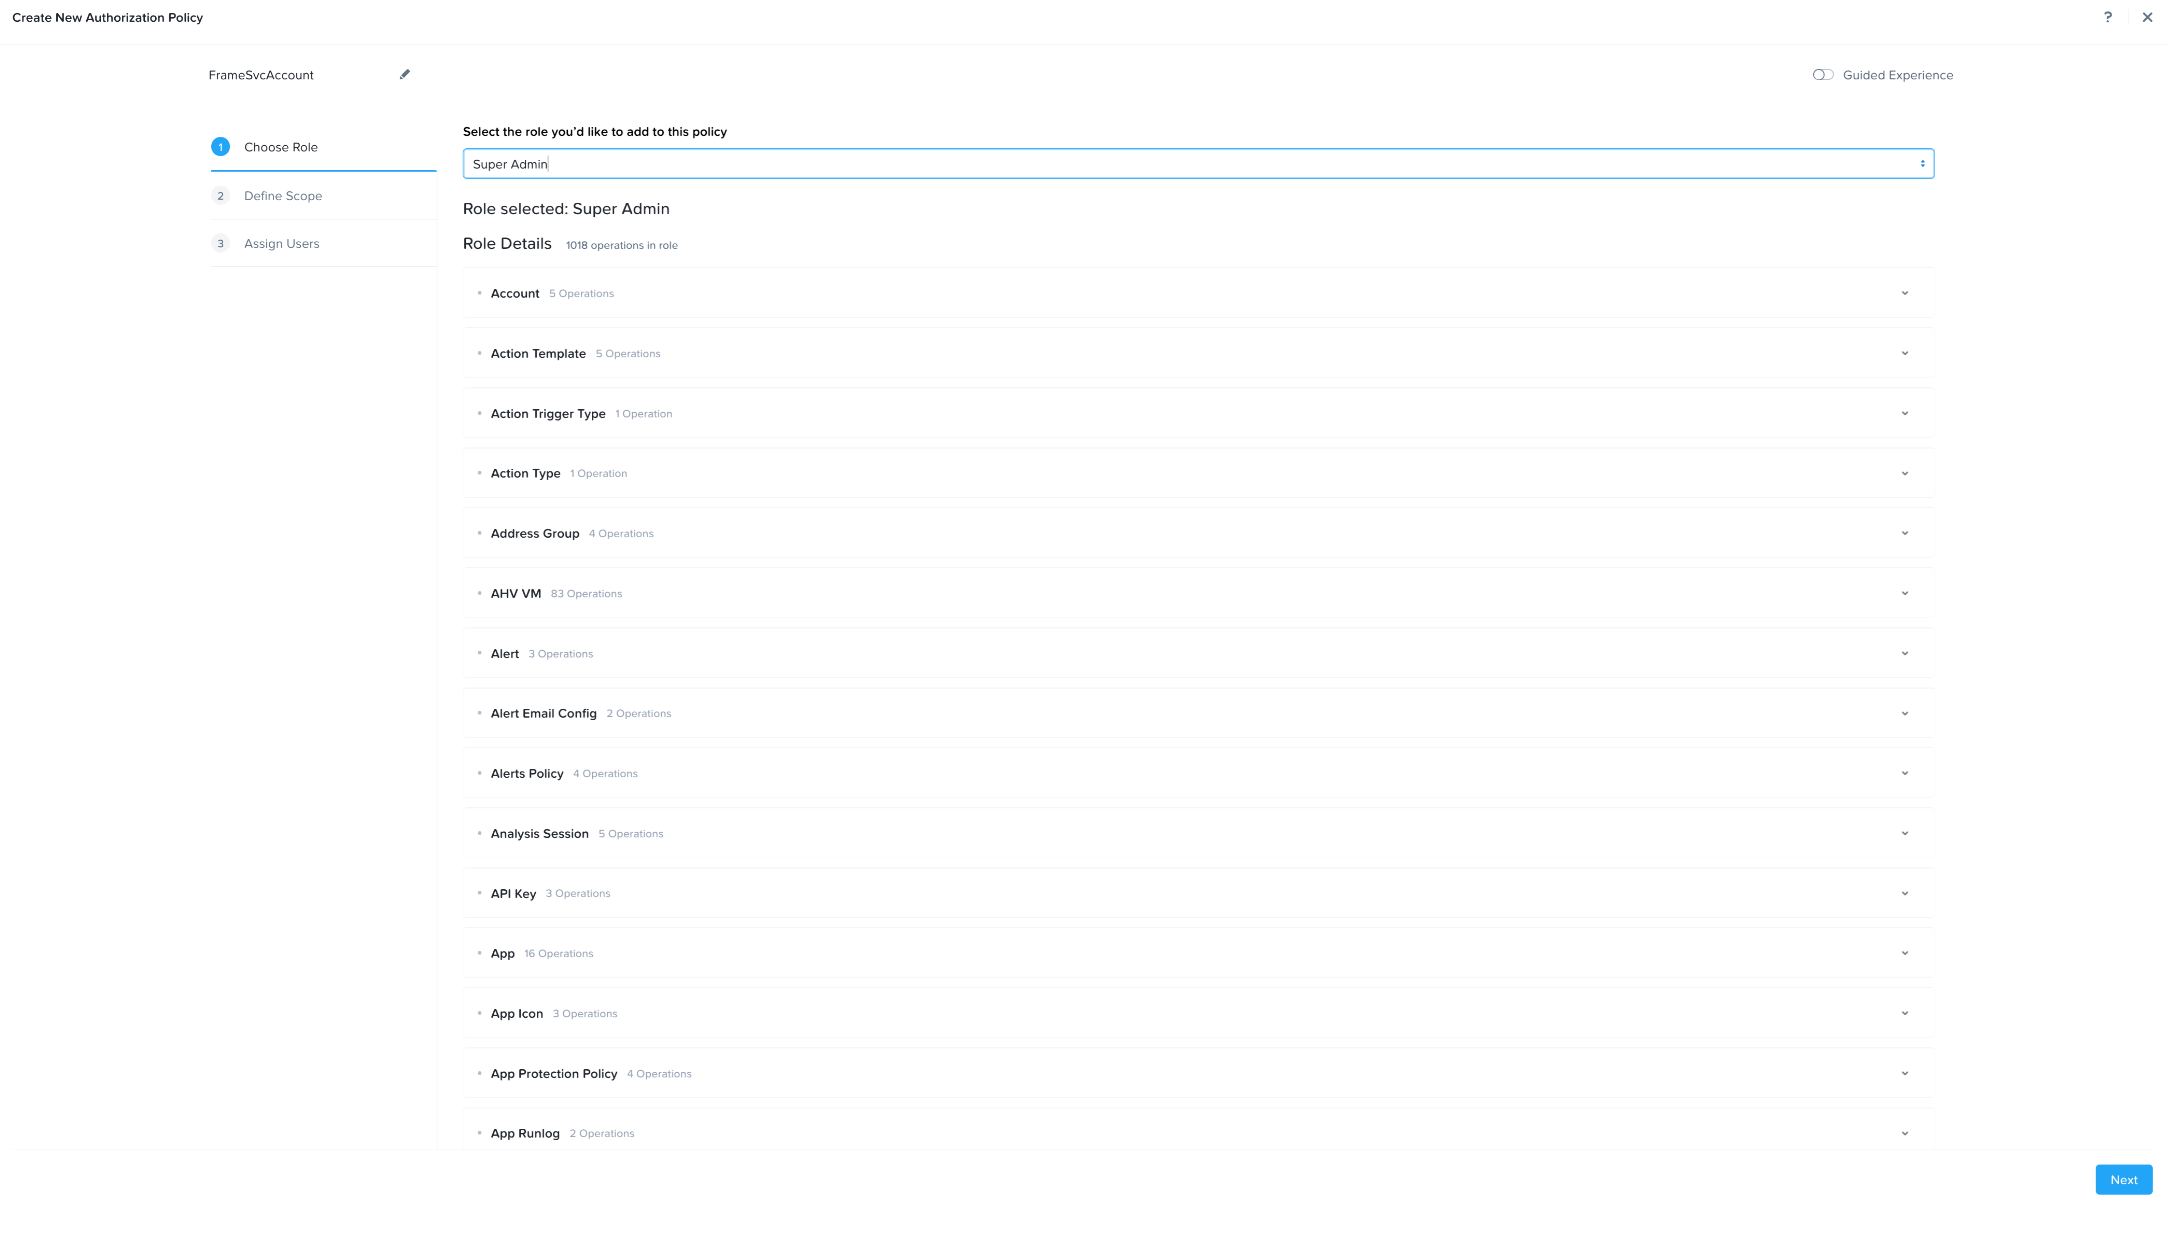
b. In the **Define Scope** step, select "Full Access" and "Future Access".
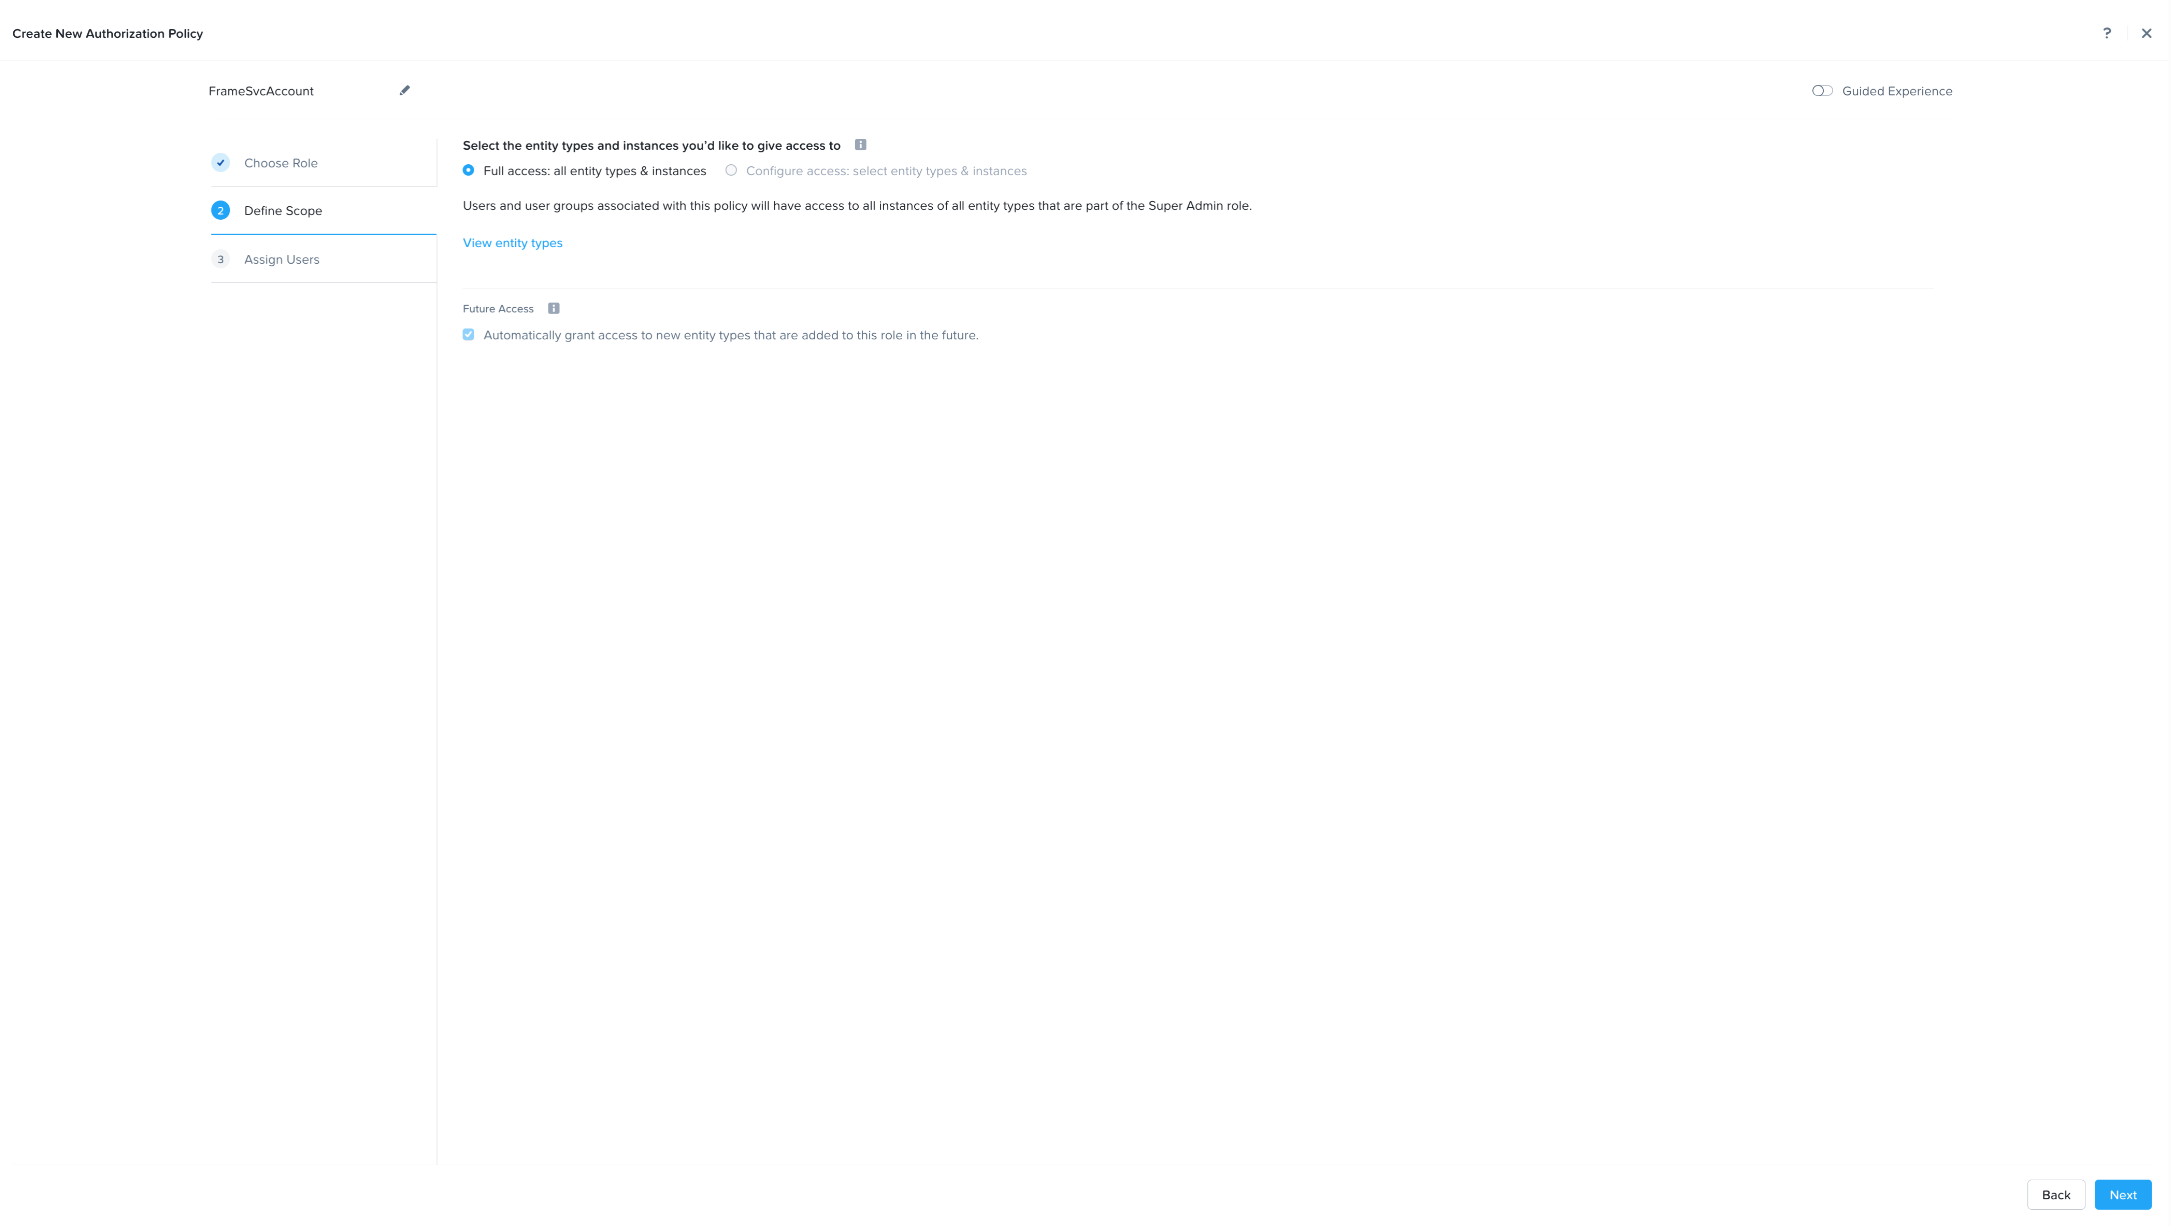
c. In the **Assign Users** step, add the local user you created in Step 7.
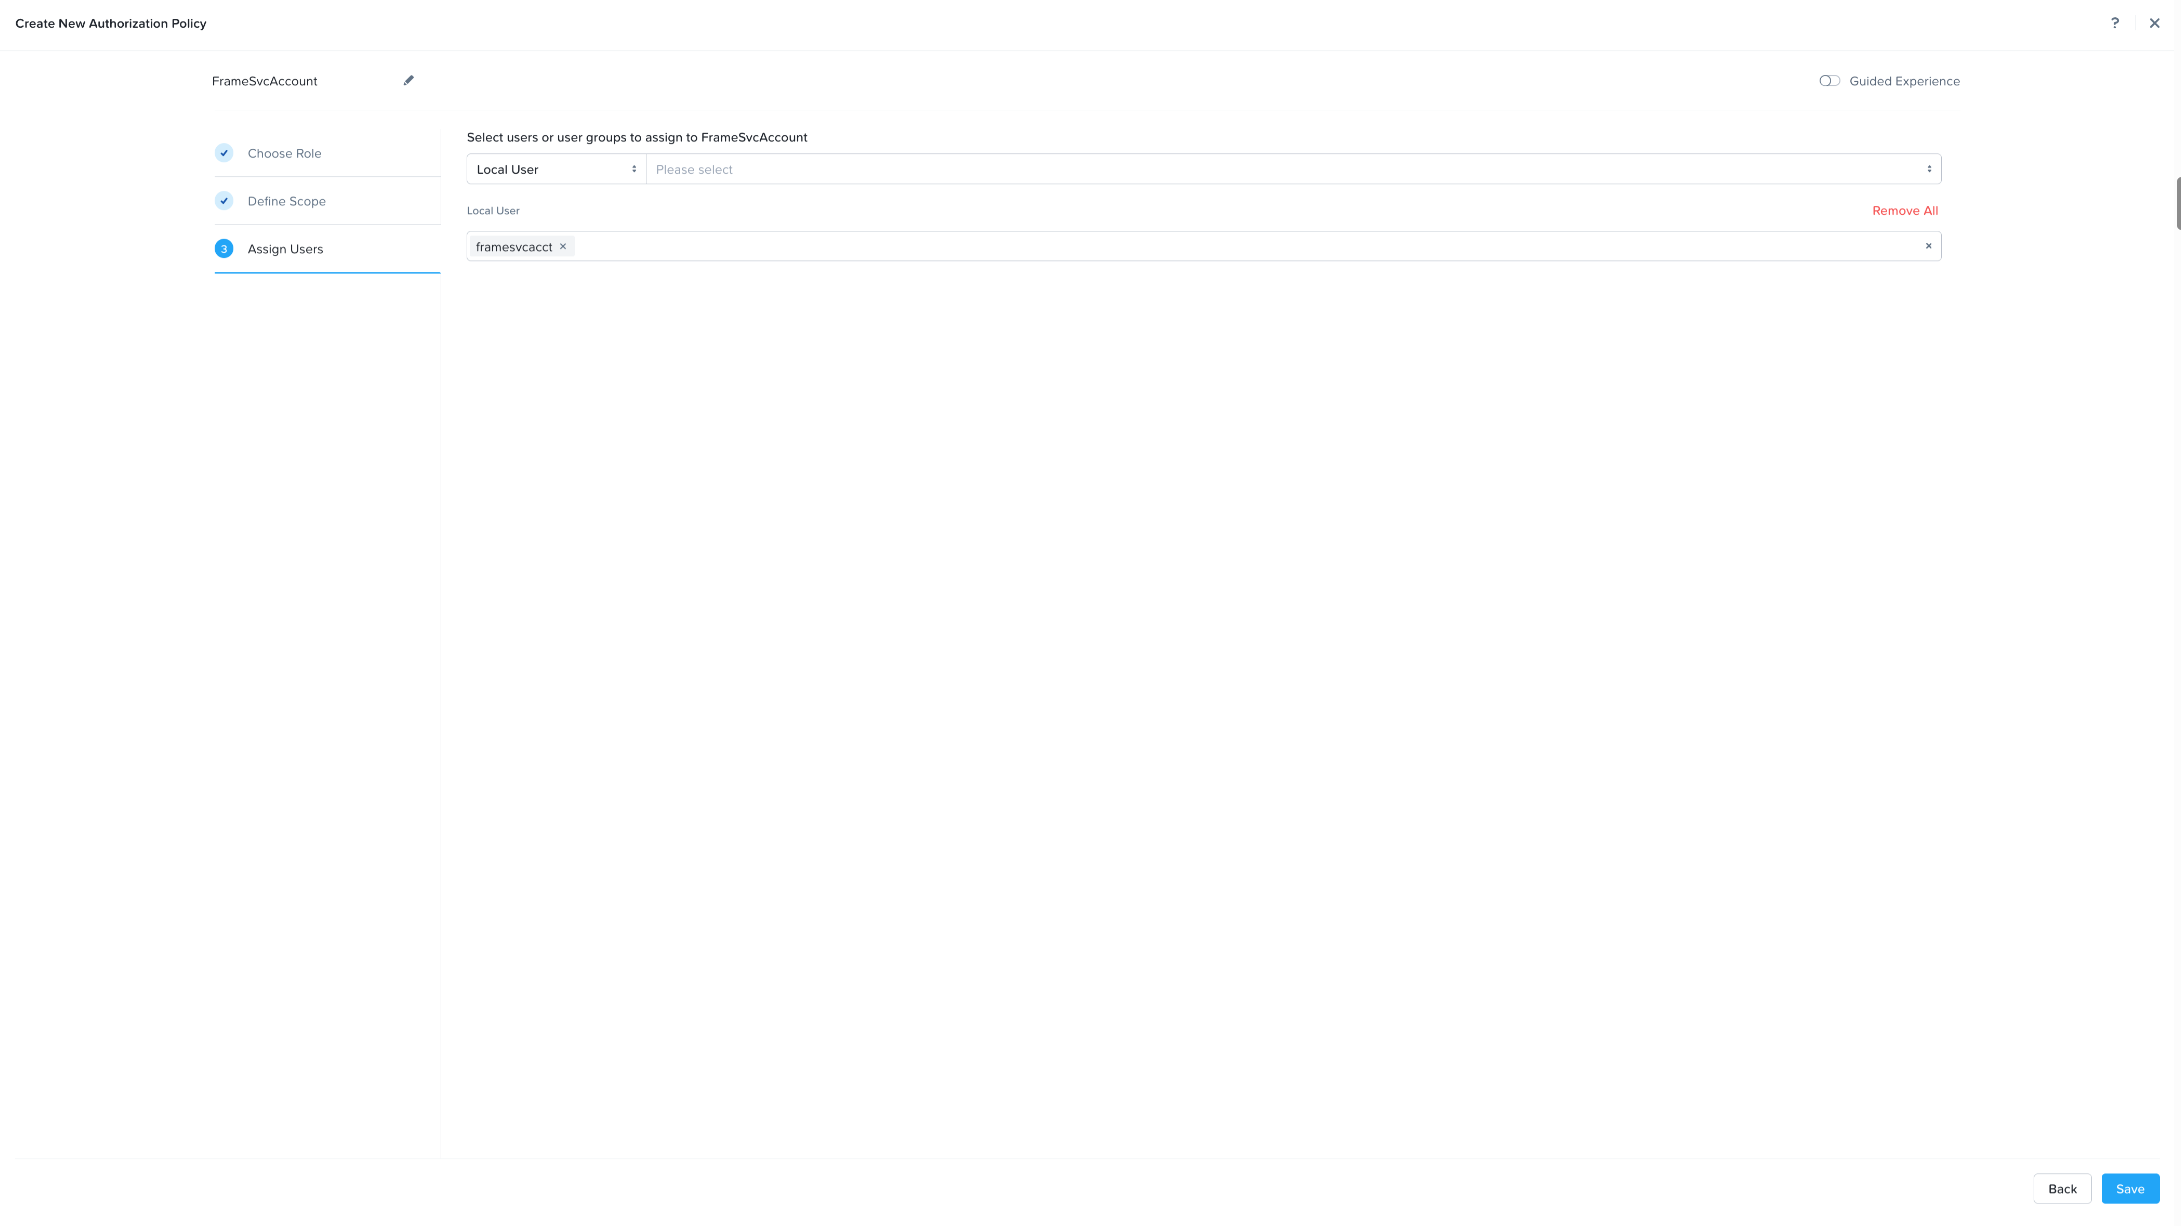
d. Click "Save" to save the authorization policy configuration.
Prism Central Category
- Click on the hamburger menu icon in the upper left portion of your Prism Central interface.
- Expand the "Administration" menu item and select "Categories."
- Click on the "New Category" button.
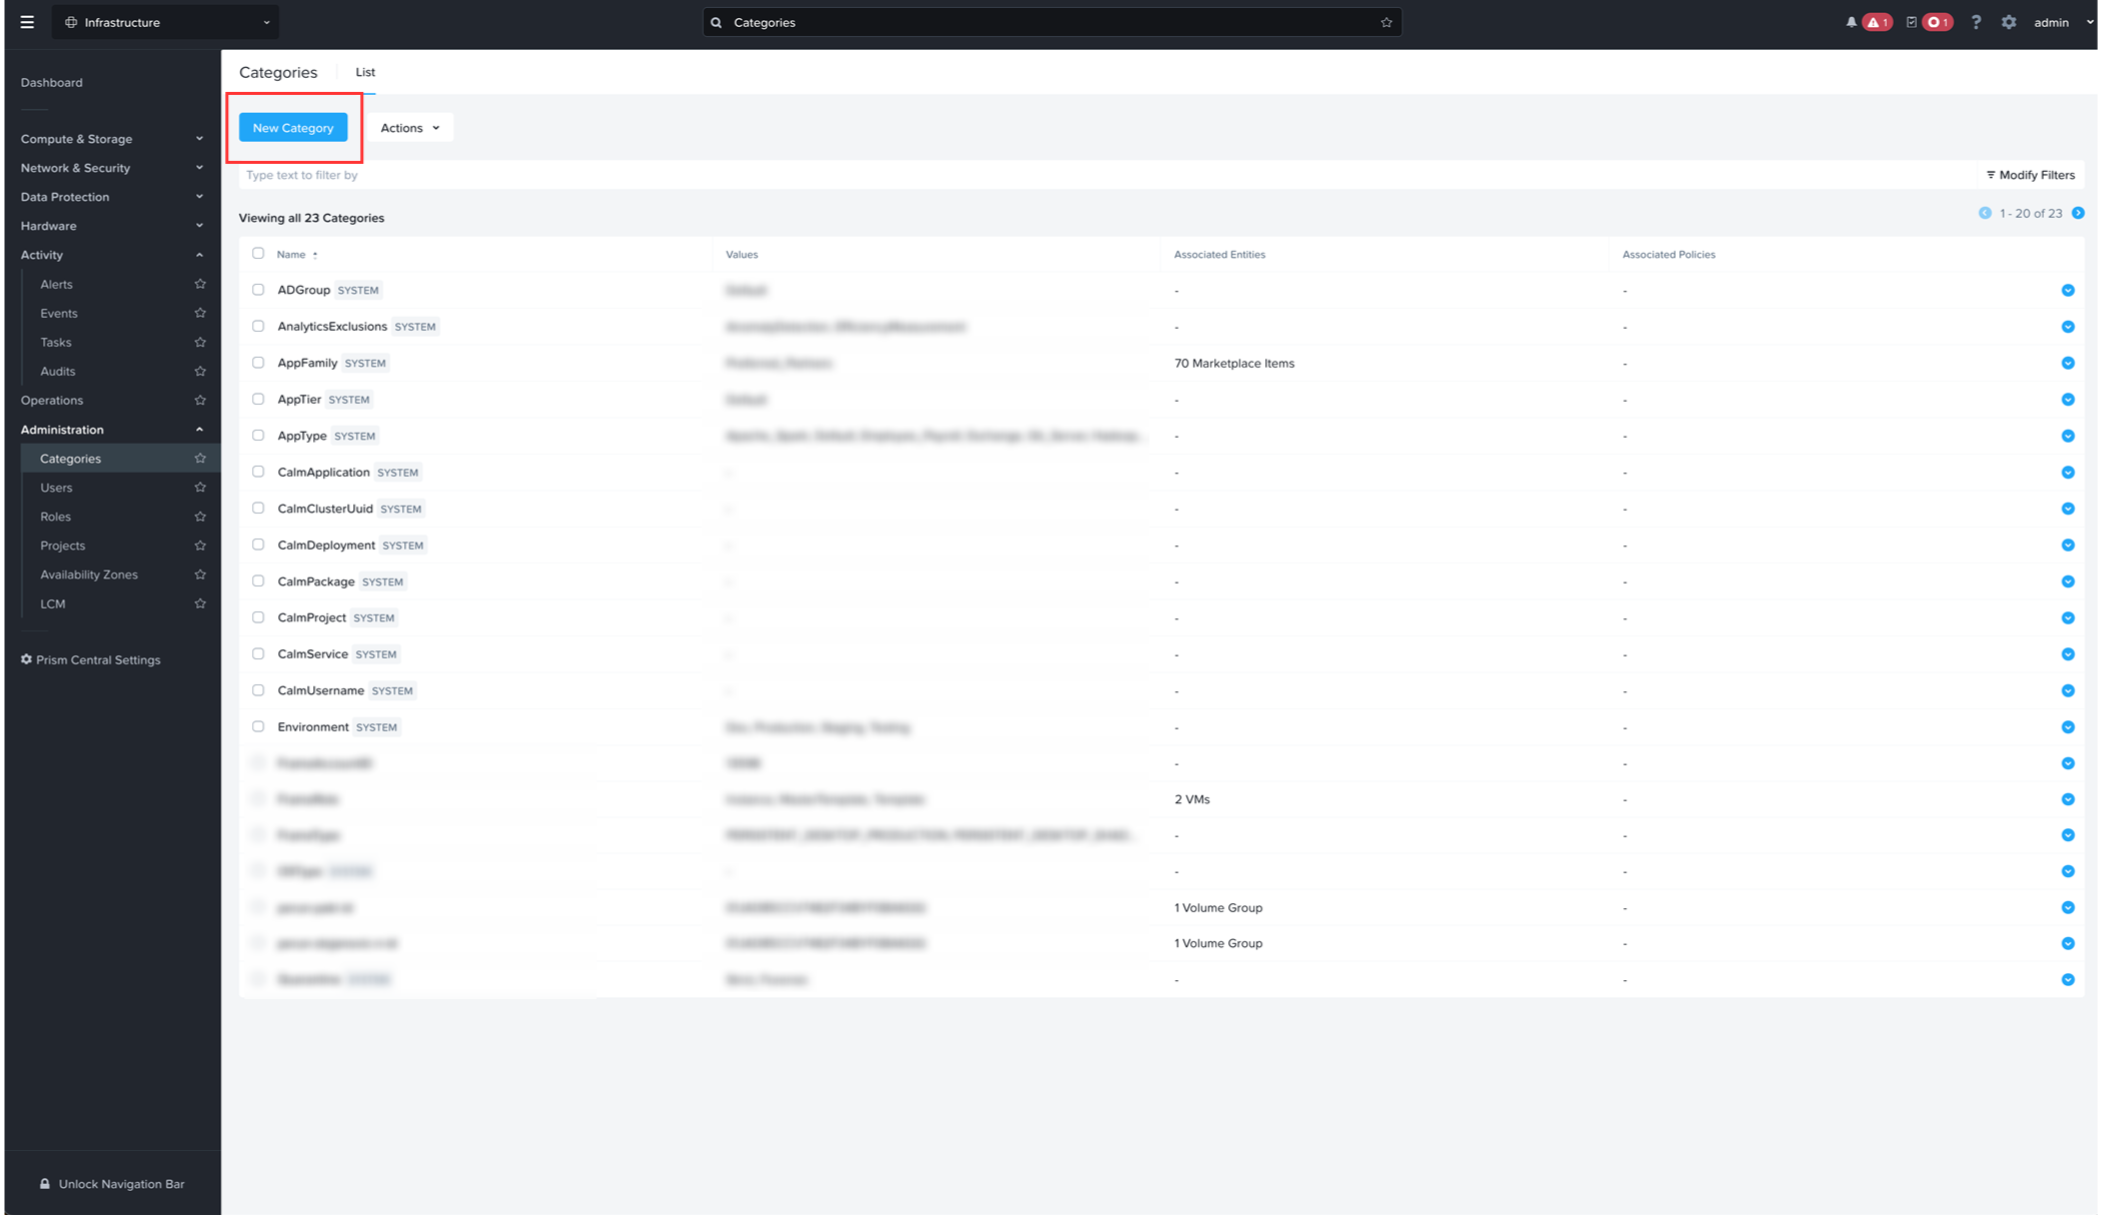
13. Fill in the form with the following values:
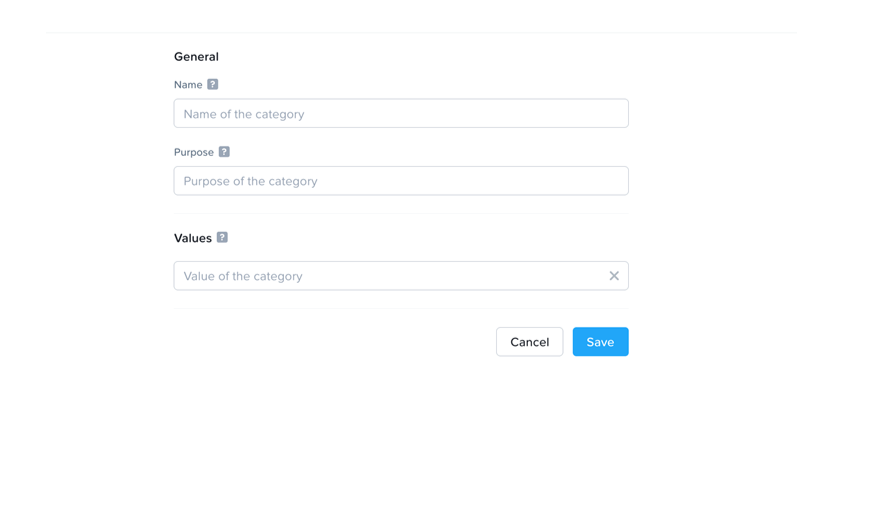
- Name: FrameRole
- Purpose: Categorizes VMs as Frame managed workload VMs
- Values: MasterTemplate- Add this value.
- Click "Save" to save your Category defintion.
Template Image
Frame supports the use of Windows client/server operating systems and Ubuntu on Nutanix AHV. To bring a specific template OS image to Frame, refer to our BYO Image documentation for details on how to prepare one or more template OS images for Frame.
Connecting your AHV Cluster to Frame
Once you have satisfied the prerequisites, you are ready to register your AHV cluster on Frame. This section provides a step-by-step guide for how to create a CCA VM in Prism Central, as a first step of the AHV cluster registration process.
CCA qcow Download
You must first download the Frame Cloud Connector Appliance (CCA) qcow from our Downloads page and upload it to your Prism Image Library. You will use this CCA qcow disk to create a CCA VM in Prism Central.
Create a CCA VM
-
First, in your Prism Central console, navigate to your VMs page and select "Create VM."

-
Create a new VM for the Frame Cloud Connector Appliance (CCA) in a VLAN that meets the network requirements, as described in Private Networking or Private Networking with SGA.

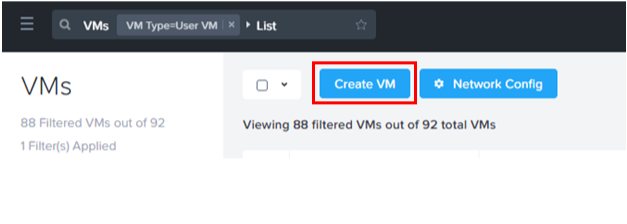
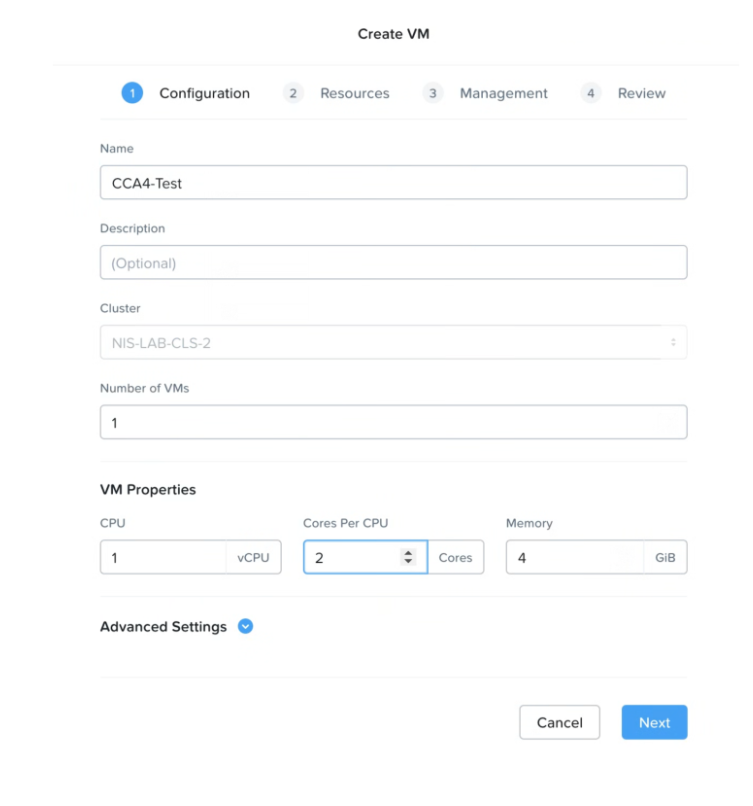
For use cases with up to 500 concurrent users, Frame recommends configuring your CCA with 1 vCPU, 2 cores, and 4 GB RAM. For additional concurrent users, add additional CCA VMs after you have registered your AHV cluster.
-
Click "+ Add New Disk" in the upper right corner of the window.

-
Under the Operation drop down menu, select "Clone from Image" and then select the CCA4 qcow2 disk. Finally, click "Update"

-
The Boot Configuration should be set to "Legacy BIOS" (default).

-
Next, select "+ Add New NIC."

-
Select your network for the CCA VM, then click “Add.” In this example, we're using VLAN as the network. Your network configuration may be different.

-
Next, check the “Custom Script” check box and click on the “Type or Paste Script option.” Enter as shown below. Click “Save” and close the VM.
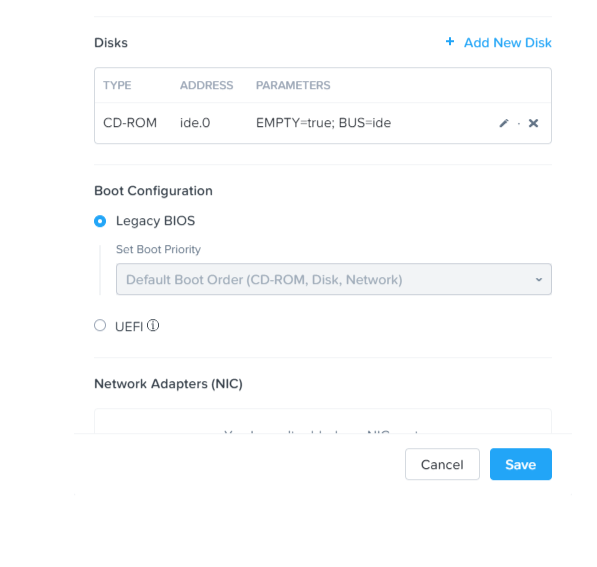
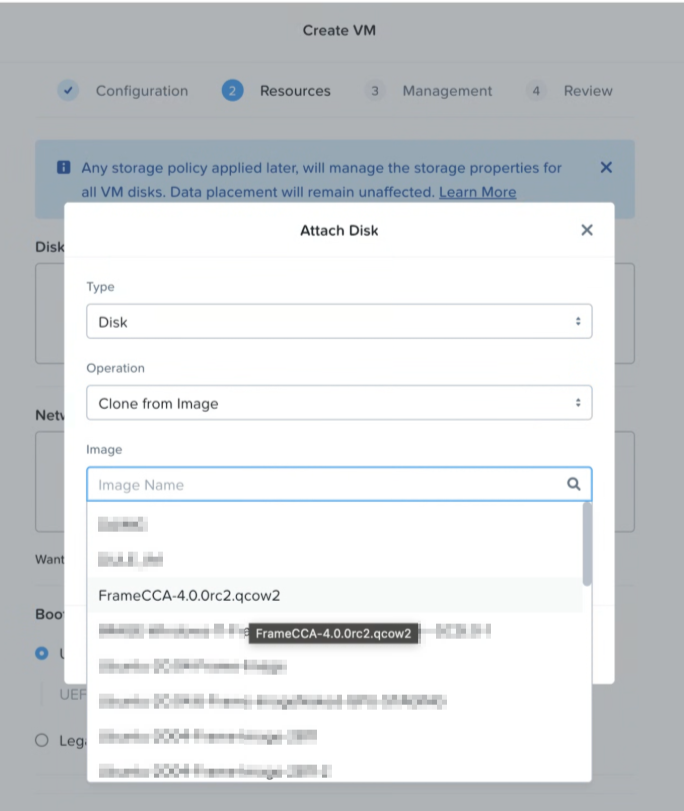
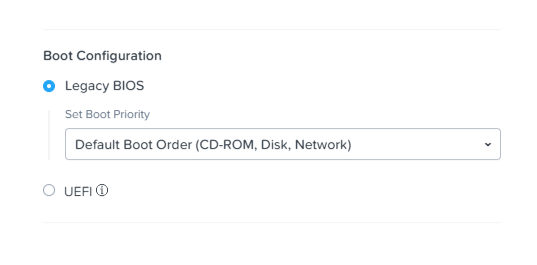
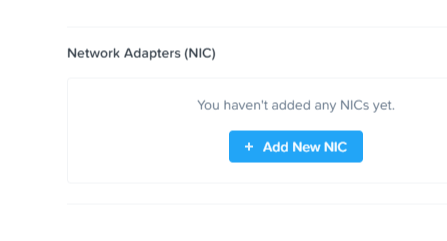
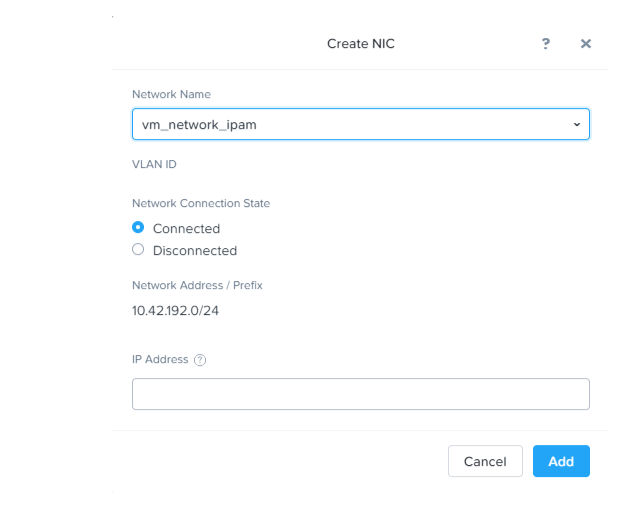

**EU Control Plane** If you are configuring your CCA for Dizzion's EU control plane, paste the following script into the “Type or Paste Script” field:
#cloud-config
runcmd:
- set_cca_env CCA_BACKPLANE_URL https://hub.deu.difr.com
- Save the VM with the preferences specified and power it on. By default, the CCA will try to acquire an IP address from a DHCP server. To set a static IP, follow the CCA Static IP Address instructions.
- Once the VM is powered on, continue with the step-by-step procedure for Configuring Your CCA VM for a new AHV Cloud Account or Adding a CCA to an Existing AHV Cloud Account.
Configuring your CCA VM
Generate Registration Key
-
Log in to you Frame Account, navigate to “Cloud Accounts” either under Customer or Organization Level, and select “Add Cloud Account”

-
A new page will appear, select "Nutanix-AHV".

-
Enter a name for the new CCA 4 Cluster and click "Create."
-
Select "Show Nodes" to expand the cluster overview.

-
Click on "Add a Node" to create a new registration key for your CCA VM.

Register CCA Nodes
-
Once the registration key has been generated and the previously created CCA is running, navigate to your CCA VM's IP address () in your browser to connect to the CCA wizard.
-
To log in to the CCA wizard, use the Prism Central user credentials that you created earlier for Frame and specify the Prism Central URL.

-
CCA can communicate via an HTTPS proxy server to the Frame control plane. If a proxy server is not required, just click "Continue". Otherwise, enable the “Use proxy” slider.

-
Specify the proxy server URL which the CCA will use to reach the proxy server. If the proxy server requires a service username and password, specify the service username and password required for the CCA to authenticate to the proxy server. Otherwise, leave the proxy username and password blank. Use the "Verify" button to validate your proxy server configuration.

-
Copy and enter the activation key that was created in Step 3 under the Generate Registration Key section.

From there, wait until the registration of the new node is complete:

Cloud Connector Appliance (CCA) 4 Setup
-
To check the status of the current CCA setup, simply expand the Cluster overview. The status will be displayed under the "Status" column on the right-hand side.

-
Under the status overview select "Regions." On the next screen, click “Add Region” to choose the AHV cluster which should be connected. Click "Sync” to get a list of all available AHV clusters that can be connected, select the desired one, and finally complete the process by clicking on "Add Regions".


Import the Virtual Network
-
Next, add the Virtual Network to be used for the Frame Accounts by clicking on the "Import Virtual Network" link in the top right corner of the page.

-
Click on the "Sync" link next to the "Select Virtual Network" dropdown menu to get a list of all available networks the target cluster.

-
Select the one that needs to be imported.
-
Enter a display name for the virtual network.

-
Click "Import Virtual Network" at the bottom of the dialog.
-
Import the Image
-
Next, switch to the Master Image category on the top row and select the "Import Image" link in the upper right corner.

-
Click "Sync" to get a list of all available images that can be imported as a new Master Image.

-
Select the image you wish to use.

-
Enter a display name for the Image.
-
Click "Import" to complete the image setup process.

-
Add Instance Types
-
Next, navigate to the "Instance Types" tab. You can either create new instance types or edit existing ones. To add an instance type, click the blue "Add Instance Type" link in the upper right corner of the page. To edit an existing one, click the kebab menu within the row of the instance type you'd like to modify. For this example, we'll create a new instance type:

- Display Name: Name of the instance type that will appear to administrators and users within Frame Console and Launchpad, respectively.
- GPU: If you have NVIDIA vGPUs configured in Prism, the list of vGPU profiles will be displayed. You may select a vGPU profile if you wish for the instance type to have a vGPU when VMs of this instance type are provisioned.
- Cores: Number of cores for each vCPU.
- CPUs: Number of vCPUs for this instance type.
- Memory: The amount of RAM assigned to the instance type in GiB.
Add Storage Container
-
Our next and final step is to add a storage capacity target for the use of enterprise profiles/personal drives. Select the “Storage Container” tab from the top row.
-
Click “Add Storage Container” in the upper right corner. From there, click "Sync" to get a list of all available containers on the target cluster.

-
Select the storage container which should be used for profile/personal drives and click the "Add" button.

-
CCA Static IP Address
By default, CCA VMs are assumed to obtain their IP address from a DHCP server provided by you. If a static IP address is required for the CCA, then the IP address of the VM will need to be manually configured.
-
After the CCA has been provisioned, open the console of the CCA VM from Prism Central (or Prism Element) and login as user cca password difr.
-
Select option 1 from the screen:

-
Chose the network interface to configure:

-
Enter the following information for the CCA VM:

- Address: Static IP address of the CCA VM. Make sure to append the correct/XXto the IP address.
- Gateway: IP address of the gateway for the CCA VM.
- DNS address: IP address(es) of the DNS server(s) which can resolve public DNS records, including the FQDNs for the Frame control plane. -
Make sure to save your settings.
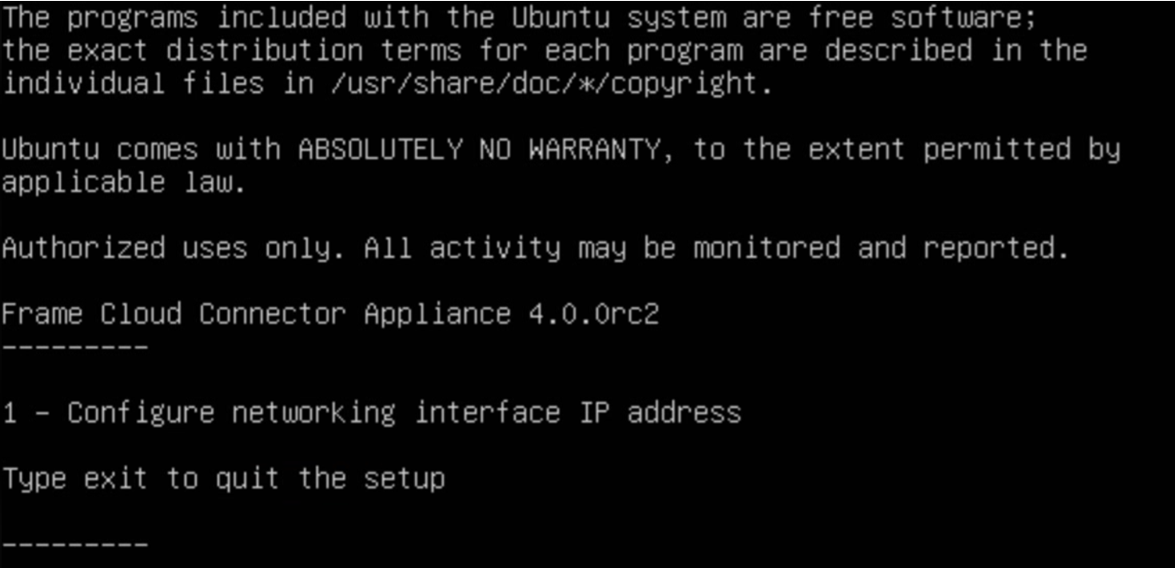
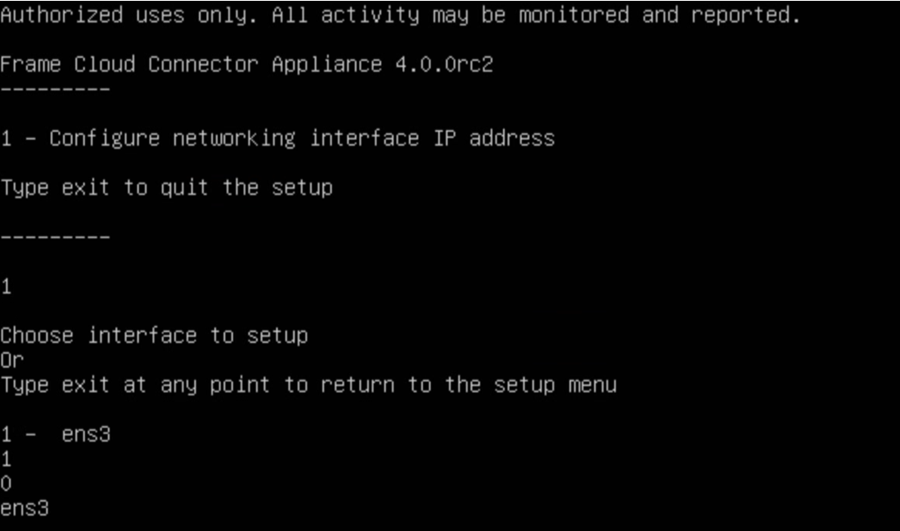
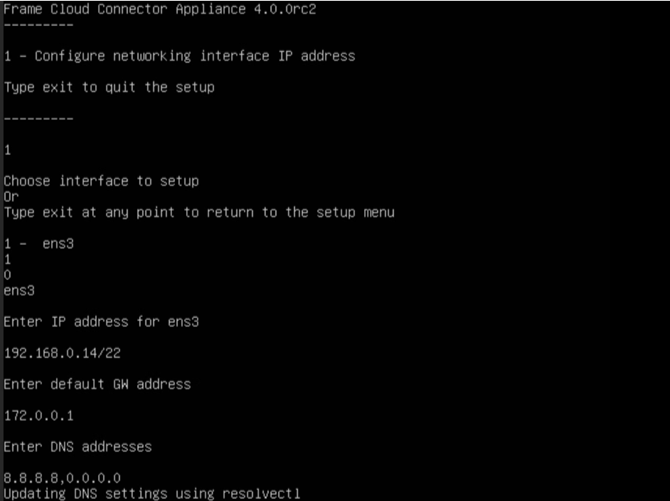
Adding a CCA to an Existing AHV Cloud Account
This section describes the workflow if you have an existing AHV Cloud Account and would like to perform any of the following operations:
- Setup a highly available CCA configuration
- Update the version of a CCA VM
- Changed the AHV cluster's IP address and need to create a new CCA VM
- Enable Enterprise Profiles, Personal Drives, or proxy server for an existing AHV Cloud Account
- Modify settings for Enterprise Profiles, Personal Drives, or an existing proxy server configuration
First, create a new CCA VM following the instructions in the Create a CCA VM procedure.
Once your new CCA VM is powered on and you have logged in to your new CCA VM using your Prism Central user credentials, as described in Configuring your CCA VM, Steps 5-6, you can use the following workflow to update your proxy server settings (Steps 1 and 2 below) or make additional configuration changes (Steps 3 through 7).
-
If you want to update the CCA configuration for your existing AHV Cloud Account to use a proxy server, then click on the slider to "Use Proxy."

-
Specify the proxy server URL which the CCA will use to reach the proxy server. If the proxy server requires a service username and password, specify the service username and password required for the CCA to authenticate to the proxy server. Otherwise, leave the proxy username and password blank. Use the "Verify" button to validate a valid proxy server configuration.

-
Since you are adding a CCA instance to an existing AHV cloud account, choose the Attach Appliance to Frame option.

-
Confirm the AHV cluster and specify its Prism Element credentials. At this step, you can update the Enterprise Profiles and Personal Drives settings as well for the existing AHV Cloud Account.

-
Select the Customer or Organization entity you created earlier in the Frame account setup. Choose the AHV Cloud Account for which high availability configuration is required and Click "Attach."

-
The wizard should inform you that your CCA VM has successfully connected to Frame control plane.

-
Once you have attached the new version of the CCA to the AHV cloud account, you can power off the CCA VM running the older version of CCA and terminate the VM. You can perform the above steps again to add additional CCA VMs of the new version for high availability and scalability.
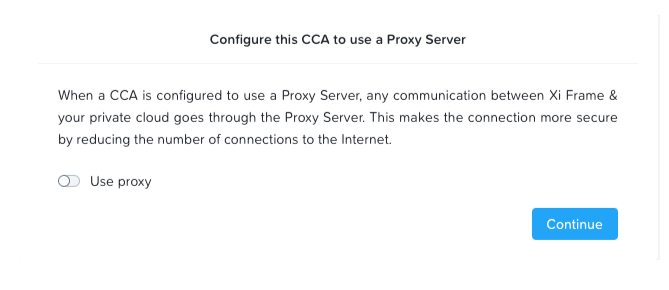
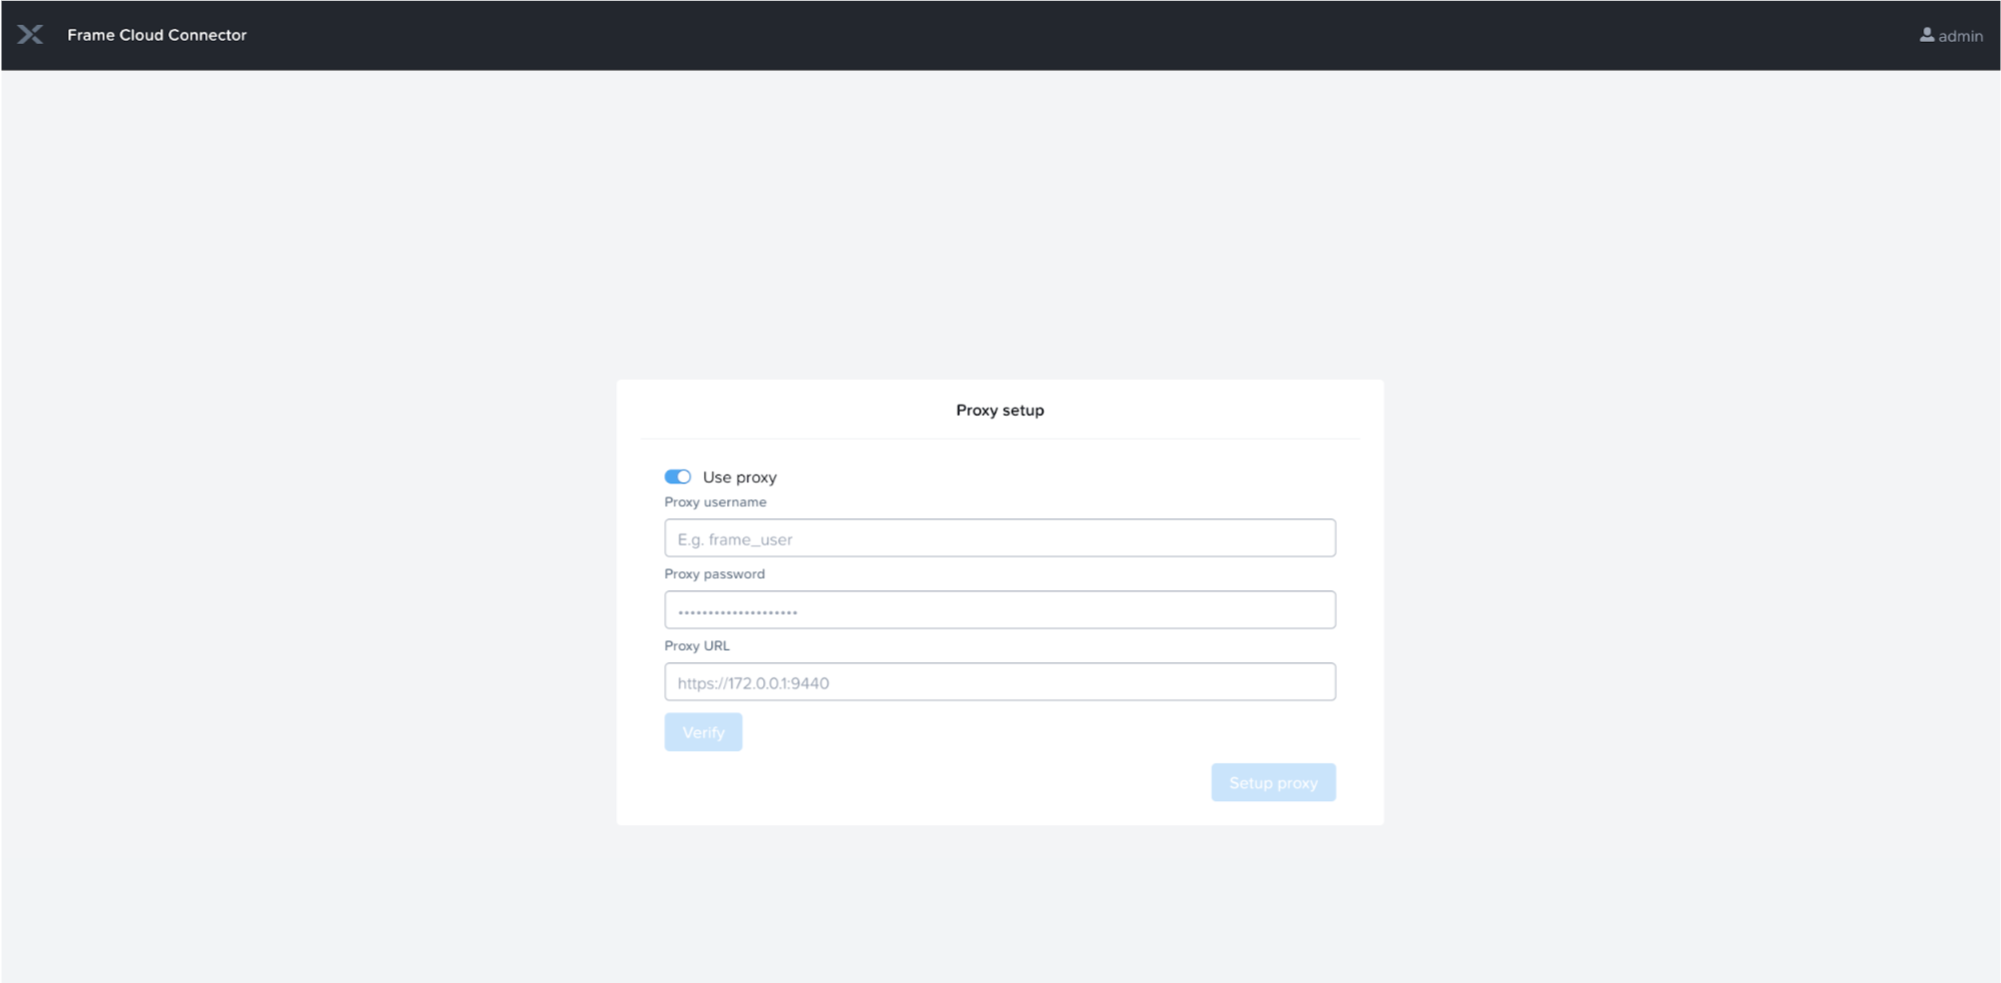
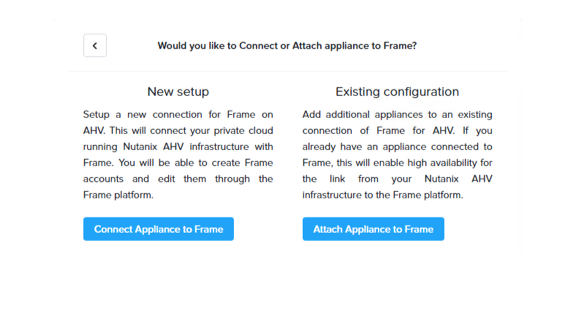
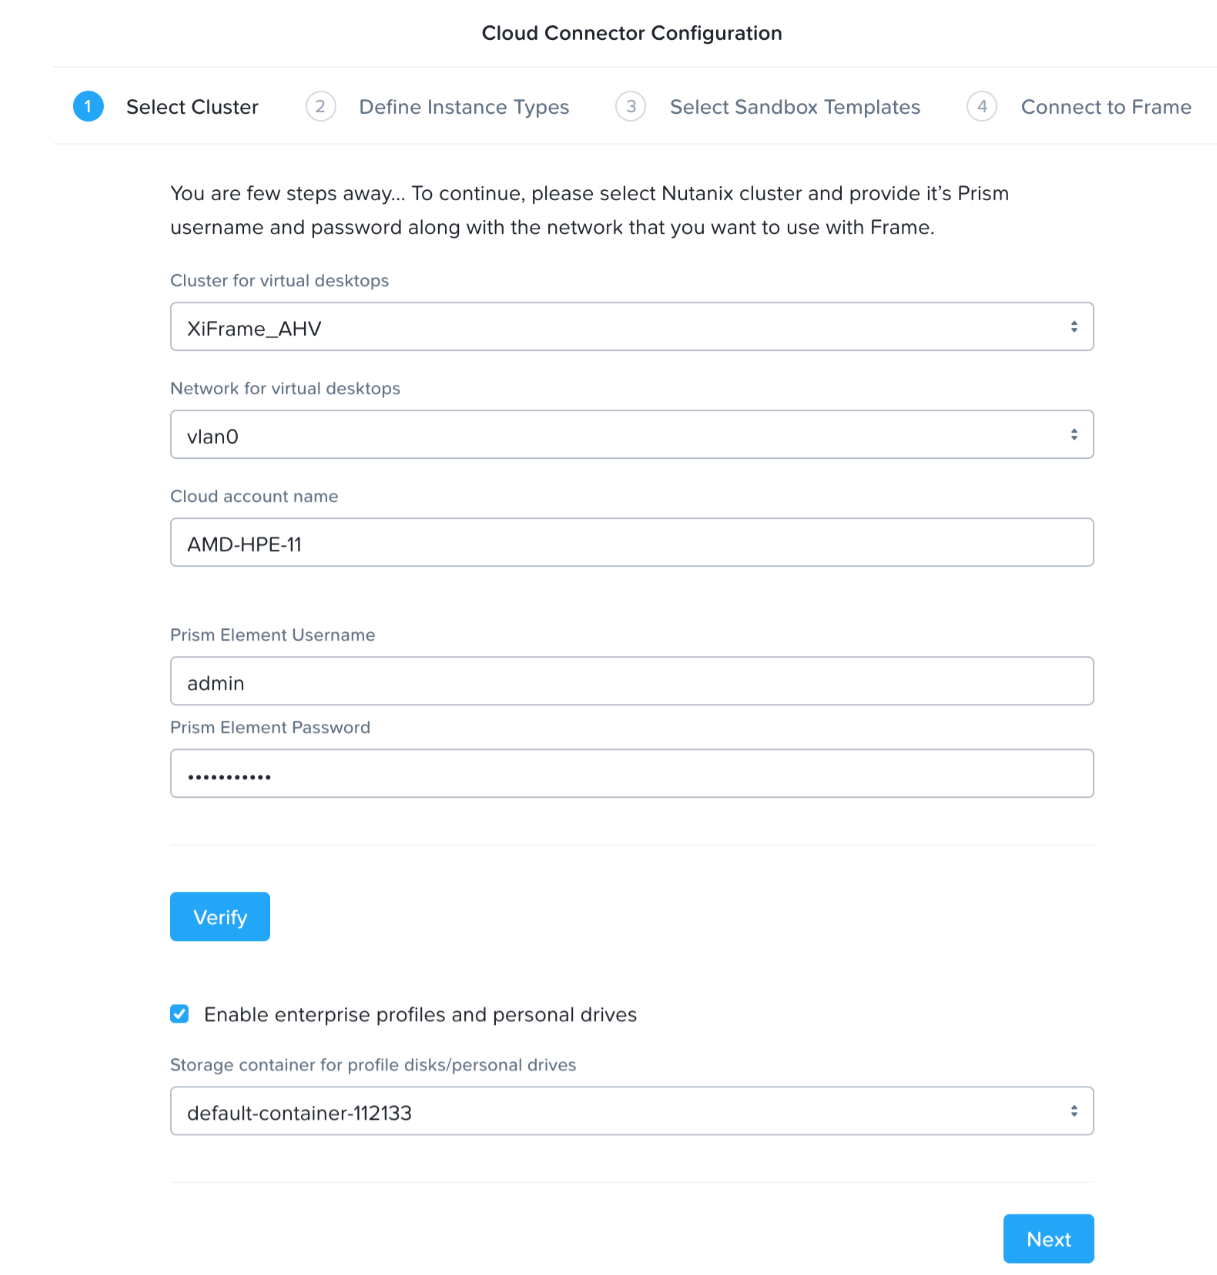
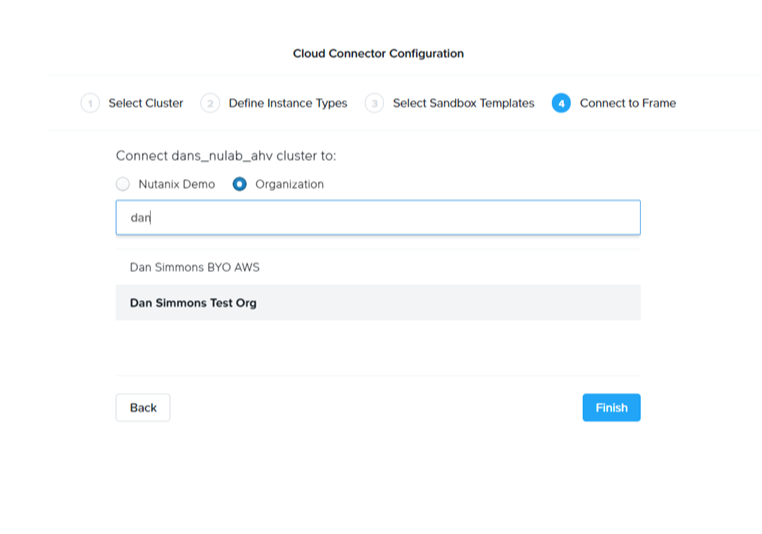
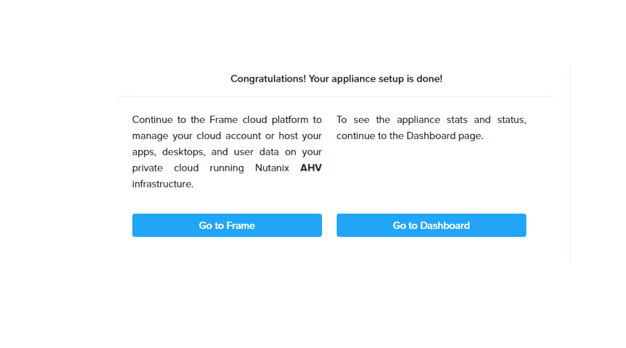
Troubleshooting
If you experience issues with CCA 4, administrators can troubleshoot by reviewing logs or accessing network configuration through AHV’s VNC console.
If the CCA web interface does not display the Prism Central URL field, verify the following:
- Ensure that the CCA VM was deployed using the latest CCA 4 image.
- Confirm that the VM is properly connected to the network and can communicate with Prism Central.
- Check that no additional "volume groups" are attached to the VM.
The CCA 4 Dashboard provides real-time visibility into the connection status between CCA and Frame, as well as CCA and Prism Central. It also displays the latest API requests and a summary of Prism Central activity since the CCA VM was last powered on. To access the Dashboard, open a browser and navigate to:
https://<CCA VM IP address>/
Log in using your Prism Central service account credentials.
Amazon Workspaces Core (WSC) Managed Instances (Early Access)
Overview
Amazon WorkSpaces Core Managed Instances (WCMI - Workspace Core v2) offer maximum flexibility, supporting customer-supplied Windows 11 images, persistent or non-persistent desktops, and Microsoft 365 Apps via BYOL. The pricing model is usage-based, allowing customers to choose from a wide range of EC2 instance types, including GPU-enabled options. Designed for organizations that want to run Windows 11 and/or Microsoft 365 under their own licenses, this model offers a managed yet flexible way to deploy desktops on Amazon WorkSpaces Core while leveraging Dizzion’s DaaS platform for orchestration, security, and user access. It enables license portability and ensures compliance with existing Microsoft agreements.
Prerequisites
Before registering workloads, ensure the following conditions are met:
- The AWS cloud account has been imported into Frame using the standard AWS Cloud Account creation procedure. For detailed instructions, see AWS Add Cloud Account.
- WorkSpaces V2 supports only Windows 11 and operates under a Bring Your Own License (BYOL) model.
- Both persistent and non-persistent workloads are supported.
- You have granted permission for the creation of the required service-linked role (workspaces-instances.amazonaws.com), as described in the Workflow section.
Important Note!
The sandbox runs as an EC2 instance on Dedicated Instances, as required for Windows 11 licensing compliance. This setup also enables platform features like publish, backup, and clone which are mandatory. Production desktops, however, run as WorkSpaces Core Managed Instances, optimized for scalability and end-user performance.
Workflow
Step 1 – Add AWS Cloud Account
If you have not already done so, follow the instructions in AWS Add Cloud Account to connect your own AWS account.
Step 2 – Enable Workspace v2
Since AWS WorkSpaces Core Managed Instances (WCMI) V2 is currently a Tech Preview feature, you will need to contact Dizzion Support to have this feature enabled for your account.
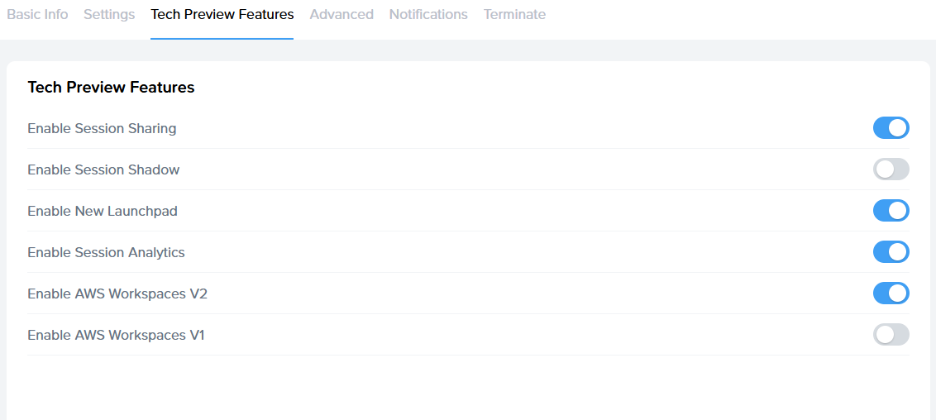
Step 3 – Initialize AWS permissions
Once the feature is enabled, navigate to Cloud Accounts, locate your AWS cloud account, select the three-dot menu, and choose Update. Then, open the WorkSpaces Core V2 tab and click Initialize environment for WorkSpaces Managed Instances.
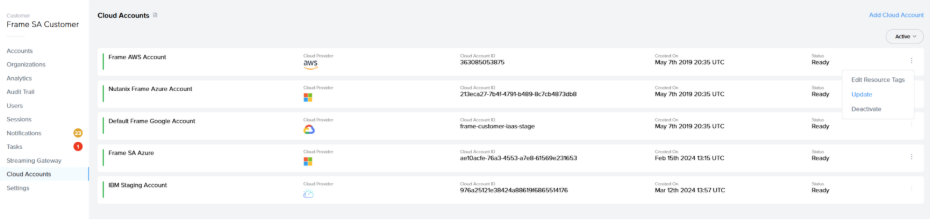
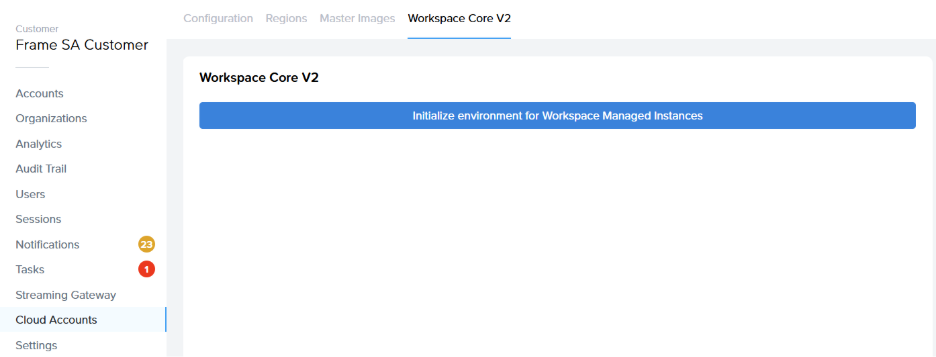
This action is required by AWS and creates a service-linked role for the service workspaces-instances.amazonaws.com, which is necessary for managing WorkSpaces.
Step 4 – Create Account using Workspace Core Managed Instances
You are now ready to create a Frame Account using WorkSpaces Managed Instances.
When selecting AWS as the cloud provider, two options will be available: EC2 and WorkSpaces Core V2. 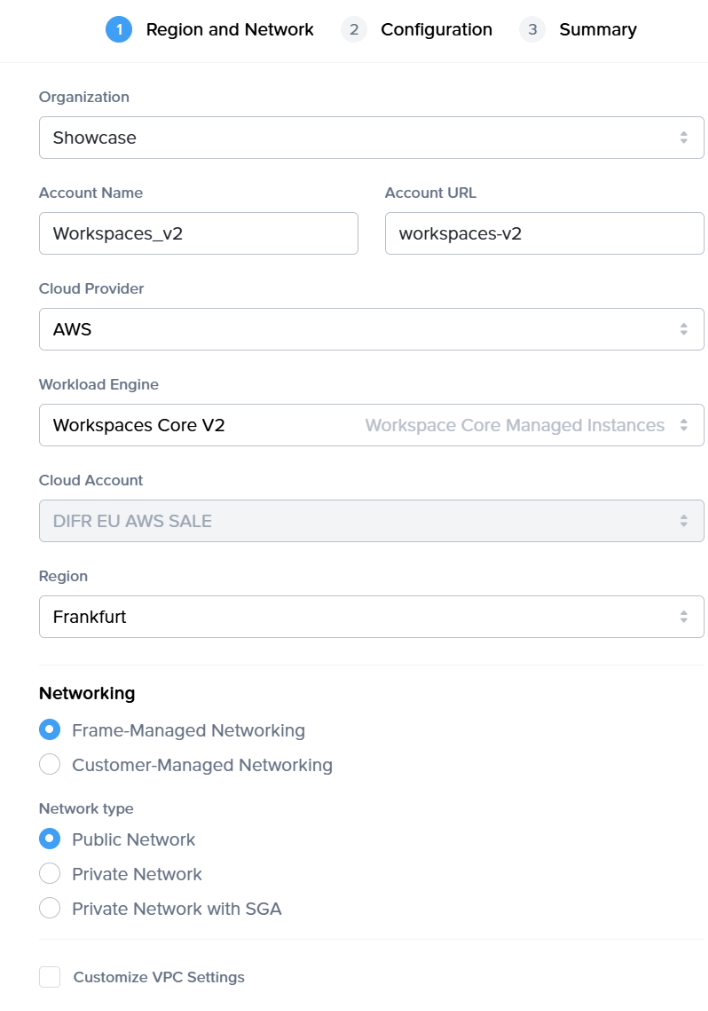
The created account will have all the same functionalities as any other Frame non-persistent or persistent account.
Limitations
Please note that:
-
This feature only works for Windows 11 and Bring-Your-Own-Licensing model (BYOL)
- Flow for changing the instance type of assigned persistent desktop is specific: the Workspace will be backed up and restored with desired instance type because AWS does not support in-place modification of Workspace Managed Instances.
- Not all regions are supported - check the available regions within console UI.
- Not all instance types are supported either, but most of them are already added.
GCP Sole-Tenant Nodes - Windows 11 on GCP
Overview
The GCP Sole-Tenant Nodes with Frame deployment option allows customers to run virtual desktops and applications on dedicated physical hosts within Google Cloud Platform (GCP).
This model is required for Windows 11 workloads on GCP and is currently supported only for customers using Bring-Your-Own (BYO) Microsoft licensing.
This option is ideal for customers with strict regulatory, licensing, or workload-isolation needs who want to leverage Frame on GCP while retaining full hardware control.
By provisioning workloads on GCP Sole-Tenant Nodes, organizations gain:
- Dedicated hardware isolation for improved security and compliance
- Full control over VM placement to meet software licensing requirements
- Predictable performance by preventing noisy-neighbor scenarios
Description
To run Windows 11 workloads on Google Cloud Platform (GCP) within the Dizzion Frame platform, the deployment must use GCP Sole-Tenant Nodes.
This configuration ensures compliance with Microsoft licensing requirements and supports the use of customer-provided Windows 11 images.
Prerequisites
Before enabling GCP Sole-Tenant Nodes in Frame, ensure the following requirements are in place:
- An existing GCP Cloud Account integrated with Frame
- BYO Windows licensing for Windows 11 workloads
- If using a BYO Image, a Windows 11 image must be prepared and imported according to GCP requirements or you can use a Frame-managed Image (recommended)
- Required IAM permissions in the GCP project to support Sole-Tenant Node deployment and image operations
- An active Dizzion Support request to enable Sole-Tenant configuration for the Frame account
Workflow
Step 1 – Contact Dizzion Support
Sole tenancy flow is applied the moment the Windows 11 image family is selected when creating an account
Step 2 – Choose or Prepare the Windows 11 Image
You can use a Frame-managed Image or prepare your own BYO Windows 11 Image.
If you need to create your own image, follow the official GCP guidance for Windows image creation and import:
GCP Official Guide. As a final step, install the Frame Guest Agent: Frame Agent Setup Tool (FAST), then import the newly created master image into your GCP Cloud Account.
Extra guide: Please note that preparing and importing BYO image can also be done by following this guide:
Step 1 – Create the Windows 11 VHD
• In VirtualBox, create a new VM and select Windows 11 (64-bit).
• Enable UEFI boot in settings (System > Motherboard > Enable EFI).
• Create the disk in VHD format.
• Install Windows 11 and configure as needed.
• Shut down the VM when ready.
Step 2 – Upload the VHD to Cloud Storage
• Create or choose a GCS bucket (e.g. image-builder-raw-images).
• Upload the VHD:gsutil cp "C:\Path\to\Windows11.vhd" gs://image-builder-raw-images/
Step 3 – Import the Image into GCP
Run the following command to import your VHD as a custom image:gcloud compute images import windows11baseimage --source-file gs://image-builder-raw-images/Windows11.vhd
--guest-os-features=UEFI_COMPATIBLE --byol
Step 3 – Add Additional IAM Permissions
Please make sure the following IAM roles are added for the GCP Cloud Account:
roles/compute.storageAdminroles/dns.adminroles/iam.serviceAccountUserroles/compute.admin
Note: For customers who added a GCP Cloud Account after November 12th, 2024, these IAM permissions are already assigned.
Step 4 – Deploy Frame Account on Sole-Tenant Nodes
After enablement is complete, you can create Frame Accounts and deploy workloads on Sole-Tenant Nodes using your Windows 11 image.
Step 5 – Validate Deployment
Verify that virtual machines launch successfully on dedicated Sole-Tenant Nodes, and confirm that licensing requirements and expected performance characteristics are met.
Example from GCP Console:
Cost Considerations
GCP Sole-Tenant Nodes generally have significantly higher costs than standard shared compute instances.
Customers should:
- Work with their GCP Account Team to review pricing
- Consider Committed Use or Sustained Use agreements
- Evaluate costs before deployment
Important: Dizzion does not control GCP pricing and strongly recommends evaluating cost implications before enabling this feature.