Okta
Okta provides a flexible yet simple Identity Provider solution that integrates easily with the Frame platform. Following the steps below, you simply need to locate, copy, and paste certain values between platforms. This process should take less than fifteen minutes. Refer to Okta documentation for additional information on how to configure Okta.
:::caution Attention
Please be aware that while Okta does have a pre-built Frame app, this app does not yet support group attributes. In order to use group attributes, you must configure the application manually as described below.
:::
Getting Started
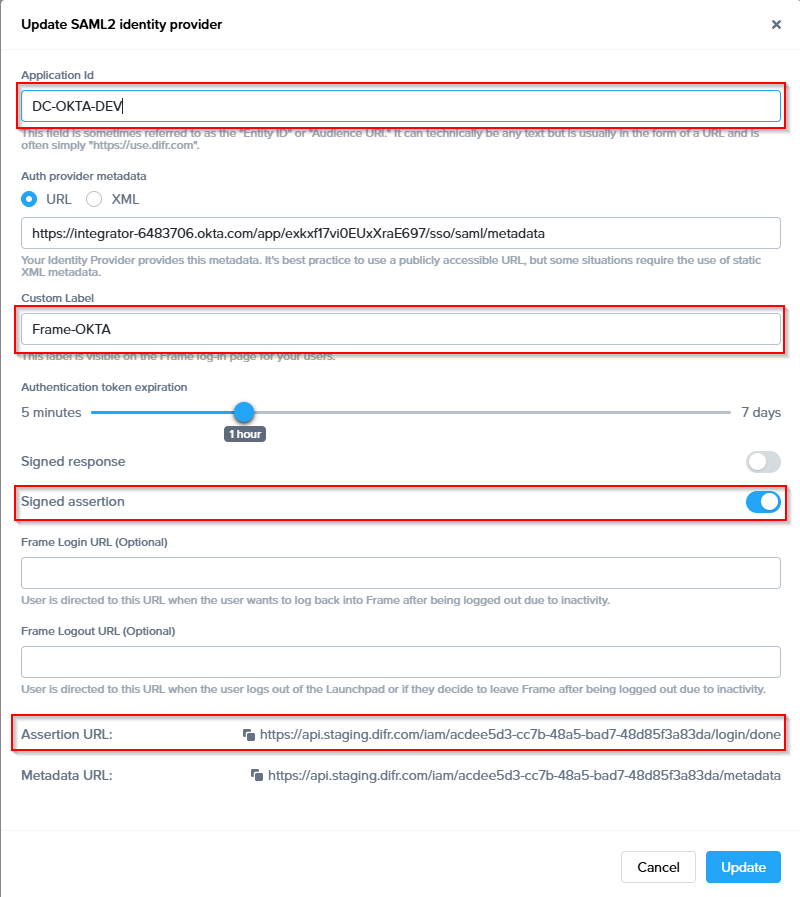
To begin, let's create a URL-friendly SAML2 Application ID (also referred to as Entity ID) that we'll use in a few places throughout our setup, as well as a Custom Label which will be displayed on the login page for users, for example.
Application ID: DC-OKTA-DEV
Custom Label: Frame-OKTA
Also copy the Assertion URL
Click "add" to save the changes for later
Follow the steps to create a SAML 2 Provider explained in the General SAML2 Integration section, until you see until you see the template with the missing configuration info, and copy the Metadata URL which will be needed later in the setup. From here leave the tab open, and continue with the configuration in the Azure console.
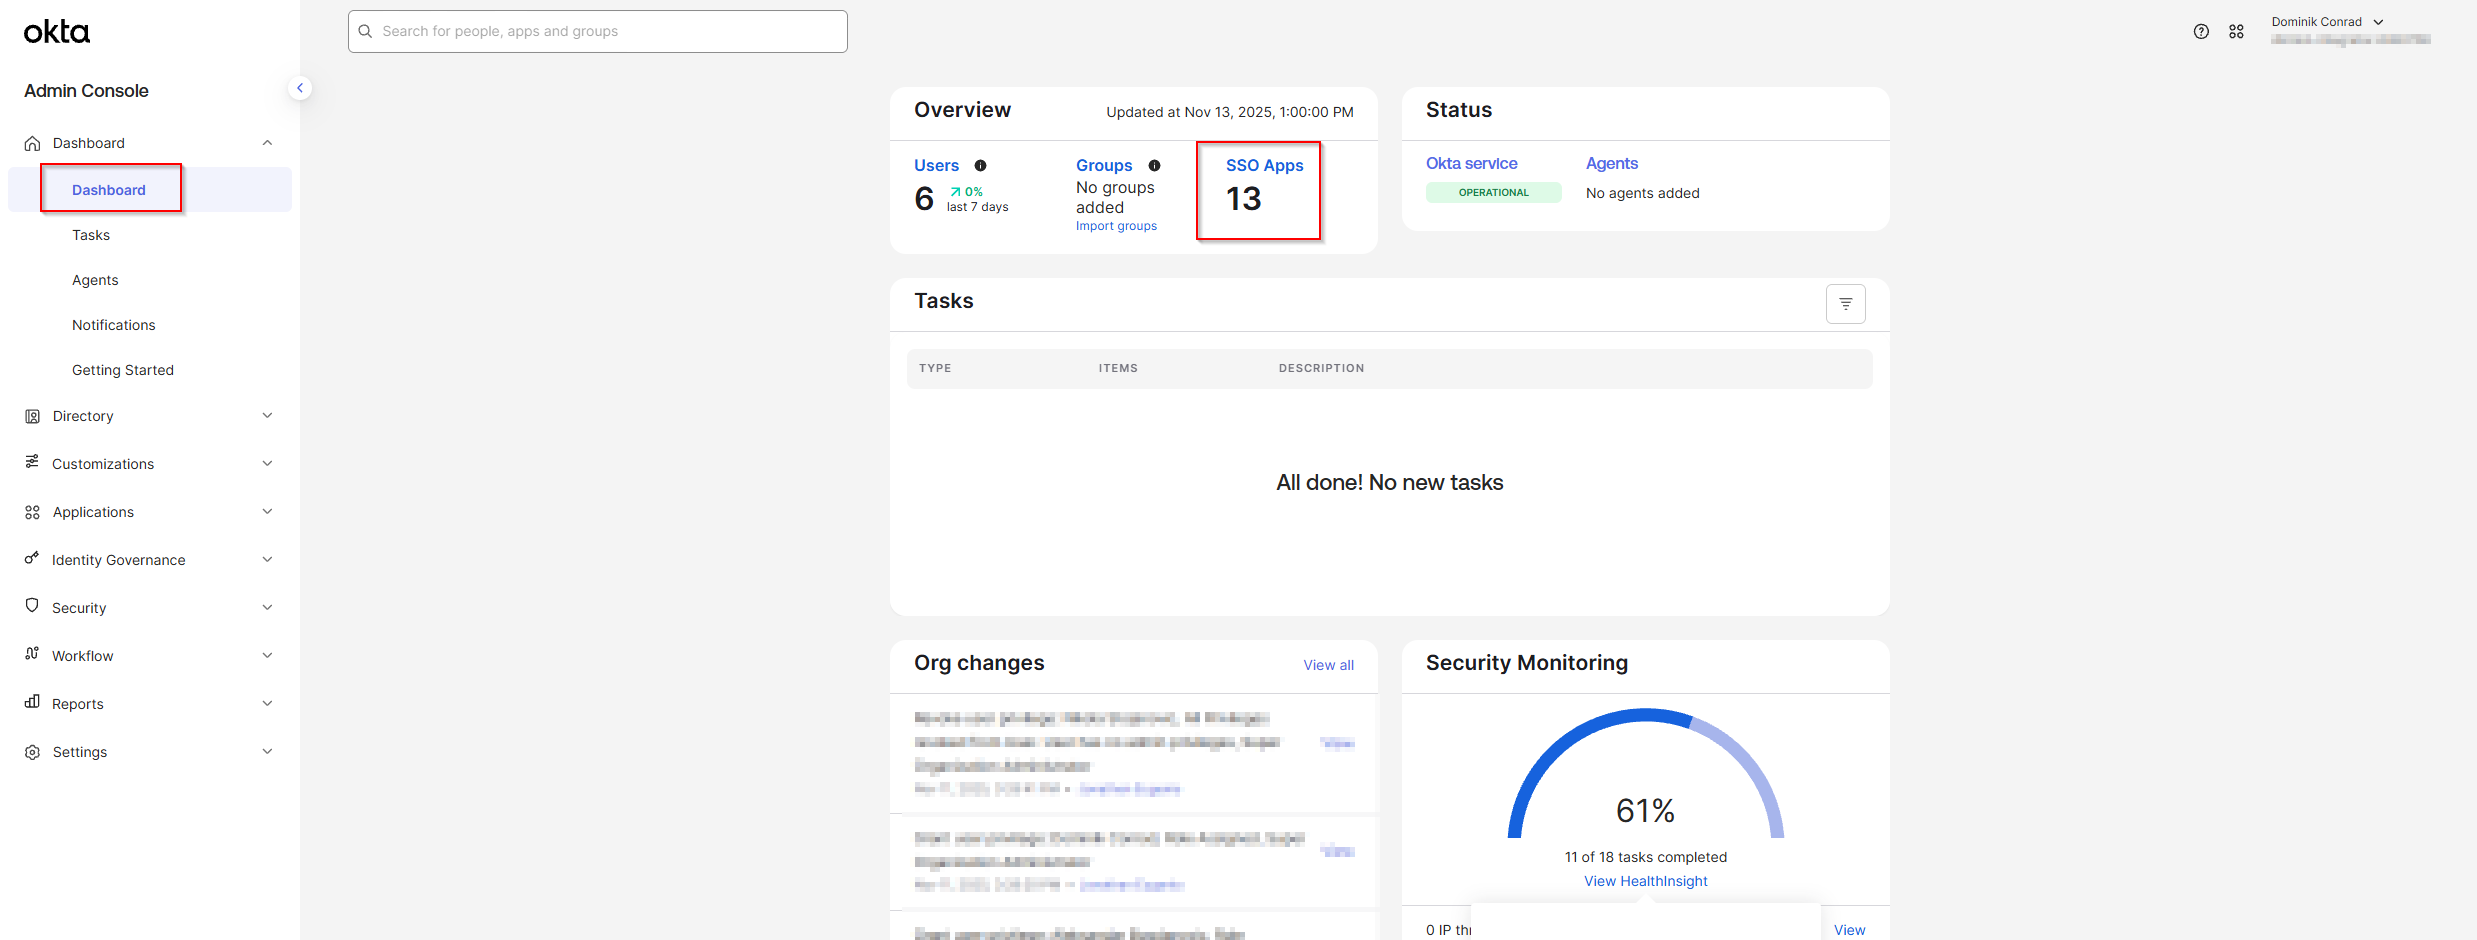
- In a separate/new tab, log in to your Okta account as an Admin and open the Dashboard. Select SSO Apps.

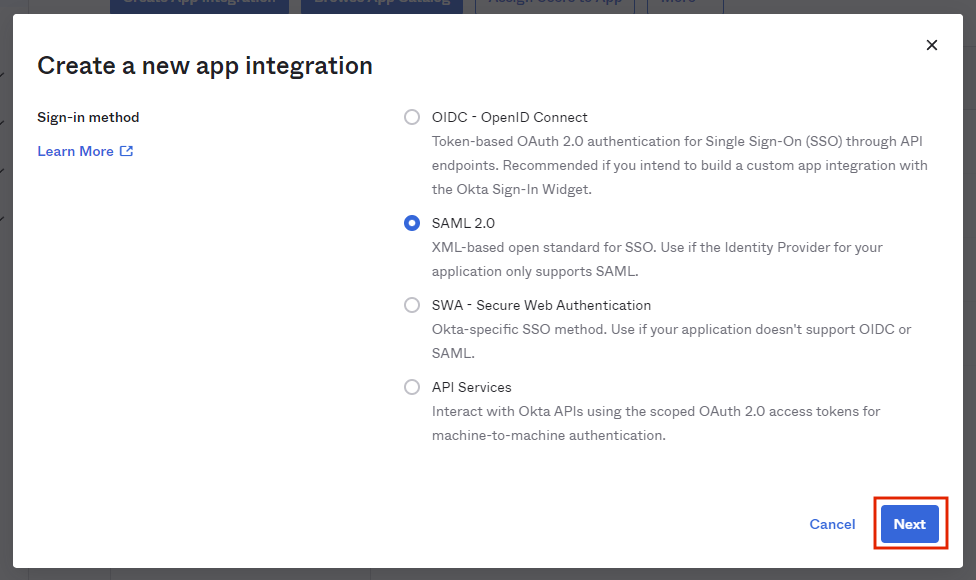
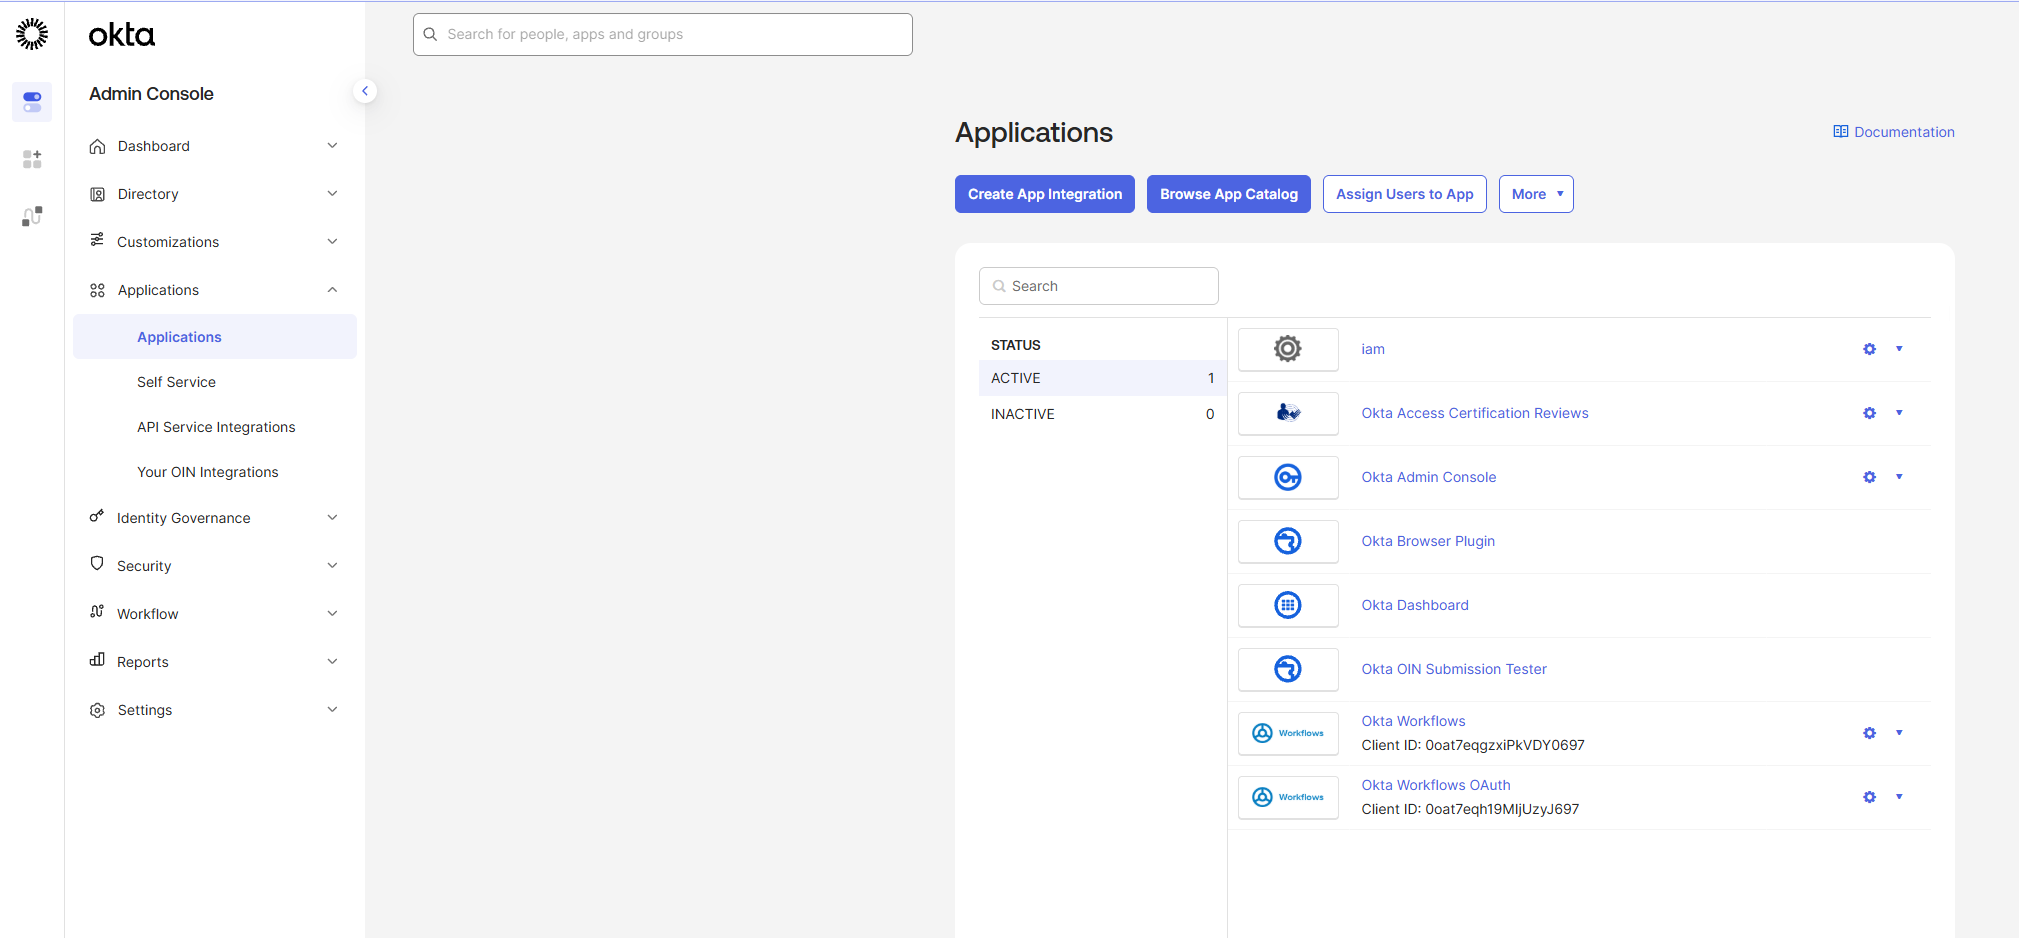
- Click Create App Integration in the top-left corner of the page.

- 2. Select SAML 2.0 and click Next.
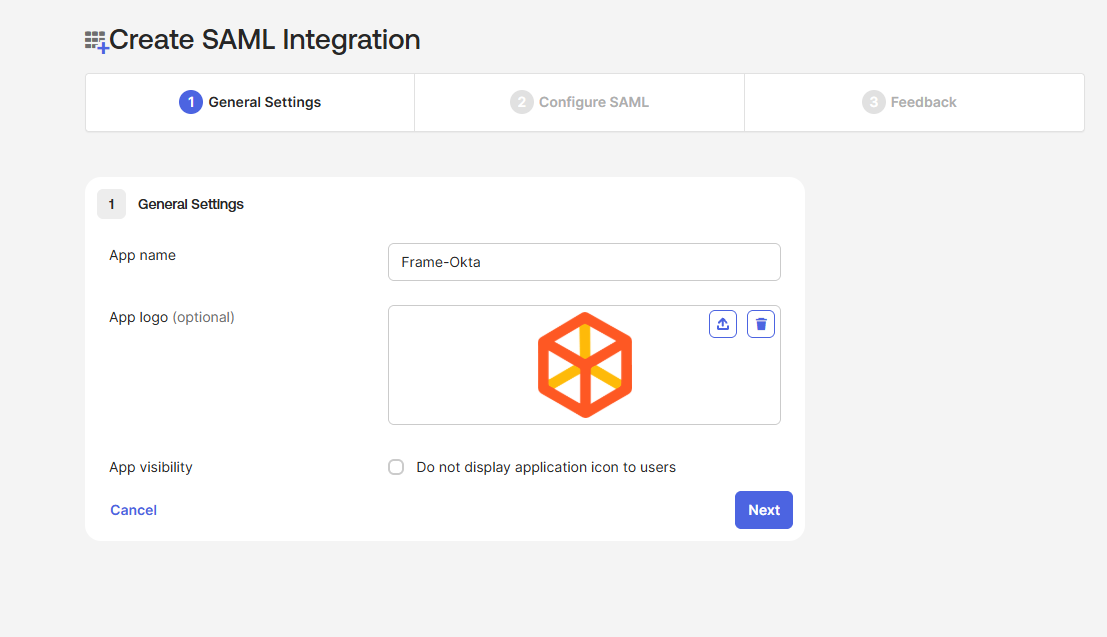
- Provide an app name and icon. We've provided a Frame icon below for convenience:


- From there, you will be taken to the SAML Settings page.

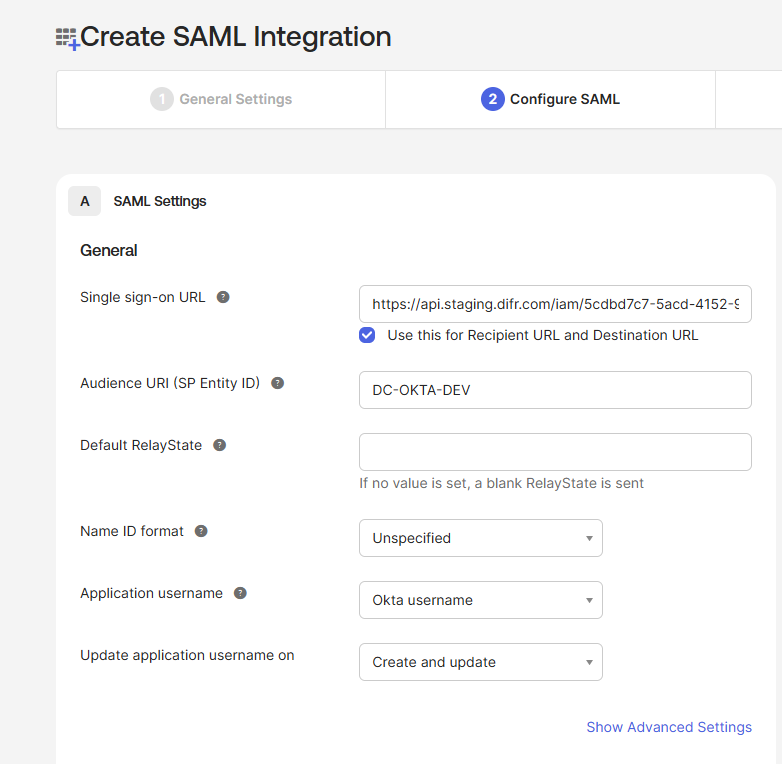
- Next, it's time to paste our AsserationURL from the Getting Started section of this page.
- Next, we'll enter the following information:Audience URI: A DNS-compliant string. For this example, we will use
DC-OKTA-DEV. This customer-defined string will be entered on the Frame side as our Application ID later on. You must use a unique Audience URI for your own IdP integration. - Default RelayState: This field can be left blank for SP-initiated SSO scenario. For IdP-initated SSO scenarios, you will need to specify the URL your IdP will redirect the user to once the user has authenticated to Okta. The value can be a custom entity endpoint URL or a Launch Link URL.
- Configure how Okta will specify the Subject for the SAML2 assertion.
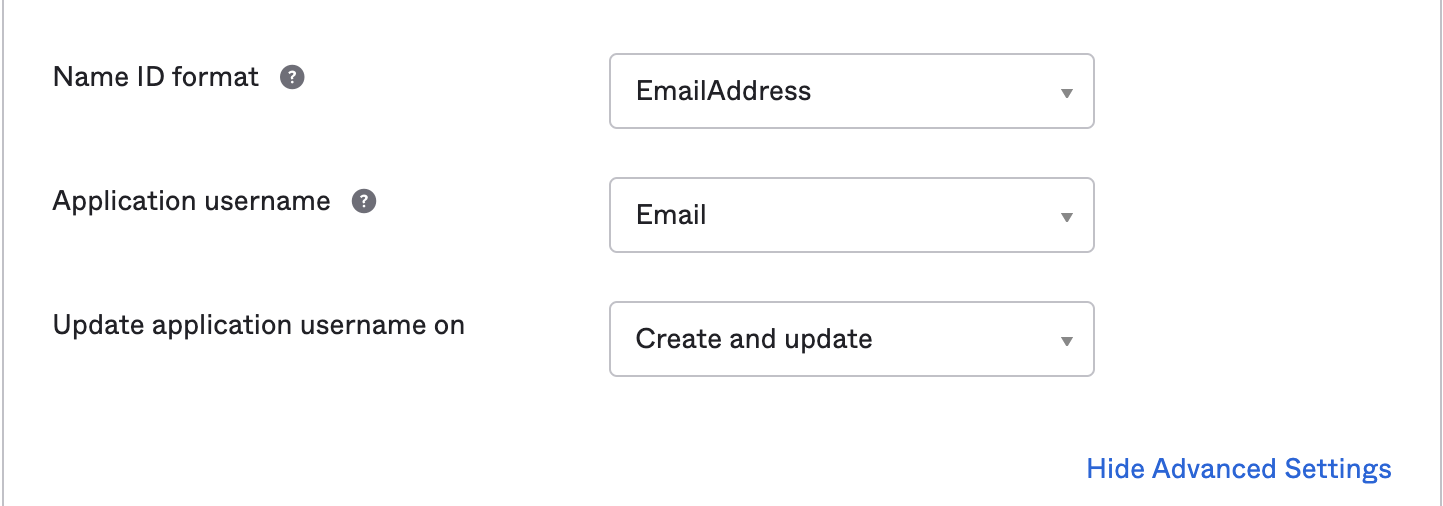 Name ID format: Use value of EmailAddress
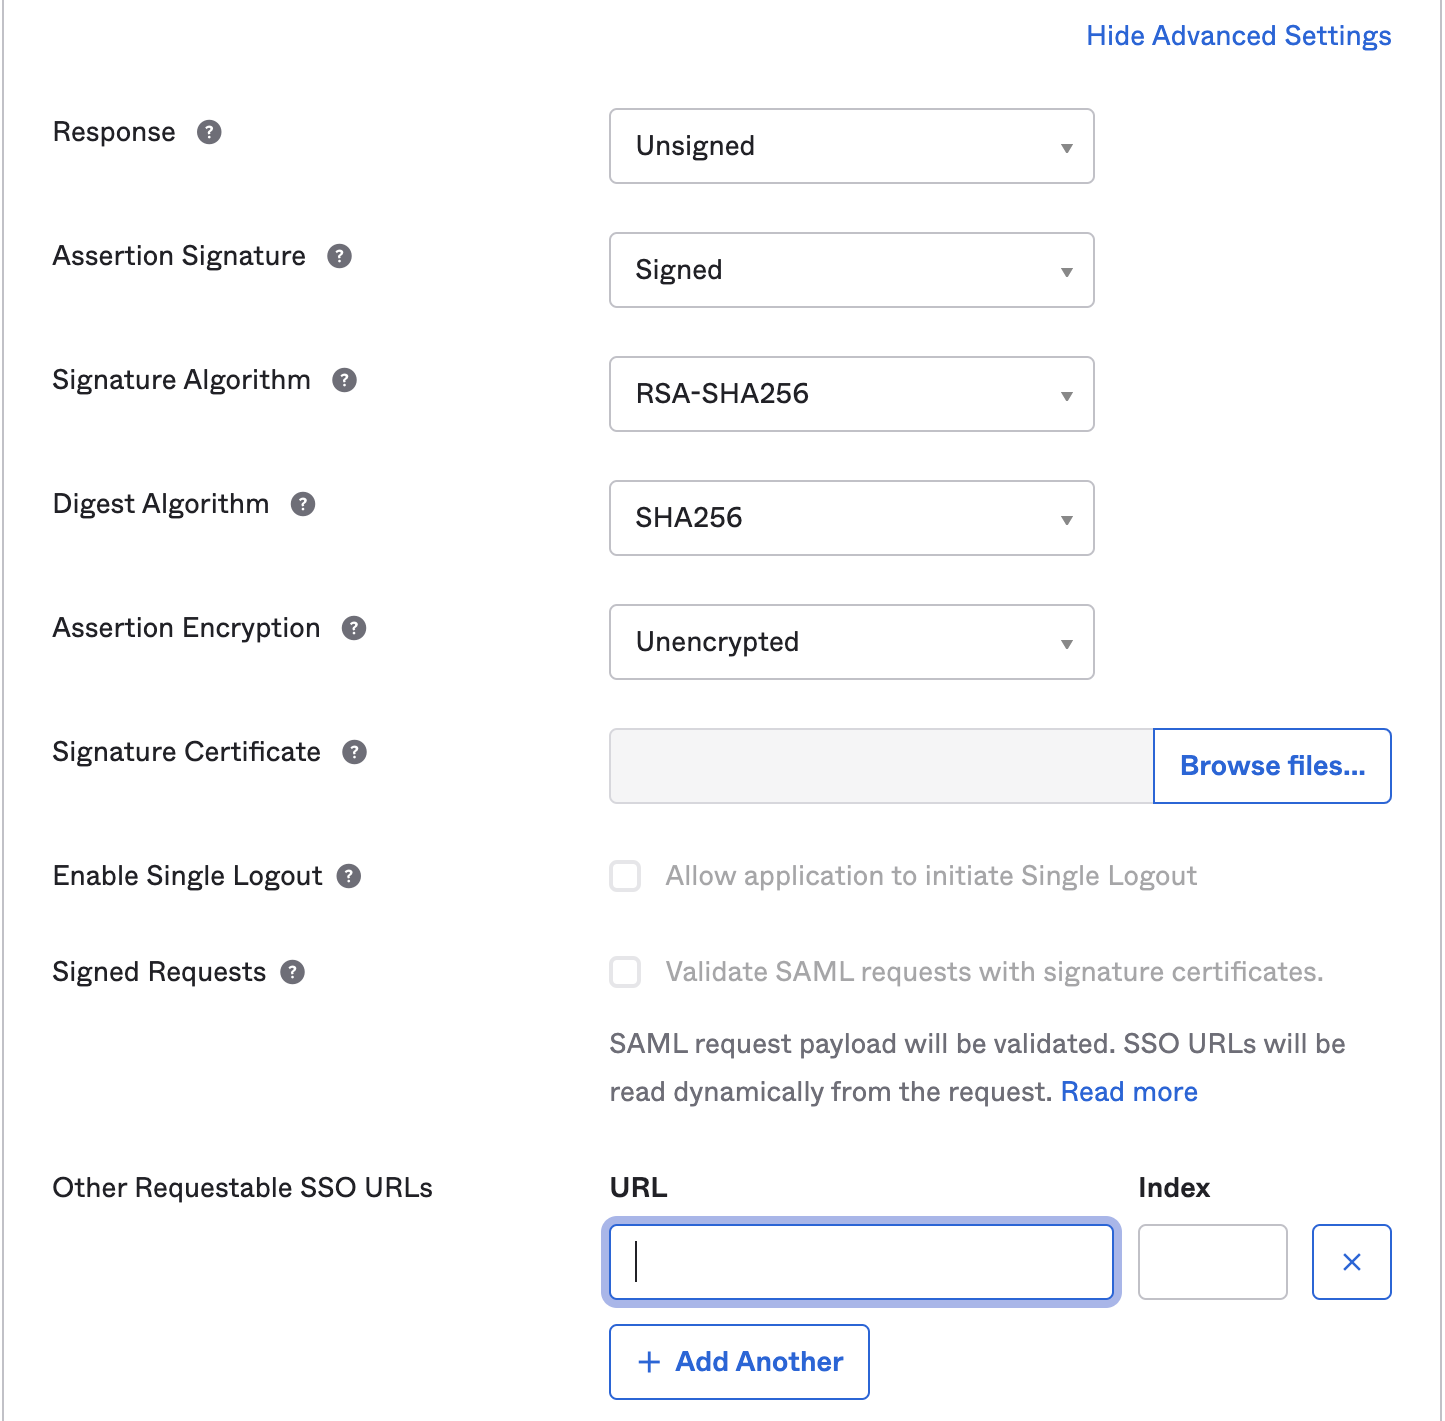
Application username: Use value of Email - Select Show Advanced Settings in the bottom right corner and the Okta fields shown in the following screen will be visible.
 Update the following fields:
Response: Use value of Unsigned
Assertion Signature: Use value of Signed
Other Requestable SSO URLs: If you plan to use the Frame Login Page, add a second Single sign-on URL with the FQDN api.difr.com.com with an index of1. For example,https://img.frame.nutanix.com/saml2/done/docs-frame-okta/for the above example. - Add three Attribute Statements. They must be exactly as shown here, including capitalization. Additionally, you can add “Group Attribute Statements” if you wish. We go into detail for passing group attributes/claims in later steps.

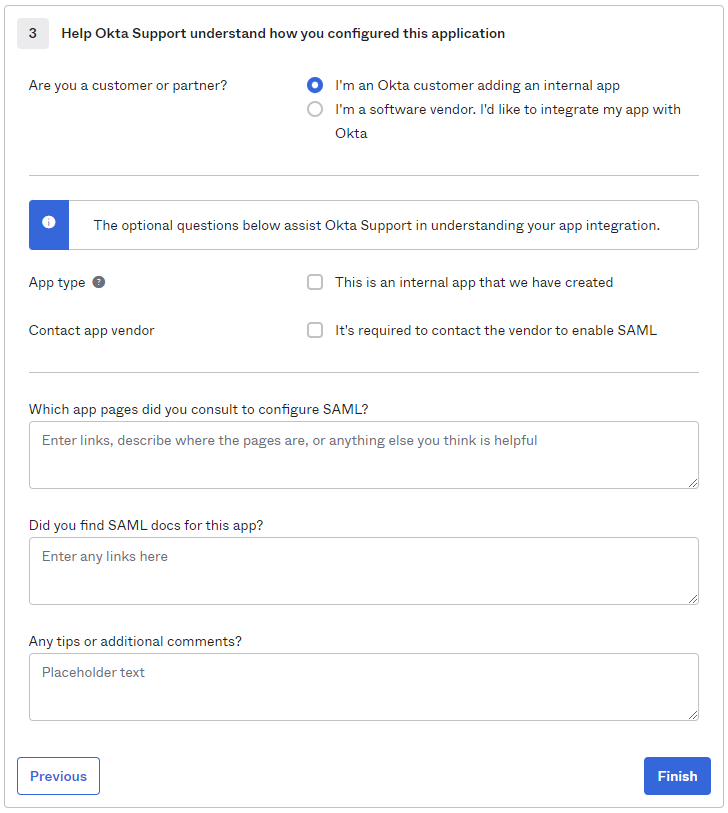
- Click Next and fill out the feedback page as desired.
- Click Finish.
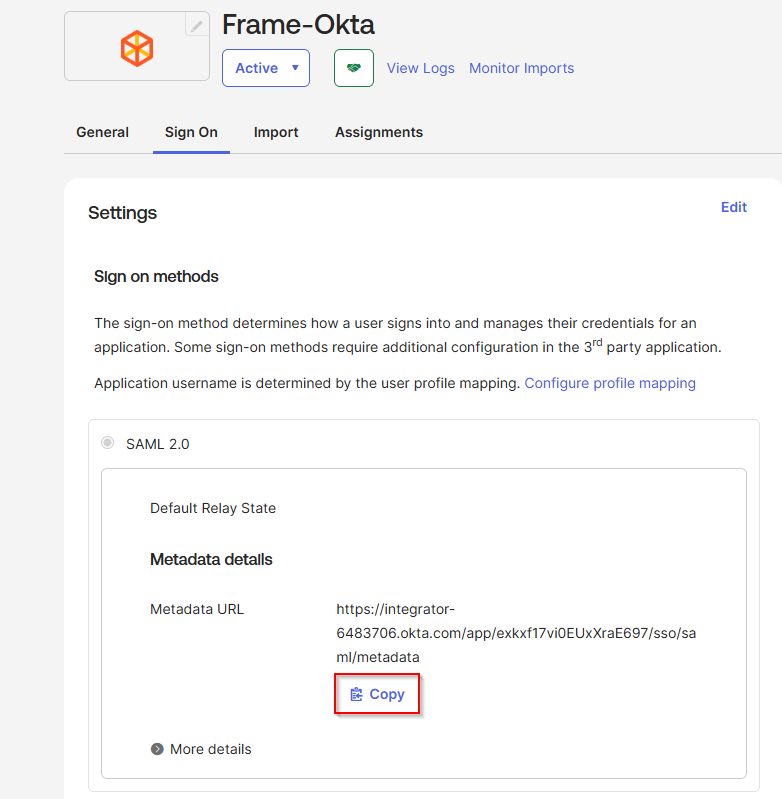
- You will automatically be taken to the Sign On page/tab where we'll obtain the final piece of information. Scroll down to the bottom box under the Sign On Methods section and right-click on the blue Identity Provider metadata link. Copy the link URL and save it somewhere to reference in later steps.
- The Okta side of the setup is now complete. Next, we'll configure the Frame side of the integration using the the values we've copied from these steps in the Okta Dashboard.
- Final Steps

Configure the SAML2 Authentication Integration Provider in Frame
-
Navigate back to your Frame tab and enter the following data into our Add a SAML2 Identity Provider form:
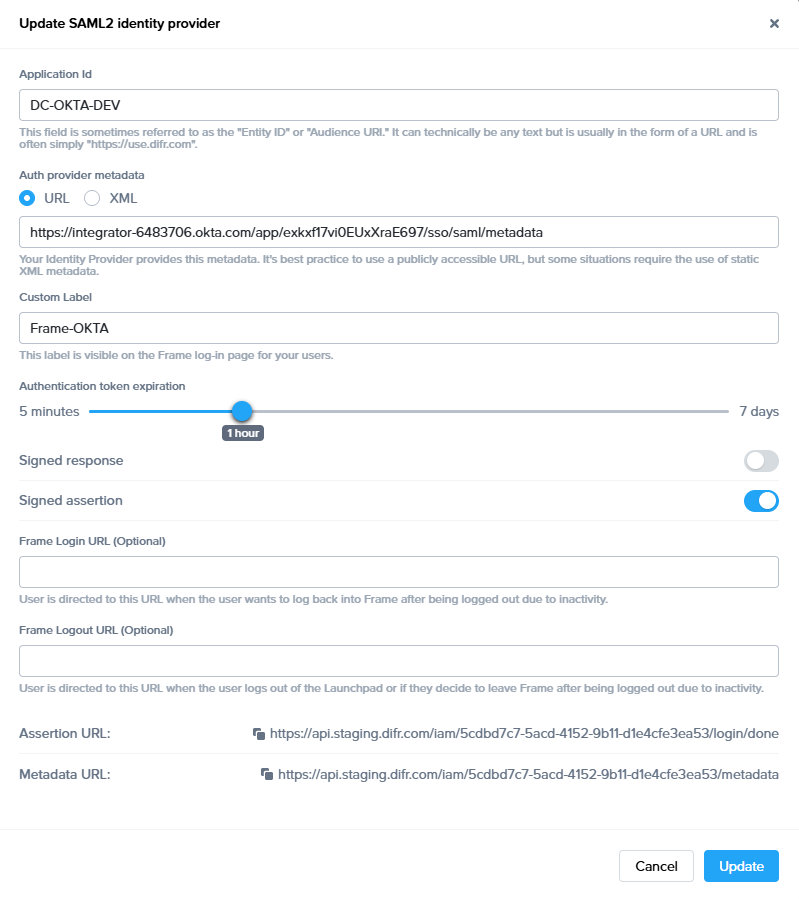
- Application ID: The value here needs to match the value set as the "Entity ID" from Step 5.
- Auth provider metadata: Click the “XML” option and paste the contents of the Metadata XML file from Step 4.
- Custom Label:. Allows Admins to customize Frame's Sign in page chiclets/buttons associated with this SAML2 integration.
- Authentication token expiration: Choose a token expiration duration that supports your end-user workflows and complies with your security policies.
- Enable “Signed assertion”
- Assertion Consumer Service (ACS) URL: The endpoint where the Identity Provider (IdP) delivers SAML authentication responses after a successful login.
- Metadata URL: A publicly accessible URL providing your Service Provider's SAML metadata, used by Identity Providers to configure and establish trust.
Optional - Frame Login URL: user is directed to this URL when the user wants to log back into Frame after being logged out due to inactivity.
- Frame Logout URL: user is directed to this URL when the user logs out of the Launchpad or if they decide to leave Frame after being logged out due to inactivity.
Click Add.
You have successfully created your Okta integration with the Frame platform! Move on to the next section for configuring roles and permissions for your users, as well as information for passing Group attributes to Frame.

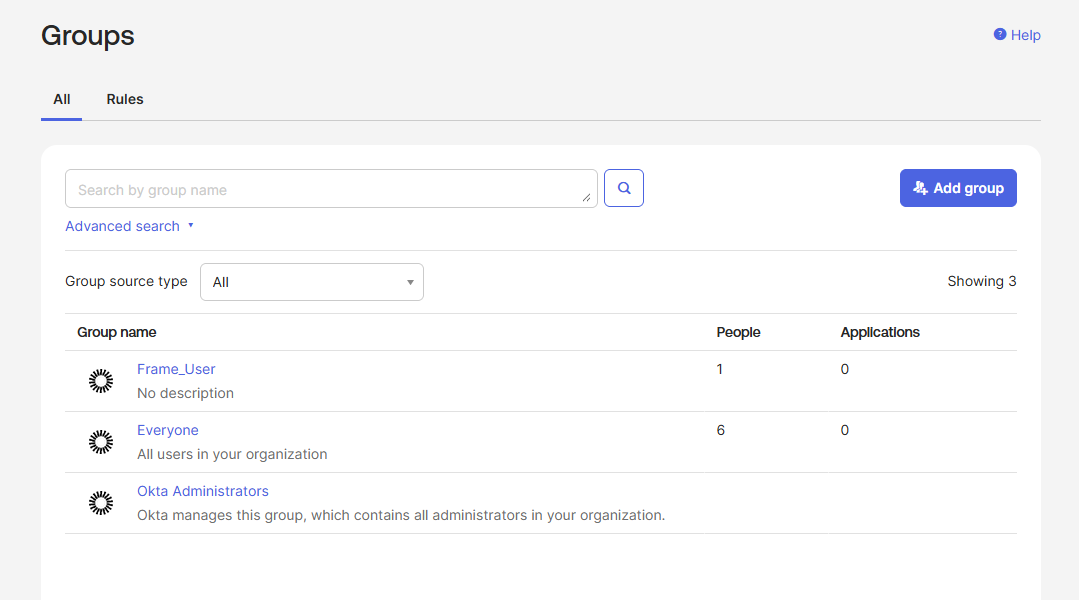
Configuring SAML2 Permissions
- Once the IdP is successfully configured on Frame, administrators will need to configure the authorization rules for the account from the SAML2 Permissions tab listed to the right of the SAML2 Provider tab, as discussed in our Roles and User Permissions with a SAML2 IdP sections.
- Passing Group Attributes
- You can authorize any groups of users you want to allow to use the Frame platform based on the user-group assignments you have configured in Okta. We recommend following the guidance of Okta's support team provided in this link regarding group attribute statements with custom SAML applications.
- Groups attribute and the associated set of Okta groups to insert in the SAML2 Response can be defined in Okta. In this example, enter
groupsfor the group name attribute and define the group name inclusion filter.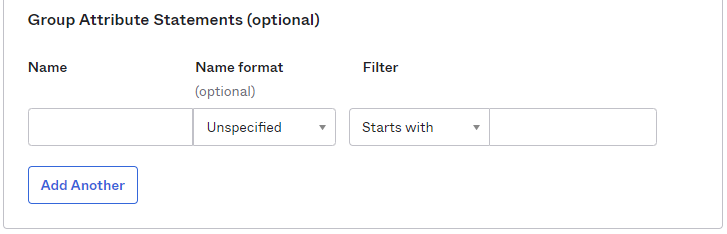
- Here's an example of a list of groups in Okta:

- Assuming that one of the Okta groups that is passed to Frame is Okta-Contractors, the Frame administrator would specify a SAML2 permission where any user's SAML2 response contains a value of
Okta-contractorsin thegroupsSAML2 attribute will be granted Account Administrator role on Frame account Contractor Account.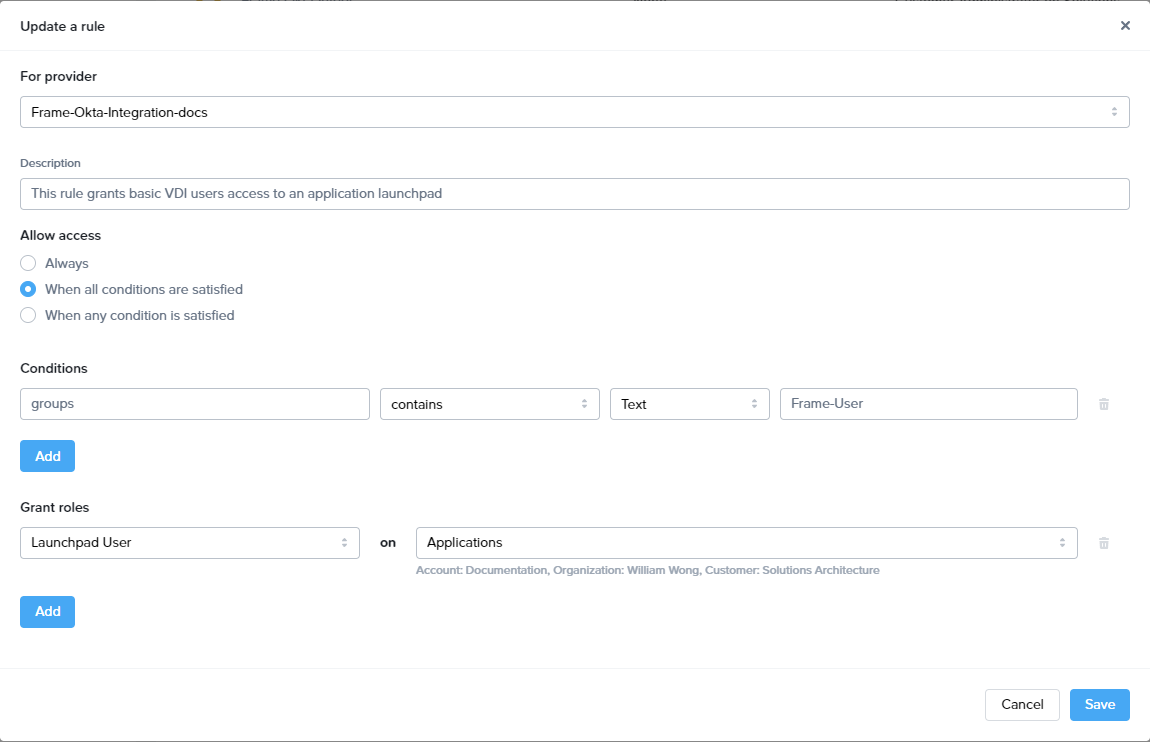
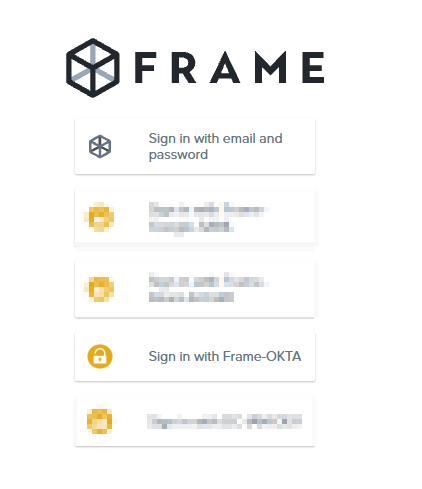
- Signing into Frame with Okta
- Your new SAML2 auth integration will appear as button on your Frame login page. The URL for navigating to your Frame login page will vary depending on which level the SAML2 integration was configured. See our section about Entities and URLs to help pick the right one for you and your end-users and/or staff.
- When landing on a URL configured for your Okta SAML2 Integration, your end-users should see an option like this: