Frame Agent Setup Tool
The Frame Agent Setup Tool (FAST) is used to install Frame Agent, Frame drivers, and Frame tools on your template image. FAST is also used to keep the Frame components on your template image(s), Sandboxes, Utility server(s), and persistent desktops up-to-date, regardless of infrastructure or instance types being used.
When using FAST to prepare a template image for use in Frame, RDP will continue to function (unlike the Frame Guest Agent Installer). Once the template image is used by Frame to provision workload VMs in a Frame account, administrators will need to enable the RDP Debug Mode feature to access Frame-managed workloads via RDP.
Requirements
In order for FAST to download the required Frame components for installation or update, the VM running FAST must be able to reach the following Internet FQDNs via tcp/443 (HTTPS), as discussed in Networking Requirements:
- download.visualstudio.microsoft.com
- downloads.console.nutanix.com
Installation
-
Download the Frame Agent Setup Tool from the Downloads page into your template image or existing Sandbox, Utility Server, and/or persistent desktops.
-
Run the executable to launch the Frame Agent Setup Tool.
Usage
The FAST utility has two different views: Bundle View and Updater View. When you run FAST, it will search for the Frame Guest Agent and Server components. If Frame Guest Agent cannot be found (e.g. clean Windows OS image), FAST will start in Bundle View. If Frame Guest Agent is already installed, FAST will start in Updater View.
Bundle View
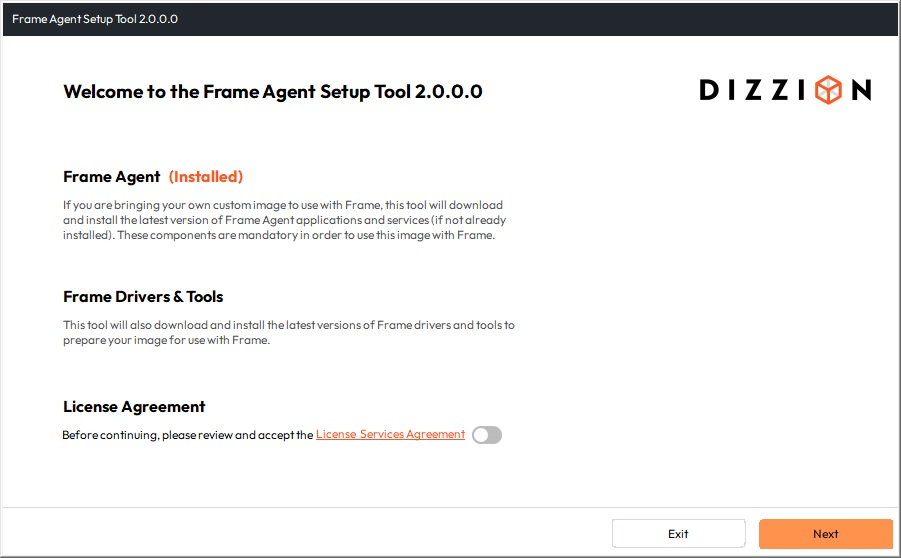
When FAST is started and determines the Frame Guest Agent is not present on the VM (such as when you are preparing a template image to be used in Frame):
- A dialog prompt will open. Accept the terms and conditions and click the “Next” button to continue.

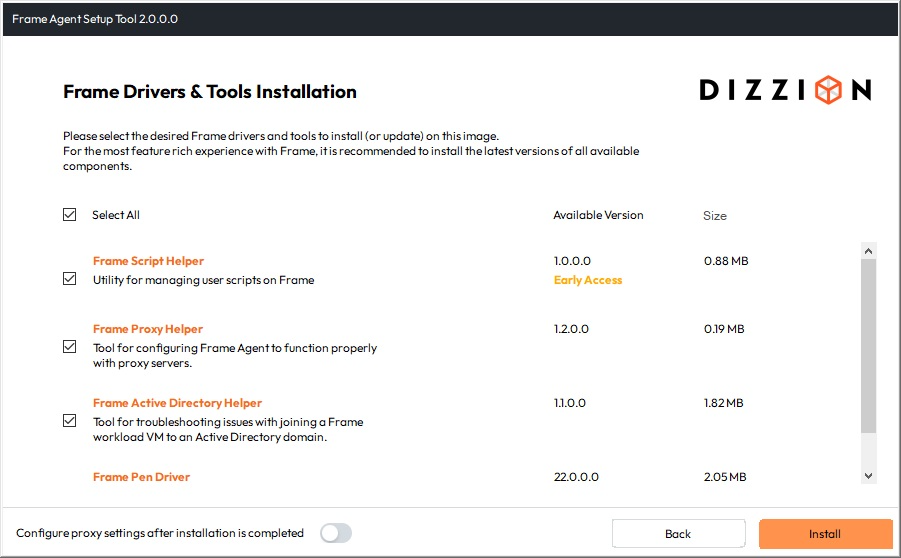
- Click on Select All for all of the packages to be installed or install specific packages by checking the associated boxes. Frame Guest Agent and Frame Server will be installed automatically. Click the Install button to continue.

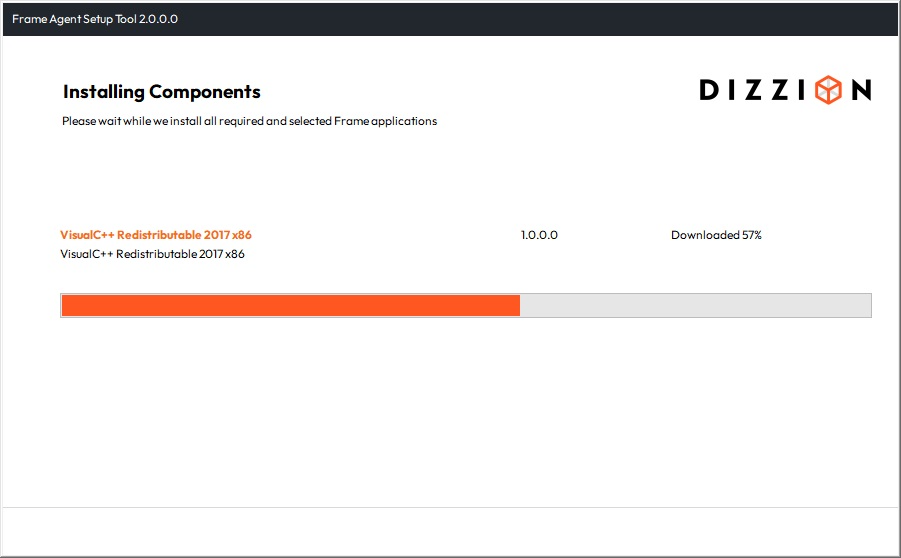
Each package will be downloaded and then installed, one by one. See the example below:

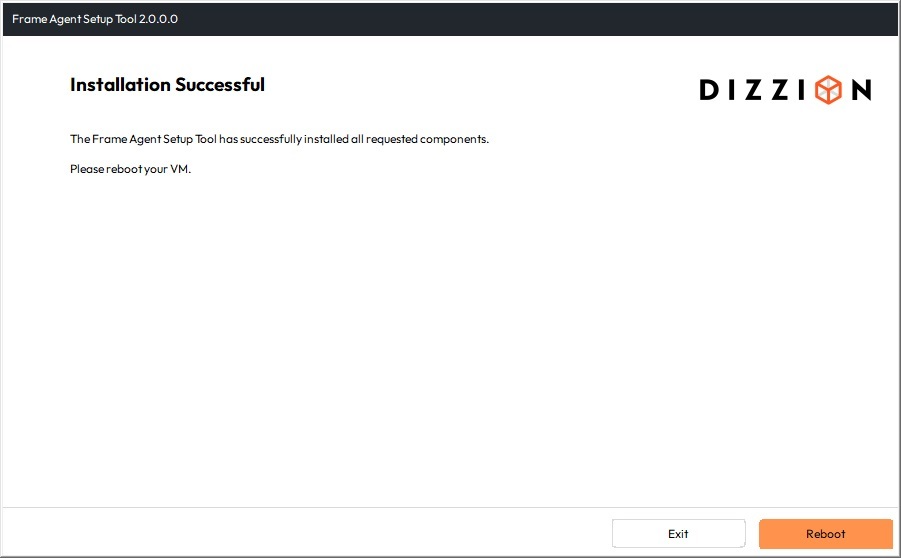
- When all components are installed, you may either Exit the Frame Agent Setup Tool to perform additional tasks in the VM or Reboot the VM. The VM must be rebooted for the Frame components to take effect.

Updater View
When FAST is started and determines the Frame Guest Agent is present on the VM (Sandbox, Utility server, and/or Persistent Desktops), FAST will display the Updater view.
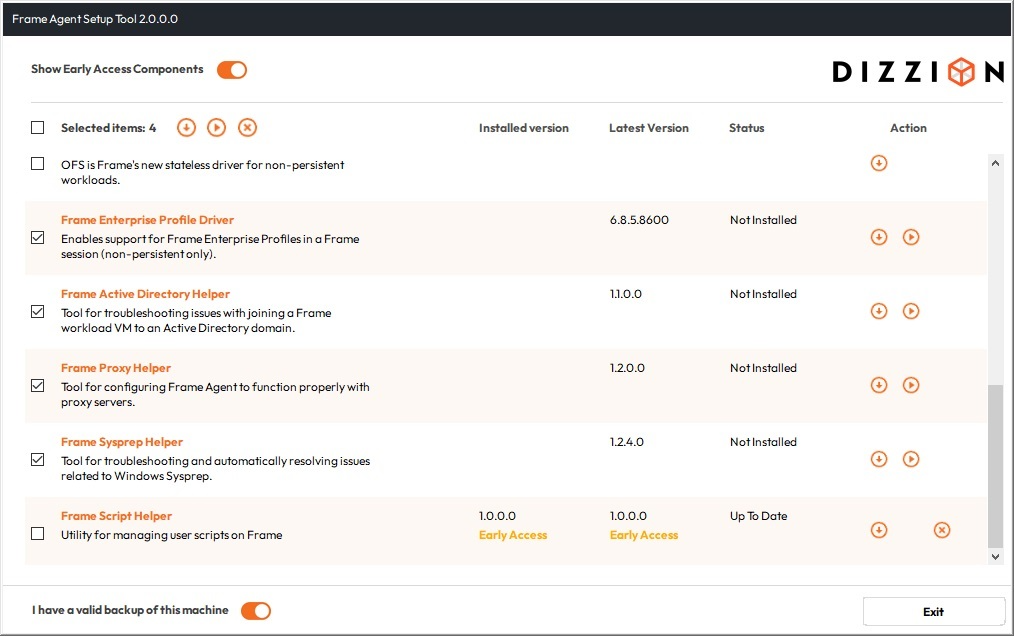
Enable or disable the Show Early Access Components if you wish to see or not see the components that have an Early Access version.
Single Component Installation
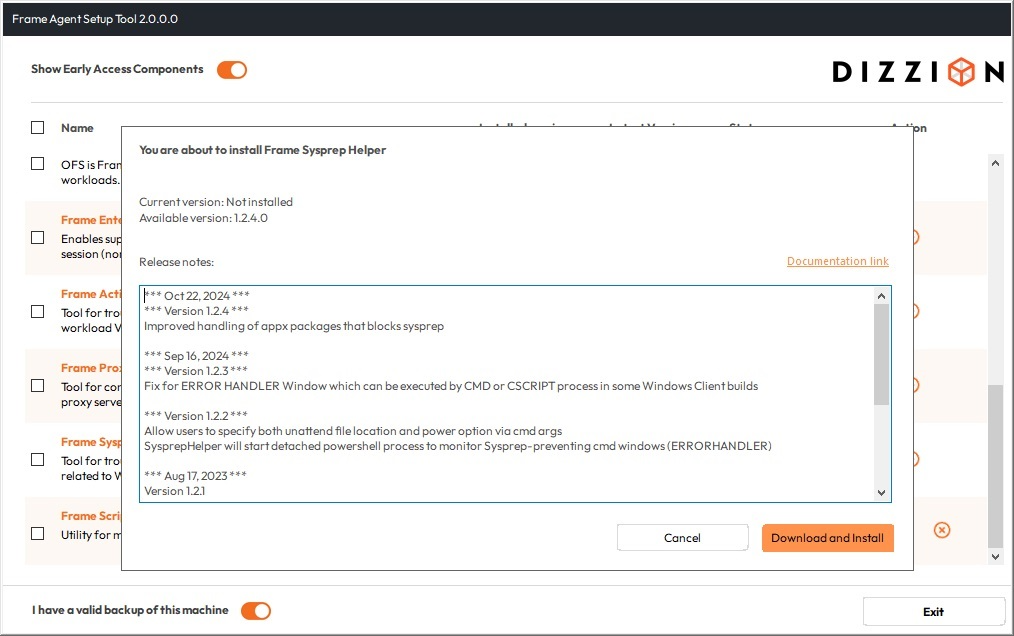
To install/update an individual component, click either on the appropriate action on the right side (Download or Download and Install). You can double click the component row to view the component version number (current and latest), release notes, and link to documentation. Click on Download and Install to begin the download and installation process or Cancel to return to the component list.

Multi-Component Installation
- Select the desired component(s) for update or installation by checking the associated checkboxes.

-
Click the toggle located at the bottom of the window to acknowledge the machine has been backed up.
-
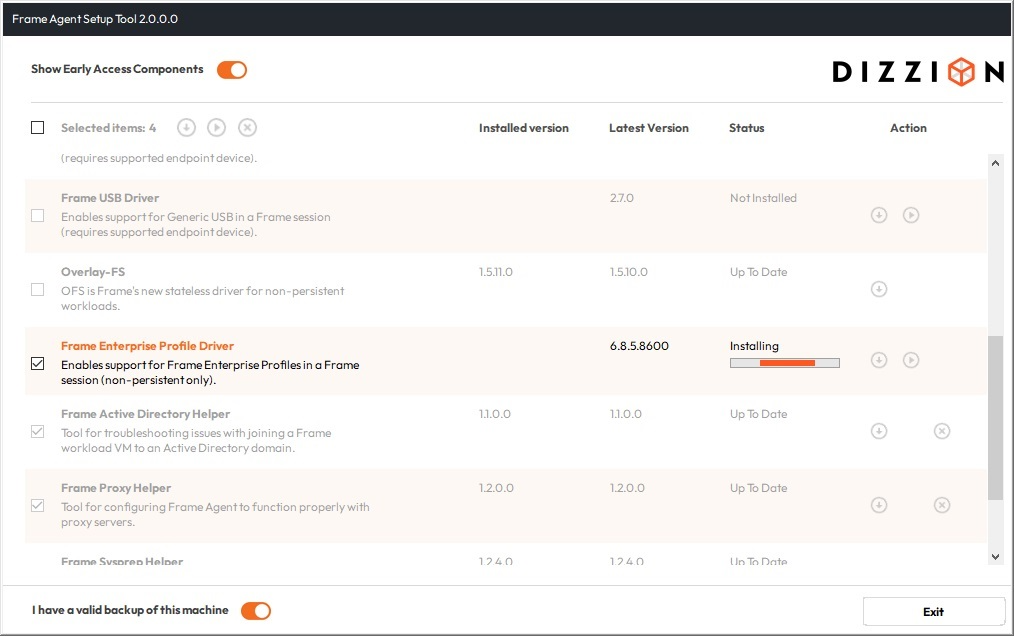
Click the "Download" or "Download and Install" icon at the upper left corner of the FAST application window. FAST will not update the Frame Agent and Frame Server components, if they are up to date.
-
Accept the prompt by clicking OK. FAST will download and install the selected components.

- When all components are updated, you can close the Frame Agent Setup Tool.
Package Statuses
In the Updater View, FAST will display the status of each package. Definitions for each of the package status are described in the following table.
<APITable>
| Status | Description |
|---|---|
| Up to Date | A package found on the machine is already up-to-date with the latest version. |
| Update Required | An installed package requires an update. Failure to update could result in system instability or compatibility conflicts. |
| Update Available | An installed package has an optional update. While not required, this update could improve performance or add new features. |
| Not Installed | An optional package is not installed. |
</APITable>
Command-Line Usage
You may want to automate Frame Agent Setup Tool to update all components of your Frame virtual machines programmatically. In that case, Frame Agent Setup Tool can be executed with various arguments to orchestrate installation and updates. For example, if you execute on the Windows command line:
FrameAgentSetupTool.exe getpackages
FAST will list all missing or obsolete packages.
Arguments
<APITable>
| Name | Description |
|---|---|
/? |
Display help |
getpackages |
Display a list of all missing/obsolete packages |
getpackages json |
Display a list of all missing/obsolete packages in json format |
install |
Install all missing/obsolete packages |
install only <Package1> <Package2> ... |
Install only provided packages |
install except <Package1> <Package2> ... |
Install all missing/obsolete packages except provided packages |
install frameimage |
Install all system and Frame components |
install only <Package1> <Package2> frameimage |
Install only provided applications and all Frame system components |
install except <Package1> <Package2> frameimage |
Install all available application except listed ones after installation of Frame system components |
</APITable>
Supported Applications & Drivers
In addition to the Frame Guest Agent and Frame Server, FAST installs and updates the following drivers and tools.
<APITable>
| Name | Description |
|---|---|
| Frame Audio Driver | Enables Frame to properly interface with the audio card on the workload VM for use in a Frame session. |
| Frame Video Driver | Enables Frame to properly interface with the video card on the workload VM for use in a Frame session. |
| Liquidware ProfileDisk | Enables support for Frame Enterprise Profiles in a Frame session (non-persistent only). |
| Frame Pen Driver | Enables support for digital pen tablets in a Frame session (requires supported endpoint device). |
| Frame Printer Driver | Enables support for Frame Printer in a Frame session. |
| Frame Scanner Driver | Enables support for WIA scanners in a Frame session (requires supported endpoint device). |
| Frame SmartCard Driver | Enables support for CAC/SmartCards in a Frame session (requires supported endpoint device). |
| Frame USB Driver | Enables support for Generic USB in a Frame session (requires supported endpoint device). |
| Frame AD Helper | Tool for troubleshooting issues with joining a Frame workload VM to an Active Directory domain. |
| Frame Proxy Helper | Tool for configuring Frame Agent to function properly with proxy servers. |
| Frame Sysprep Helper | Tool for troubleshooting and automatically resolving issues related to Windows Sysprep. |
</APITable>
FGA Proxy Helper Tool
The FGA must be able to communicate with the Frame control plane in order for Frame Platform to be able to orchestrate and broker users into these workload VMs. If your workload VMs must connect to an outbound proxy server to reach the Internet, you will need to configure (or update) the FGA Proxy Settings once the Frame Guest Agent is installed (or if your outbound proxy server information changes). The proxy settings apply only to the Frame Guest Agent. You will need to configure the Windows proxy server settings for Windows OS and your applications separately.
The Proxy Helper tool FrameProxyHelper.exe is located in the Frame Tools directory C:\ProgramData\Nutanix\Frame\Tools.

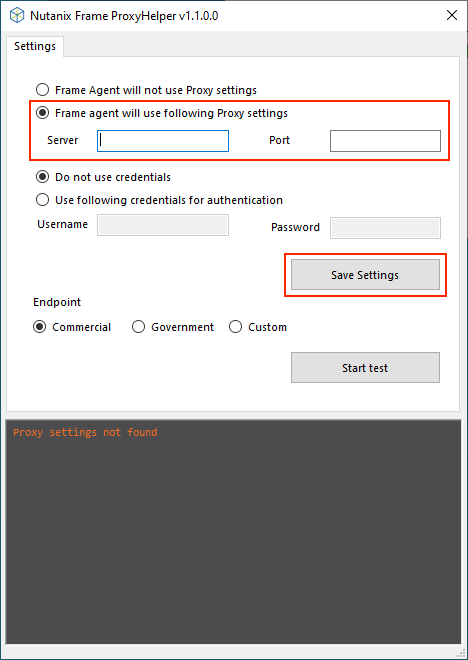
- Server: The IP address of the outbound proxy server.
- Port: The desired port on the outbound proxy server.
If your proxy server requires basic authentication, you may select the "Use following credentials for authentication" and fill out the "Username" and "Password."
You can then test the settings by clicking on "Start test" and save the settings by clicking on "Save Settings".
Troubleshooting
The Frame Agent Setup Tool generates a log file for troubleshooting which is located in:
C:\ProgramData\Nutanix\Frame\Logs
Take a look at these and if you need further assistance, open a support ticket.