Operating Systems
Bring Your Own, Linux, Windows, Frame Agent Setup Tool, BYO Images on Azure, AWS, GCP, IBM and Nutanix AHV
- Operating System
- Bring Your Own
- Linux
- Windows
- Frame Agent Setup Tool (FAST)
- BYO Images on Amazon Web Services
- BYO Images on Microsoft Azure
- BYO Images on Google Cloud Platform
- BYO Images on IBM Cloud
- BYO Images on Nutanix AHV
Operating System
Customers can deploy their applications on Frame-provided OS images if using a public cloud infrastructure or bring your own (BYO) OS images. The following table describes the options and considerations for each option.
| OS Image Source | Supported Infrastructures | Considerations |
|---|---|---|
| Bring Your Own (BYO) | Amazon Web Services, Google Cloud Platform, IBM Cloud VPC Microsoft Azure, and Nutanix AHV | Requires preparation and registration of image BYO Azure images can be less than the 128 GiB Microsoft Azure images (30 GiB to 2048 GiB) |
| Frame-provided | Amazon Web Services, Google Cloud Platform, IBM Cloud VPC, and Microsoft Azure | Do not need your own OS image at Frame account creation |
In both Frame-provided and BYO OS image options, customers are responsible for OS licensing, application licensing, and OS and application updates.
OS Template Image Guides
Once you have confirmed that the operating system you wish to bring is in the table of Frame-supported operating systems, you can consult the appropriate OS template image guide.
Bring Your Own
Organizations have the ability to “bring your own” (BYO) images on their Frame cloud account(s) as template images. Once a template image is registered on their cloud account within Frame, administrators can create Frame accounts using the template image. Before selecting a BYO image guide from the list of infrastructure providers, please carefully review the requirements and considerations listed below.
Requirements
- You have a 64-bit version of Windows or Linux operating system. 32-bit OS images are not supported.
- You have downloaded the latest Frame Guest Agent (FGA) Installer (Windows) or Frame Guest Agent Workload Installer (Linux).
- You are using your own infrastructure (Amazon Web Services, Google Cloud Platform, Microsoft Azure, and Nutanix AHV).
- For AWS, Azure, and GCP, you must be using one or more of the public cloud infrastructure instance types listed in the tables here.
- Set your template image timezone to UTC. When users start a Frame session, the workload VM will be set, by default, to the correct timezone based on the user's browser locale.
- Ensure your template image VM network adapter is configured to obtain IP address from DHCP. If the IP address is a static IP address, the workload VMs (Sandbox, Utility Servers, test and production pool instances) created from your template image will not boot correctly.
Procedure
In order to register your template image with Frame, you will need to perform the following steps:
- Download the Windows Frame Guest Agent (FGA) Installer or Linux Frame Workload Installer.
- Prepare your Windows or Linux template image using the Frame installer in your chosen infrastructure.
- Register your template image in the appropriate Cloud Account associated with the desired Frame Customer or Organization entity.
Linux
This document will provide you with instructions on how to prepare and register your own template image for use with Frame. Before moving forward with the preparation procedure, please ensure you have read through the general requirements on the BYO image page and considerations below.
Considerations
- Create a template VM running a supported version of Ubuntu from an ISO or from the AWS, Azure, or GCP Marketplace.
Create an Ubuntu Template Image VM
The following instructions assume you have an Ubuntu 24.04 ISO image in your desired infrastructure. If you already have an Ubuntu VM you wish to use as the starting point for your template VM, then you can skip to the installation of the Frame Guest Agent.
- Create a VM using your Ubuntu ISO (mounted as a CD-ROM). The VM should have at least 2 vCPUs, 8 GB memory, 40 GiB disk, and a network interface.
- Power on the VM and access the VM through the console or via ssh.
- Choose your language.

- If you are informed that there is an installer update available, choose "Continue" without updating to stay on version 20.04. You can always perform the updates later in the Sandbox.

- Choose your Keyboard Configuration. Choose "Done" when complete.

- Configure your Network Connections. Choose "Done" when complete.

- Leave the Proxy Address field blank and choose "Done" (unless the VM needs to communicate to the Internet using an outbound proxy server).

- Enter in your Archive Mirror address, if you have a preferred option. Choose "Done" when complete.

- On the Guided storage configuration page, uncheck the Set up this disk as an LVM group option, then choose "Done".

- On the Storage configuration page, choose "Done".

- Confirm the “destructive action” (wiping/formatting the hard disk).

- Provide computer/user information.

- Install OpenSSH server.

- Do not install any add-ons.

-
The installation will now begin.
-
When prompted, let the security updates install.

- Reboot when prompted.

- If prompted, press Enter to eject Ubuntu installation media.
Install Frame Guest Agent
-
Download the Frame Workload Installer (Linux) to your local machine (or within the template VM) from the Downloads page.
-
Unzip the Frame Workload Installer.
-
Untar the Frame Workload Installer tar file.
-
If you need to upload the Frame Workload Installer, use
winscpto transfer the Frame Workload Installer file folder (frame_workload_installer_linux-2.0.0 folder) to the template VM. This assumes you have installed and enabled OpenSSH in your Ubuntu VM. -
Login to the Linux VM using account specified during installation of the operating system. In the Linux VM,
ls -alto verify theframe_workload_installer_linux-2.0.0folder exists. Change directory to the folder. -
Run
sudo bash prepare.sh. Elevate if prompted.

- Upon completion, run
sudo bash install.sh.

- Upon completion, shut down the VM.
Tag Template
You will now need to tag the template VM, image, or snapshot (depending on the infrastructure) in order for Frame control plane to be able to recognize this template image. This process is exactly the same as what is required for tagging Windows template images.
Instructions for performing tagging, by infrastructure are at:
Register Template Image
Once you have successfully created and tagged your template image(s) in your infrastructure, you will register your template image.
AWS Marketplace
If you want to use Ubuntu 24.04 from AWS Marketplace you must accept the terms of AWS Marketplace Ubuntu Image
- Go to the AWS Marketplace
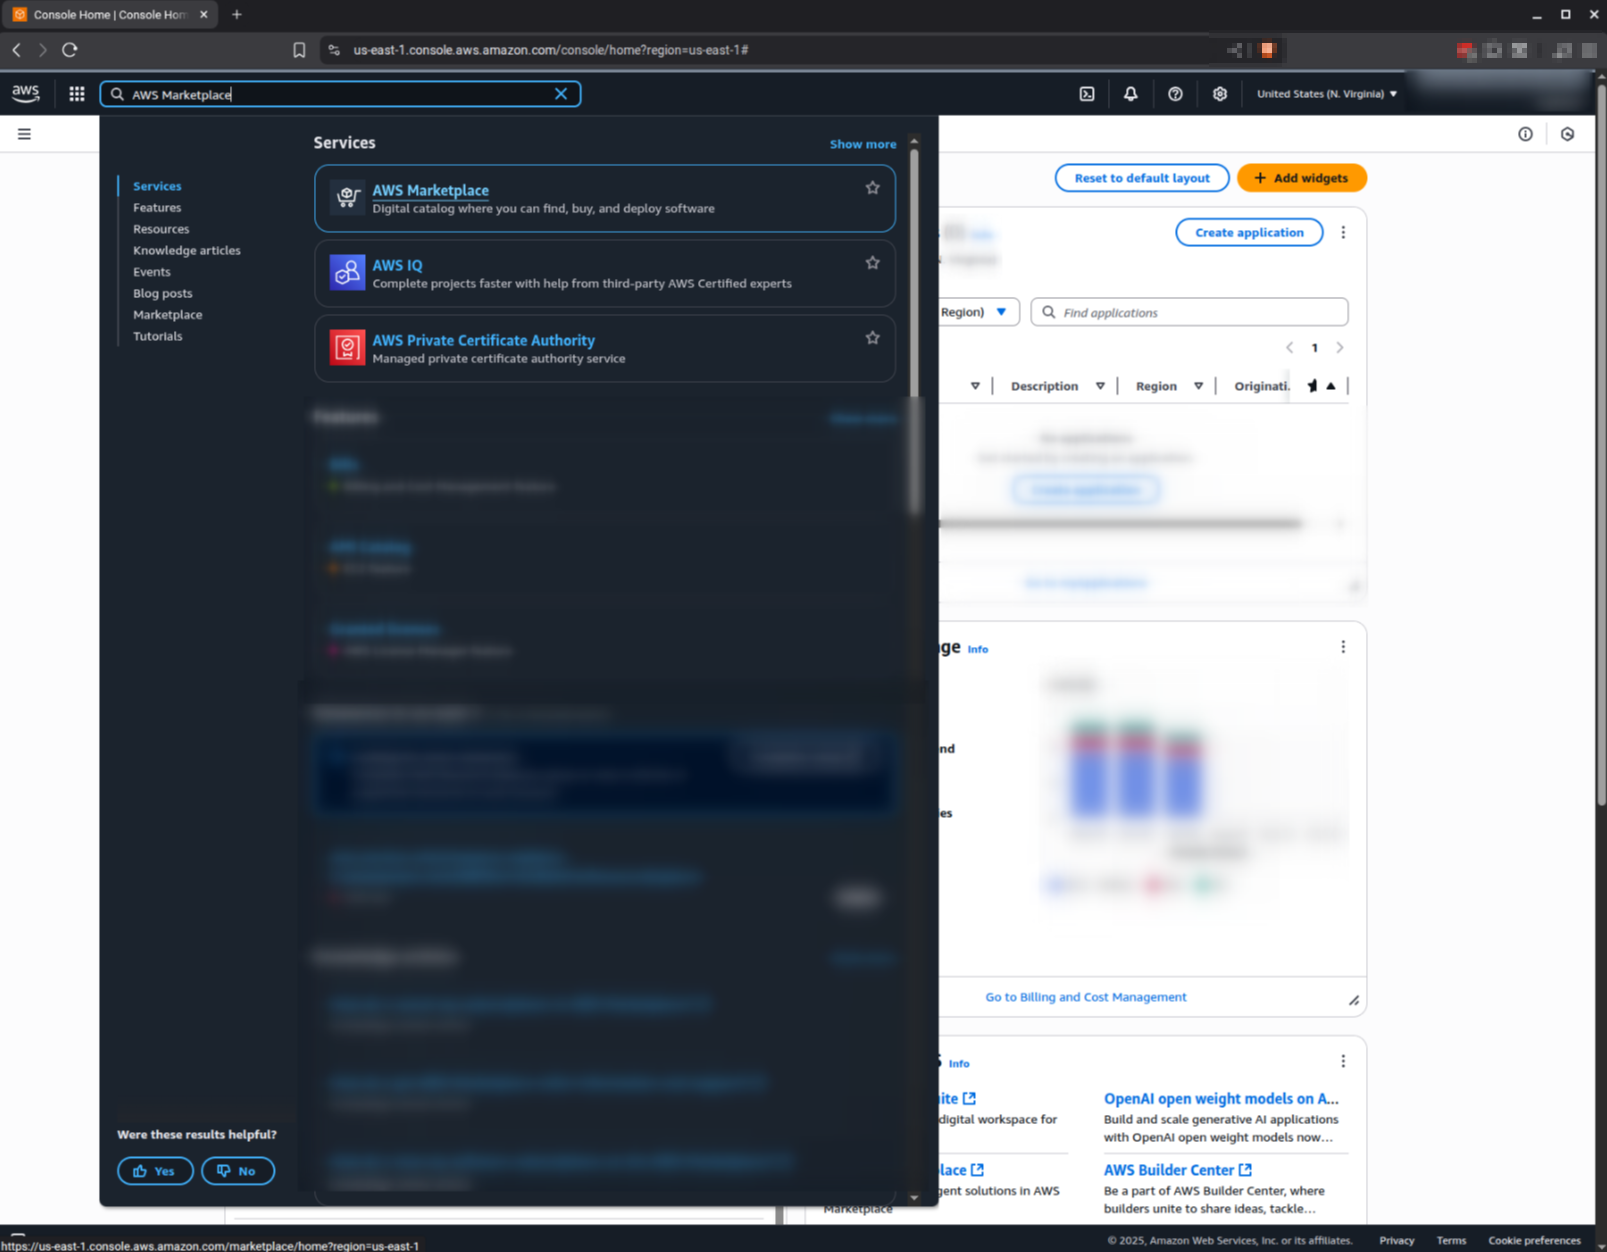
2. Go to "Discover products" and search for the <Ubuntu version> (current supported version is 24.04)
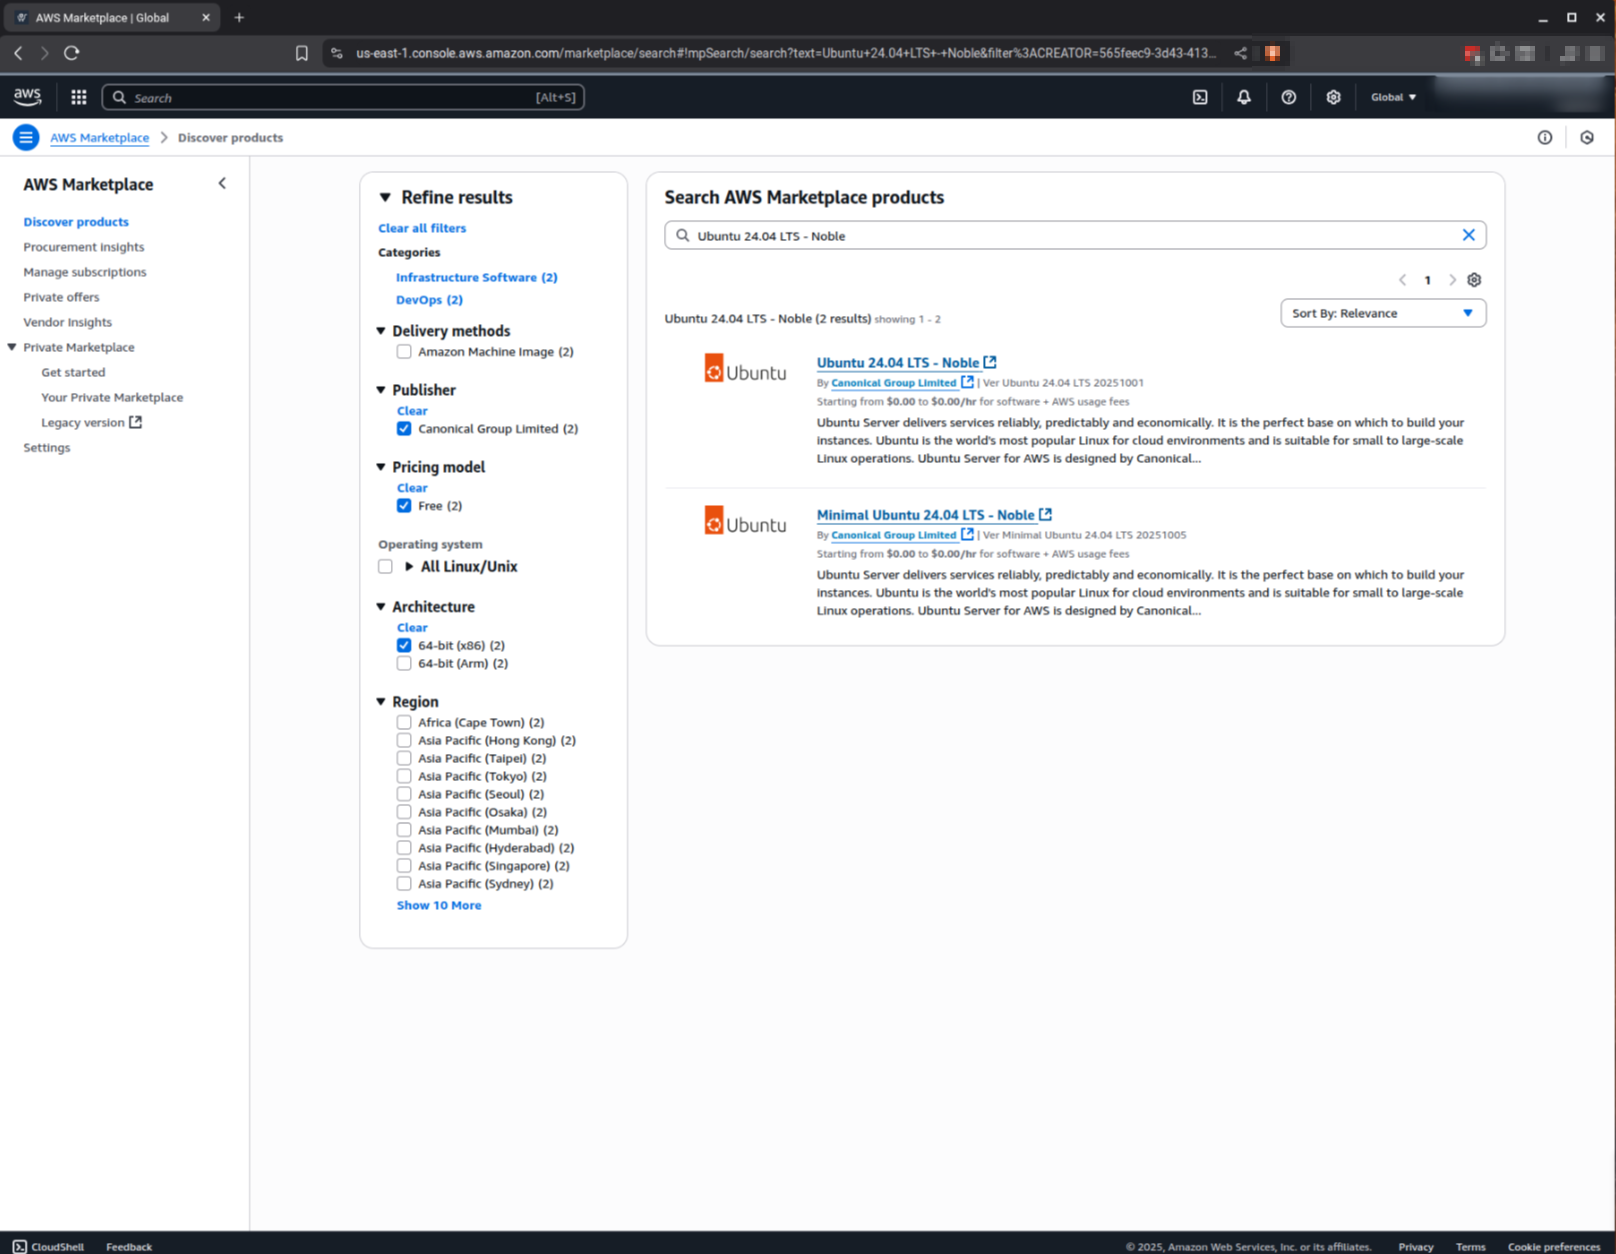
3. Select the image you want to use, scroll down to the end of the page and click on Subscribe

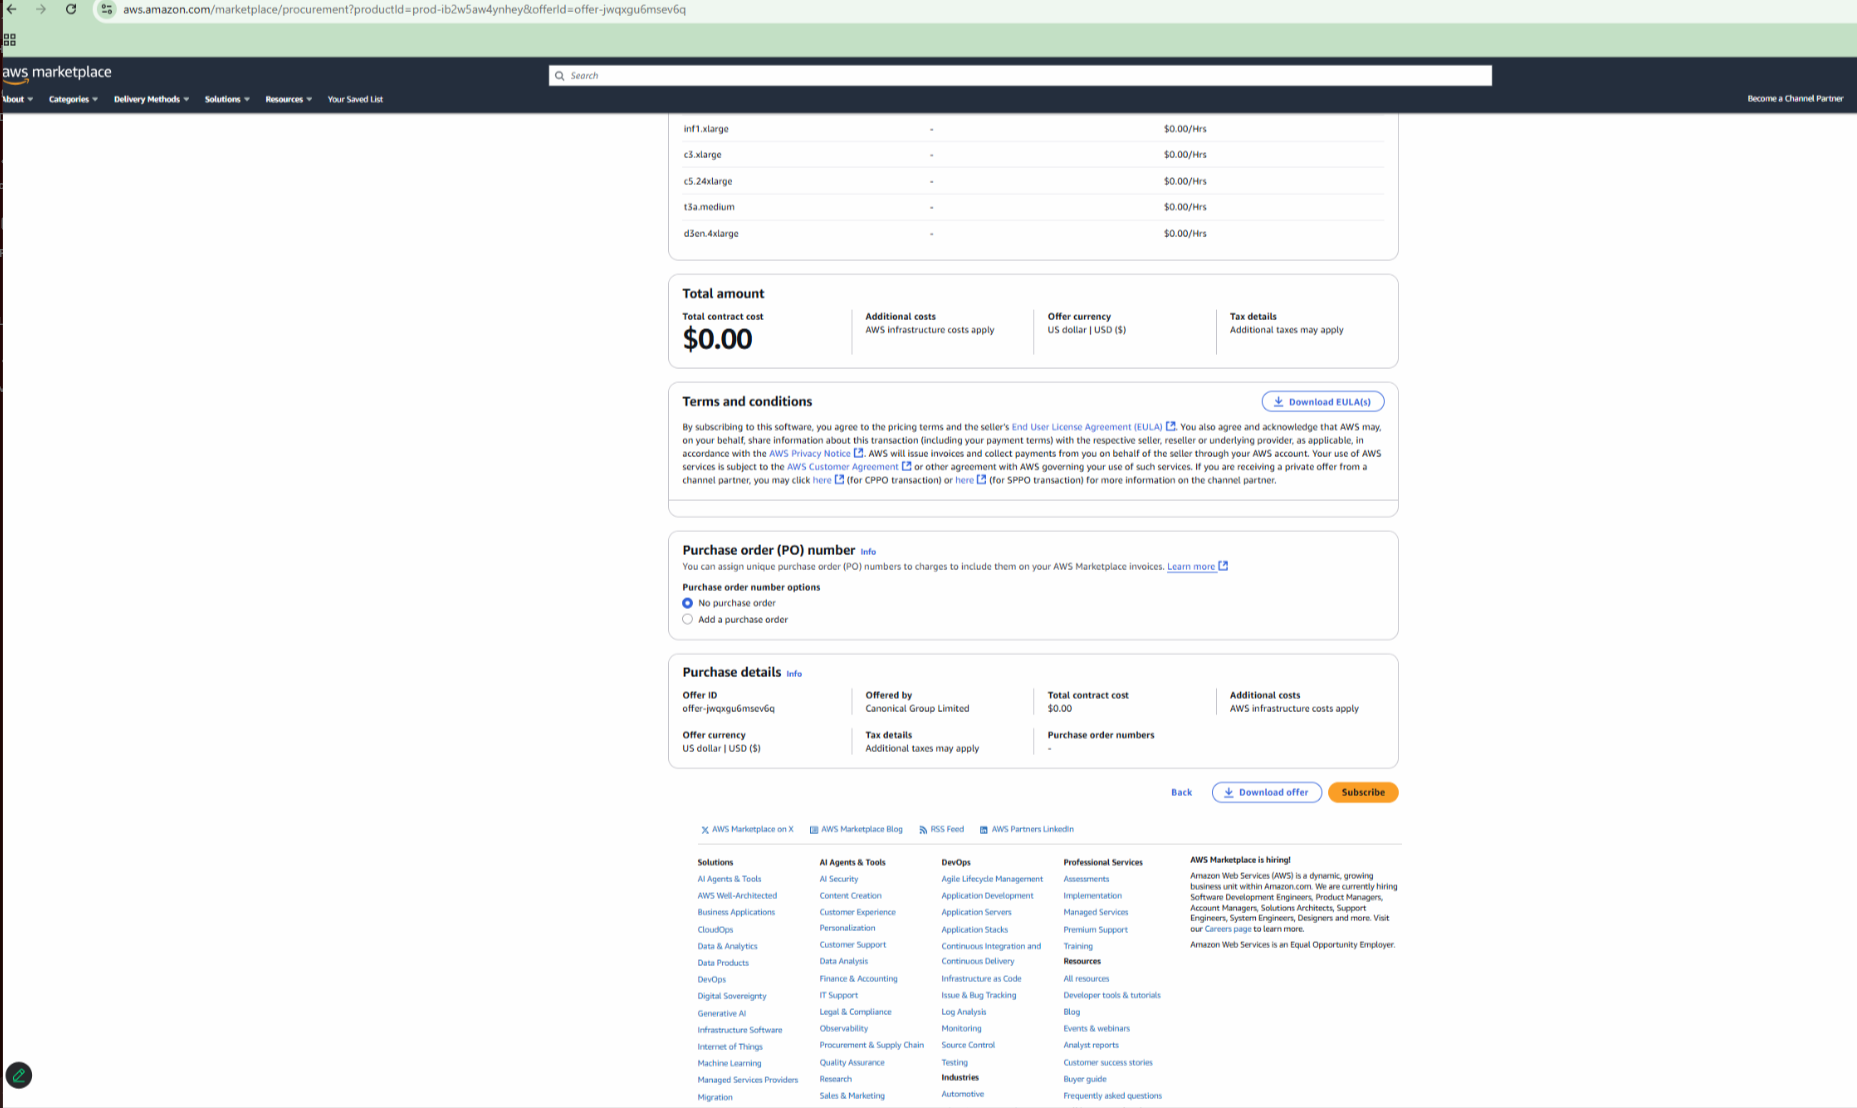
That's it, you are set to use the image from AWS Marketplace
Windows
Considerations
- OEM versions of Microsoft Windows Operating Systems may contain third-party software which can potentially cause issues and undesired side effects when used in a hypervisor. Frame strongly recommends the use of a Microsoft-provided OS image (instead of an OEM version from a third party) or an OS image provided by the public cloud provide, if you are using a public cloud.
- Before registering the template image VM to Frame, Windows sysprep will need to be run to generalize the template image VM. The sysprep step will remove your template image VM from your domain. You will need to configure your Frame account for Windows Domain Join if you wish to have domain-joined workload VMs for your users.
- During image generalization with sysprep, there are certain conditions where Microsoft Store apps (AppX packages) could cause sysprep to fail. Please reference this Microsoft article for additional details.
- If you require HTTPS traffic from your workload VMs to pass through an authenticated (or unauthenticated) proxy server to reach the Internet, you will need to:
- Configure the Frame Guest Agent proxy settings. Frame Guest Agent supports authenticated (username/password) and unauthenticated proxy servers, provided they can handle HTTPS and Secure WebSocket traffic. Refer to our FGA Proxy Server documentation page for further details.
- Configure your Windows proxy server settings for your end user applications.
- Create a local Windows user account with local administrator privileges, if one does not exist in your template image. Do not use the reserved Frame local Windows users (added to local Windows Administrators group) and .
- Enable Microsoft RDP in your template image before installing the Frame Guest Agent to access the template image VM. Verify you can access your template image using RDP with your local Windows administrator user.
- Verify that your template image does not have a Windows recovery partition using Windows Disk Management. A recovery partition within the template image will prevent Frame from successfully increasing the disk size of the Sandbox, Utility server(s), and persistent desktop VMs. Remove the recovery partition using Windows .
Note: Image Optimization
- Third-party image optimizers can be used to optimize the efficient operation of the Windows image during Sandbox configuration.
- Some examples of third-party image optimizers that can be used with Frame are Citrix Optimizer, Best Practice Analyzer, VMware Windows OS Optimization Tool, or the community-supported WOSTT.
- These third-party tools are used with no warranty or support.
Dizzion strongly recommends you create a backup of your Sandbox before running any of these optimizer tools.
Minimum Instance Type Configuration
End user experience is highly dependent on the underlying VM resources in combination with the demands of the operating system and user applications. For Windows OS, we recommend a minimum instance type configuration of:
- 2 vCPU
- 4 GB memory
- 45 GB disk
You may need to increase the vCPU count, memory, and disk space based on your use case(s), operating system, applications, and user experience expectations.
Supported Windows versions
Frame supports the following Windows operating system versions:
- Windows 10, 1909 and higher
- Windows 11, 21H2 and higher
- Windows Server 2019, 1809 and higher
- Windows Server 2022, Windows Server 2025
Prepare your Windows Template Image
Important: GPU Drivers
If you plan to use AMD or NVIDIA GPU-backed instance types, only use the Frame-verified drivers listed below. Frame cannot offer support for any other driver version or combinations. The following drivers have been validated:
Driver Version Details
AHV
- NVIDIA driver version:
527.41
AWS
- NVIDIA driver version:
513.46 - AMD driver version:
20.10.25.04
{" "}
Azure
- NVIDIA driver version:{" "}
512.78 - AMD driver version:{" "}
21Q2-1
GCP
- NVIDIA driver version:
513.46
Register Template Image
Once you have successfully created and tagged your template image(s) in your infrastructure, you will register your template image.
Frame Sysprep Helper Tool
The Frame Sysprep Helper Tool is designed to simplify the Microsoft Sysprep process by parsing errors reported by sysprep and immediately repairing them when possible. Sysprep is executed:
- When a Windows template image is prepared.
- Each time an administrator publishes a Sandbox in a domain-joined Frame account.
Frame Sysprep Helper can be used in two ways:
-
As a desktop application for Sysprep testing.
-
As a console app, used in scenarios where administrators want to automate sysprep error-fixing during account publishing.
If you start the Sysprep Helper Tool as a desktop application on your Sandbox and Sysprep succeeds, you must reboot your instance.
Using Sysprep Helper Tool
The Sysprep Helper Tool is included as part of Frame Tools. The executable is located in . The tool can be used instead of Microsoft-provided Sysprep.exe when attempting to automatically resolve issues during Sysprep execution.
To use the Frame Sysprep Helper Tool when publishing a DJI-enabled Frame account, add default Sysprep type key in the Windows system registry.
Key AdvancedSysprep
- for standard Sysprep
- for Sysprep using Sysprep Helper Tool
You can also enable/disable this setting by using the checkbox in the Sysprep Helper UI.
If the registry entry is missing or the value is , generalization during publish will run the standard Sysprep process.
Publishing Process
Sysprep is executed during a publish of persistent desktops (in non-domain-joined and domain-joined Frame accounts) and non-persistent domain-joined Frame accounts. The following PowerShell script is executed:
Sysprep script will perform various cleanup tasks and then execute a final generalization task: Sysprep.exe with appropriate arguments.
The workflow:
- Retrieves OS information
- Checks activation status
- Checks antivirus status
- Removes existing user profiles
Logging
Frame Sysprep Helper logs can be found in: C:\ProgramData\Nutanix\Frame\Logs\Sysprep-helper.txt
Frame Agent Setup Tool (FAST)
The Frame Agent Setup Tool (FAST) is used to install Frame Agent, Frame drivers, and Frame tools on your template image. FAST is also used to keep the Frame components on your template image(s), Sandboxes, Utility server(s), and persistent desktops up-to-date, regardless of infrastructure or instance types being used.
When using FAST to prepare a template image for use in Frame, RDP will continue to function (unlike the Frame Guest Agent Installer). Once the template image is used by Frame to provision workload VMs in a Frame account, administrators will need to enable the RDP Debug Mode feature to access Frame-managed workloads via RDP.
Before using FAST to install, update, or remove Frame components, ensure that there is a valid backup of the VM. 2. FAST is not a package repair tool. If you encounter issues with broken MSI installations, you will need to repair MSI installations manually or use 3rd party software tools.
Requirements
In order for FAST to download the required Frame components for installation or update, the VM running FAST must be able to reach the following Internet FQDNs via tcp/443 (HTTPS), as discussed in Networking Requirements:
- download.visualstudio.microsoft.com
- downloads.console.nutanix.com
Installation
FAST is included in Frame-provided Windows OS images in public cloud. If you are using a Frame-provided image, the FAST executable will be in the `C:\ProgramData\Nutanix\Frame\Tools` folder.
- Download the Frame Agent Setup Tool from the Downloads page into your template image or existing Sandbox, Utility Server, and/or persistent desktops.
- Run the executable to launch the Frame Agent Setup Tool.
Usage
The FAST utility has two different views: Bundle View and Updater View. When you run FAST, it will search for the Frame Guest Agent and Server components. If Frame Guest Agent cannot be found (e.g. clean Windows OS image), FAST will start in Bundle View. If Frame Guest Agent is already installed, FAST will start in Updater View.
Bundle View
When FAST is started and determines the Frame Guest Agent is not present on the VM (such as when you are preparing a template image to be used in Frame):
- A dialog prompt will open. Accept the terms and conditions and click the “Next” button to continue.
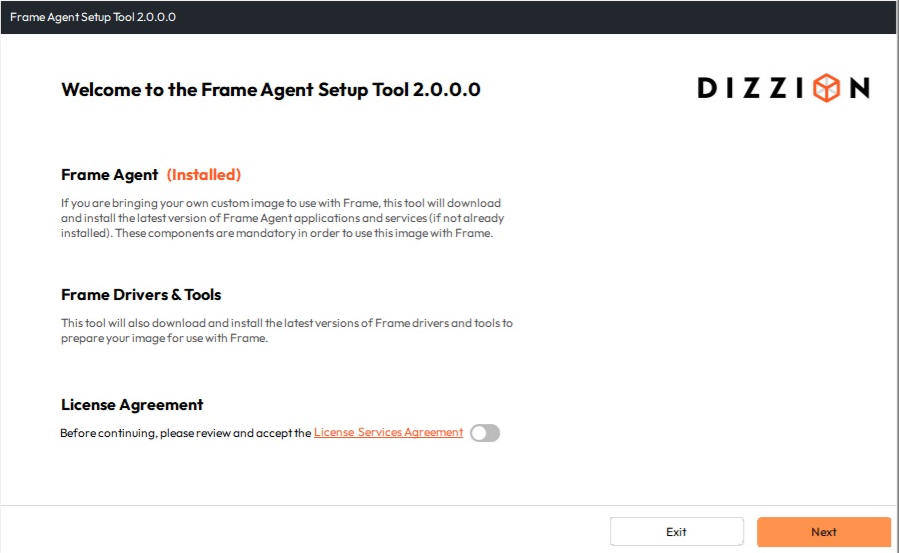
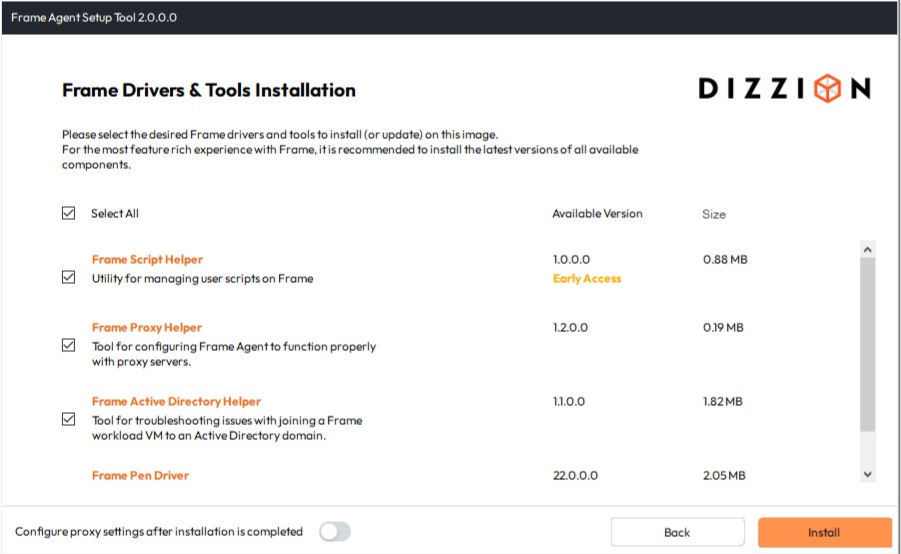
2. Click on **Select All** for all of the packages to be installed or install specific packages by checking the associated boxes. Frame Guest Agent and Frame Server will be installed automatically. Click the **Install** button to continue.
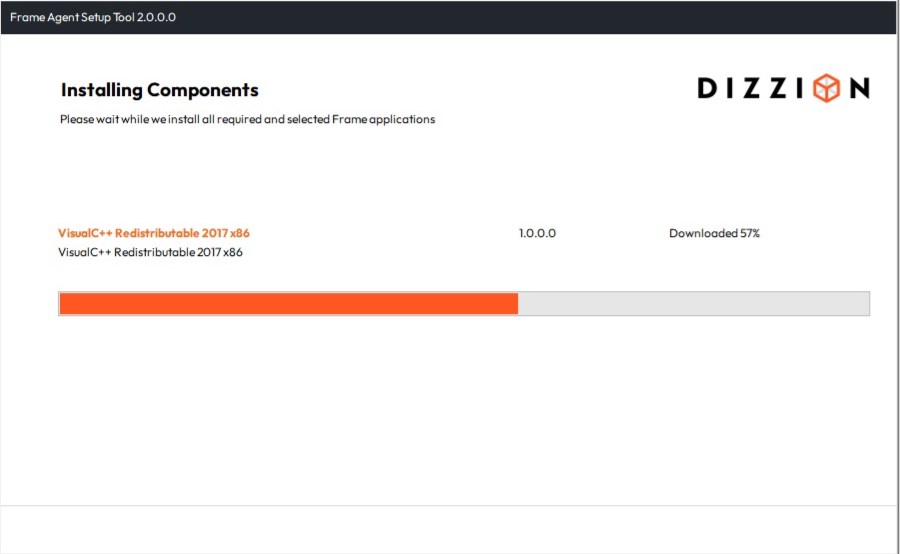
Each package will be downloaded and then installed, one by one. See the example below:
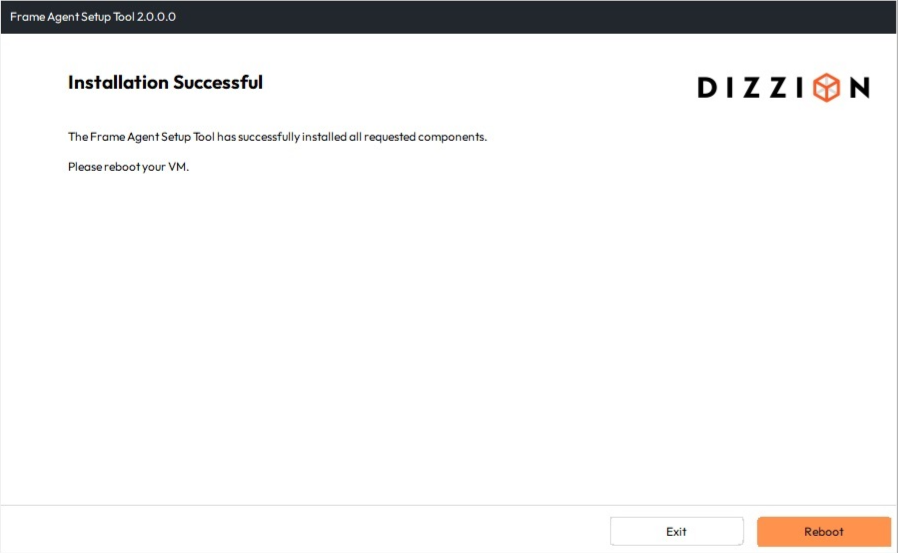
1. When all components are installed, you may either **Exit** the Frame Agent Setup Tool to perform additional tasks in the VM or **Reboot** the VM. The VM must be rebooted for the Frame components to take effect.
Updater View
When FAST is started and determines the Frame Guest Agent is present on the VM (Sandbox, Utility server, and/or Persistent Desktops), FAST will display the Updater view.
Enable or disable the Show Early Access Components if you wish to see or not see the components that have an Early Access version.
Single Component Installation
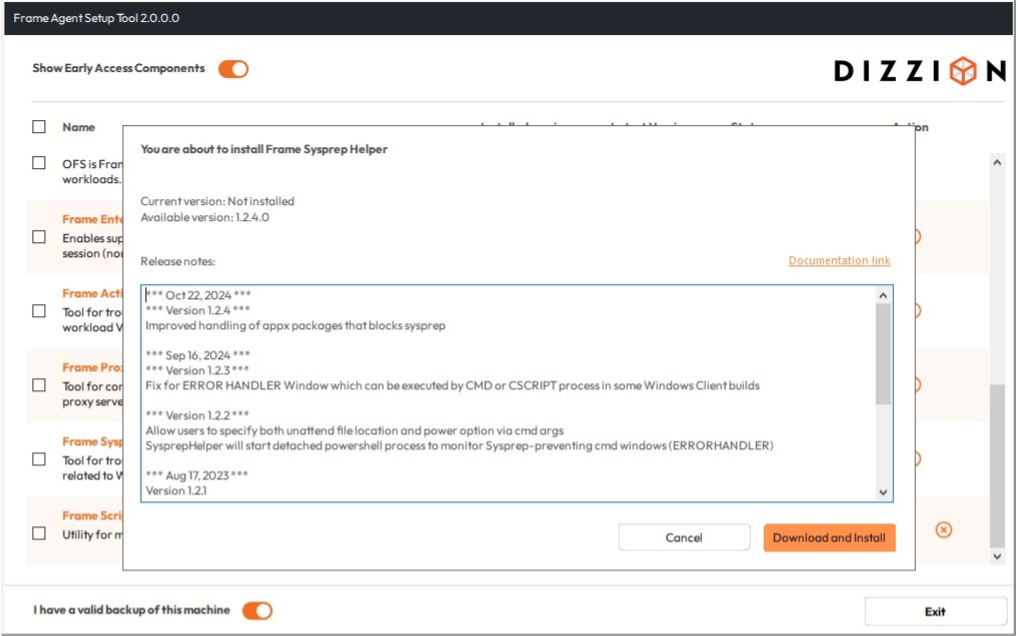
To install/update an individual component, click either on the appropriate action on the right side (Download or Download and Install). You can double click the component row to view the component version number (current and latest), release notes, and link to documentation. Click on Download and Install to begin the download and installation process or Cancel to return to the component list.
Multi-Component Installation
- Select the desired component(s) for update or installation by checking the associated checkboxes.
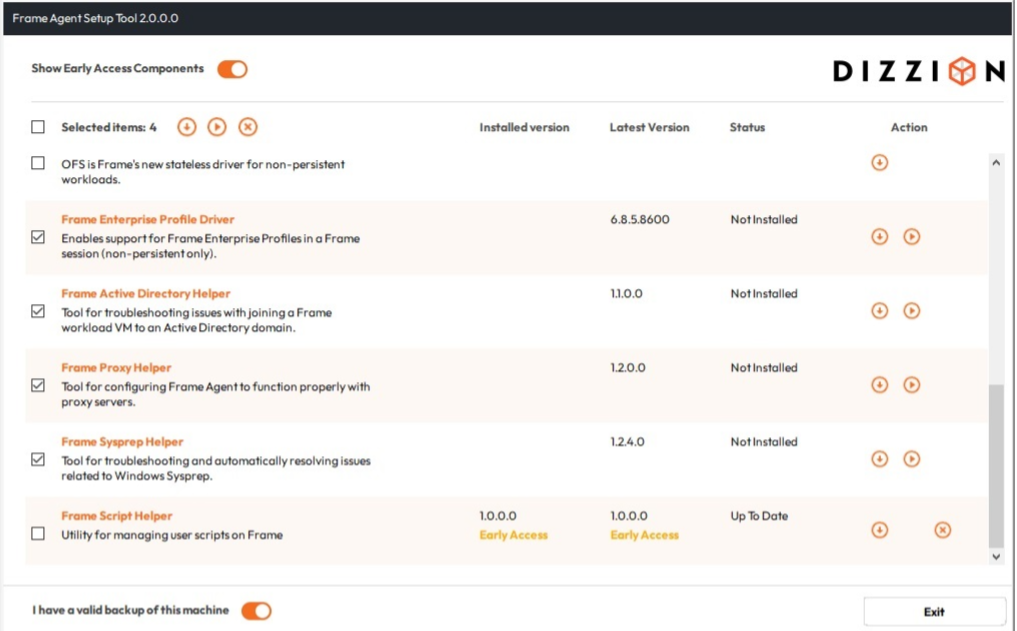
2. Click the toggle located at the bottom of the window to acknowledge the machine has been backed up. 3. Click the "Download" or "Download and Install" icon at the upper left corner of the FAST application window. FAST will not update the Frame Agent and Frame Server components, if they are up to date. 4. Accept the prompt by clicking **OK**. FAST will download and install the selected components.
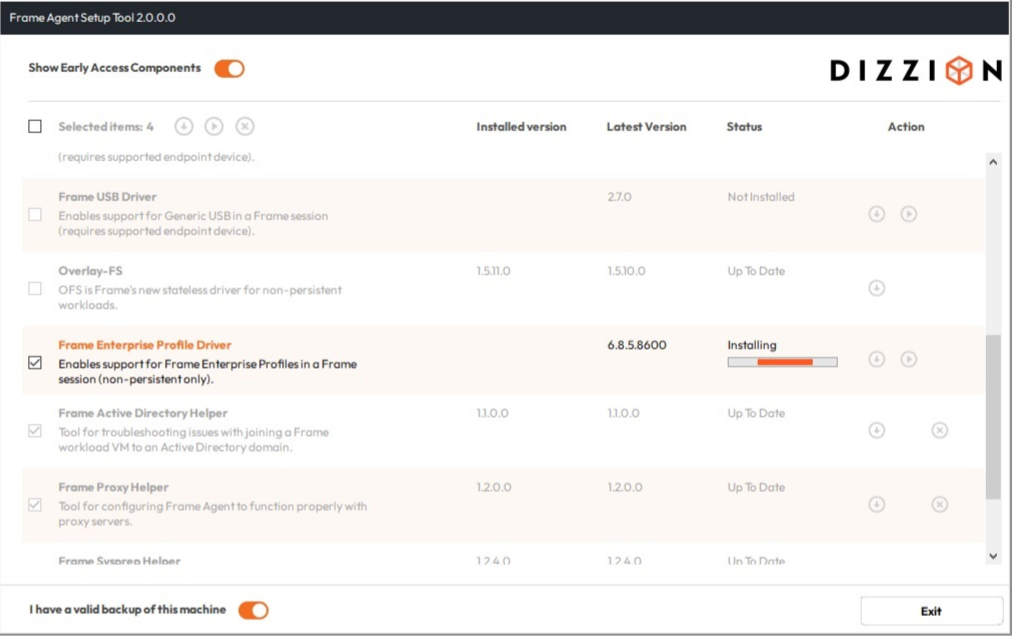
5. When all components are updated, you can close the Frame Agent Setup Tool.
Package Statuses
In the Updater View, FAST will display the status of each package. Definitions for each of the package status are described in the following table.
| Status | Description |
|---|---|
| Up to Date | A package found on the machine is already up-to-date with the latest version. |
| Update Required | An installed package requires an update. Failure to update could result in system instability or compatibility conflicts. |
| Update Available | An installed package has an optional update. While not required, this update could improve performance or add new features. |
| Not Installed | An optional package is not installed. |
Command-Line Usage
You may want to automate Frame Agent Setup Tool to update all components of your Frame virtual machines programmatically. In that case, Frame Agent Setup Tool can be executed with various arguments to orchestrate installation and updates. For example, if you execute on the Windows command line:
FrameAgentSetupTool.exe getpackagesFAST will list all missing or obsolete packages.
Arguments
| Name | Description |
|---|---|
| `/?` | Display help |
| `getpackages` | Display a list of all missing/obsolete packages |
| `getpackages json` | Display a list of all missing/obsolete packages in json format |
| `install` | Install all missing/obsolete packages |
| `install only ...` | Install only provided packages |
| `install except ...` | Install all missing/obsolete packages except provided packages |
| `install frameimage` | Install all system and Frame components |
| `install only frameimage` | Install only provided applications and all Frame system components |
| `install except frameimage` | Install all available application except listed ones after installation of Frame system components |
Supported Applications & Drivers
In addition to the Frame Guest Agent and Frame Server, FAST installs and updates the following drivers and tools.
| Name | Description |
|---|---|
| Frame Audio Driver | Enables Frame to properly interface with the audio card on the workload VM for use in a Frame session. |
| Frame Video Driver | Enables Frame to properly interface with the video card on the workload VM for use in a Frame session. |
| Liquidware ProfileDisk | Enables support for Frame Enterprise Profiles in a Frame session (non-persistent only). |
| Frame Pen Driver | Enables support for digital pen tablets in a Frame session (requires supported endpoint device). |
| Frame Printer Driver | Enables support for Frame Printer in a Frame session. |
| Frame Scanner Driver | Enables support for WIA scanners in a Frame session (requires supported endpoint device). |
| Frame SmartCard Driver | Enables support for CAC/SmartCards in a Frame session (requires supported endpoint device). |
| Frame USB Driver | Enables support for Generic USB in a Frame session (requires supported endpoint device). |
| Frame AD Helper | Tool for troubleshooting issues with joining a Frame workload VM to an Active Directory domain. |
| Frame Proxy Helper | Tool for configuring Frame Agent to function properly with proxy servers. |
| Frame Sysprep Helper | Tool for troubleshooting and automatically resolving issues related to Windows Sysprep. |
FGA Proxy Helper Tool
The FGA must be able to communicate with the Frame control plane in order for Frame Platform to be able to orchestrate and broker users into these workload VMs. If your workload VMs must connect to an outbound proxy server to reach the Internet, you will need to configure (or update) the FGA Proxy Settings once the Frame Guest Agent is installed (or if your outbound proxy server information changes). The proxy settings apply only to the Frame Guest Agent. You will need to configure the Windows proxy server settings for Windows OS and your applications separately.
The Proxy Helper tool FrameProxyHelper.exe is located in the Frame Tools directory C:\ProgramData\Nutanix\Frame\Tools.
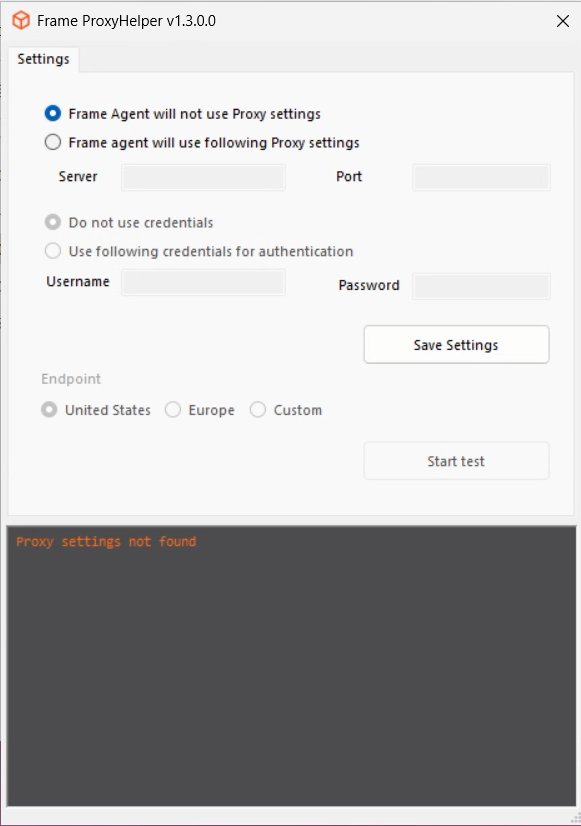
Server: The IP address of the outbound proxy server.
Port: The desired port on the outbound proxy server.
If your proxy server requires basic authentication, select "Use following credentials for authentication" and enter the "Username" and "Password." You can then test the settings by clicking "Start test" and save them by clicking "Save Settings".
Manual installation and repair of the Frame Agent and its components
This guide outlines the process for installing and repairing the Frame Agent and its associated system components. It is beneficial for repairing or reinstalling the Agent on Persistent Desktops, as well as upgrading Frame components on the Sandbox.
Prerequisites:
Dizzion strongly advises administrators to back up before proceeding.
Solution:
- Please make sure you create a backup before starting the installation or repair process.
- Start a session or connect via Remote Desktop Protocol (RDP) if the Frame session is unavailable.
- Open Terminal as an administrator.
- Navigate to the Frame Tools directory by running:
cd C:\ProgramData\Nutanix\Frame\Tools - Execute the installation script:
.\FrameAgentSetupTool.exe install frameimage
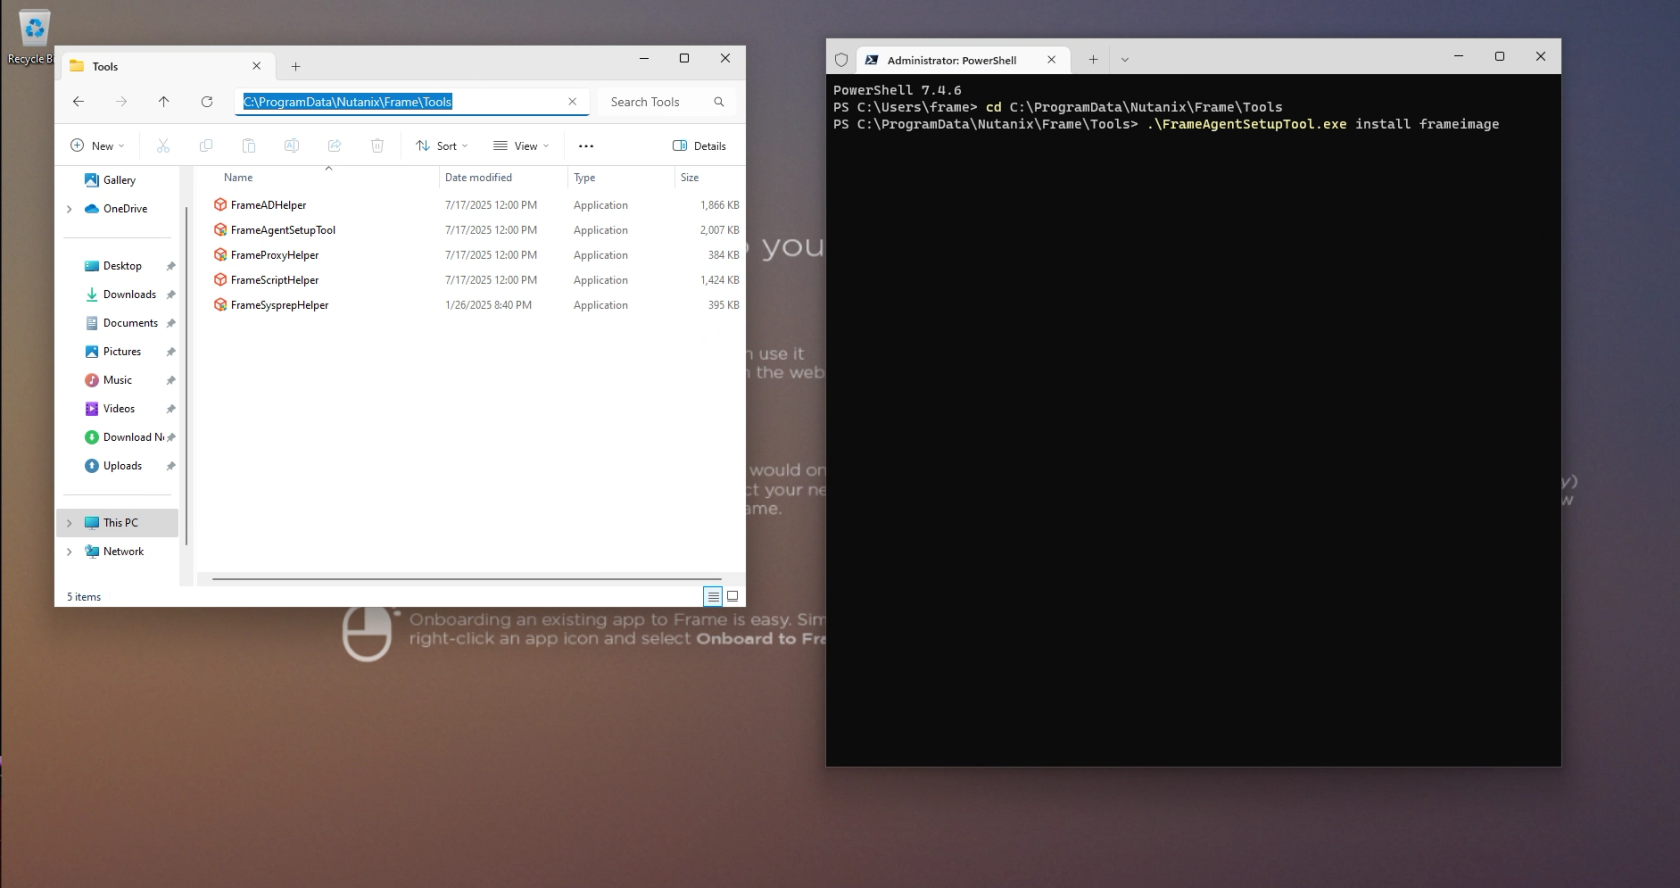
This process installs all required system dependencies, including Frame drivers and updated components.
- Reboot and Validate
After installation, reboot the system and verify the installation.
Handy to know; You can re-install and re-register all FAST components by holding the left Shift Key, and then running FAST
Troubleshooting
Logs
The Frame Agent Setup Tool generates a log file for troubleshooting which is located in: C:\ProgramData\Nutanix\Frame\Logs
Take a look at these and if you need further assistance, open a support ticket.
BYO Images on Amazon Web Services
This document will provide you with instructions on how to prepare and register your own template image in AWS for use with Frame. Before moving forward with the preparation procedure, please ensure you have read through the general requirements and considerations on the Windows BYO image page. We will outline additional details specific to AWS public cloud below.
Considerations
The base Frame Sandbox images in AWS are based on either the “Microsoft Windows Server 2019 Base” or “Microsoft Windows Server 2022 Base” operating system from the AWS Marketplace. The Sandboxes created from these Frame-provided images have the Frame Agent pre-installed and are a great starting point for admins to create the desired user experience. This is the default deployment workflow for Frame administrators.
In some cases, the enterprise IT department may already have a disk image that has been validated by the organization. It may be easier to deploy Frame, if this image is the base image for their Frame accounts. If you chose to bring your own image, you will need to upload and register that image as an AMI in your AWS subscription prior to installing the Frame Agent.
In rare instances, customers may want to build the BYO image themselves from the base AWS Marketplace images. This is also supported if you start with the “Microsoft Windows Server 2019 Base” or “Microsoft Windows Server 2022 Base” images in the AWS Marketplace. Community and third-party AWS Marketplace AMIs have not been tested.
Preparation
- First, starting with a Windows Server 2019 or Windows Server 2022 AMI, create a VM in the AWS account you are going to use for Frame. When configuring your image, you must use a Windows OS user account with local Windows administrator privileges.

- Use RDP to connect into your VM. Follow the Installation and Usage instructions to download the Frame Agent Setup Tool (FAST) and install the Frame Agent, drivers, and tools in your template image VM.
- Once FAST has successfully installed the Frame Agent, drivers, and tools, reboot the VM to complete the installation of the Frame Agent. Use RDP to connect back into your VM.
For additional installation scenarios (e.g., proxy server configuration, command line arguments, review our [Frame Agent Setup Tool](/books/platform-administrators-guide/page/windows/frame-agent-setup-tool) documentation.
-
(Optional): If a proxy server is required for all outbound traffic to the Internet from your private network, you will need to configure Frame Guest Agent to use your proxy server. Refer to our FGA Proxy Helper Tool documentation page for further details.
-
(Optional): If you plan to use AMD or NVIDIA GPU-based instance types in AWS, make sure you install the appropriate AMD or NVIDIA GPU drivers in your template image VM.
Important Frame-verified GPU Drivers
The following driver versions have been validated for use with Frame workload VMs. Frame cannot offer support for any other driver version or combinations.
For AWS, use:
- NVIDIA driver version: 552.08
- AMD driver version: 23.10.02.02
-
(Optional): Install your applications and finish image customization.
-
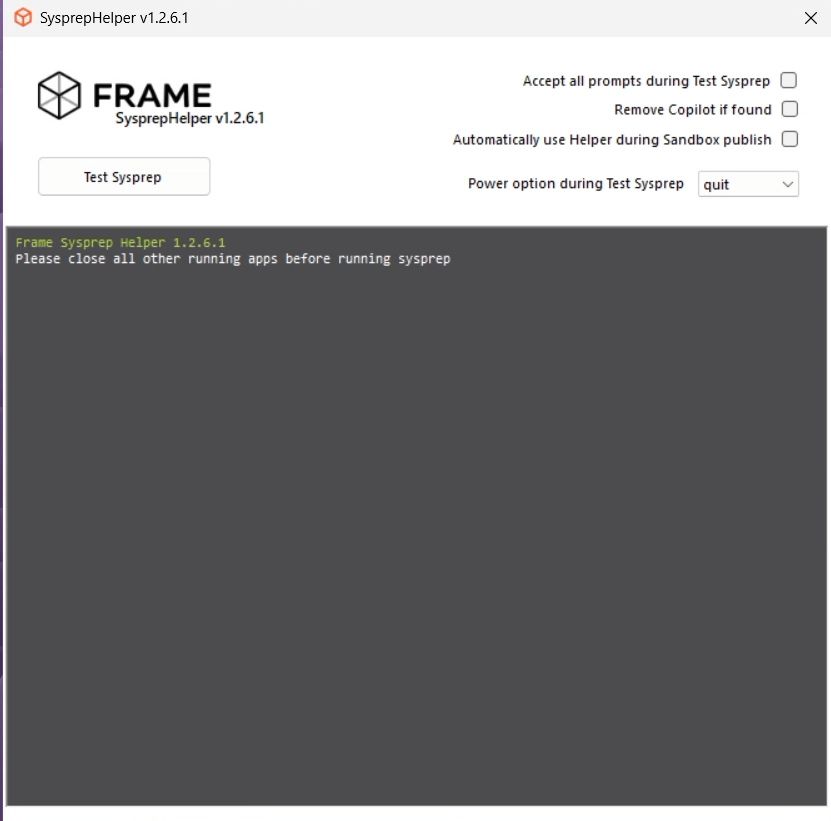
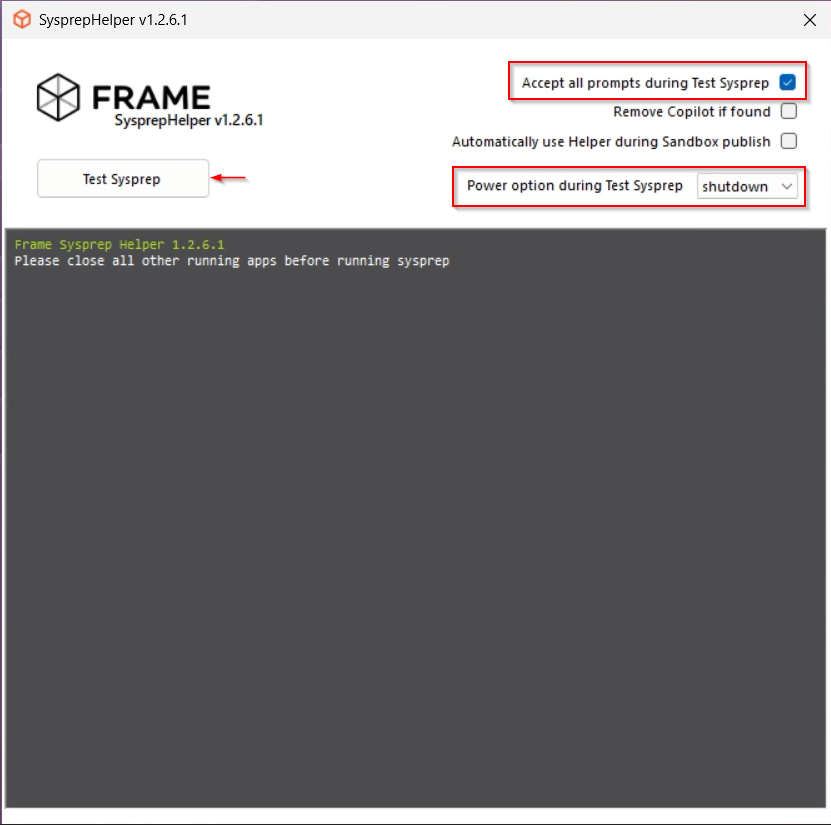
Once you have configured the image as desired, launch the Sysprep Helper tool.
- Select Accept all prompts during Sysprep
- change power option from quiet to shutdown
- Click on "Test Sysprep" to start the process
After the sysprep process finished successfully the vm will be powered of automatically.

-
If the VM does not shutdown, then there was a problem with sysprep. Review the sysprep logs in to determine the source of the error.

- When sysprep is successful, the VM will automatically power off. Verify that the VM has stopped in AWS Console.
Tag AMI
-
Create an image from your AWS instance.
-
Once the image is created, navigate to the list of images/AMIs in the AWS console. Click on the AMI you created in the previous step and assign a tag with the Key name and value to the AMI.
-
Add the second tag with the Key name and the value to the AMI.

Voilà! You have successfully created a template image to be registered in Frame for use to create your Frame workloads. You may prepare additional template images (e.g., different Windows OS versions, template images with different sets of applications) by simply repeating the procedure with a new image.
Registration
Now it's time to register your template image in Frame. See how to do this in our Cloud Accounts > Template Images guide.
BYO Images on Microsoft Azure
This document will provide you with instructions on how to prepare and register your own template image in Azure for use with Frame. Before moving forward with the preparation procedure, please ensure you have read through the general requirements and considerations on the Windows BYO image page. We will outline additional details specific to Azure public cloud below.
Considerations
- When creating a new template image for Azure, we recommend you start with the Microsoft-provided Windows 10, Windows 11, Windows Server 2019, or Windows Server 2022 images. Community and third-party Azure Marketplace VMs have not been tested.
- We recommend using 1909, 20H1, 20H2, or 21H1 editions of Windows 10 Pro/Enterprise. Windows 10 Enterprise multi-session images are not supported.
- Azure Generation 1 and 2 VMs are supported. If you plan to use Windows 11 with vTPM, you must use Azure Generation 2 VMs.
- Limit Azure image/snapshot name to 50 characters to avoid deployment issues in Frame.
- You may bring your own image, but the procedure below assumes you have uploaded the image to Azure and verified that a Windows VM instance built using your image operates correctly in Azure.
Image Preparation
- First, starting with a Windows 10, Windows 11, Windows Server 2019, or Windows Server 2022 image, create a VM in the Azure account you are going to use for Frame. When configuring your image, you must use a Windows OS user account with local Windows administrator privileges. For Windows 11 with vTPM, deploy a trusted launch VM as discussed in the Microsoft documentation page Deploy a trusted launch VM before proceeding to Step 2.

-
Use RDP to connect into your VM. Follow the Installation and Usage instructions to download the Frame Agent Setup Tool (FAST) and install the Frame Agent, drivers, and tools in your template image VM.
-
Once FAST has successfully installed the Frame Agent, drivers, and tools, reboot the VM to complete the installation of the Frame Agent. Use RDP to connect back into your VM.
For additional installation scenarios (e.g., proxy server configuration, command line arguments, review our Frame Agent Setup Tool documentation.
-
(Optional): If a proxy server is required for all outbound traffic to the Internet from your private network, you will need to configure Frame Guest Agent to use your proxy server. Refer to our FGA Proxy Helper Tool documentation page for further details.
-
(Optional): If you plan to use AMD or NVIDIA GPU-based instance types in Azure, make sure you install the appropriate AMD or NVIDIA GPU drivers in your template image VM.
Important Frame-verified GPU Drivers
The following driver versions have been validated for use with Frame workload VMs. Frame cannot offer support for any other driver version or combinations.
For AWS, use:
- NVIDIA driver version: 552.08
- AMD driver version: 23.10.02.02
-
(Optional): Install your applications and finish image customization.
-
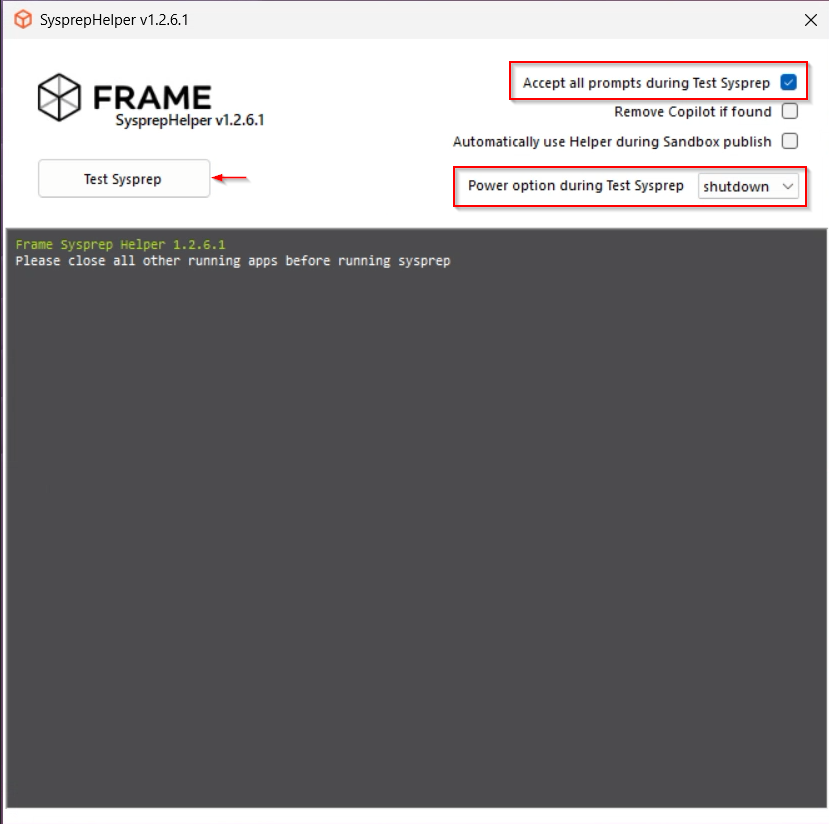
Once you have configured the image as desired, launch the Sysprep Helper tool.
- Select Accept all prompts during Sysprep
- change power option from quiet to shutdown
- Click on "Test Sysprep" to start the process
After the sysprep process finished successfully the vm will be powered of automatically.
-

-
If the VM does not shutdown, then there was a problem with sysprep. Review the sysprep logs in to determine the source of the error.
- When sysprep is successful, the VM will automatically power off. Verify that the VM has stopped in Azure Console.

Tag Snapshot
To use the template image to create VMs (e.g., Sandbox VM), you need to snapshot the VM disk you prepared and label the snapshot for Frame. Use of a snapshot eliminates the need for Azure to run sysprep again when the new VM is created from the template image.

- Take a snapshot of the OS disk.

- Make sure you choose "Standard_HDD" for storage type, leave the default encryption type, and select "Public endpoint" for connectivity method.

-
Once the image is created, navigate to the list of snapshots in the Azure Portal. Click on the snapshot you created in the previous step and assign a tag with the name and the value to the snapshot.
-
Assign a second tag with the name and the value to the snapshot.

Voilà! You have successfully created a template image to be registered in Frame for use to create your Frame workloads. You may prepare additional template images (e.g., different Windows OS versions, template images with different sets of applications) by simply repeating the procedure with a new image.
Registration
Now it's time to register your template image in Frame. See how to do this in our Cloud Accounts > Template Images guide.
BYO Images on Google Cloud Platform
This document will provide you with instructions on how to prepare and register your own template image in GCP for use with Frame. Before moving forward with the preparation procedure, please ensure you have read through the general requirements and considerations on the Windows BYO image page. We will outline additional details specific to GCP public cloud below.
Considerations
- When creating a new template image for GCP, we recommend you start with “Microsoft Windows Server 2019” or “Microsoft Windows Server 2022” x64 Datacenter editions with Desktop Experience from the Google Marketplace. Community and third-party Google Marketplace images have not tested.
- You may bring your own image, but the procedure below assumes you have uploaded the image to GCP and verified that a Windows VM instance built using your image operates correctly.
Preparation
-
First, starting with a Windows Server 2019 or Windows Server 2022 image, create a VM in the GCP project you are going to use for Frame. When configuring your image, you must use a Windows OS user account with local Windows administrator privileges.
-
Use RDP to connect into your VM. Follow the Installation and Usage instructions to download the Frame Agent Setup Tool (FAST) and install the Frame Agent, drivers, and tools in your template image VM.
- Once FAST has successfully installed the Frame Agent, drivers, and tools, reboot the VM to complete the installation of the Frame Agent. Use RDP to connect back into your VM.
For additional installation scenarios (e.g., proxy server configuration, command line arguments, review our Frame Agent Setup Tool documentation.
-
(Optional): If a proxy server is required for all outbound traffic to the Internet from your private network, you will need to configure Frame Guest Agent to use your proxy server. Refer to our FGA Proxy Helper Tool documentation page for further details.
-
(Optional): If you plan to use NVIDIA GPU-based instance types in GCP, make sure you install the appropriate NVIDIA GPU drivers in your template image VM.
Important Frame-verified GPU Drivers
The following driver versions have been validated for use with Frame workload VMs. Frame cannot offer support for any other driver version or combinations.
For AWS, use:
- NVIDIA driver version: 552.08
- AMD driver version: 23.10.02.02
-
(Optional): Install your applications and finish image customization.
-
Once you have configured the image as desired, launch the Sysprep Helper tool.
- Select Accept all prompts during Sysprep
- change power option from quiet to shutdown
- Click on "Test Sysprep" to start the process
After the sysprep process finished successfully the vm will be powered of automatically.
-
-
If the VM does not shutdown, then there was a problem with sysprep. Review the sysprep logs in to determine the source of the error.
- When sysprep is successful, the VM will automatically power off. Verify that the VM has stopped in GCP Console.

Create Image from VM
- Click on the name of the stopped VM to get to the properties of the VM.

- Scroll down and locate "Boot disk", click on the VM Name link under the “Name” column.

- On the disk’s properties page, click "Create Image" and then complete the Create an Image form:

- Name: Specify the name of the image.
- Source: Specify the source to be Disk.
- Source disk: Confirm the source disk.
- Location: Select the region or regions you want this image available in.
- Description: Specify a description for this image.
- Labels: Add the labels required by Frame to recognize this image as a Frame template image.
- Key with value
- Key with value
- Click Create to create a GCP image from your VM disk with the required Frame labels.
Voilà! You have successfully created a template image to be registered in Frame for use to create your Frame workloads. You may prepare additional template images (e.g., different Windows OS versions, template images with different sets of applications) by simply repeating the procedure with a new image.
Label Image
If you already have a GCP Windows OS image that was already prepared and sysprepped, you can simply label the image using the following procedure in Google Console and use it in Frame.

- Click on "+ ADD LABEL" and fill out the required fields and assign a label of Key and value , as shown below.

-
Add a label of Key and value .
-
Click "Save" when you have completed the form.
Registration
Now it's time to register your template image in Frame. See how to do this in our Cloud Accounts > Template Images guide.
BYO Images on IBM Cloud
This document will provide you with instructions on how to prepare and register your own template image in IBM Cloud for use with Frame. Before moving forward with the preparation procedure, please ensure you have read through the general requirements and considerations on the Windows BYO image page. We will outline additional details specific to IBM Cloud public cloud below.
Considerations
Customers planning to use their own OS image (Windows 10, Windows 11, Windows Server 2019, or Windows Server 2022) can bring their own (BYO) template image by starting the process in one of two ways:
-
An IBM Cloud-provided OS image (e.g., Windows Server 2019 or Windows Server 2022). This approach is the simplest as the IBM Cloud-provided OS image already has the required IBM Cloud drivers.
-
A Microsoft-provided Windows 10, Windows 11, Windows Server 2019, or Windows Server 2022 image. This approach requires installation of IBM Cloud-required drivers in the image before uploading the image to IBM Cloud. Additionally, customers will need to verify that the image will operate correctly in IBM Cloud.
Administrators must also be aware of the following considerations:
- Windows 10 Enterprise multi-session images are not supported.
- IBM Cloud Generation 2 and 3 VMs are supported. However, Windows 10/11 requires Generation 3 VMs due to the requirement for UEFI.
IBM Cloud-provided OS Images
This procedure describes how to prepare your template OS image based on an IBM Cloud-provided OS image. When configuring your image, you must use a Windows OS user account with local Windows administrator privileges.
-
Log in to https://cloud.ibm.com/ and under VPC Infrastructure, open Virtual server instances.
-
Click on Create + option to create a new virtual machine.

-
Select desired location, specify a name for the virtual server, select desired resource group, and for the image family, select "ibm-windows-server-2019-full-standard-amd64-18" or "ibm-windows-server-2022-full-standard-amd64-12". Choose the profile. In the example below, the Balanced | bx3d-2x10 profile was selected.

-
Add one or more SSH keys to your instance. If you already have SSH key, you can use your existing key or you can create new key. In case you are creating a new SSH key, please note that the key is generated in .prv format and will be saved to your local machine. You will need that key to authenticate to the virtual server via RDP.

-
Setup Networking and Enable Metadata. You can create a new VPC or choose an existing VPC to put this virtual server. Enable the Metadata slider for the Frame Agent Setup Tool (FAST) to execute properly.

-
Click on Create virtual machine to finalize VM creation.
-
You will now need to RDP into your VM in order to install the Frame Agent, optimize the image, and execute Microsoft sysprep.
a. RDP into your virtual server. If an RDP connection is unsuccessful, verify that you have enabled
tcp/3389andudp/3389. Select your virtual server and under “Network attachments with Virtual network interface”, click on Security group. You should be able to view the security group configuration page for your virtual server. Click on Manage rules.
b. Enable the RDP protocol (
port 3389) by creating an inbound rule.
c. If you do not have a network route to your virtual server (i.e., S2S/P2S VPN), you will need to attach a Floating IP address to your virtual network interface. To assign a Floating IP, open the Virtual network interface under “Network attachments with Virtual network interface” and under Floating IPs, click on Attach + option to add existing or to create new Floating IP.


d. Open Remote Desktop Connection from your PC and specify the IP address of your VM. Username for the RDP connection will be "Administrator" and the password needs to be extracted from .prv SSH key that you obtained during VM creation. To extract the Administrator password:
-
Download OpenSSL
-
Copy the file containing the private key (.prv format) to a folder with openssl.exe and run command:
.\openssl.exe rsa -in .\key.prv -out keypem.pem -
Open
keypem.pemin Notepad. -
Under your user persona in the upper right-hand corner of the IBM Cloud Portal, click on Log in to IBM CLI and API.
-
To use IBM Cloud CLI and API, you will need to install the latest version of the stand-alone IBM Cloud Command Line Interface and the plugin by following the IBM documentation:
- [Getting started with the IBM Cloud CLI](https://cloud.ibm.com/docs/cli?topic=cli-getting-started)
- [VPC CLI reference](https://cloud.ibm.com/docs/cli?topic=cli-vpc-reference)
:::

- Run the following command:
```cmd
ibmcloud is instance-initialization-values <virtual server instance id> --private-key "<private key>"
```
where `<virtual server instance id>` is the value listed in the Virtual server instance page and `<private key>` is copied from the keypem.pem file you opened in notepad.exe.

e. From your Remote Desktop Connection UI, enter your username (Administrator) and password (private key) and RDP into the virtual server.
Now that you have a template image VM accessible via RDP, you can proceed with the installation of the Frame agent and drivers.
Microsoft-provided OS Images
This procedure describes how to prepare your template OS image based on a Microsoft-provided OS image. In this scenario, you are bringing your own OS image and licensing.
With IBM Cloud, this scenario is particularly relevant if you wish to use Windows 10 or Windows 11 for the template OS image, as these Microsoft Client operating system images are not available from IBM Cloud. When configuring your image, you must use a Windows OS user account with local Windows administrator privileges.
Create Windows OS Image
This procedure requires use of a third-party tool Oracle VirtualBox to prepare a Microsoft-provided or third-party-provided OS image for use in IBM Cloud. This document is derived from the IBM Cloud Creating a custom Windows image page.
-
Download the Oracle VirtualBox installer from the VirtualBox website and install on a local machine.
-
Download the QEMU disk image utility from https://cloudbase.it/qemu-img-windows/ (download binaries using the link at the bottom of the web page). Extract the tool on the same local machine. Run the following command, as a Windows administrator, from the Windows command line to prepare a virtual hard drive (.vhd):
qemu-img.exe create -f vpc <filename>.vhd <file size>where
<filename>is the filename for the virtual hard disk and<file size>is the image size (e.g, 65G or 100G)
For Windows 11 operating system, the minimum virtual hard disk size is 64 GB.
-
Download the Microsoft-provided disk image (ISO) file for the desired operating system (e.g., https://www.microsoft.com/en-us/software-download/windows11).
-
Download the VirtIO drivers for Windows:
-
For IBM Cloud VPC, IBM Cloud discusses their recommended procedure to obtain the wirtio-win drivers at Step 3 of their Creating a Windows custom image documentation page.
-
Alternatively, you may obtain the virtio-win driver from other sources, such as from the Fedora Project (https://github.com/virtio-win/virtio-win-pkg-scripts/blob/master/README.md).
-
-
Open Oracle VirtualBox and create new virtual machine.
a. Click on the New button.

b. Specify a name for your VM, choose the .iso file for the image, and select either the Pro or Enterprise. Check the option "Skip Unattended Installation" and click on Next.

c. Select the virtual hardware configuration of the virtual machine that will prepare the image for use in IBM Cloud. If you are creating a Windows 11 OS image, you must ensure that the Enable EFI checkbox is selected.

d. Next, add the Virtual Hard Drive (.vhd) that was created using the QEMU disk image utility by selecting the option "Use an Existing Virtual Hard Disk File", find the .vhd file, and select that file.

e. Click Finish to complete the VM creation process.

f. Select newly created VM and select Settings. Click on Storage and add virtio-scsi controller.


g. Left click the Windows OS .vhd disk and drag and drop the disk on the virtio-scsi controller. Click OK to continue.


Windows Out of Box Experience (OOBE)
The following section only highlights the relevant steps of the Windows Out of Box Experience (OOBE).
-
Start the VM and go through the operating system installation process. Press any key to boot from .vhd and go through the OOBE workflow.

-
Choose the Windows OS Version.

-
Accept licensing and when you reach the "Which type of installation do you want?" screen, select the Custom: Install Windows only (advanced) option.

-
Go back to Oracle VirtualBox, select your VM, open Settings, select Storage, and mount a CD-ROM.

-
Select the Virtio ISO and click Choose.

-
The virtio-win ISO should now be listed under the "Controller: SATA". Click OK to continue.

-
Go back to the Windows installation window and click on Load drivers, browse and select virtio, amd64, and then win 11. If you are installing Windows 10, select the same folder. Click OK to continue.


-
Select the newly added disk where you will install your Windows OS and click Next.

-
After this step, Windows installation will start. Once the Windows installation is complete, you will have to go through the Windows Out of Box Experience (OOBE) by customizing Region, Language, Keyboard(s), etc. Do not sign in into your online user account. Create a local Windows administrator account and save the username and the password. You will need this local Windows administrator account next.
Configure Windows OS
-
Once the OOBE is done, power on the VM and login using your local Windows administrator account.
-
Install the virtio drivers. The virtio ISO should still be mounted on your VM. Go to File Explorer, open the CD-ROM Drive with virtio ISO.

-
Start virtio-win-guest-tools.exe application and follow the wizard without any changes.

-
Open the browser and go to Customizing a virtual server and follow steps 1, 2 and 3 only.
a. Download and install Cloudbase-Init.
b. Modify the
cloudbase-init.confandcloudbase-init-unattend.confconfiguration files as explained in the IBM Cloud documentation page. Please be careful as any mistake in modifying the configuration file will result in problems when configuring your image. -
Next, remove the Windows recovery partition on VM as you may need to extend the disk to increase disk capacity in the future. If the recovery partition exists, follow the steps to remove the recovery partition.

-
Open Windows cmd.exe as administrator and type
reagentc /info
-
Next, enter
reagentc /disableto lock the agent and allow removal of recovery partition.
-
Then execute:
diskpart list disk select disk 0 list partitionIn the example below, the recovery partition is partition #4.

-
Once you have confirmed the partition number for the recovery partition, execute the following commands. If there is no recovery partition, then exit Diskpart and continue.
select partition <number> delete partition overridewhere
<number>is the recovery disk partition. You may chose to executelist partitionto confirm that the recovery partition was successfully removed.
-
On the Windows command line, enter
reagentc /enable. -
Get back to Disk Management and extend C partition by right clicking on (C:) and Extend Volume...


-
Shutdown the virtual machine.
-
Confirm the location of the .vhd file on your local machine in preparation for uploading the file to IBM Cloud.

- Upload the virtual hard drive into IBM Cloud. Login to https://cloud.ibm.com/ and create new Object Storage in Standard tier and the bucket.


- Using Aspera, upload the .vhd file.
You will need to install extension and client for Aspera as the .vhd file is larger than 200 MB. Follow the instructions from the IBM Cloud Portal.

- Next, you need to grant the VPC infrastructure read/write access to the object storage containing the .vhd file. Configure this authorization by going to Manage – Access (IAM) and opening the Authorizations section and creating new authorization.

- Now it is time to create the IBM Image from the .vhd file. Under VPC Infrastructure, locate and click on Images and then Create +.
a. Specify the Geography, Region, Name, and Resource group.
b. For Image source, select Cloud Object Storage and pick the Cloud Object Storage instance, Location, and Bucket where your uploaded image file is located.
c. Select the image file that will be used to create the custom image.
d. Select the Operating system. For Windows 10 or 11, use Windows Server and the Version should be windows-2019-amd64-byol.
e. Click the Create custom image button to create the custom image.
- Once the custom image is created, you will create the virtual server instance using that custom image. Go to VPC Infrastructure and then the Virtual server instances for VPC page. Click on Create +.
a. Choose your desired Location (Geography, Region, and Zone) for your virtual server instance.
b. Give the virtual server instance a name and choose the Resource Group in which you want to deploy this instance in.
c. In the Image section, click on Change image, go to Custom images tab, select your custom image, and click Save.
d. Choose a profile.
e. Configure the SSH key and networking. Please make sure that RDP port 3389 is opened by the security group.
f. Enable Metadata and Secure access – this step is mandatory for FAST installer to work.
g. Click the Create virtual server button.
If you don’t have VPN S2S or P2S connection to your IBM infrastructure, please assign Floating IP Address to your instance so you can access it over public internet.
- Once your Windows virtual server instance has booted, RDP into your virtual instance. Use the local administrator username and password that you set during VM creation on Oracle VirtualBox during OOBE procedure.
Now that you have a template image VM accessible via RDP, you can proceed with the installation of the Frame agent and drivers.
Install Frame Agent and Drivers
-
Use RDP to connect into your VM. Follow the Installation and Usage instructions to download the Frame Agent Setup Tool (FAST) and install the Frame Agent, drivers, and tools in your template image VM.
-
Once FAST has successfully installed the Frame Agent, drivers, and tools, reboot the VM to complete the installation of the Frame Agent. Use RDP to connect back into your VM.
For additional installation scenarios (e.g., proxy server configuration, command line arguments, review our Frame Agent Setup Tool documentation.
-
(Optional): If a proxy server is required for all outbound traffic to the Internet from your private network, you will need to configure Frame Guest Agent to use your proxy server. Refer to our FGA Proxy Helper Tool documentation page for further details.
-
(Optional): If you plan to use NVIDIA GPU-based instance types in IBM, make sure you install the appropriate NVIDIA GPU drivers in your template image VM. Also, please check with your IBM support representative about the license for using this GPU in WDDM.
We currently don't have AMD-supported instance types. If you wish to use those, please contact support.
Example for Nvidia:
-
(Optional): Install your applications and finish image customization.
-
Once you have configured the image as desired, launch the Sysprep Helper tool.
- Select Accept all prompts during Sysprep
- change power option from quiet to shutdown
- Click on "Test Sysprep" to start the process
After the sysprep process finished successfully the vm will be powered of automatically.
-
-
If the VM does not shutdown, then there was a problem with sysprep. Review the sysprep logs in
%WINDIR%\System32\Sysprep\Pantherto determine the source of the error. -
When sysprep is successful, the VM will automatically power off. Verify that the VM has stopped in AWS Console.

Tag the IBM Cloud Machine Image
-
Create an image from your IBM Cloud instance.
-
Once the image is created, navigate to the list of images in the IBM Cloud console. Click on the image you created in the previous step and assign a tag with the Key name
frameroleand valuemasterimageto the image.
Voilà! You have successfully created a template image to be registered in Frame for use to create your Frame workloads. You may prepare additional template images (e.g., different Windows OS versions, template images with different sets of applications) by simply repeating the procedure with a new image.
Registration
Now it's time to register your template image in Frame. See how to do this in our Cloud Accounts > Template Images guide.
BYO Images on Nutanix AHV
This document will provide you with instructions on how to prepare and register your own Windows OS template image in AHV for use with Frame. Before moving forward with the preparation procedure, please ensure you have read through the general requirements on the BYO image and considerations on the Windows BYO image pages. We will outline additional details specific to Nutanix AHV below.
You must create and register at least one template or "gold" image when registering your AHV cluster to have an AHV Cloud Account in Frame. This template image will be used to create the Frame Sandbox and Utility Server(s) (optional) when you create a Frame account.
Additional template images can be created and registered after the AHV Cloud Account is created.
Considerations
When preparing to create a Windows 10 or Windows 11 OS image, you must consider the following:
-
Do not install Nutanix Guest Tools in your template image. Nutanix Guest Tools can cause communication issues between the workload instances and the Frame control plane.
-
If your image already has Nutanix Guest Tools installed, you must install VirtIO drivers before uninstalling Nutanix Guest Tools. If you attempt to remove Nutanix Guest Tools without first installing VirtIO drivers, your virtual machine will not boot.
-
Use SATA as the interface for CD-ROM and SCSI for disk drives when creating a VM in Prism Central or Prism Element. Do not use IDE as the interface for CD-ROM or disk drives. This is mandatory for BYO Windows 11 with vTPM images.
-
Do not use volume groups disks.
-
Set your template image timezone to UTC. When users start a Frame session, the workload VM will be set, by default, to the correct timezone based on the user's browser locale.
-
When setting up the template image, it can be useful to have the Windows Firewall disabled. Firewall can be customized and re-enabled later in the Sandbox for a Frame account. To do so, run the following command in Powershell.
Set-NetFirewallProfile -Profile Domain, Public, Private -Enabled FalseIf you do not wish to disable Windows Firewall but still want to enable RDP, run the following command in PowerShell.
Enable-NetFirewallRule -DisplayGroup "Remote Desktop" -
Enable Microsoft RDP in your template image before installing the Frame Guest Agent to access the template image VM. Verify you can access your template image using RDP with your local Windows administrator user. Ensure RDP is allowed in the Windows Firewall for your template image.
Preparation
-
First, starting with a Windows 10, Windows 11, Windows Server 2019, or Windows Server 2022 image, create a VM in the AHV cluster you are going to use for Frame. When configuring your image, you must use a Windows OS user account with local Windows administrator privileges. If you are bringing a Windows 11 image with vTPM, review and complete the required tasks following the Windows 11 with vTPM section of this guide, before continuing with Step 2.
-
Use RDP to connect into your VM. Follow the Installation and Usage instructions to download the Frame Agent Setup Tool (FAST) and install the Frame Agent, drivers, and tools in your template image VM.
-
Once FAST has successfully installed the Frame Agent, drivers, and tools, reboot the VM to complete the installation of the Frame Agent. Use RDP to connect back into your VM.
For additional installation scenarios (e.g., proxy server configuration, command line arguments, review our Frame Agent Setup Tool documentation.
-
(Optional): If a proxy server is required for all outbound traffic to the Internet from your private network, you will need to configure Frame Guest Agent to use your proxy server. Refer to our FGA Proxy Helper Tool documentation page for further details.
-
(Optional): If you plan to use NVIDIA GPU-based instance types on your AHV cluster, you can either install the appropriate NVIDIA GPU drivers in your template image VM (if all of your Frame accounts will use the NVIDIA GPU) or install the NVIDIA GPU drivers in the Frame account Sandbox (if not all Frame accounts will use the NVIDIA GPU). Refer to the requirements in our BYO AHV Infrastructure guide.
-
(Optional): Install your applications and finish image customization.
-
Once you have configured the image as desired, launch the Sysprep Helper tool.
- Select Accept all prompts during Sysprep
- change power option from quiet to shutdown
- Click on "Test Sysprep" to start the process
After the sysprep process finished successfully the vm will be powered of automatically.
-

-
If the VM does not shutdown, then there was a problem with sysprep. Review the sysprep logs in to determine the source of the error.
- When sysprep is successful, the VM will automatically power off. Verify that the VM has stopped in Prism.
Tag VM
Ensure the MasterTemplate VM does not get deleted. Otherwise, you will not be able to create Frame accounts using that template image.
Voilà! You have successfully created a template image to be registered in Frame for use to create your Frame workloads. You may prepare additional template images (e.g., different Windows OS versions, template images with different sets of applications) by simply repeating the procedure with a new image.
Registration
Now it's time to register your template image in Frame. See how to do this in our Cloud Accounts > Template Images guide.
Windows 11 vTPM Support
For customers who wish to use Windows 11 with Virtual Trusted Platform Module (vTPM), you must first create and enable your template image VM with Secure Boot and vTPM, following the instructions in Nutanix documentation (AOS 6.6) and summarized below.
Requirements
- Prism Central version pc.2022.9 or above
- AHV version 20220304.242 or above
- AOS version 6.5.1 or above
- VM must use UEFI firmware
- Secure Boot-enabled VM required with minimum Nutanix VirtIO package version of 1.2.1 or higher (for Windows 11 with vTPM)
Limitations
- You must create a new VM configured for SATA CD-ROMs and disks to use Secure Boot. VMs that use IDE disks or legacy BIOS cannot be converted to use Secure Boot.
- vTPM-enabled VMs cannot be used in a Frame account configured for Disaster Recovery Backup as production domain snapshots are not supported as of AOS version 6.6.
References
- Nutanix vTPM Support
- Nutanix UEFI Support for VM
- Understanding UEFI, Secure Boot, and TPM in the Virtualized Environment
- Windows 11 and AHV
Procedure
The following instructions are for the scenario where you are installing Windows 11 from a Microsoft Windows 11 ISO and Nutanix VirtIO drivers from a Nutanix ISO:
-
Log in to Prism Element or Prism Central and create a new VM, enabling UEFI and Secure Boot.
-
Connect to any CVM via CLI and run in aCLI:
-
Configuration can be verified by running in aCLI:
You would expect to see an aCLI response like:

-
Go back to Prism Element or Prism Central and create and attach two CD-ROM (SATA) drives for the Windows 11 and VirtIO ISOs.
-
Finally, create a sufficiently-sized boot disk that has enough capacity to house the Windows 11 OS plus an additional ~20 GB of free space (45-80GB in total). Disk capacity can be increased later when a Frame account is created using this template image.
-
Power on the VM and run the Windows installer to install Windows 11 on the VM.
-
Return to Preparation to install the Frame Agent and prepare the VM to be used in Frame.