# Linux with Windows AD LDAP
Customers wishing to deliver Frame-managed Linux desktops to users can use this guide to configure their Linux desktops to authenticate using Windows Active Directory (AD) LDAP.
## Prerequisites
1. Active Directory Setup.
2. Frame Account settings as specified below.
### AD Domain Controller Setup
Before Linux VMs can be configured to use Windows AD LDAP, the Windows AD domain controller must be configured as described in the [Domain Controller Prep](https://docs.difr.com/link/103#bkmrk-page-title) guide.
### Frame Account Settings
During the creation of the Frame account, you must use Frame-provided images for accounts hosted on public cloud infrastructure or on AHV, installed the [Frame Workload Installer (Linux)](https://files.difr.com/) version 2.0.3 or greater in your BYO Ubuntu Server 20.04 template image.
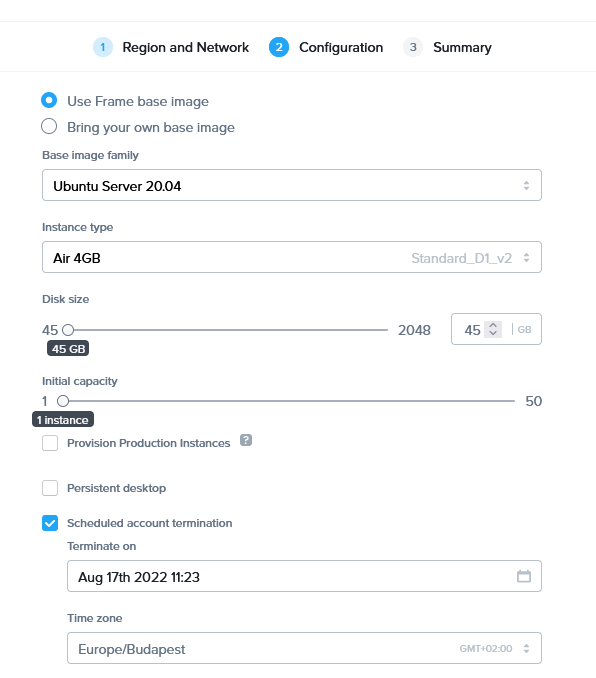
Account Creation - Use Frame Base ImageThe [Domain](https://docs.difr.com/link/102#bkmrk-page-title) settings within the Frame Account Settings for an Ubuntu Frame account are identical to the settings for a Windows Frame account with two notable exceptions:
1. The Domain settings field **Service Account Name (UPN)** needs to be entered with capital letters (e.g., `frame.service@DOMAIN.NAME.COM`).
2. The username for logging in to the domain-joined production instances needs to be in the following format: `username@domain.com`. **Do not use** just `username` or `domain.com\username`.
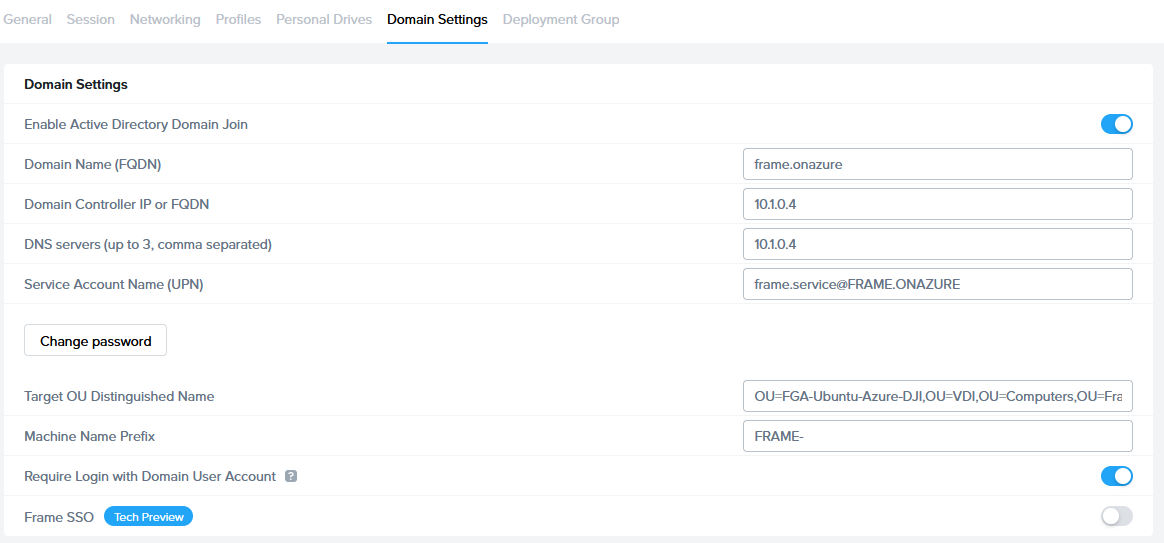
Account Settings - DomainOnce you have updated your Domain settings, reboot your Sandbox VM.
## Pre-publish Verification
Before publishing your Sandbox, power on the Sandbox VM and access the Sandbox. Open a Linux terminal and execute the following commands:
```bash
realm discover
dig
ping
```
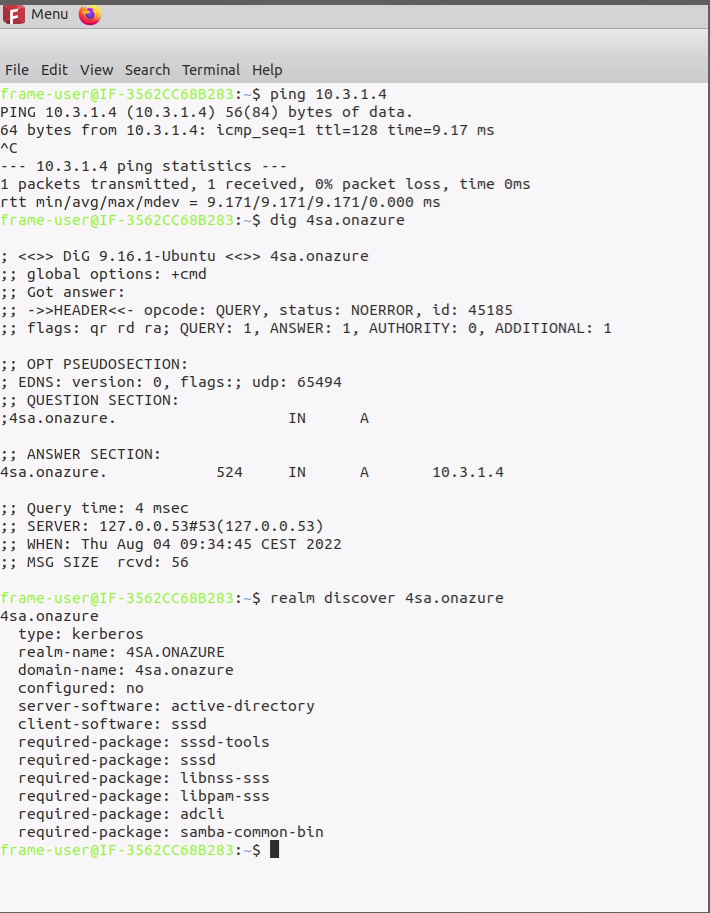
Sandbox - Pre-publishIf the commands return the expected results, then proceed with publishing the Frame account Sandbox.
## Post-publish Verification
Once you have published the Sandbox, you can launch a production VM. You should see the following login screen:
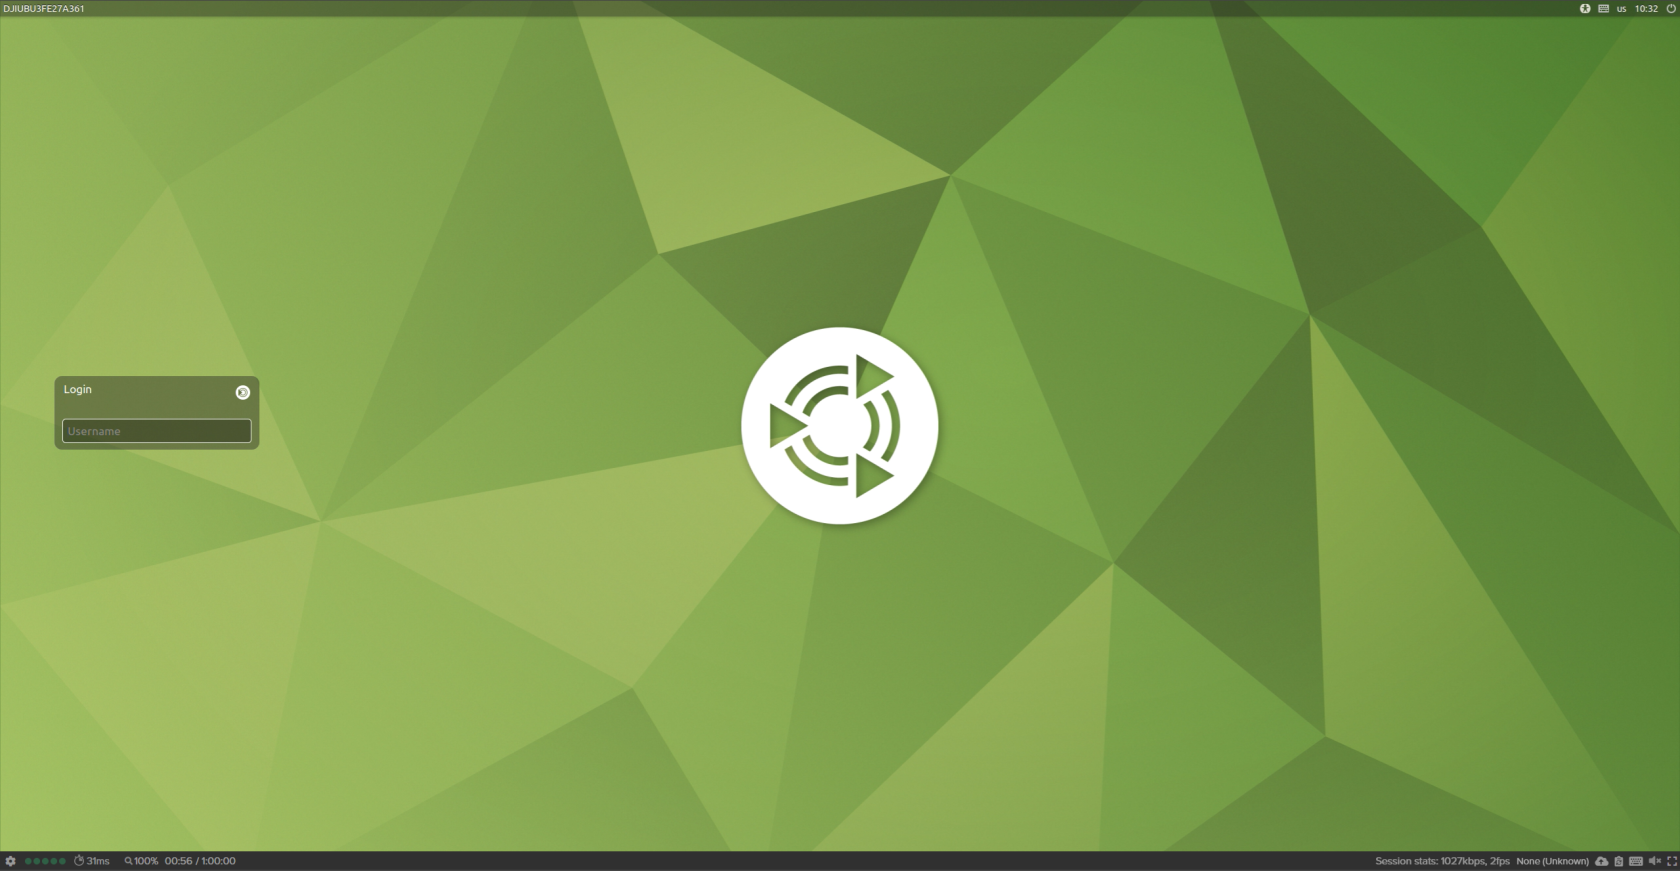
Ubuntu Login PageEnter a user's credentials in UPN format (`firstname.lastname@domain` and then the user's password).
Once Windows AD has authenticated your user credentials via LDAP, you will see your home directory:
[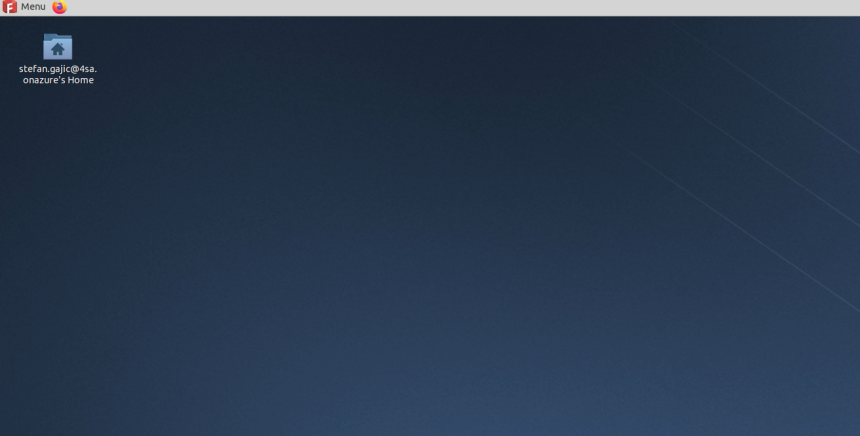](https://docs.difr.com/uploads/images/gallery/2026-01/qRyimage.png)
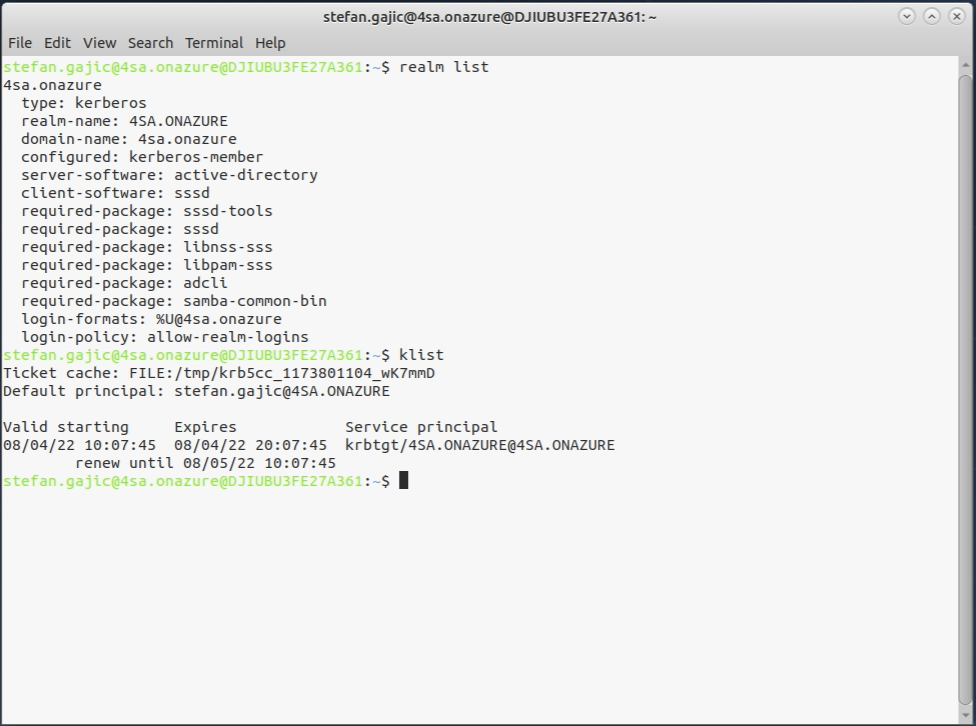
Home DirectoryAdditionally, by opening terminal in your Ubuntu desktop, you can type the `realm list` command to check the domain settings:
Ubuntu Login Page