# Google Workspace
Frame supports Single Sign-On (SSO) with Google authentication through both OAuth2 and SAML2 integration options. The OAuth2 option is the easiest to setup and can be done in under a minute. The SAML2 option is also relatively quick and easy, but does require a few more steps.
## Google Workspace OAuth2 SSO Integration
Google Workspace OAuth2 SSO integration is supported only when users access Frame via a supported web browser. Google Workspace OAuth2 is not supported by Frame App (due to Google Sign-In not supporting Chromium Embedded Framework).
### Configuring Google Workspace OAuth2
1. If you would like to enable Google Workspace OAuth2 integration with Frame, you will first need to following the procedure outlined in Google's guide to [Control which third-party & internal apps access Google Workspace data](https://support.google.com/a/answer/7281227?hl=en#zippy=%2Cmanage-access-to-apps-trusted-limited-or-blocked).
2. On the Google Admin Console home page, go to **Security > API controls**.
3. Under App access control, click on MANAGE THIRD-PARTY APP ACCESS.
4. Click on “Configure new app” drop down menu and select **OAuth App Name Or Client ID**.
5. Search for the Client ID `884836301137-76l5epasioe5sb3qvsp31obn45qk6t5i.apps.googleusercontent.com`.
6. Once you locate the Frame app in the search results, click **Select**.
7. Check the checkbox for the Frame app with the Client ID `884836301137-76l5epasioe5sb3qvsp31obn45qk6t5i.apps.googleusercontent.com` and then click **SELECT**.
8. For App access, specify that this Frame app is to be *TRUSTED* and click **CONFIGURE**.
### Configuring Google OAuth2 in Frame
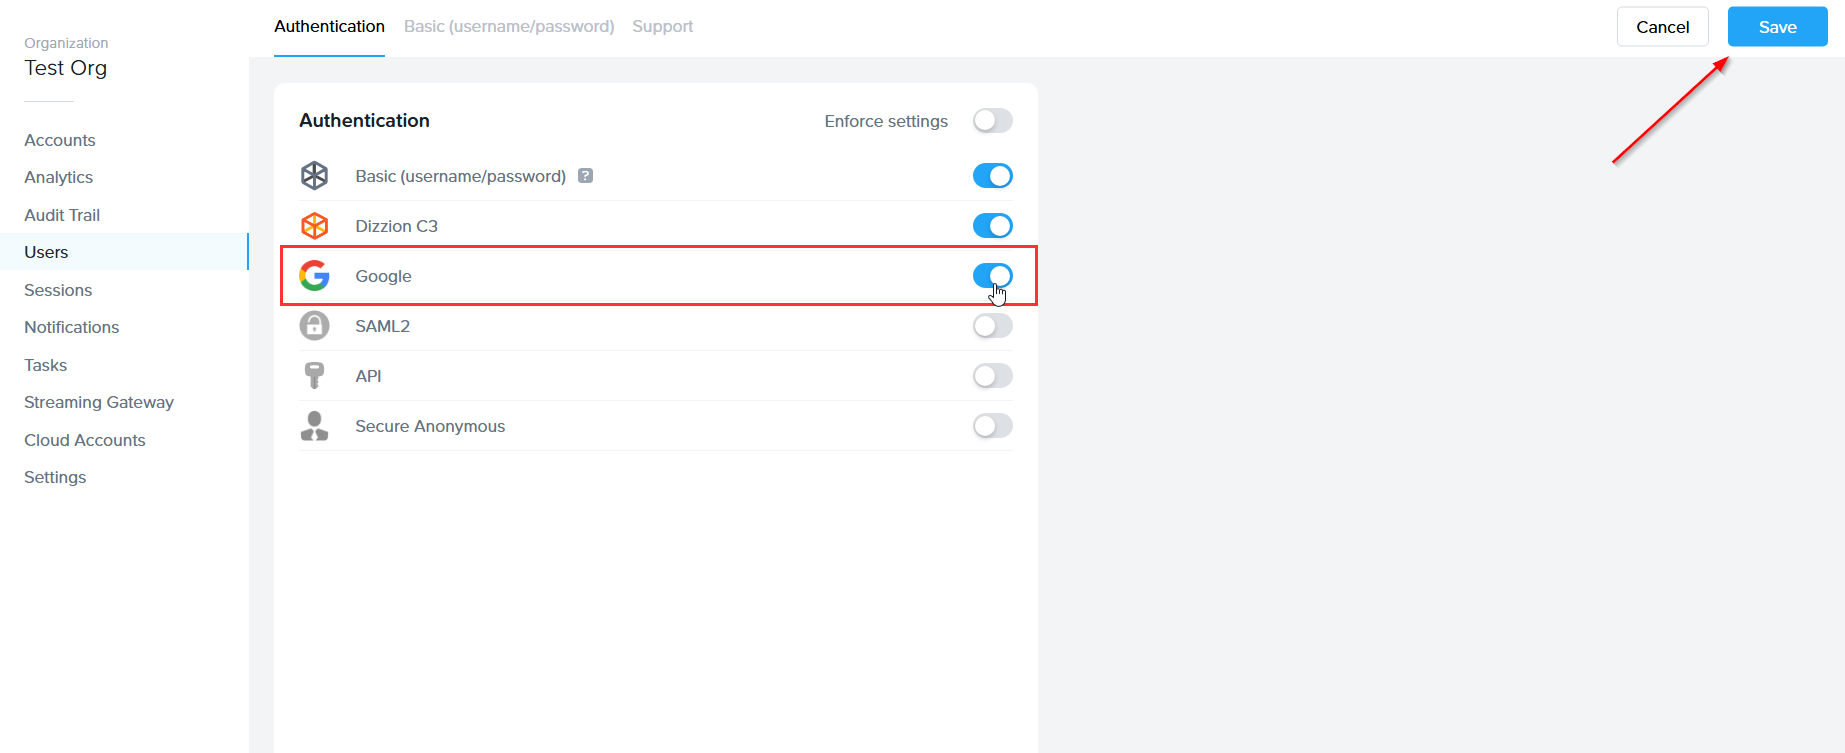
1. Before Google OAuth2 can be added, the administrator must enable the Google toggle at a given level by navigating to the Admin Console. From there, navigate to the **Customer** or **Organization** page (depending on where you wish to add Google).
2. Select **Users** from the left-hand menu.
3. From there, navigate to the **Authentication** tab and enable the **OAuth2** toggle. Click **Save**.
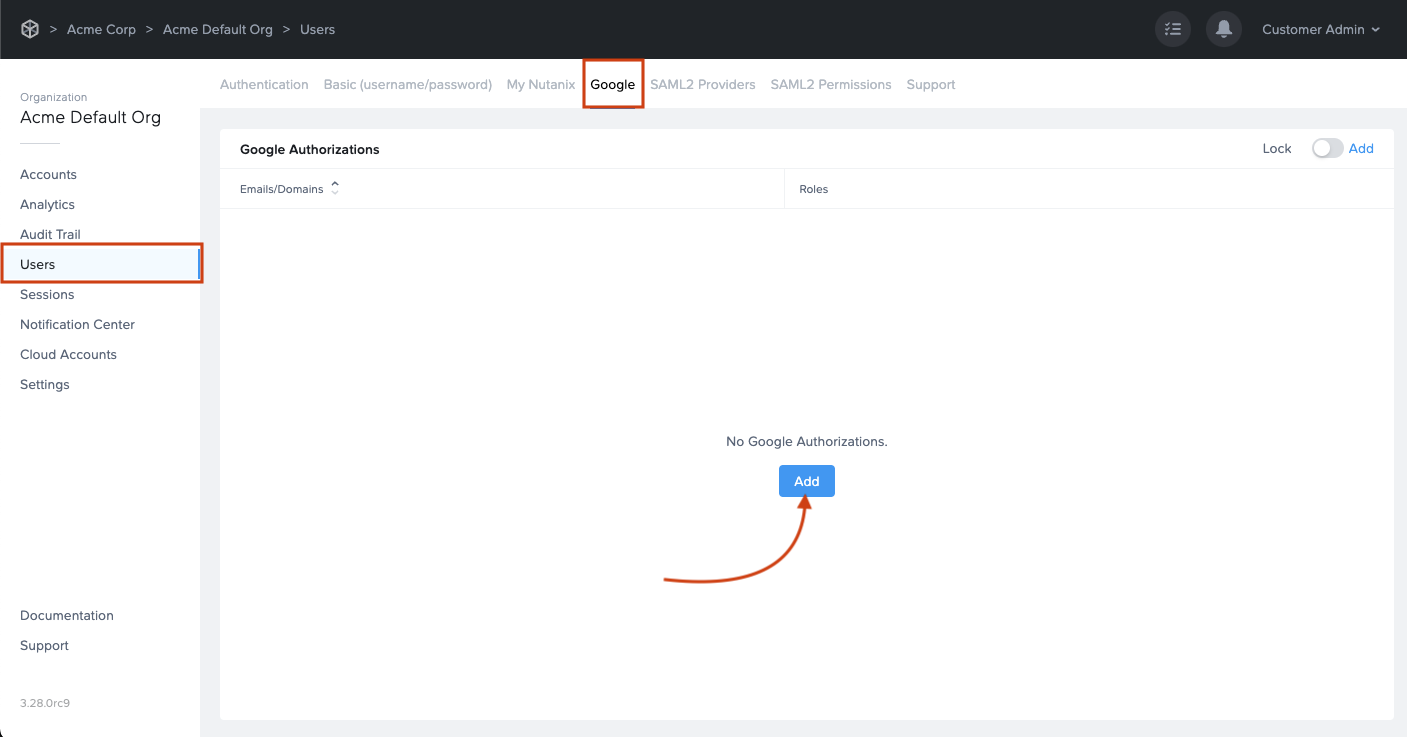
4. Click on the newly created **Google** tab. From there, click **Add**.
5. The *Add Google authorization* dialog window will appear:
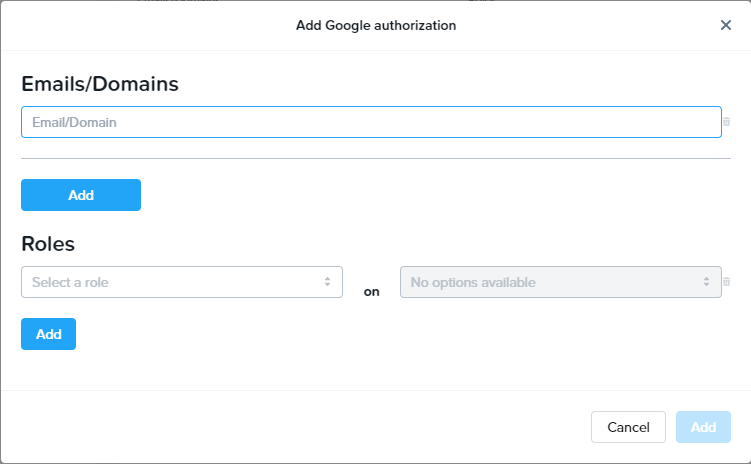
6. From this window, you can specify individual email addresses or entire domains you wish to grant access to and their corresponding roles. For this example, we will give access to the domain mycompany.com. All users tied to this domain will be given “Launchpad User” access on the “Applications 2” Launchpad. Read more about permissions in the [Manage User Permissions](https://docs.difr.com/link/81#bkmrk-user-permissions-wit) section of Frame documentation.
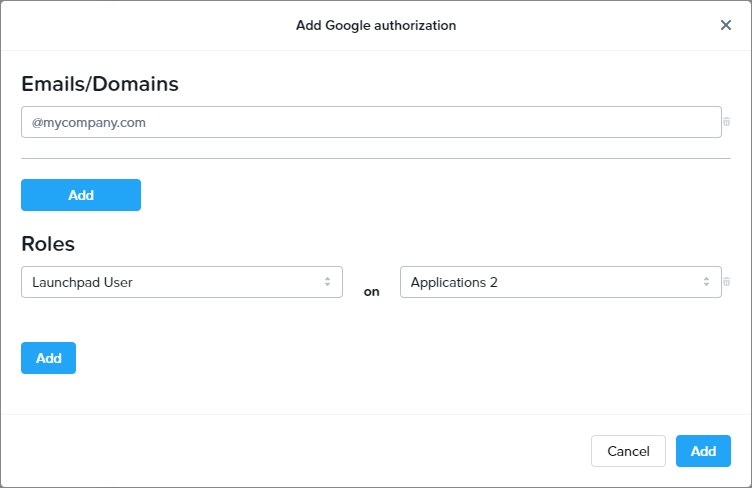
When specifying a Google Workspace domain, you must prefix the domain with the @ symbol, as shown above.
7. Click **Add** when you have finished specifying your emails/domains and roles.
### Signing in with Google Workspace via OAuth2
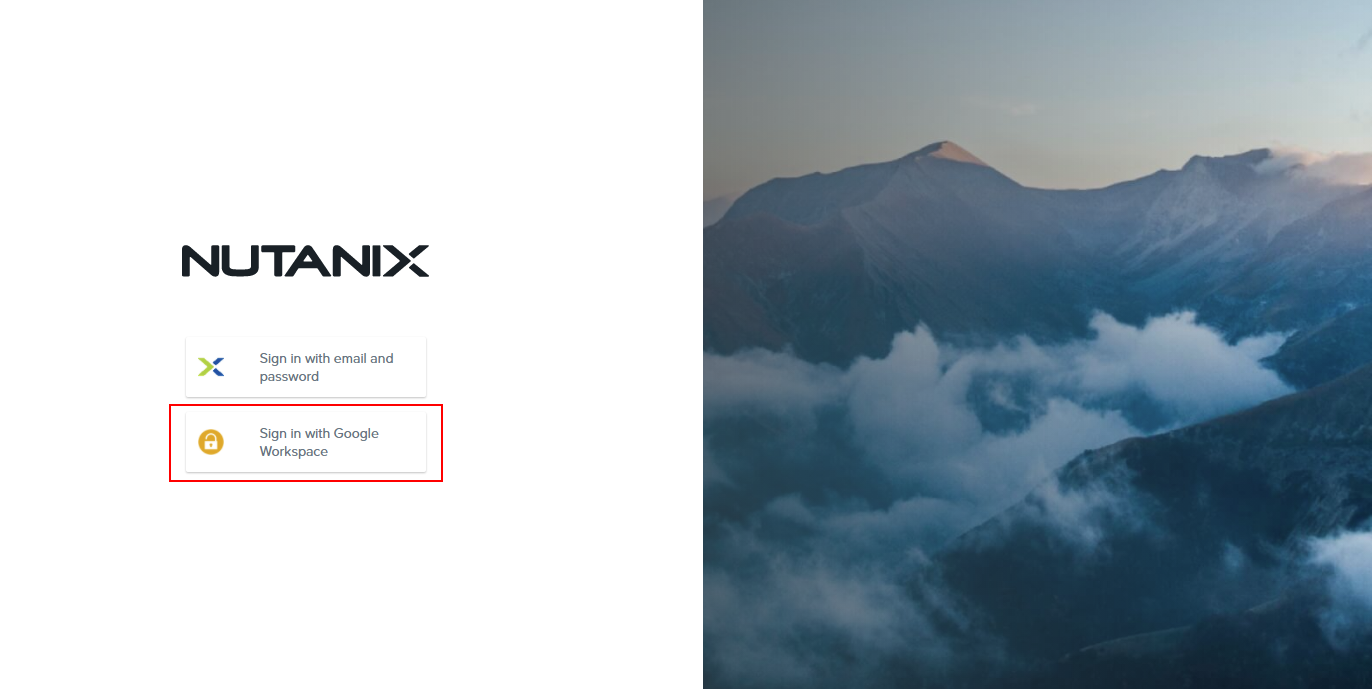
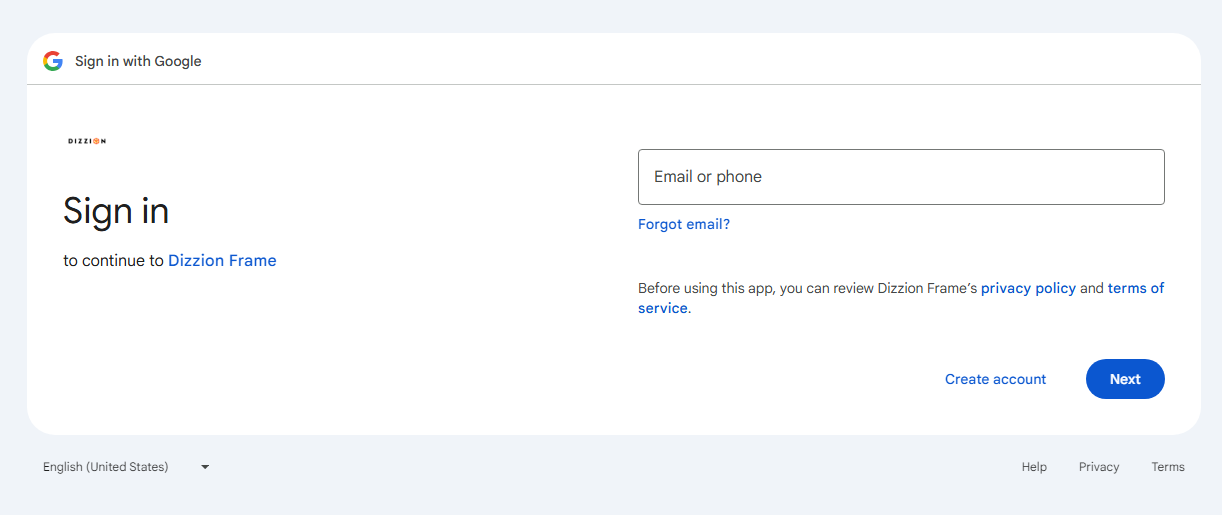
You can now instruct your users to select the *Sign in with Google* option when accessing their [Frame login page](https://docs.difr.com/books/platform-administrators-guide/page/authentication#bkmrk-entity-endpoint-urls) and enter their Google credentials.

They will be prompted to allow Frame access to their Google Drive the first time they sign in.
That's it! Your users can now use Sign in with Google on your account via our OAuth2 integration option. If you prefer to set up your integration using SAML2, continue reading.
## Google Workspace SAML2 Integration
Google Workspace SAML2 integration can only be set up by someone with a Super Admin role on a Google Workspace account. During this configuration process we will transition from the Google Workspace Admin console to the Frame console.
### Getting Started
To begin, let's create a URL-friendly SAML2 Application ID (also referred to as Entity ID) that we'll use in a few places throughout our setup, as well as a Custom Label which will be displayed on the login page for users, for example.
Application ID: Frame
Custom Label: Frame-Google\_SAML
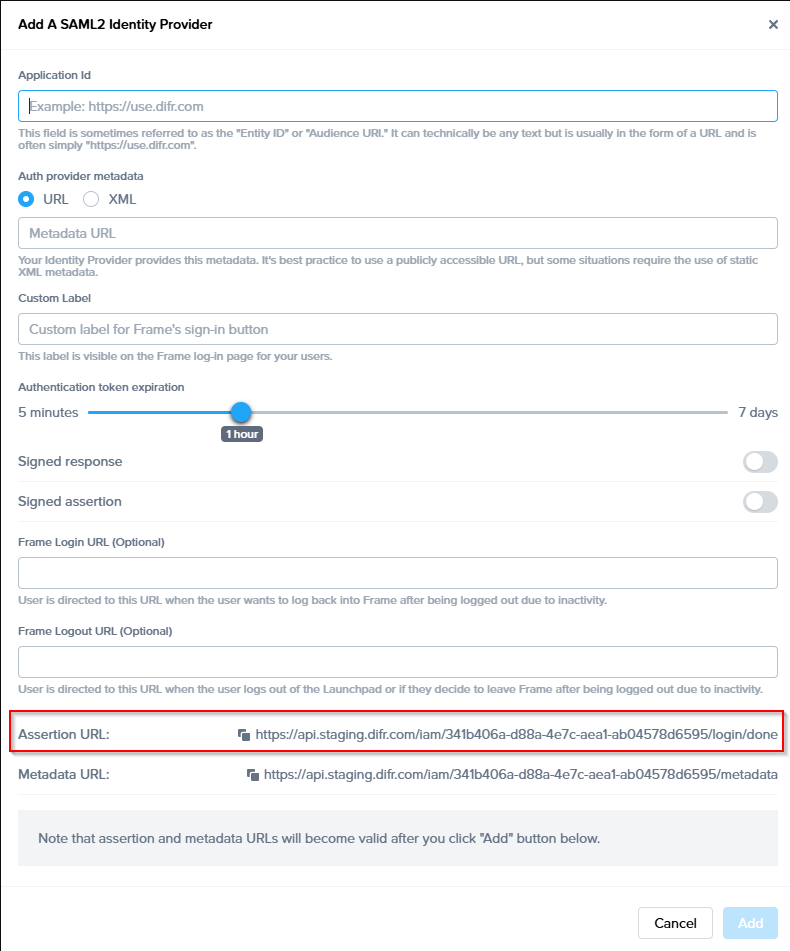
Also copy the Assertion URL
Click add to save the changes for later
Follow the steps to create a SAML 2 Provider explained in the [General SAML2 Integration](https://docs.difr.com/link/85#bkmrk-page-title) section, until you see until you see the template with the missing configuration info, and copy the Assertion URL which will be needed later in the setup. From here leave the tab open, and continue with the configuration in the Google Admin console.
[](https://docs.difr.com/uploads/images/gallery/2025-11/07yimage.png)
### Google Admin Console
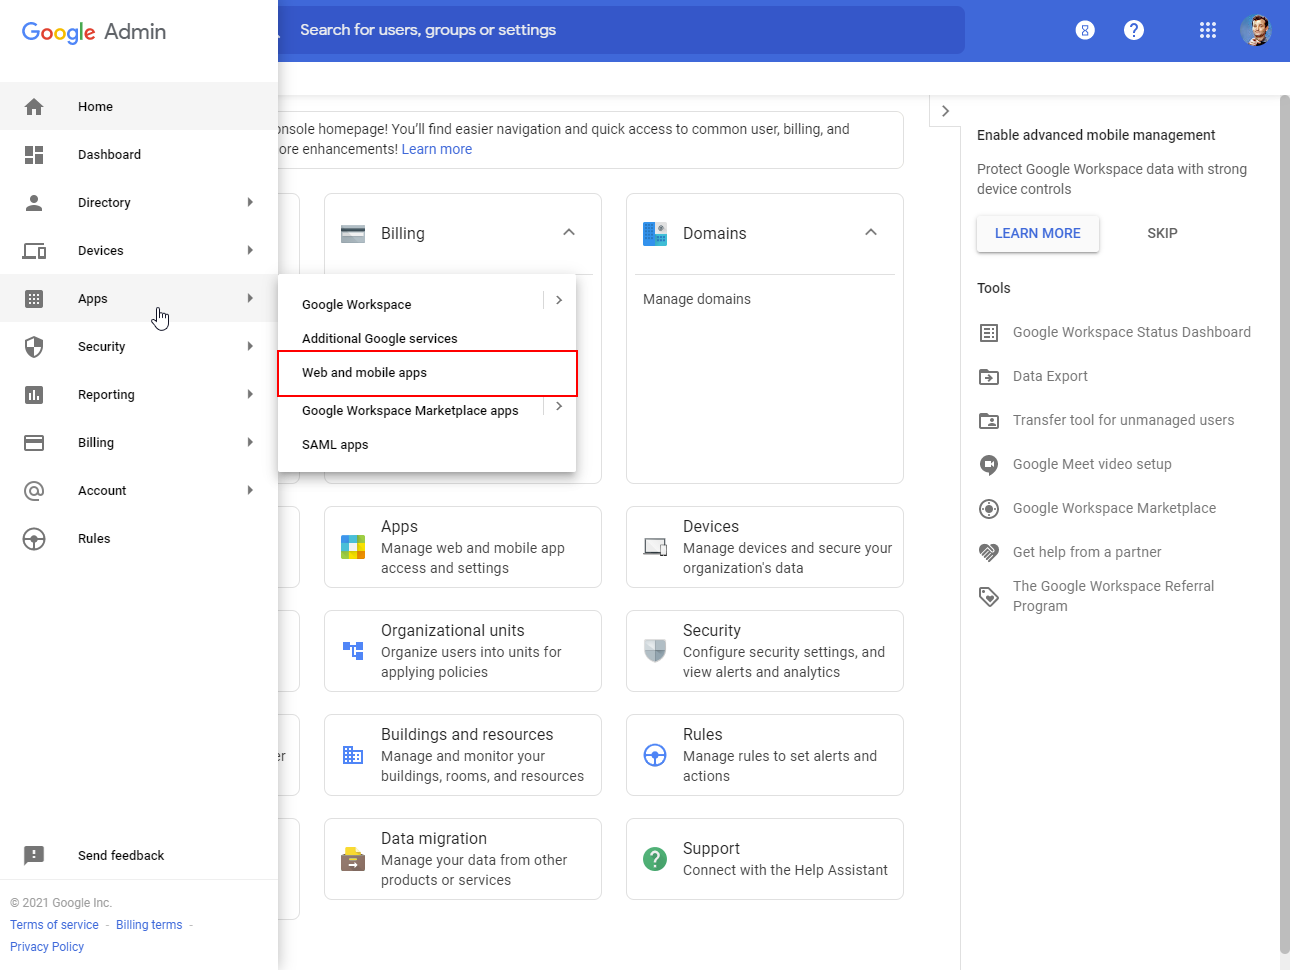
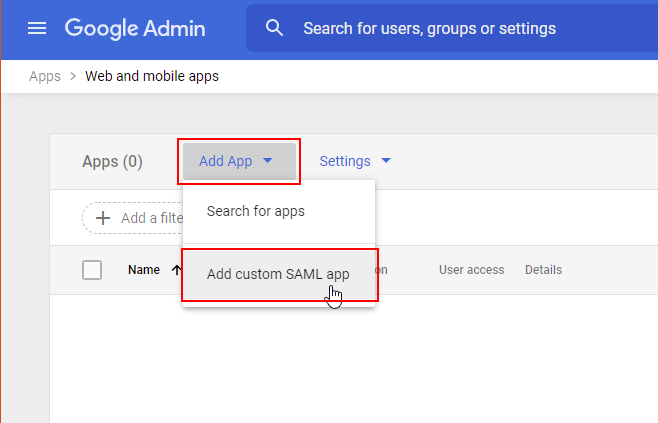
1. Navigate and log in to to your [Google Admin Console](https://admin.google.com/). Click on **Apps** and then **Web and mobile apps**.
2. From the *Apps Settings* page, click **Add App** then **Add custom SAML app** from the drop-down.
3. Enter "Frame” for the App name and upload our logo icon below (right-click, save).
[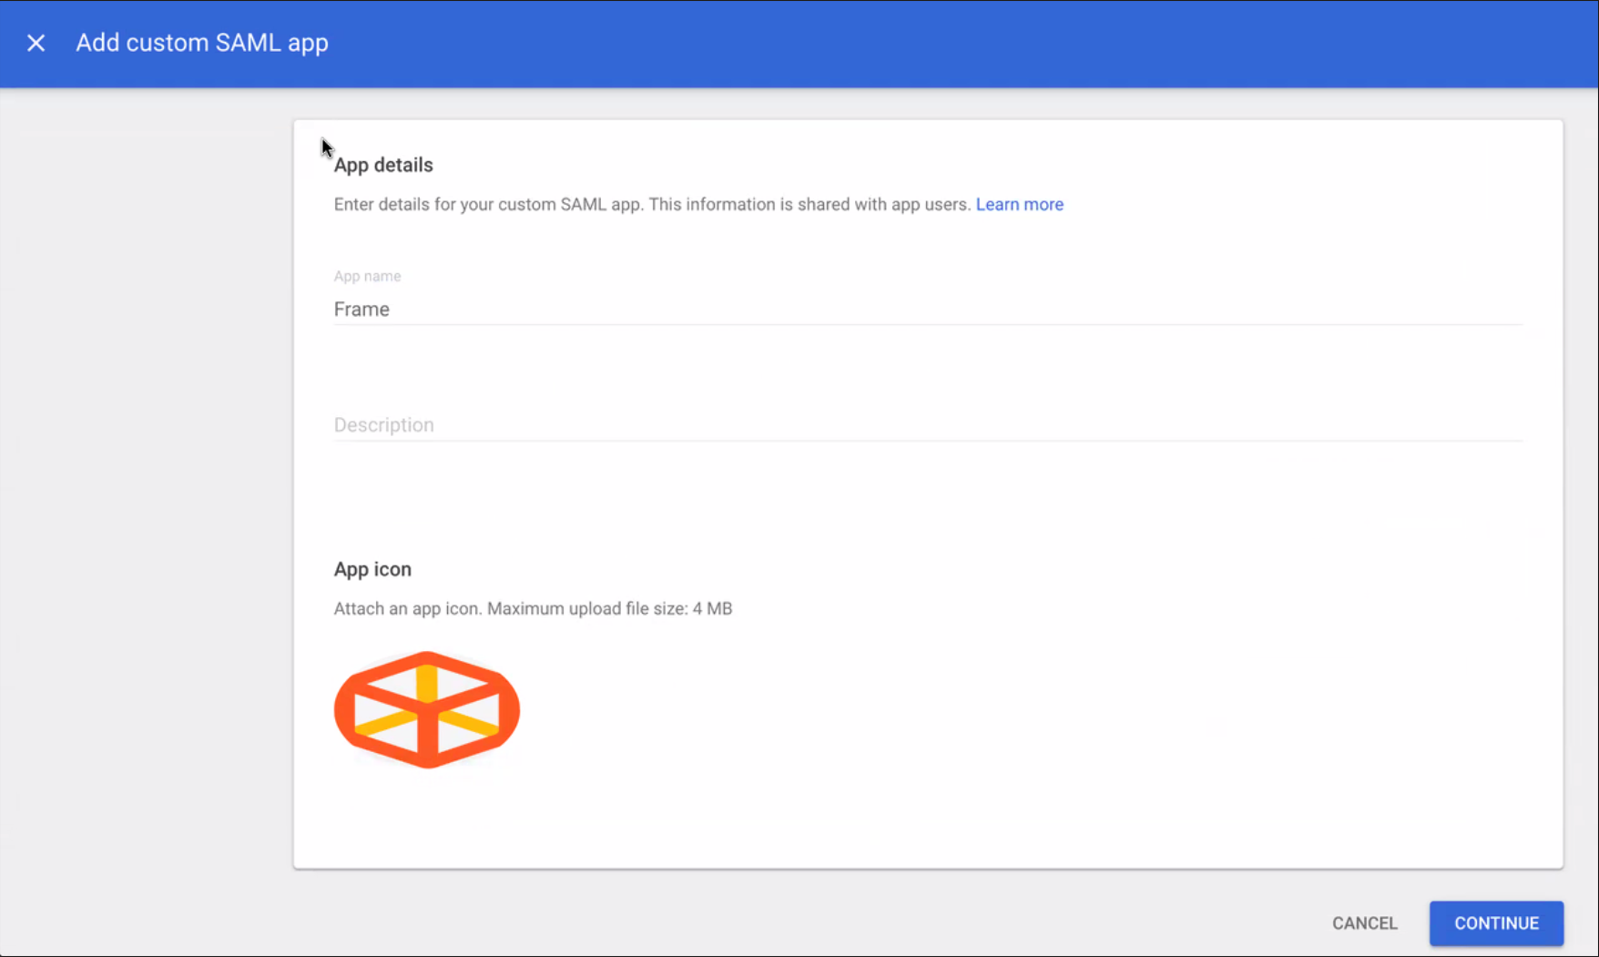](https://docs.difr.com/uploads/images/gallery/2025-11/M1Qimage.png)
***Frame Logo (right-click, save)*** 
4. Click **Continue** when ready.
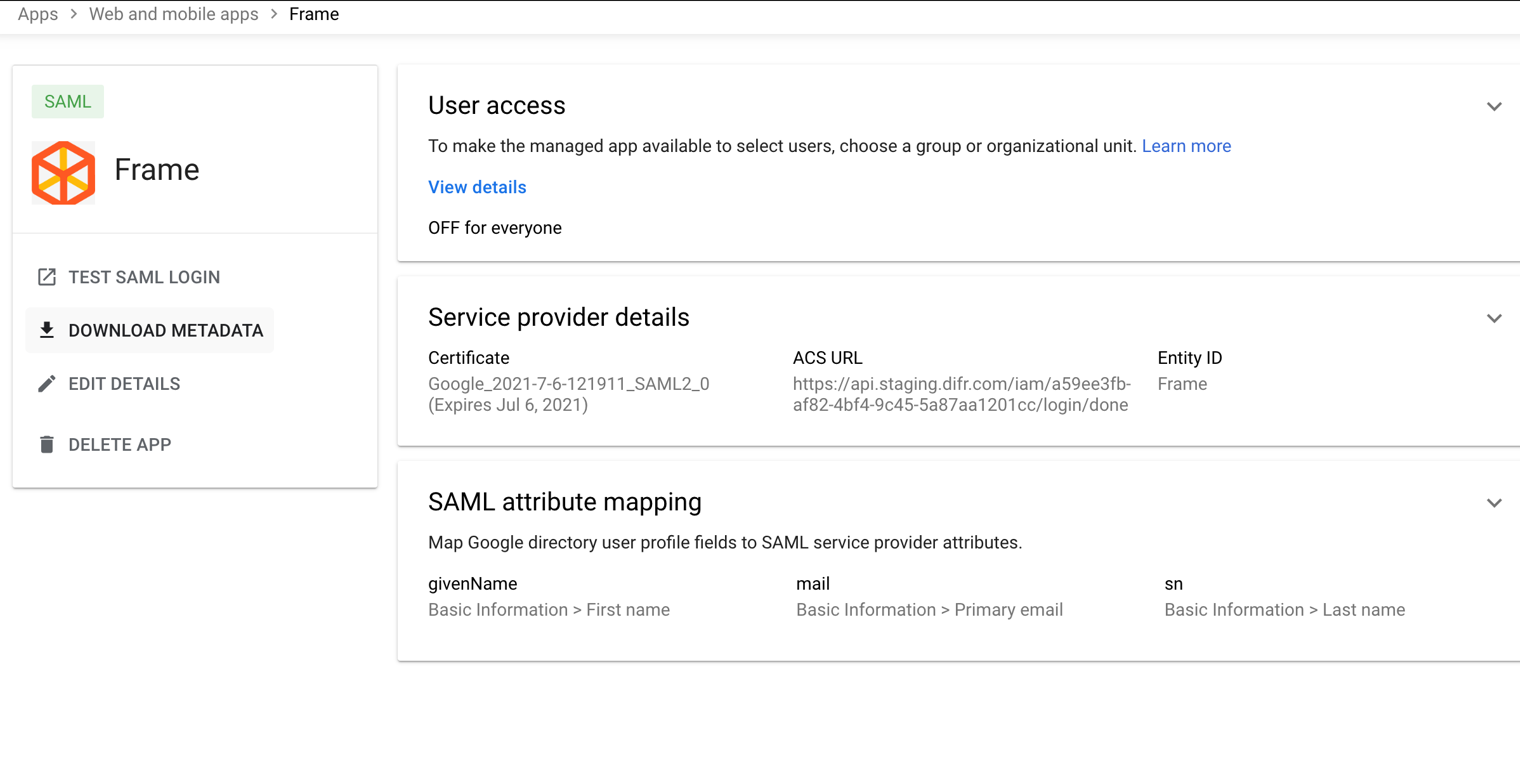
5. Click the **Download Metadata** button. Save this somewhere accessible for a later step in the Frame Console; this metadata tells Frame how to communicate with Google on Frame's behalf.
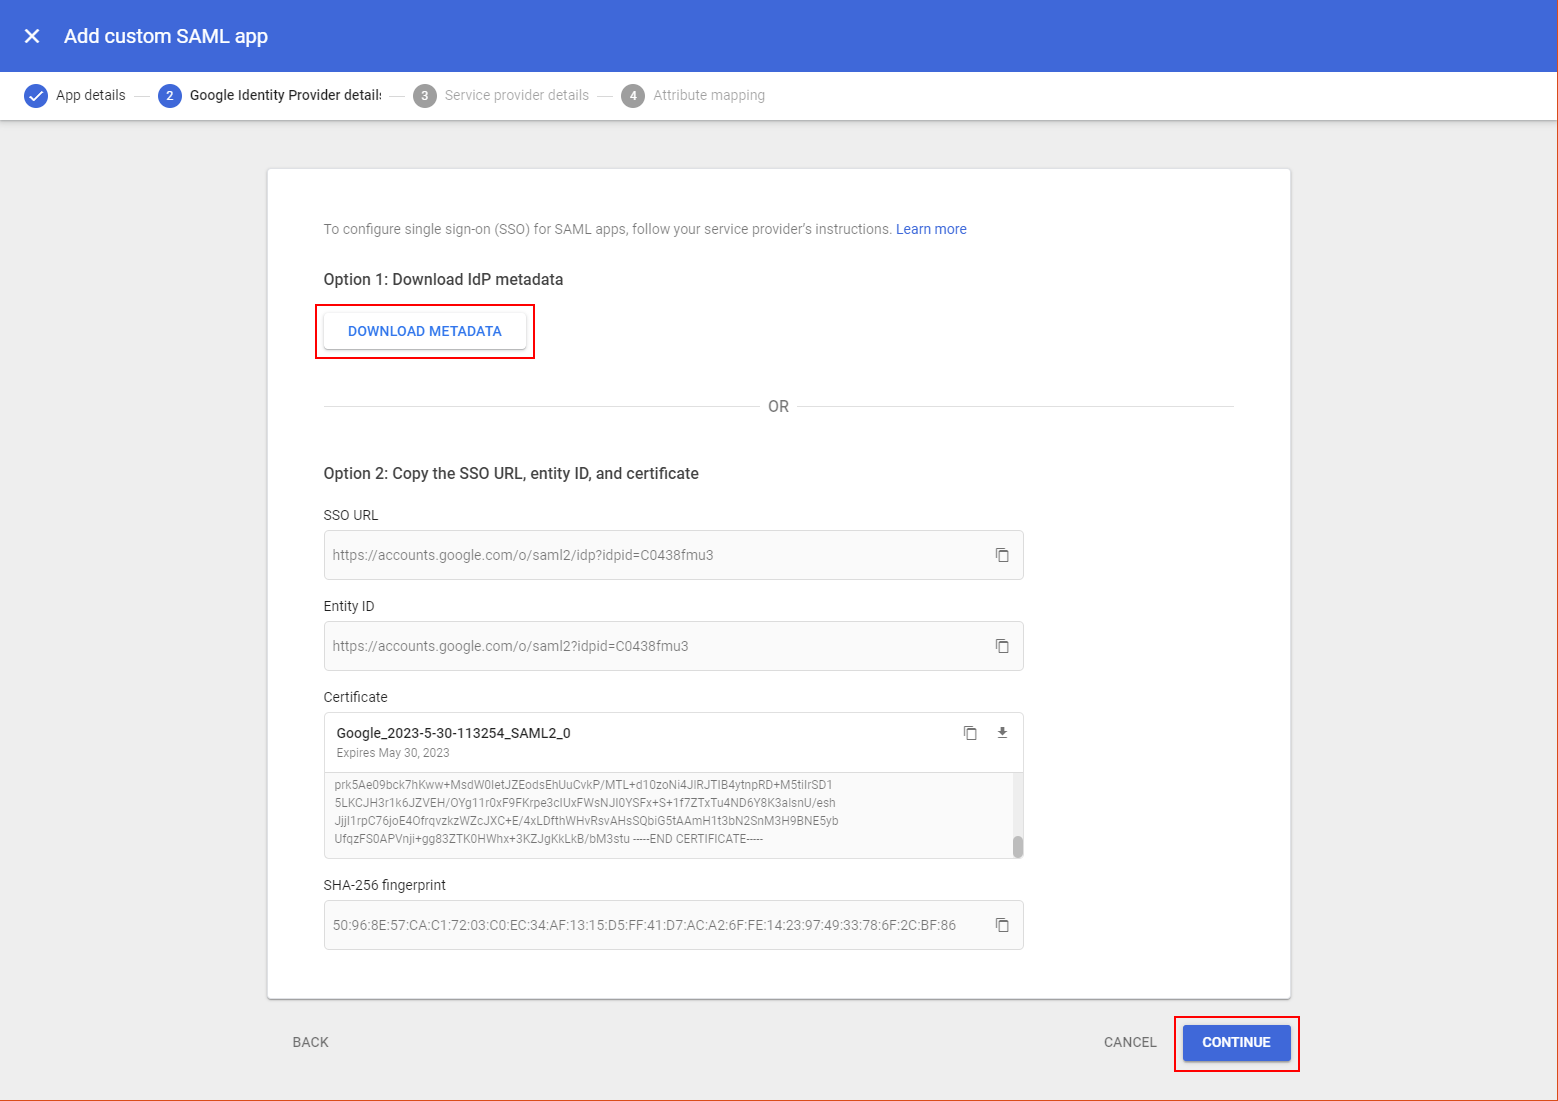
Click **Continue** when ready.
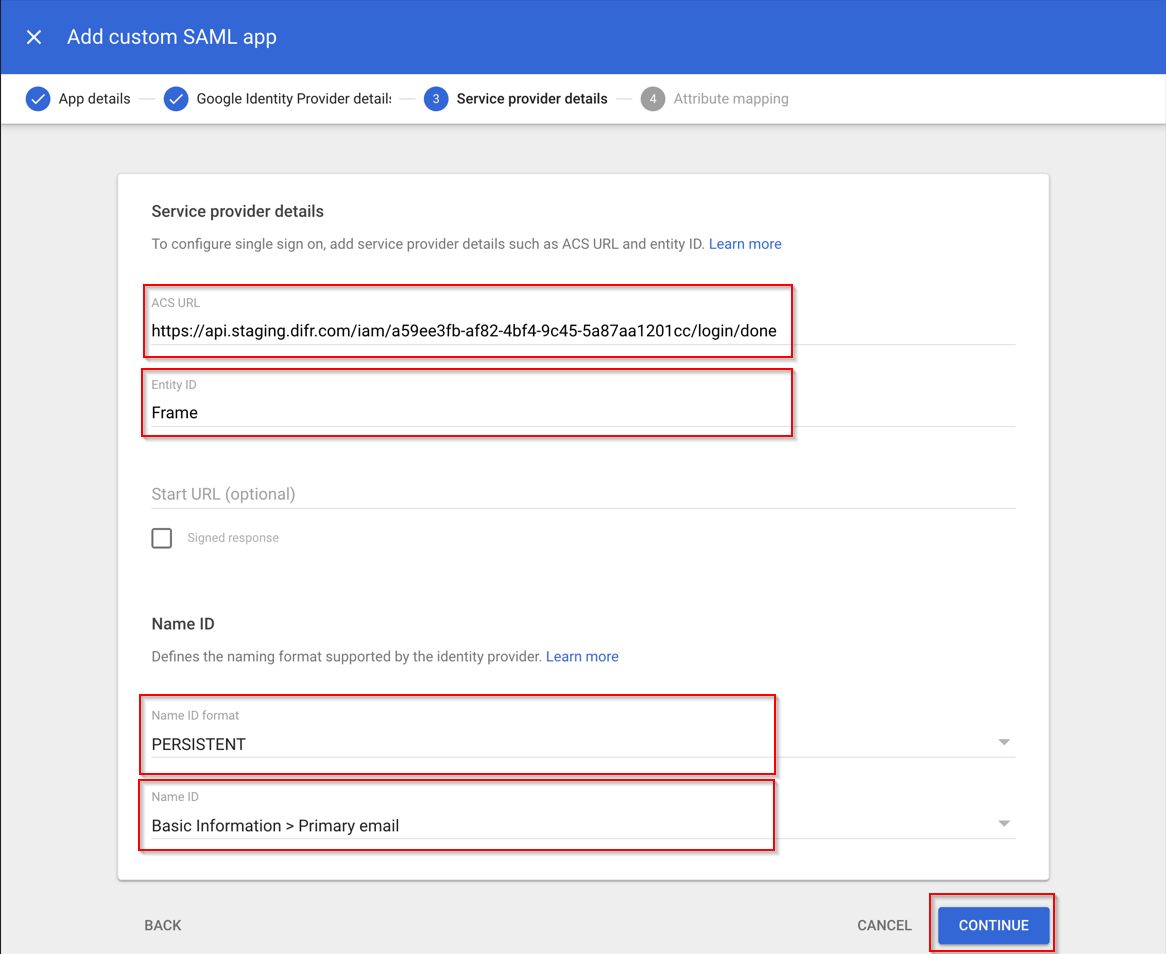
6. Next, we'll carefully enter values for **ACS URL** and **Entity ID** fields.
- **ACS (Assertion Consumer Service) URL**: This is where Google will send assertions info (first name, last name, and email address) for authenticated users to Frame. Here, we'll enter the Frame ACS URL copied in the [Getting Started](https://docs.difr.com/link/88#bkmrk-getting-started) section.
- **Entity ID**: This field is also arbitrary and must be a URI, URN, or URL; this value is **case-sensitive**. Entity IDs are attached to event logs for Admin purposes and are **required to match** in both Google and Frame Console's settings to verify and identify each other via SAML2.
Enter the Name that have been decided on in the [Getting started](https://docs.difr.com/link/88#bkmrk-getting-started) section. Copy the value you decide upon for use in later steps; Frame refers to the Entity ID in its SAML settings as “Application ID.”
7. Next, we have the **Start URL**.
The Start URL allows users to authenticate and navigate directly to Frame from Google's Workspace portal. This is often referred to as a “Identity Provider initiated login”. For most cases, the value for Start URL is simply a [Launchpad or Account Dashboard URL](https://docs.difr.com/platform/identity-and-access/authentication#entity-endpoint-urlsentity-endpoint-urls) to the account the user will have access to. If this field is left blank, your users can still log in to Frame with this Google App from the Frame Console's sign in page(s).
Leaving this blank may be desired if you have many Frame Accounts for your users to access or "land on".
8. Next, Ensure that the *Name ID format* field is set to **PERSISTENT** and the *Name ID field* is set to **Basic Information > Primary email**. Click **Continue** when ready.
[](https://docs.difr.com/uploads/images/gallery/2025-11/1xPimage.png)
9. Here, we need to configure mappings between user fields from Google to recognizable terms that Frame is expecting to receive when users sign in. Fill it out exactly as pictured below:

Optional: Group Membership information can be set before finishing the setup, those can also be done afterwards at any time.
[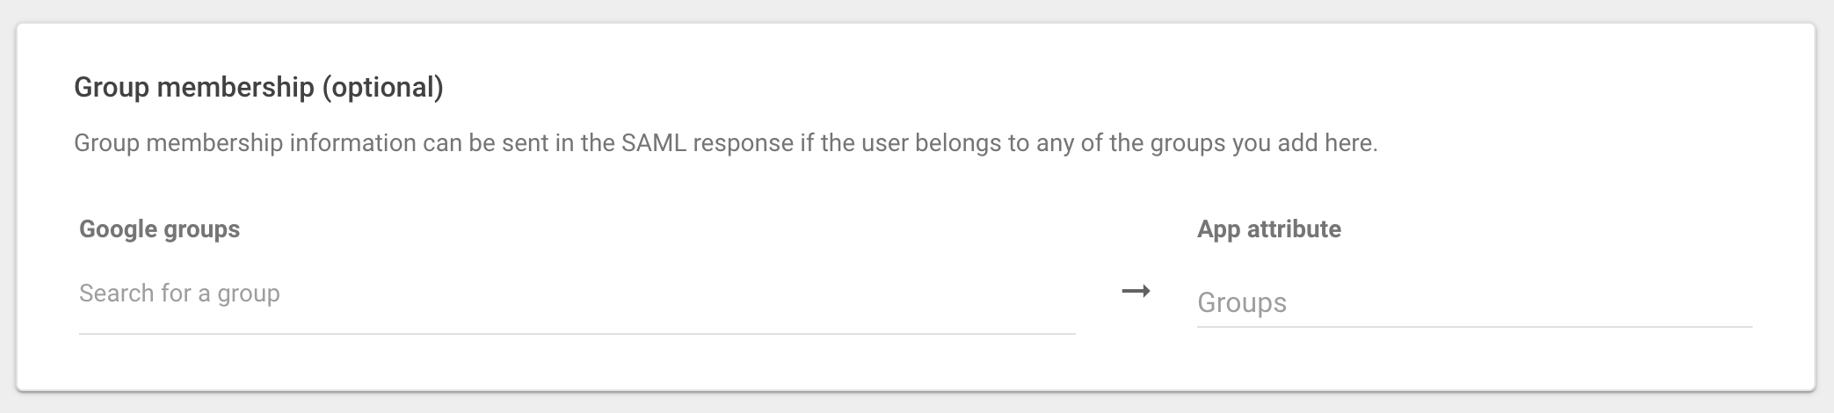](https://docs.difr.com/uploads/images/gallery/2025-11/z6eimage.png)
Click **Finish** when complete
10. You'll now be brought to the main page of your new Custom App. The last thing we need to do is **enable user access**, as the default setting for new Custom Apps is *OFF for everyone*. To enable access, click on your SAML App, and select User access, from there make sure that enable for everyone is selected.
[](https://docs.difr.com/uploads/images/gallery/2025-11/UKbimage.png)
Then, configure your user/group access and click **SAVE**. In our use-case, we wanted the service to be ON for everyone:
[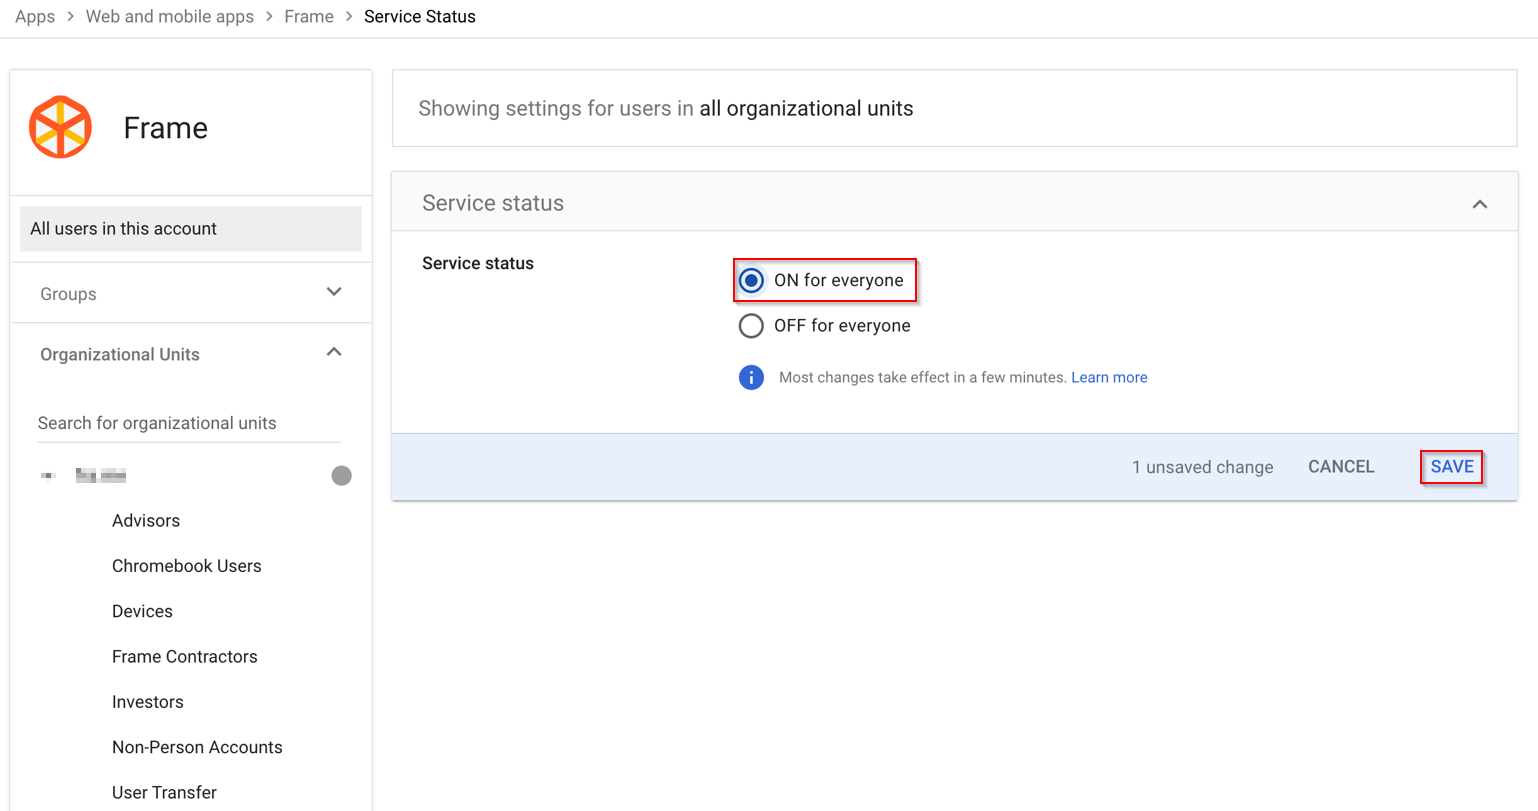](https://docs.difr.com/uploads/images/gallery/2025-11/iJpimage.png)
That's it for the Google Admin portion of the setup – we're half way there! By this point you should have the following items needed to setup Frame Console as the SAML2 Service Provider:
- - [x] **Downloaded Metadata XML file**
- [x] **SAML2 Integration Name**
- [x] **Entity ID** (later referenced as Application ID)
### Configure SAML2 in Frame
11\. Navigate back to the Frame console which from the [Getting started section](https://docs.difr.com/link/88#bkmrk-getting-started) and continue with the SAML2 provider configuration by clicking on the menu and select Update.
[](https://docs.difr.com/uploads/images/gallery/2025-11/nVpimage.png)
12\. Enter the missing Information which has been collected during the steps above.
[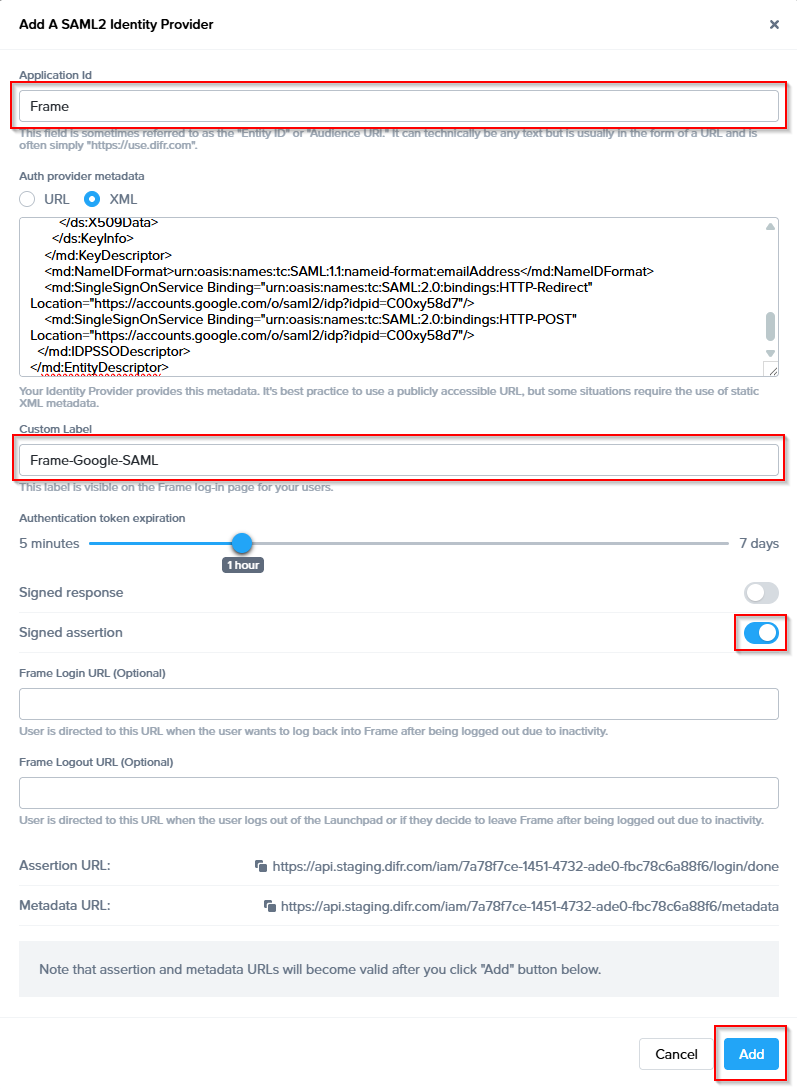](https://docs.difr.com/uploads/images/gallery/2025-11/469image.png)
- **Application ID**: The value here **needs to match** the value set as the "Entity ID" from Step 5.
- **Auth provider metadata**: Click the “XML” option and paste the contents of the Metadata XML file from Step 4.
- **Custom Label**:. Allows Admins to customize Frame's Sign in page chiclets/buttons associated with this SAML2 integration.
- **Authentication token expiration**: Choose a token expiration duration that supports your end-user workflows and complies with your security policies.
- **Enable “Signed assertion”**
- **Assertion Consumer Service (ACS) URL:** The endpoint where the Identity Provider (IdP) delivers SAML authentication responses after a successful login.
- **Metadata URL:** A publicly accessible URL providing your Service Provider's SAML metadata, used by Identity Providers to configure and establish trust.
**Optional**
- Frame Login URL: user is directed to this URL when the user wants to log back into Frame after being logged out due to inactivity.
- Frame Logout URL: user is directed to this URL when the user logs out of the Launchpad or if they decide to leave Frame after being logged out due to inactivity.
Lastly, confirm that everything is entered correctly and click **Add**.
### Configuring SAML2 Permissions
### Accessing Frame with Google Workspace
Your SAML integration will now appear to your users as a sign in button on your specific Frame Sign in Page.