# Basic Authentication
Basic Authentication is a manual approach for providing access; admins need to manually invite users **via email**, and have them **set their own** passwords. You manually reset their passwords, manually delete the users, and give users various roles/permissions for Frame Accounts, Organizations, or Customers. If you are planning on using Frame's Basic Authentication for your user management, continue reading to learn how to manage your users. If you are planning on using a third-party provider, we recommend reading through the information in the [Identity Provider Integrations](https://docs.difr.com/books/platform-administrators-guide/page/identity-provider-integrations) section.
Basic Authentication should be used for proof of concept, development, and testing purposes \*\*only\*\*. Basic Authentication does not provide user/password management capabilities (password expiration, password complexity policies, or multi-factor authentication). Frame strongly recommends customers use a third-party SAML2 identity provider for user authentication.
## Invite Users
Once you have onboarded your apps, published your changes, and set up your Launchpad – you are ready to invite users. You can use the Frame Basic IdP by following the instructions below.
1. From the Dashboard, click on the **Users** page listed on the left. From there, go to the **Basic (username/password)** tab.
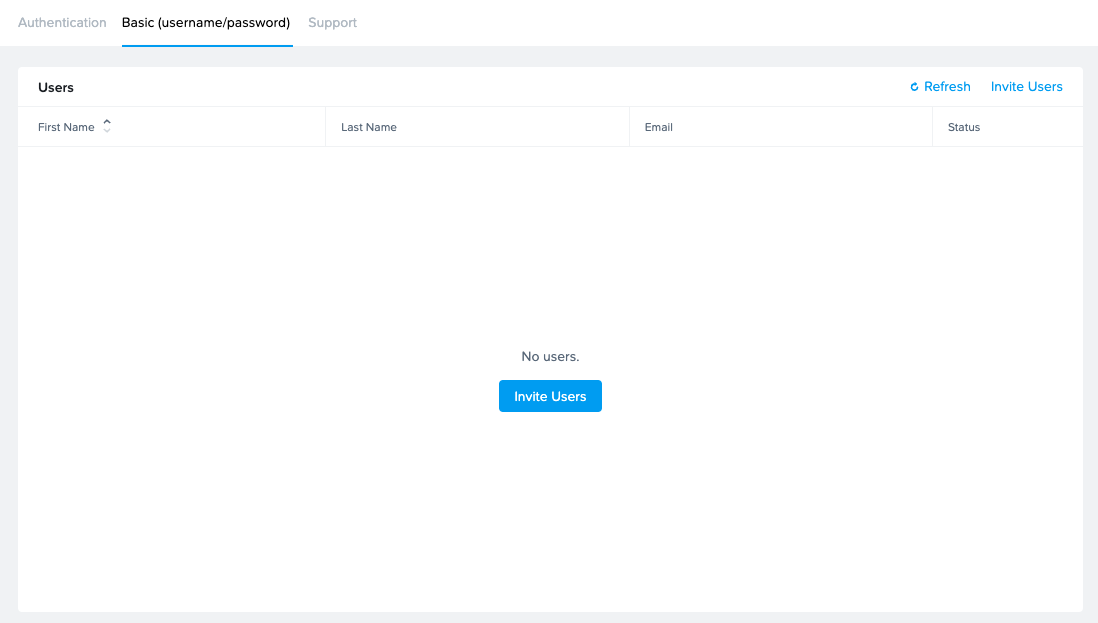
2. Click the **Invite User** button in the upper right corner of the screen. A new window will appear prompting you to enter the email address of the user you would like to invite.
The system will automatically check to see if the email address is already associated with the account.
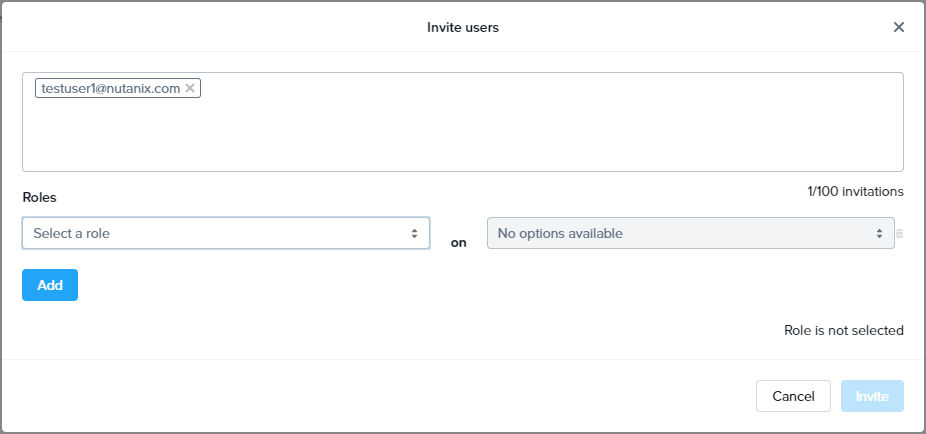
3. Once the email address has been entered, the **Roles** section will appear within the window. Select the role you would like to assign to your user. You can assign different roles for different accounts for this user by clicking the **Add** button. If you would like to learn more about user roles, check out our [documentation](https://docs.difr.com/books/platform-administrators-guide/page/available-roles).

4. Click **Invite** when ready. The window will close and your user's information will automatically populate under the **Users** list. An invite will be sent to your user where they will fill out their name and set their password.
## Reset a Deactivated User Account
Inevitably, some of your users will forget their passwords. User can reset their own password, as described in our [end user documentation](https://docs.difr.com/books/desktop-users-guide/page/introduction#password-management-1). However, if they fail to login successfully in 3 consecutive login attempts, Frame Basic IdP will deactivate their user account. Reactivating a Frame Basic IdP user account is simple and can be done with just a few clicks.
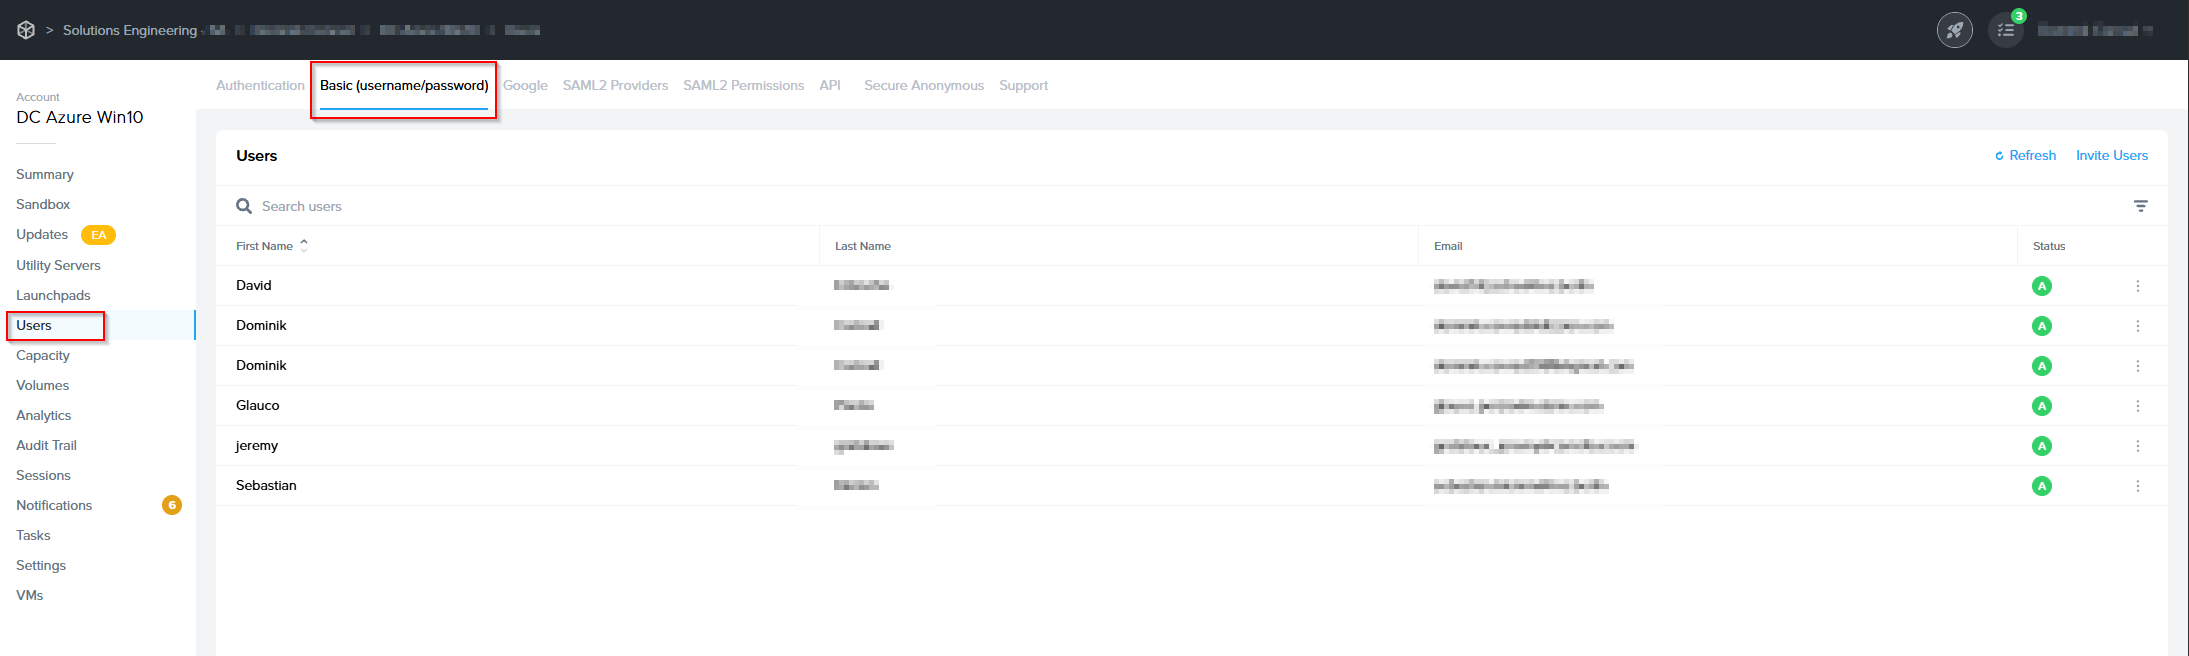
1. Depending on your assigned administrator role, go to the **Users** left-hand menu on the Customer or Organization Dashboard in your [Admin Console](https://docs.difr.com/link/93#bkmrk-page-title) or on the Account [Dashboard](https://docs.difr.com/link/93#bkmrk-navigating-your-fram).
2. Click on the **Basic (username/password)** tab.
[](https://docs.difr.com/uploads/images/gallery/2025-12/Rzcimage.png)
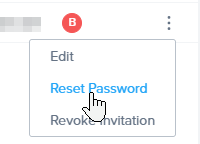
3. Locate your deactivated user from the Users list. You should see that their status has changed to "B" for **Blocked**.

4. Find and click on the ellipsis listed next to their name on the far right side of the screen. Select **Reset Password** as shown below:
5. Your user will be sent an email with a link to reset their Frame Basic IdP user password.
Voilà! You have successfully reactivated your user's Frame account.
## Removing Users
Removing users from your account can be done with just a few clicks.
1. Depending on your assigned administrator role, go to the **Users** left-hand menu on the Customer or Organization page in your [Admin Console](https://docs.difr.com/link/93#bkmrk-page-title) or on the Account [Dashboard](https://docs.difr.com/link/93#bkmrk-navigating-your-fram).
2. Click on the **Basic (username/password)** tab.
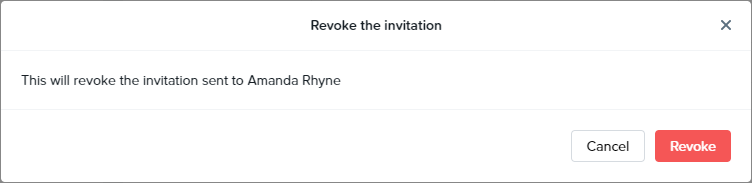
3. Click on the ellipsis next to the user you wish to remove from the account and select **Revoke Invitation**.
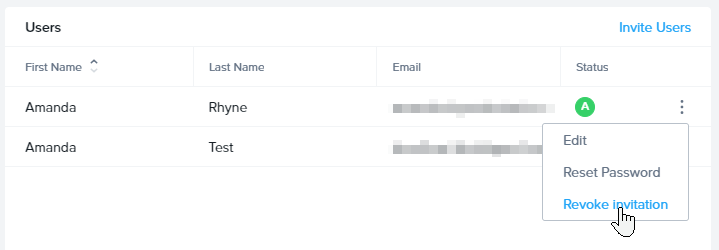
4. A confirmation prompt will appear. Click **Revoke** in the bottom right corner of the dialog box.
## Logging in
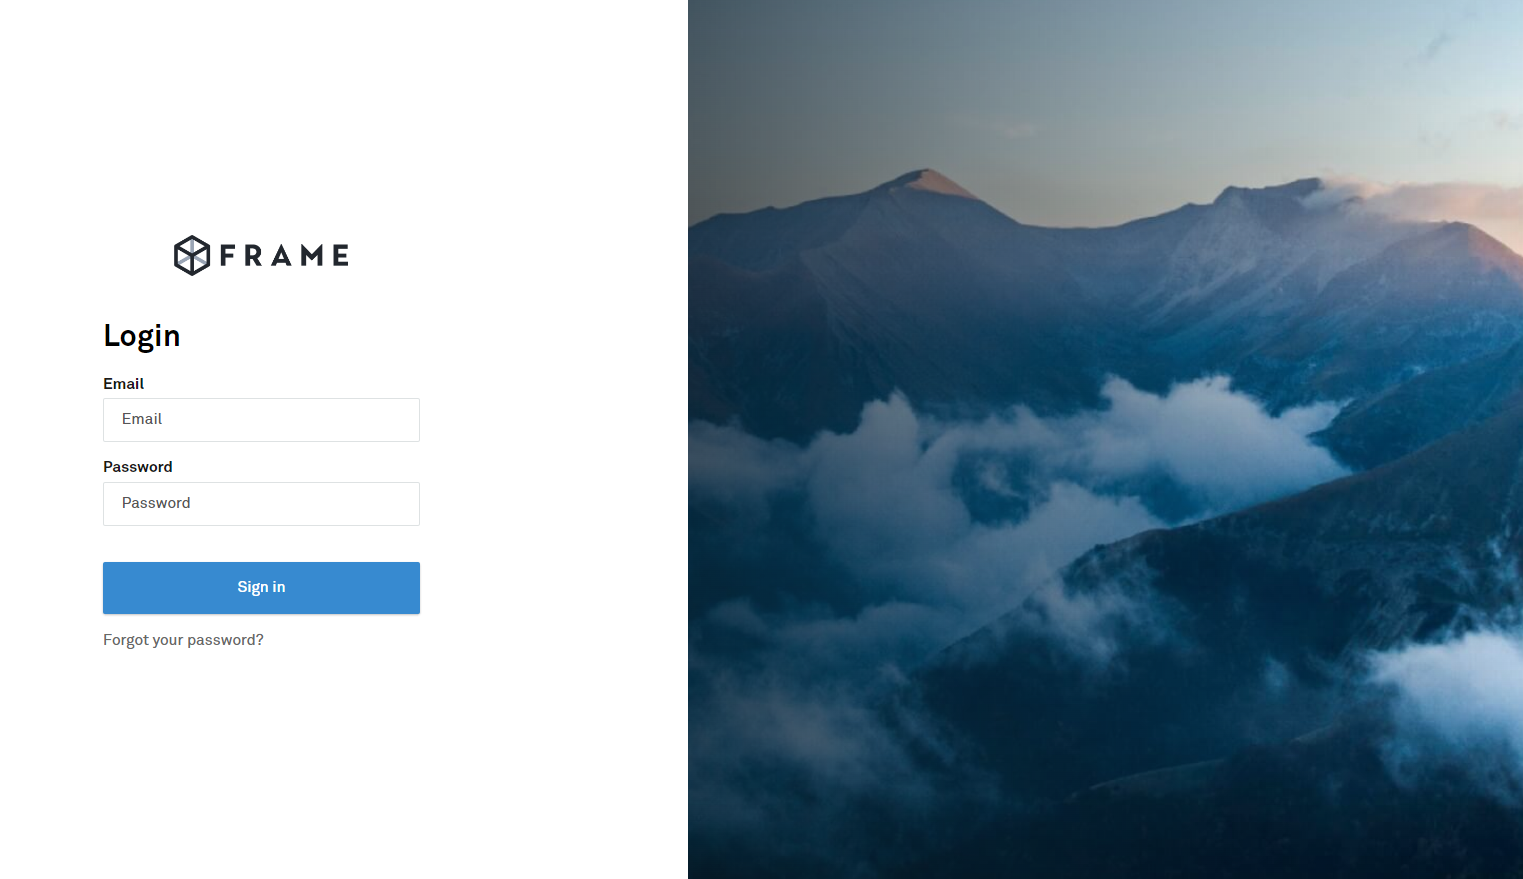
Once users have accepted their Basic Authentication invitation, they can sign in using email address and password on our Frame Basic IdP Login page as pictured below. Most Frame Basic IdP users can login at ; however, you can direct your users to go to a [specific Launchpad or Account Dashboard URL](https://docs.difr.com/books/platform-administrators-guide/page/authentication#entity-endpoint-urls).
### Require Frame Basic IdP
If you require users to always authenticate using Frame Basic IdP (especially if you have more than one IdP configured for your Customer, Organization, and/or Account(s)), direct your users to a [specific Launchpad or Account Dashboard URL](https://docs.difr.com/books/platform-administrators-guide/page/authentication#entity-endpoint-urls) appended to the URL.