Due to the way that AWS CloudFormation Stacks operate, the orchestration of Frame resources in your AWS subscription is not tied to a particular IAM user account. Frame Platform does not rely on the IAM user that was used to associate your AWS subscription to the Frame Platform. The IAM user can be deleted or disabled at any time without disabling your integration with Frame. If you do wish to disable your integration with Frame manually, please delete the Nutanix-Frame- High-Cloud-Stack-Prod CloudFormation``` stack, as well as the FrameGatewayRole, FrameLambdaRole IAM Roles
2. You know your AWS Account ID that will be registered with Frame. The AWS Account ID can be found by going to your “My Account” page in your AWS Console. Click on the drop down menu next to your account name in the upper right corner of your AWS Console to access this page. 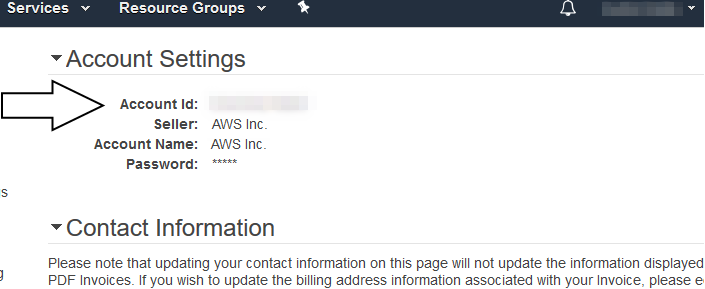 3. Determine whether you are registering your cloud subscription on your Frame Customer Entity or an Organization entity. 4. **Streaming Gateway Appliance**: If you plan to deploy Streaming Gateway Appliances in AWS (either during the Frame account creation process or manually after the Frame account is created), you will need to accept the CentOS 7 license terms in the AWS Marketplace first. Visit [https://aws.amazon.com/marketplace/pp/B00O7WM7QW/](https://aws.amazon.com/marketplace/pp/B00O7WM7QW/) and subscribe to CentOS 7 (x86\_64).Costs may begin to accrue immediately after completing the CloudFormation Stack creation.
You will need to be logged in to the AWS console with your IAM user in a separate tab or window in order to complete the CloudFormation Stack creation. Frame Platform will not have access to your AWS user credentials.
### AWS Dedicated Instances When deploying Windows 10 or 11 VMs using your BYO AWS account, Frame now leverages **AWS Dedicated Instances** by default. Dedicated Instances provide isolated hardware environments to ensure compliance with Microsoft’s EULA for virtualized desktops. This feature helps maintain licensing integrity for both Frame-provided and customer-provided Windows images. More details around licensing with AWS Dedicated Instances can be found in our [Microsoft Licensing Guide](https://docs.difr.com/platform/key-concepts/licensing/msft-licensing)Note
**Pricing Reminder** AWS Dedicated Instances follow a pay-as-you-go model, with an additional regional fee (per hour, per region) applied whenever a dedicated instance is active. You can find more information about regional fees in the [AWS Dedicated Instance Pricing Guide.](https://aws.amazon.com/ec2/pricing/dedicated-instances/)**Caution Deploying Windows 10 or 11 VMs in AWS** When deploying **Windows 10 or 11 VMs** using your BYO AWS account, Frame now leverages **AWS Dedicated Instances** by default. Dedicated Instances provide isolated hardware environments to ensure compliance with Microsoft’s EULA for virtualized desktops. This feature helps maintain licensing integrity for both Frame-provided and customer-provided Windows images. More details around licensing with AWS Dedicated Instances can be found in our [Microsoft Licensing Guide](https://docs.difr.com/platform/key-concepts/licensing/msft-licensing)
8. Simply scroll to the bottom and check the box to allow CloudFormation to create IAM resources for you, then click “Create stack” 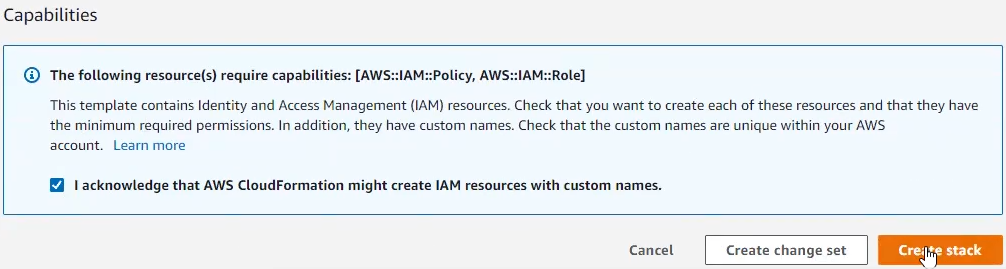 9. Once the above process is complete, you will be directed to a page which lists the events for this CloudFormation Stack. The creation process will proceed automatically. You may need to refresh the page to see new events. Once events appear named `Nutanix-Frame-High-Orchestrator-Role-Prod`, `Nutanix-Frame-High-Lambda-Role-Prod`, and `Nutanix-Frame-High-Workload-Role-Prod` and are marked as status “CREATE\_COMPLETE”, the stack creation has completed. This typically takes less than two minutes.  10. Once the stack has been created, navigate back to your Frame tab and select “Verify Credentials”. 11. Once your credentials are verified, you can select the data centers (AWS regions) for your Frame accounts. You may add additional data centers in the future. 12. Check the box at the bottom informing you of possible resource usage on your AWS cloud infrastructure and then click "Add Account". After a few minutes, you will see your AWS Cloud Account listed as "Ready".  Now that your AWS Cloud Account is created and accessible within Frame, you will be able to create Frame accounts using this BYO cloud account. ### Resources Created During BYO AWS Cloud Account Creation During the creation of a BYO AWS or BYO AWS GovCloud Cloud Account, the Cloud Formation template creates three IAM Roles. - FrameGatewayRole allows Frame Platform to provision and deprovision AWS resources for Frame-managed workloads. - FrameLambdaRole allows log entries to be captured by Frame Platform. - FrameWorkloadRole enables Frame Platform to store and retrieve Dizzion-provided OS images in an S3 bucket in each of the AWS regions where you create Frame accounts. ## Service Limits By default, a newly created AWS account will impose certain service limits on available resources. Depending on the number of the Frame workload VMs required of a given machine type (e.g., number of concurrent users on g4dn.2xlarge), how the Frame account is created (e.g., Frame networking with or without an SGA), and whether you use Publish or Quick Publish, you will likely need to adjust the default limits imposed on the AWS account. If these limits are set to values that are lower than what is required by the Frame platform, you can expect certain functions to either fail, or be substantially delayed. The requirements by Frame for these service limits depends on the desired workload and required resources. The recommended service limit increases include the following:| AWS Resource | Recommendation |
|---|---|
| EC2 (CPU-only and GPU instance types) | AWS has service quotas on the total number of vCPUs for any given instance family, on a per-region basis. We recommend you first determine the expected max number of instances by instance type (per Frame account) for your needs. Next, calculate the required number of instance family-specific vCPUs based on the expected max number of instances and the required number of vCPUs per instance type (for that family). If you use Publish, set your vCPU quota to 2.2 times the number of instance family-specific vCPUs. The additional 20% will accommodate any additional resources such as Sandboxes, Utility servers, etc. If you use Quick Publish, you can use a minimum factor of 1.X times to calculate the required number of instance family-specific vCPUs. X is computed as the “Number of production instances created on publish” divided by expected max instances. By default, the “Number of production instances created on publish” value is configured to be 10 VMs. A factor of 1.3-1.5 should be sufficient to account for typical Quick Publishes and overhead. |
| EBS | Typically, this resource does not need to be modified. To estimate total disk storage consumption, multiply the total number of VMs you expect to provision by the size of the Sandbox VM (e.g., 80 GiB) across all Frame accounts you plan to provision. Number and size of any utility servers, number of Sandbox image backups, number and size of personal drives, and number and size of enterprise profile disks would be additional storage to consider. |
| IP Addresses | AWS does not have any service quotas on public or private IP addresses that are assigned when an EC2 instance is powered on and removed when an EC2 instance is powered off. If a Frame account is created with Frame public networking, each workload VM will have both a public and private IP address. If the Frame account is created using Frame private networking, all workload VMs will only have private IP addresses. If the Frame account is created using Frame private networking with Streaming Gateway Appliance (SGA), then Frame will provision 1 public IP address for each SGA VM and 1 public IP address for the load balancer in front of the SGA VMs. All of the workload VMs will only have private IP addresses. You will also need to account for the temporary increase of in-use IP addresses during a Publish or Quick Publish when the new production VMs are created and before the old production VMs are terminated. |
| Elastic IP Addresses | Elastic IP addresses are static, public IPv4 addresses. Frame does not provision Elastic IP addresses. However, if you plan to use VPN endpoints, you will need to factor into your service quota calculations the 1 or 2 Elastic IP Addresses needed for configuring the VPN gateway. |
| Network interfaces | By default, you should have 5,000 network interfaces per region. If a Frame account is created with Frame public networking, you will have need 2 network interfaces (private IP address and public IP address) per workload VM. If a Frame account is created with Frame private networking with SGA, you will have need 1 network interfaces (private IP address) per workload VM. |
| VPCs | If Frame public networking or Frame private networking is used to create Frame accounts, the number of VPCs equals the number of Frame accounts. If Frame private networking with SGA is used to create Frame accounts, the required number of VPCs is two times the number of Frame accounts. For BYO networking, no new networks are created. |
Service limit increases may not be necessary for smaller production environments or trial accounts.
### Tips - If possible, group your service limit increases by geographic region. Each geographic region has its own approval team. A limit increase across multiple regions can take multiple weeks. - Approval time can vary by the size of the request. For instance, two or three small service limit increase requests are generally approved more quickly than one large request. - Since capacity is limited, increasing service limits on GPU-backed instances generally takes longer than general purpose limit increases. - T3 instance limit increase requests are usually approved and implemented within 24 hours of the request. G4/G5 instance limit increases take longer (especially for larger quantities). ## Instance Types Each IaaS provider has a unique naming scheme for their instance types. AWS categorizes their “Elastic Cloud Compute instances” (a.k.a. “EC2 instances”) based on compute, memory, and GPU configuration. More information about Amazon EC2 instances can be found in their [official AWS documentation](https://aws.amazon.com/ec2/instance-types/). For the latest AWS instances supported by Frame, refer to our [Supported Instance Types table](https://docs.difr.com/books/platform-administrators-guide/page/supported-instance-types). ## Resource Naming Frame provisions the resources below based on a specific naming convention. The resource name value is also saved as value for the tag `Name`.| Resource | Resource Name | Example |
|---|---|---|
| Workload VM | prod:v\\{vendor\_id}:s\\{server.id} | `prod:v53209:s8059811` |
| Workload VM root volume | prod:v\\{vendor\_id}:s\\{server.id}:root | `prod:v53209:s8059811:root` |
| User Volume | prod:v\\{vendor\_id}:\\{random 8 character}:\\{type} | `prod:v48287:8206856b:profile` |
| User Volume backup (Snapshot) | prod:v\\{vendor\_id}:d\\{user\_volume\_id} | `prod:v48287:d169928` |
| Image | prod-v\\{vendor\_id}-s\\{server\_id}-\\{image\_type}-\\{random 5 characters} OR prod-v\\{vendor\_id}-\\{image\_type}-\\{random 5 characters} | `prod-v53209-s8059811-publish-64d3d` or `prod-v48287-manual-8e750` |
| Master Image | prod-master\_image-src-\\{source\_image\_id}-\\{random 5 characters} | `prod-master_image-src-239323-d06e8` |
| VPC | prod:v\\{vendor.id}:vpc\\{vendor.vpc\_set.count()} | `prod:v7538:vpc0` |
| Subnet | prod:v\\{vendor.id}:sn\\{idx} | `prod:v53209:sn3` |
| Security group | prod:v\\{vendor.id}:sg-default | `prod:v53209:sg-default` |
| Static Public IP | prod:v\\{vendor.id}:sg-default | `prod:v53242:sg-default` |
| NAT Gateway | prod:v\\{vendor.id}:sg-default | `prod:v53242:sg-default` |
| Routing table | prod:v\\{vendor.id}:sg-default | `prod:v53242:sg-default` |
| SGA VPC | prod:sga:\\{streaming\_configuration\_id}:vpc | `prod:sga:2425:vpc` |
| SGA subnet | prod:sga:\\{streaming\_configuration\_id}:vpc\\{vpc.id}:sn\\{str(i)} | `prod:sga:2425:vpc69807:sn1` |
| SGA security group | prod:sga:\\{streaming\_configuration\_id}:vpc:\\{vpc.id}:sg-default | `prod:sga:2420:vpc:69784:sg-default` |
| SGA VM | prod:sga:\\{streaming\_configuration\_id}:s\\{server.id} | `prod:sga:2420:s1f175e3d` |
| SGA VM root disk | prod:sga:\\{streaming\_configuration\_id}:s\\{server.id} | `prod:sga:2425:sc95b63e7` |
| SGA load balancer | prod:sga:\\{streaming\_configuration\_id}:nlb | `prod:sga:2425:nlb` |
Note
The Streaming Gateway Appliance (SGA) resource naming applies only to Frame-provisioned and managed SGAs.Costs (e.g., storage) may begin to accrue immediately after completing the registration of your Azure account on your Frame Customer or Organization entity.
## Preparation Before your Azure account can be registered with Frame, you will need to complete two tasks: 1. Create an Azure application registration 2. Add Azure subscription owner permissions to your Azure application registration ### Create an Azure Application Registration You will need to create an Azure app registration for Frame. The app registration is the mechanism by which you'll give Frame access to create and manage network, virtual machines, and storage resources in your Azure subscription. 1. Open the Microsoft Entra ID (formerly Azure Active Directory) option and App registration section. From there, click on the "Add" button and select "App registration” to create a new app. [](https://docs.difr.com/uploads/images/gallery/2026-01/PjGimage.png) 2. You'll see a panel titled “Register an application.” You'll be asked for the following information: - **Name**: you can choose any name. Some customers simply use the name "Frame". Others will append some identifying information for internal reporting purposes to "Frame". This name will appear in the list of Application Registrations. - **Supported account types**: Specify who has access to the application. "Accounts in this organization directory only" is the standard selection for customers. - **Redirect URI (Optional)**: This value can be left blank.The client secret is used by Frame to manage your BYO Azure account. Microsoft Azure has a maximum expiration date of 2 years from the client secret creation date. If you fail to update your client secret before it expires, Frame will no longer be able to manage the resources in your Azure account and you will likely experience a service outage.
Before your client secret expires, you will need to generate a new client secret (following Steps 9 and 10 above) and [re-enter your cloud account secret](https://docs.difr.com/books/platform-administrators-guide/page/cloud-accounts#azure) in the Configuration tab of your Azure Cloud Account. ### Configuring your Azure Subscription This section assumes that you already have an active Azure account with a subscription that can be used for Frame workloads. At this point, you should have also set the resource limits for your subscription to levels high enough to accommodate your expected loads. To confirm your subscription status, login to the Azure web portal, navigate to your subscription, and confirm that its status is “active”: 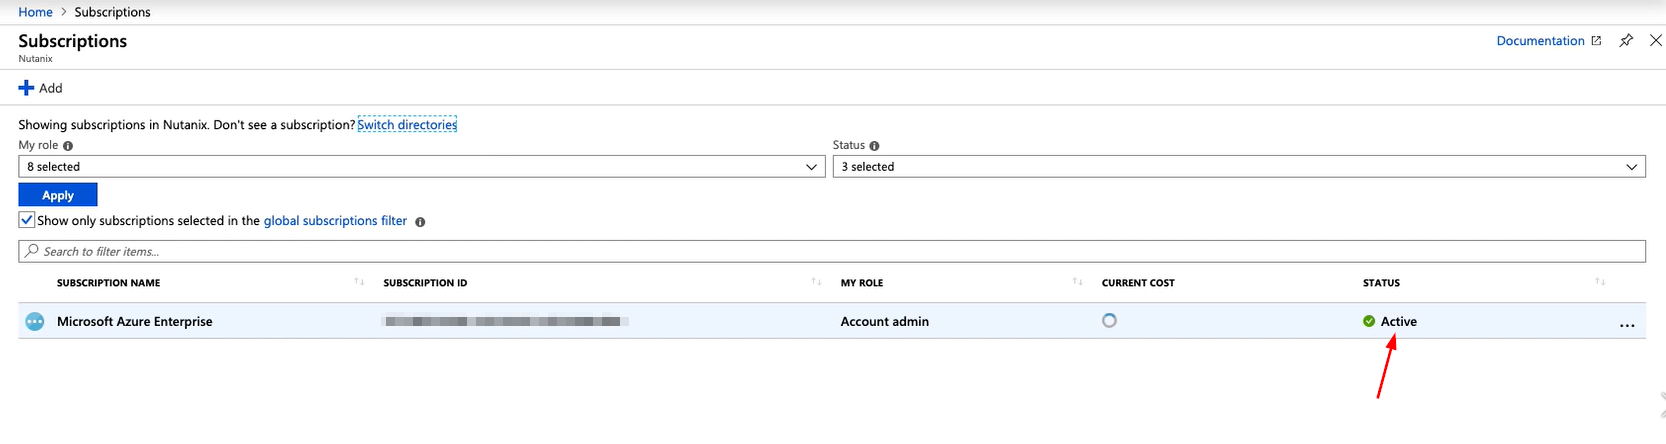 Azure Portal - Active Subscription Before registering your Azure account with Frame, you will grant owner permissions to your new Azure App Registration. 1. At the top of your Azure portal, search for “Subscriptions” and click on the first option that appears. 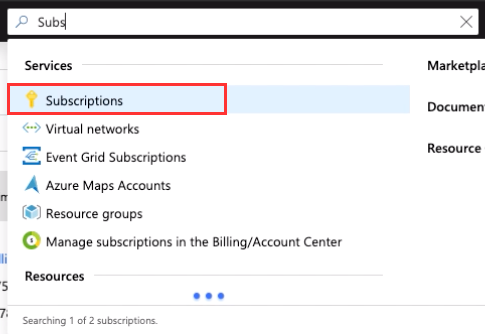 2. Find the subscription that you will use with Frame. Copy the Subscription ID and set it aside to be used in the final steps of this guide. [](https://docs.difr.com/uploads/images/gallery/2026-01/qXTimage.png) 3. Now, click on the subscription to open its properties. Click on the "Access Control (IAM)" page, and then click the "Add" button on the top of the Access Control panel. Select "Add role assignment." [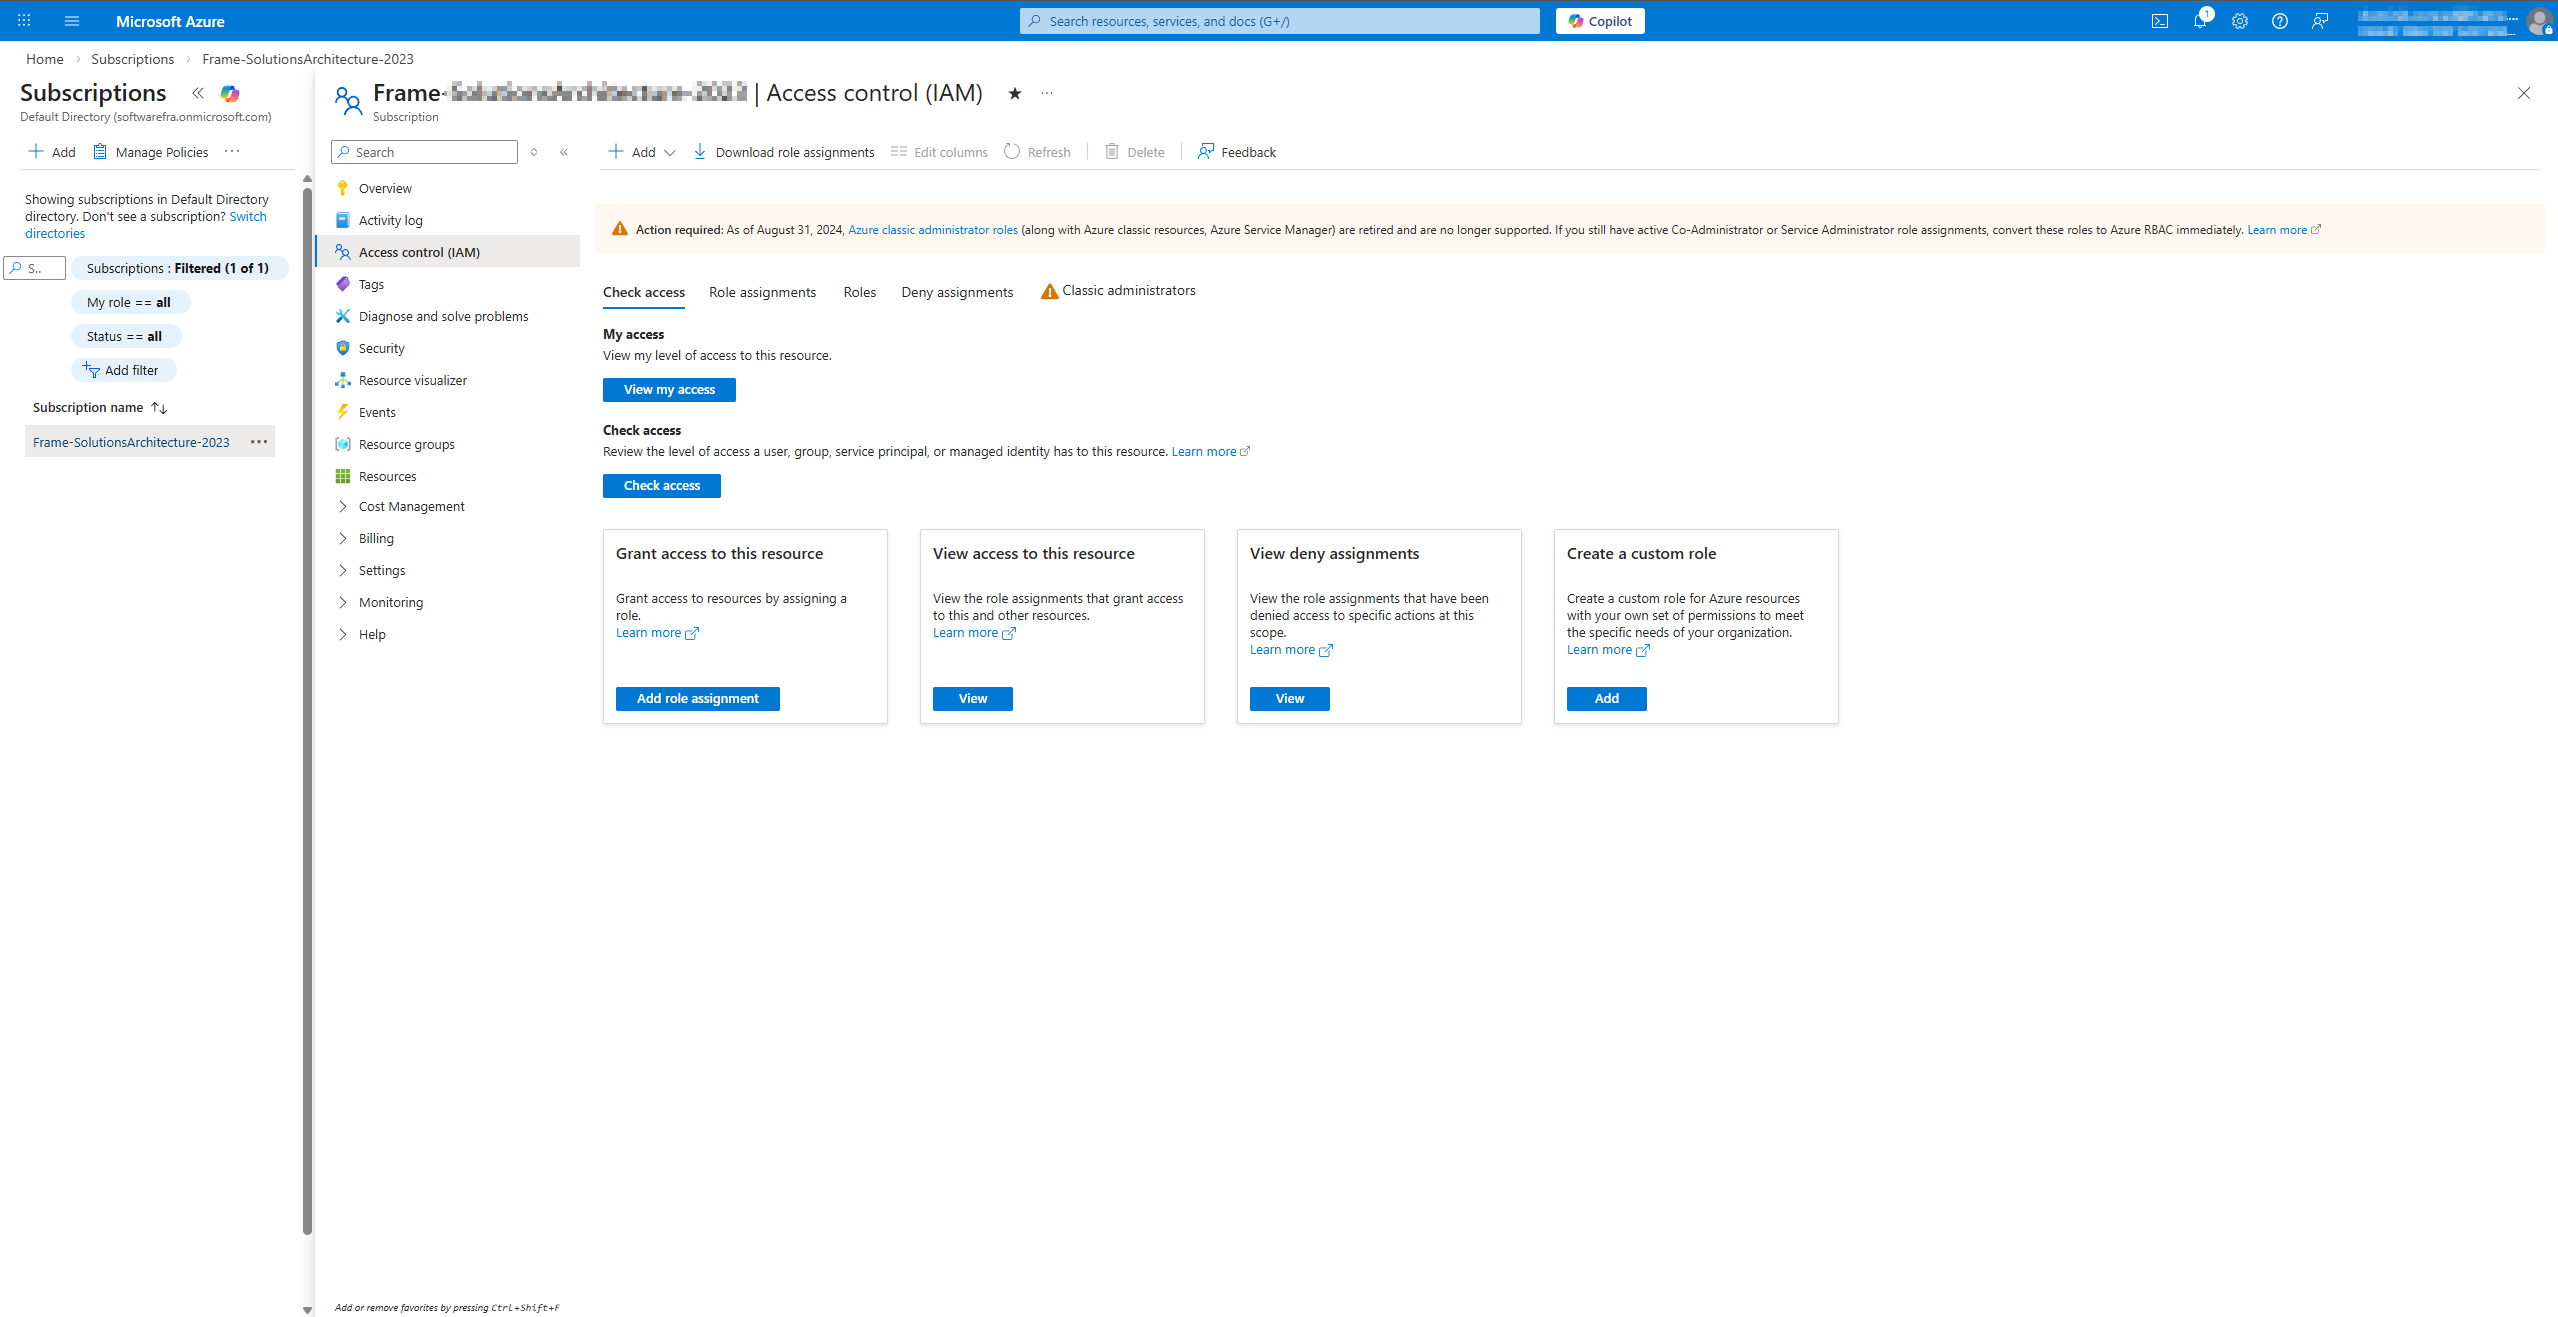](https://docs.difr.com/uploads/images/gallery/2026-01/t3wimage.png) 4. A new window will appear. On the **Role** tab, select “Owner” or “Contributor” from the Privileged administrator roles tab. [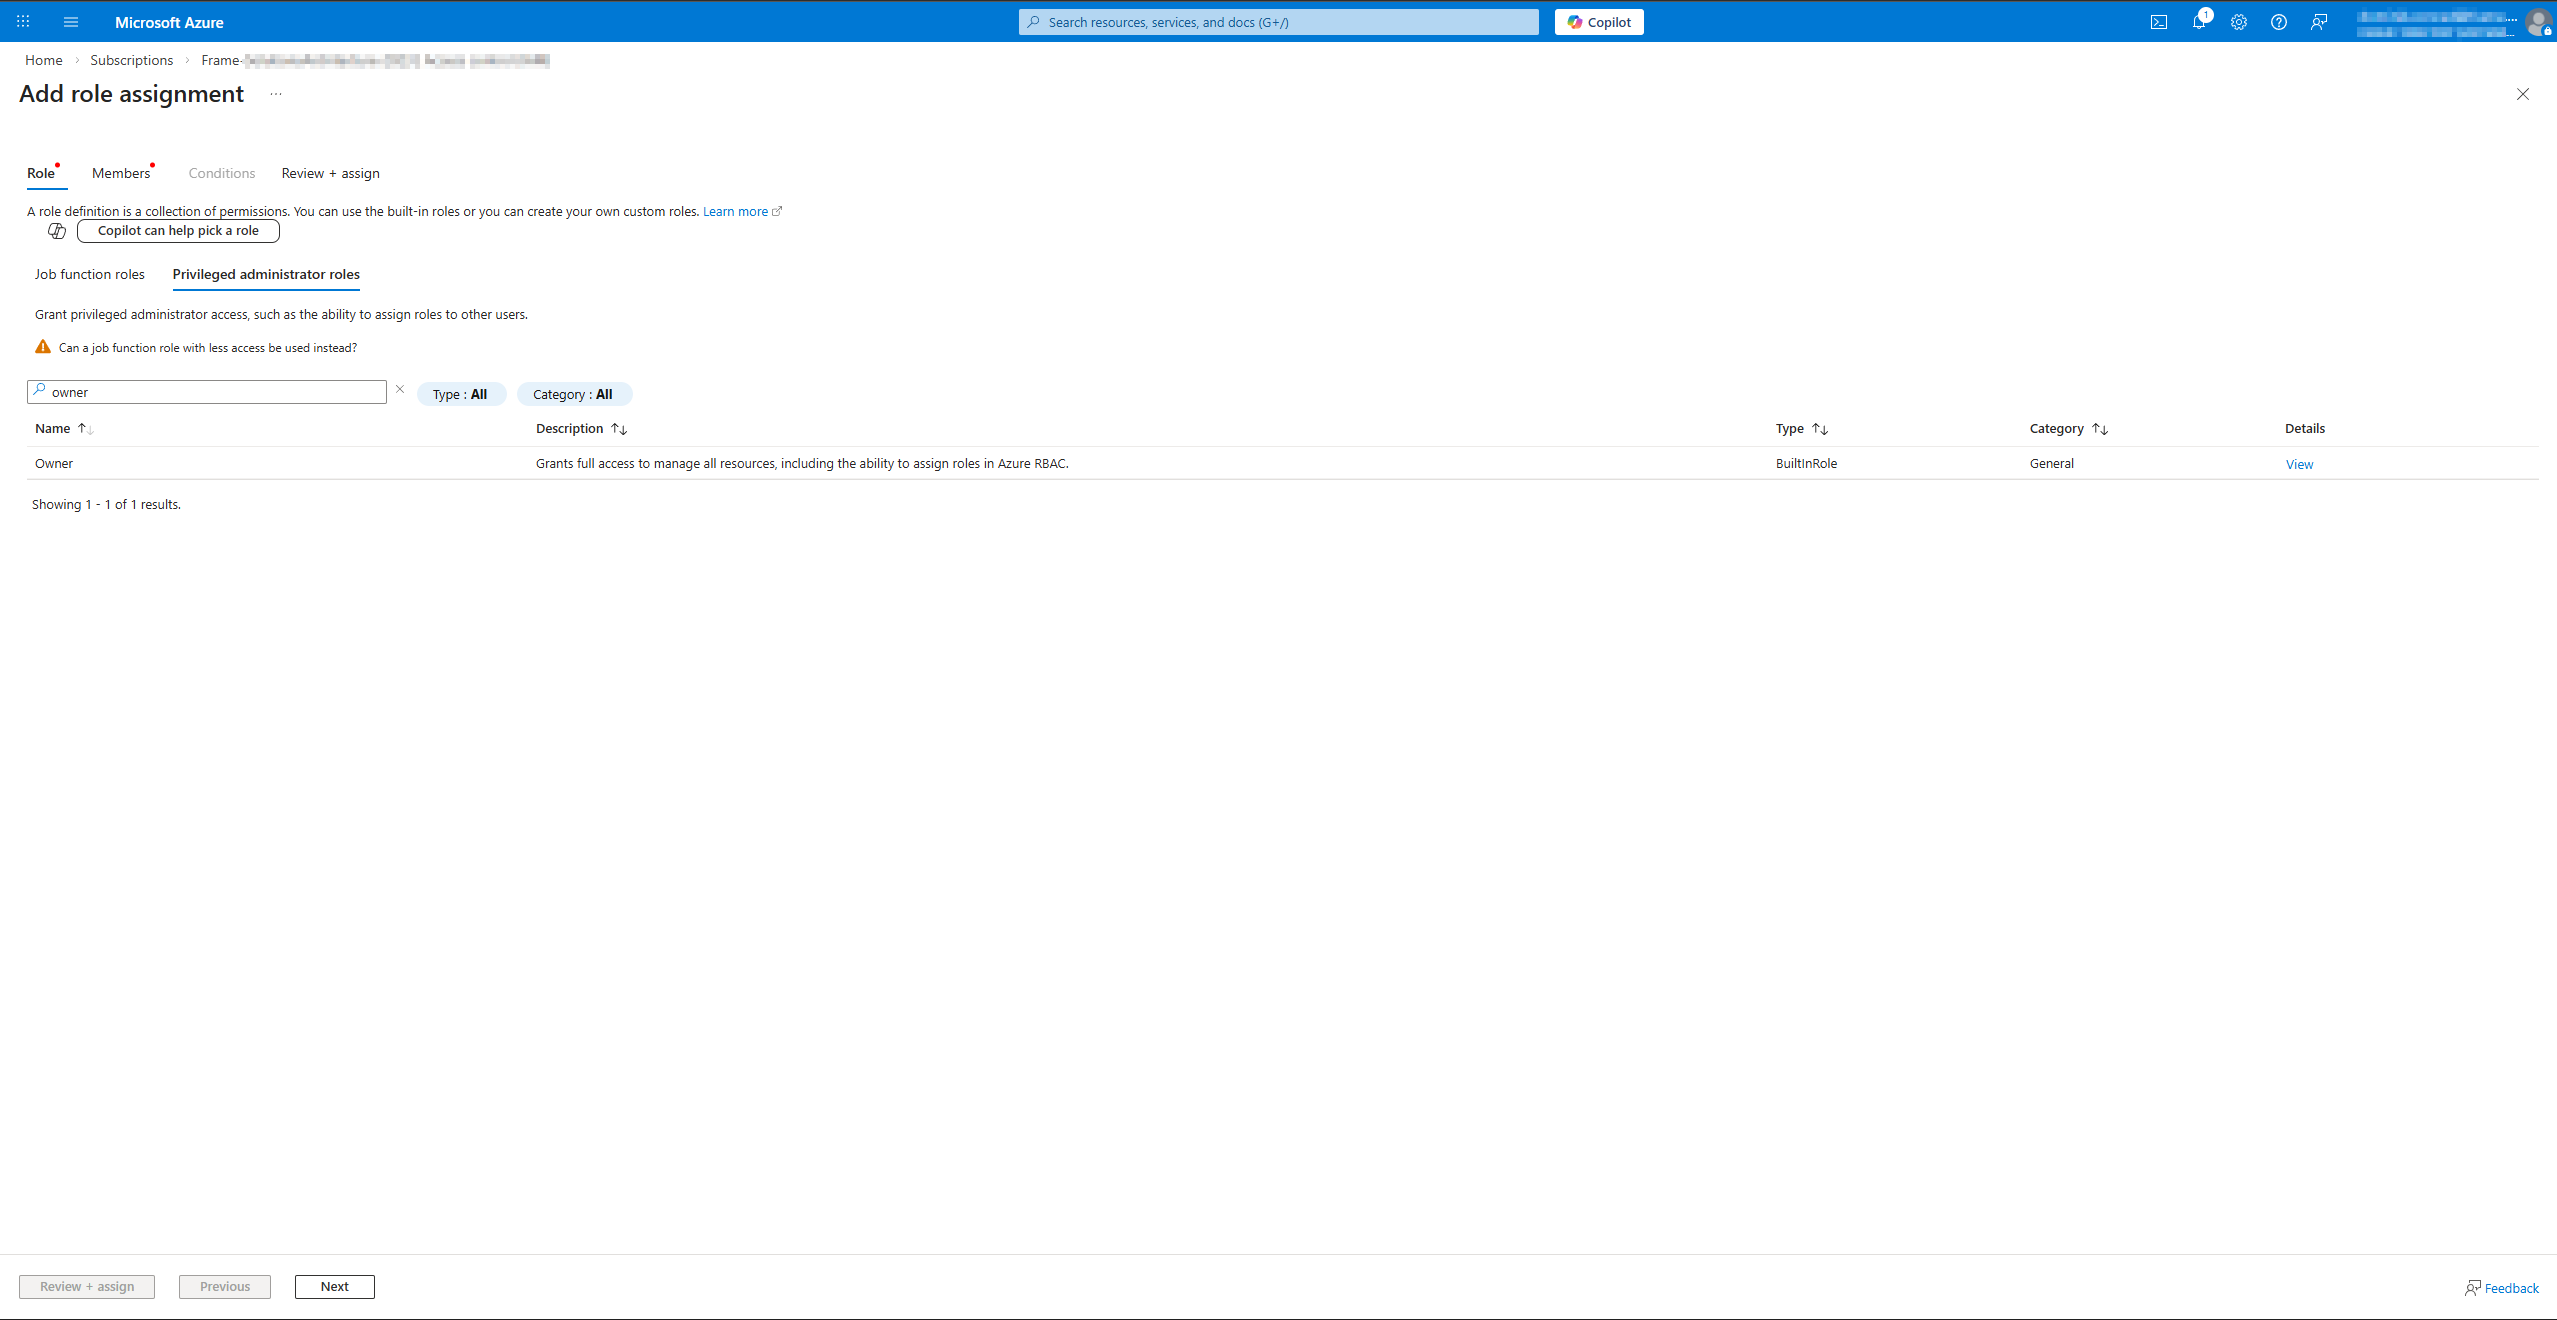](https://docs.difr.com/uploads/images/gallery/2026-01/Soeimage.png) 5. Go to the **Members** tab. [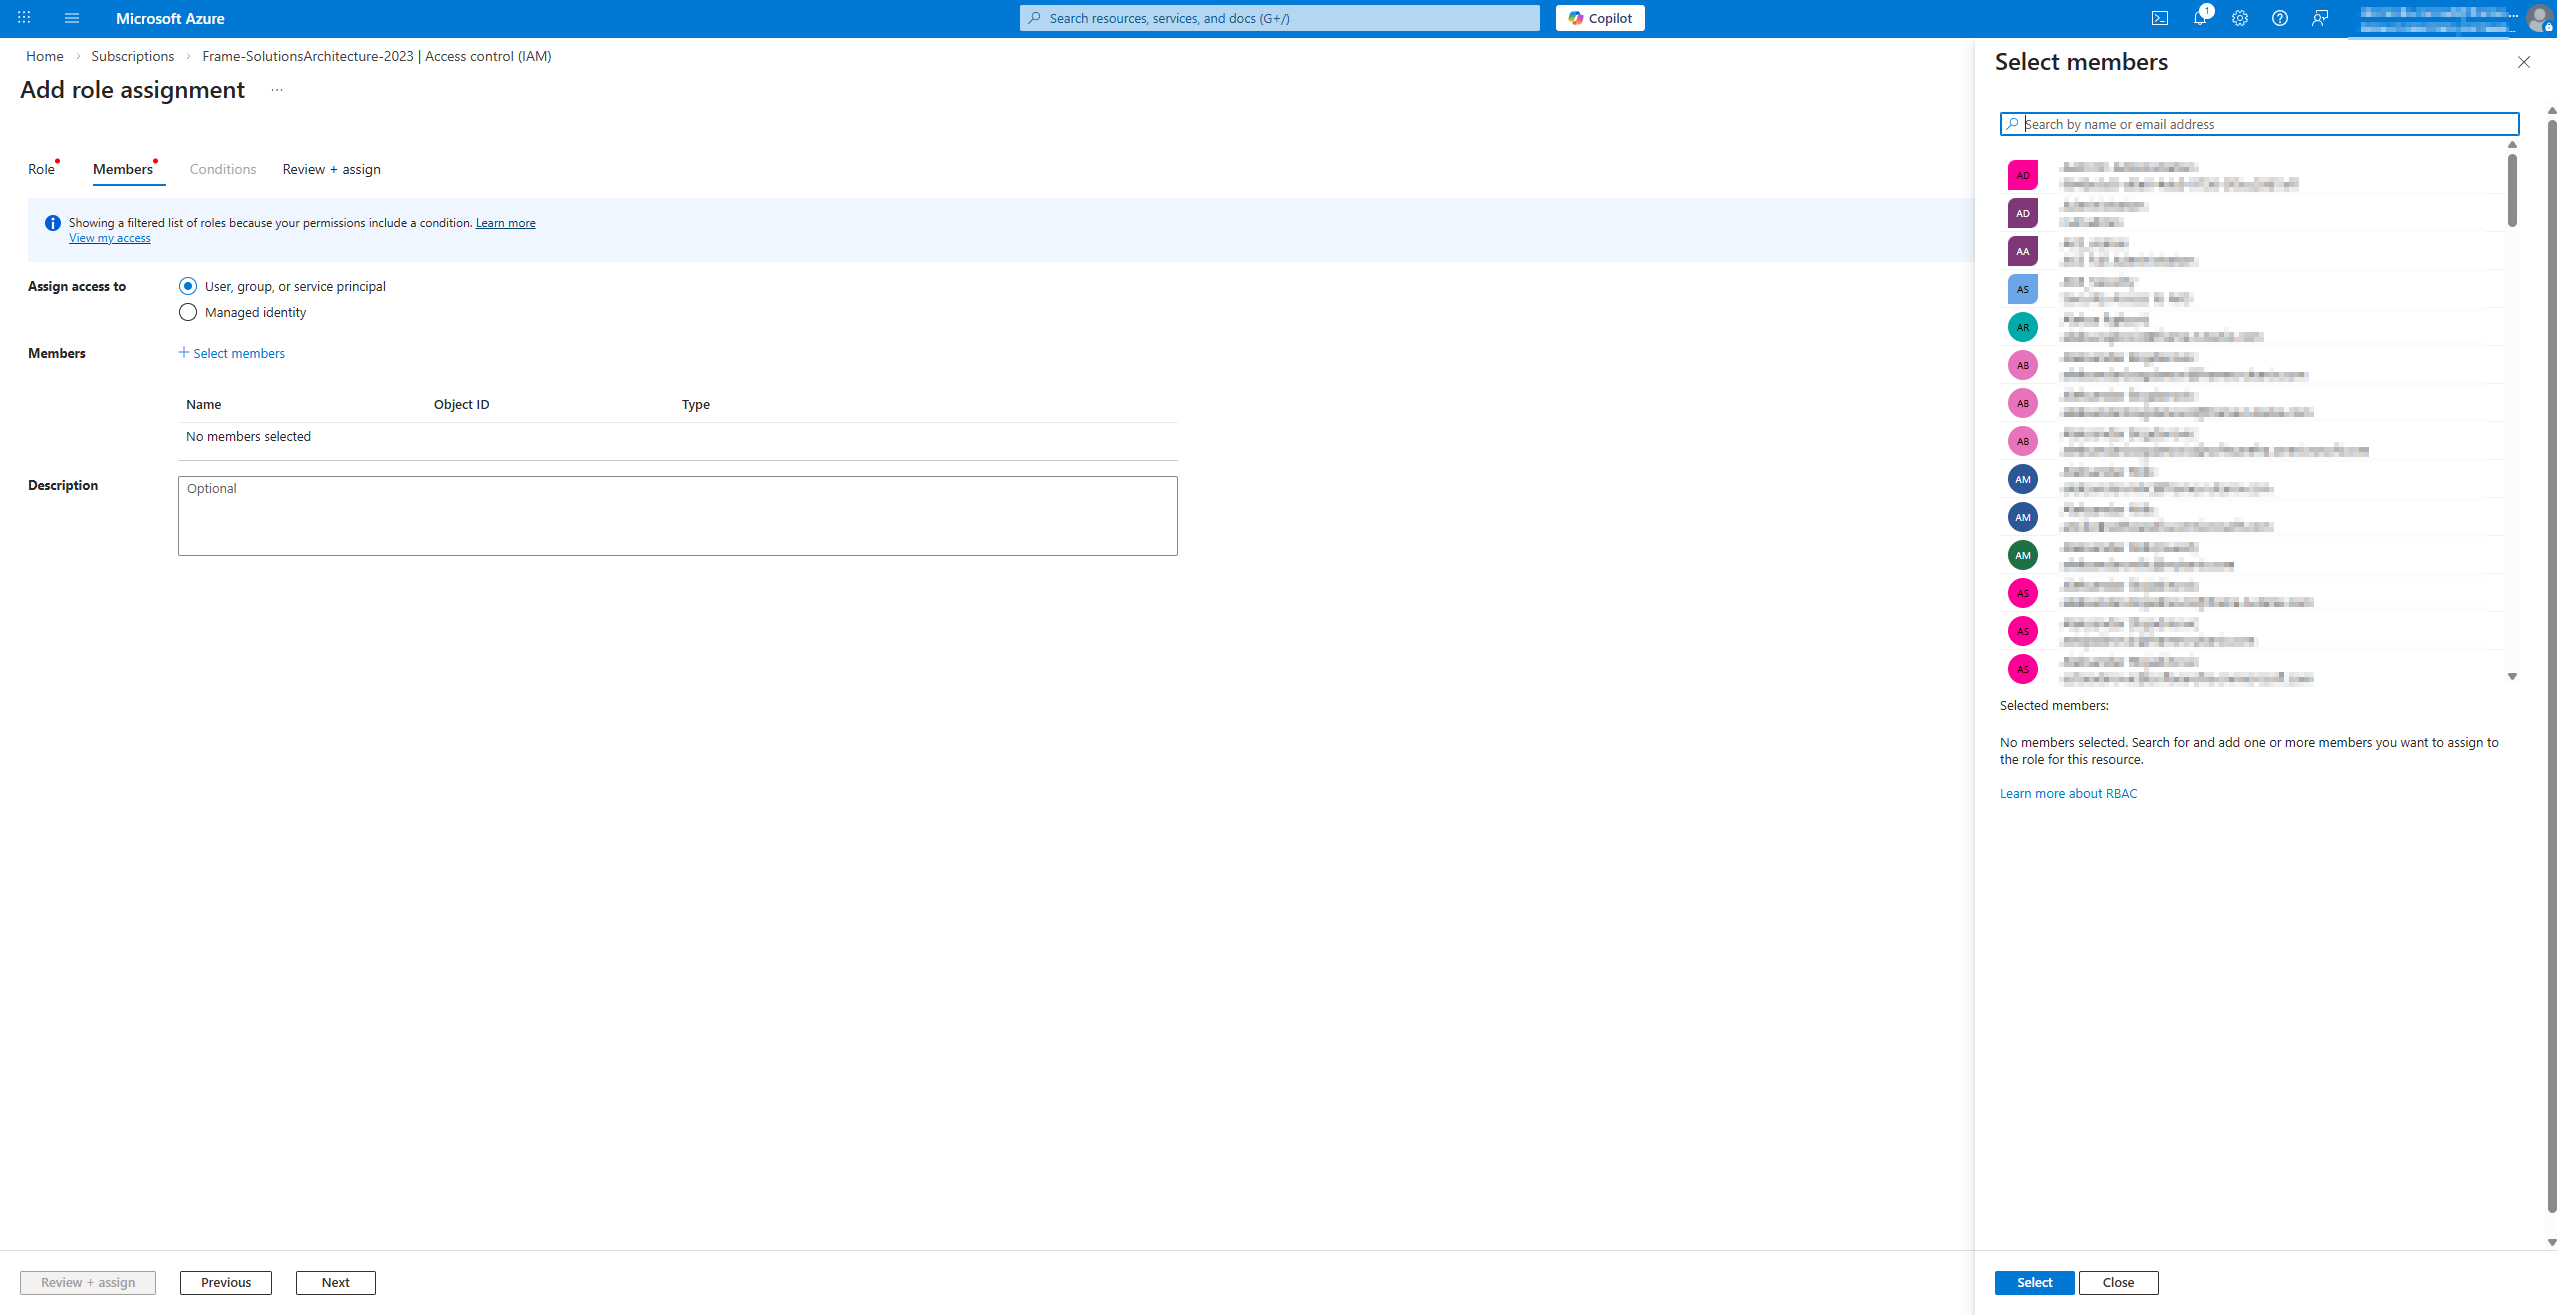](https://docs.difr.com/uploads/images/gallery/2026-01/e1Uimage.png) Azure Portal - Specify Members - **Assign access to**: Select "User, groups or service principals" - **Members**: Click on "+Select members", search for the name of app registration (in this example, it starts with Frame), and then select the app registration and click on the Select button. 6. Go to **Review + assign** tab and finish the process of assigning role to app registration by clicking on the "Review + assign" button. [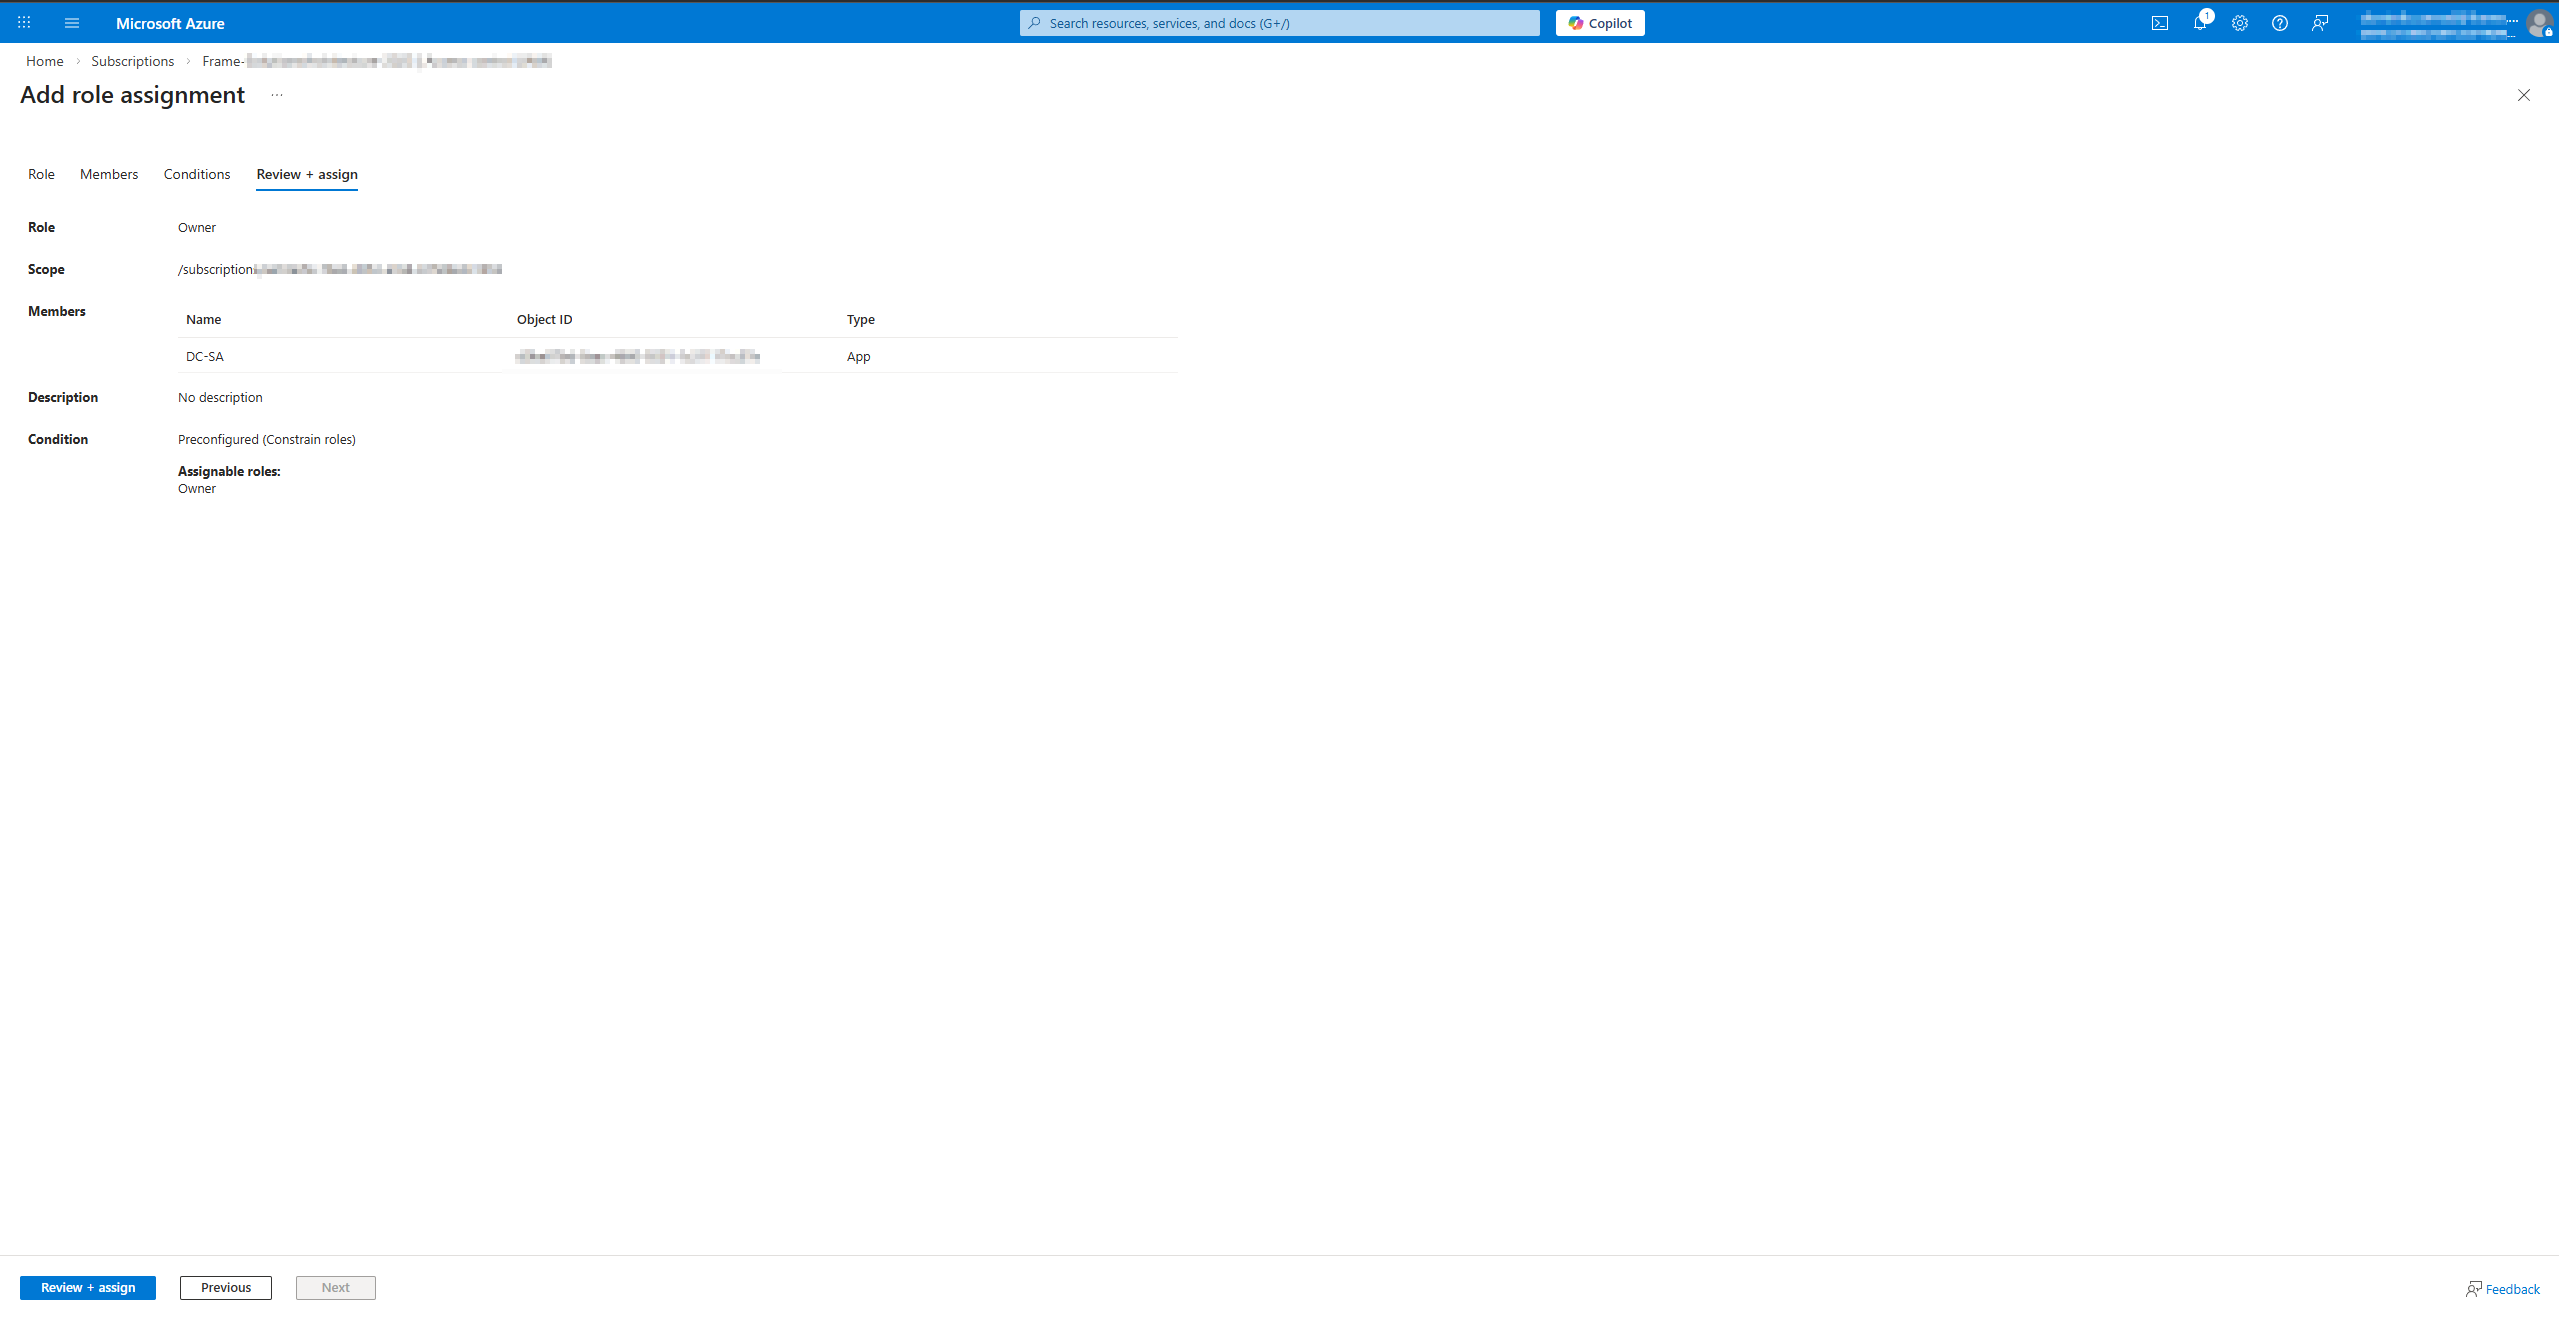](https://docs.difr.com/uploads/images/gallery/2026-01/ZeBimage.png) Azure Portal - Review and Assign 7. Before moving on, ensure you have obtained the following values. - Azure Application ID - Azure Directory ID - Azure Subscription ID - Azure Client Secret You will use these values for the Frame setup below. ## Adding your Cloud Account ### Procedure 1. Go to your Frame Admin Console. 2. Navigate to the **Customer** or the **Organization** page (depending on where you wish to add the cloud account). 3. Click on **Cloud Accounts** in the left-hand menu. 4. Click the **Add Cloud Account** button on the top-right corner of the page. 5. A new window will appear prompting you for the following information: [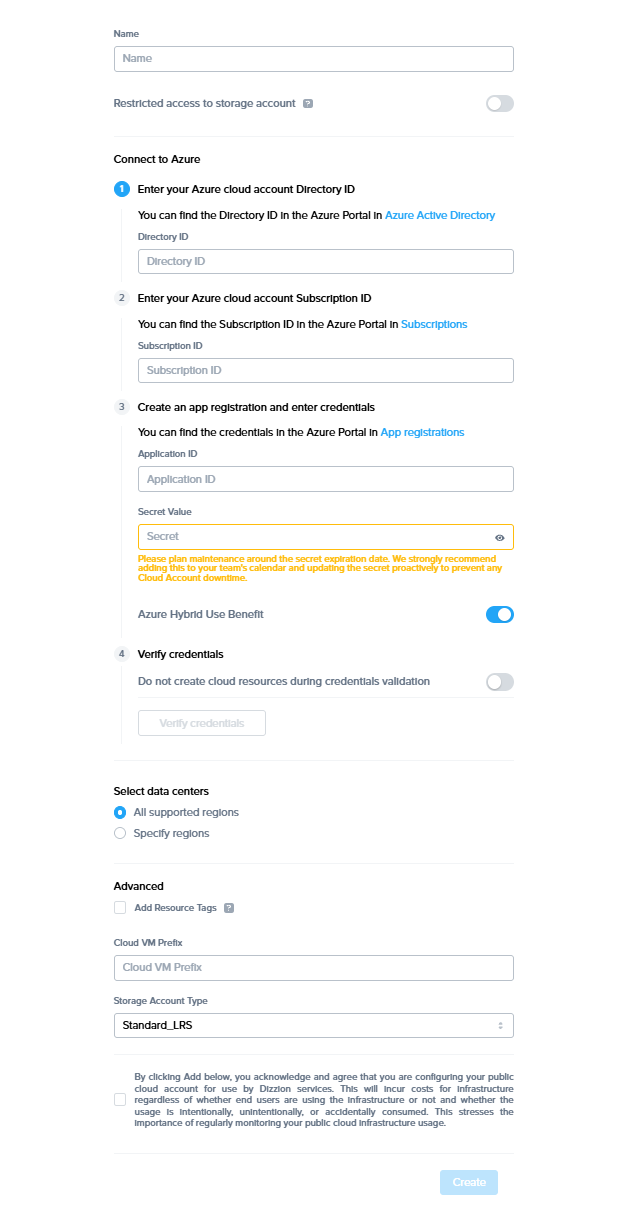](https://docs.difr.com/uploads/images/gallery/2025-12/NAlimage.png) Frame Console - Add Cloud Account - **Cloud Provider**: Select Azure. - **Name**: Enter the desired name of your cloud service. This will be the name of the Cloud Account in Frame Console. - **Restricted access to storage account**: Enable slider to restrict Azure storage container access to only Frame Platform public IP addresses. - **Directory ID**: Enter the Azure Directory ID. - **Subscription ID**: Enter the Azure Subscription ID. - **Application ID**: Enter the Azure Application ID. - **Secret**: Enter the Azure Secret key value. - **Note:** Under the **Secret** section, you will see the following message: > *“Please plan maintenance around the secret expiration date. We strongly recommend adding this to your team's calendar and updating the secret proactively to prevent any Cloud Account downtime.”* This note is included because the current Microsoft Azure UI only allows you to create secrets with a **maximum validity of 2 years**. Once the secret expires, you will need to **renew it in the Azure Portal** and **update the new secret in the Dizzion Console**. Therefore, please plan maintenance activities before the expiration date to ensure uninterrupted access. There are unofficial methods to create App Registration secrets through the Azure CLI with expiration periods of up to 99 years. However, this approach is not officially documented by Microsoft, and its usage should depend on your organization’s internal security policy. Dizzion does not recommend this method. - **Azure Hybrid Use Benefit**: Enable if your Microsoft Azure Agreement entitles you to have Azure Hybrid Use Benefit. - **Do not create cloud resources during credentials validation**: Enable to skip the test where Frame Platform verifies it can create Azure resources during the credential validation process. 6. Once you have entered the above information, click the “Verify credentials” button.What's happening behind the scenes?
When you click the "verify credentials" button in Step 6, our system performs a series of actions to ensure that the API credentials you provided have the necessary permissions to orchestrate resources within your Azure Subscription. Specifically, the system will: - Create a temporary resource group named `frame-cred-test*` to verify initial API credentials. - Attempt to create the following resources within this resource group: - A disk - A public IP address - A storage account These resources are created and then promptly deleted to confirm that the credentials provided have the appropriate permissions for our platform to function correctly in your Azure environment. This process ensures that your credentials can manage and orchestrate the necessary resources for the Frame platform.| Azure Resource | Recommendation |
|---|---|
| Virtual Machines-Family vCPUs (CPU-only and GPU instance types) | Azure has quotas on the total number of vCPUs and the total number of family-specific vCPUs, on a per-location basis. We recommend you first determine the expected max number of instances by instance type (per Frame account) for your needs. Next, calculate the number of vCPUs and family-specific vCPUs based on the expected max number of instances and the required number of vCPUs per instance type (for that family). If you use Publish, set your vCPU quota to 2.2 times the required number of vCPUs and specific family-specific vCPUs quotas to 2.2 times your expected max number of instances. The additional 20% will accommodate any additional resources such as Sandboxes, Utility servers, etc. If you use Quick Publish, you can use a minimum factor of 1.X times to calculate the required number of vCPUs and family-specific vCPUs. X is computed as the “Number of production instances created on publish” divided by expected max instances. By default, the “Number of production instances created on publish” value is configured to be 10 VMs. A factor of 1.3-1.5 should be sufficient to account for typical Quick Publishes and overhead. |
| Azure Managed Disks | Typically, this resource quota does not need to be modified. To estimate total disk storage consumption, multiply the total number of VMs you expect to provision by the size of the Sandbox VM (e.g., Windows 10 images 128 GiB; Windows Server images 64 GiB) across all Frame accounts you plan to provision. Number and size of any utility servers, number of Sandbox image backups, number and size of personal drives, and number and size of enterprise profile disks would be additional storage to consider. |
| Public IPs | If a Frame account is created with Frame public networking, each workload VM will have both a public and private IP address. If the Frame account is created using Frame private networking, all workload VMs will only have private IP addresses. If the Frame account is created using Frame private networking with Streaming Gateway Appliance (SGA), then you will need 1 public IP address for each SGA VM (and 1 public IP address for the load balancer in front of the SGA VMs). All of the workload VMs will only have private IP addresses. You will also need to account for the temporary increase of public IP addresses during a Publish or Quick Publish when the new production VMs are created and before the old production VMs are terminated. |
| VNets | If Frame public networking or Frame private networking is used to create Frame accounts, the number of VNets equals the number of Frame accounts. If Frame private networking with SGA is used to create Frame accounts, the required number of VNets is two times the number of Frame accounts. For BYO networking, no new networks are created. |
| Resource | Resource Name | Example |
|---|---|---|
| Vendor resource group | azr-prod-v{vendor\_id}-instances-{3\_digits} | `azr-prod-v53273-instances-001` |
| Workload VM | azr-prod-v{server.vendor\_id}-s{server.id} | `azr-prod-v53209-s8059811` |
| Workload VM root volume | azr-prod-v{server.vendor\_id}-s{server.id}-root | `azr-prod-v53209-s8059811-root` |
| User Volume | azr-prod-v{server.vendor\_id}-d{disk.id}-{random 5 characters}-{disk\_type} | `azr-prod-v53273-d170923-857e4-profile` |
| User Volume backup (Snapshot) | azr-prod-v{vendor\_id}-{user\_volume\_id}-{snapshot\_type}-{random 5 characters} | `azr-prod-v53273-6f4ee921-profile-d1101` |
| Image (Snapshot) | azr-prod-v{vendor\_id}-s{server\_id}-{random 5 characters}-{snapshot\_type} | `azr-prod-v53273-s8066212-6afc7-publish` |
| Master Image | azr-prod-v{vendor\_id}-s{server\_id}-{random 5 characters}-{snapshot\_type} | `azr-prod-v53273-s8066212-6afc7-publish` |
| VNET | azr-prod-v{vendor\_id}-vnet-{random 5 characters} | `azr-prod-v53273-vnet-c56be` |
| VNET resource group | prod-vnets-{azure\_region} | `prod-vnets-eastus` |
| Subnet | azr-prod-v{vendor\_id}-sn-{random 5 characters} | `azr-prod-v53273-sn-42423` |
| Security group | azr-prod-v{vendor\_id}-sn-{random 5 characters} | `azr-prod-v53273-sg-da34f` |
| SGA resource group | azr-prod-sga-{random 4 characters} | `azr-prod-sga-2431` |
| SGA availability set | sga-availability-set-c{streaming\_configuration\_id} | `sga-availability-set-c2431` |
| SGA load balancer | azr-prod-sga-{streaming\_configuration\_id}-lb | `azr-prod-sga-2431-lb` |
| SGA load balancer public IP | azr-prod-sga-{streaming\_configuration\_id}-lb-ip | `azr-prod-sga-2431-lb-ip` |
| SGA VNET | azr-prod-sga-{streaming\_configuration\_id}-vpc | `azr-prod-sga-2431-vpc` |
| SGA security group | azr-prod-sga-{streaming\_configuration\_id}-vpc-sg-default | `azr-prod-sga-2431-vpc-sg-default` |
| SGA VM | azr-prod-sga-{workload\_streaming\_configuration\_id}-s{random 8 characters} | `azr-prod-sga-2431-s0f532a75` |
| SGA VM root disk | azr-prod-sga-{workload\_streaming\_configuration\_id}-s{random 8 characters} | `azr-prod-sga-2431-s0f532a75` |
The Streaming Gateway Appliance (SGA) resource naming applies only to Frame-provisioned and managed SGAs.
## Disk Options Frame supports two types of Azure-managed disk types. By default, Frame provisions [Standard SSD-managed](https://learn.microsoft.com/en-us/azure/virtual-machines/disks-types#standard-ssds) disks for VM boot disks and user volumes. If a customer needs higher performing, low-latency disks for a given Frame account, the customer can contact Support and request that the Frame account be re-configured to use [Premium SSD](https://learn.microsoft.com/en-us/azure/virtual-machines/disks-types#premium-ssds) managed disks for VM boot disks and user volumes. Azure Premium SSDs do cost more than Standard SSDs.Disks of a particular type that were provisioned prior to the disk type configuration change will remain as they were provisioned. Therefore, customers are advised to create the Frame account, request Support update the disk type to the desired disk type, and terminate the Sandbox, in order for the Sandbox disk to be re-created with the newly-configured disk type. Then, verify the Sandbox disk was provisioned with the desired disk type before continuing on to configure the Frame account, including installing applications in the Sandbox and publishing.
# Google Cloud Platform ## Overview The **Bring Your Own Google Cloud Platform (BYO GCP)** feature allows customers to integrate their GCP environment with the Frame Platform, enabling direct deployment of virtual desktops and applications within their own GCP infrastructure. With BYO GCP, customers retain complete control over their cloud resources while leveraging Frame’s orchestration capabilities for seamless workload management. This approach ensures organizations can optimize performance, control costs, and scale their virtual workspaces efficiently to meet evolving business needs. ## Setup ### Requirements In order to register your GCP Project (account) with Frame, ensure that you have addressed the following before proceeding: 1. The GCP Project principal who will execute the Frame-provided script has the role of “Owner” or has sufficient permissions to grant the required GCP roles to the Frame Platform service user . Once the deploy.sh script is executed, the principal who executed the script is no longer needed for Frame. 2. The specific GCP roles granted to the Frame Platform service user will depend on the desired Frame functionality to be used with your GCP Project. - To use all Frame features, the Frame Platform service user must have the following roles, which are granted when the default script is executed: - compute.instanceAdmin - compute.networkAdmin - compute.securityAdmin - compute.storageAdmin - dns.admin - For customers who must control and manage all GCP networking resources and will only use Frame accounts deployed using customer-managed [private networking](https://docs.difr.com/books/platform-administrators-guide/page/requirements), the Frame Platform service user must have the following roles, at a minimum. The script will need to be modified before the script is executed: - compute/instanceAdmin - compute.networks.getEffectiveFirewalls - For customers who want to use their own OS images (BYO OS image), rather than Frame-provided images, Frame must be able to list the images in the project, read those images, and create instances from those images. Frame will not delete, tag, or create BYO images. The operations necessitates the Frame Platform service user being granted the role: - compute.imageUser 3. You know your GCP Account ID that will be registered with Frame. The GCP Account ID can be found by going to the Dashboard of your GCP console. ### Shared VPC For customers who wish to use GCP Shared VPCs, you will need to register both your GCP Host and Service Projects in Frame. - **GCP Host Project**: After the GCP Host Project has been added as a Cloud Account in Frame, the GCP Administrator can remove assigned roles described above and assign the role. - **GCP Service Project**: The GCP Service Project which will use the Shared VPC and specific subnets within the Shared VPC must then be added as a second Cloud Account in Frame. Once you have registered the two GCP projects, you can configure Frame to [share specific subnets](https://docs.difr.com/books/platform-administrators-guide/page/cloud-accounts#shared-vpcs-gcp-only) from your Shared VPC in your GCP Host Project Cloud Acount with your GCP Service Project Cloud Account.Both the GCP Host and Service Projects should only be registered (imported) once, even if additional subnets are created later in the Host Project and shared with one or more Service Projects.
### Workload VM Service Account Frame allows customers to attach a GCP service account to each workload VM Frame Platform provisions. The GCP service account can be specified at the Frame Cloud Account level (by default, all VMs created within the Cloud Account will have this service account assigned) or for a specific Frame Account. The service account specified for an Account takes precedence over the service account specified for the Cloud Account. Once the GCP Cloud Account is registered in Frame, open a support case and specify the name of your Frame Customer (or Organization) entity, name of the GCP Cloud Account, and the GCP service account (email address). If you want to use a different GCP service account with the specific Frame Account, create the Frame Account and then open a support case with the name of the Frame Account, Frame Vendor ID, and the GCP service account (email address). Once the GCP service account is attached to your Frame Account, you will need to terminate the Sandbox (and any other workload VMs) in the Frame Account in order for Frame Platform to reprovision the workload VMs with the GCP service account.Before a GCP service account can be attached to each workload VM, the customer must add the role to the Frame Platform service user .
### Customer-Managed Encryption Keys Frame allows customers to specify a customer-managed encryption key (CMEK) for [encryption of persistent disks](https://cloud.google.com/compute/docs/disks/customer-supplied-encryption) at the GCP Cloud Account level or at the Frame Account level. The CMEK specified at the Frame Account level will take precedence over the CMEK specified at the GCP Cloud Account level. You must open a support case with the name of the GCP Cloud Account or Frame Account and the name of the key used to encrypt the persistent disks. ## Adding your Cloud Acount ### Procedure 1. Navigate to your Google Cloud Platform console by going to [https://console.cloud.google.com/](https://console.cloud.google.com/). 2. Locate and copy the Project ID found in your GCP console Dashboard.The GCP Project principal who will execute the Frame-provided deploy.sh script has the role of “Owner” or has sufficient permissions to grant the required GCP roles to the Frame Platform service user . Once the deploy.sh script is executed, the principal who executed the script is no longer needed for Frame.
If required, you can modify the deploy.sh script to remove or add specific GCP IAM role/permission lines to grant the required roles, based on your use case (as described in the [Requirements](#requirements)).| GCP Resource | Recommendation |
|---|---|
| CPUs and Machine Types | GCP has quota metrics on the total number of CPUs and number of CPUs for specific machine types, on a per-location basis. We recommend you first determine the expected max number of instances by machine type (per Frame account) for your needs. Next, calculate the total number of CPUs based on the expected max number of instances and the required number of CPUs for a specific machine type. If you use Publish, set your CPU quota to 2.2 times the required number of CPUs and specific machine type quotas to 2.2 times your expected max number of instances. The additional 20% will accommodate any additional resources such as Sandboxes, Utility servers, etc. If you use Quick Publish, you can use a minimum factor of 1.X times to calculate the required number of CPUs and the max instances. X is computed as the “Number of production instances created on publish” divided by expected max instances. By default, the “Number of production instances created on publish” value is configured to be 10 VMs. A factor of 1.3-1.5 should be sufficient to account for typical Quick Publishes and overhead. |
| Persistent Disk SSD | Frame provisions [Persistent Disks](https://cloud.google.com/persistent-disk) for all workload VM disks. These persistent disks are zonal SSDs. Typically, this resource does not need to be modified. To estimate total disk storage consumption, multiply the total number of VMs you expect to provision by the size of the Sandbox VM (e.g., 80 GiB) across all Frame accounts you plan to provision. Number and size of any utility servers, number of Sandbox image backups, number and size of personal drives, and number and size of enterprise profile disks would be additional storage to consider. |
| GPU-backed Instances | If you plan to use GPU-backed instances, you will need to increase the specific Virtual Workstation GPU (e.g., “NVIDIA T4 Virtual Workstation GPUs”) quota to the maximum number of workload VMs that will be provisioned. As was discussed in the CPU recommendation, make sure to account for the temporary increase of GPU VMs during a Publish or Quick Publish when the new production VMs with attached GPUs are created and before the old production VMs with attached GPUs are terminated. |
| IP Addresses | If a Frame account is created with Frame public networking, each workload VM will have both an ephemeral external IP address and a private IP address. If the Frame account is created using Frame private networking, all workload VMs will only have private IP addresses. If the Frame account is created using Frame private networking with Streaming Gateway Appliance (SGA), then Frame will provision 1 ephemeral external IP address and 1 private IP address for each SGA VM as well as 1 ephemeral external IP address and 1 private IP address for the load balancer in front of the SGA VMs. All of the workload VMs will only have private IP addresses. You will also need to account for the temporary increase of in-use IP addresses during a Publish or Quick Publish when the new production VMs are created and before the old production VMs are terminated. |
| Networks | If Frame public networking or Frame private networking is used to create Frame accounts, the number of VPC networks equals the number of Frame accounts. If Frame private networking with SGA is used to create Frame accounts, the required number of VPC networks is two times the number of Frame accounts. For BYO networking, no new networks are created. |
| Subnetworks | If Frame networking is used to create Frame accounts, the number of subnetworks equals the number of Frame accounts. For BYO networking, no new subnetworks are created. |
| Resource | Resource Name | Example |
|---|---|---|
| Workload VM | ins-prod-v{vendor\_id}-s{server.id} | |
| Workload VM root volume | ins-prod-v{vendor\_id}-s{server.id} | |
| User Volume | usrd-prod-v{vendor\_id}-{random 8 characters}-{disk\_type} | |
| User Volume backup (Snapshot) | usrd-snp-prod-v{vendor\_id}-d{user\_volume\_id}-{random 5 characters} | |
| Image | img-prod-v{vendor\_id}-s{server\_id}-{image\_type}-{random 5 characters} OR img-prod-v{vendor\_id}-{image\_type}-{random 5 characters} | |
| Master Image | img-prod-master\_image-src-{source\_image\_id}-{random 5 characters} | |
| VPC | vpc-prod-v{vendor.id}-i{index} | |
| Subnet | vpc-prod-v{vendor.id}-i{index}-sn | |
| NAT router | vpc-prod-v{vendor.id}-i{index}-nat-router | |
| NAT gateway | vpc-prod-v{vendor.id}-i{index}-nat-gateway | |
| SGA VPC | sga-vpc-prod-{streaming\_configuration\_id} | |
| SGA subnet | sga-vpc-prod-{streaming\_configuration\_id}-sn | |
| SGA VM | sga-vpc-prod-{streaming\_configuration\_id}-s{sga\_server\_id} | |
| SGA VM root disk | sga-vpc-prod-{streaming\_configuration\_id}-s{sga\_server\_id} | |
| SGA load balancer static public IP | sga-{sga\_vpc\_id}-static-ip | |
| SGA load balancer target pool | sga-{sga\_vpc\_id}-target-pool | |
| SGA load balancer forward rule | sga-{sga\_vpc\_id}-forwarding-rule |
The Streaming Gateway Appliance (SGA) resource naming applies only to Frame-provisioned and managed SGAs.
## Disk Options Frame supports two types of [GCP persistent disk types](https://cloud.google.com/compute/docs/disks#disk-types). By default, Frame provisions zonal **performance (SSD) persistent disks** (pd-ssd) for VM boot disks and user volumes. If a customer needs lower cost, albeit slower performing disks, for a given Frame account, the customer can contact Support and request that the Frame account be configured to use zonal **balanced persistent disks** (pd-balanced) for VM boot disks and user volumes.Disks of a particular disk type that were provisioned prior to the disk type configuration change will remain as they were provisioned. Therefore, customers are advised to create the Frame account, request Support update the disk type to the desired disk type and terminate the Sandbox, in order for the Sandbox disk to be re-created with the newly configured disk type. Then, verify the Sandbox disk was provisioned with the desired disk type before continuing on to configure the Frame account, including installing applications in the Sandbox and publishing.
# IBM Cloud Frame supports the orchestration of IBM Cloud Virtual Private Cloud (VPC) and virtual server resources in the customer's own IBM Cloud account. ## Requirements In order to register your IBM Cloud account with Frame, ensure that you have the met the following requirements before proceeding: 1. Valid IBM Cloud account 2. Permissions to add and modify role assignments for the IBM Cloud account.Costs (e.g., storage) may begin to accrue immediately after completing the registration of your IBM Cloud account on your Frame Customer or Organization entity.
## Preparation Before your IBM Cloud account can be registered with Frame, you will need to complete two tasks: 1. Obtain your IBM Cloud Account ID. 2. Create an IBM Cloud [Service ID](https://cloud.ibm.com/docs/account?topic=account-serviceids&interface=ui) for the Dizzion DaaS Service. 3. Generate an IBM Cloud API key for your IBM Cloud Account ID. ### Obtain your IBM Cloud Account ID You will need to obtain your IBM Cloud Account ID for the IBM Cloud Account you wish to register in your Frame tenant. 1. Open the IBM Cloud Console and navigate to Manage > Account > Account settings.| Service | Roles and Actions |
|---|---|
| All IAM Account Management Services | Administrator |
| Cloud Object Storage | Editor, Manager |
| VPC Infrastructure Services | Administrator |
| Key Protect | Editor, Reader |
| Transit Gateway | Editor |
| All Account Management | Administrator |
| IBM Cloud VPC Resource | Recommendation |
|---|---|
| vCPU | IBM has a default quota of 200 vCPUs per region. We recommend you first determine the expected max number of instances by instance profile across all Frame accounts for each region. Next, calculate the number of vCPUs based on the expected max number of instances and the required number of vCPUs per instance profile. If you use Publish, set your vCPU quota to 2.2 times the required number of vCPUs. The additional 20% will accommodate any additional resources such as Sandboxes, Utility servers, etc. If you use Quick Publish, you can use a minimum factor of 1.X times to calculate the required number of vCPUs. X is computed as the “Number of production instances created on publish” divided by expected max instances. By default, the “Number of production instances created on publish” value is configured to be 10 VMs. A factor of 1.3-1.5 should be sufficient to account for typical Quick Publishes and overhead. |
| RAM | IBM has a default quota of 5600 GB per region. We recommend you first determine the expected max number of instances, by instance profile, across all Frame accounts for each region. Next, calculate the total amount of RAM by summing the products of the max number of instances and the memory for each instance profile. |
| Instance Storage | IBM has a default quota of 18 TB per region. Typically, this resource quota does not need to be modified. To estimate total disk storage consumption, multiply the total number of VMs you expect to provision by the size of the Sandbox VM (e.g., Windows 10/11 images 128 GiB; Windows Server images 64 GiB) across all Frame accounts you plan to provision. Number and size of any utility servers, number of Sandbox image backups, number and size of personal drives, and number and size of enterprise profile disks would be additional storage to consider. |
| Floating IPs | If a Frame account is created with Frame public networking, each workload VM will have both a public and private IP address. If the Frame account is created using Frame private networking, all workload VMs will only have private IP addresses. If the Frame account is created using Frame private networking with Streaming Gateway Appliance (SGA), version 3, then you will need 1 Floating IP address for each SGA VM (and 1 Floating IP address for the load balancer in front of the SGA VMs). For SGA 4, you will need 1 Floating IP address for each SGA VM. All of the workload VMs will only have private IP addresses. You will also need to account for the temporary increase of public IP addresses during a Publish or Quick Publish when the new production VMs are created and before the old production VMs are terminated. |
| GPU | IBM has a default quota of 16 per IBM Cloud account. If you plan to use GPU-backed instance profiles, you will need to request an increase to this quota. |
| VPCs | IBM has a default quota of 10 VPCs per region. If Frame public networking or Frame private networking is used to create Frame accounts, the number of VPCs equals the number of Frame accounts. If Frame private networking with SGA is used to create Frame accounts, then the SGA cluster will require its own VPC (independent of the number of Frame accounts attached to the SGA cluster). For customer-managed networking, no new networks are created. |
| Resource | Resource Name | Example |
|---|---|---|
| Workload VM | prod-v{server.vendor\_id}-s{server.id} | `prod-v53209-s8059811` |
| Workload VM root volume | prod-v{server.vendor\_id}-s{server.id}-root | `prod-v53209-s8059811-root` |
| User Volume | prod-v{server.vendor\_id}-d{disk.id}-{random 5 characters}-{disk\_type} | `prod-v53273-d170923-857e4-profile` |
| User Volume backup (Snapshot) | prod-v{vendor\_id}-{user\_volume\_id}-{snapshot\_type}-{random 5 characters} | `prod-v53273-6f4ee921-profile-d1101` |
| Image (Snapshot) | prod-v{vendor\_id}-s{server\_id}-{random 5 characters}-{snapshot\_type} or prod-v{vendor\_id}-{image\_type}-{random 5 characters} | `prod-v53273-s8066212-6afc7-publish` or `prod-v48287-manual-8e750` |
| Master Image | prod-master-image-src-{source\_image\_id}-{random 5 characters} | `prod-master-image-src-239323-d06e8` |
| VPC | prod-v{vendor\_id}-vpc{index} | `prod-v53273-vpc0` |
| Subnet | prod-v{vendor\_id}-sn{index} | `prod-v53273-sn1` |
| Security group | prod-v{vendor\_id}-sn{index} | `prod-v53273-sg0` |
| Static Public IP address | prod-v{server.vendor\_id}-s{server.id} or prod-v{vendor\_id}-vpc{index}-natgw-{index} | `prod-v53209-s8059811` or `prod-v7538-vpc0-natgw-0` |
| NAT Gateway | prod-v{vendor.id}-vpc{vpc\_idx}-natgw-{idx} | `prod-v7538-vpc0-natgw-0` |
| Routing table | frame-prod-{random words separated by ‘-’}-{rtb\_db\_id} | `frame-prod-remold-daffy-unmarked--01hrywf31kevm2k2rp9vn2sv5z` |
| SGA VPC | prod-sga-{streaming\_configuration\_id}-vpc | `prod-sga-2431-vpc` |
| SGA subnet | prod-sga-{streaming\_configuration\_id}-vpc{index} | `prod-sga-2425-vpc3` |
| SGA security group | prod-sga-{streaming\_configuration\_id}-vpc-sg-default | `prod-sga-2431-vpc-sg-default` |
| SGA VM | prod-sga-{workload\_streaming\_configuration\_id}-s{random 8 characters} | `prod-sga-2431-s0f532a75` |
| SGA VM root disk | prod-sga-{workload\_streaming\_configuration\_id}-s{random 8 characters} | `prod-sga-2431-s0f532a75` |
| Resource group | frame-prod-mr-{random 25 characters} | `frame-prod-mr-01hybt5xcqyp1x4q3jvdmyd5ah` |
The Streaming Gateway Appliance (SGA) resource naming applies only to Frame-provisioned and managed SGAs.
# Nutanix AHV ## Overview **Frame's integration with Nutanix AHV** allows customers to seamlessly connect their AHV clusters to the Frame Platform, enabling them to run virtual desktops and applications directly within their on-premises infrastructure. By registering their AHV cluster with their Frame tenant, customers gain the flexibility to manage workloads locally while leveraging Frame’s remote desktop delivery and orchestration capabilities. This hybrid model empowers organizations to maintain full control over their virtual environment while offering end-users a high-performance experience across any device. ## Setup ### Requirements In order to register your AHV cluster with Frame, you need to ensure that you have addressed the following before proceeding: 1. The Nutanix hyperconverged cluster must have: - Acropolis Operating System (AOS) 7.0.0.5 (minimum) or newer - Acropolis Hypervisor (AHV) compatible with the cluster hardware and AOS version - Prism Central 2024.3 or newer, with your Prism Central VM configured with at least 26 GB of RAM For further details on the supported combinations of AOS, AHV, and Prism Central for a given Ubuntu or Windows guest OS, consult with Nutanix's [AOS Software Interoperability Matrix](https://portal.nutanix.com/page/documents/compatibility-interoperability-matrix/software) and [AHV Guest OS Compatability and Interoperability Matrix](https://portal.nutanix.com/page/documents/compatibility-interoperability-matrix/guestos). Frame, unlike other Nutanix services hosted on a Prism Central-managed cluster, does not require any additional compute resources for Prism Central. Frame uses: - Prism Central APIs to query categories, obtain the list of template images tagged with Frame-specific categories, and query for the list of available VLANs in the AHV cluster as well as AHV cluster-based resources (e.g., provision/deprovision VMs/storage, power on/off VMs, attach/detach disks, replicate backups, etc.) For sizing the Prism Central VM, consider your specific number of virtual machines across your AHV cluster(s). Refer to the [Nutanix KB article](https://portal.nutanix.com/page/documents/details?targetId=Prism-Central-Guide-vpc_2024_2:upg-pc-upgrade-prerequisites-c.html) as a reference for right sizing your Prism Central VM. 1. If vGPUs are to be used, then the following NVIDIA components must be installed, as documented in the [Nutanix AHV Administration Guide](https://portal.nutanix.com/page/documents/details?targetId=NVIDIA-Grid-Host-Driver-For-AHV-Install-Guide:NVIDIA-Grid-Host-Driver-For-AHV-Install-Guide): - NVIDIA vGPU Software License Server with a valid NVIDIA license file - NVIDIA GRID vGPU Host drivers - NVIDIA GRID vGPU Guest OS drivers AHV-compatible host drivers are available for download from [Nutanix Portal](https://portal.nutanix.com/page/downloads?product=ahv). All other NVIDIA components are obtained via NVIDIA Licensing Software Downloads site. 2. Network has been configured for the AHV cluster to communicate with the Frame control plane and for users to access the workload VMs on the AHV cluster following one of two network deployment models, as described in [Private Networking](https://docs.difr.com/books/platform-administrators-guide/page/requirements) or [Private Networking with SGA](https://docs.difr.com/books/platform-administrators-guide/page/private-networking-with-sga-ahv). 3. DHCP must be available for the Frame workload VMs. 4. At least one template OS image installed with Frame Agent. ### Supported NVIDIA GPUs A list of supported NVIDIA GPUs can be found in official [Nutanix AHV documentation](https://portal.nutanix.com/page/documents/compatibility-interoperability-matrix/nvidia-drivers).Note
Depending on the specific HCI hardware model and the Nutanix AHV/AOS version to be used, the hardware and/or AHV version may or may not support all of the GPU cards above.**\*\*EU Control Plane\*\* If you are configuring your CCA for Dizzion's EU control plane, paste the following script into the “Type or Paste Script” field: **\#cloud-config runcmd: - set\_cca\_env CCA\_BACKPLANE\_URL https://hub.deu.difr.com
11. Save the VM with the preferences specified and power it on. By default, the CCA will try to acquire an IP address from a DHCP server. To set a static IP, follow the [CCA Static IP Address instructions](https://docs.difr.com/link/49#bkmrk-cca-static-ip-addres). 12. Once the VM is powered on, continue with the step-by-step procedure for [Configuring Your CCA VM](https://docs.difr.com/link/49#bkmrk-configuring-your-cca) for a new AHV Cloud Account or [Adding a CCA to an Existing AHV Cloud Account](https://docs.difr.com/link/49#bkmrk-adding-a-cca-to-an-e). ## Configuring your CCA VM ### Generate Registration Key 1. Log in to you Frame Account, navigate to “Cloud Accounts” either under Customer or Organization Level, and select “Add Cloud Account” 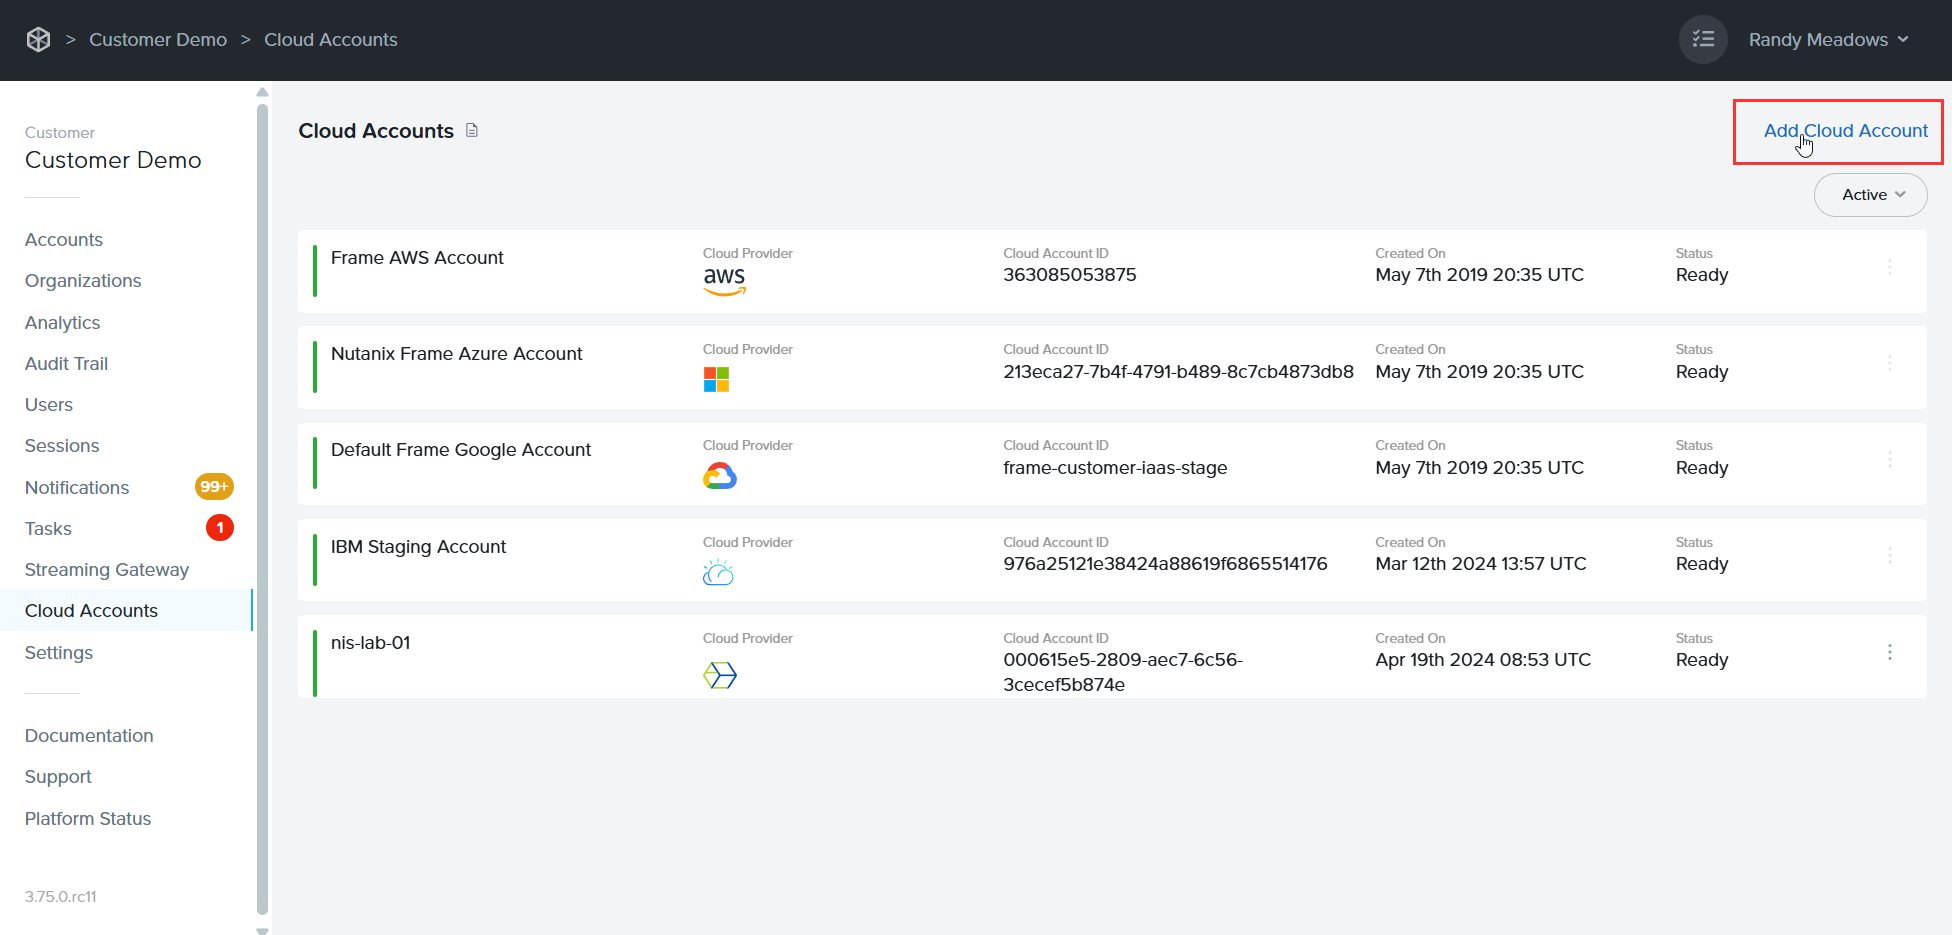 2. A new page will appear, select "Nutanix-AHV".  3. Enter a name for the new CCA 4 Cluster and click "Create." 4. Select "Show Nodes" to expand the cluster overview. 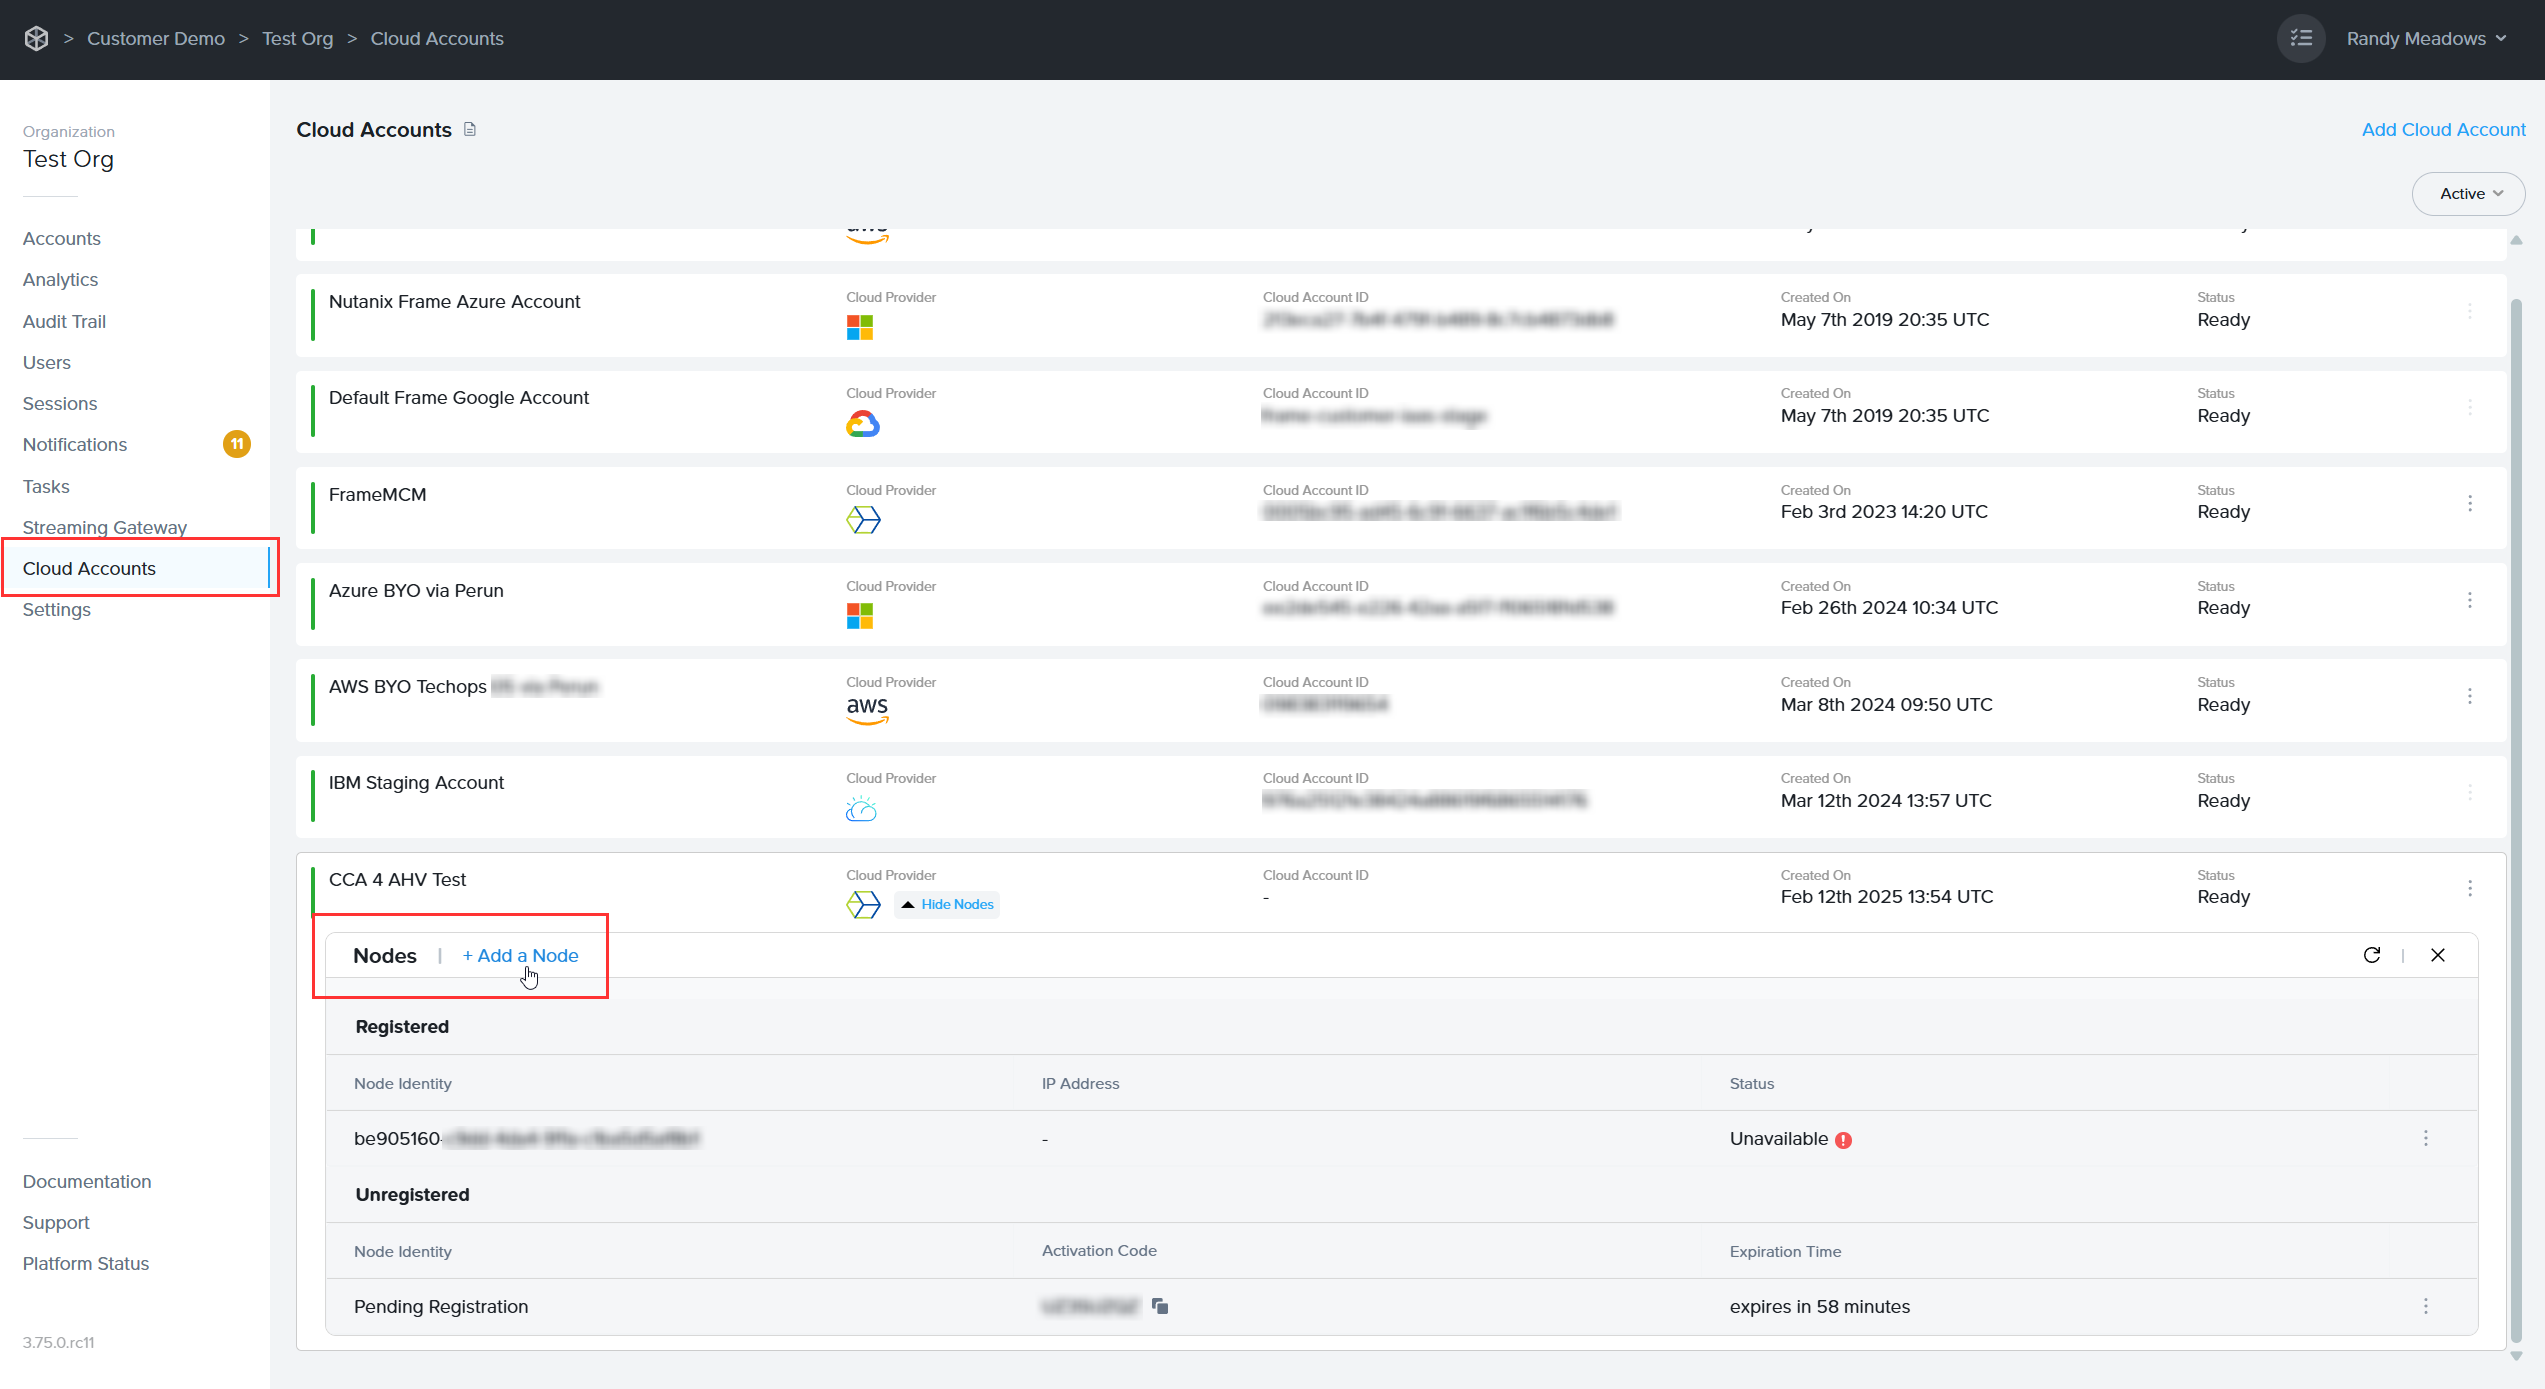 5. Click on "Add a Node" to create a new registration key for your CCA VM.  ### Register CCA Nodes 1. Once the registration key has been generated and the previously created CCA is running, navigate to your CCA VM's IP address () in your browser to connect to the CCA wizard. 2. To log in to the CCA wizard, use the Prism Central user credentials that you created earlier for Frame and specify the Prism Central URL.  3. CCA can communicate via an HTTPS proxy server to the Frame control plane. If a proxy server is not required, just click "Continue". Otherwise, enable the “Use proxy” slider. 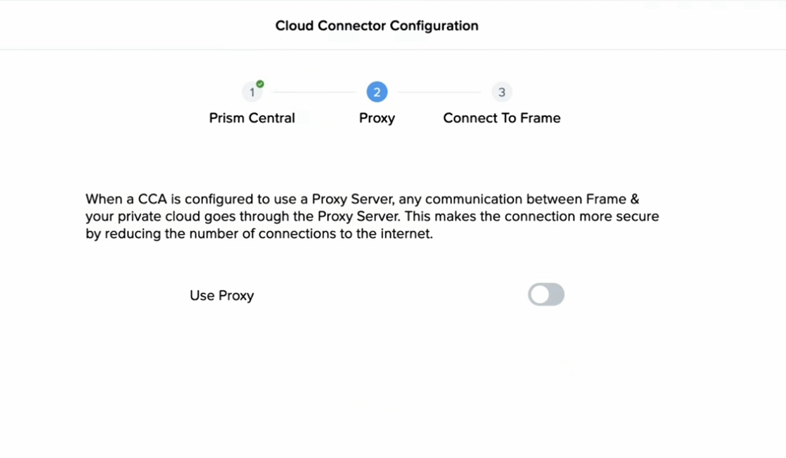 4. Specify the proxy server URL which the CCA will use to reach the proxy server. If the proxy server requires a service username and password, specify the service username and password required for the CCA to authenticate to the proxy server. Otherwise, leave the proxy username and password blank. Use the "Verify" button to validate your proxy server configuration. 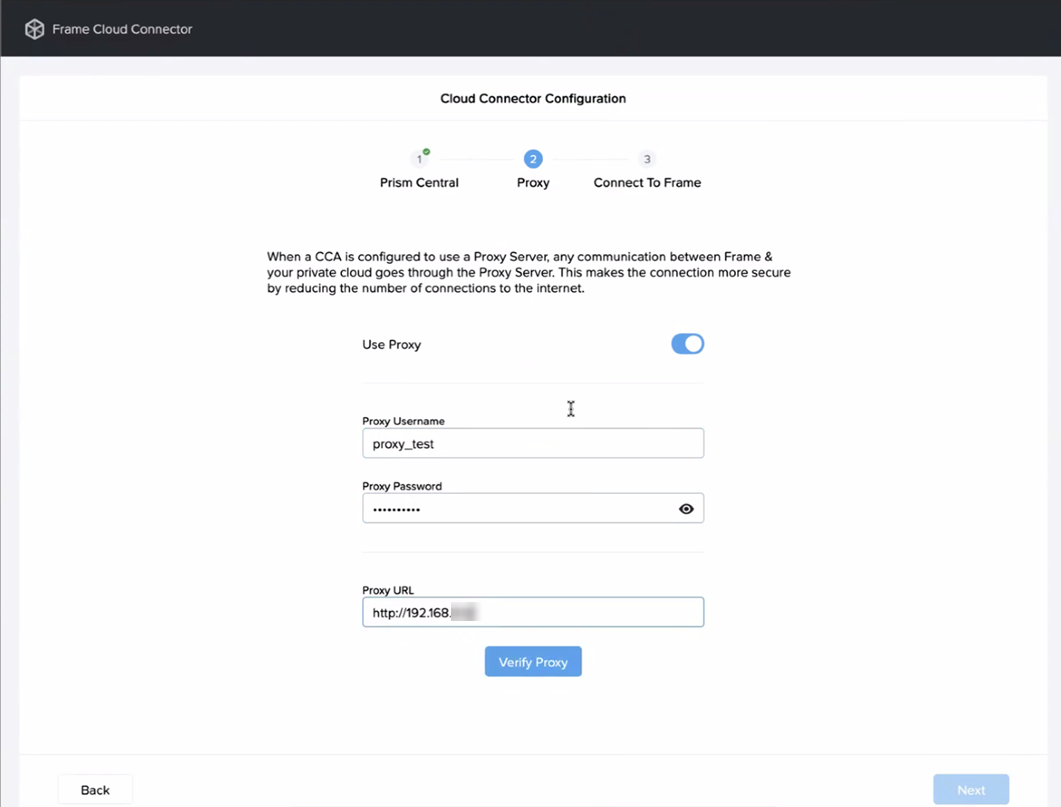 5. Copy and enter the activation key that was created in Step 3 under the [Generate Registration Key section](#generate-reg-key). 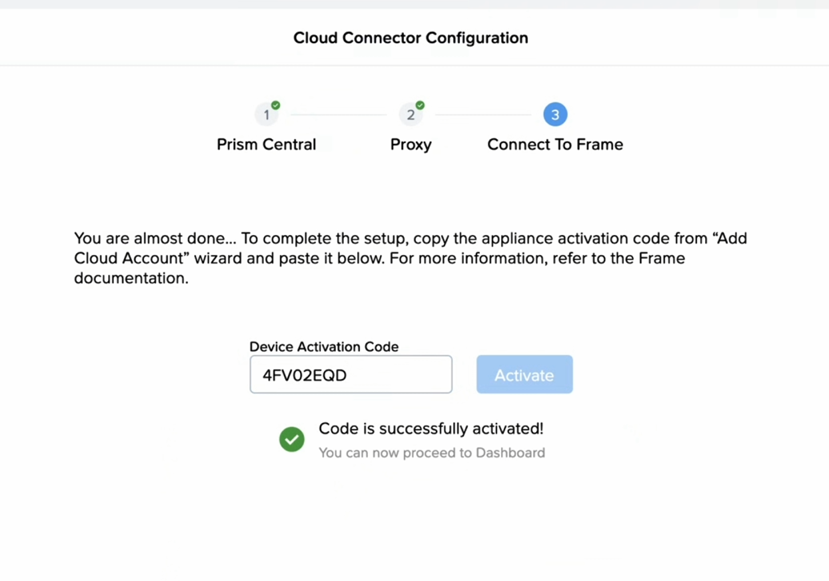 From there, wait until the registration of the new node is complete:  ## Cloud Connector Appliance (CCA) 4 Setup 1. To check the status of the current CCA setup, simply expand the Cluster overview. The status will be displayed under the "Status" column on the right-hand side.  2. Under the status overview select "Regions." On the next screen, click “Add Region” to choose the AHV cluster which should be connected. Click "Sync” to get a list of all available AHV clusters that can be connected, select the desired one, and finally complete the process by clicking on "Add Regions". 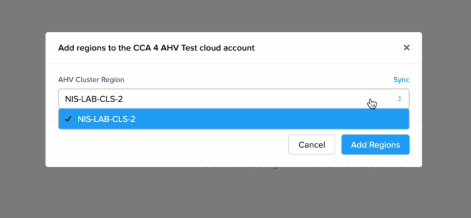 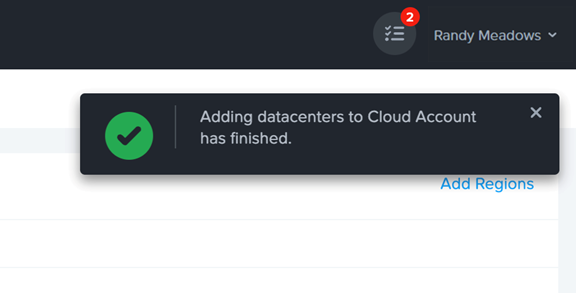 ### Import the Virtual Network 3. Next, add the Virtual Network to be used for the Frame Accounts by clicking on the "Import Virtual Network" link in the top right corner of the page. 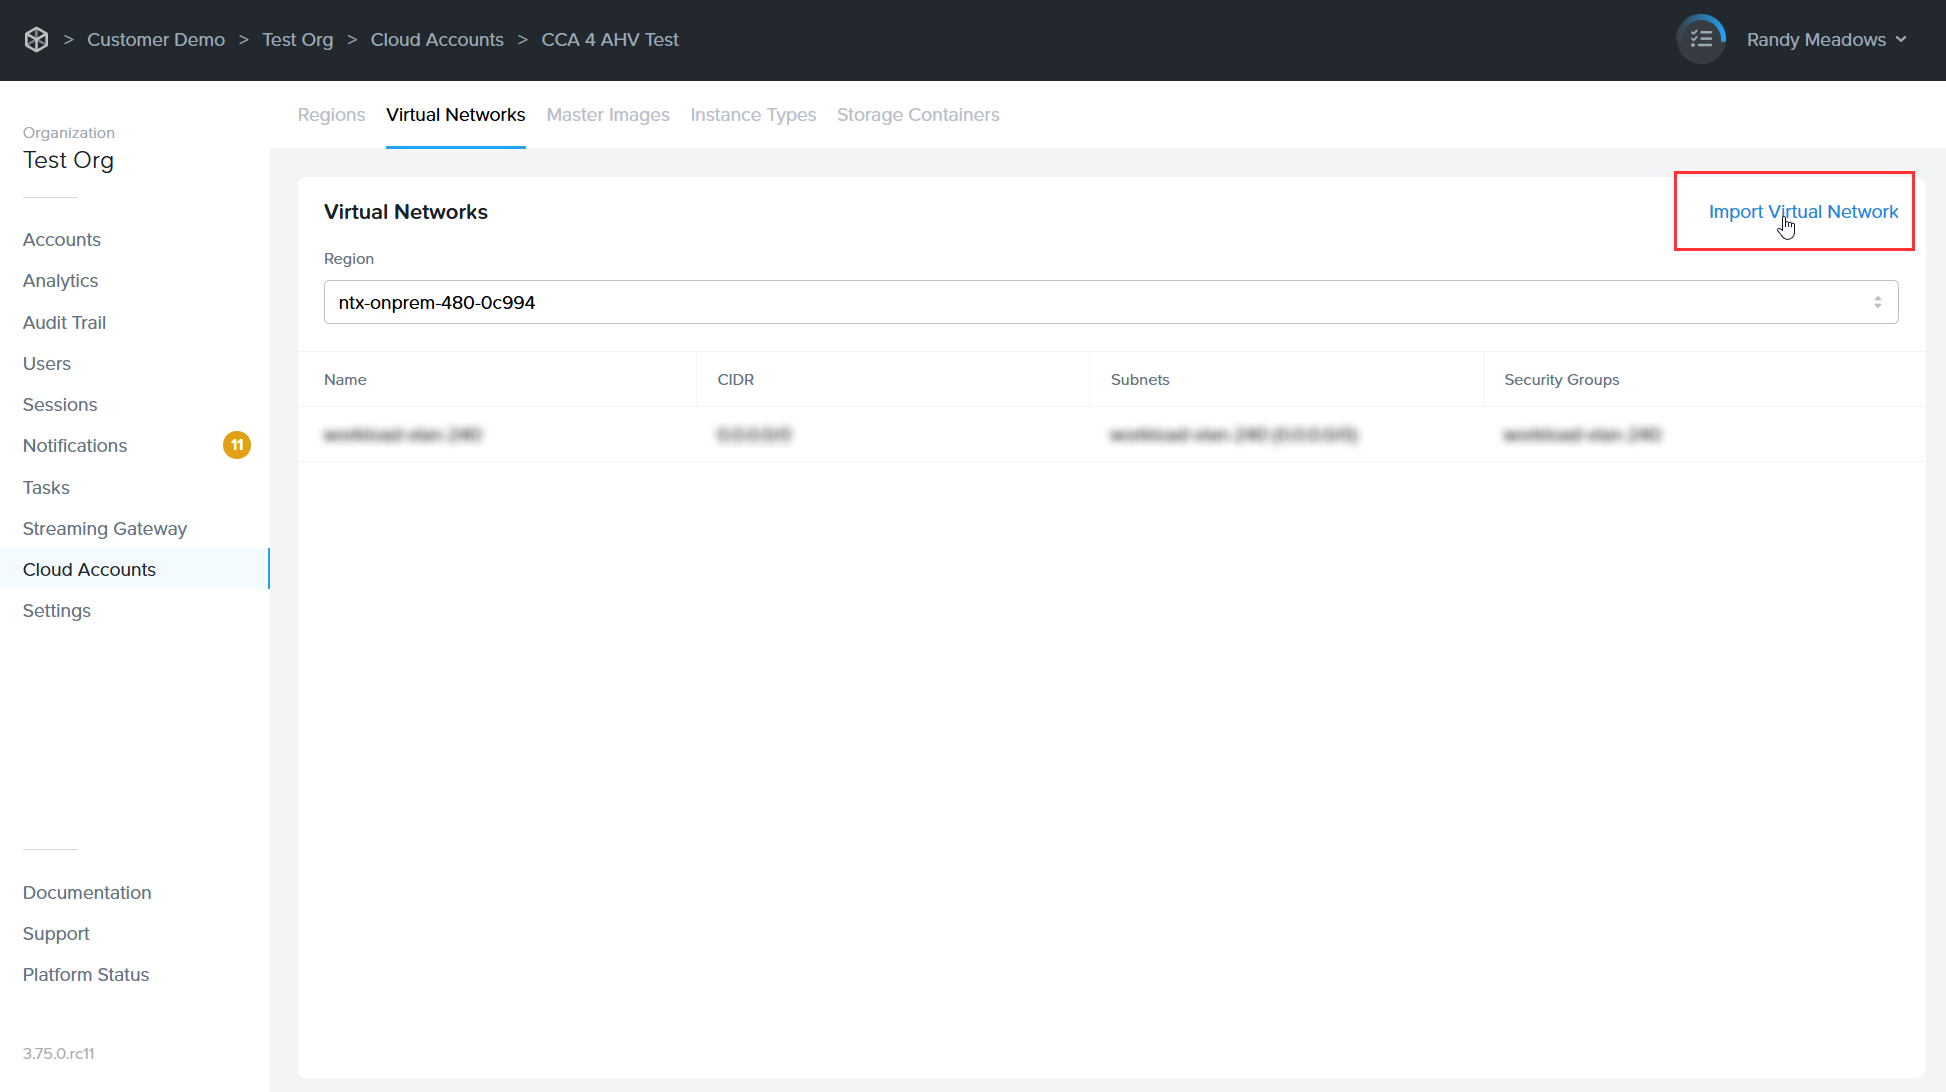 1. Click on the "Sync" link next to the "Select Virtual Network" dropdown menu to get a list of all available networks the target cluster. 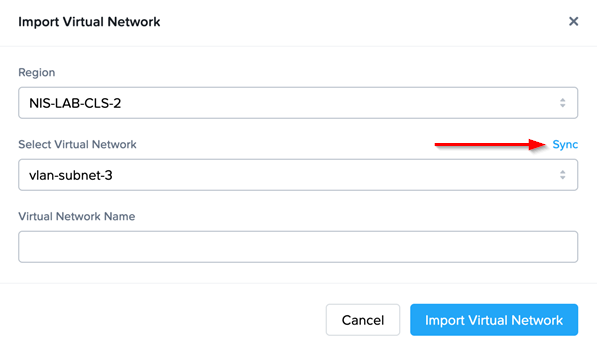 2. Select the one that needs to be imported. 3. Enter a display name for the virtual network. 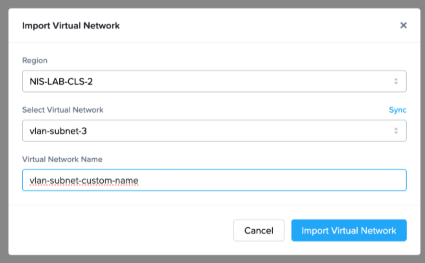 4. Click "Import Virtual Network" at the bottom of the dialog. ### Import the Image 4. Next, switch to the Master Image category on the top row and select the "Import Image" link in the upper right corner. 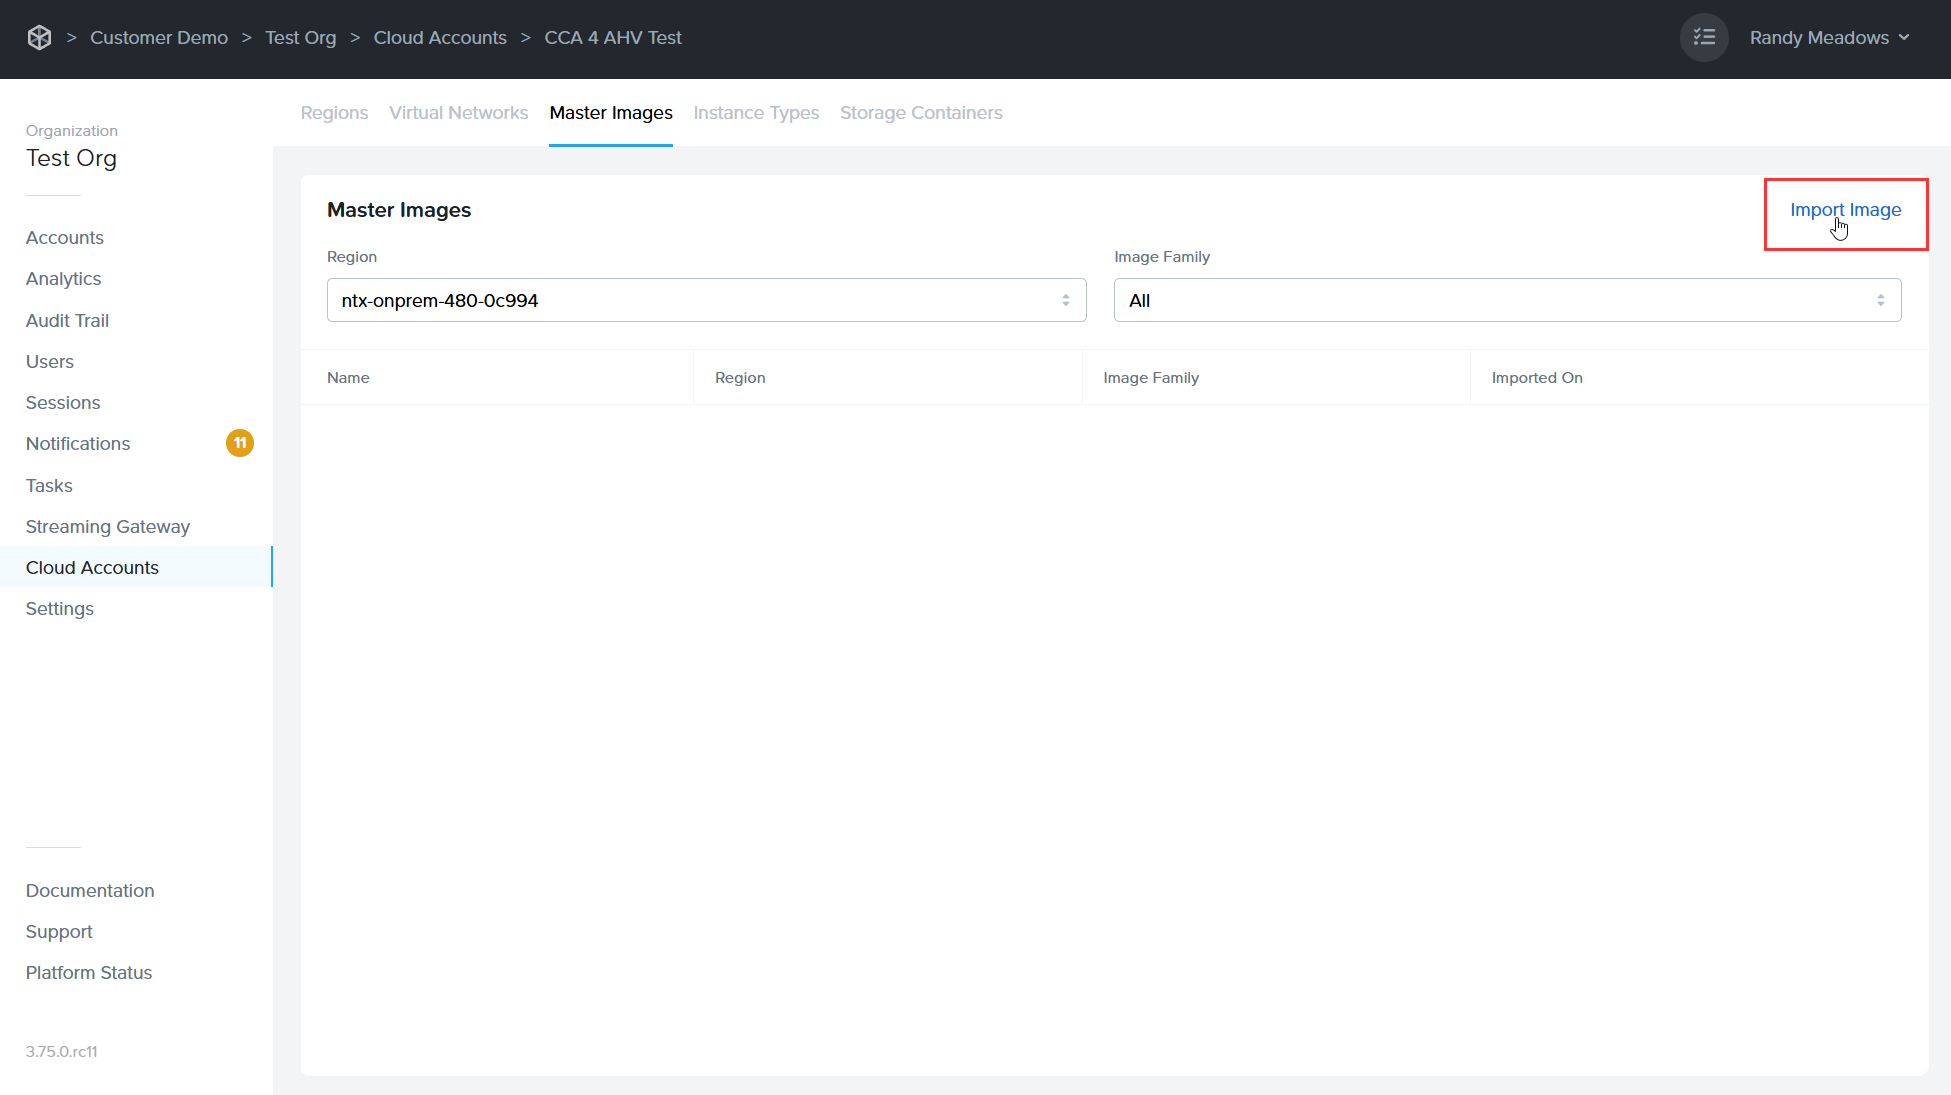 1. Click "Sync" to get a list of all available images that can be imported as a new Master Image. 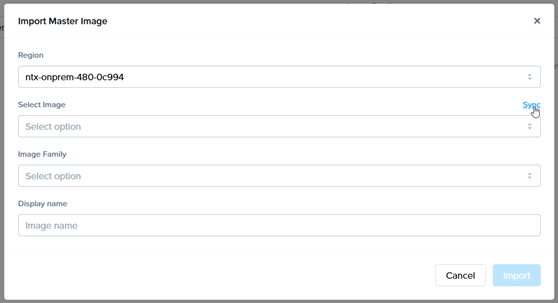 2. Select the image you wish to use. 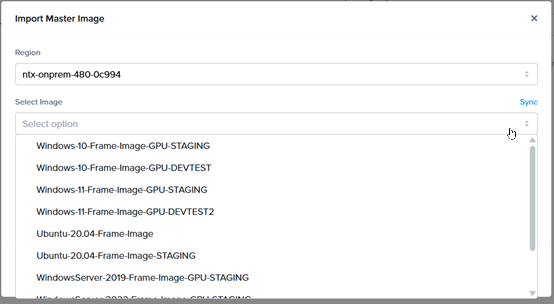 3. Enter a display name for the Image. 4. Click "Import" to complete the image setup process. 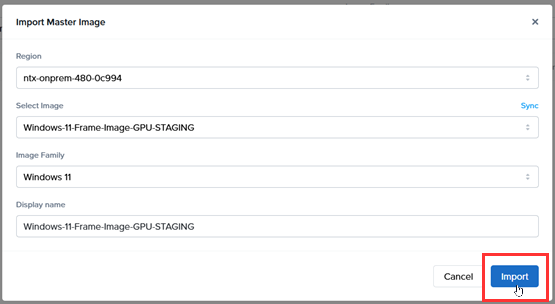 ### Add Instance Types 5. Next, navigate to the "Instance Types" tab. You can either create new instance types or edit existing ones. To add an instance type, click the blue "Add Instance Type" link in the upper right corner of the page. To edit an existing one, click the kebab menu within the row of the instance type you'd like to modify. For this example, we'll create a new instance type: 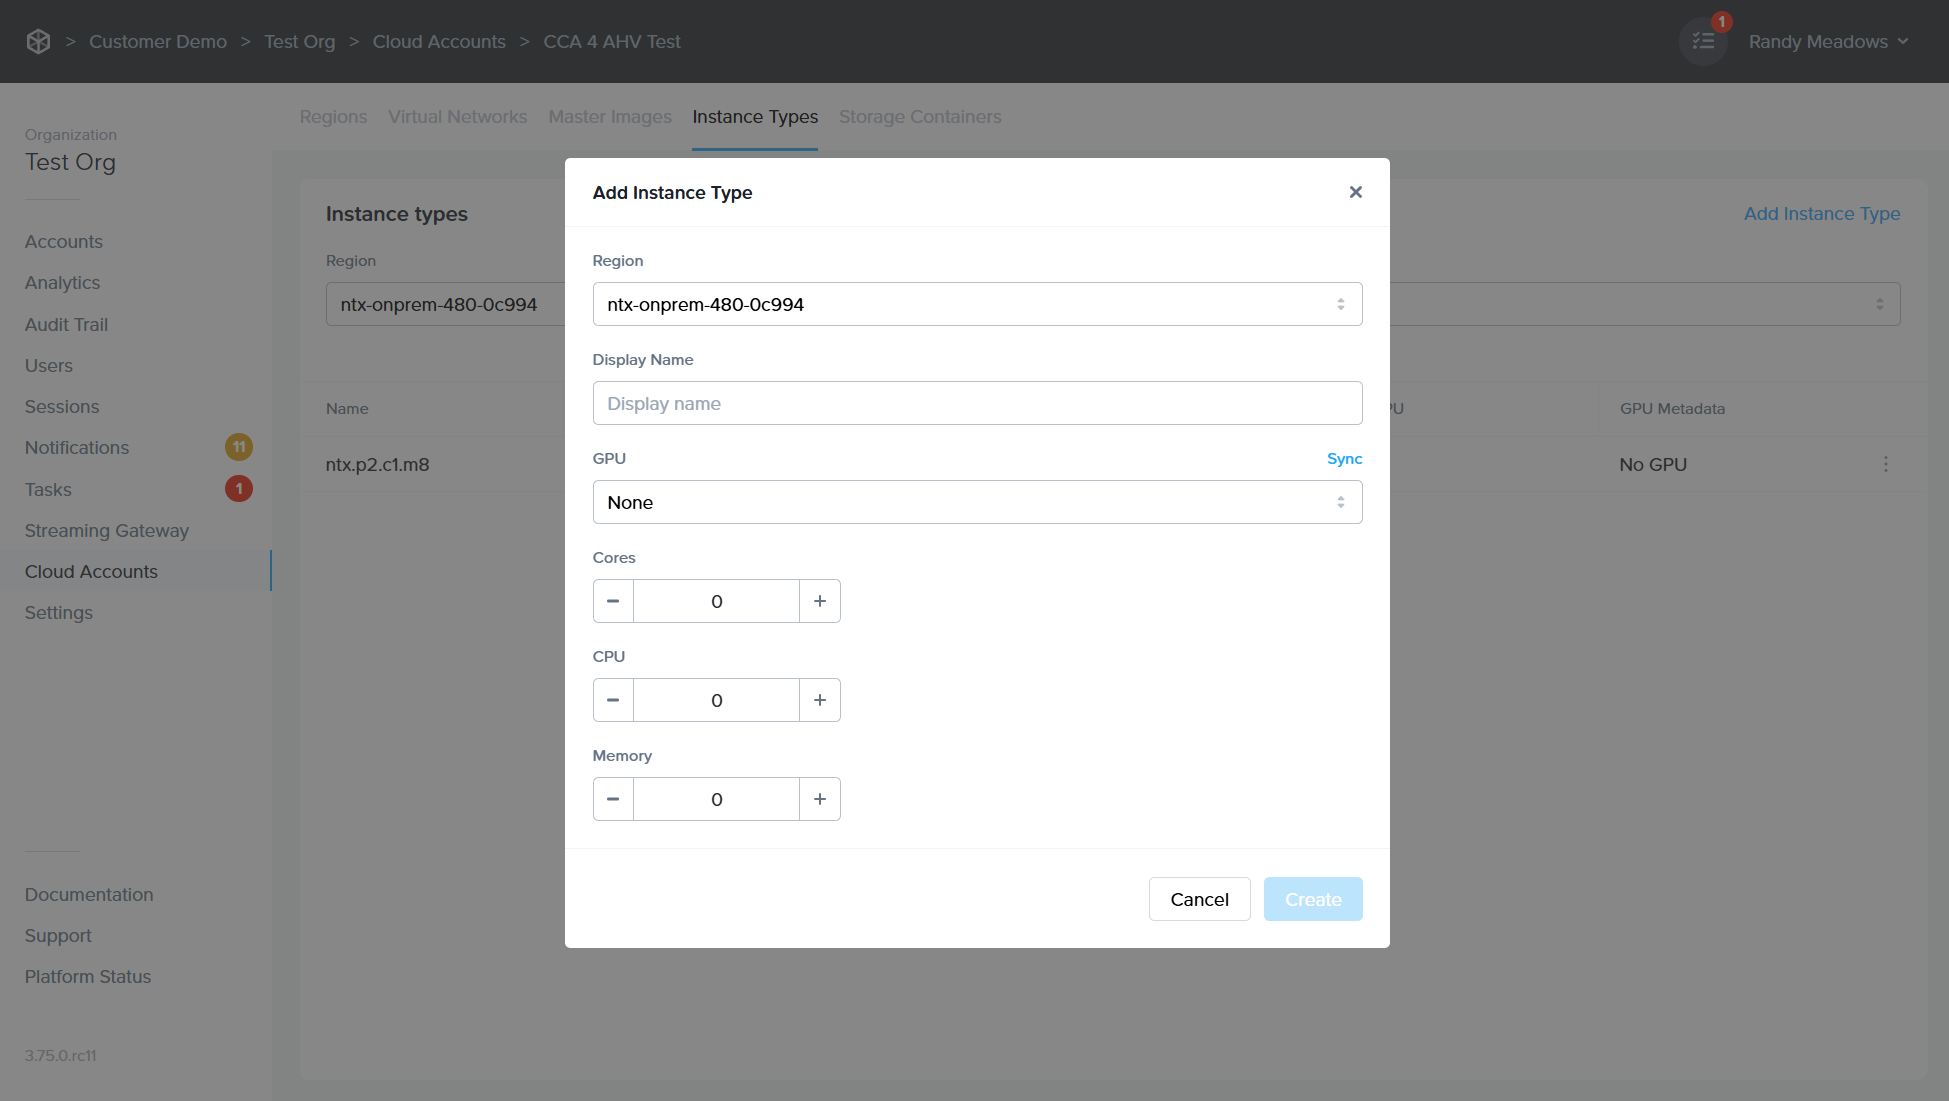 - **Display Name**: Name of the instance type that will appear to administrators and users within Frame Console and Launchpad, respectively. - **GPU**: If you have NVIDIA vGPUs configured in Prism, the list of vGPU profiles will be displayed. You may select a vGPU profile if you wish for the instance type to have a vGPU when VMs of this instance type are provisioned. - **Cores**: Number of cores for each vCPU. - **CPUs**: Number of vCPUs for this instance type. - **Memory**: The amount of RAM assigned to the instance type in GiB. ### Add Storage Container 6. Our next and final step is to add a storage capacity target for the use of enterprise profiles/personal drives. Select the “Storage Container” tab from the top row. 1. Click “Add Storage Container” in the upper right corner. From there, click "Sync" to get a list of all available containers on the target cluster. 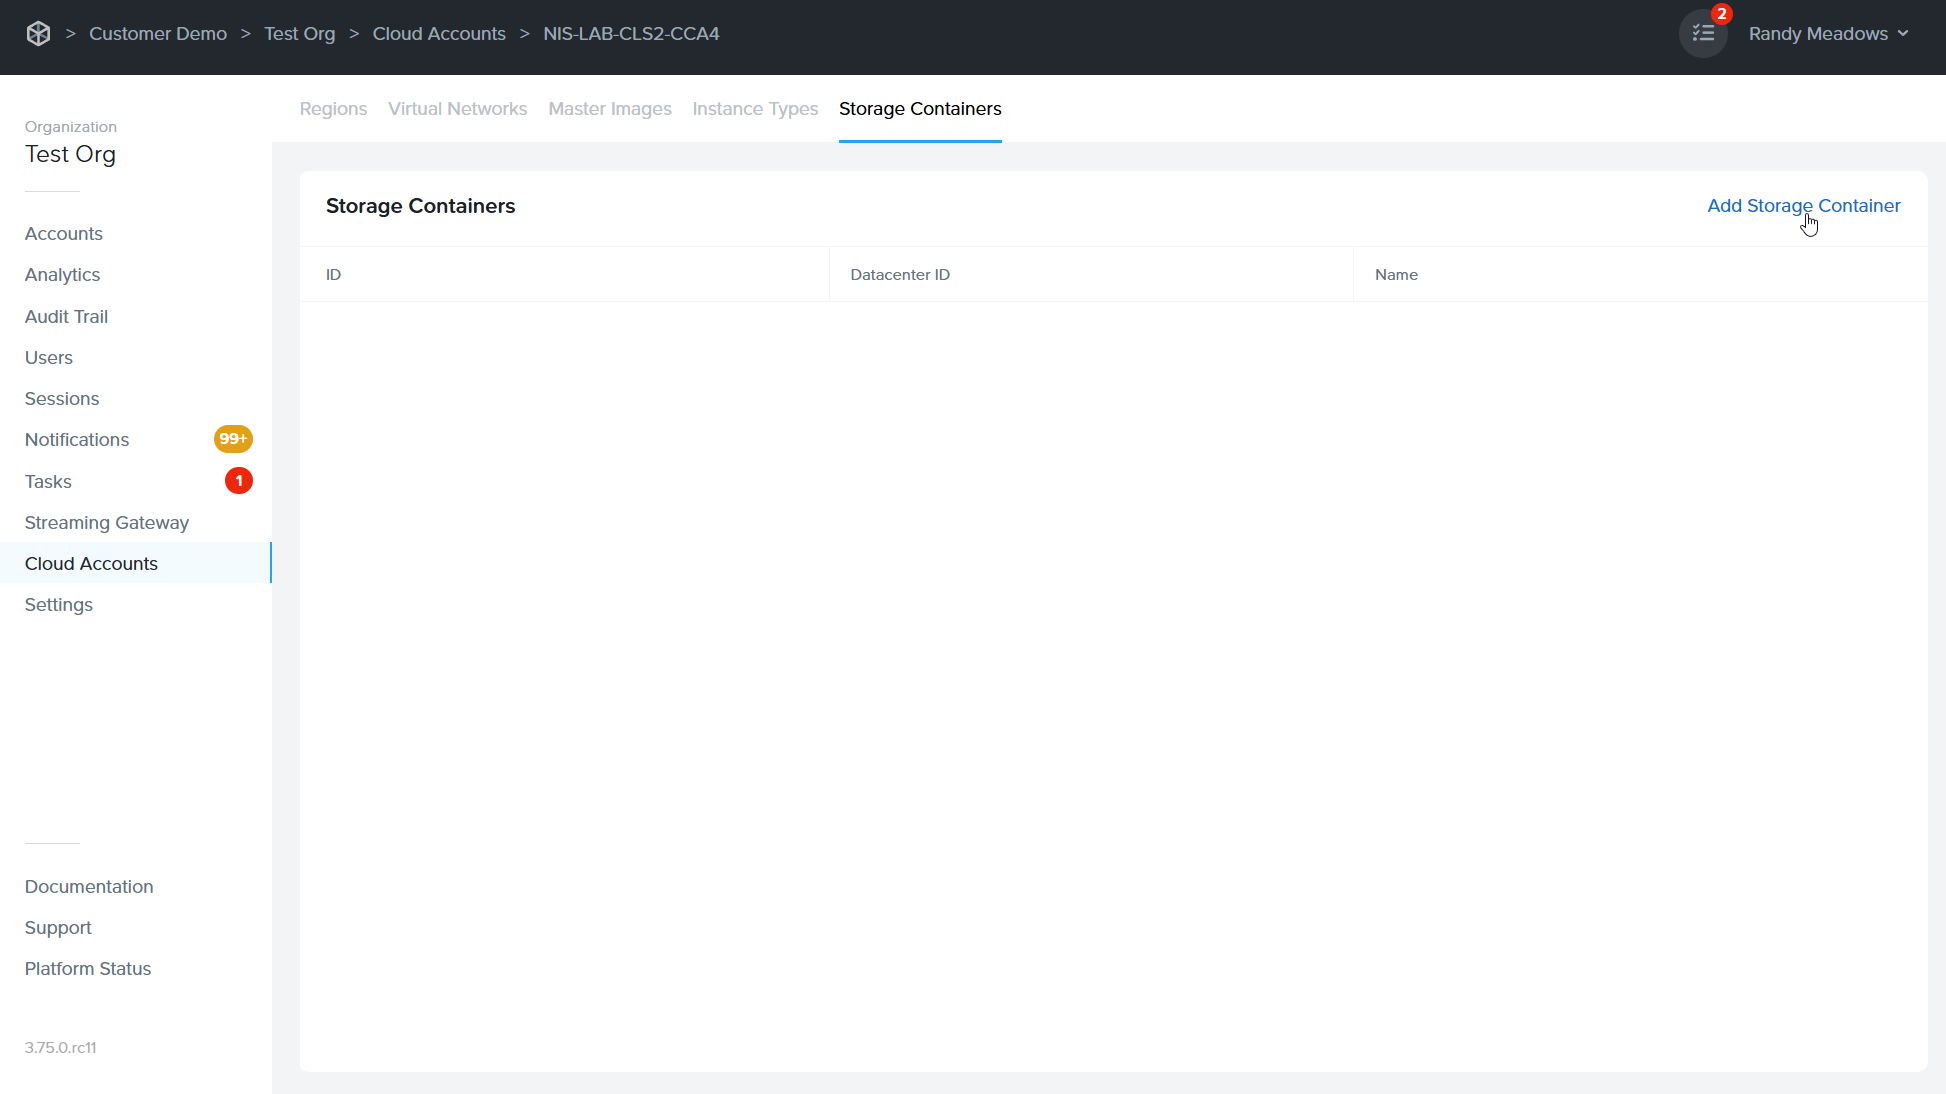 2. Select the storage container which should be used for profile/personal drives and click the "Add" button. 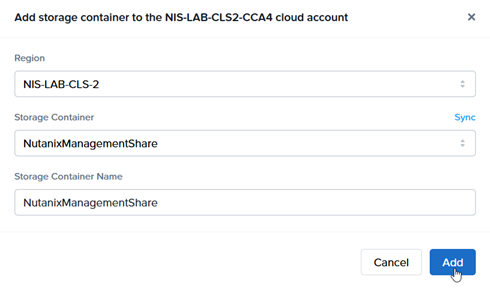 ### CCA Static IP Address By default, CCA VMs are assumed to obtain their IP address from a DHCP server provided by you. If a static IP address is required for the CCA, then the IP address of the VM will need to be manually configured. 1. After the CCA has been provisioned, open the console of the CCA VM from Prism Central (or Prism Element) and login as user cca password difr. 2. Select option 1 from the screen:**Important Note!** The sandbox runs as an EC2 instance on Dedicated Instances, as required for Windows 11 licensing compliance. This setup also enables platform features like publish, backup, and clone which are mandatory. Production desktops, however, run as WorkSpaces Core Managed Instances, optimized for scalability and end-user performance.
## Workflow #### Step 1 – Add AWS Cloud Account If you have not already done so, follow the instructions in [AWS Add Cloud Account](https://docs.difr.com/books/platform-administrators-guide/page/amazon-web-services) to connect your own AWS account. #### Step 2 – Enable Workspace v2 Since AWS WorkSpaces Core Managed Instances (WCMI) V2 is currently a Tech Preview feature, you will need to contact Dizzion Support to have this feature enabled for your account.  #### Step 3 – Initialize AWS permissions Once the feature is enabled, navigate to Cloud Accounts, locate your AWS cloud account, select the three-dot menu, and choose Update. Then, open the WorkSpaces Core V2 tab and click Initialize environment for WorkSpaces Managed Instances.  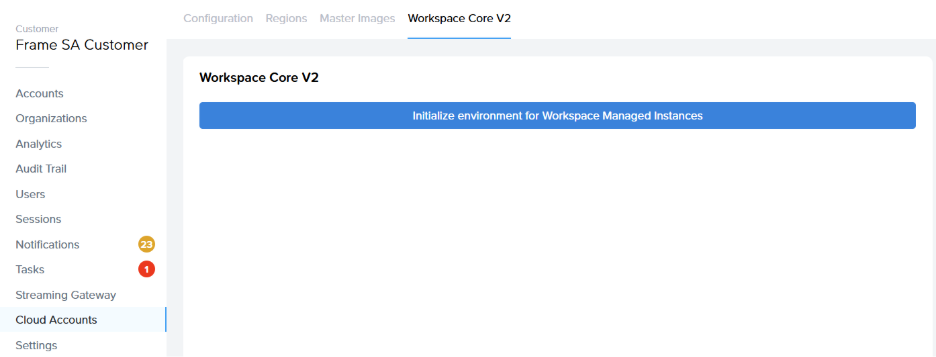 This action is required by AWS and creates a service-linked role for the service workspaces-instances.amazonaws.com, which is necessary for managing WorkSpaces. #### Step 4 – Create Account using Workspace Core Managed Instances You are now ready to create a Frame Account using WorkSpaces Managed Instances. When selecting AWS as the cloud provider, two options will be available: EC2 and WorkSpaces Core V2.  The created account will have all the same functionalities as any other Frame non-persistent or persistent account. ## Limitations Please note that:Sole tenancy flow is applied the moment the Windows 11 image family is selected when creating an account
#### Step 2 – Choose or Prepare the Windows 11 Image You can use a **Frame-managed Image** or prepare your own **BYO Windows 11 Image**. If you need to create your own image, follow the official GCP guidance for Windows image creation and import: [GCP Official Guide. ](https://docs.cloud.google.com/compute/docs/images/creating-custom-windows-byol-images)As a final step, install the **Frame Guest Agent**:[ Frame Agent Setup Tool (FAST), ](https://docs.difr.com/books/platform-administrators-guide/page/frame-agent-setup-tool-fast)then import the newly created master image into your GCP Cloud Account. **Extra guide:** Please note that preparing and importing BYO image can also be done by following this guide: **Step 1 – Create the Windows 11 VHD** • In VirtualBox, create a new VM and select Windows 11 (64-bit). • Enable UEFI boot in settings (System > Motherboard > Enable EFI). • Create the disk in VHD format. • Install Windows 11 and configure as needed. • Shut down the VM when ready. **Step 2 – Upload the VHD to Cloud Storage** • Create or choose a GCS bucket (e.g. `image-builder-raw-images`). • Upload the VHD: `gsutil cp "C:\Path\to\Windows11.vhd" gs://image-builder-raw-images/` **Step 3 – Import the Image into GCP** Run the following command to import your VHD as a custom image: `gcloud compute images import windows11baseimage --source-file gs://image-builder-raw-images/Windows11.vhd --guest-os-features=UEFI_COMPATIBLE --byol` #### Step 3 – Add Additional IAM Permissions Please make sure the following IAM roles are added for the GCP Cloud Account: - `roles/compute.storageAdmin` - `roles/dns.admin` - `roles/iam.serviceAccountUser` - `roles/compute.admin`**Note:** For customers who added a GCP Cloud Account after November 12th, **2024**, these IAM permissions are already assigned.
#### Step 4 – Deploy Frame Account on Sole-Tenant Nodes After enablement is complete, you can create **Frame Accounts** and deploy **workloads on Sole-Tenant Nodes** using your Windows 11 image. #### Step 5 – Validate Deployment Verify that virtual machines launch successfully on dedicated **Sole-Tenant Nodes**, and confirm that **licensing requirements** and **expected performance** characteristics are met. **Example from GCP Console:** 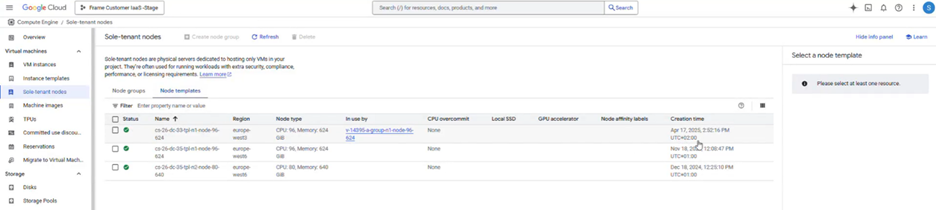 ### **Cost Considerations** GCP Sole-Tenant Nodes generally have **significantly higher costs** than standard shared compute instances. Customers should: - Work with their **GCP Account Team** to review pricing - Consider **Committed Use** or **Sustained Use** agreements - Evaluate costs **before deployment****Important:** Dizzion does **not control GCP pricing** and strongly recommends evaluating cost implications before enabling this feature.
# Cloud Providers - Cloud PC Only Infrastructure, Cloud Accounts, Amazon Workspaces Core, IBM Cloud VPC # Infrastructure This next portion of our documentation describes the Dizzion-supported and Dizzion-provided infrastructure options for Cloud PC. All infrastructure (RAM, CPU, GPU, Storage) for Cloud PC is included in the monthly, per-VM fee. To view Cloud PC size options and pricing, see [Cloud PC Flex Credit Rates.](https://docs.difr.com/books/subscription-management/page/cloud-pc-flex-credit-rates "Cloud PC Flex Credit Rates") # Cloud Accounts Dizzion manages the purchasing, setup, integration, and all management of the Cloud Accounts for Cloud PC customers. Frame Administrators with the appropriate roles can view the list and status of existing cloud accounts by navigating to the Customer or Organization Dashboard in the [Admin Console](https://docs.difr.com/books/platform-administrators-guide/page/administration) and selecting **Cloud Accounts** in the left-hand menu. # Amazon Web Services (AWS) Workspaces Core Dizzion Cloud PC on AWS Workspaces Core supports **dedicated/named instances** in the following AWS regions: - NA - US (East) - NA - US (West) - NA - Canada - AP - Mumbai - AP - Seoul - AP - Singapore - AP - Sydney - AP - Tokyo - EU - Frankfurt - EU - Ireland - EU - London - EU - Paris - Israel - Tel Aviv - SA - Sao Paulo The following instance names and sizes are supported in each region:| **Instance Name** | **vCPU** | **Memory** | **GPU** | **Root Volume (GB)** | **User Volume (GB)** | **Total Disk (GB)** |
| Lite - 2x8-8010 | 2 | 8 | - | 80 | 10 | 90 |
| Lite - 2x8-8050 | 2 | 8 | - | 80 | 50 | 130 |
| Lite - 2x8-80100 | 2 | 8 | - | 80 | 100 | 180 |
| Lite - 2x8-175100 | 2 | 8 | - | 175 | 100 | 275 |
| Standard - 4x16-8010 | 4 | 16 | - | 80 | 10 | 90 |
| Standard - 4x16-8050 | 4 | 16 | - | 80 | 50 | 130 |
| Standard - 4x16-80100 | 4 | 16 | - | 80 | 100 | 180 |
| Standard - 4x16-175100 | 4 | 16 | - | 175 | 100 | 275 |
| Power - 8x32-8010 | 8 | 32 | - | 80 | 10 | 90 |
| Power - 8x32-8050 | 8 | 32 | - | 80 | 50 | 130 |
| Power - 8x32-80100 | 8 | 32 | - | 80 | 100 | 180 |
| Power - 8x32-175100 | 8 | 32 | - | 175 | 100 | 275 |
| Pro-GPU - 4x16-100100 | 4 | 16 | 1 NVIDIA T4 | 100 | 100 | 200 |
| Max-GPU - 16x64-100100 | 16 | 64 | 1 NVIDIA T4 | 100 | 100 | 200 |
| **Instance Name** | **vCPU** | **Memory** | **GPU** | **Storage Volume (GB)** |
| Lite - 2x10-100 | 2 | 10 | - | 100 |
| Standard - 4x20-100 | 4 | 20 | - | 100 |
| Power - 8x40-100 | 8 | 40 | - | 100 |
| Pro-GPU - 16x80-100 | 16 | 80 | 1 NVIDIA L4 | 100 |
| Max-GPU - 24x120-100 | 24 | 120 | 1 NVIDIA L40S | 100 |
Note
**Considerations** 1. Frame-managed networking is only available when a Frame account is provisioned on public cloud infrastructure. 2. Customer-managed networking is required for Frame accounts provisioned on Nutanix AHV infrastructure. 3. Customer-managed networking is an option for Frame accounts provisioned on customer-managed public cloud infrastructure. 4. Customer-managed networking is not available when using Frame-provided public cloud infrastructure.If you attach network elements to the Frame-managed VNET or VPC after the Frame account is provisioned, Frame Control Plane will return an error and not deprovision the network elements when you terminate the Frame account.
### Customer-managed Networking When customer-managed networking is selected during Frame account creation in [public cloud](https://docs.difr.com/books/platform-administrators-guide/page/account-creation#public-cloud) or on [AHV clusters](https://docs.difr.com/books/platform-administrators-guide/page/account-creation#ahv-infrastructure), the customer is responsible for provisioning and managing all **public cloud** or **AHV** networking elements required for the operation of Frame: - VPC/VNET - Subnets - Routes - Security groups/firewall rules - NAT gateway - DNS - DHCP - Load balancer (if required for SGA high availability). The [Frame account creation](https://docs.difr.com/books/platform-administrators-guide/page/account-creation) process requires the following information, which can be obtained from the console of your infrastructure provider. This information dictates where Frame control plane will provision the workload VMs.| Infrastructure | Configuration Parameters |
|---|---|
| AWS | VPC name and CIDR Subnet name and CIDR Security Group |
| Azure | Resource group name VNET name Subnet name and CIDR |
| AHV | VLAN name |
| GCP | VPC name Subnet name |
If you choose \*\*customer-managed networking\*\*, you must ensure that your networking (CIDR, routes, security group/firewall rules) meets the \[network requirements\](/platform/networking/requirements) for the deployment model you wish to use \*\*before\*\* you attempt to create a Frame account.
WARNING
**FQDN vs. IP Address** Frame protects its control plane from DDoS and external threats using a global content distribution network (CDN) and web application firewall. The public IP addresses associated with the Frame Fully-Qualified Domain Names (FQDNs) may change without notice and vary globally due to this CDN service. Customers who deploy Frame into a private network (in public cloud or on-premises with AHV) may need to configure their network security appliances to allow Frame workload VMs (and Frame Streaming Gateway Appliances and Cloud Connector Appliances, if required) in their network to communicate with the Frame control plane. These customers are **strongly recommended** to use the Frame Fully-Qualified Domain Names (FQDNs) instead of public IP addresses. Alternatively, they may use an outbound proxy supporting HTTP/HTTPS and Secure WebSocket (WSS) in conjunction with their firewall. If a customer chooses to use public IP addresses within their security appliances (instead of the Frame FQDNs), customers will need to monitor these Frame control plane DNS records and update their security appliances with the new Frame public IP addresses, if they change.**Considerations** Customers provisioning Frame accounts in their own network (**customer-managed networking**) in public cloud should select either *Private Networking* or *Private Networking with SGA* deployment models.
| Deployment Type | Deployment Model | Description |
|---|---|---|
| **Public Cloud** | [Public Networking](https://docs.difr.com/books/platform-administrators-guide/page/public-networking-public-cloud) | All workload VMs (Sandbox, Test, Production, and Utility Server VMs) hosted in a public cloud infrastructure have public IP addresses and are directly accessed by users from the Internet. |
| [Private Networking](https://docs.difr.com/books/platform-administrators-guide/page/private-networking-public-cloud) | All workload VMs (Sandbox, Test, Production, and Utility Server VMs) hosted in a public cloud infrastructure only have private IP addresses. Users must access the workload VMs through a private network connection. | |
| [Private Networking with SGA](https://docs.difr.com/books/platform-administrators-guide/page/private-networking-with-sga-public-cloud) | All workload VMs (Sandbox, Test, Production, and Utility Server VMs) hosted in a public cloud infrastructure have private IP addresses. However, users can access the workload VMs through a Streaming Gateway Appliance (SGA) from the Internet. | |
| **AHV** | [Private Networking](https://docs.difr.com/books/platform-administrators-guide/page/private-networking-ahv) | All workload VMs (Sandbox, Test, Production, and Utility Server VMs) hosted on a Nutanix AHV cluster only have private IP addresses. Users must access the workload VMs through a private network connection. |
| [Private Networking with SGA](https://docs.difr.com/books/platform-administrators-guide/page/private-networking-with-sga-ahv) | All workload VMs (Sandbox, Test, Production, and Utility Server VMs) hosted on a Nutanix AHV cluster have private IP addresses. However, users can access the workload VMs through a Streaming Gateway Appliance (SGA) from the Internet. |
| Workload Type | IP Address Assignment |
|---|---|
| [Sandbox](https://docs.difr.com/books/platform-administrators-guide/page/sandbox) | **DHCP (Dynamic IP)** |
| [Utility Server](https://docs.difr.com/books/platform-administrators-guide/page/utility-servers) | |
| [Persistent Desktops](https://docs.difr.com/books/platform-administrators-guide/page/persistent-desktops-administration) | |
| [Test/Production VMs](https://docs.difr.com/books/platform-administrators-guide/page/capacity) | |
| [Streaming Gateway Appliance (SGA)](https://docs.difr.com/books/platform-administrators-guide/page/streaming-gateway-appliance) | **Static IP** |
| [Cloud Connector Appliance (AHV only)](https://docs.difr.com/books/platform-administrators-guide/page/nutanix-ahv#bkmrk-connecting-your-ahv-) |
To ensure proper network communication to the Frame Platform there are two Backends available depending on which one should be used for the connection for services and VMs please refer to the corresponding networking requirements: [USE ](https://docs.difr.com/link/56#bkmrk-private-networking-%28)(located in the United states- Location AWS us-east-1Virginia) [DEU ](https://docs.difr.com/link/56#bkmrk-deu%3A-private-network)( located in European Union - Location AWS eu-central-1 Frankfurt)
## FRP8 Networking [FRP8](https://docs.difr.com/books/platform-administrators-guide/page/frame-remoting-protocol#bkmrk-frame-remoting-proto-1) is a udp-based protocol for all communication between the end user and the Frame workload VMs. 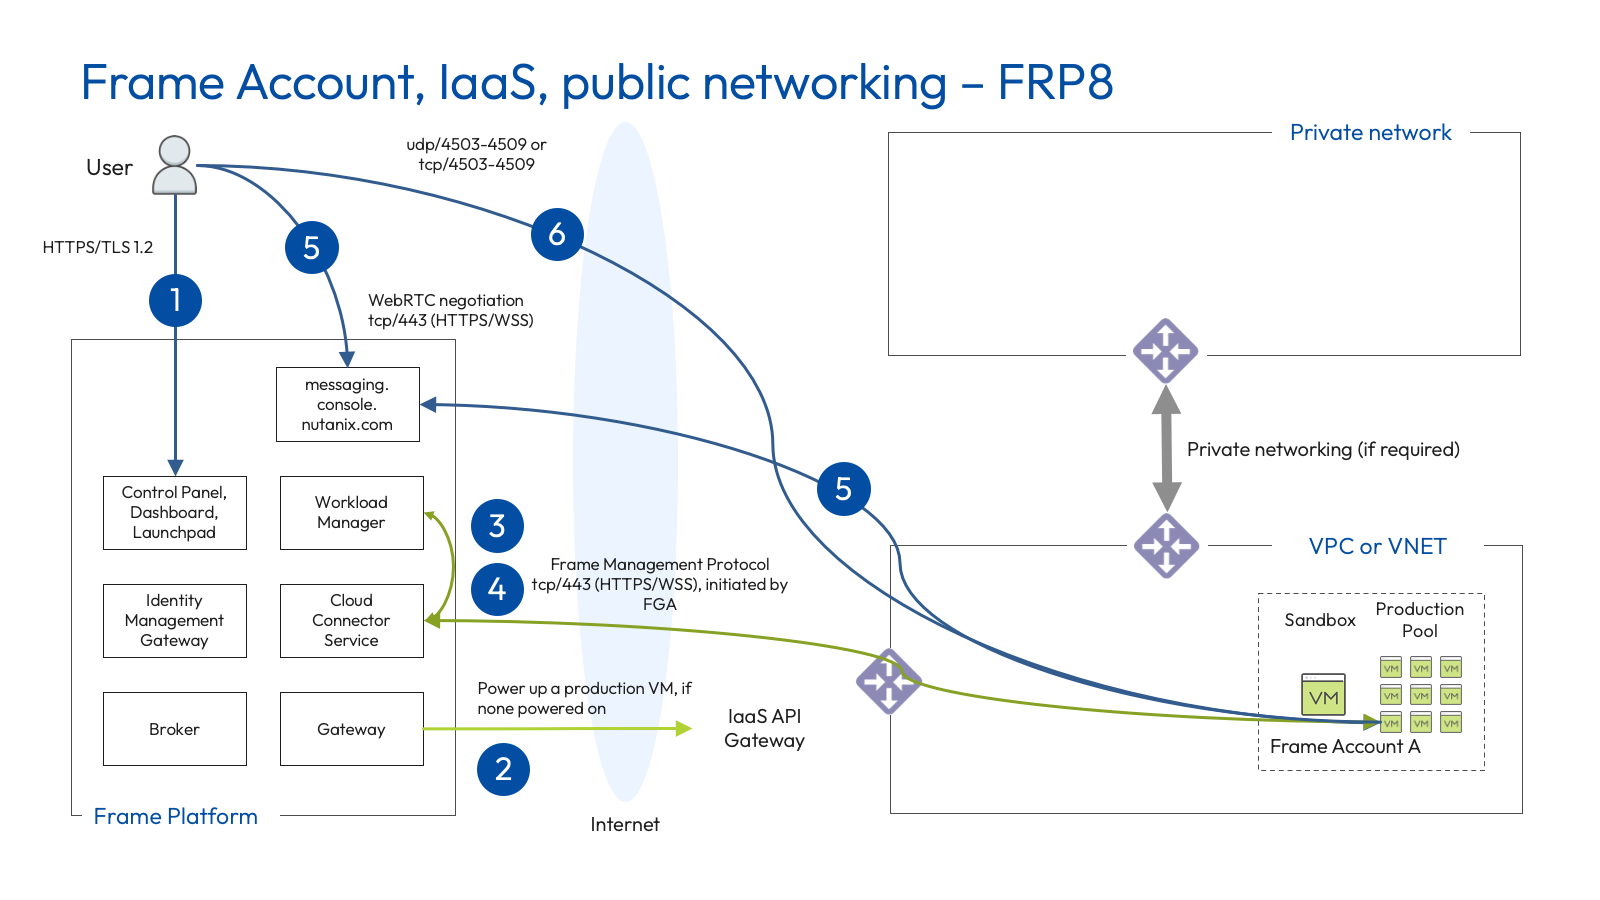** Dizzion is in the process of migrating from \*.nutanix.com to \*.difr.com domain. For the** ** time being, the additional difr.com domains will need to be whitelisted in addition to the** ** existing nutanix.com domains. At a later time, once Dizzion has confirmed there is no** ** dependencies on the nutanix.com domains, we will send out a communication notifying** ** customers that all nutanix.com domains can be safely removed from your whitelist** ** configurations.**
** IMPORTANT: For IMG Domains, Customers can whitelist new IMG difr domains but** ** should NOT change SAML 2 configurations to use new difr.com domains. SAML 2** ** configurations should continue to use img.console.nutanix.com and** ** img.frame.nutanix.com until further direction from Dizzion.**
## USE: Public IaaS - Public Networking (FRP8) The following table lists the required protocols and ports for Frame accounts using Public Networking and FRP8.| Source to Destination | Source IP address | Destination FQDN(s) | Protocol/port |
|---|---|---|---|
| Workload VMs to Frame Platform | Public IP address | - api.use.difr.com - hub.deu.difr.com - logging.use.difr.com - downloads.difr.com - download.visualstudio.microsoft.com - gateway-external-api-prod.frame.nutanix.com - downloads.console.nutanix.com - logging.console.nutanix.com - cch.console.nutanix.com | tcp/443 (HTTPS) |
| Workload VMs to Frame Platform | Public IP address | - hub.use.difr.com - logging.use.difr.com - api.use.difr.com - cch.console.nutanix.com - logging.console.nutanix.com - messaging.console.nutanix.com | tcp/443 (HTTPS, WSS) |
| Workload VMs to Frame Platform | Public IP address | - stun.use.difr.com | udp/3478 |
| End user to Frame Platform | Public IP address | - use.difr.com - api.use.difr.com - img.use.difr.com - assets.use.difr.com - login.use.difr.com - logging.use.difr.com - downloads.difr.com - console.nutanix.com - img.frame.nutanix.com - img.console.nutanix.com - cpanel-backend.console.nutanix.com - terminal-prod.frame.nutanix.com - logging.console.nutanix.com - login.console.nutanix.com (for Frame IdP, if used) | tcp/443 (HTTPS) |
| End user to Frame Platform | Public IP address | - api.use.difr.com - messaging.console.nutanix.com | tcp/443 (HTTPS, WSS) |
| End user to Workload VM | Public IP address | - Workload’s dynamic private IP address within VPC/VNET | udp/4503-4509, tcp/4503-4509 (optional) |
| Source to Destination | Source IP address | Destination FQDN(s) | Protocol/port |
|---|---|---|---|
| Workload VMs to Frame Platform | Public IP address | - api.deu.difr.com - hub.deu.difr.com - logging.deu.difr.com - downloads.difr.com - download.visualstudio.microsoft.com | tcp/443 (HTTPS) |
| Workload VMs to Frame Platform | Public IP address | - hub.deu.difr.com - logging.deu.difr.com - api.deu.difr.com | tcp/443 (HTTPS, WSS) |
| Workload VMs to Frame Platform | Public IP address | - stun.deu.difr.com | udp/3478 |
| End user to Frame Platform | Public IP address | - deu.difr.com - api.deu.difr.com - img.deu.difr.com - assets.deu.difr.com - login.deu.difr.com - logging.deu.difr.com - downloads.difr.com | tcp/443 (HTTPS) |
| End user to Frame Platform | Public IP address | - api.deu.difr.com | tcp/443 (HTTPS, WSS) |
| End user to Workload VM | Public IP address | - Workload’s dynamic private IP address within VPC/VNET | udp/4503-4509, tcp/4503-4509 (optional) |
Customers who choose to create a Frame account in their own managed network where all users access the Frame workload VMs within their private network must follow the networking requirements defined below.
If users must access network resources on-premises or in a private network, a [private network connection](https://docs.difr.com/books/platform-administrators-guide/page/vpn-configurations) (e.g., VPN, direct connection, SD-WAN, VPC/VNET peering) with the appropriate routing must be implemented.To ensure proper network communication to the Frame Platform there are two Backends available depending on which one should be used for the connection for services and VMs please refer to the corresponding networking requirements: [USE ](https://docs.difr.com/link/56#bkmrk-private-networking-%28)(located in the United states- Location AWS Datacenter Virginia) [DEU ](https://docs.difr.com/link/56#bkmrk-deu%3A-private-network)( located in European Union - Location AWS Datacenter Frankfurt)
## FRP8 Networking [FRP8](https://docs.difr.com/books/platform-administrators-guide/page/frame-remoting-protocol#bkmrk-frame-remoting-proto-1) is a udp-based protocol for all communication between the end user and the Frame workload VMs.** Dizzion is in the process of migrating from \*.nutanix.com to \*.difr.com domain. For the** ** time being, the additional difr.com domains will need to be whitelisted in addition to the** ** existing nutanix.com domains. At a later time, once Dizzion has confirmed there is no** ** dependencies on the nutanix.com domains, we will send out a communication notifying** ** customers that all nutanix.com domains can be safely removed from your whitelist** ** configurations.**
** IMPORTANT: For IMG Domains, Customers can whitelist new IMG difr domains but should NOT change SAML 2 configurations to use new difr.com domains. SAML 2 configurations should continue to use img.console.nutanix.com and img.frame.nutanix.com until further direction from Dizzion.**
## USE: Private Networking (Public Cloud)| Source to Destination | Source IP address | Destination FQDN(s) | Protocol/port |
|---|---|---|---|
| Workload VMs to Frame Platform | Public IP address | - api.use.difr.com - hub.deu.difr.com - logging.use.difr.com - downloads.difr.com - download.visualstudio.microsoft.com - gateway-external-api-prod.frame.nutanix.com - downloads.console.nutanix.com - logging.console.nutanix.com - cch.console.nutanix.com | tcp/443 (HTTPS) |
| Workload VMs to Frame Platform | Public IP address | - hub.use.difr.com - logging.use.difr.com - api.use.difr.com - cch.console.nutanix.com - logging.console.nutanix.com - messaging.console.nutanix.com | tcp/443 (HTTPS, WSS) |
| End user to Frame Platform | Public IP address | - use.difr.com - api.use.difr.com - img.use.difr.com - assets.use.difr.com - login.use.difr.com - logging.use.difr.com - downloads.difr.com - console.nutanix.com - img.frame.nutanix.com - img.console.nutanix.com - cpanel-backend.console.nutanix.com - terminal-prod.frame.nutanix.com - logging.console.nutanix.com - login.console.nutanix.com (for Frame IdP, if used) | tcp/443 (HTTPS) |
| End user to Frame Platform | Public IP address | - api.use.difr.com - messaging.console.nutanix.com | tcp/443 (HTTPS, WSS) |
| End user to Workload VM | Private IP address | - Workload’s dynamic private IP address within VPC/VNET | udp/4503-4509, tcp/4503-4509 (optional) |
| Source to Destination | Source IP address | Destination FQDN(s) | Protocol/port |
|---|---|---|---|
| Workload VMs to Frame Platform | Public IP address | - api.deu.difr.com - hub.deu.difr.com - logging.deu.difr.com - downloads.difr.com - download.visualstudio.microsoft.com | tcp/443 (HTTPS) |
| Workload VMs to Frame Platform | Public IP address | - hub.deu.difr.com - logging.deu.difr.com - api.deu.difr.com | tcp/443 (HTTPS, WSS) |
| End user to Frame Platform | Public IP address | - deu.difr.com - api.deu.difr.com - img.deu.difr.com - assets.deu.difr.com - login.deu.difr.com - logging.deu.difr.com - downloads.difr.com | tcp/443 (HTTPS) |
| End user to Frame Platform | Public IP address | - api.deu.difr.com | tcp/443 (HTTPS, WSS) |
| End user to Workload VM | Private IP address | - Workload’s dynamic private IP address within VPC/VNET | udp/4503-4509, tcp/4503-4509 (optional) |
Customers who choose to create a Frame account in their own managed network where users will access the Frame workload VMs from the Internet through an SGA must follow the networking requirements defined below.
To ensure proper network communication to the Frame Platform there are two Backends available depending on which one should be used for the connection for services and VMs please refer to the corresponding networking requirements: [USE ](https://docs.difr.com/link/56#bkmrk-private-networking-%28)(located in the United states- Location AWS Datacenter Virginia) [DEU ](https://docs.difr.com/link/56#bkmrk-deu%3A-private-network)( located in European Union - Location AWS Datacenter Frankfurt)
## FRP8 Networking (SGA 4) [FRP8](https://docs.difr.com/books/platform-administrators-guide/page/frame-remoting-protocol#bkmrk-frame-remoting-proto-1) is a udp-based protocol for all communication between the end user and the Frame workload VMs.** Dizzion is in the process of migrating from \*.nutanix.com to \*.difr.com domain. For the** ** time being, the additional difr.com domains will need to be whitelisted in addition to the** ** existing nutanix.com domains. At a later time, once Dizzion has confirmed there is no** ** dependencies on the nutanix.com domains, we will send out a communication notifying** ** customers that all nutanix.com domains can be safely removed from your whitelist** ** configurations.**
** IMPORTANT: For IMG Domains, Customers can whitelist new IMG difr domains but** ** should NOT change SAML 2 configurations to use new difr.com domains. SAML 2** ** configurations should continue to use img.console.nutanix.com and** ** img.frame.nutanix.com until further direction from Dizzion.**
## USE: Private Networking (Public Cloud) - Streaming Gateway 4| Source to Destination | Source IP address | Destination FQDN(s) | Protocol/port |
|---|---|---|---|
| Workload VMs to Frame Platform | Public IP address | - api.use.difr.com - hub.deu.difr.com - logging.use.difr.com - downloads.difr.com - download.visualstudio.microsoft.com - gateway-external-api- - downloads.console.nutanix.com - logging.console.nutanix.com - cch.console.nutanix.com | tcp/443 (HTTPS) |
| Workload VMs to Frame Platform | Public IP address | - hub.use.difr.com - logging.use.difr.com - api.use.difr.com - cch.console.nutanix.com - logging.console.nutanix.com | tcp/443 (HTTPS, WSS) |
| End user to Frame Platform | Public IP address | - use.difr.com - api.use.difr.com - img.use.difr.com - assets.use.difr.com - login.use.difr.com - logging.use.difr.com - downloads.difr.com - console.nutanix.com - img.frame.nutanix.com - img.console.nutanix.com - cpanel-backend.console.nutanix.com - terminal-prod.frame.nutanix.com - logging.console.nutanix.com - login.console.nutanix.com (for Frame IdP, if used) | tcp/443 (HTTPS) |
| End user to Frame Platform | Public IP address | - api.use.difr.com - messaging.console.nutanix.com | tcp/443 (HTTPS, WSS) |
| SGA VMs to Frame Platform | Public IP address | - hub.use.difr.com - ntp.ubuntu.com - api.snapcraft.io - cch.console.nutanix.com | tcp/443 (HTTPS, WSS) |
| End user to SGA VM | Public IP address | - SGA VM-specific public IP address | udp/3478 and tcp/3478 |
| SGA VM to End user | Public IP address | - End user-specific public IP address | udp/49152–65535 |
| SGA VM to Workload VM | Private IP address | - Dynamic private IP address within VPC/VNET | udp/4503–4509 |
| Workload VM to SGA VM | Private IP address | - SGA VM-specific private IP address | udp/49152–65535 |
| Source to Destination | Source IP address | Destination FQDN(s) | Protocol/port |
|---|---|---|---|
| Workload VMs to Frame Platform | Public IP address | - api.deu.difr.com - hub.deu.difr.com - logging.deu.difr.com - downloads.difr.com - download.visualstudio.microsoft.com | tcp/443 (HTTPS) |
| Workload VMs to Frame Platform | Public IP address | - hub.deu.difr.com - logging.deu.difr.com - api.deu.difr.com | tcp/443 (HTTPS, WSS) |
| End user to Frame Platform | Public IP address | - deu.difr.com - api.deu.difr.com - img.deu.difr.com - assets.deu.difr.com - login.deu.difr.com - logging.deu.difr.com - downloads.difr.com | tcp/443 (HTTPS) |
| End user to Frame Platform | Public IP address | - api.deu.difr.com | tcp/443 (HTTPS, WSS) |
| SGA VMs to Frame Platform | Public IP address | - hub.deu.difr.com - ntp.ubuntu.com - api.snapcraft.io | tcp/443 (HTTPS, WSS) |
| End user to SGA VM | Public IP address | - SGA VM-specific public IP address | udp/3478 and tcp/3478 |
| SGA VM to End user | Public IP address | - End user-specific public IP address | udp/49152–65535 |
| SGA VM to Workload VM | Private IP address | - Dynamic private IP address within VPC/VNET | udp/4503–4509 |
| Workload VM to SGA VM | Private IP address | - SGA VM-specific private IP address | udp/49152–65535 |
If a customer requires an outbound proxy server for any communication to the Internet, the outbound proxy server must support both HTTPS and Secure WebSocket (WSS) in order for the Frame Guest Agent (FGA) and CCAs to establish HTTPS and WSS connections to Frame Platform.
To ensure proper network communication to the Frame Platform there are two Backends available depending on which one should be used for the connection for services and VMs please refer to the corresponding networking requirements: [USE ](https://docs.difr.com/link/57#bkmrk-nutanix-ahv---privat-1)(located in the United states- Location AWS Datacenter Virginia) [DEU ](https://docs.difr.com/link/57#bkmrk-deu%3A-nutanix-ahv---p)( located in European Union - Location AWS Datacenter Frankfurt)
## FRP8 Networking [FRP8](https://docs.difr.com/books/platform-administrators-guide/page/frame-remoting-protocol#bkmrk-frame-remoting-proto-1) is a udp-based protocol for all communication between the end user and the Frame workload VMs.** Dizzion is in the process of migrating from \*.nutanix.com to \*.difr.com domain. For the** ** time being, the additional difr.com domains will need to be whitelisted in addition to the** ** existing nutanix.com domains. At a later time, once Dizzion has confirmed there is no** ** dependencies on the nutanix.com domains, we will send out a communication notifying** ** customers that all nutanix.com domains can be safely removed from your whitelist** ** configurations.**
** IMPORTANT: For IMG Domains, Customers can whitelist new IMG difr domains but** ** should NOT change SAML 2 configurations to use new difr.com domains. SAML 2** ** configurations should continue to use img.console.nutanix.com and** ** img.frame.nutanix.com until further direction from Dizzion**
## USE: Nutanix AHV - Private Networking| Source to Destination | Source IP address | Destination FQDN(s) | Protocol/port |
|---|---|---|---|
| Cloud Connector Appliance (CCA) to Frame Platform | Public IP address | - use.difr.com - api.use.difr.com - console.nutanix.com - cpanel-backend.console.nutanix.com - gateway-external-api.console.nutanix.com | tcp/443 (HTTPS) |
| Cloud Connector Appliance (CCA) to Frame Platform | Public IP address | - hub.use.difr.com - cch.console.nutanix.com | tcp/443 (HTTPS, WSS) |
| Prism Central to Frame Platform | Public IP address | - downloads.difr.com - downloads.console.nutanix.com | tcp/443 (HTTPS) |
| CCA to Prism Central | Private IP address | - Prism Central IP address | tcp/443 (HTTPS) |
| CCA to Prism Element | Private IP address | - Prism Element IP address | tcp/443 (HTTPS) |
| Workload VMs to Frame Platform | Public IP address | - api.use.difr.com - hub.deu.difr.com - logging.use.difr.com - downloads.difr.com - download.visualstudio.microsoft.com - gateway-external-api-prod.frame.nutanix.com - downloads.console.nutanix.com - logging.console.nutanix.com - cch.console.nutanix.com - download.visualstudio.microsoft.com | tcp/443 (HTTPS) |
| Workload VMs to Frame Platform | Public IP address | - hub.use.difr.com - logging.use.difr.com - api.use.difr.com - cch.console.nutanix.com | tcp/443 (HTTPS, WSS) |
| End user to Frame Platform | Public IP address | - use.difr.com - api.use.difr.com - img.use.difr.com - assets.use.difr.com - login.use.difr.com - logging.use.difr.com - downloads.difr.com - console.nutanix.com - img.frame.nutanix.com - img.console.nutanix.com - cpanel-backend.console.nutanix.com - terminal-prod.frame.nutanix.com - logging.console.nutanix.com - login.console.nutanix.com (for Frame IdP, if used) | tcp/443 (HTTPS) |
| End user to Frame Platform | Public IP address | api.use.difr.com | tcp/443 (HTTPS, WSS) |
| End user to Workload VM | Private IP address | Workload’s dynamic private IP address within VPC/VNET | udp/4503-4509, tcp/4503-4509 (optional) |
| Source to Destination | Source IP address | Destination FQDN(s) | Protocol/port |
|---|---|---|---|
| Cloud Connector Appliance (CCA) to Frame Platform | Public IP address | - deu.difr.com - api.use.difr.com | tcp/443 (HTTPS) |
| Cloud Connector Appliance (CCA) to Frame Platform | Public IP address | - hub.deu.difr.com | tcp/443 (HTTPS, WSS) |
| Prism Central to Frame Platform | Public IP address | - downloads.difr.com | tcp/443 (HTTPS) |
| Workload VMs to Frame Platform | Public IP address | - api.deu.difr.com - hub.deu.difr.com - logging.deu.difr.com - downloads.difr.com - download.visualstudio.microsoft.com | tcp/443 (HTTPS) |
| Workload VMs to Frame Platform | Public IP address | - hub.deu.difr.com - logging.deu.difr.com - api.deu.difr.com | tcp/443 (HTTPS, WSS) |
| End user to Frame Platform | Public IP address | - deu.difr.com - api.deu.difr.com - img.deu.difr.com - assets.deu.difr.com - login.deu.difr.com - logging.deu.difr.com - downloads.difr.com | tcp/443 (HTTPS) |
| End user to Frame Platform | Public IP address | - api.deu.difr.com | tcp/443 (HTTPS, WSS) |
| End user to Workload VM | Private IP address | Workload’s dynamic private IP address within VPC/VNET | udp/4503-4509, tcp/4503-4509 (optional) |
If a customer requires an outbound proxy server for any communication to the Internet, the outbound proxy server must support both HTTPS and Secure WebSocket (WSS) in order for the Frame Guest Agent (FGA), CCAs, and SGAs to establish HTTPS and WSS connections to Frame Platform.
To ensure proper network communication to the Frame Platform there are two Backends available depending on which one should be used for the connection for services and VMs please refer to the corresponding networking requirements: [USE ](https://docs.difr.com/link/58#bkmrk-nutanix-ahv---privat-1)(located in the United states- Location AWS us-east-1Virginia) [DEU ](https://docs.difr.com/link/58#bkmrk-deu%3A-nutanix-ahv---p)( located in European Union - Location AWS eu-central-1 Frankfurt)
## FRP8 Networking (SGA 4) [FRP8](https://docs.difr.com/books/platform-administrators-guide/page/frame-remoting-protocol#bkmrk-frame-remoting-proto-1) is a udp-based protocol for all communication between the end user and the Frame workload VMs.** Dizzion is in the process of migrating from \*.nutanix.com to \*.difr.com domain. For the** ** time being, the additional difr.com domains will need to be whitelisted in addition to the** ** existing nutanix.com domains. At a later time, once Dizzion has confirmed there is no** ** dependencies on the nutanix.com domains, we will send out a communication notifying** ** customers that all nutanix.com domains can be safely removed from your whitelist** ** configurations.**
** IMPORTANT: For IMG Domains, Customers can whitelist new IMG difr domains but should NOT change SAML 2 configurations to use new difr.com domains. SAML 2 configurations should continue to use img.console.nutanix.com and img.frame.nutanix.com until further direction from Dizzion**
## USE: Nutanix AHV - Private Networking with Streaming Gateway 4| Source to Destination | Source IP address | Destination FQDN(s) | Protocol/port |
|---|---|---|---|
| Cloud Connector Appliance (CCA) to Frame Platform | Public IP address | - use.difr.com - api.use.difr.com - console.nutanix.com - cpanel-backend.console.nutanix.com - gateway-external-api.console.nutanix.com | tcp/443 (HTTPS) |
| Cloud Connector Appliance (CCA) to Frame Platform | Public IP address | - hub.use.difr.com - cch.console.nutanix.com | tcp/443 (HTTPS, WSS) |
| Prism Central to Frame Platform | - Public IP address | - downloads.difr.com - downloads.console.nutanix.com | tcp/443 (HTTPS) |
| CCA to Prism Central | Private IP address | - Prism Central IP address | tcp/443 (HTTPS) |
| Workload VMs to Frame Platform | Public IP address | - api.use.difr.com - hub.deu.difr.com - logging.use.difr.com - downloads.difr.com - download.visualstudio.microsoft.com - gateway-external-api-prod.frame.nutanix.com - downloads.console.nutanix.com - logging.console.nutanix.com - cch.console.nutanix.com - download.visualstudio.microsoft.com | tcp/443 (HTTPS) |
| Workload VMs to Frame Platform | Public IP address | - hub.use.difr.com - logging.use.difr.com - api.use.difr.com - cch.console.nutanix.com - logging.console.nutanix.com - messaging.console.nutanix.com | tcp/443 (HTTPS, WSS) |
| End user to Frame Platform | Public IP address | - use.difr.com - api.use.difr.com - img.use.difr.com - assets.use.difr.com - login.use.difr.com - logging.use.difr.com - downloads.difr.com - console.nutanix.com - img.frame.nutanix.com - img.console.nutanix.com - cpanel-backend.console.nutanix.com - terminal-prod.frame.nutanix.com - logging.console.nutanix.com - login.console.nutanix.com (for Frame IdP, if used) | tcp/443 (HTTPS) |
| End user to Frame Platform | Public IP address | - api.use.difr.com - messaging.console.nutanix.com | tcp/443 (HTTPS, WSS) |
| SGA VMs to Frame Platform | Public IP address | - hub.use.difr.com - cch.console.nutanix.com - ntp.ubuntu.com - api.snapcraft.io (Canonical Snapcraft) | tcp/443 (HTTPS, WSS) |
| End user to SGA VM | Public IP address | - SGA VM-specific public IP address | udp/3478 and tcp/3478 |
| SGA VM to End user | Public IP address | - End user-specific public IP address | udp/49152–65535 |
| SGA VM to Workload VM | Private IP address | - Dynamic private IP address within VPC/VNET | udp/4503–4509 |
| Workload VM to SGA VM | Private IP address | - SGA VM-specific private IP address | udp/49152–65535 |
| Source to Destination | Source IP address | Destination FQDN(s) | Protocol/port |
|---|---|---|---|
| Cloud Connector Appliance (CCA) to Frame Platform | Public IP address | - deu.difr.com - api.deu.difr.com | tcp/443 (HTTPS) |
| Cloud Connector Appliance (CCA) to Frame Platform | Public IP address | - hub.deu.difr.com | tcp/443 (HTTPS, WSS) |
| Prism Central to Frame Platform (not required starting with PC 2023.4) | Public IP address | - downloads.difr.com | tcp/443 (HTTPS) |
| Workload VMs to Frame Platform | Public IP address | - api.deu.difr.com - hub.deu.difr.com - logging.deu.difr.com - downloads.difr.com - download.visualstudio.microsoft.com | tcp/443 (HTTPS) |
| Workload VMs to Frame Platform | Public IP address | - hub.deu.difr.com - logging.deu.difr.com - api.deu.difr.com | tcp/443 (HTTPS, WSS) |
| End user to Frame Platform | Public IP address | - deu.difr.com - api.deu.difr.com - img.deu.difr.com - assets.deu.difr.com - login.deu.difr.com - logging.deu.difr.com - downloads.difr.com | tcp/443 (HTTPS) |
| End user to Frame Platform | Public IP address | - api.deu.difr.com | tcp/443 (HTTPS, WSS) |
| SGA VMs to Frame Platform | Public IP address | - hub.use.difr.com - ntp.ubuntu.com - api.snapcraft.io (Canonical Snapcraft) | tcp/443 (HTTPS, WSS) |
| End user to SGA VM | Public IP address | - SGA VM-specific public IP address | udp/3478 and tcp/3478 |
| SGA VM to End user | Public IP address | - End user-specific public IP address | udp/49152–65535 |
| SGA VM to Workload VM | Private IP address | - Dynamic private IP address within VPC/VNET | udp/4503–4509 |
| Workload VM to SGA VM | Private IP address | - SGA VM-specific private IP address | udp/49152–65535 |
It is also possible to automatically prompt users to login via VPN when they start a session on Frame by using \[pre-session scripts\](/books/platform-administrators-guide/page/scripting).
Frame works with Cisco AnyConnect, GlobalProtect, OpenVPN, and SonicWall services. Any other VPN clients that support split-tunnel configurations should work as well. ### Site-to-Site VPN For customers who deploy Frame workloads in public cloud and require end users to access network services in their private, on-premises network, customers can design and implement a site-to-site Virtual Private Network (VPN) using their public cloud provider's VPN Gateway solution. Use of a site-to-site VPN eliminates the need for end users to authenticate to a VPN Gateway while in a Frame session. To learn more about VPN gateways, review the documentation below for each of the supported public cloud infrastructures: - [AWS](https://docs.aws.amazon.com/vpn/latest/s2svpn/SetUpVPNConnections.html) - [Azure](https://docs.microsoft.com/en-us/azure/vpn-gateway/vpn-gateway-about-vpngateways) - [GCP](https://cloud.google.com/network-connectivity/docs/vpn/how-to) - [IBM](https://cloud.ibm.com/docs/vpc?topic=vpc-using-vpn) ### Other Private Inter-Networking Solutions Customers can use other private inter-networking solutions: - VPC/VNET peering, if the Frame workloads in one VPC/VNET need to communicate with resources in a different VPC/VNET on the same public cloud infrastructure - AWS Direct Connect, Azure ExpressRoute, or Google Cloud Interconnect - SD-WAN The design, deployment, and management of these inter-networking solutions are the responsibility of the customer. # Streaming Gateway Appliance Streaming Gateway Appliance (SGA) Installation, Upgrade, Management # Streaming Gateway Appliance Organizations who have users on the Internet must determine how their users will access their Frame workload VMs in a private network. For these use cases, organizations can provide their users with corporate VPN access or deploy the Frame Streaming Gateway Appliance (SGA), a secure reverse proxy that supports the Frame Remoting Protocol (FRP). SGA enables organizations to grant their users secure access to their virtualized applications and/or desktops without the use of a VPN. ## Considerations Frame provides two options for deploying one or more SGAs. Administrators should review the following considerations to determine which deployment approach fits their requirements. | | Manual SGA Deployment | Auto SGA Deployment | | -------------- | ------------------------------------------------------------------------- | ------------------------------------ | | Infrastructure | Required for AHV-based accounts.Supported for public cloud accounts. | Supported for public cloud accounts. | | Networking | Requires customer-managed networking. | Requires Frame-managed networking. | 1. Auto SGA Deployment: Frame will provision all of the required network resources (e.g., SGA VPC, security groups/firewall rules, SGA VM(s), VPC/VNET peer, and SGA VMs. SGA VMs will have public IP addresses. Frame will also provision, for SGA 3.X only, a load balancer if more than one SGA VM is required). 2. Manual SGA Deployment: Customers manually deploy and register their SGAs and configure their networking/firewall rules. They also provision and configure, for SGA 3.X only, a load balancer if more than one SGA VM is required.
Manual SGA deployments are required when customers have specifc networking requirements (e.g., inbound firewall, WAF, and/or load balancer requirements, prohibition on workload VMs having public IP addresses, outbound NAT or zero-trust Internet access requirements, etc.) that Auto SGA deployment cannot satisfy. In these scenarios, the customer ensures that all SGA and Frame VM network prerequisites are satisfied in order for users to be able to access their workload VMs via a manually deployed SGA Cluster. IMPORTANT: Upgrading from one SGA version to the next version requires termination and recreation of the SGA VMs. Scheduled downtime may be required. ## SGA Versions
| SGA Version | Considerations |
|---|---|
| SGA 3 (out-of-support) |
|
| SGA 4 |
|
Note
Customers manually deploying SGA VMs in public cloud (customer-managed networking) should ensure they select a non-burstable instance type with sufficient network performance. Public cloud providers may constrain CPU utilization and/or restrict network bandwidth with lower cost instance types.**NOTE** 1. While each SGA VM must have an associated public IP address, the public IP address does not have to be attached to virtual network interface of the SGA VM itself. Instead, the customer administrator can manually deploy an SGA VM with only a private IP addresses and then configure a NAT rule either on their firewall, web application firewall, or load balancer that maps the inbound public IP address of the SGA VM to the corresponding private IP address on the SGA VM. 2. SGA 4 no longer requires a corresponding DNS A record for its public IP address; however, customers can create DNS records for their SGA 4 public IP addresses, if desired. 3. SGA 4 does not support IPv6 addresses.
### High Availability With SGA 4, Frame control plane will handle load balancing user session requests across the available SGA nodes in the SGA cluster. A load balancer is no longer needed to perform the load balancing function.For public cloud, make sure that you create the SGA Cluster in the same region as the Frame Accounts you wish to attach to the SGA Cluster. For Nutanix AHV, make sure the SGA Cluster is in the same data center as the Frame Accounts you wish to attach to the SGA Cluster. If you do not, then users may experience unacceptable latency, limited bandwidth, and high packet loss, resulting in poor end user experience.
## Automatic Deployment For Automatic Deploy, follow the procedure described under [Create Cluster, Automatic Deployment](https://docs.difr.com/link/66#bkmrk-automatic-deployment). ## Manual Deployment For Manual Deployment, follow the procedure: 1. [Create Cluster, Manual Deployment](https://docs.difr.com/link/66#bkmrk-create-cluster) 2. [Add Node, Manual Deployment](https://docs.difr.com/link/66#bkmrk-manual-deployment) 3. Add additional nodes following Step 2 as desired. # SGA 4 Upgrade Administrators need to schedule a maintenance window to upgrade their SGA VM(s) to ensure users know not to access the SGA-enabled workload VMs while the SGA upgrade is in progress. Administrators can use the [Maintenance Mode](https://docs.difr.com/books/platform-administrators-guide/page/maintenance-mode) feature to alert users that the account is undergoing maintenance.**Caution** The time to perform an SGA upgrade will depend on the infrastructure your account is using, infrastructure traffic, and the number of SGA Nodes to be deployed.
## Automatically Deployed SGA Nodes To upgrade your SGA 4 VMs, add new SGA nodes. Once the new SGA nodes are **Available** under **Streaming Gateways** page for the SGA Cluster, power off the old SGA 4 nodes to test the new SGA 4 nodes. If those new SGA 4 nodes work, then delete the old SGA 4 nodes. ## Manually Deployed SGA Nodes Add new SGA node(s) for the existing SGA Cluster in **Streaming Gateways** page to obtain the Registration Code(s). Then manually provision new SGA node(s) using those Registration Code(s). Once the new SGA node(s) are availabe, power off the old SGA 4 nodes in your cloud infrastructure console to test the new SGA 4 nodes. If those new SGA 4 nodes work, then delete the old SGA 4 nodes from your cloud infrastructure console. # SGA 4 Management Management of SGA 4 Nodes and Clusters is on the **Streaming Gateway** page at either the **Customer** or **Organization** entity level. The SGA management functionality will depend on whether you have deployed the SGA Cluster using Frame (Automatic Deployment) or manually (Manual Deployment). ## Automatic Deployment With automatic deployment of an SGA Cluster, Frame is responsible for the lifecycle of all network resources and the SGA VMs. The Frame Accounts must have been created using Frame-managed networking in order for administrators to use Automatic Deployment of SGA. If a Frame account was created using customer-managed networking, then the administrator must manually deploy the SGA cluster and nodes following the instructions under [Manual Deployment](https://docs.difr.com/link/66#bkmrk-manual-deployment).If you are creating an SGA 4 cluster with the expectation of upgrading from existing SGA 3.x Frame accounts, please ensure you use a non-overlapping CIDR for the SGA 4 cluster. To accomplish this, enable the "Use custom CIDR range" slider in the Create Streaming Gateway Cluster configuration form.
### Create Cluster 1. To create a new SGA cluster, go to the Frame Console and at the Frame Customer or Organization entity level, click on **Streaming Gateways** on the lefthand menu. 2. Click on **Create New Cluster** in the upper right corner.The Activation Code must be used within 30 minutes of creation. If the Activation Code expires, you may click on **Generate new code** on the SGA Node line to obtain a new Activation Code.
### Delete Cluster A SGA Cluster can be deleted only if there are no Frame Accounts attached to the cluster. 1. To delete an SGA cluster, go to the Frame Console and at the Frame Customer or Organization entity level where the SGA Cluster is defined, click on **Streaming Gateways** on the lefthand menu. 2. Click on the kebab menu to the right of the SGA Cluster and select **Delete**.You must enter the \*\*Activation Code\*\* into the unregistered SGA VM or provision the SGA VM using the SGA VM Cloud Configuration file within 30 minutes of the Activation Code being generated. Otherwise, you will need to generate a new Activation Code when the Activation Code expires.
The **Activation Code** will be provided to the SGA Node after you provision the SGA VM using your infrastructure provider's console and access the SGA VM via the serial console. 3. For manually deployed SGA VMs on **AHV only**, you must add #cloud-config parameters bellow for each Backend Region \-----US Backend----- ``` #cloud-config runcmd: - set_sga_env SGA_CLOUD_PROVIDER nutanix ``` \-----EU Backend----- ```yaml #cloud-config runcmd: - set_sga_env SGA_BACKPLANE_URL https://hub.deu.difr.com - set_sga_env SGA_CLOUD_PROVIDER nutanix ```You will use this file during VM creation in AHV Step 10 below.
Verify that you have `#cloud-config` as the first line in your SGA VM cloud configuration file. ## Infrastructure Setup - AHV The following instructions assume you have already identified the AHV VLAN that the SGA will be placed in. The VLAN containing the SGA Nodes will need to be “public” (have a route from/to the Internet) and will need network connectivity to the private VLAN where the workloads are placed. 4. Create a new VM in Prism Central (or Prism Element), enter a name and set timezone to UTC.**\*\*Warning\*\*** The timezone must be set to UTC.
5.Before provisioning SGA VMs in AWS, ensure you enable serial console access to your SGA VMs. Otherwise, you will not be able to access the SGA VM. Consult AWS documentation on \\\[EC2 Serial Console\\\] (https://docs.aws.amazon.com/AWSEC2/latest/UserGuide/ec2-serial-console.html) for further details.
4. Download and Import an SGA Image: With access to the AWS Command Line Interface (CLI) and an [AWS Access Key](https://aws.amazon.com/premiumsupport/knowledge-center/create-access-key/), you can download and import the SGA image into your AWS account. 1. Download the AWS SGA image file (.raw.gz) from the [Downloads page](https://files.difr.com/). 2. Decompress the .gz file. 3. Create an S3 bucket and upload the uncompressed .raw file to the S3 bucket. The S3 bucket should be in the region where you plan to deploy the SGA. The image size is ~10 GB, so it may take some time to upload. 4. Create a `vmimport` role as described in [this documentation](https://docs.aws.amazon.com/vm-import/latest/userguide/required-permissions.html#vmimport-role) 5. Create an import configuration file using the template below. Name the file “sgaimport.json” and place that file in the directory where the uncompressed raw file is. The description string can be customized. We recommend the description contain the name of the image and version number. ```json [ { "Description": "SGA 4.0.1", "Format": "raw", "UserBucket": { "S3Bucket": "**\*\*Important\*\*** Capture the ENI ID since it will need to be used later in the creation process.
The compressed image is under 1 GB, so it may take awhile to upload.
6. [Import the image](https://cloud.google.com/compute/docs/import/importing-virtual-disks) from your bucket. This may take up to 30 minutes to complete. 7. External IP: Deploying an SGA requires a Static Public IP address, which Google refers to as an “External IP address”. So first, we will need to reserve an External IP.The public IP address configured in the SGA VM will be provided to the Frame control plane during SGA registration. Frame control plane provide this public IP address to users when users request access to their Frame desktops in Frame Accounts attached to the SGA Cluster.
1. Once the SGA VM is powered up, connect to the serial console of the SGA VM through your infrastructure portal. 2. Log in to the SGA VM using the default credentials (username: `sga`, password: `difr`).Although the menu lists these options in numerical order, you must complete them in the following sequence below to avoid activation errors. Specifically, complete Steps 1 and 2 before entering the Activation Code in Step 3 to avoid errors.
| \*\*Step\*\* | \*\*Wizard Option\*\* | \*\*Action\*\* | \*\*Details / Notes\*\* |
|---|---|---|---|
| 1 | Option `4` | Configure private IP, subnet, gateway, and DNS | Must be completed first. If skipped or done out of order, activation code validation will fail. |
| 2 | Option `2` | Set the public IP address for the SGA VM | This is the IP that users will connect to. Can be updated later, but only affects future sessions. |
| 3 | Option `1` | Enter the Activation Code (register with the backplane) | Only works if private and public IPs are configured. Activation code errors occur if done prematurely. |
| 4 (if needed) | Option `3` | Set relay IP for multi-NIC configurations | Use when multiple NICs are present to forward traffic from the user to workload VMs. |
If the Frame account was created using a Frame-managed network and the SGA 4 Cluster was automatically deployed, then Frame control plane will automatically peer the SGA 4 network and Frame account network together. If the Frame account was created using customer-managed networking and the SGA 4 Cluster was manually deployed, the customer must configure all networking elements to allow bidirectional traffic between the SGA 4 nodes and the Frame account workload VMs.
### Procedure 1. Navigate to the **Settings** page of the Frame Account Dashboard. 2. Click on the **Networking** tab and then **Attach SGA 4.0**.Existing sessions currently hosted on nodes in Maintenance Mode will continue to run without interruption.
To enable Maintenance Mode for your manually-deployed SGA 4 cluster, simply click the kebab menu to the right of the node name and select **Start Maintenance**.If your Frame account was attached to SGA 3.X before the Frame account was attached to SGA 4, the SGA 4 detach operation will revert the Frame account to use SGA 3.X, as the above figure illustrates. This can be used to rollback to SGA 3.X if necessary (until SGA 3.X is end of life).
## Automating Deployment of SGA Nodes If you plan to automate SGA 4 VM deployment, prepare an SGA VM cloud configuration file (YAML file) that will be used when you provision your SGA VM by replacing `Since users will not be able to reach the workload VMs behind your SGA VM during the time that your SGA VM is unavailable, you will need to schedule a maintenance window to perform this operation if you only have one SGA VM or have more than one SGA VM in a high-availablity configuration.
## Troubleshooting ### Networking You can verify that the SGA VM can reach the Frame control plane by using the following command within the SGA VM OS: ``` curl -v 'https://cch.console.nutanix.com/sga/verify' -H "Content-Type: application/json" -X POST -d '{"code":"dummy_code"}' ``` This is useful if you encounter issues registering the SGA VM or if the SGA VM status is `Unavailable` in the Frame Console. ### Services If the SGA VM is not available in Frame Console, check the status of the SGA service. ``` sudo systemctl status sga.service - sga elixir app status ``` If the SGA node is not accepting FRP8 sessions, check the status of the coturn service. ``` sudo systemctl status coturn.service - coturn status ``` The logs for these two services can be viewed by executing one of the following commands: ``` sudo journalctl -fu coturn.service - follow the logs of coturn sudo journalctl -fu sga.service - follow the logs of sga elixir app ``` # Operating Systems Bring Your Own, Linux, Windows, Frame Agent Setup Tool, BYO Images on Azure, AWS, GCP, IBM and Nutanix AHV # Operating System Customers can deploy their applications on Frame-provided OS images if using a public cloud infrastructure or bring your own (BYO) OS images. The following table describes the options and considerations for each option.| OS Image Source | Supported Infrastructures | Considerations |
|---|---|---|
| [Bring Your Own (BYO)](https://docs.difr.com/books/platform-administrators-guide/page/bring-your-own) | [Amazon Web Services](https://docs.difr.com/books/platform-administrators-guide/page/byo-images-on-amazon-web-services), [Google Cloud Platform](https://docs.difr.com/books/platform-administrators-guide/page/byo-images-on-google-cloud-platform), [IBM Cloud VPC](https://docs.difr.com/books/platform-administrators-guide/page/byo-images-on-ibm-cloud) [Microsoft Azure](https://docs.difr.com/books/platform-administrators-guide/page/byo-images-on-microsoft-azure), and [Nutanix AHV](https://docs.difr.com/books/platform-administrators-guide/page/ahv) | Requires preparation and registration of image BYO Azure images can be less than the 128 GiB Microsoft Azure images (30 GiB to 2048 GiB) |
| Frame-provided | [Amazon Web Services](https://docs.difr.com/books/platform-administrators-guide/page/amazon-web-services), [Google Cloud Platform](https://docs.difr.com/books/platform-administrators-guide/page/google-cloud-platform), [IBM Cloud VPC](https://docs.difr.com/books/platform-administrators-guide/page/ibm-cloud-early-access), and [Microsoft Azure](https://docs.difr.com/books/platform-administrators-guide/page/azure) | Do not need your own OS image at Frame account creation |
Note: Image Optimization
- Third-party image optimizers can be used to optimize the efficient operation of the Windows image during Sandbox configuration. - Some examples of third-party image optimizers that can be used with Frame are Citrix Optimizer, Best Practice Analyzer, VMware Windows OS Optimization Tool, or the community-supported WOSTT. - These third-party tools are used with no warranty or support. Dizzion strongly recommends you create a backup of your Sandbox before running any of these optimizer tools.**Driver Version Details**
**AHV** - NVIDIA driver version: `527.41` **AWS** - NVIDIA driver version: `513.46` - AMD driver version: `20.10.25.04` {" "} **Azure** - NVIDIA driver version:{" "} ` 512.78 ` - AMD driver version:{" "} ` 21Q2-1 ` **GCP** - NVIDIA driver version: `513.46`If you start the Sysprep Helper Tool as a desktop application on your Sandbox and Sysprep succeeds, you must reboot your instance.
### Using Sysprep Helper Tool The Sysprep Helper Tool is included as part of Frame Tools. The executable is located in . The tool can be used instead of Microsoft-provided Sysprep.exe when attempting to automatically resolve issues during Sysprep execution. To use the Frame Sysprep Helper Tool when publishing a DJI-enabled Frame account, add default Sysprep type key in the Windows system registry. Key **AdvancedSysprep** - for standard Sysprep - for Sysprep using Sysprep Helper Tool You can also enable/disable this setting by using the checkbox in the Sysprep Helper UI.If the registry entry is missing or the value is , generalization during publish will run the standard Sysprep process.
### Publishing Process Sysprep is executed during a publish of persistent desktops (in non-domain-joined and domain-joined Frame accounts) and non-persistent domain-joined Frame accounts. The following PowerShell script is executed: Sysprep script will perform various cleanup tasks and then execute a final generalization task: Sysprep.exe with appropriate arguments. The workflow: 1. Retrieves OS information 2. Checks activation status 3. Checks antivirus status 4. Removes existing user profiles ### Logging Frame Sysprep Helper logs can be found in: `C:\ProgramData\Nutanix\Frame\Logs\Sysprep-helper.txt` # Frame Agent Setup Tool (FAST) The Frame Agent Setup Tool (FAST) is used to install Frame Agent, Frame drivers, and Frame tools on your template image. FAST is also used to keep the Frame components on your template image(s), Sandboxes, Utility server(s), and persistent desktops up-to-date, regardless of infrastructure or instance types being used. When using FAST to prepare a template image for use in Frame, RDP will continue to function (unlike the Frame Guest Agent Installer). Once the template image is used by Frame to provision workload VMs in a Frame account, administrators will need to enable the [RDP Debug Mode](https://docs.difr.com/books/platform-administrators-guide/page/rdp-debug-mode) feature to access Frame-managed workloads via RDP.Before using FAST to install, update, or remove Frame components, ensure that there is a valid backup of the VM. 2. FAST is not a package repair tool. If you encounter issues with broken MSI installations, you will need to repair MSI installations manually or use 3rd party software tools.
### Requirements In order for FAST to download the required Frame components for installation or update, the VM running FAST must be able to reach the following Internet FQDNs via tcp/443 (HTTPS), as discussed in [Networking Requirements](https://docs.difr.com/link/51#bkmrk-requirements): 1. download.visualstudio.microsoft.com 2. downloads.console.nutanix.com ### InstallationFAST is included in Frame-provided Windows OS images in public cloud. If you are using a Frame-provided image, the FAST executable will be in the `C:\\ProgramData\\Nutanix\\Frame\\Tools` folder.
1. Download the Frame Agent Setup Tool from the [Downloads page](https://files.difr.com/) into your template image or existing Sandbox, Utility Server, and/or persistent desktops. 2. Run the executable to launch the Frame Agent Setup Tool. ### Usage The FAST utility has two different views: Bundle View and Updater View. When you run FAST, it will search for the Frame Guest Agent and Server components. If Frame Guest Agent cannot be found (e.g. clean Windows OS image), FAST will start in [Bundle View](#bundle-view). If Frame Guest Agent is already installed, FAST will start in [Updater View](#updater-view). Bundle View When FAST is started and determines the Frame Guest Agent is not present on the VM (such as when you are preparing a template image to be used in Frame): 1. A dialog prompt will open. Accept the terms and conditions and click the “Next” button to continue.| Status | Description |
|---|---|
| Up to Date | A package found on the machine is already up-to-date with the latest version. |
| Update Required | An installed package requires an update. Failure to update could result in system instability or compatibility conflicts. |
| Update Available | An installed package has an optional update. While not required, this update could improve performance or add new features. |
| Not Installed | An optional package is not installed. |
| Name | Description |
|---|---|
| `/?` | Display help |
| `getpackages` | Display a list of all missing/obsolete packages |
| `getpackages json` | Display a list of all missing/obsolete packages in json format |
| `install` | Install all missing/obsolete packages |
| `install only ...` | Install only provided packages |
| `install except ...` | Install all missing/obsolete packages except provided packages |
| `install frameimage` | Install all system and Frame components |
| `install only frameimage` | Install only provided applications and all Frame system components |
| `install except frameimage` | Install all available application except listed ones after installation of Frame system components |
| Name | Description |
|---|---|
| Frame Audio Driver | Enables Frame to properly interface with the audio card on the workload VM for use in a Frame session. |
| Frame Video Driver | Enables Frame to properly interface with the video card on the workload VM for use in a Frame session. |
| Liquidware ProfileDisk | Enables support for Frame Enterprise Profiles in a Frame session (non-persistent only). |
| Frame Pen Driver | Enables support for digital pen tablets in a Frame session (requires supported endpoint device). |
| Frame Printer Driver | Enables support for Frame Printer in a Frame session. |
| Frame Scanner Driver | Enables support for WIA scanners in a Frame session (requires supported endpoint device). |
| Frame SmartCard Driver | Enables support for CAC/SmartCards in a Frame session (requires supported endpoint device). |
| Frame USB Driver | Enables support for Generic USB in a Frame session (requires supported endpoint device). |
| Frame AD Helper | Tool for troubleshooting issues with joining a Frame workload VM to an Active Directory domain. |
| Frame Proxy Helper | Tool for configuring Frame Agent to function properly with proxy servers. |
| Frame Sysprep Helper | Tool for troubleshooting and automatically resolving issues related to Windows Sysprep. |
Handy to know; You can re-install and re-register all FAST components by holding the left Shift Key, and then running FAST
## Troubleshooting #### Logs The Frame Agent Setup Tool generates a log file for troubleshooting which is located in: C:\\ProgramData\\Nutanix\\Frame\\Logs Take a look at these and if you need further assistance, open a [support ticket](https://support.dizzion.com/hc/en-us). # BYO Images on Amazon Web Services This document will provide you with instructions on how to prepare and register your own template image in AWS for use with Frame. Before moving forward with the preparation procedure, please ensure you have read through the general requirements and considerations on the [Windows BYO image](https://docs.difr.com/books/platform-administrators-guide/page/windows) page. We will outline additional details specific to AWS public cloud below. ## Considerations The base Frame Sandbox images in AWS are based on either the “Microsoft Windows Server 2019 Base” or “Microsoft Windows Server 2022 Base” operating system from the AWS Marketplace. The Sandboxes created from these Frame-provided images have the Frame Agent pre-installed and are a great starting point for admins to create the desired user experience. This is the default deployment workflow for Frame administrators. In some cases, the enterprise IT department may already have a disk image that has been validated by the organization. It may be easier to deploy Frame, if this image is the base image for their Frame accounts. If you chose to bring your own image, you will need to upload and register that image as an AMI in your AWS subscription prior to installing the Frame Agent. In rare instances, customers may want to build the BYO image themselves from the base AWS Marketplace images. This is also supported if you start with the “Microsoft Windows Server 2019 Base” or “Microsoft Windows Server 2022 Base” images in the AWS Marketplace. Community and third-party AWS Marketplace AMIs have not been tested. ## Preparation 1. First, starting with a Windows Server 2019 or Windows Server 2022 AMI, create a VM in the AWS account you are going to use for Frame. When configuring your image, you must use a Windows OS user account with local Windows administrator privileges.For additional installation scenarios (e.g., proxy server configuration, command line arguments, review our \[Frame Agent Setup Tool\](/books/platform-administrators-guide/page/windows/frame-agent-setup-tool) documentation.
4. **(Optional)**: If a proxy server is required for all outbound traffic to the Internet from your private network, you will need to configure Frame Guest Agent to use your proxy server. Refer to our [FGA Proxy Helper Tool](https://docs.difr.com/link/73#bkmrk-fga-proxy-helper-too) documentation page for further details. 5. **(Optional)**: If you plan to use AMD or NVIDIA GPU-based instance types in AWS, make sure you install the appropriate [AMD](https://docs.aws.amazon.com/AWSEC2/latest/WindowsGuide/install-amd-driver.html) or [NVIDIA](https://docs.aws.amazon.com/AWSEC2/latest/WindowsGuide/install-nvidia-driver.html) GPU drivers in your template image VM.**Important Frame-verified GPU Drivers** The following driver versions have been validated for use with Frame workload VMs. Frame cannot offer support for any other driver version or combinations. For **AWS**, use: - NVIDIA driver version: 552.08 - AMD driver version: 23.10.02.02
6. **(Optional)**: Install your applications and finish image customization. 7. Once you have configured the image as desired, launch the Sysprep Helper tool. \- Select Accept all prompts during Sysprep \- change power option from quiet to shutdown \- Click on "**Test Sysprep"** to start the process After the sysprep process finished successfully the vm will be powered of automatically.**Important Frame-verified GPU Drivers** The following driver versions have been validated for use with Frame workload VMs. Frame cannot offer support for any other driver version or combinations. For **AWS**, use: - NVIDIA driver version: 552.08 - AMD driver version: 23.10.02.02
6. **(Optional)**: Install your applications and finish image customization. 6. Once you have configured the image as desired, launch the Sysprep Helper tool. \- Select Accept all prompts during Sysprep \- change power option from quiet to shutdown \- Click on "**Test Sysprep"** to start the process After the sysprep process finished successfully the vm will be powered of automatically.For additional installation scenarios (e.g., proxy server configuration, command line arguments, review our [Frame Agent Setup Tool](https://docs.difr.com/books/platform-administrators-guide/page/frame-agent-setup-tool-fast) documentation.
4. **(Optional)**: If a proxy server is required for all outbound traffic to the Internet from your private network, you will need to configure Frame Guest Agent to use your proxy server. Refer to our [FGA Proxy Helper Tool](https://docs.difr.com/books/platform-administrators-guide/page/frame-agent-setup-tool-fast#bkmrk-fga-proxy-helper-too) documentation page for further details. 5. **(Optional)**: If you plan to use NVIDIA GPU-based instance types in GCP, make sure you install the appropriate [NVIDIA](https://cloud.google.com/compute/docs/gpus/grid-drivers-table#windows_drivers) GPU drivers in your template image VM.**Important Frame-verified GPU Drivers** The following driver versions have been validated for use with Frame workload VMs. Frame cannot offer support for any other driver version or combinations. For **AWS**, use: - NVIDIA driver version: 552.08 - AMD driver version: 23.10.02.02
6. **(Optional)**: Install your applications and finish image customization. 6. Once you have configured the image as desired, launch the Sysprep Helper tool. \- Select Accept all prompts during Sysprep \- change power option from quiet to shutdown \- Click on "**Test Sysprep"** to start the process After the sysprep process finished successfully the vm will be powered of automatically.This procedure requires use of a third-party tool Oracle VirtualBox to prepare a Microsoft-provided or third-party-provided OS image for use in IBM Cloud. This document is derived from the [IBM Cloud Creating a custom Windows image](https://cloud.ibm.com/docs/vpc?topic=vpc-create-windows-custom-image) page.
1. Download the Oracle VirtualBox installer from the [VirtualBox website](https://www.virtualbox.org/wiki/Downloads) and install on a local machine. 2. Download the QEMU disk image utility from [https://cloudbase.it/qemu-img-windows/](https://cloudbase.it/qemu-img-windows/) (download binaries using the link at the bottom of the web page). Extract the tool on the same local machine. Run the following command, as a Windows administrator, from the Windows command line to prepare a virtual hard drive (.vhd): ```cmd qemu-img.exe create -f vpcFor Windows 11 operating system, the minimum virtual hard disk size is 64 GB.
3. Download the Microsoft-provided disk image (ISO) file for the desired operating system (e.g., [https://www.microsoft.com/en-us/software-download/windows11](https://www.microsoft.com/en-us/software-download/windows11)). 4. Download the VirtIO drivers for Windows: - For IBM Cloud VPC, IBM Cloud discusses their recommended procedure to obtain the wirtio-win drivers at Step 3 of their [Creating a Windows custom image](https://cloud.ibm.com/docs/vpc?topic=vpc-create-windows-custom-image#create-win-custom-image-first-steps) documentation page. - Alternatively, you may obtain the virtio-win driver from other sources, such as from the Fedora Project (https://github.com/virtio-win/virtio-win-pkg-scripts/blob/master/README.md). 5. Open Oracle VirtualBox and create new virtual machine. a. Click on the **New** button.The following section only highlights the relevant steps of the Windows Out of Box Experience (OOBE).
1. Start the VM and go through the operating system installation process. Press any key to boot from .vhd and go through the OOBE workflow.You will need to install extension and client for Aspera as the .vhd file is larger than 200 MB. Follow the instructions from the IBM Cloud Portal.
If you don’t have VPN S2S or P2S connection to your IBM infrastructure, please assign Floating IP Address to your instance so you can access it over public internet.
19. Once your Windows virtual server instance has booted, RDP into your virtual instance. Use the local administrator username and password that you set during VM creation on Oracle VirtualBox during OOBE procedure. Now that you have a template image VM accessible via RDP, you can proceed with the installation of the Frame agent and drivers. ## Install Frame Agent and Drivers 1. Use RDP to connect into your VM. Follow the [Installation](https://docs.difr.com/link/73#bkmrk-installation) and [Usage](https://docs.difr.com/link/73#bkmrk-usage) instructions to download the Frame Agent Setup Tool (FAST) and install the Frame Agent, drivers, and tools in your template image VM. 2. Once FAST has successfully installed the Frame Agent, drivers, and tools, reboot the VM to complete the installation of the Frame Agent. Use RDP to connect back into your VM.For additional installation scenarios (e.g., proxy server configuration, command line arguments, review our [Frame Agent Setup Tool](https://docs.difr.com/books/platform-administrators-guide/page/frame-agent-setup-tool-fast) documentation.
3. **(Optional)**: If a proxy server is required for all outbound traffic to the Internet from your private network, you will need to configure Frame Guest Agent to use your proxy server. Refer to our [FGA Proxy Helper Tool](https://docs.difr.com/books/platform-administrators-guide/page/google-cloud-platform/windows/frame-agent-setup-tool/#fga-proxy-helper-tool) documentation page for further details. 4. **(Optional)**: If you plan to use NVIDIA GPU-based instance types in IBM, make sure you install the appropriate [NVIDIA](https://www.nvidia.com/en-us/drivers/) GPU drivers in your template image VM. Also, please check with your IBM support representative about the license for using this GPU in WDDM. We currently don't have AMD-supported instance types. If you wish to use those, please contact support. Example for Nvidia: [](https://docs.difr.com/uploads/images/gallery/2026-02/0N2screenshot-2026-02-24-at-10-17-07.png) 5. **(Optional)**: Install your applications and finish image customization. 6. Once you have configured the image as desired, launch the Sysprep Helper tool. \- Select Accept all prompts during Sysprep \- change power option from quiet to shutdown \- Click on "**Test Sysprep"** to start the process After the sysprep process finished successfully the vm will be powered of automatically. [](https://docs.difr.com/uploads/images/gallery/2025-12/gUiimage.png) 6. If the VM does not shutdown, then there was a problem with sysprep. Review the sysprep logs in `%WINDIR%\System32\Sysprep\Panther` to determine the source of the error.Ensure the **MasterTemplate** VM does not get deleted. Otherwise, you will not be able to create Frame accounts using that template image.
Voilà! You have successfully created a template image to be registered in Frame for use to create your Frame workloads. You may prepare additional template images (e.g., different Windows OS versions, template images with different sets of applications) by simply repeating the procedure with a new image. ## Registration Now it's time to register your template image in Frame. See how to do this in our [Cloud Accounts > Template Images](https://docs.difr.com/link/45#bkmrk-add-a-template-image) guide. ## Windows 11 vTPM Support For customers who wish to use Windows 11 with Virtual Trusted Platform Module (vTPM), you must first create and enable your template image VM with Secure Boot and vTPM, following the instructions in Nutanix documentation [(AOS 6.6)](https://portal.nutanix.com/page/documents/details?targetId=Nutanix-Security-Guide-v6_6:mul-vtpm-considerations-ahv-r.html) and summarized below. ### Requirements - Prism Central version pc.2022.9 or above - AHV version 20220304.242 or above - AOS version 6.5.1 or above - VM must use UEFI firmware - Secure Boot-enabled VM required with minimum Nutanix VirtIO package version of 1.2.1 or higher (for Windows 11 with vTPM) ### Limitations - You must create a new VM configured for SATA CD-ROMs and disks to use Secure Boot. VMs that use IDE disks or legacy BIOS cannot be converted to use Secure Boot. - vTPM-enabled VMs cannot be used in a Frame account configured for Disaster Recovery Backup as production domain snapshots are not supported as of AOS version 6.6. ### References - [Nutanix vTPM Support](https://portal.nutanix.com/page/documents/details?targetId=Nutanix-Security-Guide-v6_6:mul-vtpm-considerations-ahv-r.html) - [Nutanix UEFI Support for VM](https://portal.nutanix.com/page/documents/details?targetId=AHV-Admin-Guide:vm-vm-uefi-support-c.html) - [Understanding UEFI, Secure Boot, and TPM in the Virtualized Environment](https://portal.nutanix.com/page/documents/kbs/details?targetId=kA07V000000H3K9SAK) - [Windows 11 and AHV](https://portal.nutanix.com/page/documents/solutions/details?targetId=TN-2164-Windows-11-on-AHV:TN-2164-Windows-11-on-AHV) ### Procedure The following instructions are for the scenario where you are installing Windows 11 from a Microsoft Windows 11 ISO and Nutanix VirtIO drivers from a Nutanix ISO: 1. Log in to Prism Element or Prism Central and create a new VM, enabling UEFI and Secure Boot. 2. Connect to any CVM via CLI and run in aCLI: 3. Configuration can be verified by running in aCLI: You would expect to see an aCLI response like:Role Permissions
| Hierarchy | Role | Permissions |
|---|---|---|
| Customer | Customer Administrator | Highest level of access. Customer administrators are able to create and manage multiple organizations and accounts. Customer administrators can also modify permissions for any of the user roles listed below. |
| Customer | Customer Analytics | Customer Analytics users can only access the Analytics graphs at the customer level. |
| Customer | Customer Auditor | Customer Auditor users have read only access to functionality at the customer, organizations, and account levels. |
| Customer | Customer Security Administrator | Customer Security Administrator users can only access Audit Trail and Users functions at the customer level to manage all auth providers (Basic (username/password), Google, SAML2, API, SAT), configures SAML2 providers, manage SAML2 permissions, and manages users (if Frame IdP is enabled) for all organizations and accounts. |
| Customer | Customer Support | Customer Support users can only access the Summary, Analytics, Audit Trail, and Status pages for Accounts under the customer level to review activity and research user sessions. They can reboot, terminate VMs, and close sessions. They can detach personal drives and enterprise profile disks (if the disks do not detach after session closing) and backup, restore, and delete personal drive and profile disk volumes. |
| Customer | Limited Customer Administrator | Limited Customer administrators possess the same permissions as Customer administrators for managing organizations and accounts. However, they do not have the ability to create organizations or accounts, manage users, or start sessions. |
| Organization | Organization Administrator | Organization administrators can manage any organizations assigned to them by the Customer or Limited Customer administrator and those organizations' accounts. Organization administrators can only be created by Customer or Limited Customer administrators. |
| Organization | Limited Organization Administrator | Limited Organization administrators can manage organizations assigned to them by Customer or Organization administrators and those organizations' accounts. However, they do not have the ability to create accounts, manage users, or start sessions. |
| Organization | Organization Analytics | Organization Analytics users can only access the Analytics graphs at the specified organization level. |
| Organization | Organization Auditor | Organization Auditor users have read only access to the organization and accounts under the organization. |
| Organization | Organization Security Administrator | Organization Security Administrator users can only access Audit Trail and Users functions at the specified organization level to manage all auth providers (Basic (username/password), Google, SAML2, API, SAT), configures SAML2 providers, manage SAML2 permissions, and add users (if Frame IdP is enabled) for all accounts under the specified organization. |
| Organization | Organization Support | Organization Support users can only access the Summary, Analytics, Audit Trail, and Status pages for Accounts under the specified organization level to review activity and research user sessions. They can reboot, terminate VMs, and close sessions. They can detach personal drives and enterprise profile disks (if the disks do not detach after session closing) and backup, restore, and delete personal drive and profile disk volumes. |
| Account | Account Administrator | Account administrators can access and manage any accounts assigned to them by the Organization, Limited Organization, Customer, or Limited Customer administrators. |
| Account | Limited Account Administrator | Limited Account administrators possess the same permissions as Account administrators for managing accounts. However, they do not have the ability to manage users or start sessions. |
| Account | Account Analytics | Account Analytics users can only access the Analytics page in the account Dashboard. |
| Account | Account Auditor | Account Auditor users have read only access to the account Dashboard. |
| Account | Account Security Administrator | Account Security Administrator users can only access the Users and Audit Trail pages in the account Dashboard to manage all auth providers (Basic (username/password), Google, SAML2, API, SAT), configures SAML2 providers, manage SAML2 permissions, and manage users (if Frame IdP is enabled) for the specified account. They are also able to access Audit Trail and Session Trail for the specified account. |
| Account | Account Support | Account Support users can only access, at the Account level, the Summary, Analytics, Audit Trail, and Status pages to review activity and research user sessions. They can reboot, terminate VMs, shadow sessions, and close sessions. They can detach personal drives and enterprise profile disks (if the disks do not detach after session closing) and backup, restore, and delete personal drive and profile disk volumes. |
| Account | Sandbox Administrator | Sandbox Administrator can only access the Sandbox page in the account Dashboard to manage the Sandbox (e.g., schedule a publish, power on/off VM, install and update applications, update the OS, backup Sandbox, restore from backup, change instance type, and clone to another Sandbox, if authorized). |
| Account | Utility Server Administrator | Utility Server Administrator can only access the Utility Server page in the account Dashboard to add, manage, and terminate utility servers. |
| Account | Launchpad Administrator | This account-level role can only add, delete, and change Launchpad definitions. |
| End User | Launchpad User | End users or "Launchpad users" can only access Launchpads that are configured by the administrators. A Launchpad user can access multiple Launchpads from multiple accounts if configured this way by administrators. |
| API | API - Generate Anonymous Customer Token | Authorizes the API requestor to obtain Secure Anonymous Tokens from Frame Admin API for starting Frame sessions in all Frame accounts under the specified Customer entity. |
| API | API - Generate Anonymous Organization Token | Authorizes the API requestor to obtain Secure Anonymous Tokens from Frame Admin API for starting Frame sessions in all Frame accounts under the specified Organization entity. |
| API | API - Generate Anonymous Account Token | Authorizes the API requestor to obtain Secure Anonymous Tokens from Frame Admin API for starting Frame sessions in the specified Frame account. |
If you are attempting to set up an Identity Provider (IdP) integration, you must first navigate to the Customer entity level and unlock the Enforce settings slider.
| Frame IdP | SAML2 IdP | |
|---|---|---|
| Requires SSO Configuration | No | Yes |
| Granular control of Authentication Security | Yes | Yes |
| User Attribution | Yes | Yes |
| Custom Password Policies | No | Yes |
| 2-Factor Authentication | No | Yes |
| Requires Launchpad | Yes | No |
| Works With Launchpad | Yes | Yes |
| Works with Frame Application API | No | Yes |
Basic Authentication should be used for proof of concept, development, and testing purposes \*\*only\*\*. Basic Authentication does not provide user/password management capabilities (password expiration, password complexity policies, or multi-factor authentication). Frame strongly recommends customers use a third-party SAML2 identity provider for user authentication.
### Benefits Frame's Basic Authentication is an easy way to manage users and it requires no special setup, integration or configuration. Users will be authenticated to Frame which provides the unique user identities required for optional features like persistent user profiles and end-user billing. ### Applicability Basic Authentication can be a convenient authentication solution for a single classroom, small business or a single workgroup under 100 members. It can become cumbersome with more users or if there is a frequent need to add and remove users. ### Requirements There are no special requirement for this option. All authentication options except Anonymous Users require that user identities (email addresses) be unique across all Frame accounts. This option requires the administrator to use the Frame Dashboard to manage the users. ### Limitations The Frame Basic Authentication option can only provide a simple, username and password based, authentication. This option does not support 2-factor authentication, user groups, custom password strength policies or password expiration policies. For these reasons, Basic Authentication should be used for proof of concept, development, and testing purposes **only**. ## SAML2 Identity Provider SAML2 Identity Providers assume the responsibility of maintaining and protecting a publicly visible web service while providing convenient ways to connect that service to on-premises directories and identity providers like Active Directory, Shibboleth, or LDAP servers. ### Benefits SAML2 Identity Providers assume the responsibility of maintaining and protecting a publicly visible web service while providing convenient ways to connect that service to on-premises directories and identity providers like Active Directory, Shibboleth, or LDAP servers. ### Applicability If your organization already manages users in a central place, then a SAML2 Identity Provider can be a convenient way to extend that control to external services like Frame. ### Requirements SAML2 providers typically require access to your user information through a plug-in or adapter installed in your directory server. These are provided by SAML2 providers themselves. For instance, Microsoft provides Azure AD Connect which provides an easy way to setup Azure AD as a SAML2 Identity Provider using your existing Active Directory server as the single source or truth for all user authentication. Identity providers charge for their service, but many include a free tier which may be appropriate for many Frame integrations. ### Limitations Using a SAML2 Identity Provider is the most flexible option for authentication. The only limitations are those shared with the other options described in this Solution Guide. Frame does not support fine-grained permissions, for instance allowing some authenticated users to launch an application while others cannot, based solely on groups or information in the user profile. ## Entity Endpoint URLs When each Frame entity is being created, they're given a URL slug. Using these slugs, you can construct landing pages for your users for them to sign into Frame and get straight to their resources.  Important: If you want to direct your users to your specific identity provider (and bypass the default login page), add this query string to your Frame URLs: ``` ?idp=your-IdP-integration-name to your URL. ``` ##### IMPORTANT With the new iam integration (if your SAML2) integration has difr icon in front of the SAML2: [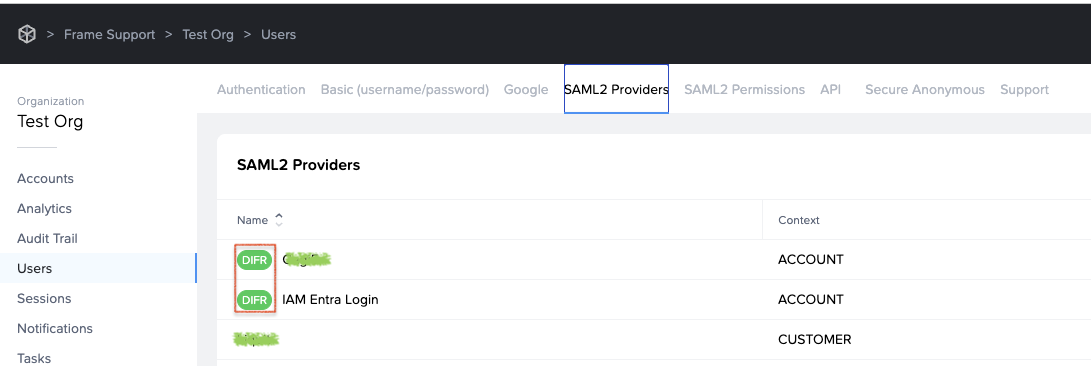](https://docs.difr.com/uploads/images/gallery/2026-05/screenshot-2026-05-12-at-13-14-16.png) the **?idp** part is different. You don't use the SAML2 name, but the SAML2 ID: [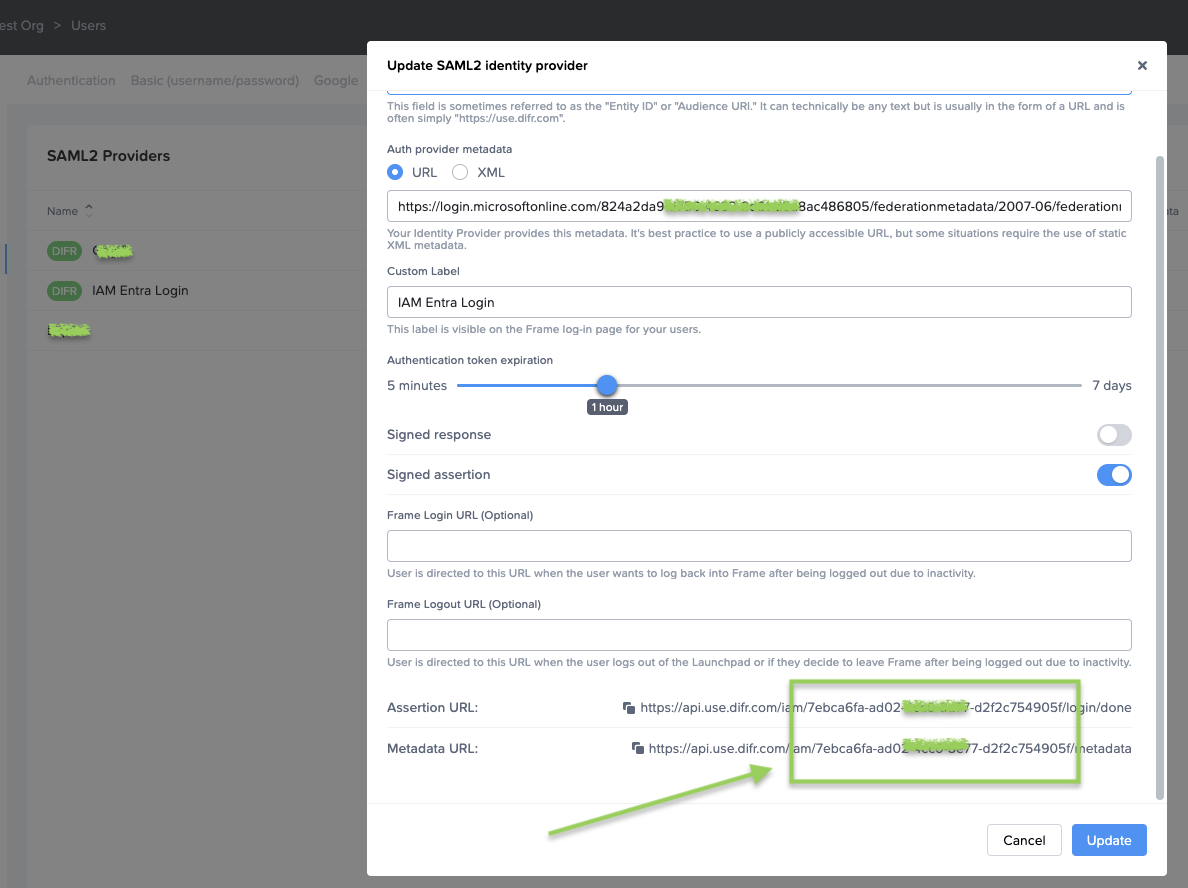](https://docs.difr.com/uploads/images/gallery/2026-05/8O5screenshot-2026-05-12-at-13-25-30.png) So the URL looks like this: ``` ?idp=your-IdP-ID to your URL. ``` An example:| https://use.difr.com/frame-support/testorg/test-2022-aws/launchpad/test-desktop-1/**?idp=7ebca6fa-ad02XXXXX77-d2f2c754905f** |
Basic Authentication should be used for proof of concept, development, and testing purposes \*\*only\*\*. Basic Authentication does not provide user/password management capabilities (password expiration, password complexity policies, or multi-factor authentication). Frame strongly recommends customers use a third-party SAML2 identity provider for user authentication.
## Invite Users Once you have onboarded your apps, published your changes, and set up your Launchpad – you are ready to invite users. You can use the Frame Basic IdP by following the instructions below. 1. From the Dashboard, click on the **Users** page listed on the left. From there, go to the **Basic (username/password)** tab.Customer and Organization administrators can manage users from the Admin page by clicking on the ellipsis next to the desired entity, selecting “Edit,” and clicking on the “Security” tab. Account administrators manage their users from the “Users” section of their Dashboard.
## Roles Roles allow administrators to easily manage the permissions and access levels of their users. Regardless of the authentication type, administrators must specify the role they wish to grant to their users before those users can be authorized to access Frame resources. ## Role Permissions| Hierarchy | Role | Permissions |
|---|---|---|
| Customer | Customer Administrator | Highest level of access. Customer administrators are able to create and manage multiple organizations and accounts. Customer administrators can also modify permissions for any of the user roles listed below. |
| Customer | Customer Analytics | Customer Analytics users can only access the Analytics graphs at the customer level. |
| Customer | Customer Auditor | Customer Auditor users have read only access to functionality at the customer, organizations, and account levels. |
| Customer | Customer Security Administrator | Customer Security Administrator users can only access Audit Trail and Users functions at the customer level to manage all auth providers (Basic (username/password), Google, SAML2, API, SAT), configures SAML2 providers, manage SAML2 permissions, and manages users (if Frame IdP is enabled) for all organizations and accounts. |
| Customer | Customer Support | Customer Support users can only access the Summary, Analytics, Audit Trail, and Status pages for Accounts under the customer level to review activity and research user sessions. They can reboot, terminate VMs, and close sessions. They can detach personal drives and enterprise profile disks (if the disks do not detach after session closing) and backup, restore, and delete personal drive and profile disk volumes. |
| Customer | Limited Customer Administrator | Limited Customer administrators possess the same permissions as Customer administrators for managing organizations and accounts. However, they do not have the ability to create organizations or accounts, manage users, or start sessions. |
| Organization | Organization Administrator | Organization administrators can manage any organizations assigned to them by the Customer or Limited Customer administrator and those organizations' accounts. Organization administrators can only be created by Customer or Limited Customer administrators. |
| Organization | Limited Organization Administrator | Limited Organization administrators can manage organizations assigned to them by Customer or Organization administrators and those organizations' accounts. However, they do not have the ability to create accounts, manage users, or start sessions. |
| Organization | Organization Analytics | Organization Analytics users can only access the Analytics graphs at the specified organization level. |
| Organization | Organization Auditor | Organization Auditor users have read only access to the organization and accounts under the organization. |
| Organization | Organization Security Administrator | Organization Security Administrator users can only access Audit Trail and Users functions at the specified organization level to manage all auth providers (Basic (username/password), Google, SAML2, API, SAT), configures SAML2 providers, manage SAML2 permissions, and add users (if Frame IdP is enabled) for all accounts under the specified organization. |
| Organization | Organization Support | Organization Support users can only access the Summary, Analytics, Audit Trail, and Status pages for Accounts under the specified organization level to review activity and research user sessions. They can reboot, terminate VMs, and close sessions. They can detach personal drives and enterprise profile disks (if the disks do not detach after session closing) and backup, restore, and delete personal drive and profile disk volumes. |
| Account | Account Administrator | Account administrators can access and manage any accounts assigned to them by the Organization, Limited Organization, Customer, or Limited Customer administrators. |
| Account | Limited Account Administrator | Limited Account administrators possess the same permissions as Account administrators for managing accounts. However, they do not have the ability to manage users or start sessions. |
| Account | Account Analytics | Account Analytics users can only access the Analytics page in the account Dashboard. |
| Account | Account Auditor | Account Auditor users have read only access to the account Dashboard. |
| Account | Account Security Administrator | Account Security Administrator users can only access the Users and Audit Trail pages in the account Dashboard to manage all auth providers (Basic (username/password), Google, SAML2, API, SAT), configures SAML2 providers, manage SAML2 permissions, and manage users (if Frame IdP is enabled) for the specified account. They are also able to access Audit Trail and Session Trail for the specified account. |
| Account | Account Support | Account Support users can only access, at the Account level, the Summary, Analytics, Audit Trail, and Status pages to review activity and research user sessions. They can reboot, terminate VMs, shadow sessions, and close sessions. They can detach personal drives and enterprise profile disks (if the disks do not detach after session closing) and backup, restore, and delete personal drive and profile disk volumes. |
| Account | Sandbox Administrator | Sandbox Administrator can only access the Sandbox page in the account Dashboard to manage the Sandbox (e.g., schedule a publish, power on/off VM, install and update applications, update the OS, backup Sandbox, restore from backup, change instance type, and clone to another Sandbox, if authorized). |
| Account | Utility Server Administrator | Utility Server Administrator can only access the Utility Server page in the account Dashboard to add, manage, and terminate utility servers. |
| Account | Launchpad Administrator | This account-level role can only add, delete, and change Launchpad definitions. |
| End User | Launchpad User | End users or "Launchpad users" can only access Launchpads that are configured by the administrators. A Launchpad user can access multiple Launchpads from multiple accounts if configured this way by administrators. |
| API | API - Generate Anonymous Customer Token | Authorizes the API requestor to obtain Secure Anonymous Tokens from Frame Admin API for starting Frame sessions in all Frame accounts under the specified Customer entity. |
| API | API - Generate Anonymous Organization Token | Authorizes the API requestor to obtain Secure Anonymous Tokens from Frame Admin API for starting Frame sessions in all Frame accounts under the specified Organization entity. |
| API | API - Generate Anonymous Account Token | Authorizes the API requestor to obtain Secure Anonymous Tokens from Frame Admin API for starting Frame sessions in the specified Frame account. |
| Assertion Claim | Claim Value | Example |
|---|---|---|
| em | johnsmith@mycompany.com | |
| givenName | First Name | John |
| sn | Surname | Smith |
By default, any user with the **Frame Customer Admin role** assigned within Dizzion C3 will automatically be assigned the **Customer Administrator role** within Frame.
#### Configuration 1. Log in to Frame and navigate to **Users > Authentication** from either the Organization or Account level of the Frame Console. (More details around authentication based on tenant hierarchy can be found [here](https://docs.difr.com/books/platform-administrators-guide/page/authentication#authentication-by-tier). 2. Enable **Dizzon C3** on this page (under the **Authentication** tab). Click **Save** in the upper right corner of the page.Before a SAML2 identity provider can be added, the administrator must enable SAML2 Providers at a given level by navigating to the Admin Console. From there, navigate to the **Customer** or **Organization** page (depending on where you wish to add the IdP). Select **Users** from the left-hand menu.
Unless there is a specific reason to do otherwise, adding the SAML2 Provider at the Customer or Organization level is best practice. 2. Enable the **SAML2** toggle under the Authentication tab and click **Save**. [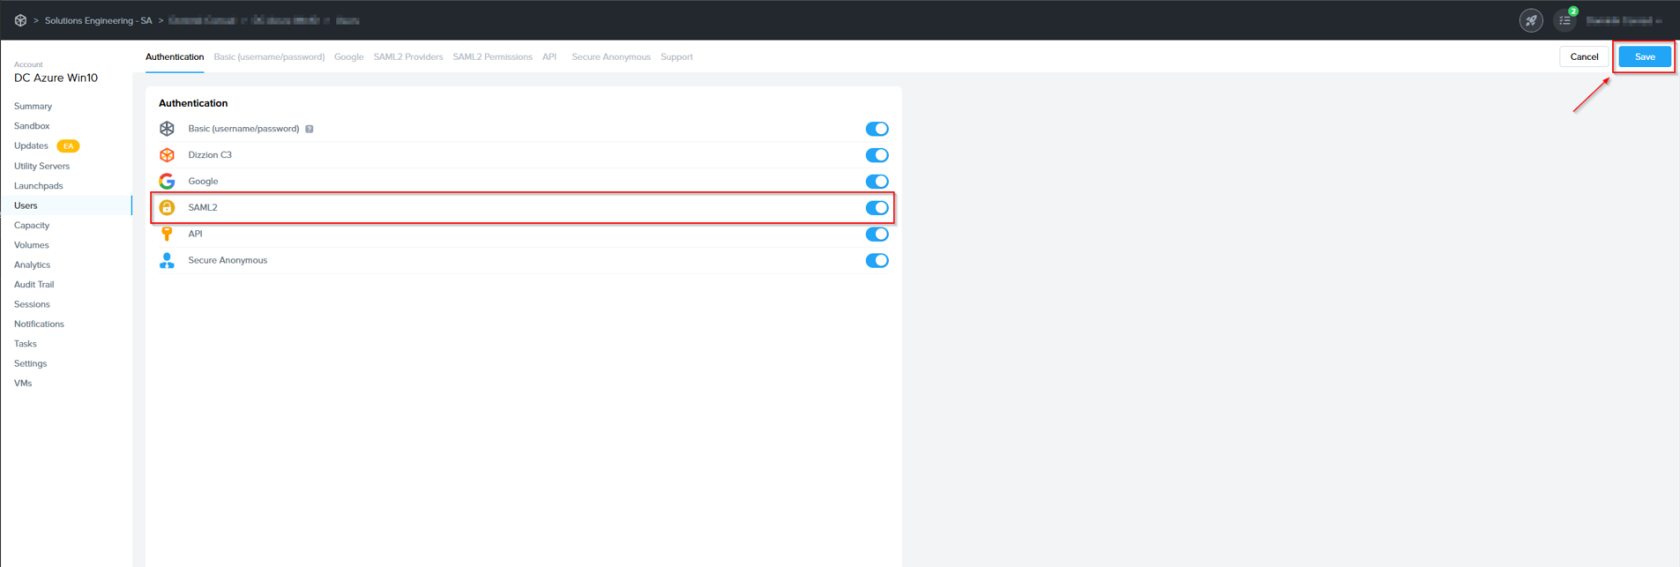](https://docs.difr.com/uploads/images/gallery/2025-10/h0timage.png) 3. You'll see a new "SAML2 Providers" tab appear; click it and you'll see a **Add SAML2 provider** button. [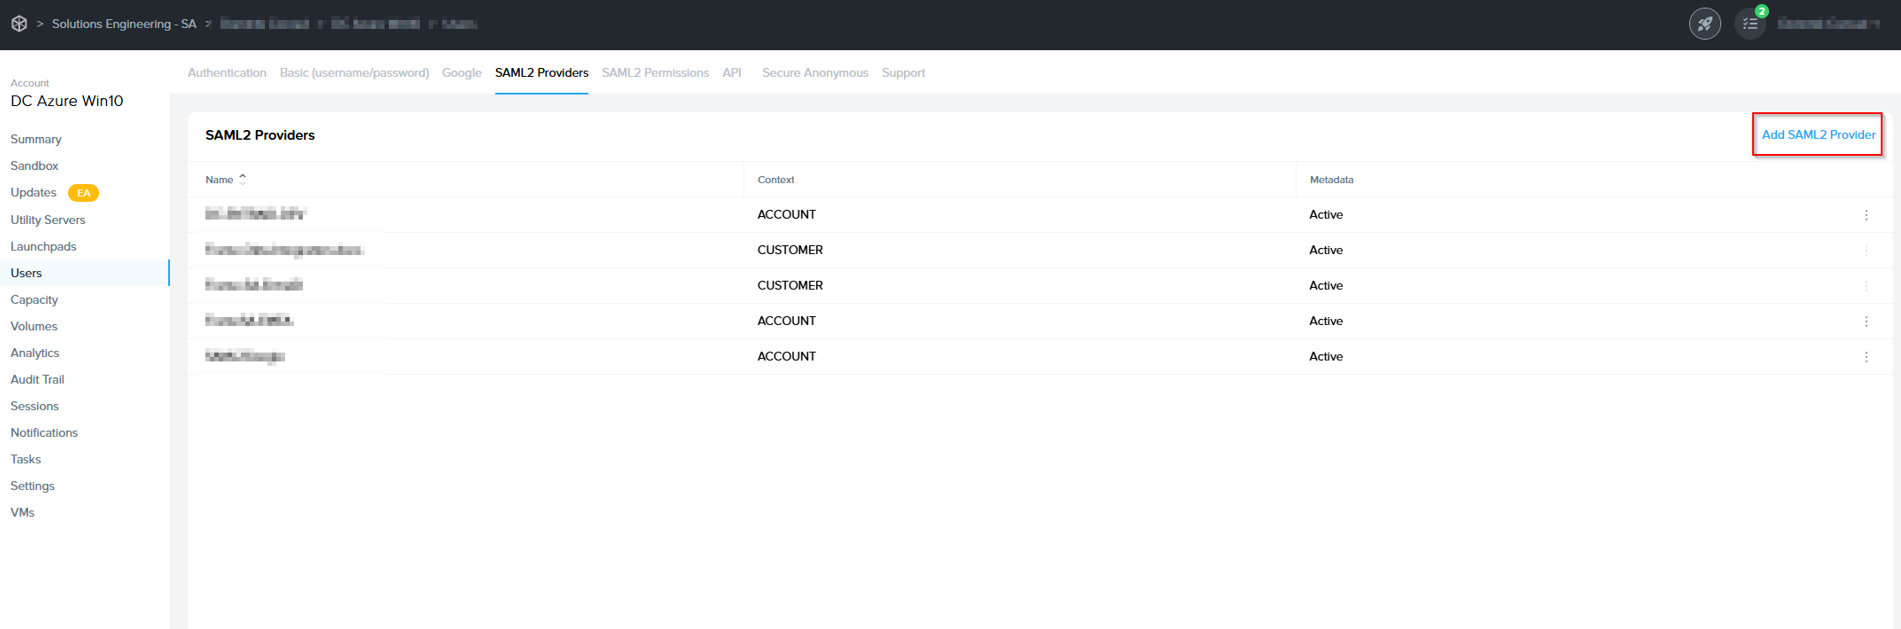](https://docs.difr.com/uploads/images/gallery/2025-10/qSTimage.png) ## Creating a SAML2 Provider 1. In the SAML2 Providers tab, click **Add SAML2 Provider** at the top right. A dialog to add a SAML2 provider will appear. [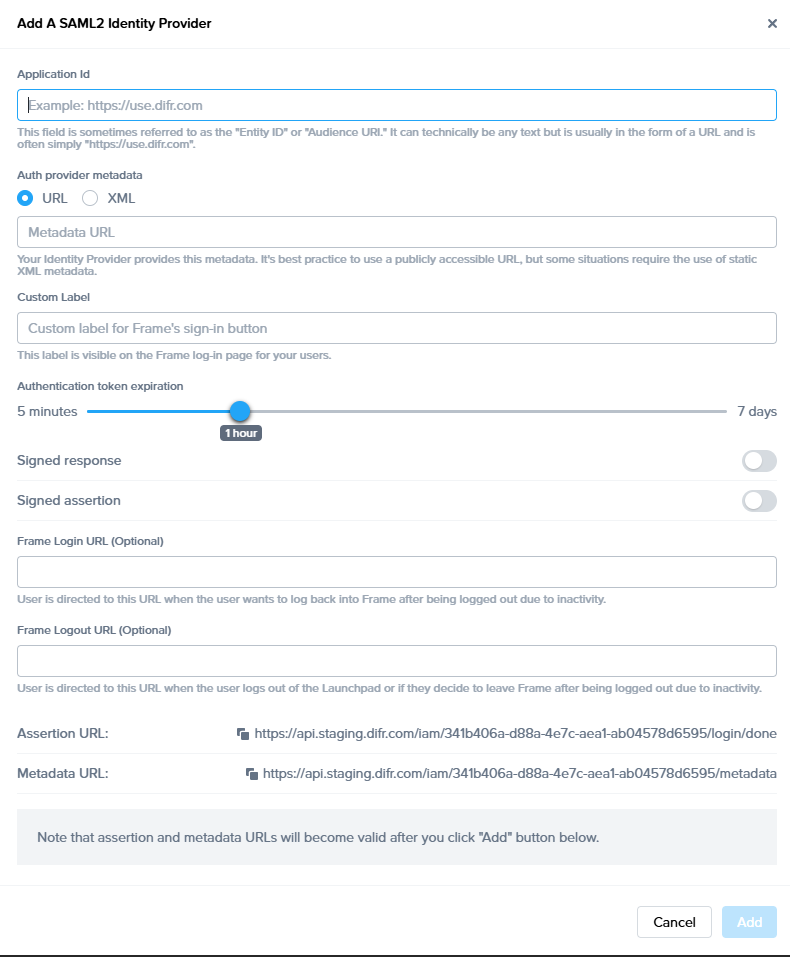](https://docs.difr.com/uploads/images/gallery/2025-10/nePimage.png) - **Application Id**: This field is sometimes referred to as Service Provider (SP) "Entity ID" or "Audience URI". It can technically be any text but is usually in the form of a URL and is often simply [https://use.difr.com](https://use.difr.com). For successful authentication, it is important that value entered in this field matches at least one of the values within "Audience Restriction" list that is part of the SAML2 assertion created by Identity Provider (IdP). - **Auth provider metadata**: Check the "URL" option and paste the Identity Provider metadata URL from your SAML2 IdP. The metadata URL must be publicly accessible to Frame Platform on the Internet. - **Custom Label**: When specified, this value will be used in the login page as `Sign in withThe SAML2 identity provider is typically configured to sign the SAML2 Authentication Response message or the SAML2 Assertion embedded within the Authentication Response message (and not both). The choice of what is signed by the SAML2 IdP must be the same choice in the Frame SAML2 IdP configuration. Otherwise, Frame will return a identity provider misconfiguration error when Frame processes the SAML2 Authentication Response from the SAML2 IdP.
Click Add when ready to create the SAML2 Provider definition. ## Configure your SAML2 IdP 3. Each SAML2-compliant identity provider will have its own configuration requirements. However, there are some common configuration parameters used by SAML2 identity providers: - **Frame Metadata URL**: This URL is in the form: [https://api.use.difr.com/iam/<ID>/metadata](https://api.use.difr.com/iam/%3CID%3E/metadata). - **Single Sign-on URL** or **Assertion Consumer Service (ACS) URL:** This URL is in the form: [https://api.use.difr.com/iam/<ID>/login/done.](https://api.use.difr.com/iam/%3CID%3E/login/done) The SAML2 IdP will send the SAML2 Authentication Response to this URL. #### **Caution**Administrators choosing to cache or store the Frame public key certificates in their SAML2 IdP will need to update those public key certificates when Dizzion renews them.
**Note**Frame does not support the SAML2 Single Logout Request.
### Mandatory SAML2 Attributes 1. In order for Frame to display properly the user's first name, last name, and email address in the Dashboard and Launchpad, your SAML2 identity provider configuration must provide these four mandatory user attributes/values using the specified SAML2 attribute names, as described in the following table:| **User attribute** | **SAML2 attribute name** |
|---|---|
| **First name** | **Use** `givenName`, `/urn:mace:dir:attribute-def:givenName/`, **or** `http://schemas.xmlsoap.org/ws/2005/05/identity/claims/givenname` **SAML2 nameFormat:** `urn:oasis:names:tc:SAML:2.0:attrname-format:basic` |
| **Last name** | **Use** `sn`, `/urn:mace:dir:attribute-def:sn/`, **or** `http://schemas.xmlsoap.org/ws/2005/05/identity/claims/surname ` **SAML2 nameFormat:** `urn:oasis:names:tc:SAML:2.0:attrname-format:basic` |
| **Email address** | **Use** `mail`, `/urn:mace:dir:attribute-def:mail/`, `http://schemas.xmlsoap.org/ws/2005/05/identity/claims/emailaddress`, **or** `http://schemas.xmlsoap.org/ws/2005/05/identity/claims/name` **SAML2 nameFormat:** `urn:oasis:names:tc:SAML:2.0:attrname-format:basic` |
| **Name ID** | `NameID` **SAML2 nameFormat:** `urn:oasis:names:tc:SAML:2.0:nameid-format:persistent` |
Google Workspace OAuth2 SSO integration is supported only when users access Frame via a supported web browser. Google Workspace OAuth2 is not supported by Frame App (due to Google Sign-In not supporting Chromium Embedded Framework).
### Configuring Google Workspace OAuth2 1. If you would like to enable Google Workspace OAuth2 integration with Frame, you will first need to following the procedure outlined in Google's guide to [Control which third-party & internal apps access Google Workspace data](https://support.google.com/a/answer/7281227?hl=en#zippy=%2Cmanage-access-to-apps-trusted-limited-or-blocked). 2. On the Google Admin Console home page, go to **Security > API controls**. 3. Under App access control, click on MANAGE THIRD-PARTY APP ACCESS. 4. Click on “Configure new app” drop down menu and select **OAuth App Name Or Client ID**. 5. Search for the Client ID `884836301137-76l5epasioe5sb3qvsp31obn45qk6t5i.apps.googleusercontent.com`. 6. Once you locate the Frame app in the search results, click **Select**. 7. Check the checkbox for the Frame app with the Client ID `884836301137-76l5epasioe5sb3qvsp31obn45qk6t5i.apps.googleusercontent.com` and then click **SELECT**. 8. For App access, specify that this Frame app is to be *TRUSTED* and click **CONFIGURE**. ### Configuring Google OAuth2 in Frame 1. Before Google OAuth2 can be added, the administrator must enable the Google toggle at a given level by navigating to the Admin Console. From there, navigate to the **Customer** or **Organization** page (depending on where you wish to add Google). 2. Select **Users** from the left-hand menu. 3. From there, navigate to the **Authentication** tab and enable the **OAuth2** toggle. Click **Save**.Google Workspace SAML2 integration can only be set up by someone with a Super Admin role on a Google Workspace account. During this configuration process we will transition from the Google Workspace Admin console to the Frame console.
### Getting Started To begin, let's create a URL-friendly SAML2 Application ID (also referred to as Entity ID) that we'll use in a few places throughout our setup, as well as a Custom Label which will be displayed on the login page for users, for example. Application ID: Frame Custom Label: Frame-Google\_SAML Also copy the Assertion URL Click add to save the changes for later Follow the steps to create a SAML 2 Provider explained in the [General SAML2 Integration](https://docs.difr.com/link/85#bkmrk-page-title) section, until you see until you see the template with the missing configuration info, and copy the Assertion URL which will be needed later in the setup. From here leave the tab open, and continue with the configuration in the Google Admin console. [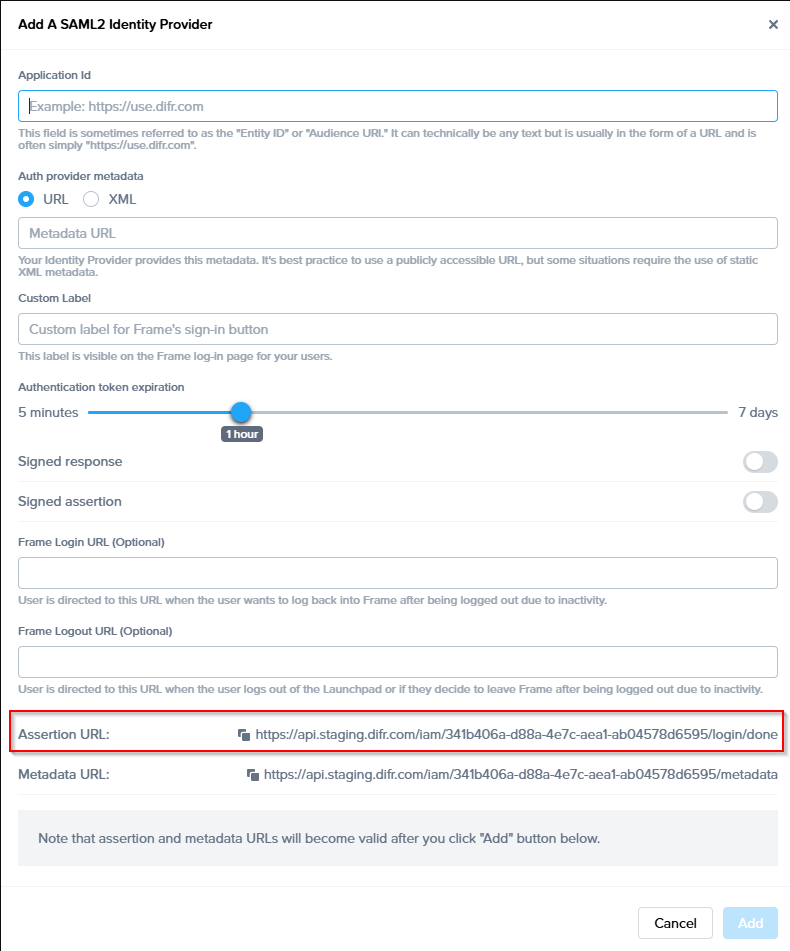](https://docs.difr.com/uploads/images/gallery/2025-11/07yimage.png) ### Google Admin Console 1. Navigate and log in to to your [Google Admin Console](https://admin.google.com/). Click on **Apps** and then **Web and mobile apps**.Leaving this blank may be desired if you have many Frame Accounts for your users to access or "land on".
8. Next, Ensure that the *Name ID format* field is set to **PERSISTENT** and the *Name ID field* is set to **Basic Information > Primary email**. Click **Continue** when ready.** http://schemas.microsoft.com/ws/2008/06/identity/claims/groups **
Note
If ADFS has no access to the Internet or the specific ADFS deployment does not support TLS 1.2, ADFS will not be able to directly use the Frame metadata URL for its configuration. In this case, you will need to download the XML file from the Frame metadata URL and manually upload the metadata XML file when creating the relying party in ADFSCAUTION
Administrators choosing to cache or store the Frame public key certificates in their SAML2 IdP will need to update those public key certificates when Dizzion renews them.Note
Frame recommends starting with “Permit Everyone” and testing authentication with your new SAML2 authentication integration. If your configuration works successfully, you can move on to a more restrictive Access Control Policy.| LDAP Attribute | Outgoing Claim Type |
|---|---|
| User-Principal-Name | |
| Surname | sn |
| Given-Name | givenName |
| Name | Value |
|---|---|
| Incoming claim type | |
| Outgoing claim type | Name ID |
| Outgoing name ID format | Persistent Identifier |
| Name | Value |
|---|---|
| User's group | Browse to and select the desired Active Directory group |
| Outgoing claim type | Group |
| Outgoing claim value | Value of your choice to send when a user is a member of the selected group |
Note
**SAML2 Configuration Lock** Customer Administrators have the option to lock SAML2 IdP configurations at the Customer level of the Frame tenant. When the toggle pictured below is enabled, SAML2 IdP integrations cannot be added from the Organization or Account levels of the Frame tenant.**I need to update the Frame public key certificates for ADFS. What do I do?**
If you are running into issues with your ADFS SAML2 integration and need to update the Frame public key certificates, please reference [ this knowledge base article](https://support.dizzion.com/hc/en-us/articles/23915708725261-How-to-refresh-Frame-certificates-metadata-in-Microsoft-ADFS) for further information (requires login). Microsoft also outlines these details in their [official documentation](https://learn.microsoft.com/en-us/archive/msdn-technet-forums/79fda425-afd4-4ec6-ad10-a73c06503b8e).**Attention** Please be aware that while Okta does have a pre-built Frame app, this app does not yet support group attributes. In order to use group attributes, you must configure the application manually as described below.
## Getting Started To begin, let's create a URL-friendly SAML2 Application ID (also referred to as Entity ID) that we'll use in a few places throughout our setup, as well as a Custom Label which will be displayed on the login page for users, for example. Application ID: DC-OKTA-DEV Custom Label: Frame-OKTA Also copy the Assertion URL Click "add" to save the changes for later Follow the steps to create a SAML 2 Provider explained in the [General SAML2 Integration](https://docs.difr.com/books/platform-administrators-guide/page/general-saml2-integration) section, until you see until you see the template with the missing configuration info, and copy the Metadata URL which will be needed later in the setup. From here leave the tab open, and continue with the configuration in the Azure console. [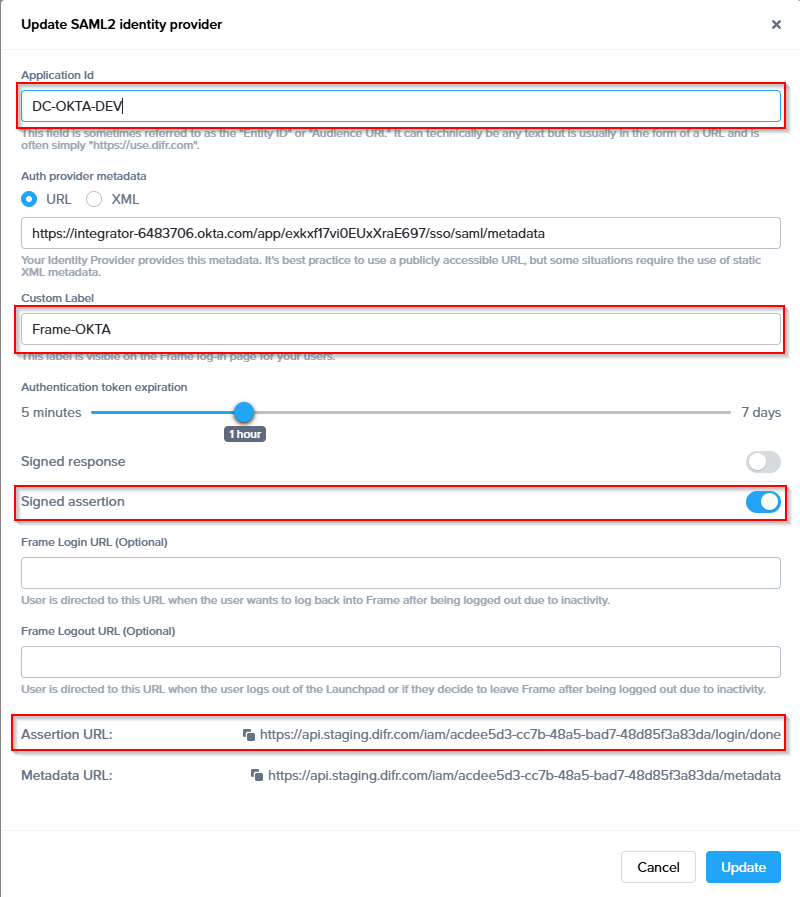](https://docs.difr.com/uploads/images/gallery/2025-11/Z8nimage.png) 1. In a *separate/new tab*, log in to your Okta account as an Admin and open the Dashboard. Select **SSO Apps**.[](https://docs.difr.com/uploads/images/gallery/2025-11/2w8image.png) 2. Click **Create App Integration** in the top-left corner of the page.[](https://docs.difr.com/uploads/images/gallery/2025-11/ALdimage.png) 3. 2. Select **SAML 2.0** and click **Next**. 4. Provide an app **name** and **icon**. We've provided a Frame icon below for convenience:[](https://docs.difr.com/uploads/images/gallery/2025-11/M7Zimage.png) 5. From there, you will be taken to the **SAML Settings** page.[](https://docs.difr.com/uploads/images/gallery/2025-11/ID4image.png) 6. Next, it's time to paste our **AsserationURL** from the [Getting Started](https://docs.difr.com/link/86#bkmrk-getting-started) section of this page. 7. Next, we'll enter the following information:**Audience URI**: A DNS-compliant string. For this example, we will use `DC-OKTA-DEV`. This customer-defined string will be entered on the Frame side as our **Application ID** later on. You must use a unique Audience URI for your own IdP integration. 8. **Default RelayState**: This field can be left blank for SP-initiated SSO scenario. For IdP-initated SSO scenarios, you will need to specify the URL your IdP will redirect the user to once the user has authenticated to Okta. The value can be a [custom entity endpoint URL](https://docs.difr.com/books/platform-administrators-guide/page/authentication#entity-endpoint-urls) or a Launch Link URL. 9. Configure how Okta will specify the Subject for the SAML2 assertion. 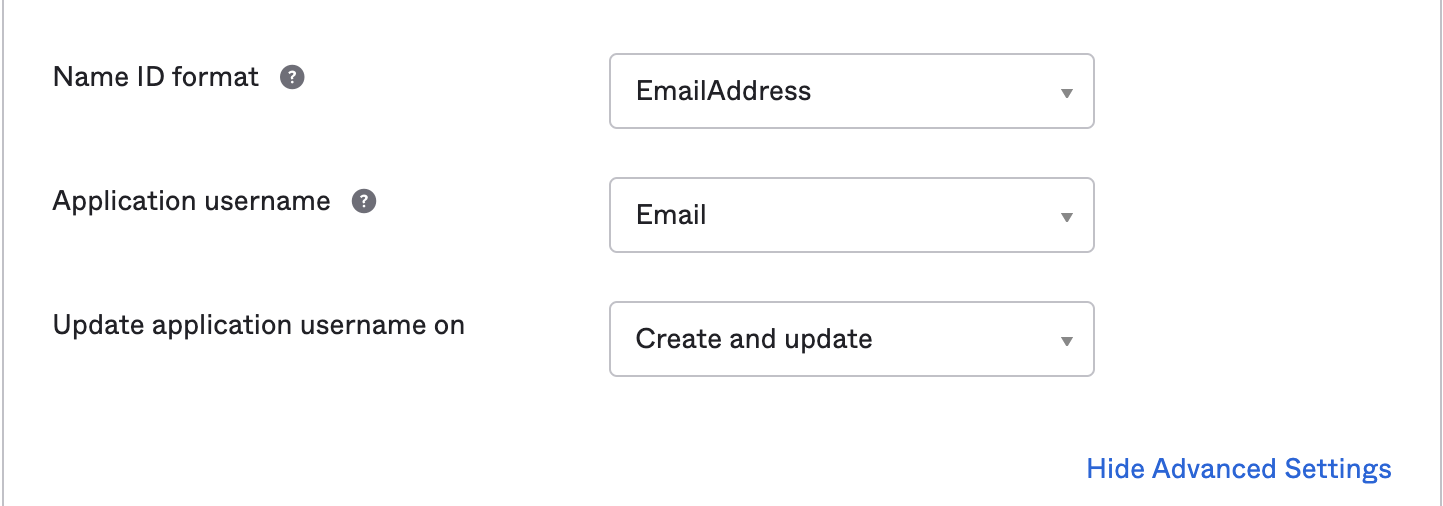**Name ID format**: Use value of **EmailAddress Application username**: Use value of **Email** 10. Select **Show Advanced Settings** in the bottom right corner and the Okta fields shown in the following screen will be visible.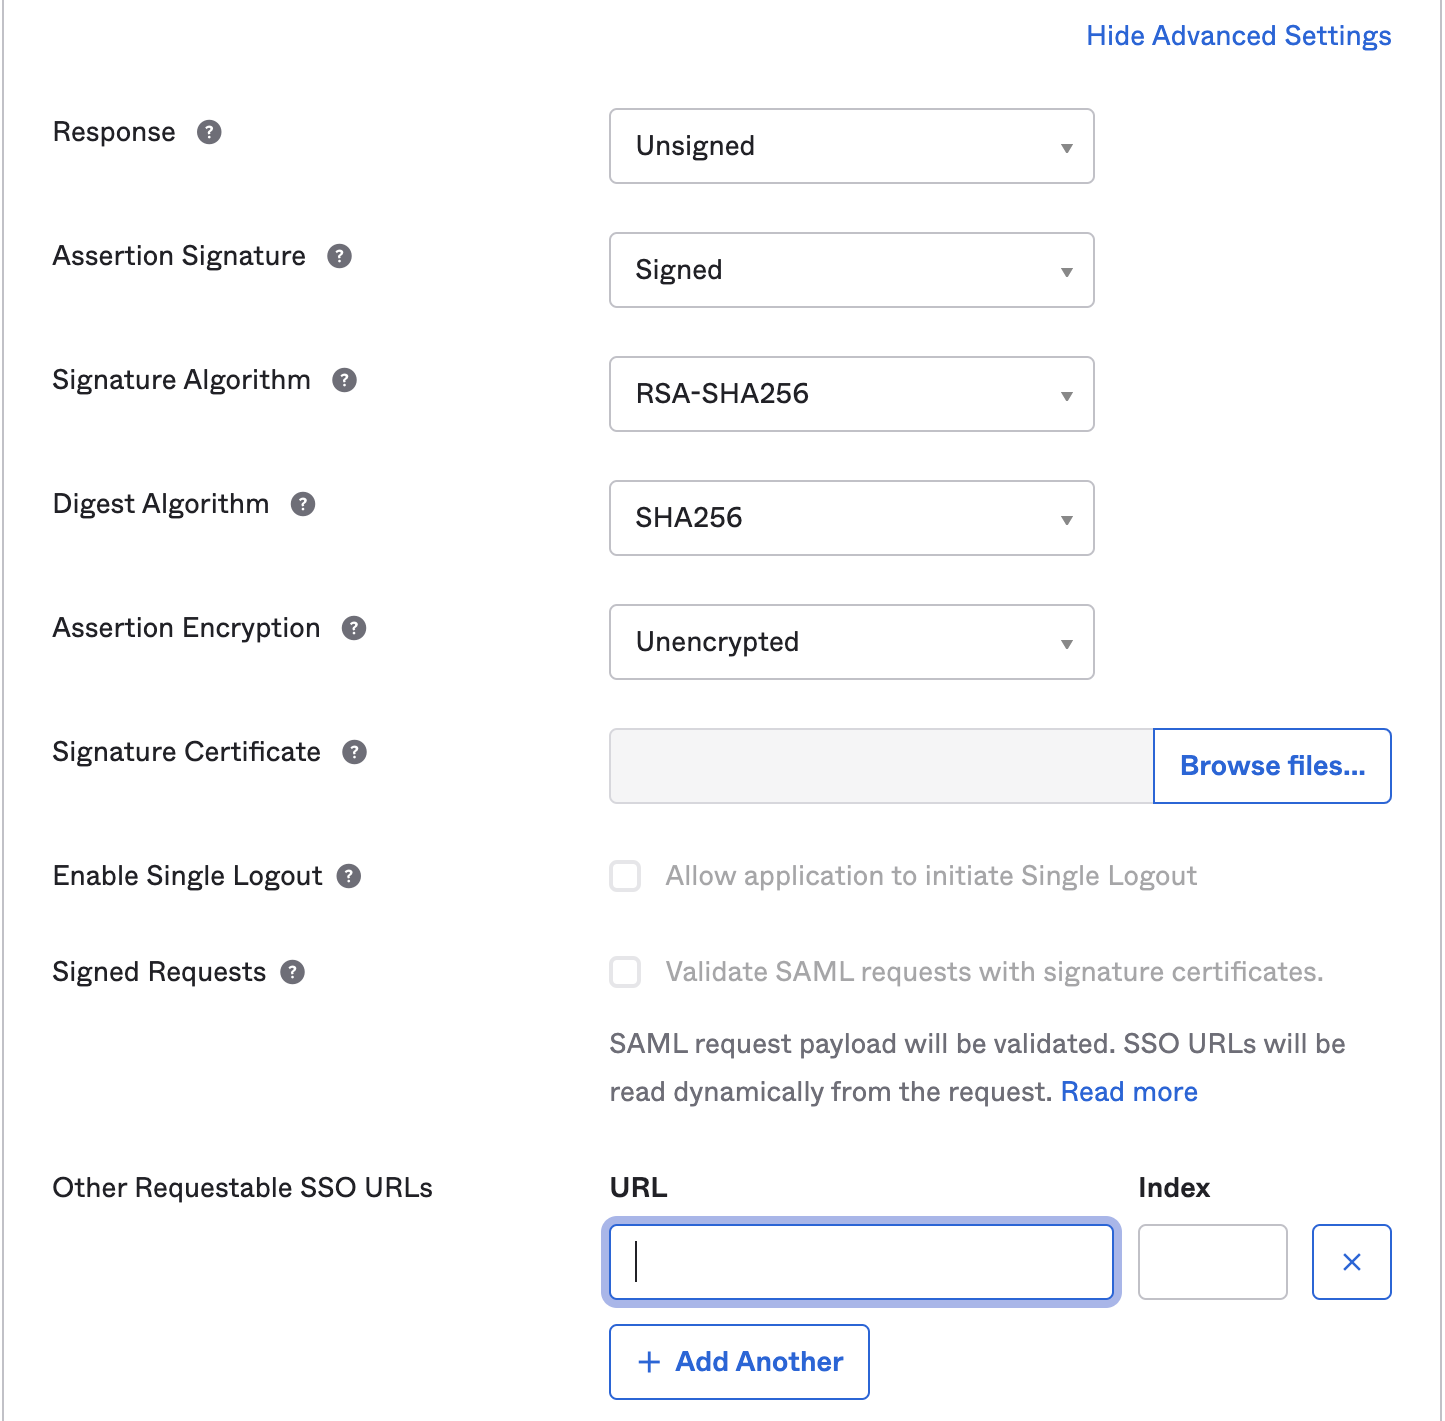Update the following fields: **Response**: Use value of **Unsigned Assertion Signature**: Use value of **Signed Other Requestable SSO URLs**: If you plan to use the Frame Login Page, add a second **Single sign-on URL** with the FQDN **api.difr.com.com** with an index of `1`. For example, [`https://img.frame.nutanix.com/saml2/done/docs-frame-okta/`](https://api.staging.difr.com/iam/5cdbd7c7-5acd-4152-9b11-d1e4cfe3ea53/login/done) for the above example. 11. **Add three Attribute Statements**. They must be exactly as shown here, including capitalization. Additionally, you can add “Group Attribute Statements” if you wish. We go into detail for passing group attributes/claims in later steps.  12. Click **Next** and fill out the feedback page as desired.  13. Click **Finish**. 14. You will automatically be taken to the **Sign On** page/tab where we'll obtain the final piece of information. Scroll down to the bottom box under the *Sign On Methods* section and right-click on the blue **Identity Provider metadata** link. Copy the link URL and save it somewhere to reference in later steps. [](https://docs.difr.com/uploads/images/gallery/2025-11/IOOimage.png) 15. The Okta side of the setup is now complete. Next, we'll configure the Frame side of the integration using the the values we've copied from these steps in the Okta Dashboard. 16. Final Steps ### Configure the SAML2 Authentication Integration Provider in Frame[ ](https://docs.dizzion.com/platform/identity-and-access/idp-integrations/entra-id#create-the-saml2-authentication-integration-provider-in-frame) 1. Navigate back to your Frame tab and enter the following data into our **Add a SAML2 Identity Provider** form:Be aware that the token duration timer starts \*\*as soon as the URLs are generated\*\*. We recommend generating these URLs right before you plan on providing them to your users so they can utilize the entire token duration.
## Mass User Creation Setup Once you have created a Secure Anonymous Token Provider and set the desired token duration, roles, and scopes, simply click on the ellipsis listed next to your Anonymous Access Provider and click **Playground**.example.com User-)Server: Request page Server-)Frame: Frame Admin API Request to Secure Anonymous Token Provider Note right of Server: API requests made
securely from your
custom SAT API integration Frame-)Server: Response with SAT as a JWT Server-)User: Web page loaded along with Frame JWT User-)Frame: Request Session rect rgba(0,100,0,0.5) loop Authenticated Session Frame-)User: Frame Session end end ``` ## Getting Started ### Requirements - Frame administrator access (Customer, Organization, or Account level). - [Frame Admin API access](https://docs.difr.com/link/171#bkmrk-page-title) enabled at Customer, Organization, or Account level. - [Secure Anonymous Token provider](https://docs.difr.com/link/91#bkmrk-page-title) with an assigned Launchpad User role. - Customer-specific location (e.g., web server, thin client) to host the custom Secure Anonymous Token API integration requesting SATs from the SAT provider. 1. If Secure Anonymous Tokens are used with a [Named User Subscription](https://docs.difr.com/link/178#bkmrk-page-title), then the SAT generation request must include a unique user identifier in order for Frame Platform to count the number of named users in a monthly billing cycle. 2. If Secure Anonymous Tokens will not contain a unique user identifier, then the customer must purchase [Per VM Subscription](https://docs.difr.com/link/178#bkmrk-page-title). 3. Customers using Secure Anonymous Tokens and purchasing Microsoft RDS SAL licenses must comply with the reporting requirements if those RDS SALs are purchased via Frame. 4. Secure Anonymous Tokens *should not be used in combination with* [Personal Drives](https://docs.difr.com/link/119#bkmrk-page-title) and/or [Profiles](https://docs.difr.com/link/123#bkmrk-page-title). ### REST API Credentials The Secure Anonymous Token API is invoked over REST endpoints to retrieve tokens. This requires an API integration with the proper roles/permissions. ### Creating a new API integration To get started, be sure to login as an administrator to gain access to API settings. 1. There are two ways to create a new API integration: a. From the Dashboard of the desired Frame account, navigate to the **Users** page. b. If you start from the Frame Admin console, you can navigate to either the **Customer** or **Organization** page and select **Users** from the left-hand menu. 2. Enable the “API” toggle and **Save**. 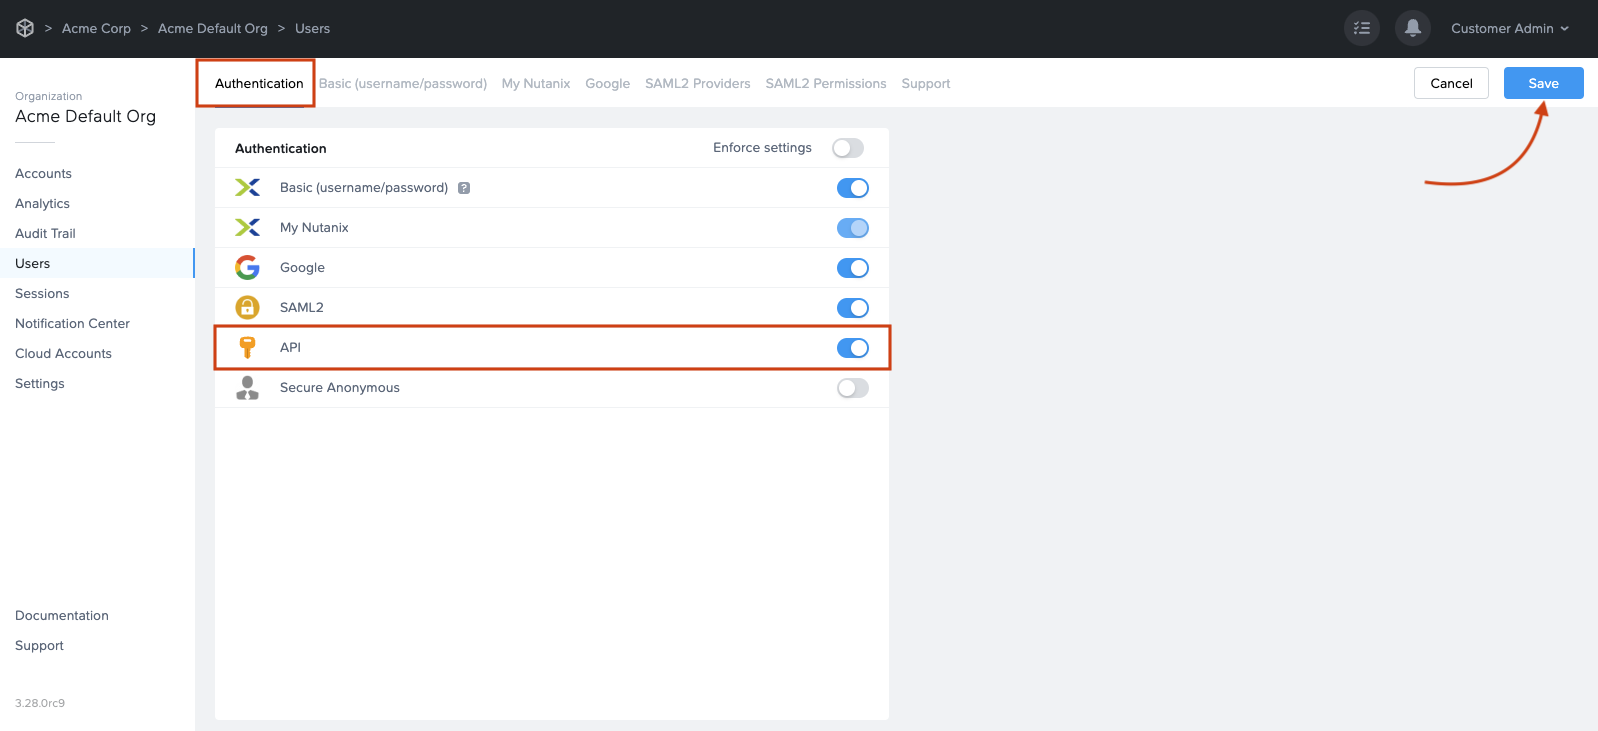 1. A new **API** tab will appear. Click on the **API** tab and then click the **Add API** link.  4. Give this new API integration a name; for this example, we'll use “API to create anonymous tokens”. Then, select a role and scope based on your scenario below. For account-level integrations, choose the `API - Generate Anonymous Account Token` role, along with the account you're configuring access for. For organization or customer level integrations, you'll need to specify the` API - Generate Anonymous Organization Token` and `API - Generate Anonymous Customer Token`, respectively.  5. Click **Add**. The new API will show up in the API list. Click the options menu for the new API and select **Manage Credentials**.  6. You'll be prompted to create a new API key – start by giving it a name, then click the **PLUS ("+")** button on the right.  7. You'll now see your Client ID and Client Secret. Copy these values to somewhere safe, as you won't be able to see the secret again after leaving this screen. 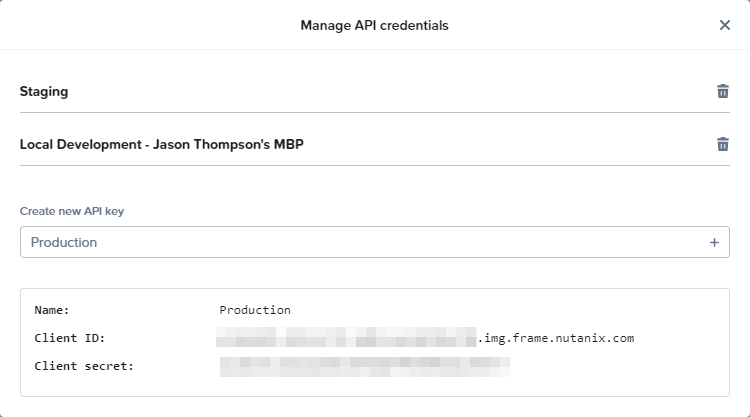 8. That's it! Now you're ready to add a SAT Provider in the next section. ### Creating a Secure Anonymous Token Provider 1. There are two ways to create a Secure Anonymous Token Provider: a. From the Dashboard of the desired Frame account, navigate to the **Users** page where you will land on the **Authentication** tab. b. If you start from the Frame Admin console, you can navigate to either the **Customer** or **Organization** page and select **Users** from the left-hand menu. 2. Enable the Secure Anonymous option under Authentication and save; a new **Secure Anonymous** tab will show up. 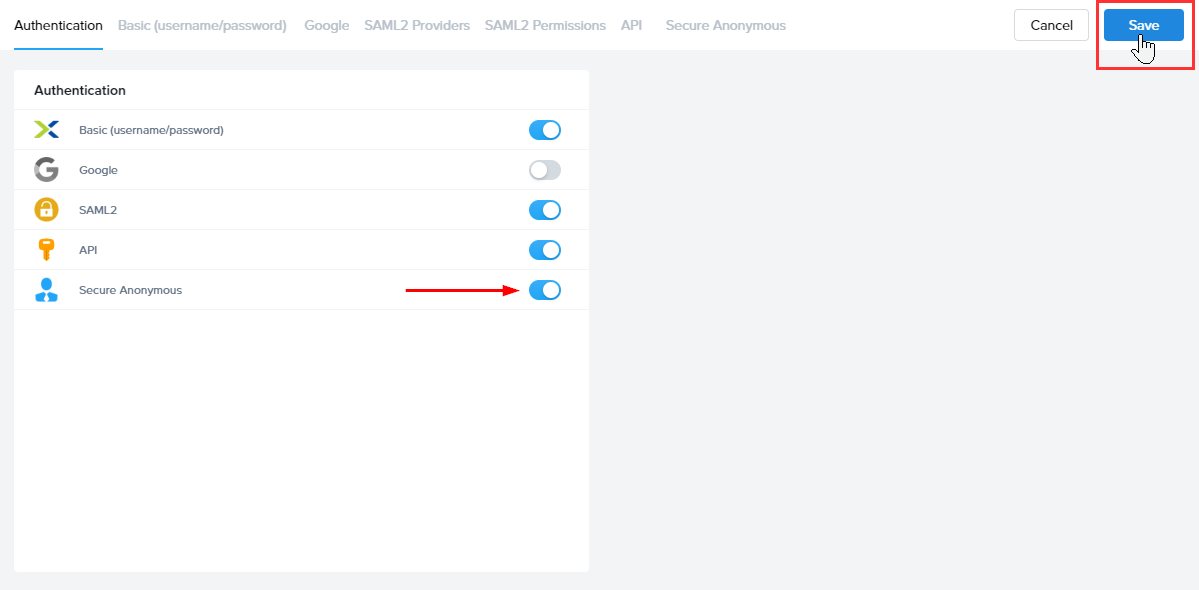 3. Click the Secure Anonymous tab, then click the **Add Provider** button to the top right.  4. You'll be prompted to describe and configure your new Secure Anonymous provider. You can specify the following:
| Property Name | Description |
|---|---|
| Description | A short description of what you plan to use the Anonymous Token provider for (e.g., public trials) |
| Token Duration | How long until the token expires and is no longer valid. |
| Roles and Scope | The role will typically be a Launchpad user, and the scope is which account/Launchpad |
| Name | Type | Description | Required |
|---|---|---|---|
| first\_name | string | “John” for example. | false |
| last\_name | string | “Smith” for example. | false |
| string | Example: john.smith@acme.com | false | |
| email\_domain | string | Example: acme.com. This will return xxxxxxx@acme.com. | false |
| metadata | object | An object containing any additional information you'd like to supply for your users/token. | false |
| Name | Type | Description | Required |
|---|---|---|---|
| should\_accept\_tos | string | When set to `true`, you are accepting the Terms of Service automatically. There will be no UI prompt for accepting the ToS if set to `true`. This default value is set to `false` | false |
| frame\_login\_url | string | URL used when a user attempts to log back in from a closed session. See more here: [Customize Auth Flow](#customize-auth-flow) | false |
| frame\_logout\_url | string | URL used when a user logs out of the Frame UI. See more here: [Customize Auth Flow](#customize-auth-flow) | false |
Attention
**Before creating a Frame account, be sure to review and understand the network configuration requirements discussed in further detail in [Network Configuration](https://docs.difr.com/link/51#bkmrk-page-title) Requirements.**Administrators creating new accounts with Frame base images may find that account creation takes longer when a new base image is available since the updated image needs to be applied.
### AHV Infrastructure When creating a Frame account on AHV infrastructure, the Customer or Organization Administrator creates the Frame account in an existing VLAN in the registered AHV Cloud Account. If the customer requires the SGA to support users accessing the workload VMs from the Internet without a VPN, they will deploy the SGA VM(s) independently in a DMZ LAN. - [Customer-Managed Networking (Private network)](https://docs.difr.com/books/platform-administrators-guide/page/requirements): all workload VMs have private IP addresses. The customer is solely responsible for configuring and managing the network containing the Frame account workload VMs and routing between end users and the workload VMs. - [Customer-Managed Networking (Private network with Streaming Gateway Appliance (SGA)](https://docs.difr.com/books/platform-administrators-guide/page/private-networking-with-sga-ahv): all workload VMs have private IP addresses. The customer is solely responsible for configuring and managing the networks containing the Frame account workload VMs and SGA VM(s) and routing between end users and the SGA VM(s) and between the SGA VM(s) and the workload VMs. ## Create a New Frame Account Entity 1. Administrators with the appropriate role can create new accounts by selecting **Accounts** in the left-hand menu from the Customer or Organization Dashboard in their [Admin Console](https://docs.difr.com/books/platform-administrators-guide/page/administration). 2. Click the **Create Account** link located on the upper right portion of the screen. The first set of parameters to specify will determine the infrastructure, location, and networking option for the Frame account. **Use the tabs below to find instructions for each network deployment configuration:** #### **Public Networking** Customers who wish to rapidly create a Frame account on the public cloud infrastructure for users accessing the virtualized applications/desktops from the Internet can choose this option. This procedure will provision a Frame account with the network requirements and architecture as defined in [Public Cloud (Default) Network Requirements](https://docs.difr.com/books/platform-administrators-guide/page/public-networking-public-cloud). All workload VMs will have public IP addresses.Networking and routing must be configured to reach the workload VMs, otherwise the customer will not be able to access the Sandbox, Utility Servers, or production VMs.
| Field/Button | Description |
|---|---|
| Organization | If account created at the customer level, this field is visible. Select or search for the top-level organization the account will reside under. |
| Account Name | Frame automatically generates an account name for you, but you can edit this field if desired. The account name will be displayed in the account Dashboard and Launchpad. |
| Account URL | This editable field designates the unique identifier for the account, when referencing the account in a URL. The format for the string referenced above would appear as: **USE** [https://use.difr.com/frame/customer/org/](https://use.difr.com/)[test-acct-private](https://console.nutanix.com/frame/customer/org/test-acct-private) **DEU** [https://deu.difr.com/frame/customer/org/t](https://deu.difr.com/)[test-acct-private](https://console.nutanix.com/frame/customer/org/test-acct-private) |
| Cloud Provider | Select the desired cloud or IaaS (Infrastructure-as-a-Service) provider for your account. |
| Workload Engine | **EC2** - virtual machines which are billed by AWS per pricing for EC2 instances **WSC bundle -** only used for CloudPC setups **WSC** m**anaged instances** -*only windows 11 BYO License is supported* managed workspaces (not EC2 instances) of a new generation, which are billed by AWS per pricing sheet for Managed Workspaces. [https://aws.amazon.com/about-aws/whats-new/2025/06/amazon-workspaces-core-managed-instances-vdi-migrations/](https://aws.amazon.com/about-aws/whats-new/2025/06/amazon-workspaces-core-managed-instances-vdi-migrations/) |
| Cloud Account | Select the desired cloud account to use, if there is more than one cloud account for that cloud provider. |
| Region | Specify the desired datacenter you would like the account to be created in. |
| Networking | Select **Frame-Managed Networking** |
| Network Type | Select **Private Network**. |
| Customize VPC Settings | Select this checkbox to specify a specific VPC/VNET CIDR. If you plan to connect this VPC/VNET to another network through a peer, VPN, or other private connection, you need to specify a non-overlapping CIDR (e.g., `10.0.0.0/20`, `192.168.0.0/24`). The VPC/VNET CIDR can be changed after the Frame account is created under Dashboard, Settings, Networking, as long as there are no customer-provisioned network resources (e.g., peers, VPNs, gateways, etc.) attached to the Frame-provisioned VPC/VNET. Note: If left unchecked, a randomized /16 CIDR from the 10.0.0.0/8 range will be used. [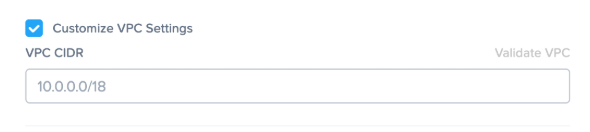](https://docs.difr.com/uploads/images/gallery/2025-12/jh2image.png) |
| Field/Button | Description |
|---|---|
| Organization | If account created at the customer level, this field is visible. Select or search for the the top-level organization the account will reside under. |
| Account Name | Frame automatically generates an account name for you, but you can edit this field if desired. The account name will be displayed in the account Dashboard and Launchpad. |
| Account URL | This editable field designates the unique identifier for the account, when referencing the account in a URL. The format for the string referenced above would appear as: **USE** [https://use.difr.com/frame/customer/org/](https://use.difr.com/)[test-acct-private-SGA](https://console.nutanix.com/frame/customer/org/test-acct-private) **DEU** [https://deu.difr.com/frame/customer/org/t](https://deu.difr.com/)[test-acct-private-SGA](https://console.nutanix.com/frame/customer/org/test-acct-private) |
| Cloud Provider | Select the desired cloud or IaaS (Infrastructure-as-a-Service) provider for your account. |
| Workload Engine | **EC2** - virtual machines which are billed by AWS per pricing for EC2 instances **WSC bundle -** only used for CloudPC setups **WSC** m**anaged instances** -*only windows 11 BYO License is supported* managed workspaces (not EC2 instances) of a new generation, which are billed by AWS per pricing sheet for Managed Workspaces. [https://aws.amazon.com/about-aws/whats-new/2025/06/amazon-workspaces-core-managed-instances-vdi-migrations/](https://aws.amazon.com/about-aws/whats-new/2025/06/amazon-workspaces-core-managed-instances-vdi-migrations/) |
| Cloud Account | Select the desired cloud account to use, if there is more than one cloud account for that cloud provider. |
| Region | Specify the desired datacenter you would like the account to be created in. |
| Networking | Select **Frame-Managed Networking** |
| Network type | Select **Private Network with SGA** |
| SGA | Select your Streaming Gateway Cluster |
| Customize VPC Settings | Select this checkbox to specify specific CIDRs for the workload VPC If you do not enable this feature and specify a CIDR, Frame will set the workload CIDR to a randomized IP address range of 10.{0-255}.0.0/18 If you plan to connect the workload VPC/VNET to another network through a peer, VPN, or other private connection, you need to specify a non-overlapping CIDR (e.g., `10.0.0.0/20`, `192.168.0.0/24`). The VPC/VNET CIDR can be changed after the Frame account is created under Dashboard, Settings, Networking, as long as there are no customer-provisioned network resources (e.g., peers, VPNs, gateways, etc.) attached to the Frame-provisioned VPC/VNET. |
| VPC CIDR | Specify the workload VPC/VNET CIDR in CIDR notation. CIDR must be a minimum of `/24`. |
SGA Instance Types
**Frame Platform will provision SGA VM(s) on the following instance/machine types. These VMs will run 24x7 since users need to be able to access the workload VMs at any time.** - **AWS: c5.xlarge** - **Azure: D4 v3** - **GCP: e2-standard-2 (SGA 3), e2-standard-4 (SGA 4)** - **IBM: cx3d-4x10 (SGA 4 only)**Until the customer configures networking, security groups, and routing to reach these workload VMs, the customer will not be able to access the Sandbox, Utility Servers, or production VMs.
| Field/Button | Description |
|---|---|
| Organization | If account created at the customer level, this field is visible. Select or search for the top-level organization the account will reside under. |
| Account Name | Frame automatically generates an account name for you, but you can edit this field if desired. The account name will be displayed in the account Dashboard and Launchpad. |
| Account URL | This editable field designates the unique identifier for the account, when referencing the account in a URL. The format for the string referenced above would appear as: **USE** [https://use.difr.com/frame/customer/org/](https://use.difr.com/)[test-acct-customer-network](https://console.nutanix.com/frame/customer/org/test-acct-private) **DEU** [https://deu.difr.com/frame/customer/org/t](https://deu.difr.com/)[test-acct-customer-network](https://console.nutanix.com/frame/customer/org/test-acct-private) |
| Cloud Provider | Select the desired cloud or IaaS (Infrastructure-as-a-Service) provider for your account. |
| Workload Engine | **EC2** - virtual machines which are billed by AWS per pricing for EC2 instances **WSC bundle -** only used for CloudPC setups **WSC** m**anaged instances** -*only windows 11 BYO License is supported* managed workspaces (not EC2 instances) of a new generation, which are billed by AWS per pricing sheet for Managed Workspaces. [https://aws.amazon.com/about-aws/whats-new/2025/06/amazon-workspaces-core-managed-instances-vdi-migrations/](https://aws.amazon.com/about-aws/whats-new/2025/06/amazon-workspaces-core-managed-instances-vdi-migrations/) |
| Cloud Account | Select the desired cloud account to use, if there is more than one cloud account for that cloud provider. |
| Region | Specify the desired datacenter you would like the account to be created in. |
| Networking | Select **Customer-Managed Networking**. |
| Virtual Private Network (VPC) | Specify the desired VPC/VNET from the list of the existing VPCs/VNETs in the specified region for the registered public cloud account. |
| Workload Subnet | Pick the subnet(s) from the list of subnets in the specified VPC or VNET. |
| Security groups (AWS only) | Pick the security group(s) from the list of security groups for the specified AWS VPC. |
| Assign public IP addresses to created machines | If you select this option, all newly-provisioned machines in the VNET/VPC will have public IP addresses, in addition to private IP addresses. |
| Use Streaming Gateway | Select this option and specify the existing SGA 4 cluster that will be attached to this Frame account. |
Azure Infrastructure
While an Azure security group is not required in the above Frame account creation workflow, an Azure security group must be provisioned on the VNET/subnet before Frame account creation. Specific inbound/outbound rules will be dependent on how the Frame traffic is routed, as defined in [Public Cloud with Private Networking](https://docs.difr.com/link/55#bkmrk-page-title).| Field/Button | Description |
|---|---|
| Organization | If account created at the customer level, this field is visible. Select or search for the top-level organization the account will reside under. |
| Account Name | Frame automatically generates an account name for you, but you can edit this field if desired. The account name will be displayed in the account Dashboard and Launchpad. |
| Account URL | This editable field designates the unique identifier for the account, when referencing the account in a URL. The format for the string referenced above would appear as: **USE** [https://use.difr.com/frame/customer/org/](https://use.difr.com/)[test-acct-ahv](https://console.nutanix.com/frame/customer/org/test-acct-private) **DEU** [https://deu.difr.com/frame/customer/org/t](https://deu.difr.com/)[test-acct-ahv](https://console.nutanix.com/frame/customer/org/test-acct-private) |
| Cloud Provider | Select the desired AHV-based Nutanix Cloud Provider for your account. |
| Cloud Account | Select the desired cloud account to use, if there is more than one cloud account for that cloud provider. |
| Region | Specify the desired datacenter or cluster you would like the account to be created in. |
| Virtual Network | Specify the desired VLAN from the list of the existing VLANs in the registered AHV Cloud Account. With Frame accounts on AHV, the CIDR block is defined in Prism Central/Prism Element and not within Frame. |
| Field/Button | Description |
|---|---|
| Frame/BYO base image | If you have already configured your organization or customer entity with a [BYO base image](https://docs.difr.com/link/69#bkmrk-page-title), you can select the “Bring your own base image” radio button and use your custom base image here. Otherwise, select **Use Frame base image** (public cloud only). |
| Base image family | Select the base server type/version for the account. The options for image family vary depending on the cloud provider. |
| Instance type | Select the system type of the Sandbox upon account creation. The system type can be modified at a later time from the Dashboard of the account. |
| Add Resource Tags | This toggle will enable you to specify one or more resource tags that will be added to cloud provider resources provisioned by Frame (public cloud only). |
| Cloud VM Prefix | If desired, specify the prefix that will be prepended to the name of each virtual machine provisioned by Frame. |
| Disk size | Use the slider or the editable field next to it to specify the initial Sandbox disk capacity upon account creation. We recommend you start with the smallest disk size since you can always increase the Sandbox disk size in the Dashboard. |
| Initial capacity | Use the slider to specify the number of workload VMs you would like provisioned upon account creation. You can adjust [capacity settings](https://docs.difr.com/link/114#bkmrk-page-title) any time after account creation. |
| Provision Production Instances | Enable this toggle if you wish to provision production instances using the base image immediately at Frame Account creation. |
| Persistent Desktop | This toggle will enable “[Persistent Desktops](https://docs.difr.com/books/platform-administrators-guide/page/persistent-desktops-administration)” for your account. If you wish to deliver non-persistent desktops or individual applications to your users, do not select the Persistent Desktop option. |
| Scheduled Account Termination | Select this option if you wish to have Frame terminate the Frame account on a specific date and time. |
**"My Sandbox is taking a long time to provision on my new account..."**
**"My Sandbox failed to provision during account creation..."**
- When publishing to provision instances with storage volumes (especially GPU-backed instances), there is a possibility that the instance and/or storage limit can be reached in the given region (e.g. the default limits for GPU instances on new IaaS accounts are typically very low per region). - If instance storage limits in a given region are hit, provisioning of the Sandbox for the new account will fail. - If the Sandbox VM cannot be provisioned during the Account creation process due to lack of availability of that instance type, the administrator will be prompted to **retry creating the Sandbox** or **change the instance type**.**"My account creation failed..."**
- For each account, a new VPC/VNET is required when creating an account using Frame networking. IaaS providers limit the number of VPCs or VNETs that can be created. - If an issue is encountered when creating VPCs or VNETs due to the limit being hit, the account creation will fail.**"I can't access my Sandbox after account creation..."**
If a Frame account using Frame Networking (Private Networking) or Customer-Managed Networking is created, the Sandbox may not be created successfully or accessible from the Internet. The Administrator must verify that the network configuration requirements are satisfied.**"How do I request a capacity limit increase from my IaaS provider?"**
In general, when provisioning accounts, the IaaS cloud account must have sufficient capacity/limits to support the instance, storage, VPC/VNET and networking demands. If limits are reached, the owner of the IaaS account must request limit increases by submitting a support ticket with their IaaS provider.**"I need help, how do I contact support?"**
If you need additional help, contact our Frame support team using the [guide](https://docs.difr.com/books/dizzion-support) on our support page.| Tab | Description |
|---|---|
| [Basic Info](#basic-info) | Allows administrators to update the Frame Account Name, URL name, description, and notes on the Frame account. |
| [General](#general) | Provides administrators with the ability to enable Quick Publish and/or Test Publish, generate Session Reports, set the machine name prefix for non-domain-joined workload VMs, and enable custom terminal and login banners. |
| [Session](https://docs.difr.com/books/platform-administrators-guide/page/session-settings) | Defines the behavior of a Frame session, including the features available to the users, time limits, keyboard mappings and profiles, and Advanced Terminal and Server Arguments. |
| [Networking](#networking) | Allows administrators to view and update the Frame account's networking settings. |
| [Availability Zones](https://docs.difr.com/books/platform-administrators-guide/page/enterprise-profiles#enable-enterprise-profiles) | Enable AWS and GCP Availability Zones for Enterprise Profiles and Personal Drives. |
| [Profiles](https://docs.difr.com/books/platform-administrators-guide/page/enterprise-profiles) | Enable and manage Enterprise Profile volume settings. |
| [Personal Drives](https://docs.difr.com/books/platform-administrators-guide/page/personal-drives) | Enable and manage Personal Drive settings. |
| [Domain Settings](https://docs.difr.com/books/platform-administrators-guide/page/domain) | Defines the parameters for joining your test/production workload VMs to your Windows domain, if required for your use case(s). |
| [Deployment Group](https://docs.difr.com/books/platform-administrators-guide/page/deployment-groups) | Determines when a Frame Account's workload VMs will receive the latest version of the Frame Guest Agent (FGA), Frame Server, and any associated drivers or components. |
| Shutdown Timeout | Determines the interval of time (in minutes) that Frame checks to see if a VM is in a state where it can be powered off (no session). By default Frame checks every 60 minutes. |
| Scheduled Termination | Enable or disable the scheduled termination of a Frame account. |
| Terminate | Terminate a Frame account. |
| Field | Description |
|---|---|
| Name | This editable field specifies the account name which will be displayed in the account Dashboard and Launchpad. |
| URL name | This editable field designates the unique identifier of the URL for users to access the login page. **Note**: This value is used as part of the URL for users to access the login page or Launchpad. If you change this value, you will need to make sure to communicate this change to your users and update references to the Account URL in any websites or documentation. |
| Description | This editable field allows you to describe the Frame Account. It is currently only displayed in the Frame Console for administrators. |
| Website | This editable field is only visible in the Frame Console to administrators. The field is not used by Frame. |
| Notes | This editable field is only visible in the Frame Console to administrators. The field is not used by Frame. |
| Field | Description |
|---|---|
| Enable Quick Publish | Refer to [Quick Publish](https://docs.difr.com/link/101#bkmrk-quick-publish) documentation for further details. |
| Session Report Generation | Refer to [Session Reports](https://docs.difr.com/link/135#bkmrk-session-reports) documentation for additional details. |
| Promote user to local admin | If disabled, the Frame session will use the local Windows user `FrameUser` who does not have local Windows administrator access. If enabled, the Frame session will use the local Windows user `Frame` who is in the local Windows Administrators group. |
| Machine Name Prefix | Frame will provision VMs with the specified Machine Name Prefix value to create a unique machine name for each workload VM. |
| Enable Test Publish | Refer to [Test Publish](https://docs.difr.com/link/101#bkmrk-test-publish) documentation for further details. |
| Enable Custom Terminal Banner | Refer to [Custom Terminal Banner](https://docs.difr.com/link/154#bkmrk-custom-terminal-bann) documentation. |
| Enable Custom Login Banner | Refer to [Custom Login Banner](https://docs.difr.com/link/154#bkmrk-custom-login-banner) documentation. |
| Field | Description |
|---|---|
| Networking | This field specifies whether the Frame account was created using Frame-managed versus Customer-managed networking. |
| Network type | For accounts created using Frame-managed networking, this field specifies whether the workload VMs are on a public network, private network, or a private network with one or more Streaming Gateway Appliances. |
| Customize VPC Settings | This field shows the VPC/VNET CIDR value for accounts created using Frame-managed networking with a specified VPC/VNET CIDR. |
Administrators should not modify any of these Networking settings unless they have consulted a Frame Solutions Architect and validated the change in a test network and Frame account.
## Shutdown Timeout The **Shutdown Timeout** feature is accessible from any account Dashboard.Administrators leveraging public cloud infrastructure should exercise caution when adjusting this value as: **-Increasing** the Shutdown Timeout value causes the VMs to remain powered on for longer increments, which increases total infrastructure usage and cost. **- Decreasing** the Shutdown Timeout value can substantially reduce infrastructure usage by turning off VMs sooner when not in use, but it may adversely affect the user experience. This is particularly true for Persistent Desktop scenarios, where users might frequently encounter delays as they wait for VMs to power up between sessions.
# Organizations Customer administrators have permissions to add, edit, and deactivate organization entities in the Frame console. This guide outlines how administrators can add, configure, and delete organization entities. ## Create an Organization Entity 1. From the Frame [Admin Console](https://docs.difr.com/books/platform-administrators-guide/page/google-cloud-platform#admin-console), select **Organizations** in the left-hand menu from the Customer page. Click **Create Organization** in the upper right hand corner of the page. 2. A new window will appear. Add the name for the organization in the **Name** field of the window. The URL name will automatically generate but can be modified as desired. Click **Create** after adding the Organization entity name.Configurations applied to the organization entity will affect the entirety of the organization and any accounts listed underneath it (where applicable).
### Basic Info After clicking **Update**, you will be taken to the **Basic Info** tab of the Organization entity's update page. You can edit any of the fields listed below:Only Frame support engineers will be able to access your account with support access enabled. If you would like to authorize other Frame personnel, you can add them in the \[Authorized Frame Personnel\](#authorized-nutanix-personnel) section.
## Authorized Frame Personnel Administrators may grant access to a single Frame admin or other Frame personnel on a temporary basis by adding them as **Authorized Frame Personnel**. Under the **Support Options section**, click **Add Personnel** and enter the email address of the Frame employee you would like to invite. Click **Save** in the upper right corner of the screen when you are done.**Tipp -** Wondering Where you Are, Check your browser tab to see which Frame entity you're accessing. This information is available to admins even while accessing their account Sandbox!
: ## Navigating your Frame Account Dashboard ### Account Administrator The Account administrator has access to any accounts assigned to them by the Customer or Organization admin. If you are an Account administrator, you will find yourself on the **[Dashboard Summary page](https://docs.difr.com/link/93#bkmrk-navigating-frame-adm)** of the **Frame Account Dashboard** upon login. Account administrators manage many important aspects of the end user experience, including but not limited to Launchpad and Sandbox configuration, Capacity and Session Settings, and more. [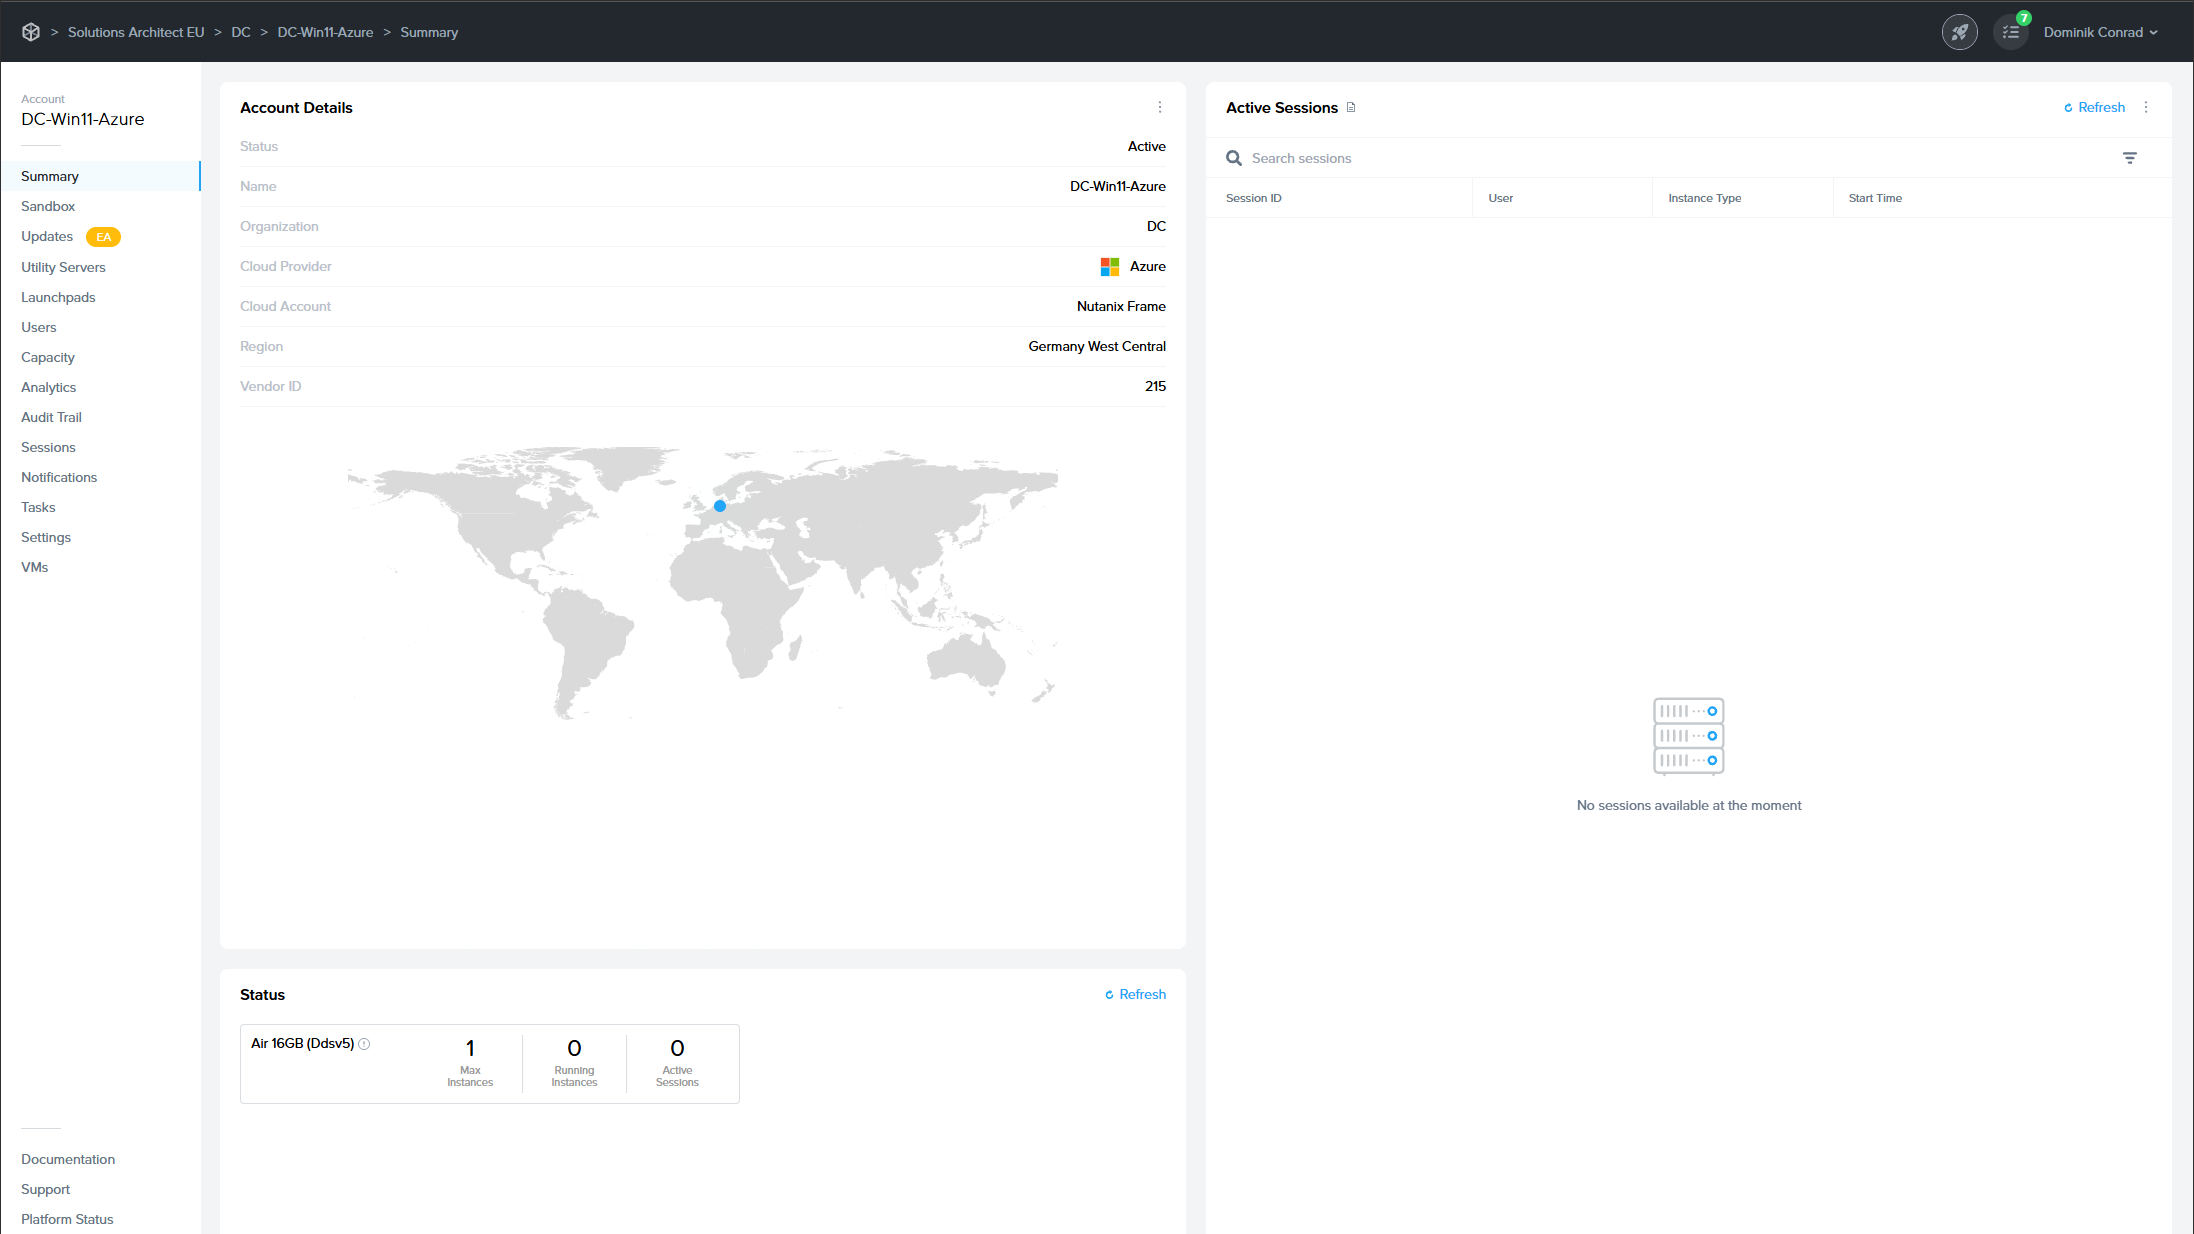](https://docs.difr.com/uploads/images/gallery/2025-12/ORzimage.png) ### Summary Page The Account Dashboard Summary page shows you many details about your account at a glance. Under **Account Details** pane, Frame Console lists: - **Status**: **Active** denotes this Frame account is available for use. - **Name**: Name of the Frame account. - **Organization**: Name of the organization that the account belongs to. - **Cloud Provider**: Infrastructure provider (AHV, AWS, Azure, or GCP) - **Cloud Account**: Name of the cloud account where the Frame account workload VMs are present. - **Region**: Public cloud region or AHV Cloud Account name. - **Vendor ID**: ID associated with this Frame account. Under the **Account Details** kebab menu, Frame admins can enable / disable [Maintenance Mode](https://docs.difr.com/link/141#bkmrk-page-title). The **Status** pane lists each of the pools (as defined in [Capacity](https://docs.difr.com/link/114#bkmrk-page-title)) created in this Frame account and for each pool, the maximum number of production instances, number of powered on production instances, and number of production instances currently in use. ## Active Sessions The Active Sessions page lists the user sessions currently in progress. 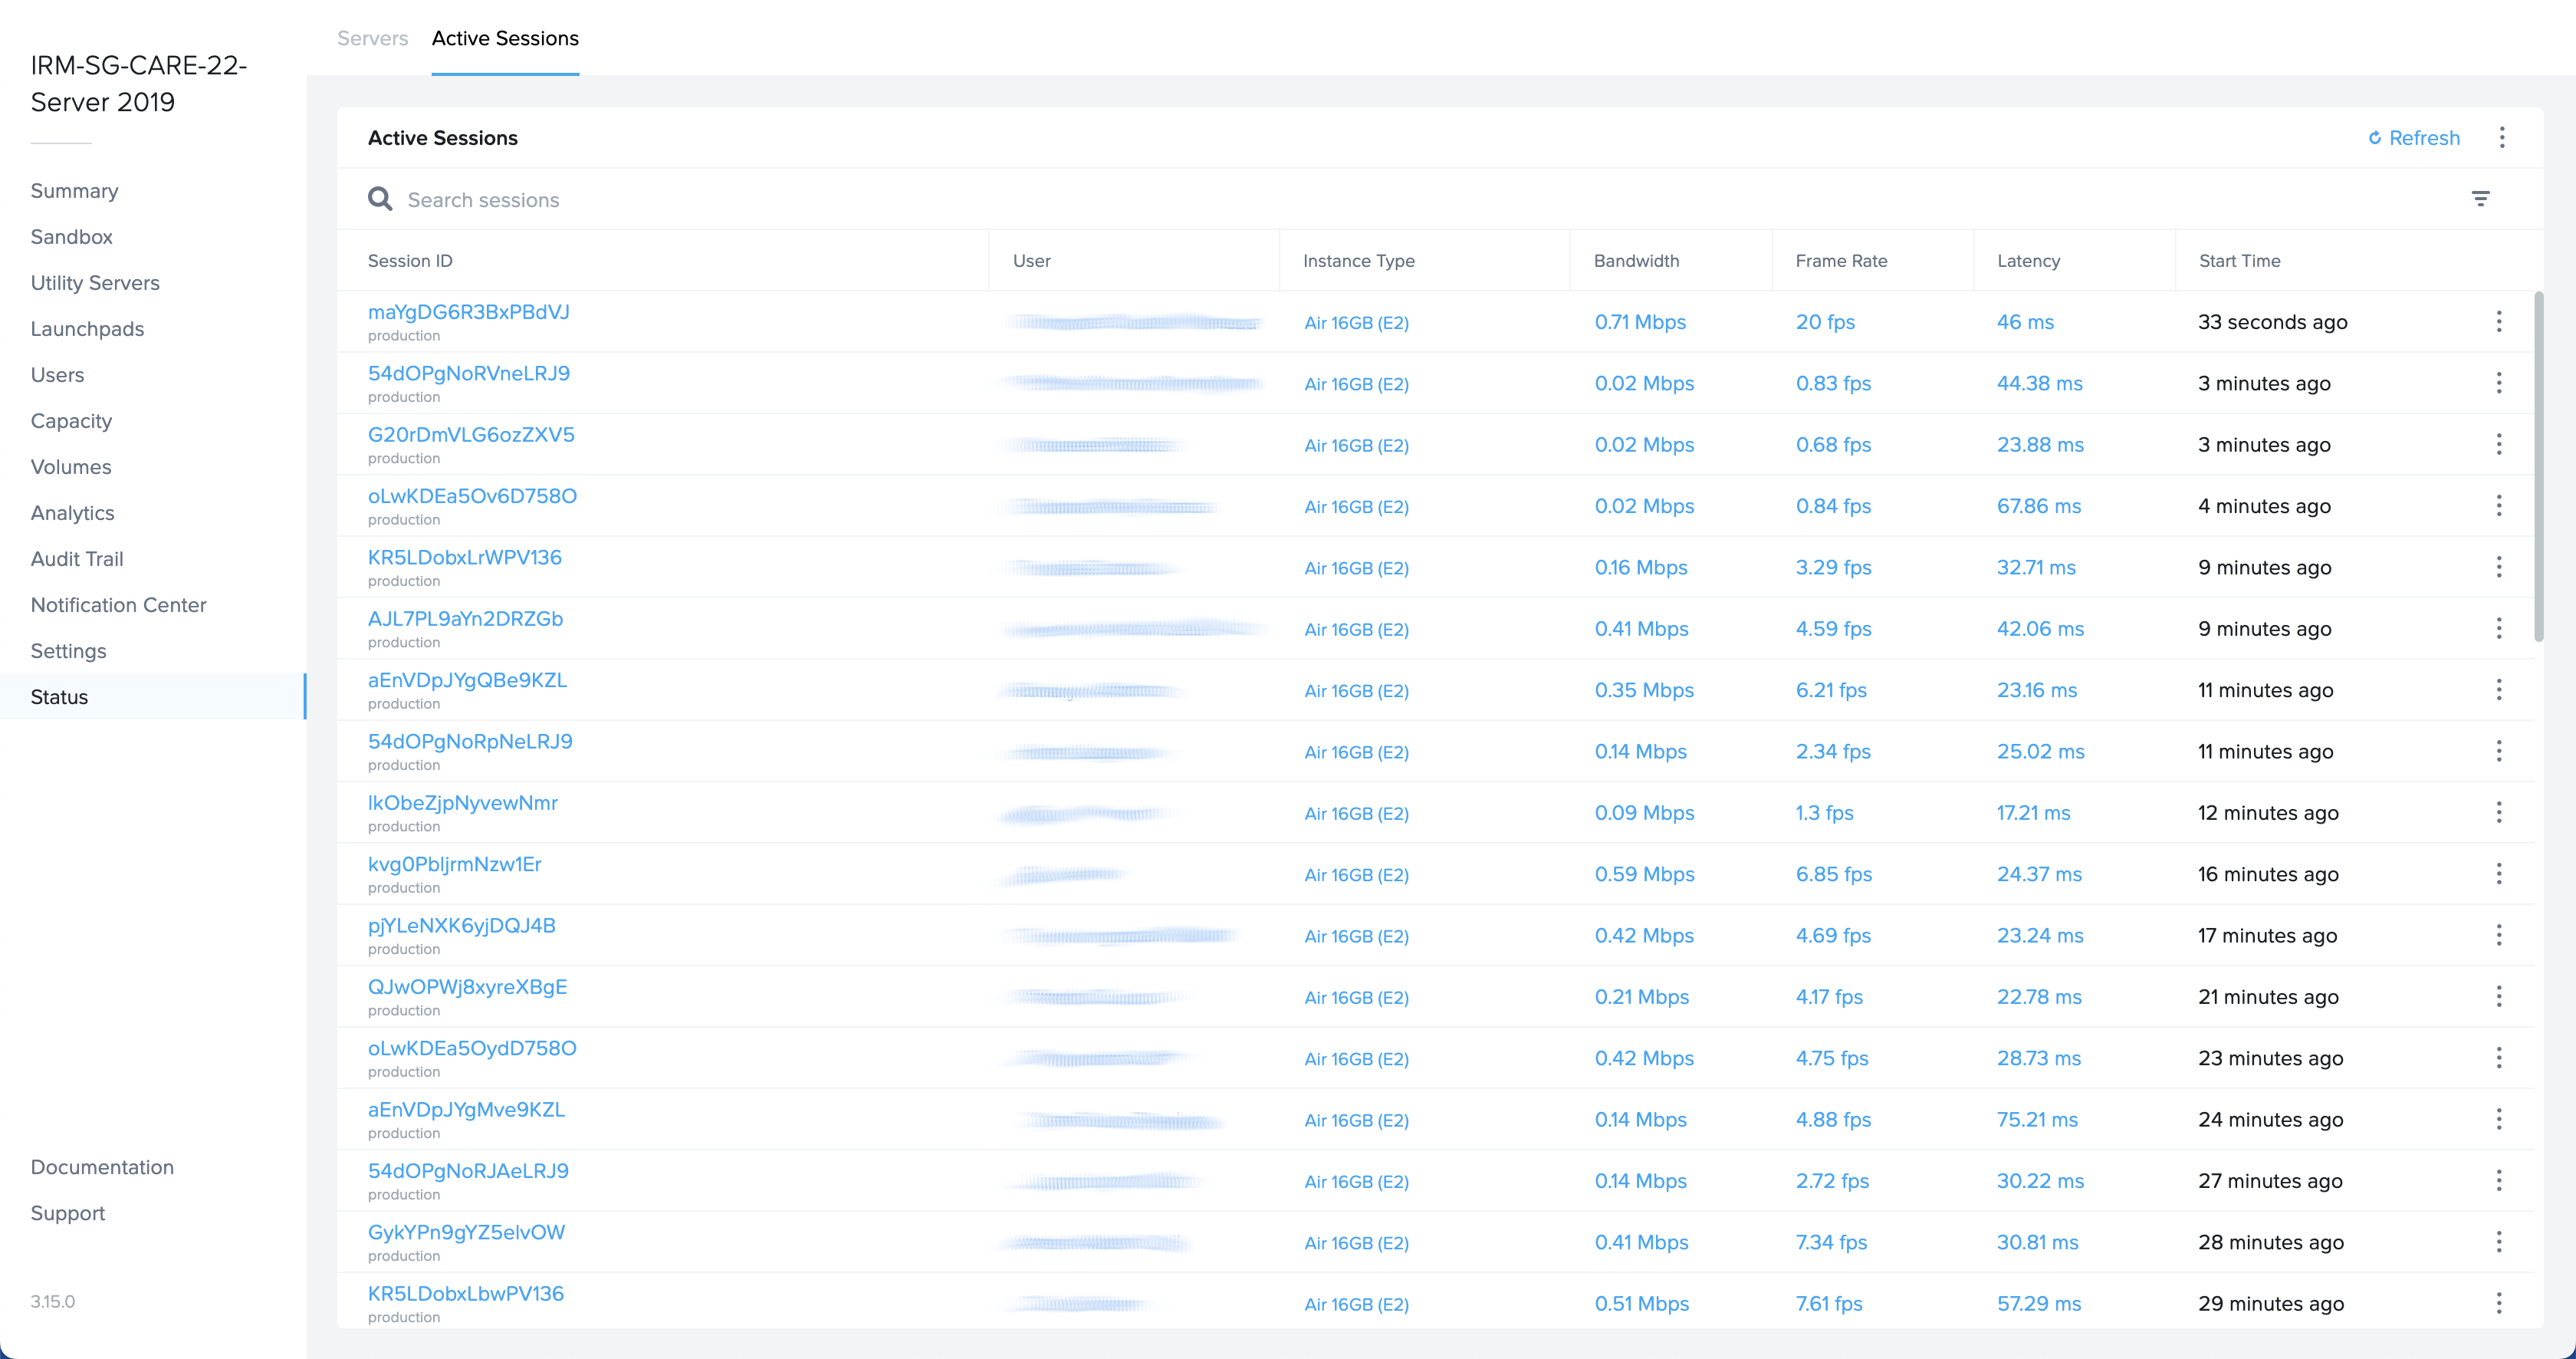 - **Session ID**: Unique identifier for the session. Important to provide when discussing a user session issue with Frame Support. - **User**: First name and last name of the user, as provided by a [third-party identity provider integration](https://docs.difr.com/books/platform-administrators-guide/page/authentication) or [Basic Authentication](https://docs.difr.com/books/platform-administrators-guide/page/basic-authentication). - **Instance Type**: Name of the instance type for this workload VM. Instance type names are specific to the underlying infrastructure. In the case of AHV, the instance type name will be the name you defined under the [Cloud Account](https://docs.difr.com/books/platform-administrators-guide/page/cloud-accounts#add-an-instance-type-ahv-only) for AHV. This name corresponds to the name of the pool in Capacity. - **Bandwidth**: Average bandwidth consumed in the session since session start. Hover over the bandwidth value to see the min, average, and max bandwidth consumed since session start. - **Frame Rate**: Average frame rate in the session since session start. Hover over the frame rate value to see the min, average, and max frame rate since session start. - **Latency**: Average latency measured in the session since session start. Hover over the latency value to see the min, average, and max latency since session start. - **Start Time**: Number of seconds, minutes, or hours since the user started their session.Administrators can see additional details about the user including location data by hovering over the user name tied to the active session.
 The administrator can select the kebab menu to the right of each active session for additional actions: [](https://docs.difr.com/uploads/images/gallery/2025-12/n6simage.png) - **Analytics: S**how detailed information about Network and Streaming, System Health, Login Performance and Application Performance for each session - **Log**: Provides a list of log entries when the session started, disconnected, and resumed. Active sessions will not have a log entry for when the session ended. - **Timeline**: Displays a timeline of the session. - **Close Session**: Administrator can close the active session. The end user will see a message stating that the administrator closed their session. - **Session Shadow:** The [Session Shadowing](https://docs.difr.com/link/137#bkmrk-page-title) feature allow admins to connect to a user session to observe the user's primary display and control the mouse and keyboard, as necessary. # Launchpads The Launchpad is the end user-facing part of the Frame platform interface where users launch and manipulate applications. The Frame platform allows you to have multiple Launchpads that can be customized for different use cases and workflows. Launchpads are attached to Accounts and, at their core, they are a representation of the applications that are available for streaming. An example of a simple application Launchpad:  Clicking on the Rocket icon in the bottom left corner of the page will show users all Launchpads they have access to (including titles and thumbnails). [](https://docs.difr.com/uploads/images/gallery/2025-12/JmBimage.png) [](https://docs.difr.com/uploads/images/gallery/2025-12/hcLimage.png) From this interface, the end user can easily access any or all of the Launchpads they have access to. This provides an efficient entryway into any of their applications and desktops. The rest of this guide will focus on creation and administration of these Launchpads. ## Application vs. Desktop Launchpads End users may use two distinct types of Launchpads. Application Launchpads are designed to serve multiple application sets to end users, while Desktop Launchpads provide a single icon that takes the user to a limited Desktop environment. Desktop environments give users access to applications within the session instead of the Launchpad interface. ## Add a Launchpad Administrators can create and configure Launchpads by navigating to the **Launchpads** page of their **Account Dashboard**. Start by clicking **Add a Launchpad** in the middle of the page.  Application Launchpad is not available with [Persistent Desktop Frame accounts](https://docs.difr.com/link/35#bkmrk-page-title). If you wish to deliver individual applications to your users, create a non-persistent Frame account. Whether you would like to deliver Applications or a Desktop interface to your users, select the desired Launchpad type and enter a name and URL slug into the corresponding fields. For this example, we'll select the Application Launchpad type.  Click **Add Launchpad** once all details have been entered. Your Dashboard interface will now display your new Launchpad: [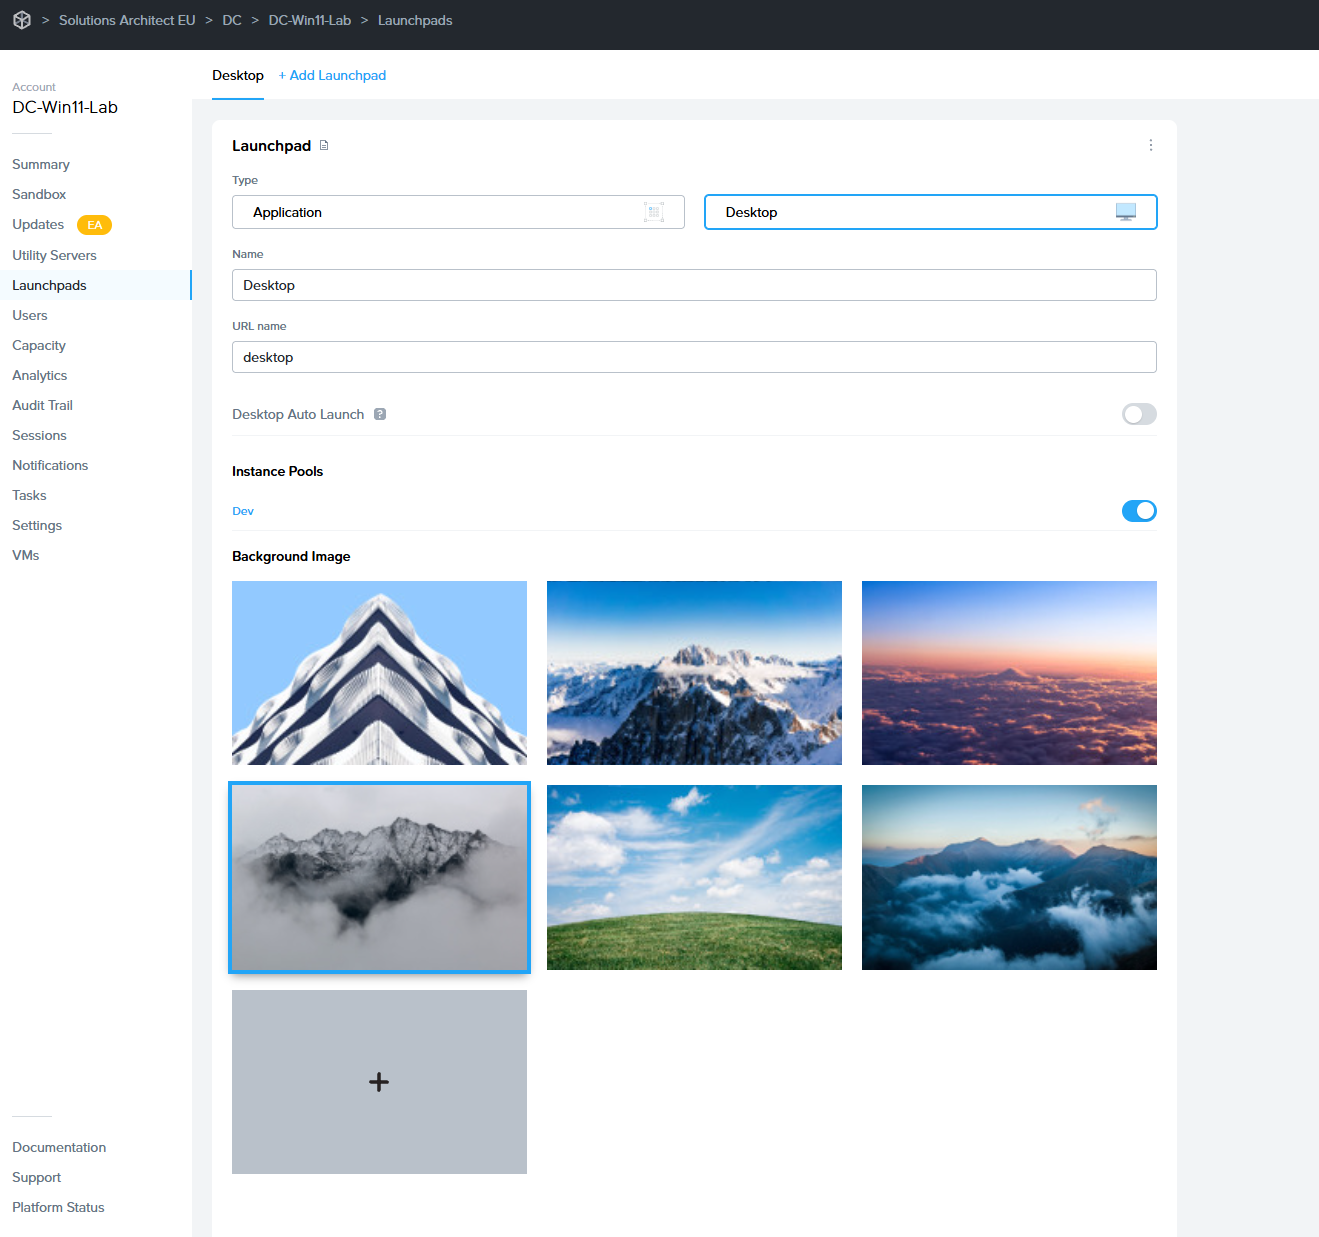](https://docs.difr.com/uploads/images/gallery/2025-12/EM4image.png) ## Configure a Launchpad In the **Launchpad panel**, admins can modify the name, URL name, and instance types they would like accessible to their end users. Admins can also switch between Application and Desktop Launchpad types and select their launchpad background image. Click on the kebab menu in the upper right corner of this section to delete the Launchpad or modify session settings specific to this Launchpad. Read more about session settings by clicking here or navigating to the [Session Settings](https://docs.difr.com/link/144#bkmrk-page-title) section of Frame Platform documentation. ### Application Launchpad Administrators can use the **Layout** section to choose which applications are visible to the end user when accessing their Application Launchpad. Click **Manage Applications** to toggle which applications you wish to display in the layout area.  Admins can group app icons together into folders and/or change the order as desired. Click **Save** once you've made the desired changes.  Here is an example of an Application Launchpad:  #### Application Auto Launch For administrators who want to send users directly into their app session, skipping the Launchpad completely, enable the Application Auto Launch slider. This feature is applicable only for Launchpads with a single application. ### Application Launchpad 2.0 Administrators delivering Frame sessions via [Application Launchpad](#application-vs-desktop-launchpads) can now provide an enhanced experience to end users with **App Mode 2.0**. App Mode 2.0 allows end users to access their onboarded applications from the Frame start menu within the session. [](https://docs.difr.com/uploads/images/gallery/2025-12/m69image.png) 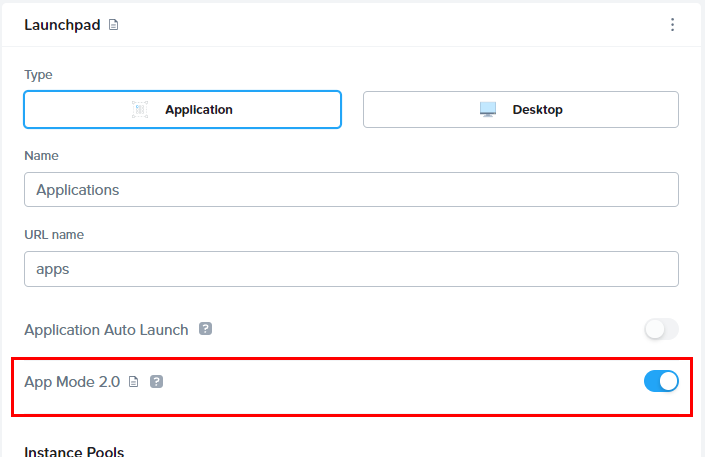 Administrators can hide the Windows Task Bar with App Mode 2.0. Refer to [Autohide the Windows Task Bar in App Mode 2.0](https://docs.difr.com/books/platform-administrators-guide/page/scripting#autohide-the-windows-task-bar-in-app-mode-20) to understand how to use FGA Scripting to set the appropriate registry key to autohide the Windows Task Bar. ### Desktop Launchpad Desktop Launchpad settings are identical to Application Launchpad settings, however, there is no "Applications" section. Desktop Launchpads only consist of one Desktop icon, so there is no layout configuration necessary. 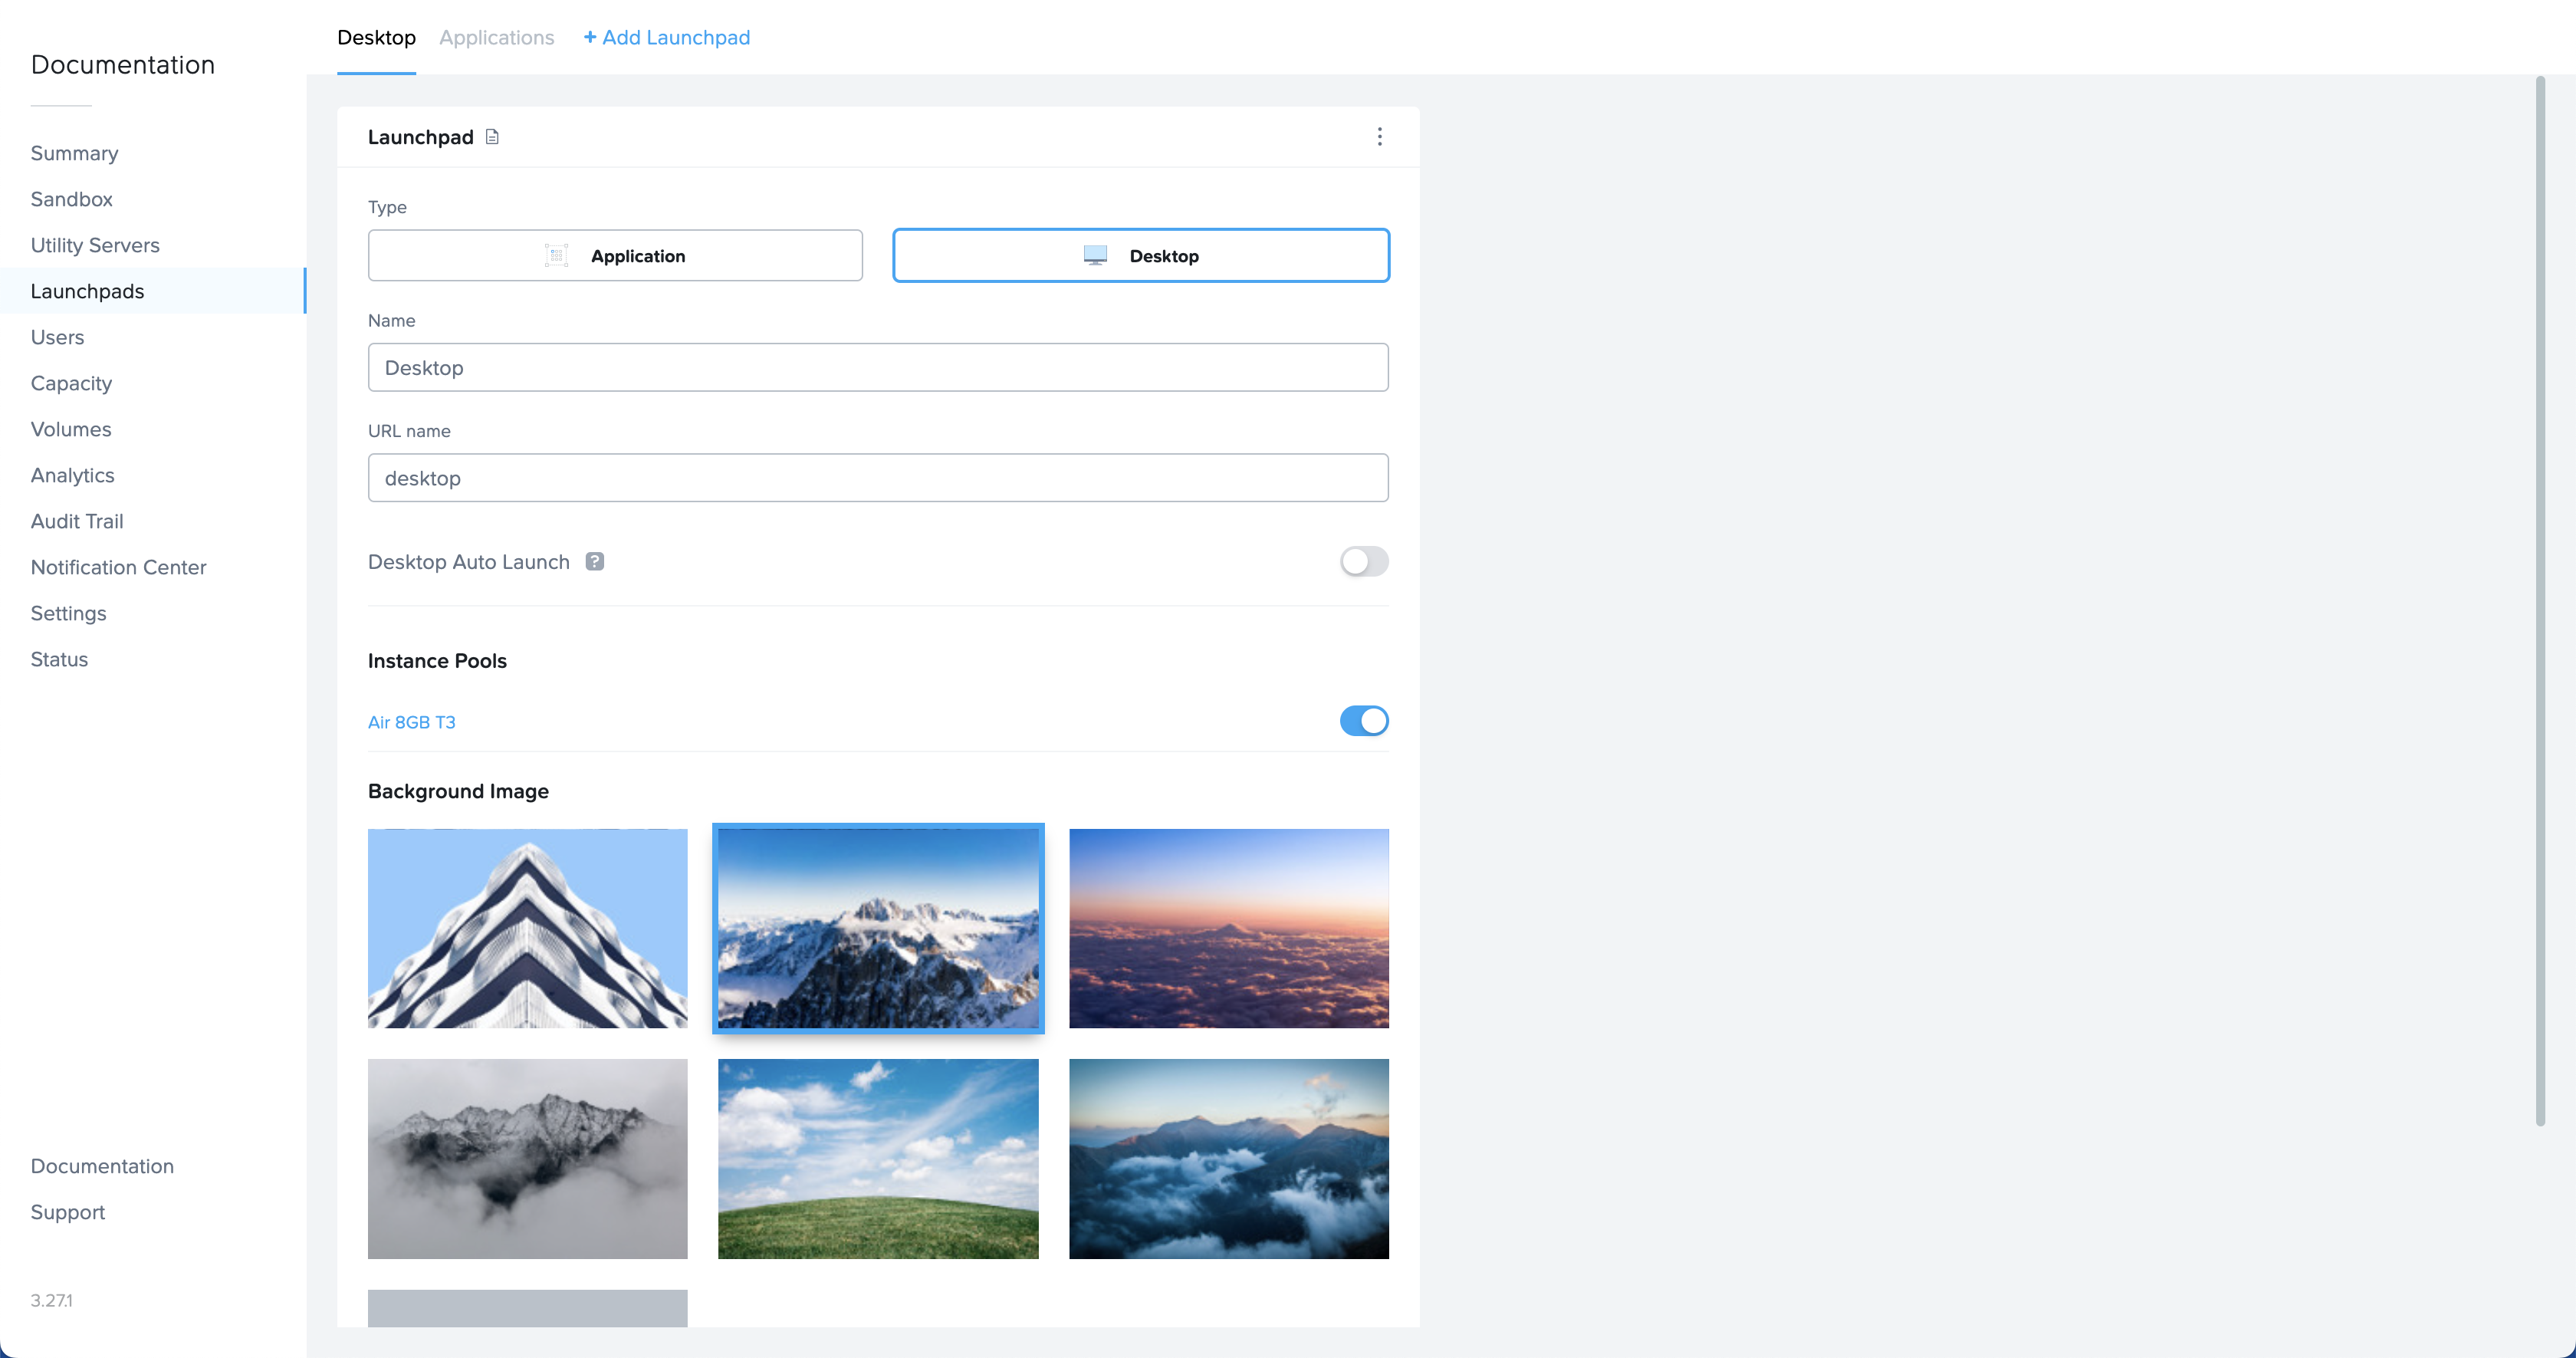 Here is an example of a Desktop Launchpad:  #### Desktop Auto Launch For administrators who want to send users directly into their desktop session, skipping the Launchpad completely, enable the Desktop Auto Launch slider. ### Launchpad Appearance Administrators can add their own custom Launchpad background images by simply clicking the gray plus symbol listed under **Background image** on the Launchpad page of their Dashboard. A file browser will launch, select the image you would like to use for your Launchpad background.  NOTE: Your custom background image cannot exceed 3 MB in size. ## Test Launchpads Test Launchpads are Launchpads tied to Test Pools, which are created with the Test Publish feature. This part of the guide details how to create Test Launchpads. Before you create a Test Launchpad, you must have already done the following: - Enabled the [Test Publish](https://docs.difr.com/link/101#bkmrk-test-publish) Feature in the Settings page of the Dashboard. - [Added at least one Test Pool](https://docs.difr.com/books/platform-administrators-guide/page/capacity#add-test-pool) in [Capacity](https://docs.difr.com/link/114#bkmrk-page-title). - Configured at least a max capacity of 1 for at least one Test Pool. - Performed a [Test Publish](https://docs.difr.com/link/101#bkmrk-test-publish). To create a Test Launchpad, go to Dashboard > Launchpad. Add a new Launchpad and enable the **Test Launchpad** toggle. You need to specify if this Test Launchpad will be an Application or Desktop Launchpad before clicking **Add Launchpad**. 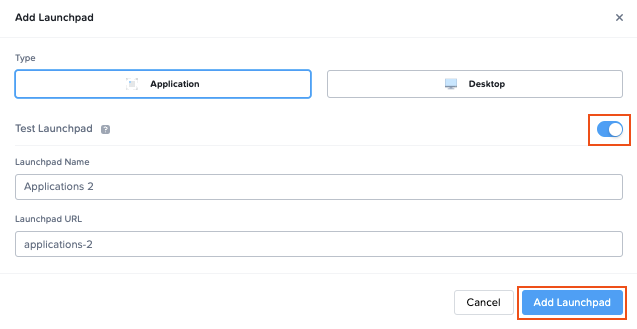 # Bring-Your-Own Workloads (Early Access) ## Overview The **Bring Your Own Workload feature** enables customers to bring their own Windows desktops, workstations, servers, or virtual machines - whether physical, virtual, or cloud-hosted - and integrate them seamlessly into the Dizzion platform for secure, remote access. This functionality Remote PC provides a simple way to add and register workloads that reside outside Dizzion-managed infrastructure, enabling access through the same Dizzion interface and delivering a consistent user experience powered by the Frame Remoting Protocol (FRP) and secured by the Streaming Gateway Appliance (SGA). By creating this type of account and registering your devices (VMs, desktops, or servers), you gain the ability for end users to securely connect to these devices directly through a browser, leveraging WebRTC-based streaming powered by the Frame Remoting Protocol (FRP). This enables consistent, low-latency experience without requiring a VPN or native client installation. This Remote PC feature is applicable for: - Windows PCs, Desktops, Workstations, Laptops. - Racked servers and workstations in on-premises datacenters and co-locations. - Cloud VMs hosted by non-Dizzion-supported infrastructure providers such as Microsoft Hyper-V, Microsoft Azure Stack Local, VMware/Broadcom vSphere, Citrix XenServer, Redhat Virtualization (RHV), Oracle KVM, Proxmox VE, Alibaba Cloud, Oracle Cloud Infrastructure (OCI) and others. - Cloud VMs hosted by Dizzion-supported providers (AWS, Azure, GCP, IBM, Nutanix AHV) where customers prefer not to import the cloud account. The process eliminates the need for traditional cloud setup steps (such as provider, region, or VPC/VNET selection) and allows registration using a single registration code and URL. # Prerequisites Before registering your workloads make sure the following requirements are met: - This feature currently only works for Windows operating systems - Workloads must have outbound network connectivity on TCP port 443 (HTTPS) to access the registration URL, which is provided in the setup instructions below. - All networking requirements must be met as described in the reference documentation [here](https://docs.dizzion.com/platform/networking/requirements). - For manual installation, you need administrative privileges on the workload VMs to install the Frame Guest Agent. For unattended installation, make sure the Frame Agent Setup Tool (FAST) is downloaded and set up for automated installation. - A Persistent Desktop account needs to be set as explained bellow # Workflow ## Step 1 – Create new Persistent Account from Console – New Account Type · In the Create Account wizard, open the Account Type dropdown menu and select ‘Bring Your Own Workload’.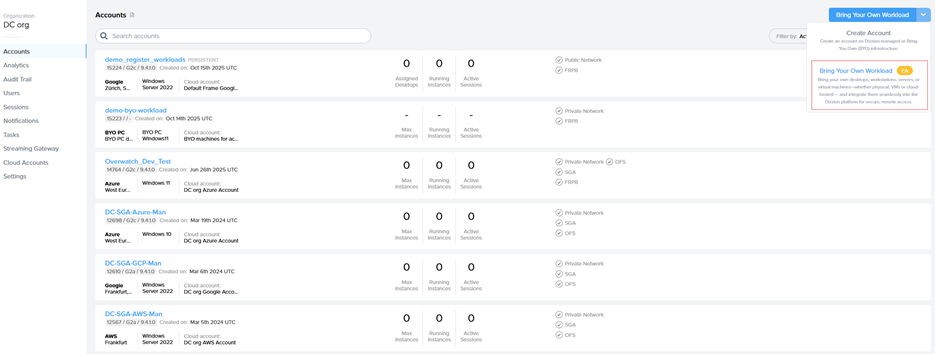 · Enter an Account Name and URL and click Create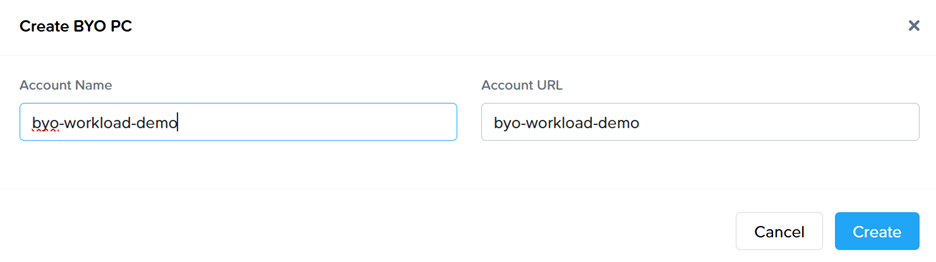 ## Step 2 – Register Workloads · Go to the VMs page and select the “Register Workloads.” 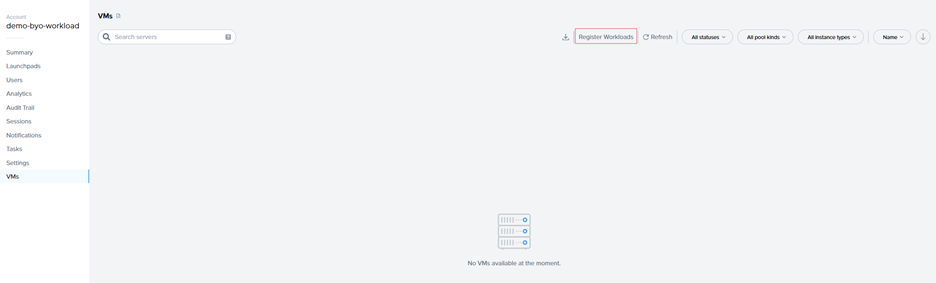 · Specify the number of workloads you want to import into a persistent desktop pool. 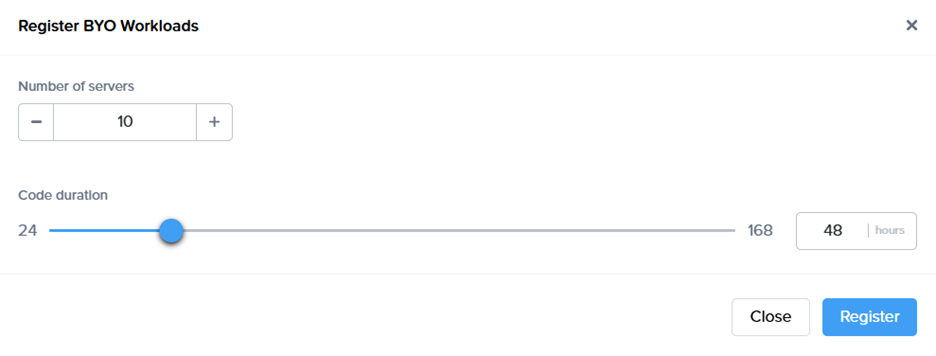 · A registration code with an expiration time, along with the backplane URL will be displayed. Copt the Code and URL so it can be used later. 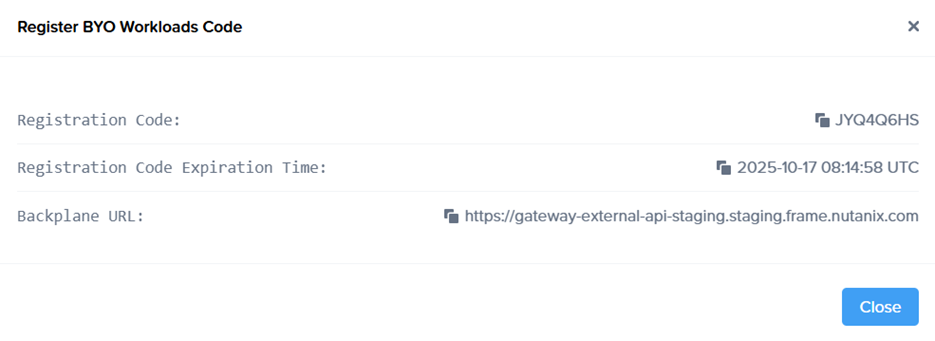 · New objects appear on the VMs page, serving as placeholders until the actual machines register. If the registration code expires, refresh the page to generate a new one.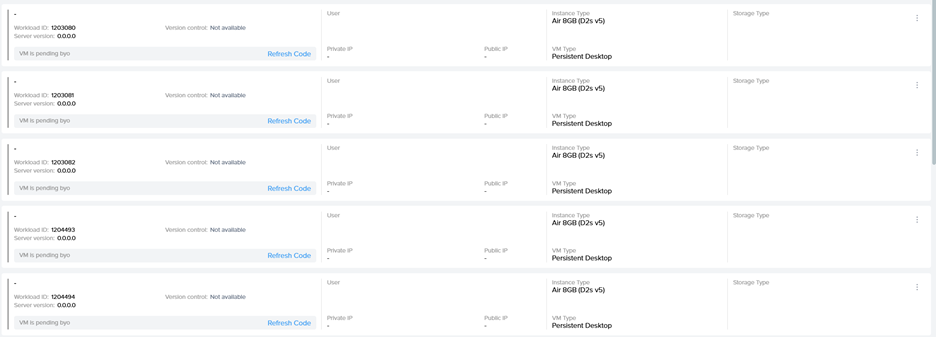 ## Step 3 - Install Frame Guest Agent on Workloads Manual installation On each workload VM, log in physically or connect remotely using VNC, Microsoft RDP, Citrix HDX, Omnissa (VMware) Blast, or another preferred protocol. Download the installer, the Frame Agent Setup Tool (FAST): [http://downloads.difr.com/prod/frame-components/FrameAgentSetupTool.exe](http://downloads.difr.com/prod/frame-components/FrameAgentSetupTool.exe) #### Registration via command prompt: frameagentsetuptool.exe install frameimage registrationcode=<code> registrationurl=<url> Replace <code> and <url> with the values generated in Step 2 of the Workflow. ### Registration via UI: 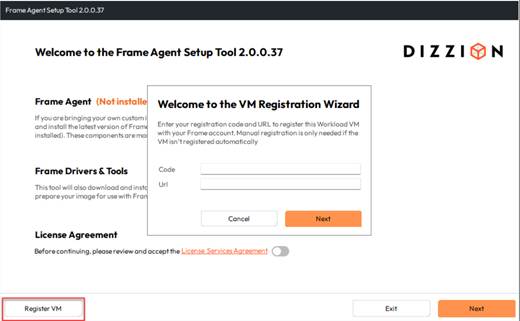 Use <code> and <url> with the values generated in Step 2 of the Workflow. ### Unattended installation For customers who prefer unattended installations of FAST, this can be deployed automatically using standard management tools. #### Recommended Methods - PowerShell Script: Run locally or remotely or distribute via GPO. - Intune / Endpoint Manager: Package FAST as a Win32 app and assign to devices. - Cloud Startup Scripts: Add the command to Azure Custom Script, AWS User Data, or GCP startup metadata for automatic registration at boot. - Use any third-party deployment tool of your choice. ## Step 4 - Automatic Registration After running the command, the Frame Guest Agent automatically registers the workload. Each workload then appears in the Persistent Desktop Production Pool as an unassigned persistent desktop. This normally will take some minutes. ## Step 5 – Create Launchpad Set up a desktop [Launchpad](https://docs.dizzion.com/platform/admin/launchpads#desktop-launchpad) for end users to access these VMs and [configure e.g. SAML2 permissions](https://docs.dizzion.com/platform/identity-and-access/authorization#user-permissions-with-a-saml2-idp). # Notes: Since the workloads are added to Frame without an associated Cloud Account, the Dizzion DaaS and Cloud PC orchestration capabilities available in standard persistent desktop accounts, such as provisioning, scaling, and image management, are not supported. The primary purpose of this account type is to provide secure and remote access to existing devices by leveraging the Streaming Gateway Appliance (SGA) and Frame Remoting Protocol (FRP) for high performance, browser based access to Windows Desktops. There are several limitations to consider: - No Sandbox support: Sandbox creation and related operations are not available. - Limited management actions: Computers can only be rebooted (soft reboot through the Frame Guest Agent) or terminated (removed from the Frame console without actions on the device itself). - Persistent desktop operations such as backup, restore, resize, and similar actions are not supported. - Manual assignment required: Imported desktops are not automatically assigned to users. - Enterprise Profiles, Personal Drives, and Domain Joined settings are not available. # Sandbox Sandbox, Install and onboard Apps, Pubishing, Updates # Sandbox Each Frame Account has a Sandbox - a virtual machine provisioned specifically to allow you to manage the operating system and applications for the Frame account. The Sandbox image acts as a template for the rest of your workload VMs. For non-persistent Frame accounts, any changes made to the Sandbox image (e.g., updating Windows OS or Linux OS, installing or updating applications) will be served to your users as soon as you [Publish](https://docs.difr.com/link/101#bkmrk-page-title). **GRAPHIC GOES HERE** For persistent desktop Frame accounts, any changes made to the Sandbox image (e.g., updating Windows OS or Linux OS, installing or updating applications) will be made available to new users after you [Publish](https://docs.difr.com/link/101#bkmrk-page-title) and the new users are assigned to their persistent desktop. Already assigned persistent desktops will not receive those Sandbox changes. Refer to [Persistent Desktop Lifecycle](https://docs.difr.com/books/platform-administrators-guide/page/google-cloud-platform#persistent-desktop-lifecycle) for more details. ### Access your Sandbox The Sandbox is accessed from the Frame Dashboard menu (`Dashboard > Sandbox`). From this page you can power it on, start the Sandbox session, and make desired changes to your operating system and applications. [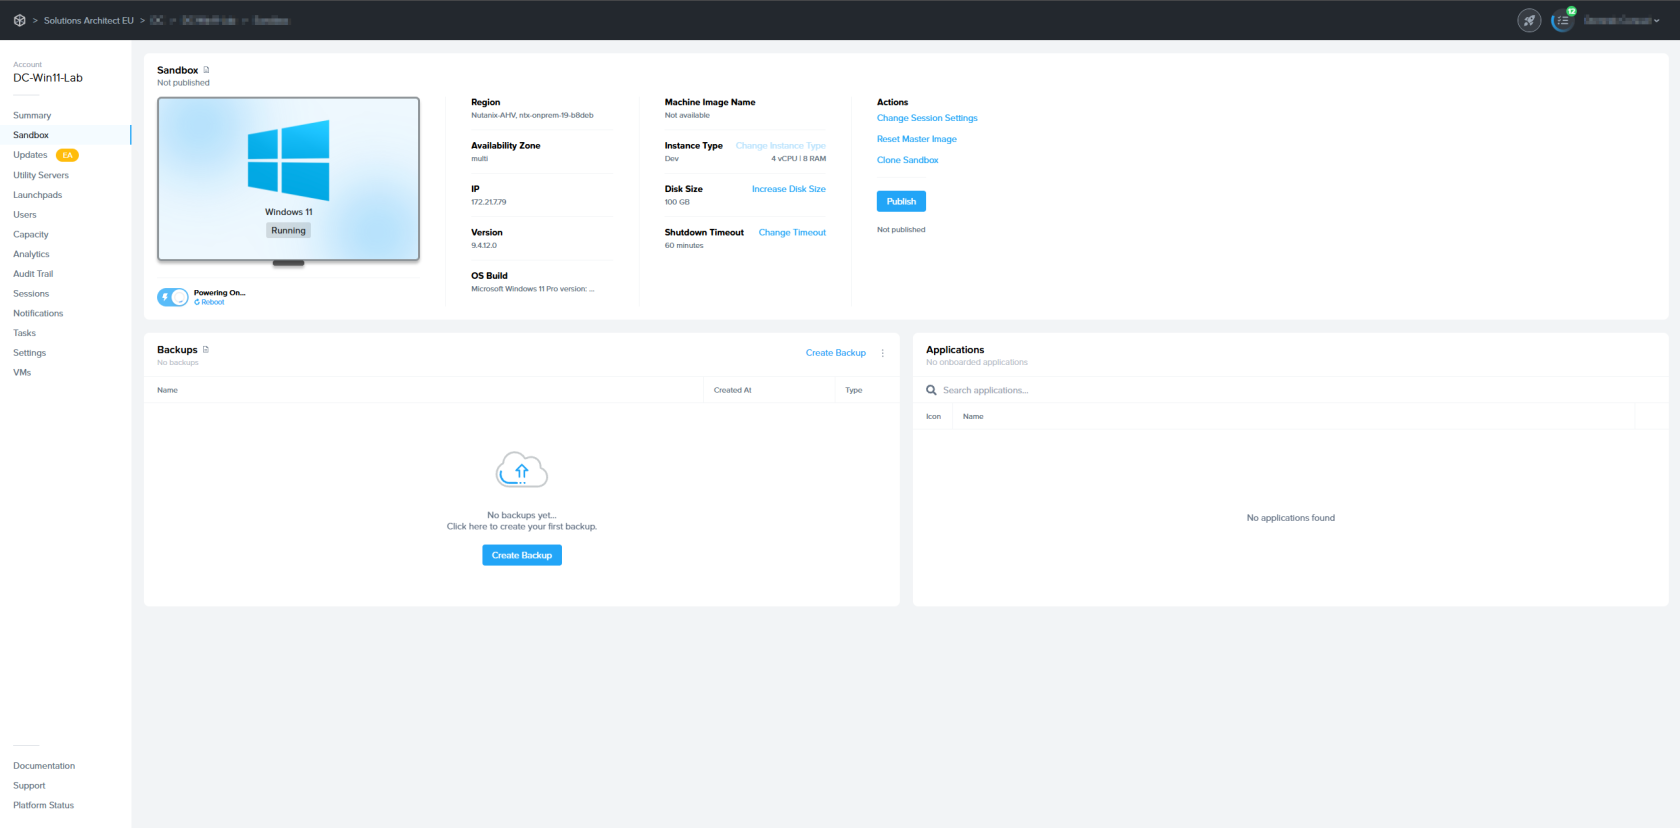](https://docs.difr.com/uploads/images/gallery/2025-12/6Jnimage.png) Once the Sandbox is powered on, you can start a session by clicking on the **Start Session** option. If the Sandbox is currently being used by an admin, the system will first prompt you to confirm that you wish to close the existing session. [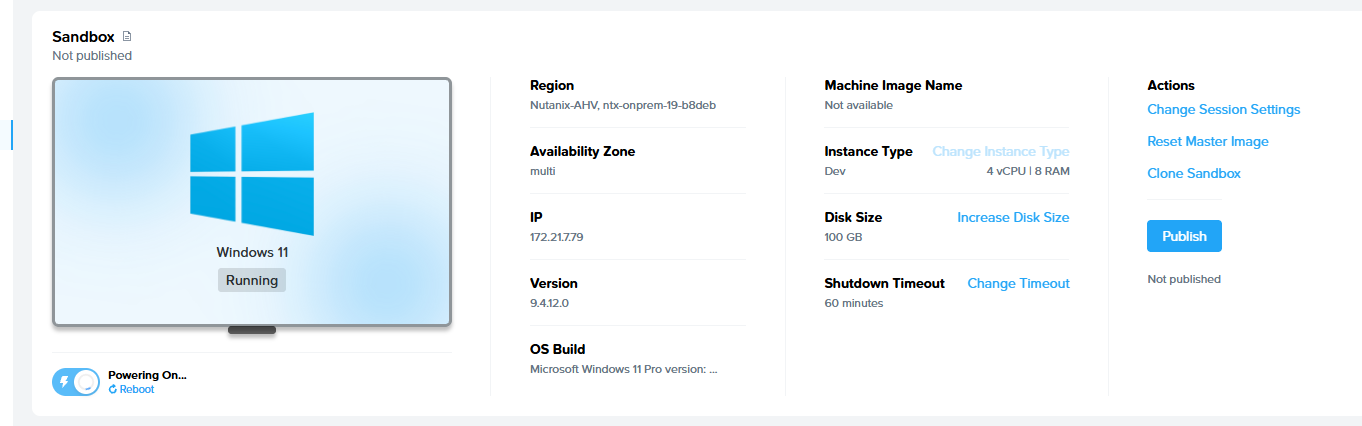](https://docs.difr.com/uploads/images/gallery/2025-12/dHeimage.png) ### Installing and Publishing With your Sandbox in place, you can install apps and customize your experience. Then, once it's all configured, it's time to deploy or **Publish** the Sandbox as a disk image to your instances. ## Sandbox Options ### Power Off or Reboot When the Sandbox is powered on, the admin can power off or reboot the Sandbox by clicking the power slider or select the reboot option [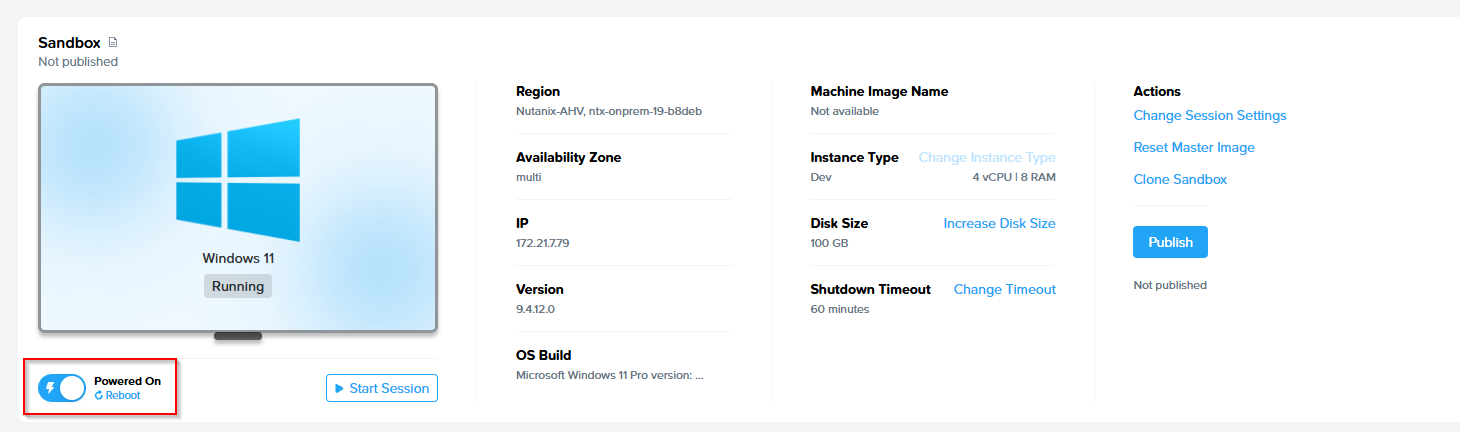](https://docs.difr.com/uploads/images/gallery/2025-12/oxIimage.png) If an administrator chooses to reboot the Sandbox while another admin is accessing it, the system will prompt the admin to choose whether to **reboot** or **force reboot** the Sandbox. Choosing reboot will ensure the Sandbox is rebooted once the active Sandbox session is closed. The force reboot option will immediately close the active session and reboot the Sandbox. 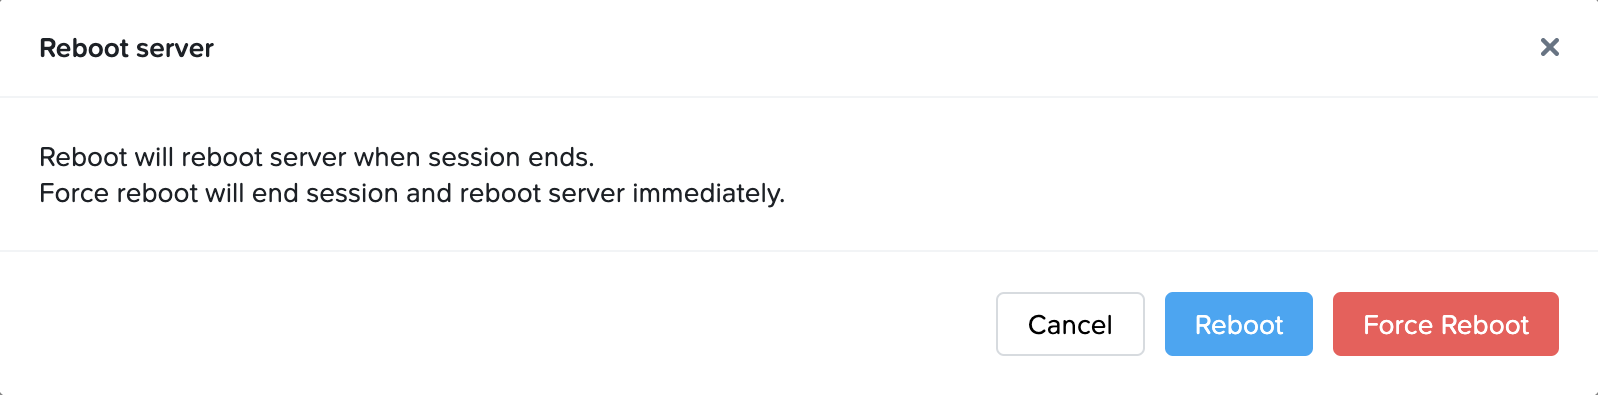 ### Change Instance Type The Sandbox instance type is defined by the administrator during account creation, however, this can be changed (provided the Sandbox VM is powered off) at any time. Changing the Sandbox instance type can be helpful if you wish to: - Test your applications and configuration on Sandbox VMs with a different instance type - Install or update applications that require a specific instance type. For example, an admin may wish to install a CAD application that requires a GPU. It can be helpful to switch to a GPU-based instance type and then back to a CPU-only instance type for installation/update tasks that don't require a GPU. For public cloud infrastructure, changing the instance type requires the new VM to power on after the existing Sandbox disk is attached to the new VM and the old VM is terminated. Click **Change Instance Type**. A dialog will appear prompting you to select a new instance type for your Sandbox. 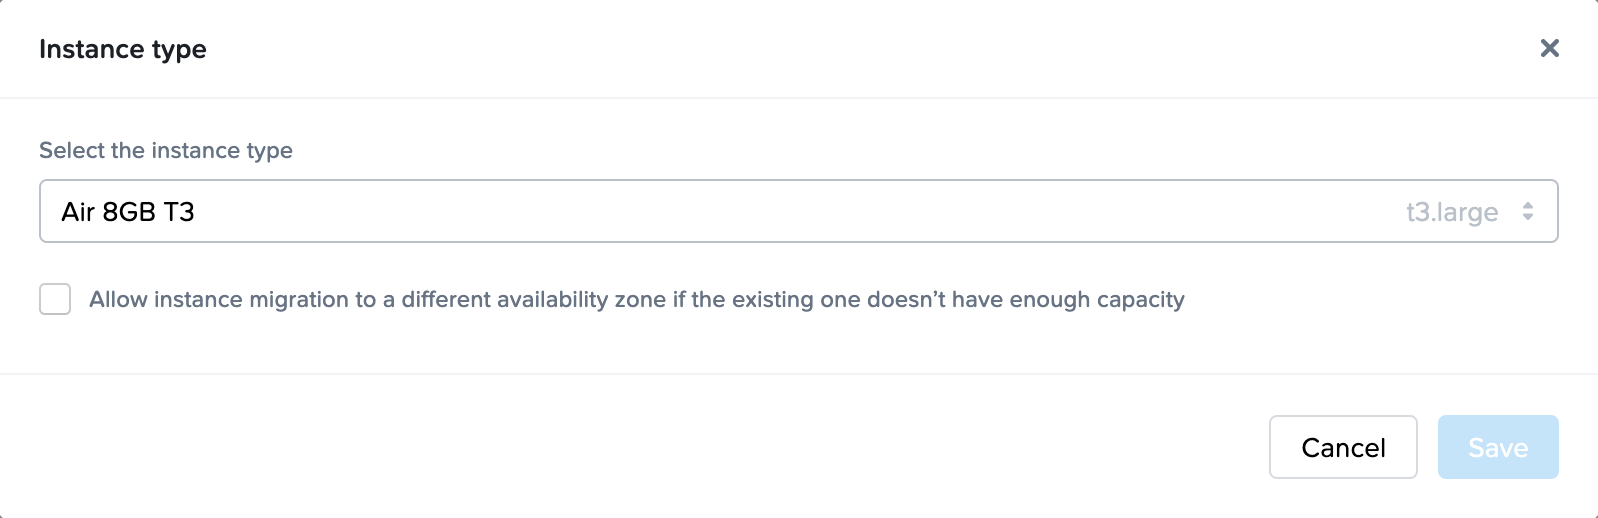 ### Increase Disk Size If your users need a larger C:\\ drive, you can increase the size of the Sandbox disk in increments of 1 GB. If you are using Azure, you will only be allowed to increase the disk size in discrete disk sizes. 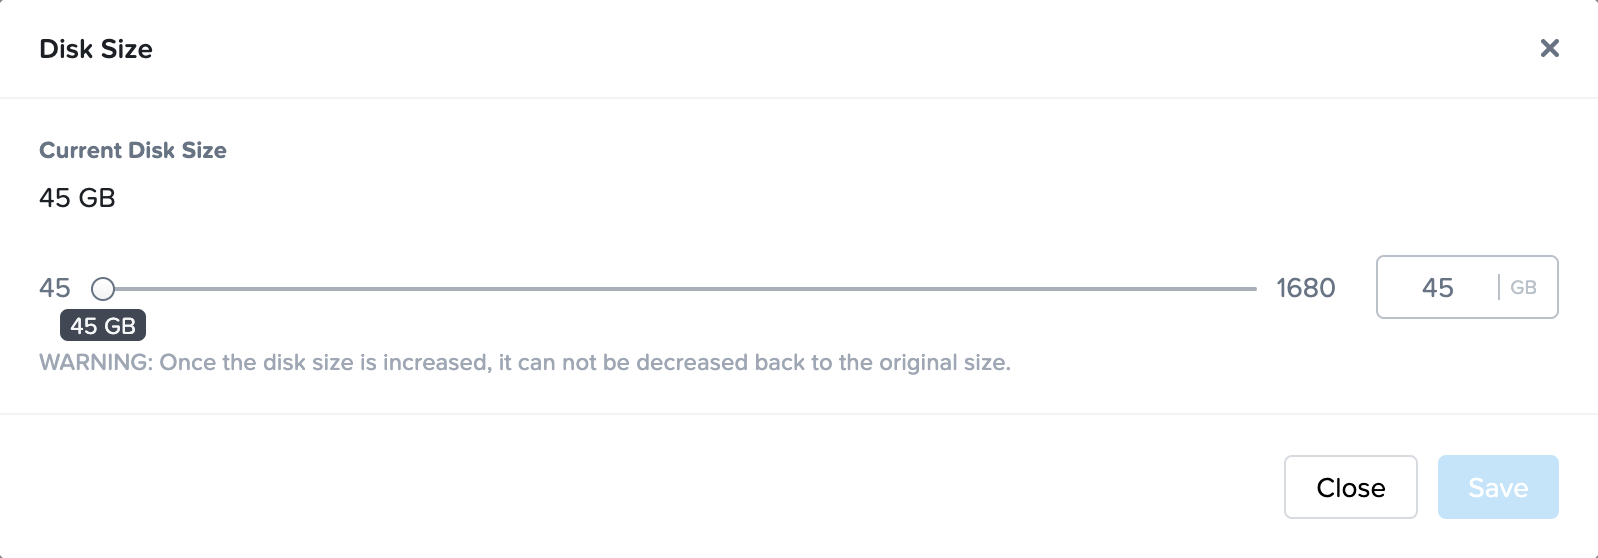 Increasing the size of the disk should be used with caution as this operation is irreversible. ### Sandbox Session Settings Frame admins can change the behavior of the session by overriding the default account-level session settings. To override the account settings, simply disable the **Use account settings** slider. You will then be allowed to edit the settings. [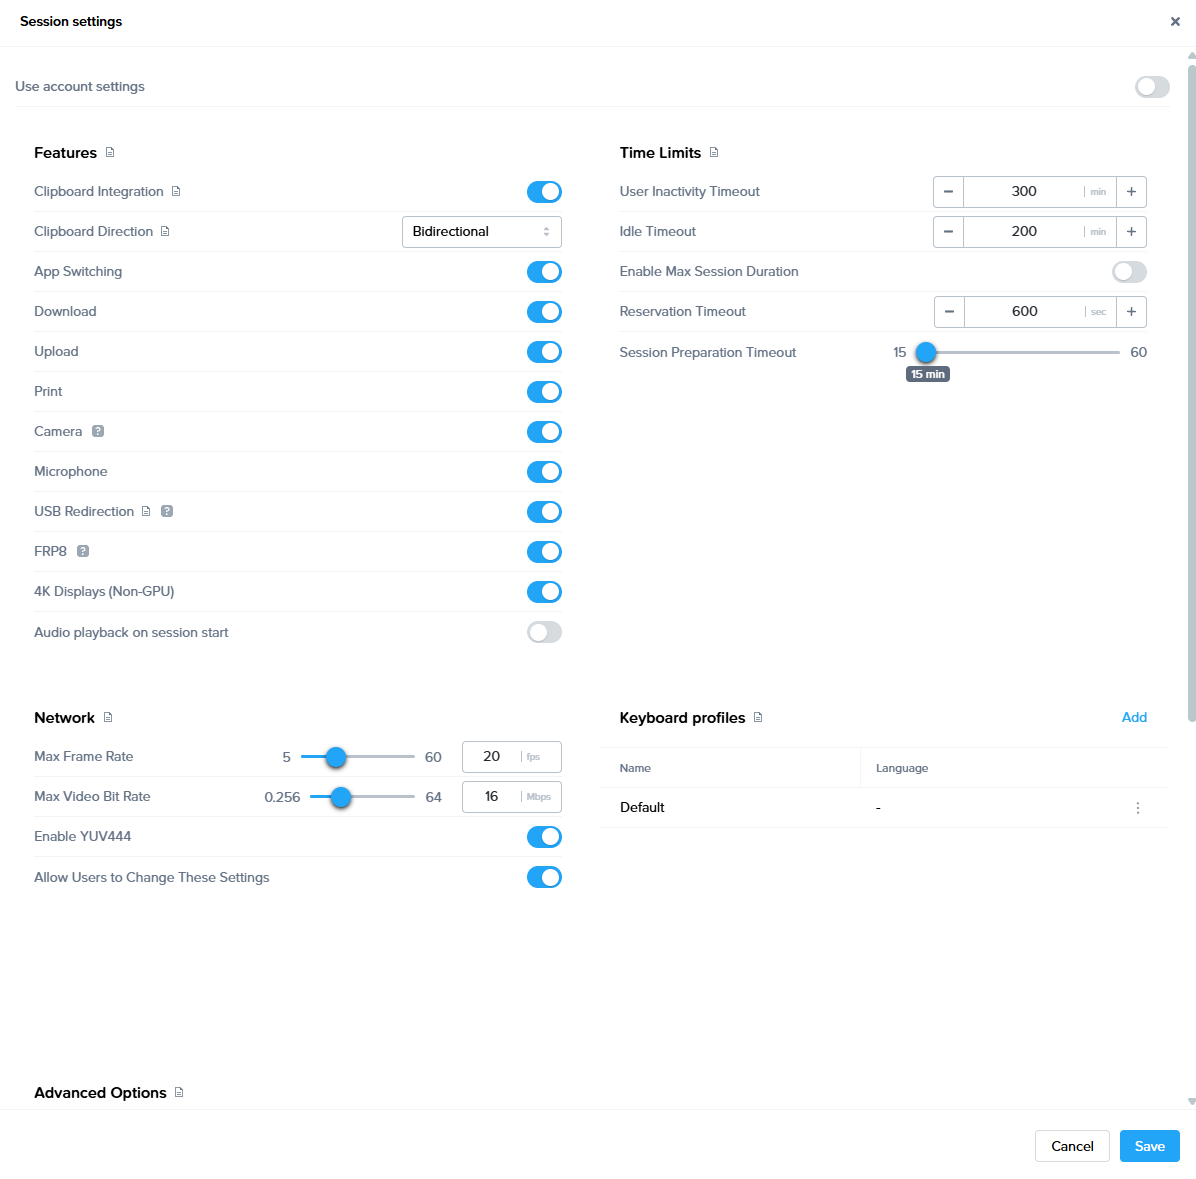](https://docs.difr.com/uploads/images/gallery/2025-12/SR5image.png) This is particularly important when Frame admins need ample time to install/configure applications, update their operating system/applications, or to test specific features. We recommend increasing the Sandbox Time Limits for this work to prevent your Sandbox session from ending prematurely. As a best practice, specific timeout settings to consider increasing are: - User Inactivity Timeout - Idle Timeout You may also want to review and enable features that allow you to do your work more efficiently, whether or not your users are allowed to use the same features in their Frame sessions: - Clipboard Integration - Download, Upload, and Print - USB Redirection Refer to [Session Settings](https://docs.difr.com/link/144#bkmrk-page-title) for details of each session setting parameter. ### Cloning The Sandbox disk image can be cloned (copied) to other Frame accounts, provided the source and destination Frame accounts share the same cloud account (public or AHV). Refer to [Cloning](https://docs.difr.com/link/117#bkmrk-page-title) for details on how to clone a Sandbox (or a Sandbox backup) to one or more destination Sandboxes. ### Backup and Restore There are 3 different ways to perform a backup of your Sandbox image: 1. Publish: when you start a publish, your Sandbox disk will automatically be backed up. 2. Manual backup: you can manually backup your Sandbox disk at any time. 3. Automated backup: you can schedule a task to backup your Sandbox with a daily or hourly periodicity. Refer to [Backups](https://docs.difr.com/link/129#bkmrk-page-title) for additional information on these three backup approaches and how to restore the Sandbox disk from a backup. ### Reset Master Image If you have used your own image ([BYO Image](https://docs.difr.com/link/69#bkmrk-page-title)) to create your Frame account, you will have the option to reset your Sandbox image back to a template image of your choice, as specified in your Cloud Account, under the Template Images tab. Reset Master Image will terminate your existing Sandbox VM and provision a new Sandbox VM with a same instance type using a copy of the default template image. If you are using Application Launchpads, you must ensure that the onboarded applications are in the new Sandbox VM and/or manually remove the onboarded application entries from the Sandbox page to match what is in the Sandbox before publishing the Sandbox. 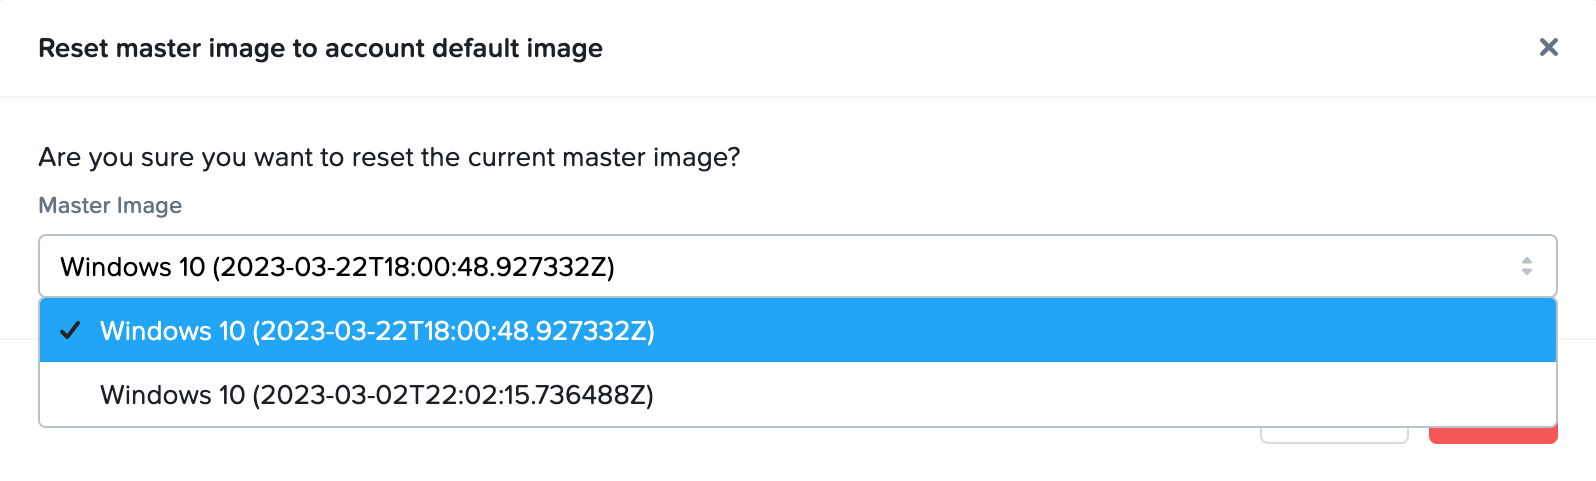 Once you have selected the template image that will be used, click **Reset** to proceed with the replacement of your Sandbox image. 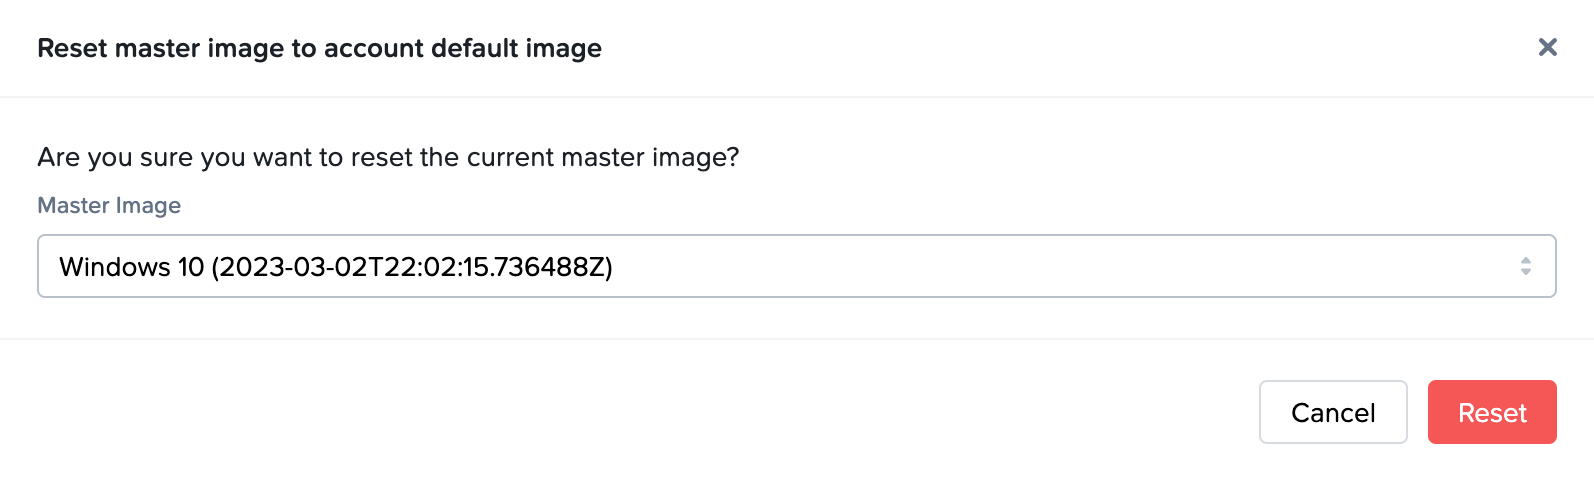 ## Updates The **Updates** page of your Account Dashboard will display any needed OS or Frame-related updates for your Sandbox. More details can be found in the [Updates section](https://docs.difr.com/books/platform-administrators-guide/page/updates) of our documentation. ## Local Group Policies In order for users to be able to use Frame, administrators must ensure that the following Windows Local Group Policy requirements are met.| Policy | Location | Required Value | Explanation |
|---|---|---|---|
| [Interactive logon: Don't display last signed-in](https://learn.microsoft.com/en-us/windows/security/threat-protection/security-policy-settings/interactive-logon-do-not-display-last-user-name) | Computer Configuration\\Windows Settings\\Security Settings\\Local Policies\\Security Options | Enabled | Auto-login is required for the Frame session to be able to start. |
| [Interactive logon: Message title for users attempting to log on](https://learn.microsoft.com/en-us/windows/security/threat-protection/security-policy-settings/interactive-logon-message-title-for-users-attempting-to-log-on) | Computer Configuration\\Windows Settings\\Security Settings\\Local Policies\\Security Options | Not defined | Frame session will not start if the title is defined. |
| [Interactive logon: Message text for users attempting to log on](https://learn.microsoft.com/en-us/windows/security/threat-protection/security-policy-settings/interactive-logon-message-text-for-users-attempting-to-log-on) | Computer Configuration\\Windows Settings\\Security Settings\\Local Policies\\Security Options | Not defined | Frame session will not start if the message is defined. |
| [Password protect the screen saver](https://learn.microsoft.com/en-us/troubleshoot/windows-client/group-policy/disable-screen-saver-passwords) | User Configuration\Administrative Templates\Control Panel\Personalization | Disable | Frame session will not start or resume if the screen saver requires a password. |
Do not:Remove the `Frame` user from the local Windows Administrators group. - Modify the `Frame` user permissions in `Computer Configuration\\Preferences\\Control Panel Settings\\Local Users and Groups`. - Change the `Frame` user password.Remove the `FrameUser` user (if the Enterprise Profile feature is to be used in a non- domain-joined pool of workload VMs). - Change the `FrameUser` user password (if the Enterprise Profile feature is to be used in a non-domain-joined pool of workload VMs). - Modify the local user password policy or implement a stronger password policy.
Otherwise, you will not be able to access the workload VMs using Frame Remoting Protocol. Changing these passwords on a workload VM can cause the Frame session to fail to start. If a password management solution such as Microsoft Local Administrator Password Solution (LAPS) is used, the two Frame-specific users must be excluded. ## Frame-specific Local Linux User Frame adds one local Linux users to each Linux workload VM: - `frame` - a local Linux user. The same warnings from the local Windows user `Frame` listed above apply for the local Linux user `frame`. ## Local Frame User Password Policy The `Frame` (Linux and Windows) and `FrameUser` (Windows only) password is rotated automatically by Frame for each Frame session. These passwords have the following characteristics: - Randomly generated - 25 characters long - Contains 4 uppercase characters - Contains 4 lowercase characters - Contains 4 numeric digits - Contains 8 special characters (`!`, `@`, `#`, `$`, `%`, `^`, `&`, `*`, `(`, `)`, `,`, `.`, `?`, `:`, `{`, `}`, `|`, `<`, `>`, `_`) # Install and Onboard Apps In general, if you are planning to only deliver virtual desktops to your users, then onboarding applications is not required – simply install your desired applications to the Sandbox. If you wish to make individual applications available to your users via an Application Launchpad, you will need to install and onboard each application. Onboarding an application for your users registers the application with the Frame control plane and prepares it to be shared as an individual application without the desktop being visible. Once you have installed or updated your applications for either Desktop or Application Launchpad, you must [publish](https://docs.difr.com/link/101#bkmrk-page-title) your Sandbox to make the applications available to your users. This guide will show Frame administrators the basics of installing, onboarding (if required), and deleting applications for their users.AWS-specific best practice
When an Amazon Elastic Block Storage (EBS) volume is created for each AWS Elastic Cloud 2 (EC2) instance provisioned during the publishing process, Amazon does not copy all of the Simple Storage Service (S3) blocks of the underlying EBS snapshot into the EC2 instance's EBS volume. This allows the EBS volume to be used immediately. Any S3 blocks that are subsequently needed are then loaded into the EBS volume on-demand ("lazy loading"). This AWS-specific behavior can result in slower than expected application and file loading until the relevant S3 blocks are loaded into the EBS volume. For customers providing virtual desktops using AWS infrastructure, Frame recommends administrators install and onboard applications in the Sandbox. The first time the EC2 instance is provisioned and powered on, Frame will start up all onboarded applications to force the applications' S3 blocks to be loaded into the EBS volume, in order to speed up application start up time.The onboarding process only applies to executables (.exe files), scripts which launch executables, and shortcuts that point to executable files.
1. Go to the **Sandbox** page of your account's *Dashboard*. Click **Power On** to boot your Sandbox if needed . When the Sandbox is available, click **Start Session**. [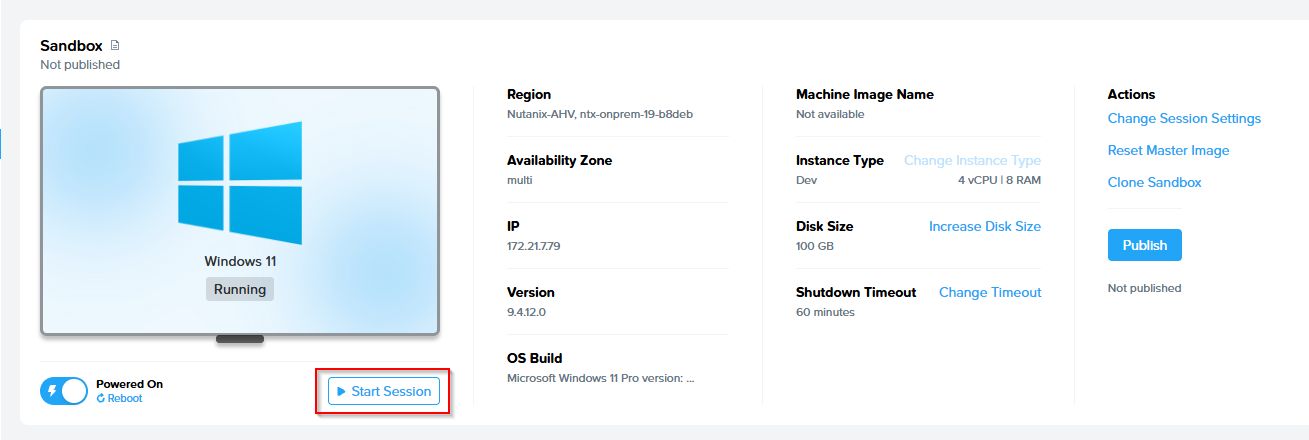](https://docs.difr.com/uploads/images/gallery/2025-12/0t3image.png) 2. If your installer is available online, you can download it directly using the browser in your Sandbox (Chrome) – this will be the fastest method for large installers. If your installer is not available online, and you have it on your local machine, you can upload it to your Frame session from your local machine. Additionally, you can opt to connect your cloud storage account to your Frame account, which would enable you to see the files in a virtual drive in your Sandbox. You can connect your cloud storage accounts from the admin menu in the upper right corner (to the right of the Sandbox image) or from within your Sandbox session by clicking on the icons at the bottom right corner of your desktop session. 3. If you downloaded your installer using the browser in the Sandbox, simply launch the setup file from the "Downloads" folder. If you used a cloud storage account, navigate to "Computer" and open the appropriate drive (e.g., X: drive for Box). If you uploaded your installer from your local machine, you can access it by going into the "Uploads" folder.**Caution** Copy your setup file(s) from the original drive to the C: drive, and then run the installation of your app as you would on a PC from the local **C: drive**.
Tip
Looking to automate app onboarding? If you're interested in scripting and automating app onboarding, see [Onboard applications via CLI](https://docs.difr.com/link/176#bkmrk-session-api-referenc).To manually onboard an application, simply right-click on the application in the program menu or directly on the application's .exe file in its install folder (e.g. in the "Program Files (x86)" or "Program Files" folder) and select "Onboard to Frame."
5. Test your application from within the Sandbox to make sure everything is functioning as expected (for instance, if you need to enter a license code/load a license file, do so now). If you onboarded the application, you can disconnect from your Sandbox session by selecting **Disconnect** from the gear menu. You will see your newly onboarded application as an application icon in your Dashboard next to your other onboarded apps. Set custom application properties by hovering over your icon and selecting the gear icon.  ## Delete Onboarded Applications If you wish to remove a particular application from your users' Launchpad, you can do so easily from the account Dashboard by following the steps below: 1. Navigate to the Dashboard. On the *Sandbox* page of the *Dashboard*, look for the **Applications** section near your Sandbox. Hover over the application you would like to get rid of – you should see a gear icon and trash can icon, like this:  2. Click on the trash symbol to schedule the deletion of the application on the next publish. This means that your users will still see the application in their Application Launchpad until the next time you publish. ## Uninstall an Application If your application has been installed on the Sandbox and you want to ensure that your users are no longer able to access the application (especially if they are using a Desktop Launchpad), you must uninstall the application from your Sandbox. 1. To uninstall applications, launch your Sandbox, click on the Windows Start button and select "Installed apps" [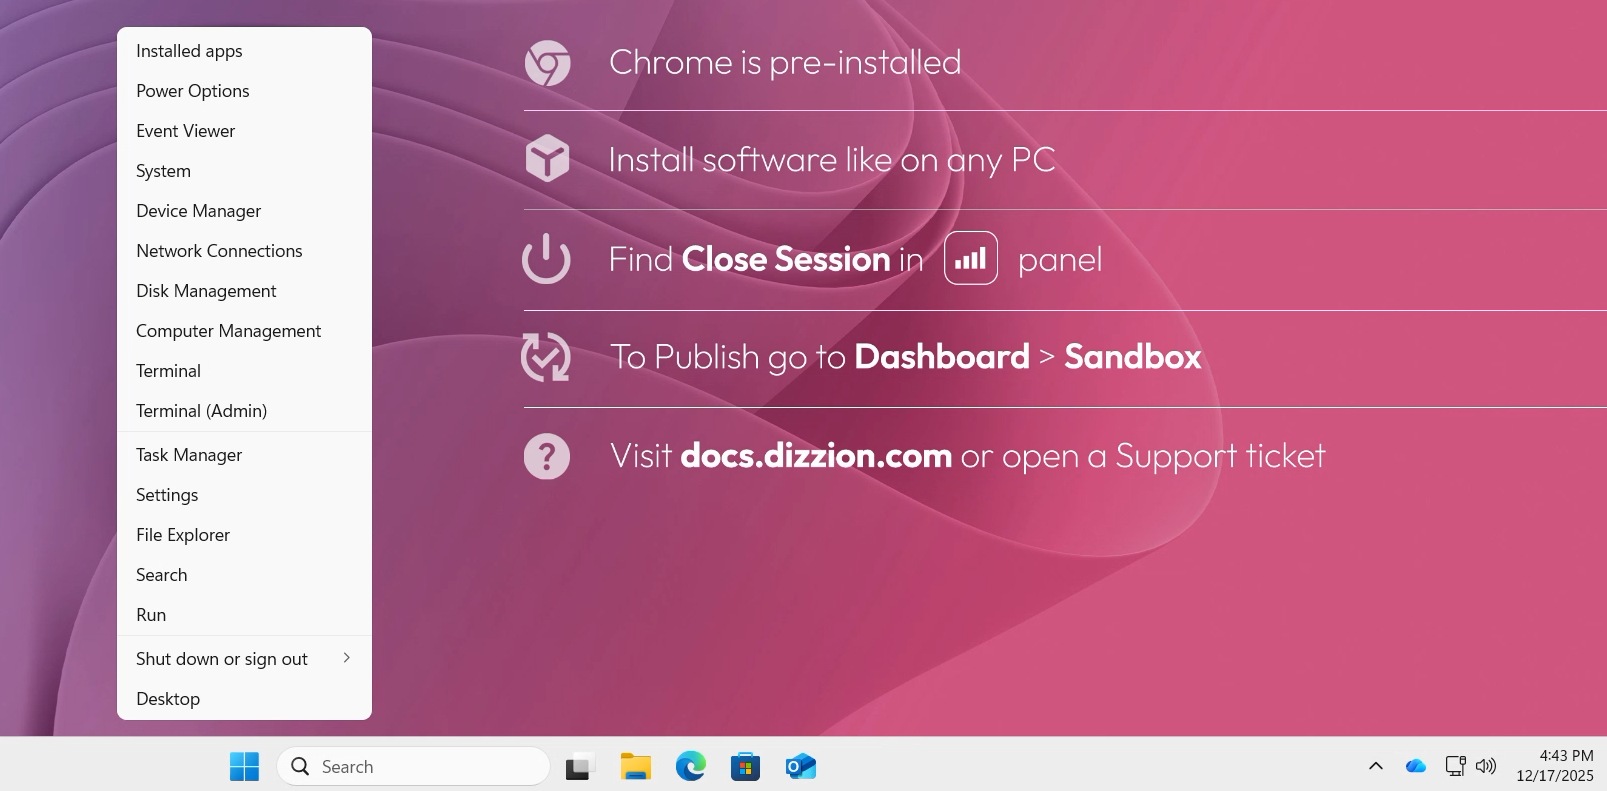](https://docs.difr.com/uploads/images/gallery/2025-12/OX2image.png) 2. A new window will pop up, from there you can see a list of all installed Applications, and can select which one should be removed. [](https://docs.difr.com/uploads/images/gallery/2025-12/w9Jimage.png) Publish your Sandbox to ensure the application binaries are no longer in the production VMs.If your users are using an Application Launchpad and you did not delete the onboarded application in the Sandbox page before publishing, your users will see an error when they try to access the application from their Application Launchpad.
# Publishing Once you have installed one or more applications, tested them in the Sandbox, set up a [Desktop Launchpad](https://docs.difr.com/books/platform-administrators-guide/page/launchpads#desktop-launchpad) or [Application Launchpad](https://docs.difr.com/books/platform-administrators-guide/page/launchpads#application-launchpad), and [defined your production capacity](https://docs.difr.com/books/platform-administrators-guide/page/capacity), you're ready to publish. There are three types of publishing: - **Publish**: A standard publish will always create the **max** number of instances specified in the account's Capacity settings for each configured Instance Pool before the existing instances are terminated. - **Quick Publish**: Quick publish allows administrators to specify how many production instances (less than or equal to Default Capacity **max**) are created on publish and powered on for each Instance Pool before any existing instances are terminated. Frame will then continue to create the remaining new VMs for each Instance Pool up to the Max Instances setting. This results in a quicker publish; however, it can result in a temporary reduction in the number of instances for each Instance Pool. - **Test Publish**: This feature allows you to test Launchpad functionality and Sandbox changes in your Frame account before committing your changes to your production environment.**Publishing requires capacity** Before publishing, you will need to set your [production capacity](https://docs.difr.com/books/platform-administrators-guide/page/capacity). Setting your production capacity specifies the amount of VMs you would like to publish your Sandbox image to. If you are not familiar with this, you can read more about system capacity and elastic instance management in our documentation [here](https://docs.difr.com/books/platform-administrators-guide/page/capacity).If there are no instance types with a max set to at least 1, **publishing will be disabled**.
## Fundamentals A **Publish** pushes any changes and configurations made to the Sandbox image to the production (or test) instances and, in turn, to the end users accessing your Frame-managed workload VMs. [](https://docs.difr.com/uploads/images/gallery/2025-10/Xv0image.png) ### Initiating a Publish Once your Sandbox is configured as desired and you're ready to publish, follow the steps below: 1. Navigate to the **Sandbox** page of your account Dashboard and ensure your Sandbox is powered on. 2. Click **Publish** in the top right corner of the Sandbox panel. A confirmation dialog will appear.You may cancel a publish up \*\*until the time Frame Platform begins creating production or test instances\*\* (depending on whether you invoked a Publish, Quick Publish, or a Test Publish, respectively).
#### From Sandbox To cancel an ongoing Publish from the Sandbox, once your Sandbox is in the Publishing state, go to the Sandbox page and under the kebab menu, the **Cancel Publish** option can be selected:**Reminder By default, all AHV-based accounts use the quick publish function**. The default number of production instances created on publish is 10. If you wish to override this number, follow the instructions below.
1. From your account Dashboard, navigate to the **Settings** page. Under the *General* tab, **enable quick publish** as shown below.If the min value in your capacity settings is set to less than the quick publish value specified, the quick value publish settings are ignored and a regular publish is performed.
That's it! You have successfully enabled quick publish for your Frame account. Any publish operations initiated from this point forward will be Quick Publishes. ### Test Publish **Test Publishing** gives administrators the ability to test their updated Sandbox image in a “Test Instance Pool” which is **separate from their production instances**. This gives administrators the option to alter the instances in an isolated environment, completely identical to production, without concern of interrupting access to the normal production instances. Test publishes can easily be rolled back via the restoration of a backup, or promoted to the active published configuration, depending on the results. [](https://docs.difr.com/uploads/images/gallery/2025-10/ISZimage.png) Before a test publish, you will need to set your [test capacity](https://docs.difr.com/books/platform-administrators-guide/page/capacity#add-test-pool). Setting your test capacity specifies the amount of VMs you would like to publish your Sandbox image to. If you are not familiar with this, you can read more about system capacity and elastic instance management in our documentation [here](https://docs.difr.com/books/platform-administrators-guide/page/capacity#add-test-pool). 1\. In your Frame Account Dashboard under the **Settings** tab, **Enable Test Publish**. Click the **Save** button to apply the change. [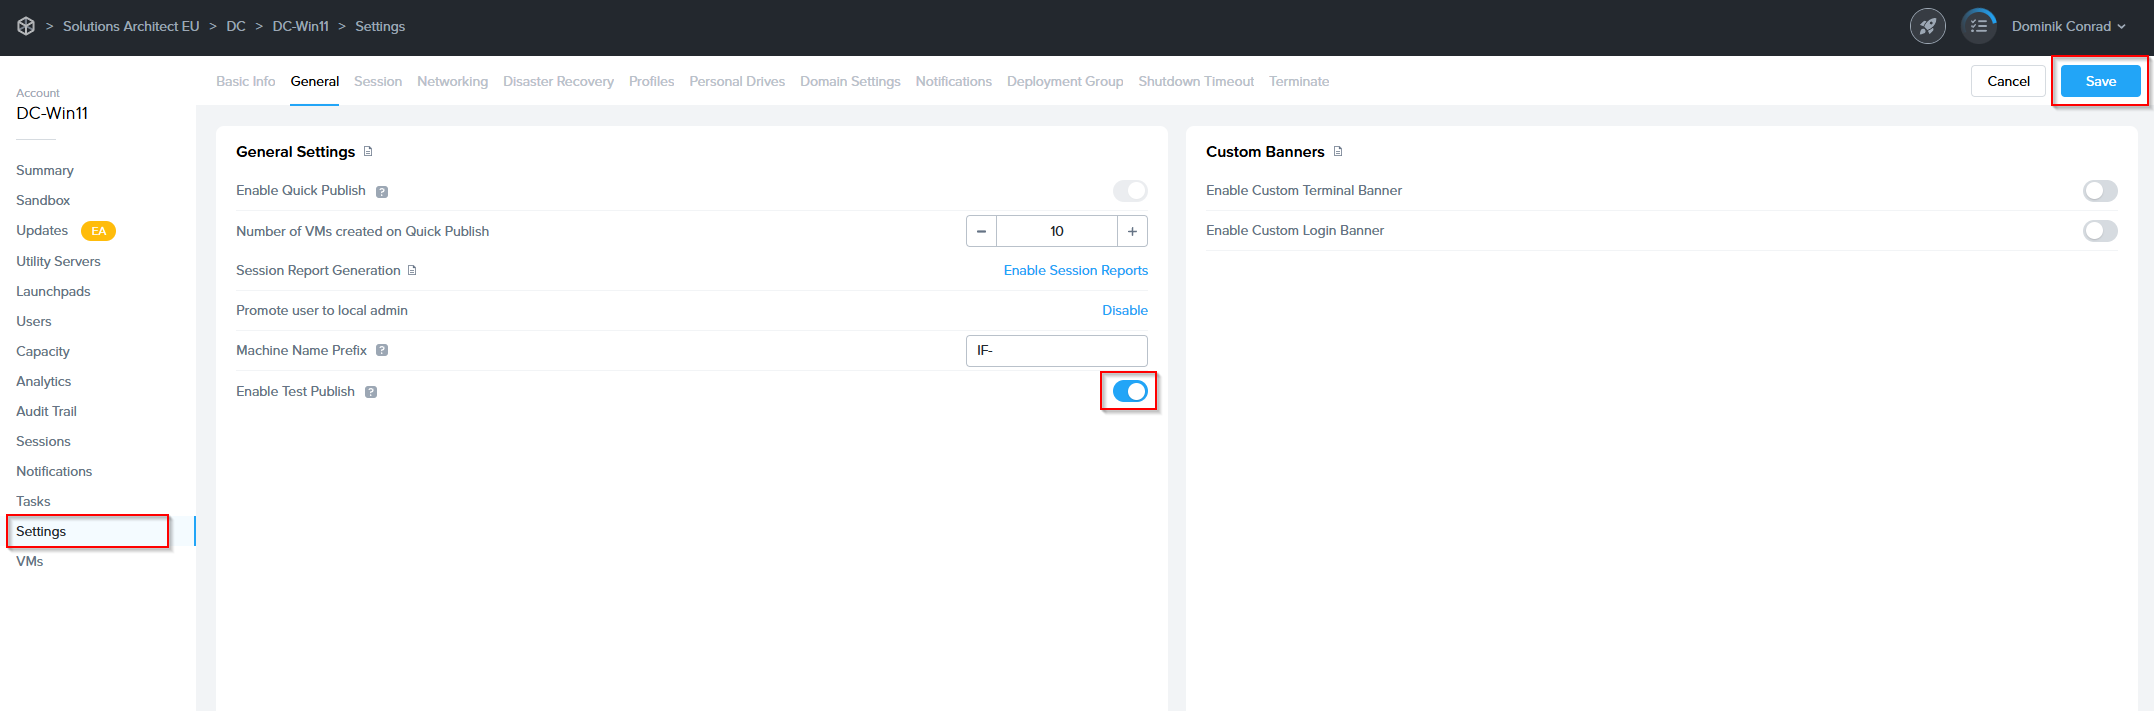](https://docs.difr.com/uploads/images/gallery/2025-10/wYWimage.png) 2\. A prompt will appear, notifying you that the Test Publishing feature **cannot be disabled once enabled** on an account. Click **Confirm****Warning** This change cannot be undone once enabled for your account.
[](https://docs.difr.com/uploads/images/gallery/2025-10/Ff5image.png) 3\. Next, verify you have at least one Test Pool under [Capacity](https://docs.difr.com/link/114#bkmrk-add-test-pool-1). 4\. When you wish to perform a test publish, navigate to the **Sandbox** page of the Dashboard and click the **Publish** button in the Sandbox panel.**Caution** Frame strongly recommends creating a backup of your Sandbox before Test Publishing. In the event you wish to discard all changes to the test environment and return to the original Sandbox configuration, you will be able to restore your backup.
[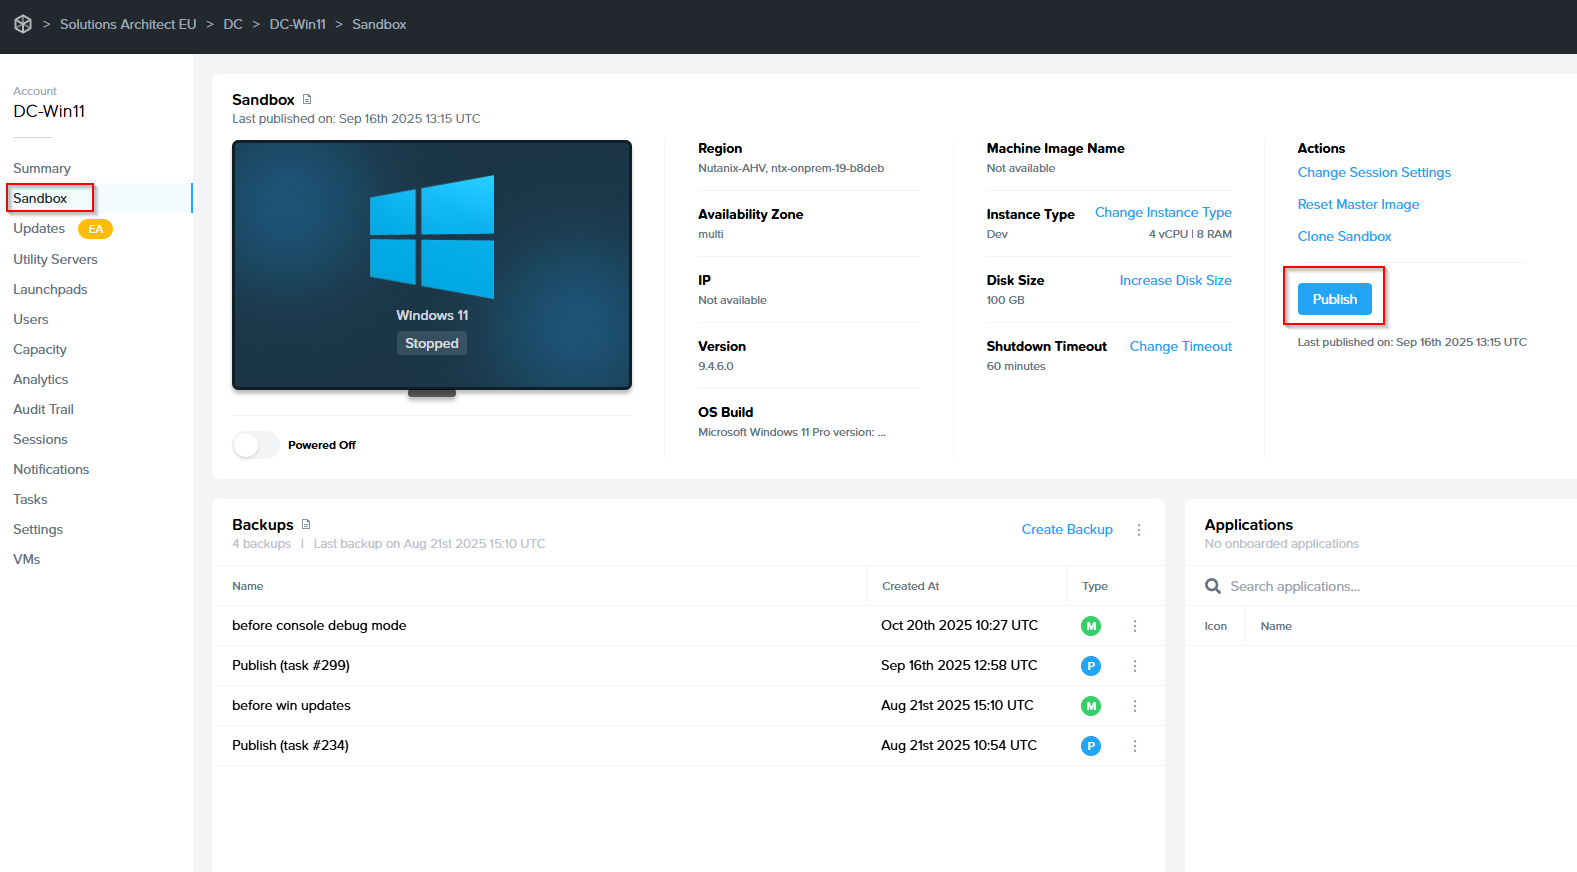](https://docs.difr.com/uploads/images/gallery/2025-10/92Aimage.png) 5\. The Publish dialog will appear, providing a dropdown menu to select your desired publish option. Select **Test Publish** and then click the **Test Publish button** to initiate provision of the test publish instances. [](https://docs.difr.com/uploads/images/gallery/2025-10/VBjimage.png) Lastly, you will want to create some Test Launchpads for your Test Instances. This will allow admins to test sessions and determine whether to promote the test publish to production users or not. Once the test publish is complete, you will want to **test the changes from a Test Launchpad**. Do that now by navigating to a test Launchpad and launching a session. Manually verify the changes while in the session. - **If everything is ok**, it's time to **promote** our test publish! Move on to the next step. - **If there are any issues**, go back to your Sandbox and make necessary changes and initiate another Test Publish for further testing. 6\. Next, we'll **promote** our Test Publish. To begin, click the **Publish button** in the top right corner of the Sandbox panel once again. This time, our confirmation dialog will provide a **Promote** option. Select and click the **Promote button**. [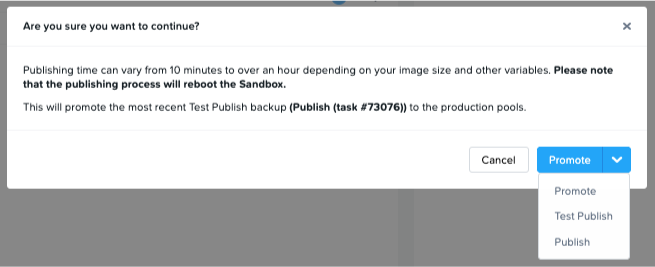](https://docs.difr.com/uploads/images/gallery/2025-10/GDRimage.png) Once the promoted Publish is complete, your users should be able to access production instances with all of your changes applied.**Note** Promotion of a Test Publish does not create a new Sandbox backup.
# Updates The **Updates** page listed in the **Account Dashboard** is designed to keep administrators informed about available updates for their virtual machines (VMs), as well as to configure this feature. This section ensures that your VMs remain up to date with the latest operating system updates, enhancing **security, performance, and functionality**. Displayed only at the **Account level**, this page provides update details specific to the VMs tied to that account. [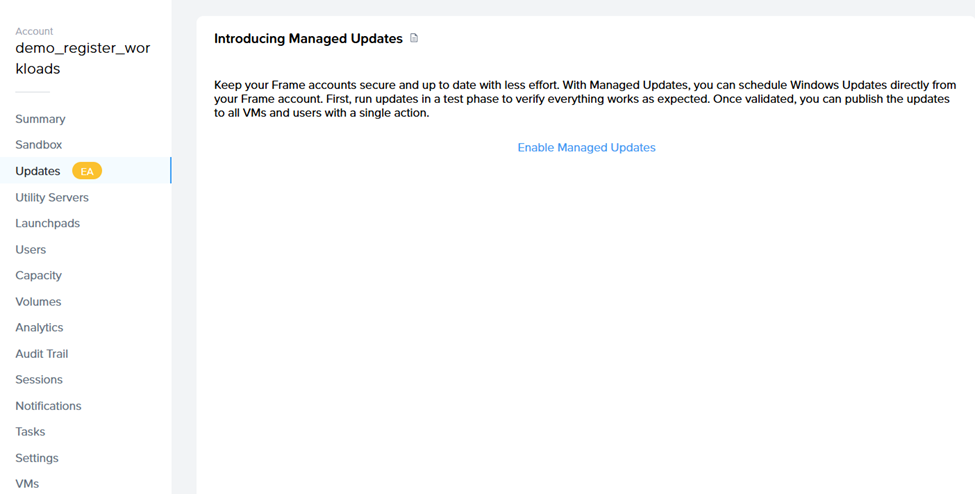](https://docs.difr.com/uploads/images/gallery/2025-10/image-1760698172386.png) **Navigation:** `Account Dashboard > Updates` --- ## VM Types The VM types and their updates displayed on the **Updates** page depend on the account environment. ### Non-persistent Accounts When updates are available, the following VM types will be shown: - Sandbox VMs - Utility Servers - VMs in test and production pools ### Persistent Accounts In persistent desktop account environments, the following VM types will be shown when updates are available: - Sandbox VMs - Utility Servers - Workload VMs --- ## Managed Updates Administrators can manage updates directly from the list and follow the provided instructions for installation. It is recommended to **schedule updates during maintenance windows** to minimize impact on users and operations. For more comprehensive information on managing OS updates, refer to our blog: [Dizzion Managed OS Updates & Windows Patching](https://www.dizzion.com/post/dizzion-managed-os-updates-windows-patching) --- # Managed Updates – Guide for Non-persistent Accounts**IMPORTANT NOTE:** Enabling the Managed Updates feature for non-persistent Dizzion DaaS accounts requires creating additional VM(s), so please be aware of this before enabling the feature.
### Step 1 Go to the **Updates (EA)** page and click **Enable Managed Updates**. [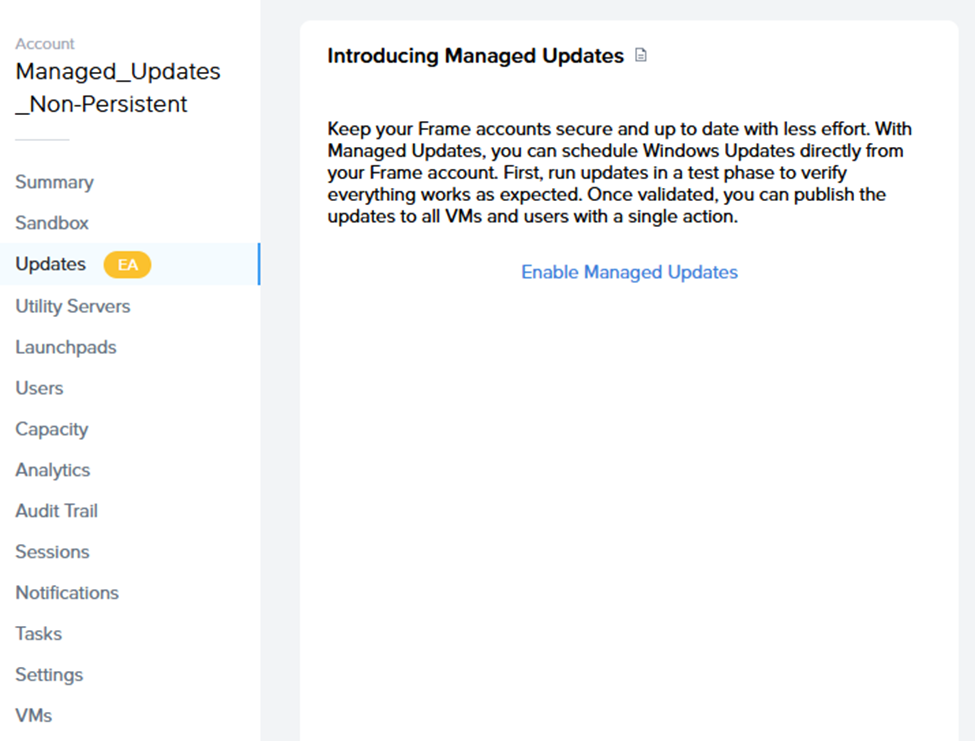](https://docs.difr.com/uploads/images/gallery/2025-10/image-1760698200551.png)**Note:** Managed Updates are per-account settings.
### Step 2 Ensure all requirements are set in the **Updates (EA)** page: [](https://docs.difr.com/uploads/images/gallery/2025-10/image-1760698252780.png) - Enable **Test Publish**. - Create a **Test Pool**. - Set the Test Pool’s capacity to at least **1**. ### Step 3 Configure **Update Settings**: ### Schedule maintenance time As this feature covers only Windows Updates released on Microsoft Patch Tuesday, please make sure to set the correct time and date when the update tasks will execute.**IMPORTANT:** While update tasks are running, no actions can be performed on the Sandbox (publishing, power on, start session, etc.).
### User Acceptance Window **Logic:** Once updates are installed, Frame automatically publishes those changes to the **Test Pool** (hence the requirement for Test Publish and Test Pool setup). This provides administrators with a **buffer of up to 3 weeks** to log in to a VM from the Test Pool, verify functionality, and either: - **a)** Accept the test manually in the **Updates** page, or - **b)** Wait for the **User Acceptance Window** to expire — after which Frame automatically publishes the changes to Production Pool(s).**Note:** Define this process internally.
### Emails for VM Update Notifications – set the email address to receive update process notifications. [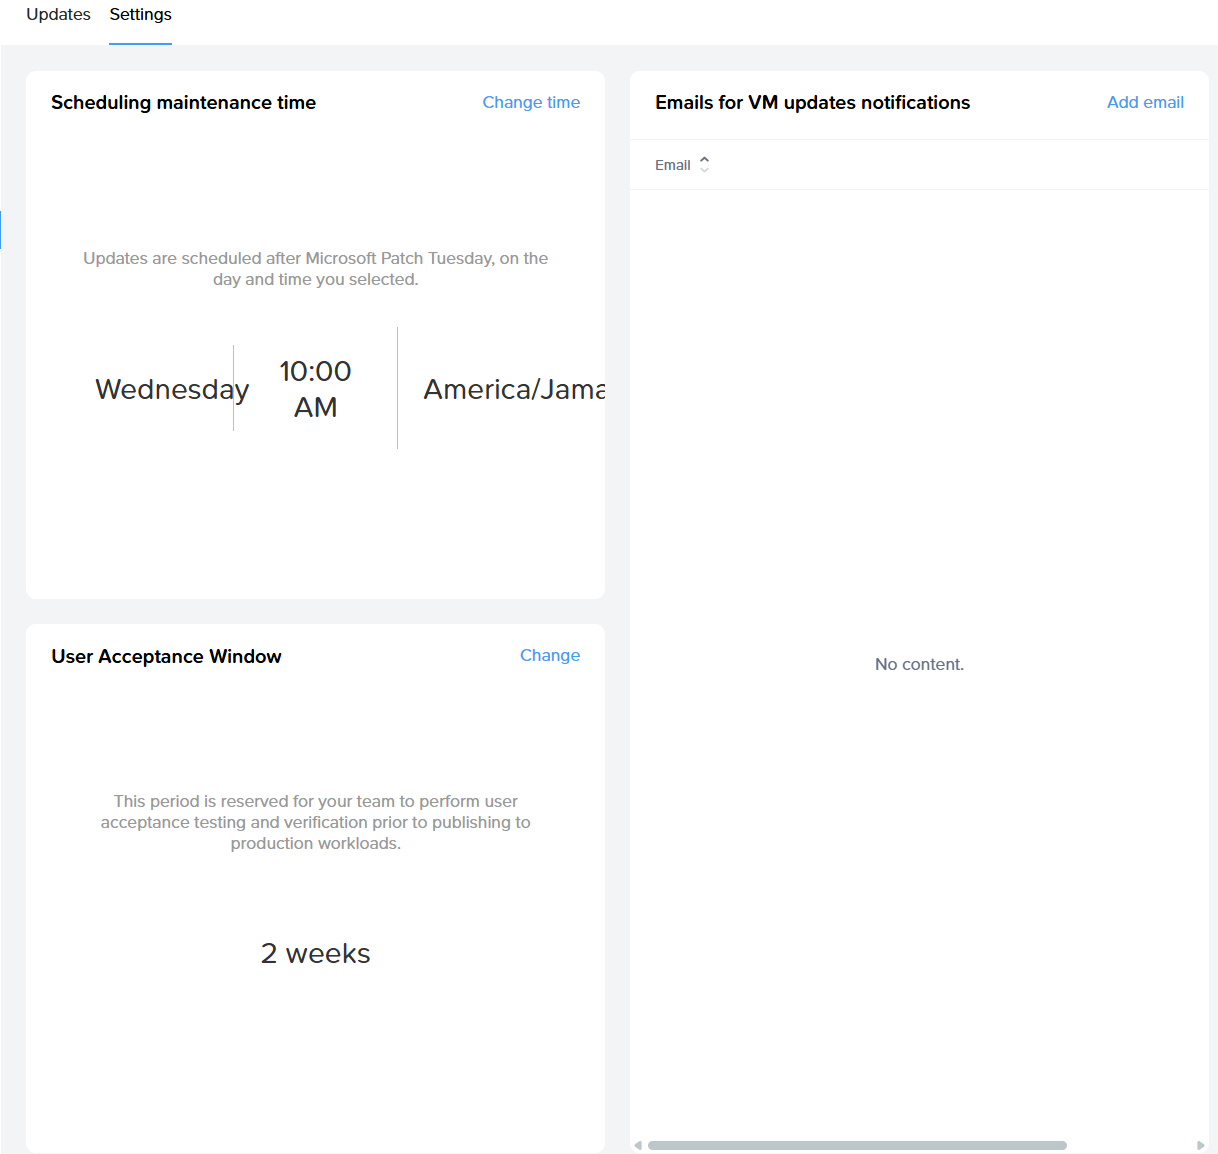](https://docs.difr.com/uploads/images/gallery/2025-10/image-1760698757345.png) ### Task List During Maintenance Window When the maintenance window starts, the system triggers the **Managed Updates – Phase 1 task**, which includes: - Backup Sandbox - Power on Sandbox - Identify available Windows updates and update internal records - Execute updates on Sandbox - Roll back if updates fail - Run test publish - Notify admin Progress can be tracked in the task progress list. After completion, you should accept the changes. **Task #2** will begin after the User Acceptance Window expires. **Managed Updates Phase 2 Tasks:** - Run Production Publish - Execute Windows Updates on Utility Servers (same process as Sandbox, without publish) --- # Managed Updates – Guide for Persistent Accounts ### Step 1 Go to the **Updates (EA)** page and click **Enable Managed Updates**. [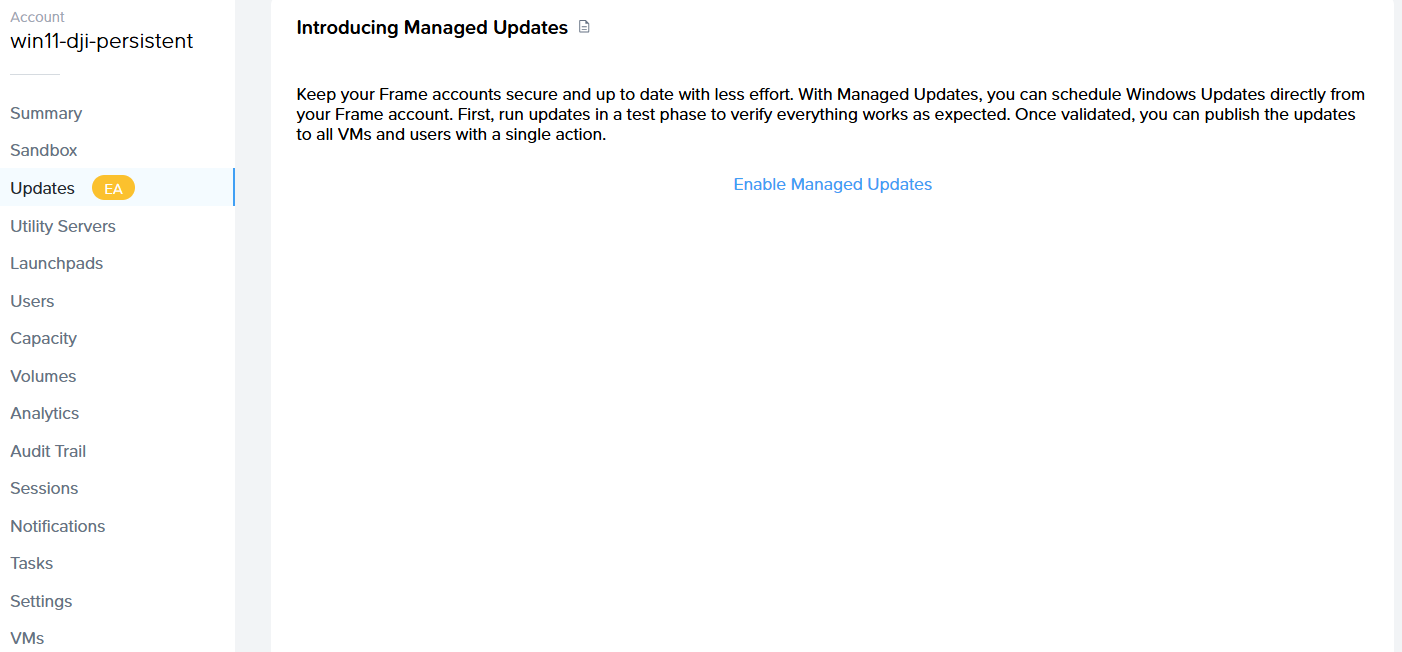](https://docs.difr.com/uploads/images/gallery/2025-10/d3Timage.png)**Note:** Managed Updates are per-account settings.
### Step 2 Configure **Update Settings**: - ### Schedule maintenance time - As this feature covers only Windows Updates released on Microsoft Patch Tuesday, please set the correct time and date for task execution.**IMPORTANT:** While update tasks are running, no actions can be performed on the Sandbox (publishing, power on, start session, etc.).
### User Acceptance VMs & Window - **User Acceptance VMs** – select which VMs will be part of User Acceptance. After the initial Sandbox update and publish, these VMs automatically receive the updates for validation. - **User Acceptance Window Logic:** Once updates are installed and published to the selected User Acceptance VMs, administrators have **up to 3 weeks** to log in, verify stability, and then either: - **a)** Accept the test in the **Updates** page, or - **b)** Wait for the User Acceptance Window to expire — after which Frame automatically publishes changes to all Production VMs. ### Emails for VM Update Notifications – set the email address to receive notifications about the update process. [](https://docs.difr.com/uploads/images/gallery/2025-10/image-1760698697337.png) ### Task List During Maintenance Window When the maintenance window starts, the system triggers the **Managed Updates – Phase 1 task**, which includes: - Backup Sandbox - Power on Sandbox - Identify available Windows updates and update internal records - Execute updates on Sandbox - Roll back if updates fail - Execute updates on User Acceptance VMs - Notify admin Progress can be monitored in the task progress list. After completion, the customer should accept the changes. **Task #2** will then start. **Managed Updates - Phase 2 tasks:** - Run Production Publish - Execute Windows Updates on Utility Servers (same process as Sandbox, without publish) - Execute Windows Updates on remaining VMs not included in the User Acceptance list # Domain Integration Domain Controller prep, AWS IAM Permissions, Azure DNS Configuration, Domain Join Setup, Frame SSO, Stale AD Objects CleanUp, Linux with Windows AD LDAP # Domain Many enterprises and organizations rely on Microsoft Active Directory (AD) for provisioning user accounts, applying security policies to operating systems, and enabling access to applications. In classic on-premises environments, Windows operating systems are “joined to the (AD) domain” in order to enable these functions. Frame allows administrators to join their workload VMs to their Active Directory domain. This allows their users to log in to a Windows machine using their own AD credentials. Since the Windows operating system is joined to the customer's domain, the user can use Windows applications that rely on AD for access, authentication and authorization, such as SAP apps. If the IT managers joins the Sandbox to the domain, they can use their existing app packages, app tools, and deployment processes to install, run, and manage their organization's applications on Frame. Microsoft also supports the ability for customers to register their devices with [Microsoft Entra](https://learn.microsoft.com/en-us/entra/identity/devices/concept-directory-join), formerly known as Azure Active Directory. With Microsoft Entra joined devices, the devices do not use an on-premises or "classic" Active Directory (AD) environment. Instead, they are joined to the company's Microsoft Entra ID tenant. This option is primarily designed for Windows 10 and Windows 11 devices. Lastly, Microsoft provides customers with the ability to join their devices to Microsoft Entra and have their devices joined to a classic AD environment. This is known as a [Microsoft Entra hybrid](https://learn.microsoft.com/en-us/entra/identity/devices/concept-hybrid-join) joined device environment. Frame currently does not support Microsoft Entra hybrid joined devices. # Domain Joined Instances Frame supports classic AD joined devices with the *Classic* option of the *Domain Join Instances (DJI)* feature. Use of the *Domain Join* feature requires the use of your own public cloud account or AHV cluster ("Bring Your Own (BYO) Infrastructure"). Before configuring your AD Domain for use with Frame, you will need to set up your BYO infrastructure as described in the [BYO Infrastructure](https://docs.difr.com/platform/infrastructure/byo) section of our documentation. To learn more about the prerequisites and how to prepare, configure, and manage your Frame Account for *Classic Domain Join Instances*, begin with the [Domain Preparation guide](https://docs.difr.com/books/platform-administrators-guide/page/domain-controller-prep). # Entra Joined Devices Frame supports Microsoft Entra joined devices with the *Entra ID* option of the *Domain Join Instances (DJI)* feature. To learn more about the prerequisites and how to prepare, configure, and manage your Frame Account for *Entra Joined Devices*, review the [Entra Joined Devices guide](https://docs.difr.com/books/platform-administrators-guide/page/entra-id-joined-devices). # Domain Controller Prep The Frame platform supports the ability for your workload VMs to join your on-premises or cloud-based Microsoft Active Directory (AD) environment. ## Requirements - Frame Account with **Windows 10**, **Windows 11**, **Windows Server 2019**, or **Windows Server 2022-based image**. - The Domain Join feature requires customers use **Windows Server 2008 R2** and **[Domain Functional Level](https://docs.microsoft.com/en-us/windows-server/identity/ad-ds/active-directory-functional-levels)** 2008 R2 or higher. - The Frame account workloads must reside in a VPC/VNET/VLAN with a non-overlapping CIDR with the rest of your network, including where your Windows domain controllers reside. Frame supports subnet masks between `/16` and `/24`. - The workload VMs to be joined to the domain must be able to reach the domain controller(s). - Customers using AWS infrastructure must update their AWS IAM role before enabling DJI (as described in the guide listed below). - Customers using Azure infrastructure must configure their Azure DNS before enabling DJI (as described in the guide listed below). ## Considerations Please consider the following before continuing with this Domain Controller Preparation guide and setup process: - The Frame user created by Frame must be a local Windows administrator. Any GPO settings that take effect on workload instances must not remove this user from the “Local administrators” group. - Autologin must be allowed for a local Frame user session to initiate successfully. Any GPO settings that disable this function will prevent domain joined instances from working properly. - Interactive Logon message must be disabled in GPO settings for successful initiation of a Frame session. - The domain join feature does not join the Sandbox or any utility servers to the domain. Frame strongly advises that administrators do not manually join the Sandbox or the utility server to the domain unless there is a specific requirement for an application to function. If either of these two VM types must be joined to the domain, the Frame administrator should enable RDP and create another local Windows admin user in that server. Before the server is joined to the domain, the administrator should verify that they can reach the server using RDP. - Do not modify the Frame user local admin account password. Modifying the password will cause autologon to fail. For password security options like LAPS, there is a need to exclude the local Frame user. - Static DNS IPs are not supported and should not be entered in the Sandbox or workload VMs. - Restricting remote RPC connections to the Windows Security Account Manager (SAM) on a domain controller to Administrators only may introduce issues with renaming computer objects in Active Directory. Delegated rights to the service account will be ignored if this policy is configured - The local Frame user password is stored in LSA (Local Security Authority) portion of the machine registry that is accessible only to SYSTEM account processes. Some of these secrets are credentials that must persist after reboot and they are stored in encrypted form on the hard disk drive. Credentials stored as LSA secrets might include: - Local Frame user password - Service account name and password for web proxy ## Supported Deployment Models and Systems To use the Domain Join feature, the workload VMs must have network access to your domain controllers. There are a few architectural models to use for connecting your Frame workloads to your AD domain controllers: 1. If your workloads are in one of the supported public cloud infrastructures, your domain controllers (DCs) can be located in the public cloud or on-premises. - If the DCs are on-premises, then an always-on connection from the workload VMs in the public cloud to your on-premises DCs is required. This can be accomplished through a site-to-site VPN, direct connection, or SD-WAN connection. You must bring your own AWS, Azure, or GCP cloud account to establish these types of private network connections since these network connections are setup within the public cloud provider's console. A software client VPN on the workload VMs that require users to authenticate to your on-premises firewall will not satisfy the networking requirements for domain-joined instances. - If the DCs are in the public cloud, then you can configure a route from your workload VMs to your DCs. This is typically done with a peering connection between the VPC/VNET containing your workload VMs and the VPC/VNET containing your Domain Controllers. 2. If your workloads are on Nutanix AHV in your on-premises network, then make sure that the workload VMs can route from the workload VLAN to your domain controllers. In the above architectural models, you will need to configure your networking and firewall rules to enable all ports and protocols corresponding to Active Directory traffic. Such a list can be found online in [Microsoft documentation](https://support.microsoft.com/en-us/help/179442/how-to-configure-a-firewall-for-domains-and-trusts). Please read through this guide thoroughly before beginning the process of connecting your AD environment with your Frame workloads.When Frame workload VMs are provisioned, the VMs rely on the DHCP service within your network to obtain their IP addresses and DNS server IP address(es). For customer-managed networking, make sure that you have configured your DHCP service to return the IP addresses of your DNS servers. Otherwise, if no DNS server IP address is provided to the newly provisioned VMs, the VMs may not be able to resolve your domain controller or the Frame Platform FQDNs.
## Requirements - Organizational Unit (OU) should not have spaces in it (e.g., `FrameAzure1`, not `Frame Azure 1`). - Service account must own the OU using “Delegate control." - Service Account must be in UPN format (e.g., `frameserviceaccount@mycompany.com`) ## Best Practices - Customers are responsible for tracking their service account password expiration date and updating the new password in the Domain Settings for the Frame account before the password expires. If the service account password expires, the Frame account publish will fail since the workload VMs will be unable to join to the domain. Alternatively, customers can configure their service account password to not expire. - During installation and initial configuration, inheritance should be blocked on the Frame OUs. When making policy changes, Nutanix recommends customers create a Development/Staging account to test your policies (in a separate OU) before implementing the policies in the OU for the Production Frame accounts. - As a best practice, Frame **does not recommend** restricting remote RPC connections to the Windows Security Account Manager (SAM) on a domain controller to Administrators only. Doing so may introduce issues with renaming computer objects in Active Directory. Delegated rights to the service account will be ignored if this policy is configured. ## Domain Controller Preparation Procedure 1. Log into your domain controller and open up “Active Directory Users and Computers." 2. Navigate to the “Computers" Organizational Unit (OU), right-click and select “Create a New OU". We recommend that you give this OU a unique name that will help you identify the Frame account that it is tied to. In this example, we have named the OU `Frame-DJI-Test`.If the service account password expires, the account will not function until the password is updated. The updated password will then need to be set in the Frame Dashboard as well. If an admin attempts to publish from their Frame account with expired domain join credentials, the publish will fail.
7. Right-click on the newly-created OU and select “Delegate Control…" to open the Delegation of Control Wizard.The "Delete selected objects in this folder" checkbox \*\*must be checked\*\* in order for Frame to be able to \[automatically clean up stale computer objects\](ad-cleanup.md) from your domain.
11. On the “Permissions” page of the wizard, with the “General” toggle checked, select both “Change password” and “Reset password.” Complete the wizard by clicking “Next” and then “Finish.”We recommend setting Loopback Processing Mode on the Frame OU to 'Replace' to help ensure unnecessary and potentially conflicting GPOs (applied to users) are not applied inadvertently. Since your organization may have specific security lockdowns and GPOs, you will need to work with our Support or Solutions Architect teams to ensure that these GPOs do no cause adverse effects to the Frame environment.
### Obtain OU Details Now we will obtain the necessary OU information needed to integrate with Frame. You will be entering this information into your Dashboard in later steps. 12. In your “Active Directory Users and Computers” console, make sure that “Advanced Features” is checked as shown below. This will enable us to easily retrieve the needed information.**Note** Additional Networking, Firewall, and Routing ConsiderationsAs mentioned at the start of this guide, you will need to ensure that all applicable Active Directory ports and protocols are open along this new network path. More information can be found in Microsoft's [official documentation](https://learn.microsoft.com/en-US/troubleshoot/windows-server/identity/config-firewall-for-ad-domains-and-trusts).
# AWS IAM Permissions AWS-based Frame accounts will need to prepare their AWS account by adjusting the permissions as listed below before setting up Domain Joined Instances. This process takes about 5 minutes. 1. First, login to the AWS Console for the account you will be using to Domain Join with Frame. From the AWS Console, click on “IAM.”As noted at the top of the Azure console, virtual machines within this virtual network must be restarted to utilize updated DNS server settings.
6. Click the "Save" icon at the top of the page once you have configured the settings in step 5.You can join your Sandbox or Utility server to your domain by logging into either machine and following the \[standard process\](https://learn.microsoft.com/en-us/windows-server/identity/ad-fs/deployment/join-a-computer-to-a-domain) of joining a Windows machine to a domain. If you domain-join your Sandbox and/or Utility servers, we recommend you configure these servers for RDP and add a local Windows administrator user. This allows you to access the Sandbox and/or Utility servers in the event you are unable to login to the servers using your domain user credentials (e.g., loss of domain trust).
## Validate Connections Firstly, we will start by verifying that our Frame account Sandbox can communicate with the domain controller (DC). Log in to the Sandbox of the Frame account you would like to join to the domain. We will use the Frame AD Helper to validate the domain configuration parameter values you will specify in the Domain Settings page. ### Frame AD Helper Frame AD Helper is a standalone tool built for testing network configuration, name resolution (DNS), and directory credentials/permissions. Frame AD Helper can assist in ensuring that all prerequisites for DJI are met successfully. It is part of the Frame Agent installation and located in the Frame Tools directory `C:\\ProgramData\\Nutanix\\Frame\\Tools\\` as `FrameADHelper.exe`.**Network Connectivity Test**
The Network Connectivity test verifies that DNS and AD services are reachable. Tests will automatically fail if network connectivity has not been established between the Frame account's VPC and AD/DNS resources. This test performs the following actions: - DNS Service Test - AD Service Test - Custom Ports Test (Optional) - verify that specific ports are reachable. To invoke the Custom Ports Test, place the `customports.txt` file in `C:\\ProgramData\\Nutanix\\Frame\\Tools\\` and modify the file prior to launching Frame AD Helper (v1.1 or newer). The file must contain a separate line for each port tested, in the following format: `Port Number`, `"Port Description"`.**Name Resolution (DNS) Test**
The Name Resolution test confirms that the Active Directory Domain Name can be resolved using the DNS server of your choice. This test performs the following actions: - Resolves a record for the Domain Name - Resolves SRV record for the Domain Name**Directory Configuration Test**
The Directory Configuration test verifies that the Active Directory service account and permissions are configured properly for DJI. This test performs the following actions: - Connects to Active Directory using the provided credentials - Creates a test computer object (GUID-Frame) - Deletes the test computer objectThe domain-joined workload VMs must be able to reach at least 1 DNS server that can resolve public FQDNs (either provided by DHCP or the domain controller). Otherwise, the workload VMs will not be able to register themselves with the Frame control plane.
2. Once you have correctly entered all of the required information, click "Save" in the upper right corner of the page. A notification will appear displaying the pending request to enable Domain Join. 3. The pending request notification will disappear once the process is complete and your Domain Join tab will now display the option to change the service account password. 4. Lastly, go back to your "Systems" page and publish your Sandbox. Once the publish is complete, you will be able to access your Domain Joined instances.To ensure your production instances are joined to your domain correctly, it is recommended to adjust your first publish to a max of 1 (under your [capacity settings](https://docs.difr.com/books/platform-administrators-guide/page/capacity)) and verify changes before publishing to a larger pool.
## Troubleshooting Frame recommends using the [Frame AD Helper tool](https://docs.difr.com/link/104#bkmrk-frame-ad-helper) as described above for scenarios where troubleshooting is required. # Frame Single Sign-On ## Introduction Frame Single Sign-On (SSO) allows users to access a domain-joined VM without requiring users to enter their domain user credentials every time they enter into a Frame session. This patented feature (US Patent #11,483,305) provides a more streamlined end-user experience in terms of Windows domain user authentication. The first time a user starts a session to a domain-joined workload VM, Frame Terminal (running within the user’s browser or Frame App) prompts the user to enter their Active Directory domain user credentials. Frame Terminal encrypts the user credentials using a user-specific public key certificate generated by Frame Platform. The encrypted domain user credentials are stored locally within the user’s browser or Frame App cache, linked to the user’s identity within Frame (as provided by the identity provider) and specific Frame Account, and sent to the workload VM via Datagram Transport Layer Security (DTLS). ## Requirements - A Frame account configured under Settings > Domain Settings so that test and production workload VMs are joined to Active Directory. - The Sandbox has been published at least once with at least one domain-joined test/production workload VM for users. - Frame Guest Agent 1.9.4.0 and higher - Frame Server 8.6.8.0 and higher - Frame Remoting Protocol 8 ## Limitations - If a user wishes to log in using a different domain user account to workloads in the same Frame account, they must clear their encrypted user credentials from the browser cache or completely clear the Frame App cache. - Frame SSO is dependent on the cache file persisting across device power cycles. Currently, Frame SSO will not work with thin clients that do not have a persistent store to save the user’s encrypted domain user credentials. ## Enable Frame SSO You enable Frame SSO, as an Admin, by going to **Settings > Domain Settings** in the Frame Account Dashboard and toggling on Frame SSO. [](https://docs.difr.com/uploads/images/gallery/2025-12/eeyimage.png) ## Disable Frame SSO To disable Frame SSO, turn off the Frame SSO feature in Domain Settings. Users will be required to authenticate to the Windows domain each time they start a Frame session, regardless of whether they used the Frame SSO feature in the past.Disabling Frame SSO does not clear the users' encrypted domain user credentials in their browser or Frame App cache. Users will need to individually clear their browser/Frame App cache (see below).
## User Experience This section discusses what your users will experience when Frame SSO is enabled on a domain-joined Frame account. ### First login When Frame SSO is enabled and the user's browser (or Frame App) does not have the user's encrypted domain credentials in its cache, the user will be asked to enter their domain credentials. [](https://docs.difr.com/uploads/images/gallery/2025-10/E63image.png)The user must specify their username as UPN: username@domain.com or domain\\username
### Subsequent logins Once the user's domain credentials are encrypted and stored in their browser or Frame App cache on the device, the user will see the following screen in subsequent logins when they start their sessions. [](https://docs.difr.com/uploads/images/gallery/2025-10/uhzimage.png) ## Encrypted User Credential Storage Once a user successfully logs into a domain-joined Frame session, the encrypted domain user credentials are saved in the browser or Frame App cache. If more than one domain user is using the browser, there will be more than one encrypted domain user credential record. ### Clearing User Credentials #### Web browser To clear the encrypted domain user credentials, the browser user must perform one of two operations: 1. The user can go to **Clear Browsing Data** in their Chrome browser and only clear **Cookies and Other Site Data**. 2. Alternatively, the user can go to the **Developer Console** and follow the path below to delete the user credential entry: `dev.console > Application > Storage > IndexedDB > frame-player-user-preferences > keyvaluepairs > [user creds entry]` #### Frame App For Frame App, users must delete the cache folder by clearing the **User Cache** in Preferences. ## Troubleshooting ### Errors #### Incorrect Username or Password If the user attempts to register a username or password that cannot be validated by their domain controller, Frame Terminal will display: [](https://docs.difr.com/uploads/images/gallery/2025-10/svVimage.png) The user will need to ensure they are entering the correct domain credentials. #### Maximum number of login attempts exceeded If the user exceeds the maximum number of login attempts as defined by their administrator's domain policies, then Frame Terminal will return an error. [](https://docs.difr.com/uploads/images/gallery/2025-10/lrWimage.png) The user should revalidate their domain user credentials outside of Frame and may need to contact their Windows administrator to reset their domain password. # Stale AD Object Cleanup When workload VMs in a DJI Frame account are created (due to a publish or an increase in the max capacity of a test or production pool), the test or production workload VMs are added to the specified Windows Active Directory as computer objects. Each time there is a publish (for non-persistent DJI Frame accounts) or if the max capacity of a test or production pool is reduced, workload VMs are terminated. However, the corresponding AD computer objects are not automatically removed from the Windows domain. Administrators have the following options to clean up stale computer objects in their Active Directory environment. ## Manual Domain administrators can periodically run the following PowerShell scripts to identify and remove stale computer objects in their domain, where stale computer objects are defined as computer objects that have not been logged in for a defined period of time. These scripts must be run with a Windows domain user with the proper Windows domain privileges to query the domain controller for the first PowerShell script and to delete computer objects from the domain for the second PowerShell script. If the script detects any computers belonging to the Windows domain OU specified in `$OU` that have not logged into the domain for "x" days as defined by the variable `$DaysInactive`, the computer object will be listed. ```powershell #Set OU and inactive days interval to match your organization requirements $DaysInactive = 60 $OU = "OU=FRAME-AWS-QA-TEST-2,OU=VDI,OU=Computers,OU=Frame,DC=frame,DC=demo" #Search for inactive computer objects and show results in a powershell table $Time = (Get-Date).Adddays(-($DaysInactive)) Get-ADComputer -Filter {LastLogonTimeStamp -lt $time} -Properties LastLogonDate -SearchBase $OU | Ft Name,DistinguishedName,LastLogonDate -AutoSize ``` To find the computers belonging to the Windows domain OU specified in `$OU` that have not logged into the domain for "x" days as defined by the variable `$DaysInactive` and remove them from the Windows domain, the Windows administrator can execute (or setup a scheduled task to execute): ```powershell #Set OU and inactive days interval to match your organization requirements $DaysInactive = 60 $OU = "OU=FRAME-AWS-QA-TEST-2,OU=VDI,OU=Computers,OU=Frame,DC=frame,DC=demo" #Search for inactive computer objects and delete them (confirmation needed) $Time = (Get-Date).Adddays(-($DaysInactive)) Get-ADComputer -Filter {LastLogonTimeStamp -lt $time} -Properties LastLogonDate -SearchBase $OU | Remove-ADComputer -confirm:$false ``` ## Automatic Frame provides a feature for automatically deleting the Active Directory (AD) computer object associated with a **terminated** Frame instance. When the feature is enabled, AD computer objects will be marked for deletion when an instance is terminated because of: 1. A [Publish](https://docs.difr.com/link/101#bkmrk-page-title), 2. the reduction of the [Max Default Capacity](https://docs.difr.com/link/114#bkmrk-page-title) of an instance pool, or 3. the termination of a domain-joined persistent desktop or non-persistent VM under [Status](https://docs.difr.com/link/113#bkmrk-page-title) or via Frame Admin API. Every 30 minutes, Frame Platform will determine the list of terminated Frame instances whose AD computer objects have not yet been deleted. Frame will then transmit the AD computer object list to one or more powered-on, domain-joined instances are in **Running** status (not in use by a user). The available instances will then contact the Windows domain controller to delete the AD computer objects. If domain-joined instances are not available to handle these requests, then Frame Platform will wait 30 minutes to try again. Since customer administrators must manually configure Sandbox and Utility Servers to be joined to a Windows domain (if desired), customer administrators are responsible for removing these AD computer objects themselves. ### Prerequisites - This automatic AD object cleanup feature applies only to non-persistent, domain-joined Frame accounts. - The workload VMs must be running **Frame Server 8.7 or greater** for this AD computer object deletion feature. - The service account specified within Account Dashboard > Settings > Domain Settings must have permissions to delete computer objects within the specified domain as mentioned in **step 10** of the [Domain Controller Prep document](https://docs.difr.com/link/103#bkmrk-page-title).**Known Limitation** This feature requires **at least one AD domain-joined instance** to be powered on and not in a Frame session within the Account in order to execute the computer object deletion. As a result, this feature is not triggered during the Account Termination process, in scenarios where the Max Instances setting is set to 0 across all available Instance Pools, or when all domain-joined instances are being used by users.
### Enable/Disable Automatic Removal of AD Computer Objects This feature is automatically enabled for all new domain-joined accounts created after May 4, 2023. If you wish to enable this feature on an older account or disable it, simply navigate to the **Account Dashboard** where the domain is configured. From there, navigate to **Settings > Domain Settings** and enable/disable the toggle, as shown below:The Entra joined device feature requires users to login with their Entra ID user account.
3. Navigate to the **Sandbox** page, and *Publish* the *Sandbox*. 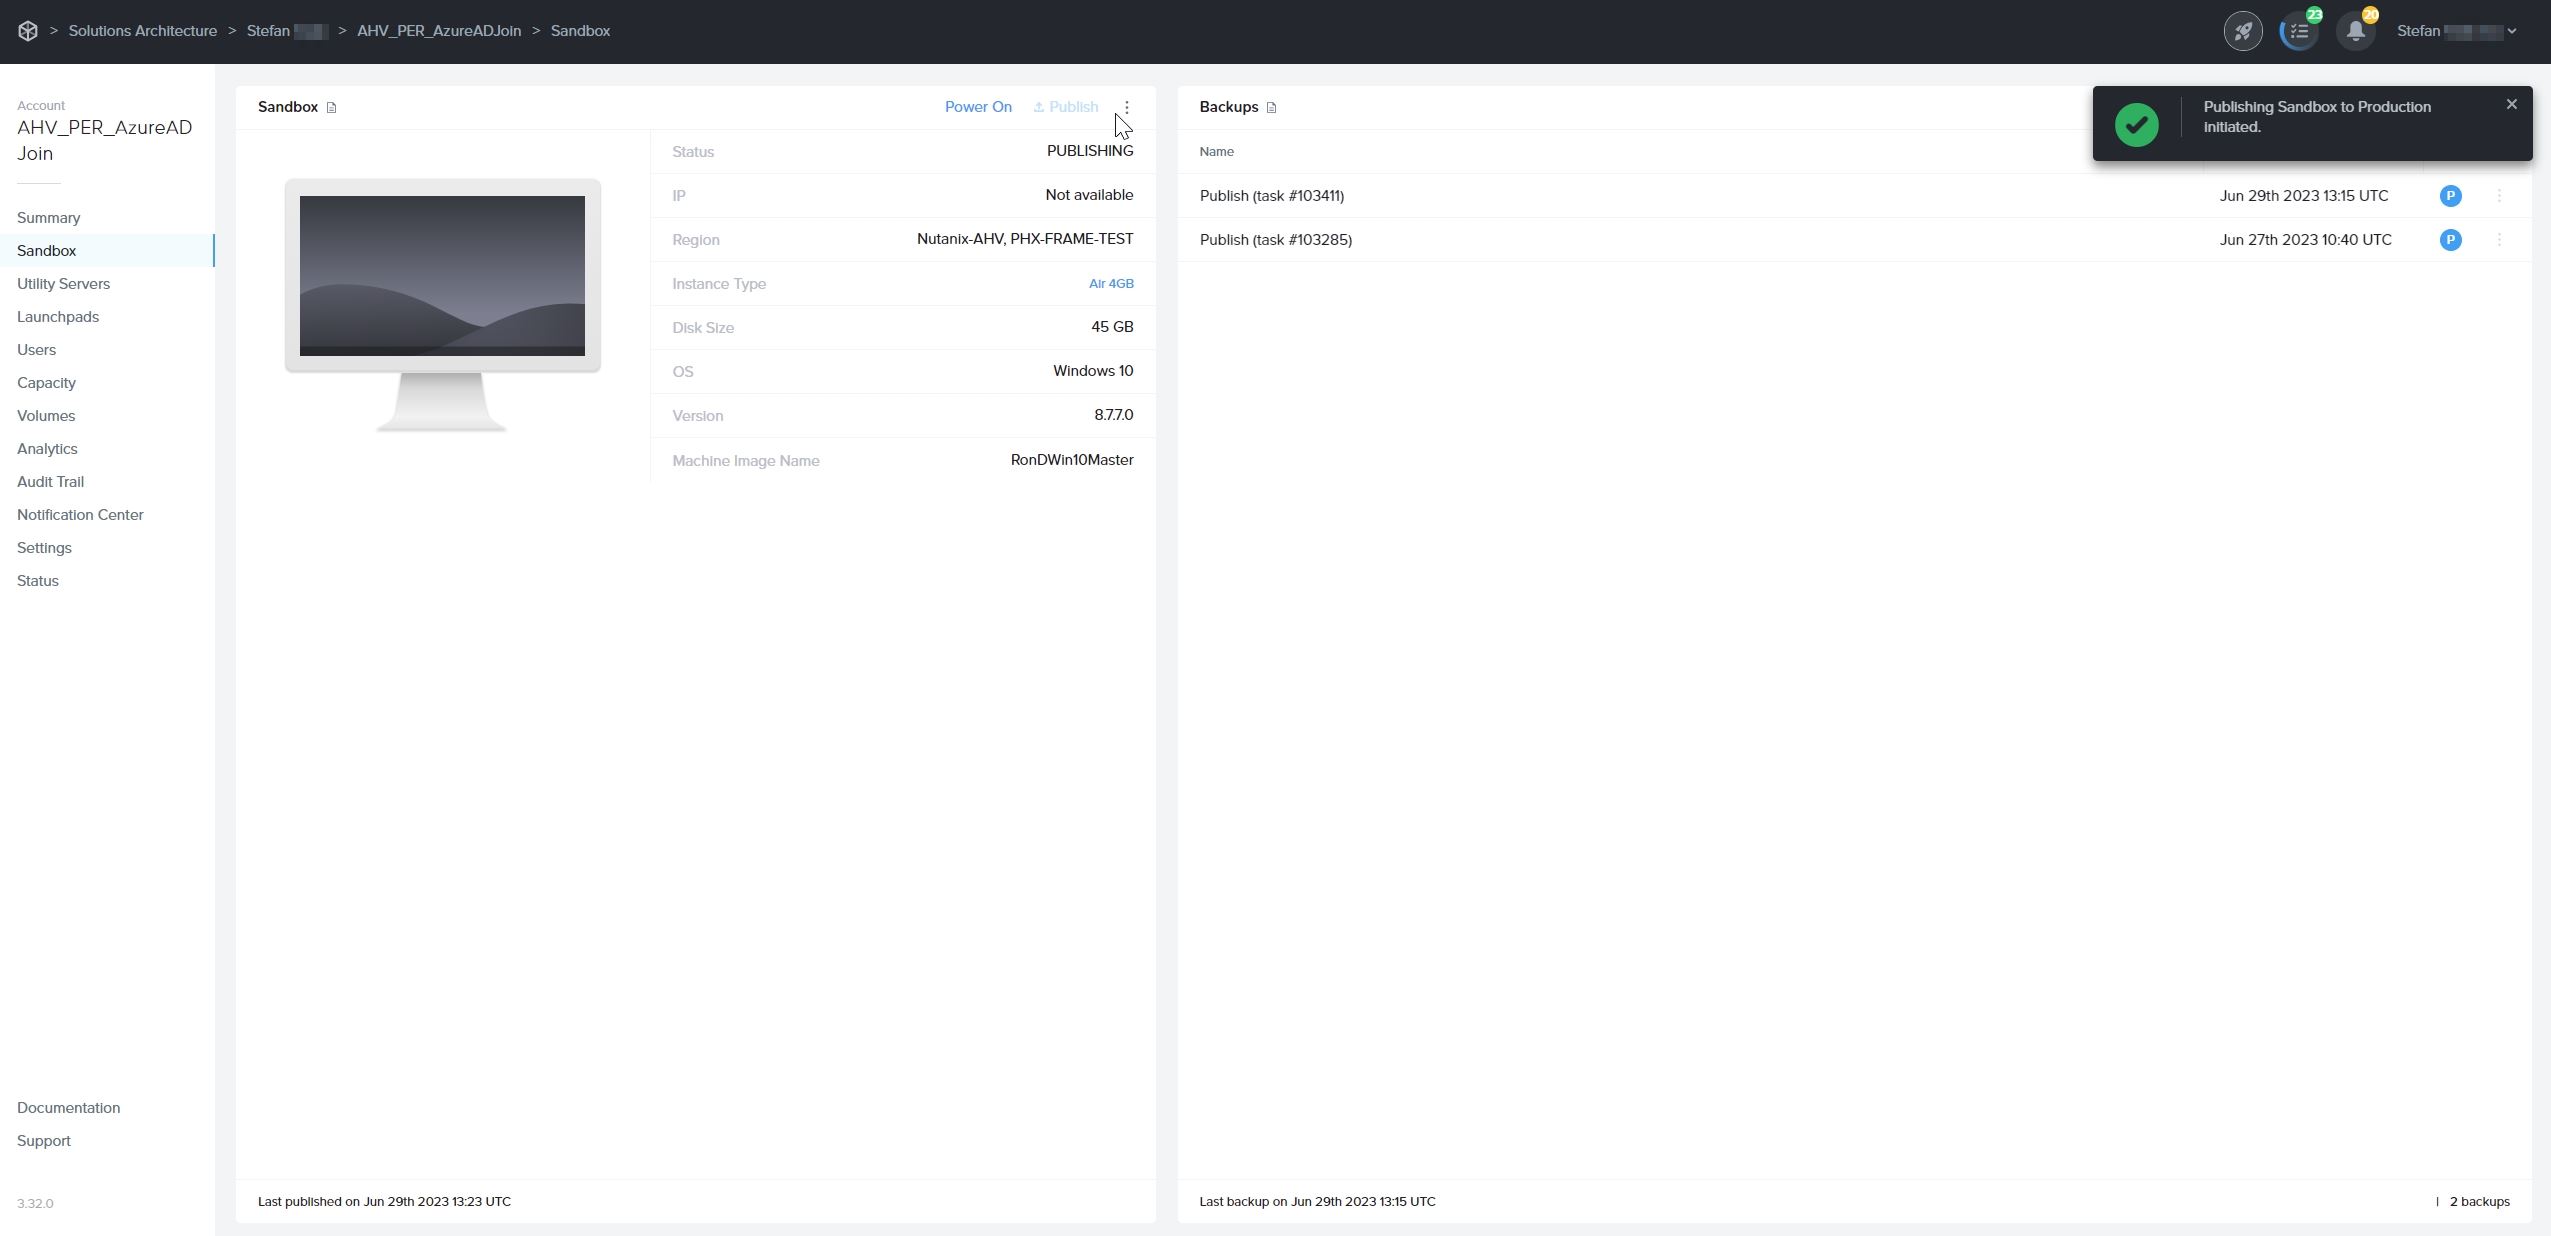Only test and production pool VMs will be Entra device joined. *Sandbox* and *Utility server(s)* will not be Entra device joined. If you wish to join your *Utility server(s)* to your Entra ID tenant, they must be joined manually.
**Do not** join the *Sandbox* to Entra ID as this action can lead to sysprep failures during the publish process.
4. After a successful publish, navigate to the **Status** page to check the status of your VMs. You will notice that Entra joined devices have a [prefix](https://docs.difr.com/platform/admin/domain/entra#windows-hostname-prefix) in their hostnames. 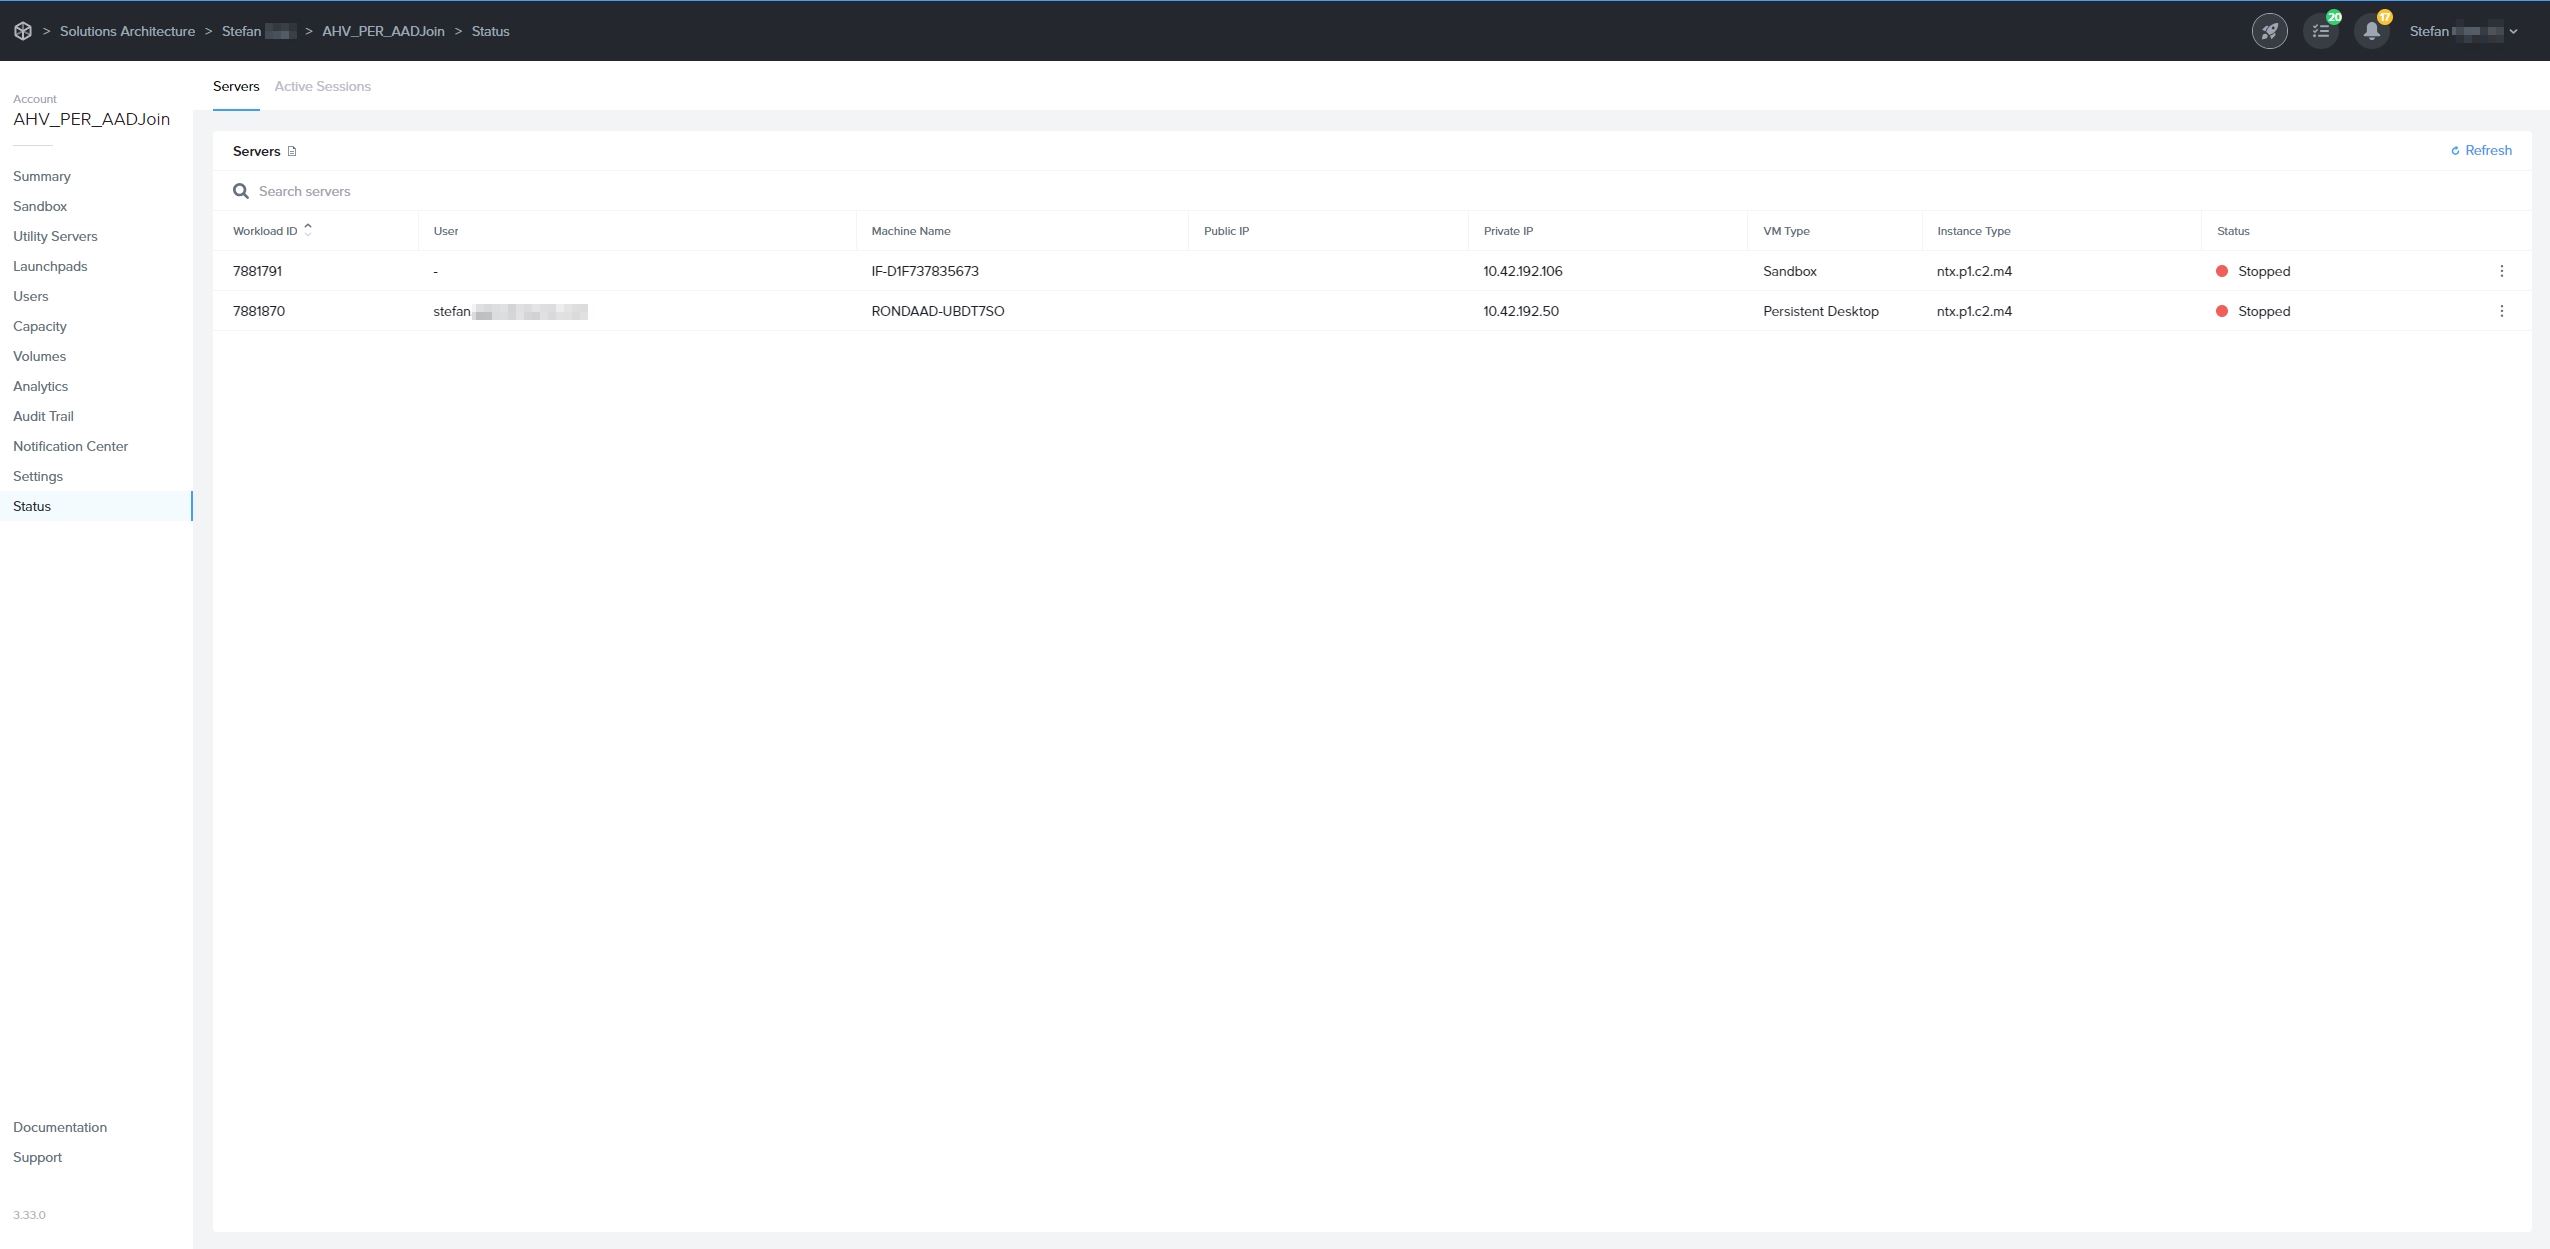 5. When end users log into their assigned VM, they will be asked to enter their Entra ID credentials as shown below:  ## Windows Hostname Prefix The Windows hostnames for Entra joined devices on AHV will be generated once the VMs are provisioned, by concatenating a prefix of 4 characters, a string "AAD-", and a 7 alphanumeric string, following the procedure described in [Microsoft's official documentation](https://learn.microsoft.com/en-us/windows-hardware/customize/desktop/unattend/microsoft-windows-shell-setup-computername). The prefix will be the first 4 characters of the filename of the master image used to create the Frame Account *Sandbox*. ## Windows 10/11 OOBE The first time a user accesses their Entra joined persistent desktop on AHV, the user will go through the Microsoft Windows Out of the Box Experience (OOBE). The experience will depend on whether the persistent desktop is Windows 10 or 11 Enterprise Edition or Professional Edition.If you have a use case where you need to reassign an Entra joined persistent desktop to another user, confirm that your Entra ID policies will grant the new user local Windows administrator privileges (if this is required).
### Enterprise Edition 1. Upon accessing their persistent desktop for the first time, the user will be prompted to choose a region.  2. Next, select a keyboard layout.  3. Optionally add a second keyboard layout.  4. Review and accept the OS license agreement. By accepting the agreement, the user agrees to comply with its terms.  5. Next, the user will need to set up their user account by entering their Entra ID username.  6. On the next page, they'll be prompted to enter their Entra ID password.  7. Choose their privacy settings.  8. Once OOBE process is completed, the user will be logged into their Entra joined virtual machine. ### Professional Edition 1. Upon accessing their persistent desktop for the first time, the user will be prompted to choose a region.  2. Next, select a keyboard layout.  3. Optionally add a second keyboard layout.  4. Review and accept the OS license agreement. By accepting the agreement, the user agrees to comply with its terms.  5. Set up their user account by selecting "Set up for Work or School".  6. Next, the user will need to set up their user account by entering their Entra ID username.  7. On the next page, they'll be prompted to enter their Entra ID password.  8. Lastly, the user will be asked to select their desired privacy settings.  9. After saving their privacy settings, the user may be logged out of their Frame session. If this happens, they simply need to start a new session.  10. Once the OOBE process is complete, the user will be logged into their Entra joined virtual machine. # AzureFrame supports Entra joined devices Early Access on Azure for both Windows 10/11 and Windows Server 2019/2022 operating systems in non-persistent and persistent desktop Frame Accounts.
Prerequisites
- Bring Your Own (BYO) Azure subscription
- Entra ID Tenant
- New or existing Windows 10/11 or Windows Server 2019/2022 non-persistent or persistent desktop Frame Account
Setup
-
Navigate to the non-persistent or persistent desktop Frame Account Dashboard within your AHV cluster in Frame Console.
-
On the Summary page, you can locate the Vendor ID of your Frame Account. That number will be part of the Azure Resource Group (RG) name that is visible in the Azure Portal.
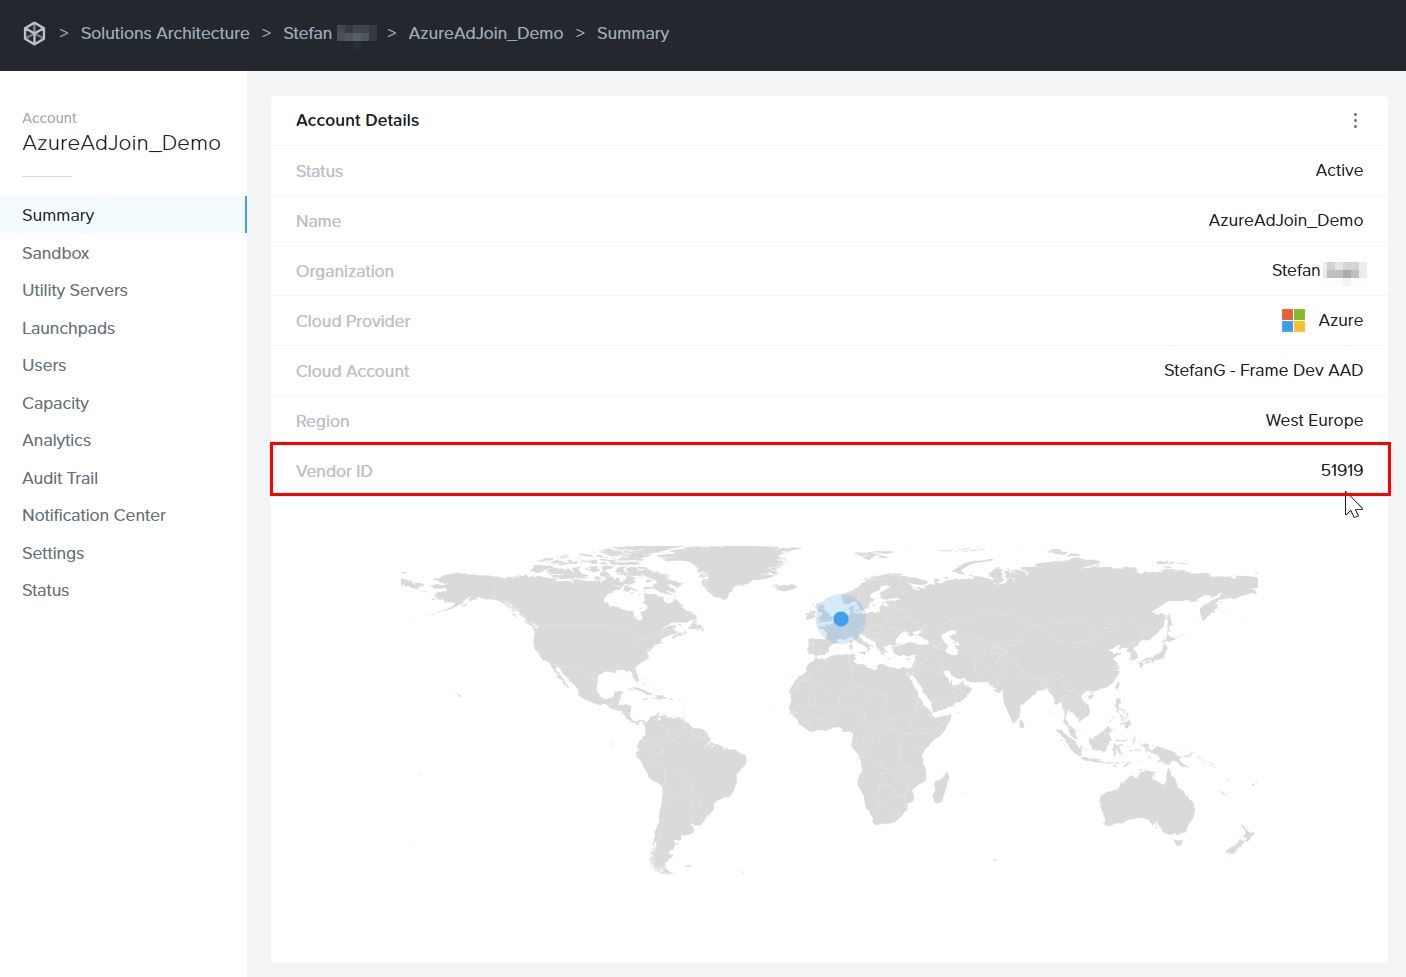
-
Next, navigate to your Azure Portal. Locate that resource group, go to Access Control (IAM), and grant access by assigning the Azure “Virtual Machine Administrator Login” or “Virtual Machine User Login” role to the user(s) or group of users for whom you want to provide administrator or user access to VMs. Details are further explained in official Microsoft documentation. You can also choose to set up role-based access control (RBAC) at the Azure subscription level so all the permissions are inherited down to RGs. Then, when new Frame Accounts are created, you will not need to manually assign the role to the newly created resource group.
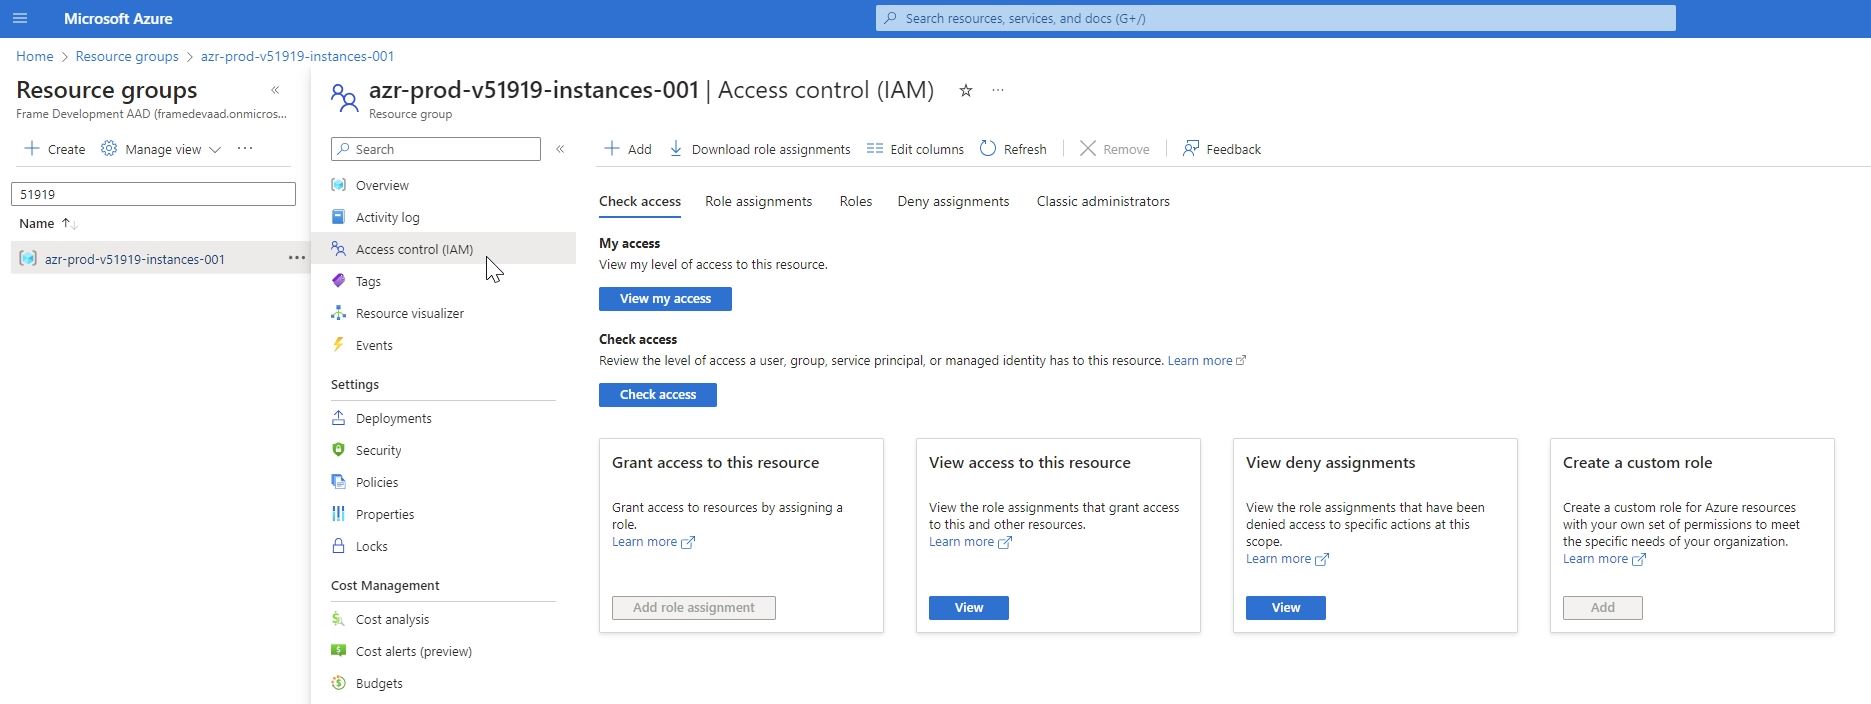
The Azure "Virtual Machine Administrator Login" role refers to the login credentials and privileges granted to an individual who has administrative control and authority over virtual machines, allowing them to manage and configure various aspects of virtual machine environments.The Azure "Virtual Machine User Login" role pertains to the login credentials and permissions given to a user who can access and utilize virtual machines within a virtualized environment, typically with limited administrative capabilities, focusing more on regular usage and application-specific tasks within the virtual machine. -
In the Frame Console, navigate to the Settings page, click on Domain Settings and select Entra ID. Then, click the Save button.
The Entra joined device feature requires users to login with their Entra ID user account.
-
Next, navigate to the Sandbox page, and Publish the Sandbox.
Only test and production pool VMs will be Entra device joined. Sandbox and Utility server(s) will not be Entra device joined. If you wish to join your Utility server(s) to your Entra ID tenant, they must be joined manually.
Do not join the Sandbox to Entra ID as this action can lead to sysprep failures during the publish process.
-
After a successful publish, navigate to the Status page to check the status of your VMs. You will notice that Entra joined devices have a prefix in their hostnames.
-
You can also login into Azure Portal and search for these Entra joined devices.
-
When end users log into their assigned VM, they will be asked to enter their Entra ID credentials as shown below:

Windows Hostname Prefix
The Windows hostnames for Entra joined devices on Azure will be generated once the VMs are provisioned, by concatenating the prefix WINAAD- with an 8 alphanumeric string, following the procedure described in Microsoft documentation.
The prefix will be the first 4 characters of the filename of the master image used to create the Frame Account Sandbox.
# Entra ID Joined Devices [Microsoft Entra ID-joined devices](https://learn.microsoft.com/en-us/entra/identity/devices/concept-directory-join) are devices that have been joined directly to Microsoft Entra ID (formerly known as Azure Active Directory) without the need for an on-premises Active Directory (AD) environment. This option is primarily designed for Windows 10 and Windows 11 devices. With Entra joined devices, users can sign in to their virtual machines using their Entra ID credentials, providing a seamless and consistent authentication experience across devices and cloud-based resources. It eliminates the dependency on on-premises AD infrastructure for authentication. It is important to note that Entra joined devices are not a replacement for traditional domain-joined devices in all scenarios. Organizations with complex on-premises Windows infrastructure, specific group policy requirements, or the need for on-premises resource access may still prefer using Active Directory domain-joined devices. Frame does support the [Microsoft Entra hybrid joined device model](https://learn.microsoft.com/en-us/entra/identity/devices/concept-hybrid-join) combining both Entra joined devices and on-premises Active Directory domain-joined devices. Refer to our [official solution guide](https://docs.difr.com/books/platform-administrators-guide/page/azure) for further details. Customers choose to use Entra joined devices for several reasons: - Simplified device management: Entra joined devices can be managed centrally through Entra ID, allowing for streamlined device management and configuration without the need for on-premises infrastructure. - Cloud-centric approach: Organizations that rely heavily on cloud services and want to leverage Entra ID's capabilities can benefit from Entra joined devices. It aligns well with a cloud-first strategy and enables tighter integration with Azure services. - Enhanced security and access controls: Entra ID provides advanced security features, such as conditional access policies and multi-factor authentication, which can be applied to Entra joined devices. This helps enforce strong security measures for accessing corporate resources. - Seamless access to cloud resources: Entra joined devices enable users to seamlessly access cloud-based applications and services integrated with Entra ID, such as Microsoft 365 and other SaaS applications, using their Entra ID credentials. ## Supported Infrastructures and Operating Systems Frame supports Entra joined devices Early Access for infrastructure configurations listed in the table below:| Infrastructure | OS Options | Account Type | Additional Details |
|---|---|---|---|
| Azure | Windows 10 or 11, Windows Server 2019 or 2022 | Non-persistent and persistent | A native Azure Virtual Machine Extension is automatically installed and used to join the Azure VMs to Entra ID during the publishing process. |
| AHV, AWS, GCP, IBM | Windows 10 or 11 | Persistent | End users must go through the Microsoft Windows Out of Box Experience (OOBE) procedure to join their assigned persistent desktop to Entra ID. |
AHV customers using persistent desktop Frame Accounts can still set up Intune in Microsoft Azure to manage end users' workload VMs.
## Windows Hello for Business (WH4B) Windows Hello for Business (WH4B) is a secure Windows 10/11 authentication method that enables users to sign in to their corporate devices and applications using biometrics or PIN, eliminating the need for passwords. It enhances security and simplifies the login experience for users. By default, many customers with Entra ID Premium Subscription will have WH4B enabled by default. In order to set up PIN (as an example of one WH4B sign in option), please note that you need to enable User Account Control (UAC), which is disabled by default on Frame workload VMs. To enable UAC, login to your `Sandbox` and in prior to publishing, execute the PowerShell command as a Windows administrator: ```powershell Set-ItemProperty -Path "HKLM:\SOFTWARE\Microsoft\Windows\CurrentVersion\policies\system" -Name "EnableLUA" -Value 1 -Type DWORD ``` If all prerequisites for using WH4B are satisfied (e.g., using Gen2 instance types with vTPM chip), your end-users will be able to set up a PIN for access to their Frame desktop. As a best practice, WH4B should only be set up with persistent desktop Frame Accounts. # Virtual Machines VMs Dashboard, Capacity, Availability Zones, Persistent Desktops Administration, Cloning, Utility Servers, Register Workload # VMs The last page listed on the left side of your Account Dashboard is the **VMs** page.The VMs page is available on Account-level Dashboards only.
## Non-persistent Accounts The VMs page displays a list of all VMs associated with your Frame account. Server information is listed by workload ID, server name, public IP, private IP, VM type, instance type, and server status. The example below shows the Vms page for a **non-persistent** Frame account.  #### VMs Page - **Workload ID**: Unique identifier for the workload VM. This ID value can be used to search for the corresponding VM in your infrastructure portal. - **Machine Name**: Name of the machine, as reported by Windows or Linux. The <img src={require('./images/dji\_icon.png').default} alt="locally available" style="display: inline"/> icon means that the machine is domain-joined. Hovering over the machine name will display the type of Windows Active Directory domain join (Classic or AD). - **Public IP**: Public IP address or the FQDN of the workload VM. In the case of an FQDN, it will resolve to a private IP address if the Frame account was created with private networking. - **Private IP**: Private IP address of the workload VM. - **VM Type**: Specifies the type of workload - Sandbox, Utility Server, Persistent Desktop, Production, Test, or Shadow. - **Instance Type**: Name of the instance type for this workload VM. Instance type names are specific to the underlying infrastructure. In the case of AHV, the instance type name will be the name you defined under the [Cloud Account](https://docs.difr.com/books/platform-administrators-guide/page/cloud-accounts#add-an-instance-type-ahv-only) for AHV. - **Status**: Current status of the workload VM - **Almost ready**: VM is currently undergoing maintenance or in the process of powering on. - **In session**: The VM is currently being used by a user. - **Rebooting**: VM is rebooting. - **Running**: VM is powered on and available. - **Starting**: VM is powering on. - **Stopped**: VM is powered off. - **Stopping**: VM is being powered off.For Persistent Desktop Frame accounts, the VMs page will also include a \*\*User\*\* column showing the user email address assigned to the persistent desktop.
 If you want to see the latest status, refresh the page at any time by clicking the "Refresh" button in the upper right corner of the page. For each VM type and the workload VM status (Running, Stopped, In session, etc.), administrators can perform actions on the workload VM by clicking on the kebab menu.| VM Status(es) | Action | Description |
|---|---|---|
| Almost ready, In session, Rebooting, Running, Starting | Reboot | Reboot the virtual machine. **Reboot** reboots the VM when the session ends. **Force Reboot** ends the session and reboots the VM immediately. |
| Almost ready, In session, Rebooting, Running, Starting | Stop | Power off the virtual machine. |
| Stopped, Stopping | Start | Power on the virtual machine. |
| VM Status(es) | Action | Description |
|---|---|---|
| All | Installed Software | List the software (name, publisher, and version) installed on the persistent virtual machine (e.g., Sandbox, Utility Server). |
| All | Enable RDP Debug | Refer to [RDP Debug Mode](https://docs.difr.com/books/platform-administrators-guide/page/rdp-debug-mode) documentation. |
| All | Terminate | Terminate the virtual machine. VM will be re-provisioned using the last published Sandbox image. If the VM is the Sandbox, then the VM will be re-provisioned using the most recent backup or if there is no backup, the master image the Sandbox was created from. |
| VM Status(es) | Action | Description |
|---|---|---|
| Almost ready, In session, Running, Starting, Stopped, Stopping | Change instance type | Switch the persistent desktop VM to use a different instance type. Available to all VM Types except Shadow. |
| Almost ready, In session, Running, Starting | Reboot | Reboot the virtual machine. **Reboot** reboots the VM when the session ends. **Force Reboot** ends the session and reboots the VM immediately. |
| Almost ready, In session, Running, Starting | Stop | Power off the virtual machine. |
| Running, Stopped | Reassign | Reassign the currently assigned persistent desktop to another user who does not have an assigned persistent desktop. Refer to [Reassign Persistent Desktops](https://docs.difr.com/books/platform-administrators-guide/page/persistent-desktops-administration#bkmrk-reassign-persistent-). |
| Running | Assign | Assign the unassigned persistent desktop to a user who does not have an assigned persistent desktop. |
| Stopped | Unassign | Refer to [Unassign Persistent Desktops](https://docs.difr.com/books/platform-administrators-guide/page/persistent-desktops-administration#bkmrk-unassign-persistent-). |
| Stopped, Stopping | Start | Power on the virtual machine. |
| VM Status(es) | Action | Description |
|---|---|---|
| All | Installed Software | List the software (name, publisher, and version) installed on the persistent virtual machine (e.g., Sandbox, Utility Server, and persistent desktop). Available to all VM types except Shadow. |
| All | Enable RDP Debug | Refer to [RDP Debug Mode](https://docs.difr.com/books/platform-administrators-guide/page/rdp-debug-mode) documentation. |
| All | Terminate | Terminate the virtual machine. VM will **not** be re-provisioned. If the VM is the Sandbox, then the VM will be re-provisioned using the most recent backup or if there is no backup, the master image the Sandbox was created from. Refer to [Terminate a Persistent Desktop](https://docs.difr.com/books/platform-administrators-guide/page/persistent-desktops-administration#bkmrk-terminate-a-persiste). |
You can define one or more production pools with the same instance type.
Additionally, you can set up and manage one or more pools of test instances so that you can publish image changes to a smaller group of users before publishing the image changes to your users accessing the production instances. ## Default Capacity Three key parameters define the default capacity of each pool: - **Minimum number of instances (Min)**: The minimum number of instances powered on at a given time that can be accessed by users immediately. - **Buffer instances (Buffer)**: Additional powered-on instances that are ready for a user within seconds. Set this to a number of users you expect will connect within a 2-minute window of time (the time it takes to boot an instance). - **Max number of instances (Max)**: The desired number of instances (concurrent users) to be provisioned for the pool. The administrator should determine this number based on peak session concurrency since this is a hard limit.Important Note that min and buffer instances incur hourly usage whether users are connected or not. You can set both to 0, so instances will only boot on-demand. This conserves usage, but users must wait approximately 2 minutes to start a Frame session.
## Active Capacity The Frame platform allows admins to define “active capacity” for certain times of day for certain days of the week. For example, you may want your minimum and buffer increased during specific hours on specific days when you expect an increase in usage. To schedule active capacity, simply click anywhere on the *Active Capacity* scheduling table to create a start time and then drag to the end time. This can be adjusted at any time by clicking from the desired start/end edge and dragging. With Active Capacity, you can define the following parameters for each time window: - **Minimum number of instances (Min)**: The minimum number of instances powered on at a given time that can be accessed by users immediately. - **Buffer instances (Buffer)**: Additional powered-on instances that are ready for a user within seconds. Set this to a number of users you expect will connect within a 2-minute window of time (the time it takes to boot an instance).Be sure to save your changes by clicking the blue \*\*Save\*\* button in the upper right corner of the window.
## Capacity per Pool Admins can define pool capacity depending on the instance type being used. For example, you may have a team of power users requiring an instance type with more RAM or vCPUs. You can then set active capacity for that instance type by clicking on the corresponding instance type tab and defining those values.Any test instances provisioned count towards the maximum number of workload VMs provisioned for your Frame Customer entity and in determining \[Per VM\](/subscription#per-vm-subscription) subscription overage.
## Add Production Pool Admins can add additional production pools for a given cloud infrastructure. To add a new production pool, go to *Capacity* from the Dashboard and click on the **+ Add Instance Pool** option to the right of the existing production pools. A new window will appear, select your new instance type from the drop-down menu and click **Add**.A pool must have the Default Capacity max value be 0 before the pool can be deleted.
# Availability Zones Availability Zones (AZs) are isolated locations within data center regions provided by various IaaS providers. They offer high availability, fault tolerance, and redundancy by allowing resources to be distributed across multiple zones. Proper use of Availability Zones can significantly enhance the resilience of your infrastructure and services. In the context of Frame platform, single AZs must be used for customers wishing to enable Personal Drives or Enteprise Profiles for their account, depending on infrastructure provider. However, it's crucial to understand the implications of moving resources between Availability Zones. Changes to AZs can have significant impacts which we will discuss in more detail below.Persistent Desktops: Customers using Persistent Desktop accounts can change their Availability Zones once their account is created, but their Persistent Desktops will have to be recreated.
## Supported Infrastructure Providers Frame supports the use of AZs for the following IaaS providers: - Amazon Web Services (AWS) - Google Cloud Platform (GCP) - IBM Cloud VPC Early Access (Known as "Multizone Regions" or MZRs)Frame does not currently support the ability to select a single AZ for Azure-based accounts.
## Configuring Availability Zones in Frame Console In the Frame console, you can manage Availability Zones by navigating to the **Availability Zones** section under the **Settings** tab of your Account's Dashboard. Here, you can toggle the use of a single Availability Zone. Please note that Enterprise Profiles and Personal Drives require setting a single Availability Zone before being enabled for an account.
Key Considerations
### Moving Availability Zones When considering moving resources between Availability Zones, keep the following points in mind: 1. Manual backups are not necessary before moving AZs as this action is already performed as part of the process. 2. Switching to a single AZ in Console will move all volumes to the specified AZ except for the Sandbox VM. 3. Once created, disks reside in one AZ until they are deleted, and VMs in the pool can be scattered across multiple zones. With the “use single zone” option, all VMs are provisioned in one AZ, necessitating the recreation of VMs in the selected zone. Volumes are created in the same zone, recorded as the designated zone for that account. 4. If needed, customers can change from one single AZ to another. This process involves recreating all the volumes in the newly selected zone. However, this change is rarely necessary. ## Procedure Moving your Frame resources to a single AZ is simple and can be done with only a few clicks. Follow the steps below if you plan on enabling Enterprise Profiles or Personal Drives for your account. 1. From the Dashboard of your account, click on the **Settings** link on the left-hand side. 2. Click the **Availability Zones** tab. 3. Under **Availability Zones**, enable the "Use a single availability zone" toggle and select your desired AZ (availability zone). ## Resources More details around availability zones for your preferred IaaS provider can be found below: - [Amazon Web Services (AWS)](https://docs.aws.amazon.com/AWSEC2/latest/UserGuide/using-regions-availability-zones.html#concepts-availability-zones) - [Google Cloud Platform (GCP)](https://cloud.google.com/compute/docs/regions-zones) - [IBM Cloud VPC Early Access ](https://cloud.ibm.com/docs/overview?topic=overview-locations) # Persistent Desktops AdministrationBy default, Frame accounts are "stateless." This means that all changes made to an instance are lost after the session closes. The instance is then returned to a pool where it waits to be served to the next user. The Frame platform also offers an alternative option called "Persistent Desktops."
Persistent Desktops are stateful, desktop-only instances that are individually assigned to users. Users are given administrative control over their own desktop – they can install and manage their own unique application sets and settings in their own persistent environment. Account administrators can still monitor usage and basic session activity through the account Dashboard.
Persistent Desktop accounts can be created and configured:
- On one of the supported infrastructures
- For Windows domain-joined instances, if required
Applicability
Persistent Desktops were designed for organizations that prefer to give their users more control over their own environments. Frame Account administrators still configure the Sandbox image to serve as the base for all instances in the pool, but end users manage their own instances once assigned. If required, Persistent Desktops can be domain-joined so enterprises can manage them through a Windows domain.
Requirements
-
Users must be able to authenticate to the platform using either:
-
If the persistent desktop Frame account is configured to join the persistent desktop VMs to a Windows domain, users may be required to authenticate to the Windows domain before accessing their assigned Windows desktop.
Setup
The Persistent Desktops feature is enabled upon account creation. It cannot be enabled on accounts that have already been created, since provisioning and infrastructure management of a Persistent Desktop account is handled differently than on a non-persistent Frame account.
Persistent Desktop Lifecycle
The state of a persistent desktop instance can be defined in the following ways:
- Currently assigned to a user ("Assigned Persistent Desktop")
- Currently unassigned, but was previously assigned to a user ("Unassigned Persistent Desktop")
- Waiting to be assigned to a new user ("Shadow Persistent Desktop")
When a user starts a Frame session and has not been assigned a persistent desktop, Frame associates the user's identity (as defined by the combination of identity provider they used to authenticate to Frame and their email address) to a Shadow Persistent Desktop. This persistent desktop is now the user's Assigned Persistent Desktop. If there are no Shadow Persistent Desktops available, the user will receive an error. Once a Shadow Persistent Desktop has been assigned, then Frame will provision another Shadow Persistent Desktop using the last published Sandbox, provided that the sum total of Assigned, Unassigned, and Shadow Persistent Desktops is less than or equal to the Max possible number of users set in Capacity.
Each time the user authenticates to their identity provider and the identity provider passes to Frame the user's email address, Frame will broker the user into their Assigned Persistent Desktop instance.
Administrators can also unassign a user from their Assigned Persistent Desktops as well as reassign a previously logged in user to the Assigned Persistent Desktop.
Finally, if the administrator can terminate a persistent desktop whether the desktop is Assigned or Unassigned.
Capacity Administration
Account capacity settings work a little differently than a non-persistent Frame account as there is only one pool of persistent desktops.
-
Max possible number of users: Enter the max number of expected users (instances) for the account in this field. This value governs the sum total number of Assigned, Unassigned, and Shadow Persistent Desktops that can exist at anytime in the Frame account. Frame will terminate shadow persistent desktops if this value is reduced below the sum of the number of assigned, unassigned, and shadow persistent desktops.
-
Shadow Pool Count: Frame will provision the specified number of shadow persistent desktop VMs at publish.
-
Minimum Unassigned VMs: Frame will attempt to maintain the specified number of minimum unsigned VMs as unassigned VMs are assigned to new users.
-
Keep running instances for new users: Enabling this toggle keeps a Shadow Persistent Desktop instance running at all times, so it is immediately available to new users (assuming the total number of Assigned, Unassigned, and Shadow Persistent Desktops is less than the specified Max possible number of users).
Once a Shadow Persistent Desktop instance is assigned to a user, Frame will provision a new Shadow Persistent Desktop subject to the Max possible number of users value. By default, the number of Shadow Persistent Desktop is set to 1. This value can be increased on request by contacting Support.
When using AWS, GCP, or Azure, enabling this toggle will result in infrastructure costs for the time that the Shadow Persistent Desktops are running, even though it is not being actively used. Keeping this toggle off eliminates those infrastructure costs, but a new user will need to wait for the instance to power on before the instance can be assigned to them for their first Frame session. This can take upwards of 10-15 minutes, depending on the infrastructure.
- Keep instances running: Specifies when and for how long the persistent desktop VMs will stay powered on.
- Basic: The persistent desktop is powered on when the user requests access to their persistent desktop. The persistent desktop will remain on for the next full hour increment, measured from when the instance was first powered on, even if the user closes their session. For example, if the persistent desktop was powered on at 9:05 AM and the user used their persistent desktop until 12:30 PM, then the active, but not used persistent desktop would be powered off at 1:05 PM. The time period can be lowered to 15 minutes by contacting Support.
- Always: The persistent desktop powers on and will remain powered on unless the persistent desktops are rebooted or powered off by the end user or administrator.
- Wake up instances: Instances can be powered on at a specific time of the day. Those persistent desktop VMs that are not in use will remain powered on for the next full hour increment, as measured from when the instance was first powered on, and then powered off. The time period can be lowered to 15 minutes by contacting Support.
Sandbox Image Management
Managing your Sandbox image on a Persistent Desktop account is the same as a non-persistent, regular Frame account. The difference lies in how your changes are propagated to the workload instances. Since an instance is assigned to each user when they log in for the first time, any Sandbox updates published after the assignment will apply only to the Shadow Persistent Desktop. Assigned and Unassigned Persistent Desktops will not be affected by the publish of the Sandbox.
If the same changes to the Sandbox must be applied to Assigned or Unassigned Persistent Desktop instances, an account administrator must use them to those instances or terminate the Assigned or Unassigned Persistent Desktop, as discussed in Terminate a Persistent Desktop.
Terminating an instance will permanently delete all data on that instance. Any data a user needs from their instance, such as work files or software licenses, should be retrieved from their persistent desktop before the account administrator terminates their instance.
Updates
The Updates page of your Account Dashboard displays any required OS or Frame updates for your VMs. More details can be found in the Updates section of our documentation.
Persistent Desktop Volumes
Administrators can manage the persistent desktop backups for individual users by navigating to the Volumes page in the account Dashboard. The first tab is the Volumes tab which provides a list of named user volumes, the volume size and status, and the available free space for each volume. There are also additional operations, described below, accessible under the kebab menu in the upper right corner of the page.
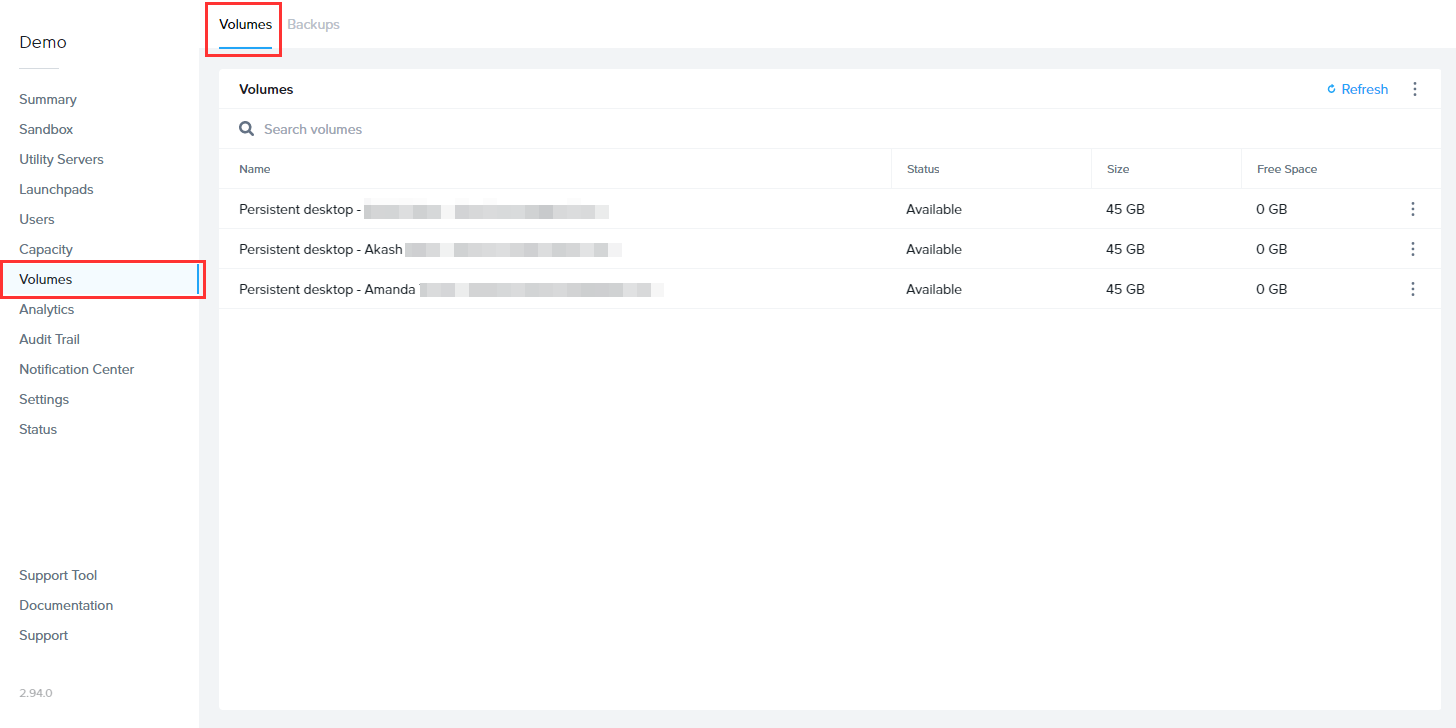
If you are looking for a specific volume, you can use the search bar at the top of the page to search by volume name.
Autogrow Settings
If you anticipate that your users will need to increase their Persistent Desktop disk size regularly, you can set Frame parameters to scale up as needed automatically. To do this, navigate to the Volumes page, click on the kebab menu and select Autogrow settings. A new dialog box will appear:
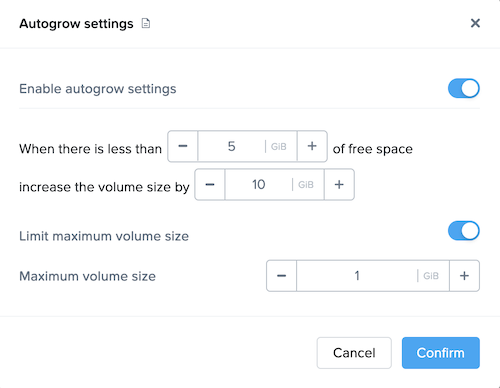
Here, you can specify the threshold at which the disk size will automatically increase for established users. By default, the disk volume will automatically be increased by 10 GB when there is less than 5 GB of free space remaining. You can adjust these values as you see fit for your users.
You can enforce a maximum disk volume size by enabling the Limit maximum volume size slider and setting the Maximum volume size. Enable autogrow settings must be enabled first. If you do not enable Limit maximum volume size, there is no limitation on how large the individual user's persistent desktop volume can autogrow.
Be sure to click Confirm once you have adjusted the settings as desired.
Backup All Volumes
You can backup all persistent desktop volumes (versus individual persistent desktop volumes) by clicking on the kebab menu and select Backup all persistent desktop volumes. You will be asked to confirm that you wish to proceed.
Clone
You can clone the persistent desktops from one Frame account to another Frame account using the Clone persistent volumes feature. This feature is only for persistent desktop Frame accounts on Nutanix AHV clusters.
-
Before you initiate the clone operation, you can specify whether the clone operation will replace persistent desktops in the destination Frame account if the same owners have assigned persistent desktop in the source Frame Account:
- Disable Replace Assigned Volumes (default) will direct the clone operation to skip the cloning of any persistent desktops from the source Frame account whose owners have assigned persistent desktops in the destination Frame account.
- Enable Replace Assigned Volumes to copy all persistent desktop volumes from the source to destination Frame account. If there are owners with assigned persistent desktops in both the source and destination Frame accounts, the owners' assigned persistent desktop volume from the source Frame account will replace the persistent desktop volume in the destination Frame account.
-
Then click on Clone button to proceed or Cancel button to cancel the clone operation request.
The clone operation **will not** delete the persistent desktop volumes in the source Frame account.
Prerequisites
- Nutanix Remote Site must be configured between the two AHV Clusters.
- The destination Frame account must exist in Frame Console.
Process
The persistent desktop VMs in the source Frame account will be powered off before the clone operation commences. If there are any users in session, the clone operation will block until all users have finished their sessions and Frame can power off their persistent desktop VMs.
Once the clone operation completes, Frame Platform will power on the persistent desktop VMs based on Capacity Administration Keep instances running setting.
Backups
The Backups tab provides the account administrator with a detailed view of available backups for the volume specified under the Volume drop-down menu at the top of the window. Details include the name, time/date of creation, type of backup, and the number of backups for the volume (shown in the lower right corner of the window).
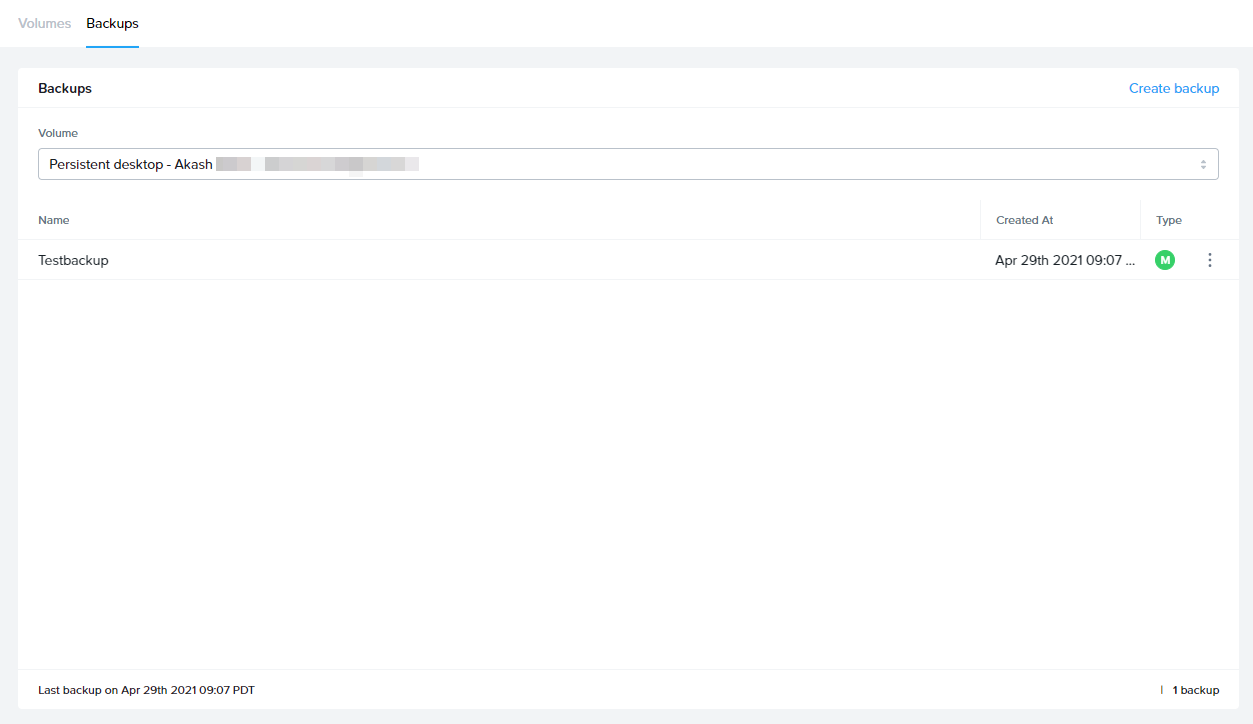
Manual Backup and Restore
To create a backup, simply click the blue Create backup link in the upper right corner of the window. A new window will appear prompting you to select the volume you wish to backup from the drop-down menu. Be sure to provide a name for this backup as well. From there, click Create in the bottom right corner of the window.
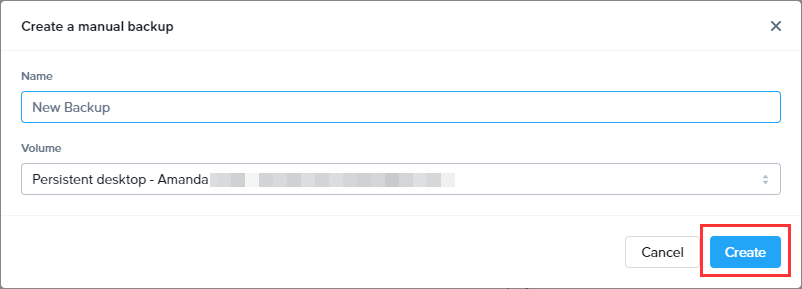
In order to create a persistent desktop volume backup, you must ensure the instance is in a **stopped** state.
The status of your backup will appear in your Notification Center:
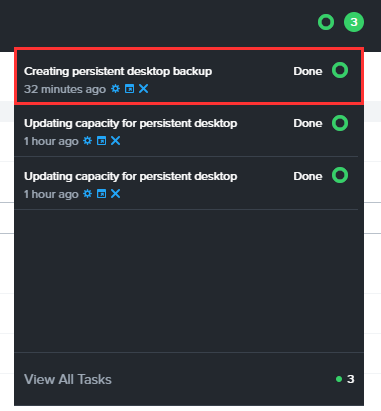
Once completed, the new backup will appear in your list. You can restore a backup at any time by clicking on the kebab menu to the right of the desired backup and clicking Restore.
Restoring from a previous backup will replace the volume with the backup image you select. Any changes made since the selected backup was created will be erased. 2. You can set the number of manual backups that are retained under Settings, Number of Manual Backups Retained.
Schedule Backups
To schedule automated backups of all persistent desktops, simply click the kebab menu in the upper right corner of the backups section and click on Settings. A new window will appear with a toggle to enable Scheduled Backups.
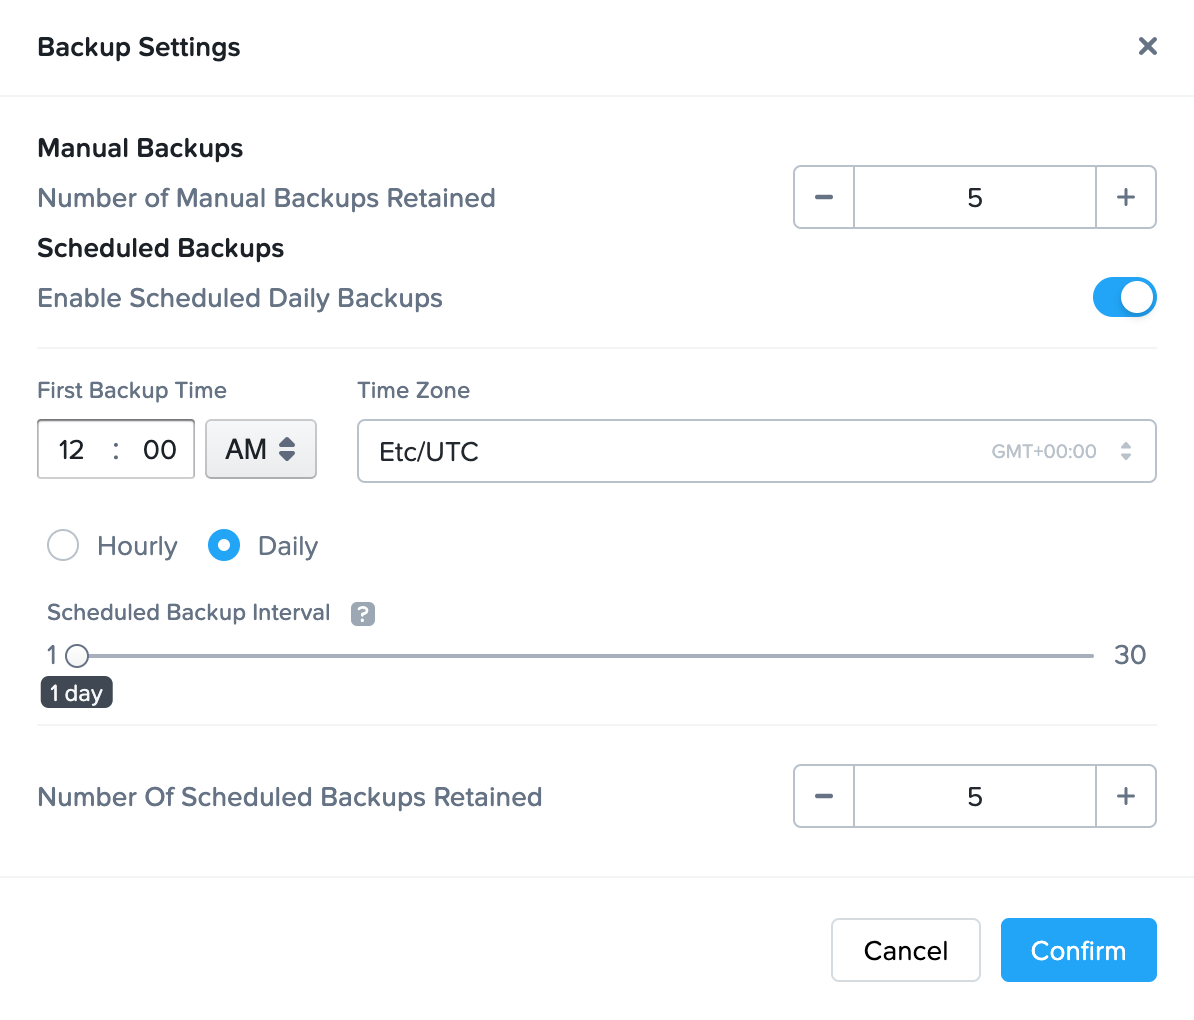
Enable the toggle and specify your scheduled backup settings.
- First Backup Time: The time when Frame will start the backup of the persistent desktops.
- Time Zone: Time zone associated with the time to start the backup of the persistent desktops.
- Scheduled Backup Interval: Periodicity for when the backups are taken (e.g., value of means backup daily).
- Number of Scheduled Backups Retained: Frame will retain up to the specified number of scheduled backups.
Click Confirm to proceed.
In order for a persistent desktop to be included in the next scheduled backup event, the persistent desktop must:
1. Be in or status. If the persistent desktop is , Frame will power off the persistent desktop before the disk is backed up.
If a user is , the persistent desktop will not be included in the scheduled backup event.
2. Have been powered on for the disk to have changed since the last scheduled backup event.
If you change the backup schedule, the revised backup schedule takes effect on the next day.
Delete a Backup
You can delete a backup by clicking on the kebab menu mentioned above and selecting Delete.
info User-managed Backups
Administrators can decide whether or not they would like their users to manage their own system backups. User-managed backups can be enabled by navigating to the Settings page in the Dashboard and enabling the Are persistent desktops backups allowed toggle listed under General settings.
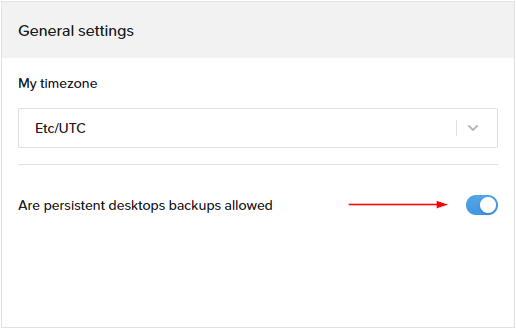
Once enabled, end users can manage their backups from their profile page. More information about this feature can be found in the Navigating your Frame Account Guide.
Change Instance Type
Some administrators may wish to change their Persistent Desktop user's instance type to accommodate the user's needs. For instance, the end user may need a higher-performing instance type after taking on a project which requires video editing and graphic design. Since Persistent Desktop accounts are structured differently than a standard Frame account, this process is also slightly different (but still simple!).
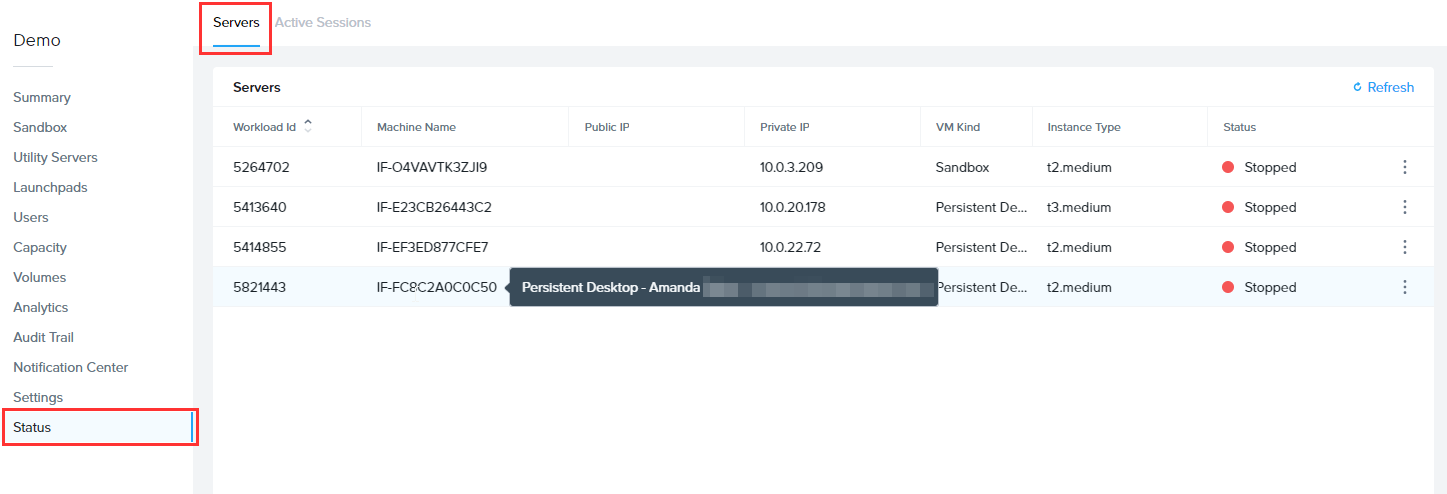
- Next, click the kebab menu to the right of the Persistent Desktop and select Change instance type.
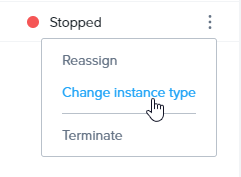
- Select the desired instance from the drop-down menu. Click Save.
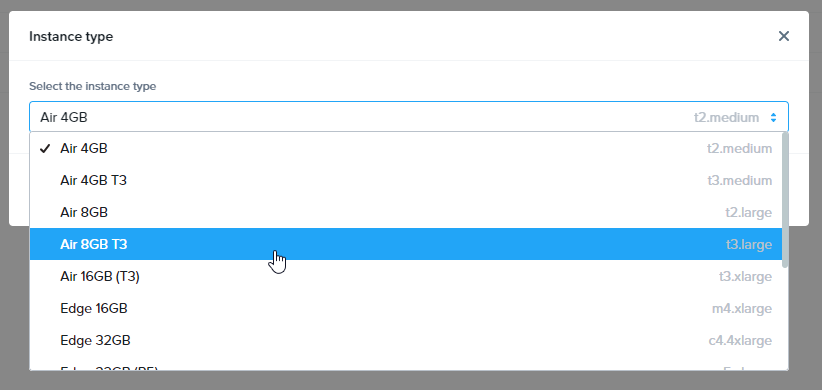
- You will receive status updates for the operation through the Notification Center.

The instance type update will be reflected in the listed details under the Servers tab.
For public cloud infrastructure, changing the instance type requires the new VM to power on after the existing persistent desktop disk is attached to the new VM and the old VM is terminated.
Reassign Persistent Desktops
Administrators can reassign an Assigned Persistent Desktop to a different user (or let an existing user be reassigned to their Persistent Desktop via a different Identity Provider) by going to the Status page within the Account Dashboard. Before proceeding to the instructions, please carefully read the considerations below:
Considerations
-
The desired user must have already logged in to the Frame Account using the identity provider and email address specified by the administrator. If the user is not visible in the drop-down menu, then they have not logged in to Frame using that specific Identity Provider. Ensure the user first logs in to the Frame Account before reassigning the Assigned Persistent Desktop to the user.
-
Any existing applications, configurations, files, application data, local user profiles, etc. will still remain on the VM when you reassign a Persistent Desktop. If desired, administrators can reassign the VM to themselves first if they need to perform any maintenance before reassigning to a new user.
-
The VM cannot be in use by a Persistent Desktop user.
-
If a user already has a Persistent Desktop assigned to them within the same Frame account, they cannot be assigned to another Persistent Desktop. Administrators attempting to do so will see an error message that reads “Bad Request: Invalid request. Selected user already has assigned instance with same account.”
Procedure
-
Navigate to the Status page on the Account Dashboard and select the Servers tab. You can hover over the machine name on this list to see more details (including the user name assigned to the Persistent Desktop VM).
-
Click on the kebab menu to the right of the Persistent Desktop to be reassigned and click Reassign.

-
When you select Reassign, the following window will appear:
-
Use the drop-down menus to select the Identity Provider the user will be accessing the platform with and the new user's email address.
-
Click Save when you're ready. Once the desktop has been reassigned, you can hover over the machine name of the Persistent Desktop VM to verify the change has been made.
Unassign Persistent Desktops
Administrators can unassign a user from their Assigned Persistent Desktop at anytime. Once the user is unassigned from their persistent desktop, the persistent desktop is an Unassigned Persistent Desktop.
Considerations
-
The administrator cannot unassign an Assigned Persistent Desktop if the persistent desktop in use by a Persistent Desktop user.
-
If the user starts a session after they were unassigned from their Assigned Persistent Desktop, Frame will:
- Assign the user a Shadow Persistent Desktop, if one exists, and this persistent desktop will now be an Assigned Persistent Desktop.
- Broker the user to an existing persistent desktop that the administrator assigned to the user using the Reassign Persistent Desktops feature (prior to the user starting a session in Frame Console).
If the administrator does not want the user to get a new persistent desktop, then they must remove the user's authorization to access the Frame persistent desktop account.
Procedure
Terminate a Persistent Desktop
If an assigned persistent desktop is no longer needed, you can terminate the persistent desktop with the following procedure:
Frame will not create a new instance to replace the terminated Persistent Desktop. The next time the user logs into Frame and requests a desktop, Frame will:
- Assign the user a Shadow Persistent Desktop, if one exists, and this persistent desktop will now be an Assigned Persistent Desktop.
- Broker the user to an existing persistent desktop that the administrator assigned to the user using the Reassign Persistent Desktops feature (prior to the user starting a session in Frame Console).
If the administrator does not want the user to get a new persistent desktop, then they must remove the user's authorization to access the Frame persistent desktop account.
Cloning Persistent Desktop Workload VMs Across Frame Accounts
Frame supports cloning Persistent Desktop (PD) workload VMs from one Frame account to another using the Clone feature. This functionality is available across all supported cloud providers, including Nutanix AHV, provided that both the source and destination accounts are deployed on the same Cloud Account.
Cloning Scenarios
The table below summarizes which cloning scenarios are supported:
| Cloning Scenario | Supported? | Additional Notes |
|---|---|---|
| Non-Domain Joined Instance (Non-DJI) → Non-DJI | ✅ | No restrictions. |
| Non-DJI → Domain-Joined Instance (DJI) | ✅ | Admins must configure the domain post-cloning. |
| DJI (Same Domain) → DJI (Same Domain) | ✅ (with additional steps) | Source VM is backed up before cloning. The original VM is deleted from the source account after cloning to maintain domain integrity. |
| DJI (Different Domains) → DJI (Different Domains) | ❌ | Domain trust/security constraints prevent this operation. |
| Other cloning scenarios | ❌ | Not allowed. |
Cloning a **persistent desktop to a different account has certain limitations if the source account is domain-joined**. Users will see a **warning message** in the UI before proceeding. The clone operation does not delete Persistent Desktop volumes in the source Frame account unless explicitly required by domain management policies.
Prerequisites
Before initiating a clone, ensure the following requirements are met:
- Both source and destination accounts must be deployed on the same Cloud Account.
- Both accounts must use the same Cloud Service and Image Family.
- The destination Frame account must be fully deployed before cloning.
- If cloning between domain-joined accounts, verify that domain configurations align to prevent conflicts.
- Cloning across different domains is not supported.
Cloning Process
# Cloning Organizational and Customer administrators are granted the ability to clone from current and backup Sandbox/Utility Server images to other accounts. This feature is ideal for scenarios where administrators have configured an image to their liking and would like to re-use it in other accounts. There are two options when cloning a Sandbox or Utility Server: 1. [Clone a Sandbox or Utility Server](https://docs.difr.com/link/117#bkmrk-clone-a-sandbox-or-u-1) - this operation triggers the backup of the source disk before copying the backup to the destination Frame account and restoring the backup as the destination Sandbox or Utility Server disk. Each clone operation generates another new backup. 2. [Clone from a Backup](https://docs.difr.com/link/117#bkmrk-clone-from-a-backup) - this operation copies the specified source disk backup to the destination Frame account and restores the backup as the destination Sandbox or Utility Server disk. This clone operation does not generate a new backup. ## Considerations - Only Organization and Customer-level administrators can initiate a clone. - Cloning works only in account entities that have been created within the same public cloud account or if the source/destination AHV clusters have been configured bidirectionally with a [Remote Site](https://docs.difr.com/books/platform-administrators-guide/page/disaster-recovery)). - Cloning from an existing Sandbox or Utility Server backup is faster than cloning from a Sandbox or Utility Server because the Frame control plane does not have to take a backup of the Sandbox or Utility Server virtual machine disk. Furthermore, if you need to clone the Sandbox from one source Frame account to more than one destination Frame account, cloning from an existing Sandbox backup is highly recommended. ## Clone a Sandbox or Utility Server The Sandbox/Utility server cloning operation will copy the Sandbox/Utility server image in one account to a Sandbox/Utility server in a different account.You must initiate the Sandbox/Utility Server cloning operation in the account you wish to copy the image from.
Follow the steps listed below to clone an image from one Sandbox/Utility server to another Sandbox/Utility server. 1. Navigate to the Dashboard of the account you would like to clone the Sandbox or Utility server from. 2. From the **Sandbox** or **Utility Servers** page of your Dashboard, navigate to the desired Sandbox or Utility server you wish to clone from. Click on the ellipsis next to the desired system and select **Clone to Another Account**.Connecting to an On-Premises server Though we typically recommend using the Utility server for client-server applications, we understand that connections to on- premises servers might be needed. Getting your application working with an established server from your own network will require one of two scenarios: - Configure your network to allow outside connections to the server. At that point, you'd configure the application to connect to whatever domain or IP address information you want to use for establishing the connection, and it should work without issue. By default, Frame doesn't restrict outbound connections from our sessions, only inbound ones. - Configure a VPN tunnel from the instances to your network. This requires the use of a VPN client that allows you to configure the traffic routing rules.
## Create a new Utility Server Creating a new Utility server is relatively simple. From your Dashboard navigate to the “Utility Servers” tab. Click the **Add Utility Server** button in the center of the page. A dialog will appear giving you a number of options to configure your Utility server:The local Windows user `Frame` must still be a member of the local Windows Administrators group in the production VMs for running the Frame services.
## Non-persistent, domain-joined Frame Account With a non-persistent, domain-joined Frame account, the Frame administrator is automatically logged into the Sandbox as the local Windows user `Frame` (a member of the local Windows Administrators group) to manage the image. When the Sandbox is published, the copy of the Sandbox is created and sysprep is executed using the Unattend.xml located in `C:\ProgramData\Nutanix\Frame\Sysprep\Unattend.xml` for FGA 8.X. The generalized Sandbox image is then used to create the production VMs.Customers are allowed to join their Sandbox to their domain. In that case, Frame administrators will login to the domain- joined Sandbox as a domain administrator and not the local Windows user `Frame`. Frame Administrators must remember that Frame will run sysprep to generalize a copy of the Sandbox image, as described previously, during the publish process.
If the user does not login to the domain-joined VM, then the user will be auto-logged as local Windows user Frame in the Windows Administrators group, regardless of whether enterprise profiles are enabled or not.
When a user connects into a production VM for that Frame account for the first time, Frame will create a profile disk for the user and mount that disk on the assigned production VM. After the user is presented with the Windows login screen and authenticates to their Windows domain, Windows will then copy the default profile in `C:\Users\Default` to the user's profile disk. Once the user has a profile disk, changes within the user profile (e.g., registry settings, credential manager entries, application settings, etc.) under `%APPDATA%` will persist between sessions. With domain-joined Frame accounts, the user always runs in the domain user context, regardless of whether enterprise profiles are disabled or enabled. ## Persistent, non-domain-joined Frame AccountIf the user does not login to the domain-joined VM, then the user will be auto-logged as local Windows user `Frame` in the Windows Administrators group. Frame administrators must configure the user profile in the Sandbox under "C:\\Users\\Frame"
## Profile Customization Windows administrators may wish to customize different elements of the Windows user profile. The following subsections highlight the common areas of Windows that administrators often customize. ### Start Menu Administrators may want to change the Windows Start menu layout for their users, following Microsoft's document on [customizing the Start layout](https://docs.microsoft.com/en-us/windows/configuration/customize-and-export-start-layout). In order to make these changes, the Windows administrator needs to add a `LayoutModification.xml` file to the Sandbox in the appropriate default user profile (e.g., `C:\Users\Default\AppData\Microsoft\Windows\Shell` subdirectory). The XML file can be generated by exporting the existing Start Menu layout and then modified per Microsoft guidelines: ```powershell Export-StartLayout –path $yourPath exampleFile.xml ``` ### Task Bar In order to modify the Windows Task Bar for all users, follow the [Configure Windows 10 taskbar](https://docs.microsoft.com/en-us/windows/configuration/configure-windows-10-taskbar) instructions. ### Fonts Adding fonts is straight-forward. Install fonts as usual but make sure to install the fonts *for all users*. ### Background Wallpaper For **non-domain-joined production instances**, Frame Administrators can change the background wallpaper by simply changing it in the sandbox and publishing. Alternatively, admins can place their wallpaper files in a custom location on the Sandbox and update the wallpaper location by using `gpedit.msc` in the Sandbox to set a local group policy under *User Configuration > Administrative Templates > Desktop > Desktop > Desktop Wallpaper*. For **domain-joined instances**, Frame Administrators can set the wallpaper through a GPO.Depending on how the workload VMs are configured to show the custom wallpaper, changes to the wallpaper may or may not apply to users with existing enterprise profiles. Administrators may need to delete the existing enterprise profile disks and have the users start new Frame sessions. When a user starts a Frame session, Frame will provision a new enterprise profile disk and Windows will initialize the user's profile using the Windows default user profile, as defined in the Sandbox.
# Enterprise Profiles The Enterprise Profiles feature collects user profile data on session end and saves it to a secure disk associated with a specific Frame user (based on identity provider (IdP) address) and Frame Account. When that user logs in to a Frame session, their secure profile disk is automatically attached to the virtual machine and made available to their session. This feature allows Frame to provide seamless per-user customization without losing the management benefits of stateless instances. Furthermore, Frame Enterprise Profiles uniquely support both domain joined and non-domain joined instances using Dizzion’s patented technology (US Patent #11,861,388). If your organization's use-case requires the same user's profile be accessible across multiple Frame accounts, third-party profile solutions such as FSLogix, Liquidware ProfileUnity, or Windows roaming profiles can be used. Organizations wishing to leverage one of these third party solutions will also need to configure [Domain Joined Instances](https://docs.difr.com/link/102#bkmrk-domain-joined-instan) and ensure that the *Enterprise Profiles* button in the associated accounts' Dashboards (*Dashboard> Settings> Profiles*) is set to **None**.1. An Enterprise Profile cannot be shared across multiple Frame Accounts. 2. Secure Anonymous Tokens may not be used in combination with Personal Drives and/or Enterprise Profiles. 3. If you plan to use Liquidware ProfileUnity and FlexApp, in addition to Enterprise Profiles, review the Liquidware KB article before enabling Enterprise Profiles.
## Requirements - Enterprise Profiles can be used in both Windows Domain Joined and non-Domain joined accounts. If an account is joined to a domain, users must log in to the Frame instance using their Active Directory credentials. With Domain-joined Frame accounts, a **single Frame user cannot log in to a Frame instance as more than one Active Directory users**. Attempting to do so could result in corruption of the user profile stored in the Profile Disk. Each Frame end user is uniquely identified by the platform (a combination of the identity provider and email address). **Frame end users must access their sessions using only one Active Directory user account.** - The drive letters `U:` and `B:` cannot be in use, as these drive letters are required for the backend implementation of Enterprise Profiles. - Administrators must set capacity and successfully complete a publish before enabling Enterprise Profiles, regardless of whether the Frame account is configured to be domain-joined or not domain-joined.Enabling Enterprise Profiles will increase the time required to establish a Frame session. When a user starts their first Frame session after Enterprise Profiles have been enabled, the time to get to that session may be increased by up to a minute; this is because their Enterprise Profile volume must be created, encrypted, and formatted on that session start. Subsequent sessions will be much faster, but still may be upwards of 10 seconds slower than sessions without Enterprise Profiles, due to timing constraints from the Cloud Provider for attaching volumes to virtual machines. This behavior is normal and expected.
## Enable Enterprise Profiles 1. First, start by [enabling a single Availability Zone](https://docs.difr.com/books/platform-administrators-guide/page/availability-zones) for the associated Frame account. Enterprise Profile's backend implementation through Frame varies depending on the cloud service provider. The implementation used for AWS requires administrators to specify an AZ because the Elastic Block Storage (EBS) resources must be accessible from the same availability zone as the VM pool.You may change the Availability Zone (AZ) by selecting a different AZ and clicking on the Save button. However, this operation should be performed during a scheduled maintenance period as Frame Platform will need to terminate the EC2 instances and recreate them in a new AZ. Additionally, all enterprise profile volumes will need to be backed up and restored in the new AZ. This will take some time depending on the number of enterprise profile volumes and users whose enterprise profile volume has not been moved to the new AZ will not be able to start a session.
2. Now select the *Profiles* tab from the Settings page. Click on the **Enterprise Profiles** radio button. Set the desired *Initial profile size* for your users and click **Save** in the upper right corner.Troubleshooting FSLogix with Windows 11
For customers using FSLogix instead of Enterprise profiles, you may need to adjust certain registry settings in order to get some GPO's to apply extensions at login: ``` HKLM:\SOFTWARE\FSLogix\Profiles GroupPolicyState 0 ``` You may also need to add this regsitry setting to force a refresh of user policies. ``` HKLM:\Software\Policies\FSLogix\ODFC RefreshUserPolicy 1 ``` Before applying these, please check with Frame support if you have any questions.Secure Anonymous Tokens (platform/identity-and-access/secure-anonymous-tokens) may not be used in combination with Personal Drives and/or Enterprise Profiles.
## Enable Personal Drives Setting up Personal Drives for your users is simple and can be done with only a few clicks. 1. First, start by [enabling a single Availability Zone](https://docs.difr.com/link/115#bkmrk-page-title) for the associated Frame account.Personal Drive's backend implementation through Frame varies depending on the cloud service provider. The implementation used for AWS requires administrators to specify an AZ because the Elastic Block Storage (EBS) resources must be accessible from the same availability zone as the VM pool.
2. Now select the “Personal Drives” tab from the Settings page. Click on the toggle to “Enable personal drives for all users.” Set the desired drive size for your users next to “Initial personal drive size” and click “Save” in the upper right corner.If you are sure that you will not use Personal Drives in the future, be sure to delete all of the volume backups and do not create new volume backups before disabling the Personal Drives feature. This will prevent you from retaining any volume backups and incurring unnecessary storage costs.
If you wish to re-enable Personal Drives and have retained the profile backups, you can selectively restore the volume backups for specific users from Volumes > Backup. ## Delete Personal Drives Administrators can delete volumes at any time. Simply navigate to the “Volumes” tab on the “Settings” page of your Dashboard and click the ellipsis next to the volume you would like to delete. Click on the checkbox to delete all backups associated with the selected volumes, if desired. Select “Delete.” Please ensure that the volume status is “Detached” before you attempt to delete it.You cannot shrink the size of a user's Personal Drive. You must delete the disk and recreate the disk again. All data on that deleted Personal Drive is lost unless the Personal Drive contents were copied to another persistent disk before the Personal Drive was deleted and copied back after the new Personal Drive was created.
### Increase Disk Size Administrators can manually increase Personal Drive volume sizes in two ways: 1. To increase one or more volumes, select the checkbox(es) next to the volume(s) for which you would like to increase the disk size. Click on the checkbox for for all volumes, if desired. Click the **Increase disk size** button in the upper right corner of the page. A dialog window will appear prompting you to specify the new disk size. Click the **Save** button to increase the size of the disks or **Close** to cancel the request. 2. Click on the kebab menu associated with a specific Personal Drive volume and then **Increase disk size** to increase the disk size for a specific Personal Drive volume. ## Manage Backups If you would like to implement backups for your volumes, check out the [Backups section](https://docs.difr.com/link/129#bkmrk-page-title) of our documentation. # Expand Drive Size The Frame platform gives admins the ability to expand the drive size of their Sandbox or Utility server as necessary from the Dashboard console.- Once you start the drive size increase process, you cannot roll back to a smaller volume size. - Customers using Azure infrastructure must adhere to their standardized disk sizes, as discussed in their official documentation.
1. First, navigate to the Dashboard of your account. You will land on the **Systems** page where your Sandbox and Utility Server can be managed. 2. Click on the ellipsis icon next to your Sandbox or Utility server and select **Increase disk size** from the drop down menu.**Dropbox Authentication** By default, this configuration will require users to log on to Dropbox each time they start a Frame session. Enterprise Profiles can be configured to avoid this issue. Once Enterprise Profiles has been enabled for the account, the end user needs only to log in to Dropbox once within the session. From that point forward, Dropbox will automatically stay logged in using the credentials stored on the user's profile disk.
## Setup 1. Start by navigating to the account Sandbox you would like to configure with Dropbox. 2. Start a Sandbox session. 3. Go to the Dropbox download site from within the Sandbox and download Dropbox Desktop App. 4. Run the Dropbox installer `DropboxInstaller.exe` within the Sandbox session and continue setup.During installation, Frame will automatically detect the installation of a new application and prompt you to “Onboard to Frame”. If you plan to deliver only virtual desktops, or would prefer this app not appear as an icon on your users' application Launchpad, skip the onboarding workflow by clicking the **Cancel** button. You can always onboard the Dropbox at a later time.
5. Once the installation is complete, the Dropbox login window will appear, simply close the window. **Do not log in**. 6. Next, right-click on the Dropbox icon in your system tray, click the gear icon, and select **Quit** to completely close Dropbox.**GDFD Authentication** By default, this configuration will require users to log on to GDFD each time they start a Frame session. Enterprise Profiles can be configured to avoid this issue. Once Enterprise Profiles has been enabled for the account, the end user needs only to log in to GDFD once within the session. From that point forward, GDFD will automatically stay logged in using the credentials stored on the user's profile disk.
## Setup 1. Start by navigating to the account Sandbox you would like to configure with Google Drive for Desktop. 2. Start a Sandbox session. 3. Go to the following URL from the browser in your Sandbox session: `https://dl.google.com/drive-file-stream/GoogleDriveSetup.exe` **Caution:** The installer URL above works only for Windows operating systems. Google does not provide a Linux Google Drive for Desktop integration. 4. The GDFD installer download should start automatically. When prompted, run the installer. Depending on your Windows OS configuration, you may see a security warning.During installation, Frame will automatically detect the installation of a new application and prompt you to “Onboard to Frame”. If you plan to deliver only virtual desktops, or would prefer this app not appear as an icon on your users' application Launchpad, skip the onboarding workflow by clicking the Cancel button. You can always onboard Google Drive's icon at a later time.
7. Lastly, you'll be informed that that Google Drive for Desktop has successfully been installed. Click **Close**.**One Drive Authentication** By default, this configuration will require users to log on to OneDrive each time they start a Frame session. Enterprise Profiles can be configured to avoid this issue. Once Enterprise Profiles has been enabled for the account, the end user needs only to log in to OneDrive once within the session. From that point forward, OneDrive will automatically stay logged in using the credentials stored on the user's profile disk.
## Setup In general, you would install OneDrive in your Frame account Sandbox and then publish your changes once configured. For Windows 10, OneDrive installer is bundled with Windows 10 and is located at `%WINDIR%\syswow64\onedrivesetup.exe`. By default, upon each Windows user's first login, the installer for OneDrive will execute for that user, installing OneDrive in a per-user context. Therefore, identify which type of OneDrive is currently installed on your system. If OneDrive was installed as a per-user application, then uninstall OneDrive and re-install OneDrive as a per-machine application. For Windows Server 2016/2019/2022, you may need to download OneDrive [installer from Microsoft](https://www.microsoft.com/en-us/microsoft-365/onedrive/download) and install OneDrive as a per-machine application. ### Identifying the OneDrive Install Type The list of applications installed in an OS can be viewed through the Programs and Features applet (appwiz.cpl), but this doesn't always tell you whether or not an application is installed per-user or per-machine. Luckily there are registry locations that help you to determine more information about the application installs. There are multiple locations in the registry that help you identify not only ALL the installed applications (even those not shown in Programs and Features), but also help you identify machine vs. user installations as well as 32-bit vs 64-bit installations. These registry locations are:| Registry Path | Discernable OneDrive version |
|---|---|
| `HKLM:\SOFTWARE\Microsoft\Windows\CurrentVersion\Uninstall` | 64-bit per-machine installation |
| `HKLM:\SOFTWARE\WOW6432Node\Windows\CurrentVersion\Uninstall` | 32-bit per-machine installation |
| `HKCU:\SOFTWARE\Microsoft\Windows\CurrentVersion\Uninstall` | 64-bit & 32-bit per-user installation |
For further information regarding Microsoft OneDrive in a VDI context, refer to Install Office on a master VHD image. Looking for more? Read our comprehensive Microsoft OneDrive solutions guide.
# Box Drive [Box](https://box.com) is a popular cloud storage platform with a variety of features such as content management, collaboration, and file sharing tools. Integrating Frame accounts with Box Cloud Storage is simple and can be done in a matter of minutes. This guide provides detailed instructions for installing, configuring, and using Box Cloud Storage with your Frame account. ## Requirements - A Frame account - Enterprise Profiles, Persistent Desktops, or another 3rd party method for user profile persistence must be utilized in order for the end user's Box credentials to persist between sessions.**Box Authentication** By default, this configuration will require users to log on to Box each time they start a Frame session. Enterprise Profiles can be configured to avoid this issue. Once Enterprise Profiles has been enabled for the account, the end user needs only to log in to Box once within the session. From that point forward, Box will automatically stay logged in using the credentials stored on the user's profile disk.
## Setup 1. Start by navigating to the account Sandbox you would like to configure with Box Drive. 2. Start a Sandbox session. 3. Go to the following URL from the browser in your Sandbox session: `https://www.box.com/resources/downloads` 4. Click **Download Box Drive for Windows**.During installation, Frame will automatically detect the installation of a new application and prompt you to “Onboard to Frame”. If you plan to deliver only virtual desktops, or would prefer this app not appear as an icon on your users' application Launchpad, skip the onboarding workflow by clicking the **Cancel** button. You can always onboard the Box executable at a later time.
6. The Box Drive login window will appear, simply close the window. **Do not log in**.By default, Frame will retain a maximum of two Publish backups for a Frame account. If you want to change the maximum number of Publish backups to be retained, you can open a support case to increase/decrease this value.
### Manual Backups 1. From an Account Dashboard, go to the **Sandbox** or **Utility Servers** page and navigate to the **Backups** panel listed under the desired system.In scenarios where a Frame-created VM backup is used as a BYO *Master Image* in AHV environments, Frame will automatically create an additional backup of the VM so that the *Master Image* VM is preserved in the event the backup needs to be deleted (either manually or automatically by Frame).
### Delete a Backup To delete a backup, simply click on the kebab menu to the right of the backup you wish you delete and select **Delete**. Click **Delete** again when the dialog appears to confirm your choice.When Frame DR is enabled and the Frame Administrator deletes a Sandbox/Utility Server backup for a Frame account, the replica is deleted in the remote site. In the case of AHV, the entire protection domain corresponding to that backup (VM clone) and the replica VM clone are deleted as well. For Azure, the backup VM is also deleted in the backup region.
## Volumes *Persistent Desktops*, *Personal Drives*, and *Enterprise Profiles* can be managed under the **Volumes** section of an Account's Dashboard. ### Manual Backups Administrators can create a backup of *Persistent Desktops*, *Personal Drives*, and *Enterprise Profile* volumes by navigating to the **Volumes** page from their Dashboard and clicking on the **Backups** tab. From there, click **Create Backup**.Multiple User Volumes and Persistent Desktop backups can be initiated simultaneously by administrators with appropriate permissions.
Please note that the maximum number of retained manual or scheduled backups is 100. Backups are stored as standard machine images and will incur storage costs from your cloud provider.
### Scheduled Backups To set up scheduled backups, navigate to the **Volumes** page from the Dashboard of your account and click on the **Backups** tab. Click on the kebab menu listed under the Backups section and select **Settings**. A new window will appear, enable the **Schedule daily backups** toggle.If you change the backup schedule (e.g., change of start time, change of the time between backups), the revised backup schedule takes effect on the first applicable time for the backup. For example, if the start time is changed for a daily backup, the new start time will be applied on the following day.
### Restore from a Backup To restore from a backup, simply click on the kebab menu next to the desired backup and select **Restore**.Restoring from a previous backup will flash the volume with the backup image you select. Any changes made since the selected backup was created will be erased.
If Frame DR is enabled, the Frame administrator will have the option to *Force restore from replica*. When this is selected, Frame will ignore the local snapshots for this volume and use the backup copy which had been replicated to the remote site. ### Delete a Backup To delete a backup from the **Backups** tab on the *Settings* page of your Dashboard, simply click on the kebab menu to the right of the backup you wish you delete and select **Delete**. If Frame DR is enabled, when a persistent desktop VM backup for a Frame account on AHV is deleted, the replica VM clone on the secondary AHV cluster is deleted. The protection domain is not deleted, even if all the backups are deleted as the VMs are still protected within the protection domain. For Azure, when a persistent desktop VM backup is deleted, the backup VM is deleted in the secondary cloud region. ### Monitoring Within the Volumes tab, the Frame Administrator can check if the most recent backup for user volume/persistent desktop succeeded or failed (with a detailed error message, if backup failed). Most recent backups for some users might have failed, for example in the last scheduled bulk backup of persistent desktops or user volumes. In that case, backup can be initiated manually for those users. In the below example, two of the three user volumes had not yet been backed up.| Primary Infrastructure | Secondary Infrastructure |
|---|---|
| Nutanix AHV cluster 1 | Nutanix AHV cluster 2 |
| Microsoft Azure region A | Microsoft Azure region B |
Currently, the Frame Disaster Recovery feature set consists of backup, replication, and restore functionality for AHV and Azure only. Support for AWS and GCP infrastructure and Failover to a secondary Frame account is in development.
| Resource | Description |
|---|---|
| Sandbox | One disk per Sandbox (gold image, associated with the account) |
| Utility Server | One disk per Utility Server |
| Persistent Desktop | One disk per persistent workload VM that has been assigned to a user |
| Enterprise Profile | One profile disk per user |
| Personal Drive | One personal drive per user |
Template images are not backed up as they are not part of a Frame account. Customers are responsible for backing up template images separately.
The customer is responsible for backup and recovery of any data not explicitly defined in the table above. For example, the customer must have a backup and disaster recovery plan for data stored in third-party profile solutions, external file servers, and database servers.
## Infrastructure Select an supported infrastructure below for instructions on how to prepare your underlying infrastructure *before* configuring a Frame account for use with the Frame DR feature. To use the Backup and Recovery feature, the AHV cluster hosting the Primary Frame Account must be configured with a Remote Site. This enables the primary AHV cluster to replicate to and recover from the secondary AHV cluster. Both the primary and secondary AHV Clusters must be added as AHV Cloud Accounts. Refer to the [Nutanix AHV Remote Site documentation](https://portal.nutanix.com/page/documents/details?targetId=Prism-Element-Data-Protection-Guide-v6_1:wc-remote-site-any-configuration-c.html) for further details on the AHV Remote Site feature. The following step-by-step procedure must be completed before the Frame account can be enabled for Frame DR. 1. Login to Prism Element on your Primary AHV Cluster and go to Data Protection.By default, tcp/2009 and tcp/2020 are used for AHV cluster to AHV cluster communication.
4. After the above information has been added, click on **Add Site**. 5. Next, under the Settings, configure the parameters for how the persistent data will be replicated.It is possible to have both primary containers mapped to only one container on the Remote Site.
In the above figure, the first row defines the mapping of the Primary Site SelfServiceContainer to the Remote Site SelfServiceContainer. The SelfServiceContainer was specified to hold the Volume Groups of the Enterprise Profile and Personal Drive volumes. The second row defines the mapping of the Primary Site storage container default-container-77107 (containing the persistent Frame resources for all Frame Accounts on the AHV cluster) to the Remote Site storage-container-112133 (storing all the backup replicas).When the Failover feature is added and the Frame Administrator configures Frame to do so, the Remote Site storage container will also store the persistent workload VMs provisioned from the replicas, at the point the replicas are copied to the secondary site. This will reduce the Return to Operation time as the VMs will not have to be provisioned the moment the Failover is enabled.
7. Click on Save to finish the setup. You can now see your new Remote Site within the Data Protection section in Prism.There is no option currently to set the post-session backup policy specifically for Sandbox or Utility Server(s).
4. After all configuration parameter values are set, click Save to save the settings to complete the setup. You can go to the account Notification Center to confirm that Frame has completed the DR configuration for your account.| Account Data | Availability | Downloadable CSV/Report | Admin API |
|---|---|---|---|
| Session Reports | No Limit \* | ✓ | ✓ |
| Audit Trail | 24 Months | ✓ | ✓ |
| Sessions | 12 Months \* | ✓ | ✓ |
| Tasks | 12 Months | ||
| Usage | 12 Months \* | ✓ | ✓ |
| User Activity | 12 Months | ✓ | ✓ |
| Disk Usage | 6 Months \* | ✓ | ✓ |
| Elasticity | 3 Months | ✓ | ✓ |
| Notifications | 3 Months | ||
| Session Trail | 2 Months | ✓ | ✓ |
| Session Logs | 1 Month |
The availability periods above are subject to change. Any data that needs to be preserved should be downloaded on a regular basis.
# Monitoring and Analytics Tasks and Notifications, Analytics, Audit Trail, Session Shadowing, Overwatch observability and Analytics # Tasks and Notifications In this document, we'll review how to access and interpret tasks and notifications for your Frame tenant. With real-time updates on tasks displayed prominently in a dedicated widget, and a structured notification system tailored to your administrative level, you'll find overseeing your Frame entity to be very efficient. We'll discuss the differences between tasks and notifications in more detail below. ## Tasks Tasks are presented in both the widget and the entity Dashboard page views, each differentiated by distinctive color-coded states. For a convenient overview of these variations, refer to the table below, which serves as a handy guide for both views.| Status Icon Color | Details |
|---|---|
| Green | Successful, Succeeding, and Done task states will appear with a green icon. |
| Red | Failed and Failing task states will appear with a red icon. |
| Gray | Canceled and Canceling task states will appear with a gray icon. |
| Cycling Blue | In progress tasks will display with a cycling blue icon until the task is complete, canceled, or has failed. |
Tasks cleared from the widget will still be accessible from the entity Dashboard.
### Tasks Page The "Tasks" page in the admin interface offers administrators a comprehensive and streamlined view of operational tasks within the system. From this interface, administrators can effortlessly track the progress and status of various tasks, such as powering on or off, and account creation. Administrators can search through their tasks using the search bar as well as fine-tune the display of tasks by employing the filtering options provided at the top of the page.Clicking \*\*Restore defaults\*\* at the top of the page will reset all task filters to default.
Each task entry provides vital details at a glance, including the task title, the task status denoted by a color-coded icon, the initiator of the task with an initiation timestamp, who the task was acknowledged by, the associated entity, and the total duration of the task. Hovering over the **Entity Info** will provide additional details about the entity.| Info | Additional Details |
|---|---|
| Task ID | Unique identifier for the task within the platform. Can be used for troubleshooting |
| Display Name | Descriptive title of the task, e.g., "Creating account Demo" |
| Kind | Type of task being performed and how it is identified by Frame platform |
| User ID | Unique identifier of the user who initiated the task |
| User Email | Email address of the user associated with the task |
| User Name | Name of the user who initiated the task |
| User Identity Provider | Identity provider associated with the user initiating the task |
| Account | Account entity where the task occurred |
| Organization | Organization entity where the task occurred |
| Customer | Customer entity where the task occurred |
| Inserted at | Timestamp of when the task was initially logged in the system |
| Updated at | Timestamp of the last update made to the task |
| Args | Additional arguments associated with the task which can be provided to Dizzion support for troubleshooting. Click the arrow to expand for more information. |
| Info | Additional Details |
|---|---|
| Start Time | Timestamp of when the task was initiated |
| End Time | Timestamp of when the task ended |
| Duration | The total duration of time required to complete the task |
| Status | Details |
|---|---|
| Info | "Info" notifications are informational and typically refer to events that have little to no impact on your users. |
| Warning | "Warning" notifications are intended to inform the administrator of events that could potentially impact the functionality of their accounts and user experience. |
| Critical | "Critical" notifications are of the highest severity and describe events that have a direct impact on platform functionality and/or user experience. |
Clicking \*\*Restore defaults\*\* at the top of the page will reset all task filters to default.
Each notifcation entry provides important details at a glance, including the notification kind, a summary of the event, the severity of the event, the associated entity, and a timestamp of the when the notification was created.Customer Administrators can see the analytics data for all organizations and accounts associated with the tenant by navigating to the Customer or Organization Dashboard from the initial Admin Console view and clicking Analytics.
## Sessions The “Sessions” tab is the first page displayed on the Analytics page of your Dashboard. This page shows a plot of the number of sessions per hour, day, or month during a given time interval. Use the drop down menus on this tab to display the information by frequency, system, and time period. This example shows the number of production sessions launched within a month.Individual measures can be enabled and disabled by clicking the text descriptor for the measures.
Once enabled, session report generation cannot be disabled.
Once enabled, session reports take approximately 24 hours to be made available for download from the Frame Dashboard.
## Session Report Definition The session report consist of a .CSV file which can be imported into the application of your choice for compiling into an itemized list with log activity of all sessions from the reports date range. This information consists of:| Name | Description |
|---|---|
| Username | The user ID associated with the session. |
| Name | The user's name on record. |
| The email address associated with the user of the session. | |
| Geo\_Distance | An estimate of the geographic distance between the user's location and the datacenter accessed, measured in miles. |
| City | The name of the city the user accessed their session from, as indicated by IP address. |
| Started\_At | UTC Time and date the session was started. |
| Time\_To\_Start | Elapsed time from an instance being requested to the session beginning, measured in seconds. |
| Session\_Duration | Duration of the session, measured in seconds. |
| State | Whether the session is open or closed, at time of report generation. |
| Remote\_IP | The IP address utilized by the session user. |
| System\_Type | The type of instance utilized for the session. |
| Session\_Type | The type of instance used during the session. IE: Sandbox, Utility Server, Production Instance, Persistent Desktop. |
| User\_Data | Lists any custom data passed to the user's session via a userData object property. |
| Account\_ID | The Frame Vendor ID. |
| Account\_Name | Name of the Frame account accessed. |
| API\_Account\_ID | Not user serviceable at this time. |
| Region | The region of the cloud account. |
| Country | The country of the cloud account. |
| Session\_ID | The session ID. |
| Storage\_Used | Lists any attached personal cloud storage such as Google Drive or Dropbox. |
| **Info** | **Description** |
|---|---|
| **Status Indicator** | The color of the bar shown in the far left side of the card indicates the session status. More details about session status can be found below. |
| **Session ID** | This unique identifier for the session is important when discussing a user session issue with Frame Support. |
| **Account Details** | Indicates if the session is Persistent, the name of the account, and the name of the Launchpad the session is tied to. |
| **User** | First name and last name of the user in session, as provided by a [third-party identity provider integration](https://docs.difr.com/books/platform-administrators-guide/page/identity-and-access) or [Basic Authentication](https://docs.difr.com/books/platform-administrators-guide/page/basic-authentication). |
| **Email** | Email address of the user accessing the session. |
| **Status Description** | The gray box at the bottom of the card describes specifics about the status of the session. In this example, this closed session was "closed by user." |
| **Info** | **Description** |
|---|---|
| **Instance Type** | Name of the instance type for this workload VM. Instance type names are specific to the underlying infrastructure. In the case of AHV, the instance type name will be the name you defined under the [AHV Cloud Account](https://docs.difr.com/books/platform-administrators-guide/page/cloud-accounts). |
| **VM Name** | Name of the workload VM. |
| **Browser** | The browser and browser version number being used to access the session. |
| **OS** | The type of operating system on the endpoint device being used to access the session. |
| **Info** | **Description** |
|---|---|
| **Start Time** | The time (UTC or local time of the administrator's endpoint) when the user connected to a virtual machine using Frame Remoting Protocol. |
| **Session Duration** | The time span from the session's start (when the user connected to a virtual machine) to its end (when the user logged out of the operating system). |
| **IP Address** | The IP address from which the session was accessed. |
| **Info** | **Description** |
|---|---|
| **Bandwidth** | Average bandwidth consumed during the session. Min, average, and max values can be viewed by hovering over the bandwidth value. **For sessions with multiple displays, bandwidth metrics are cumulative across displays.** |
| **Latency** | Average latency measured during the session. Min, average, and max values are displayed upon hovering over the latency value. |
| **Frame Rate** | Average frame rate during the session. Min, average, and max values can be revealed by hovering over the frame rate value. |
Hovering over the values within each card will display additional information.
Additionally, you can identify the status of the session at a glance by the color of the bar on the far left side of each card.| Color and Status | Description |
|---|---|
Active | The session is currently in use. The status description will likely show "Active Session." |
Closed | Indicates a closed session. Admins may see "Closed by user" or "Idle timeout has expired" in the status description box. |
Failed | This status indicates a failed session. The gray status description box will show the word "FAILED" in red along with a failed reason, if available. |
Suspended | Suspended sessions will still be shown as active, however, they are in a suspended state. You can see suspended sessions by clicking the "Suspended" option from the session status dropdown menu at the top of the page. |
| Column | Details |
|---|---|
| **Session ID** | Unique identifier for the session. Important to provide when discussing a user session issue with Frame Support. |
| **Workload ID** | Unique identifier for the server used by the session. Important to provide when discussing a session or server issues with Frame Support. |
| **First Name** | First name of the session's user, as provided by a [third-party identity provider integration](https://docs.difr.com/books/platform-administrators-guide/page/identity-and-access), [Basic Authentication](https://docs.difr.com/books/platform-administrators-guide/page/basic-authentication), or if specified in a [Secure Anonymous Token (SAT)](https://docs.difr.com/books/platform-administrators-guide/page/secure-anonymous-tokens) request. |
| **Last Name** | Last name of the session's user, as provided by a [third-party identity provider integration](https://docs.difr.com/books/platform-administrators-guide/page/identity-and-access), [Basic Authentication](https://docs.difr.com/books/platform-administrators-guide/page/basic-authentication), or if specified in a [Secure Anonymous Token (SAT)](https://docs.difr.com/books/platform-administrators-guide/page/secure-anonymous-tokens) request. |
| **Identity Provider** | Name of the Identity Provider(IdP) used by Frame. |
| **Email** | The email address of the session's user, as provided by a [third-party identity provider integration](https://docs.difr.com/books/platform-administrators-guide/page/identity-and-access) or [Basic Authentication](https://docs.difr.com/books/platform-administrators-guide/page/basic-authentication). |
| **IP Address** | IP address from where the session start request originated (Usually the IP address of the system where the browser started the session). |
| **City** | Geolocated city from where the session start request originated, derived from the user's IP address. |
| **Distance** | Distance in miles from the originating request's geolocation to the workload VM's geolocation. |
| **System** | The pool type used for the session (e.g., Production, Sandbox, Utility). |
| **Instance Type** | Name of the instance type for this workload VM. Instance type names are specific to the underlying infrastructure. In the case of AHV, the instance type name will be the name you defined under the [AHV Cloud Account](https://docs.difr.com/books/platform-administrators-guide/page/cloud-accounts). This name corresponds to the name of the pool in Capacity. |
| **Ram Memory** | Amount of RAM allocated to the instance type. |
| **vCPU** | Number of virtual CPUs available to the instance type. |
| **GPU** | GPU identifier for the instance type/infrastructure. |
| **State** | Current state of the session (e.g., 'closed'). |
| **Start** | Time when the user was connected to a virtual machine using Frame Remoting Protocol (UTC or local time of administrator's endpoint). |
| **End** | Time when the user's session finished, after post-session processes (UTC or local time of administrator's endpoint). |
| **Duration** | Elapsed time in seconds from the start to the close of the session. |
| **Bandwidth Fields (Multiple)** | Min, average, and max bandwidth values consumed during the session. |
| **Frame Rate Fields (Multiple)** | Min, average, and max frame rate values during the session. |
| **Latency Fields (Multiple)** | Min, average, and max latency values measured during the session. |
| **Metadata** | Metadata passed into a session from the User's token (SAT or from IdP), set when the token is generated. |
| **Launchpad ID** | The Launchpad ID utilized when initiating the session. |
Only users with Customer Administrator privileges will be able to view this section.
## Subscription Details Each subscription row includes the following fields: - **Subscription ID:** Unique identifier for the subscription (e.g., CN100130-1) - **Billing Model:** Indicates whether the subscription is Pre-Paid or Pay-Go - **Sales Channel:** Displays the sales channel, if applicable (e.g., CDW) - **Term (Months):** Total length of the subscription agreement - **Renewal Date:** The date the subscription will automatically renew - **Status:** Current status of the subscription (e.g., Active, In Progress, Inactive) Clicking on a subscription expands the row to display the associated entitlements. ## Entitlement Details Each entitlement includes: - **Line Number:** Numbered identifier for each product line - **Product Name:** The name or SKU of the subscribed product - **Quantity:** The number of units purchased - **Service Type:** Category of service - **Consumption Model:** Billing unit type (e.g., Per User, Per VM) - **Start Date:** When entitlement usage begins - **End Date:** When entitlement usage ends ## Troubleshooting If you have any questions about your billing details, contact our billing team at billing@dizzion.com. For technical support accessing the Billing page or navigating the Frame Admin Console, please [submit a support ticket](https://docs.difr.com/books/dizzion-support), and our team will be happy to assist you. # Frame Guest Agent (FGA) ## Overview Frame Guest Agent (FGA) is a collection of Frame-specific services that manage VM configuration and functionality. FGA provides the following services: - Communication between the VM and Frame backplane. - VM configuration, orchestration, and session management. - Session customization and scripting (stateful/stateless sessions, scripting, etc.) - Verification, migration, and upgrade orchestration. - Collection of server diagnostics and a variety of logs. - [Frame Remoting Protocol (FRP)](https://docs.difr.com/books/platform-administrators-guide/page/frame-remoting-protocol) which is responsible for the capture, encoding, and streaming of virtual applications/desktops to end user devices. ### Network The required ports/protocols for Frame Guest Agent 8 (using FRP7 or FRP8) are documented in the [Networking Requirements](https://docs.difr.com/books/platform-administrators-guide/page/networking#bkmrk-requirements) based on your Frame account's deployment model. ### OS Firewall If your configuration relies on an OS-level firewall (e.g., Windows Firewall with Advanced Security or a third-party firewall) on a Sandbox, Utility Server, and/or persistent desktops, you will need to update firewall configurations on those workload VMs. For non-persistent Frame accounts, update the Windows Firewall on the Sandbox VM and publish, or use a GPO. For example, using Windows Firewall with Advanced Security, Frame administrators would enable an inbound rule `UDP ports 4503-4509` (either via GPO or directly within the workload VMs) for FRP8. 1. Go to Windows Firewall with Advanced Security 2. Select “Inbound Rules” 3. Right click > “New Rule…” 4. Port > UDP > Specific local ports: `4503-4509` > Allow the connection > Check all, Domain, Private, Public > Enter a name > FinishRefer to the \[Networking Requirements\](/platform/networking/requirements) for the complete list of inbound and outbound protocols/ports your OS firewall must allow for your workload VMs, specific to your deployment model, to work with your end users and Frame Platform using FRP7 and/or FRP8.
## Windows Updates For non-persistent Frame accounts, Frame requires Windows updates to be applied in the Sandbox. Frame admins can then publish those updates to their test or production pools. During the provisioning of test or production workload VMs (triggered by a publish or the increase in the max Default Capacity), the Frame Guest Agent will disable Windows Update Services in the newly-provisioned non-persistent workload VMs. Frame does not disable Windows Update Services in Sandbox, Utility server, or persistent desktop VMs. ## Windows OS Performance Counters Frame administrators can monitor the behavior of Frame Agent in Windows OS workload VMs through a set of performance counters, as described in the following table. Admins can use Windows Reliability and Performance Monitor (perfmon) or third-party monitoring tools to capture and report on these counters.| Name | Description | FRP Version | Value Range |
|---|---|---|---|
| AverageFrameQP-DisplayX | Average Quantization Parameter (QP) value for the specific display. Lower values result in lower compression and higher image quality. | FRP8 | 0 - 51 |
| CaptureFrameRate-DisplayX | Real-time video capture rate (fps) of captured video on the Frame workload VM for the specific display. | FRP8 | >0 |
| EncoderFramerate-DisplayX | Real-time video encoding rate (fps) of captured video on the Frame workload VM for the specific display. | FRP8 | >0 |
| EstimatedBandwidth-DisplayX | Estimated real-time bandwidth (kbps) required to send encoded data (audio and video) from Frame workload VM via Frame Remoting Protocol for the specific display. | FRP8 | >0 |
| Framerate-DisplayX | Real-time rate (fps) that encoded video is being sent via Frame Remoting Protocol for the specific display. | FRP8 | 0 - 60 fps |
| Height-DisplayX | Current height (pixels) of specific display. | FRP8 | >0 |
| MaxAudioBitrate-DisplayX | Max audio bitrate (kbps) that can be achieved during the session for the specific display. | FRP8 | 0 - 128 kbps |
| NumberOfActiveDisplays | Number of active displays within the session (1-4). | FRP8 | 1 - 4 |
| PixelRatio-DisplayX | Current pixel ratio (ratio between available logical pixels in the session versus available physical pixels on the end-user device) for the specific display. | FRP8 | 1 - 3 |
| VideoCapture-DisplayX | Video capture method used by the session for specific display | FRP8 | 1 = DXGI 2 = GDI 4 = X11 6 = NvFBC 7 = DXGI GPU |
| VideoCodec-DisplayX | Video codec used by the session for specific display. | FRP8 | 0 = H.264 1 = MPEG2 2 = MPEG1 3 = VP9 |
| VideoEncoder-DisplayX | Video encoder used by the session for specific display. | FRP8 | 1 = x264 3 = NVENC 4 = FFMPEG (CPU) |
| Width-DisplayX | Current width (pixels) of specific display. | FRP8 | >0 |
If you exit Maintenance mode, any custom maintenance message will be deleted.
## Update Maintenance Message To update the Maintenance message, go back to the Summary page of your Frame Account Dashboard, click on the kebab button, and select **Update maintenance message**. You can then update the maintenance banner text. If you did not customize the message before, you can click on the toggle and enter your custom message. Be sure to **Save** your custom maintenance banner text when you are done. ## User Experience When Maintenance mode is enabled, Launchpad users will see the following message banner when they reach their Launchpad and will not be able to start a Frame session.Note: Before you terminate an Account, Organization or Customer entity, we strongly recommend taking the following steps to clean up any infrastructure and third-party dependencies associated with the entity you wish to terminate in Frame Console:
- Reduce the Default Capacity max value to 0 for all Accounts you wish to terminate or all Accounts associated with an Organization you wish to terminate.
- Delete any Sandbox/Utility server backups.
- Delete any Enterprise Profile/Personal Drives and their backups.
- If Frame accounts were created using Frame-managed networking, customers using BYO infrastructure should delete any cloud resources (such as a VPN Gateway, a VPC/VNET peer, manually created and attached volumes, or manually created VMs) associated with the Frame Account VPCs/VNETs from their BYO infrastructure console before terminating their Frame Account/Organization/Customer entity.
- Remove any identity providers registered on the Account or Organization entity to be terminated.
- Remove any BYO infrastructure registered on the Organization entity you wish to terminate (after all Accounts in that Organization are terminated).
- Make sure to break federation between your cloud accounts and Frame
Entity termination is an irreversible action.


You may specify a separate set of session settings for your Sandbox/Utility server or test/production instances by clicking on the ellipsis next to your Sandbox (Dashboard>Sandbox), Utility Server (Dashboard>Utility Servers) or Launchpad (Dashboard>Launchpads), clicking on "Session settings," and disabling the "Use account settings" toggle. Edit this page as desired and click "Save" to apply your changes.
## Features| Feature | Description |
|---|---|
| **Clipboard Integration** | Enables [clipboard functionality](https://docs.difr.com/link/150#bkmrk-page-title). Users can cut and paste text between their local device and their Frame session. |
| **Clipboard Direction** | When the clipboard integration is enabled, use this drop-down menu to choose the [clipboard direction](https://docs.difr.com/link/150#bkmrk-page-title) policy for your users. |
| **App switching** | When **App switching** is enabled, end users can switch between two or more application windows by typing `Alt` + `~` (`Alt` + `~` is sent to the remote Windows VM as `Alt` + `Tab`). |
| **Download** | Enables downloading files from the remote session to the user's local device. |
| **Upload** | Enables uploading files from the user's local device to their Frame session. |
| **Print** | Enables printing files from the remote session to the Frame Virtual Printer. |
| **Camera** | Enables webcam support for sessions.\\\* |
| **Microphone** | Enables audio input when using applications within the session. This feature is enhanced for sessions using FRP8. |
| **USB Redirection** | Enables locally-connected USB devices to be visible to the remote workload VM. USB-connected storage devices are automatically detected and populated as additional drives which are accessible from the file explorer.\\*\\* |
| **FRP8** | Enables [Frame Remoting Protocol 8](https://docs.difr.com/link/146#bkmrk-page-title) |
| **4K Displays** | Enables resolutions up to 4K (4096x2160) for CPU-only instances (GPU instances support up to 4K displays by default). Note: CPU-based encoding of 4K displays will require increased vCPU capacity (e.g., 4 vCPUs instead of 2 vCPUs). **Note: This feature should be enabled in scenarios where users will be accessing a CPU-only workload VM from ultra-wide or non-4k high resolution monitors.** |
| **Audio playback on session start** | This setting ensures audio playback is enabled on session start but can still be disabled within the session by the user if desired. Enabled by default. |
**Additional Documentation** Additional details for these features can be found in our [Session Features End User Guide](https://docs.difr.com/books/desktop-users-guide/page/session-features) and other sections of our official Frame documentation.
## Time Limits The "Time Limits" section displays parameters which control how long sessions can run. See the corresponding sections below to learn more about each parameter.Idle Timeout and User Inactivity Timeout session setting values cannot exceed the maxmium value of the Max Session Duration as described below.
### Max Session Duration This is the maximum length (in minutes) of time that a session can run. The duration is shown on the status bar countdown timer in the session itself. - **Default value**: 1 hour - **Minimum value**: 1 minute - **Maximum value**: 10,799 minutes Max Session Duration timeout is now an optional setting and can now be enabled or disabled with the **Enable Max Session Duration** switch. By default, this feature is disabled for all new Accounts. When enabled, administrators can set a maximum duration for all sessions, after which the sessions will automatically close. ### Reservation Timeout The Reservation Timeout parameter refers to the amount of time (in seconds) that the client's browser will wait for a server to become available before displaying a timeout error. This value would typically be adjusted to accommodate slow-starting virtual machines. This timeout is less likely to be reached if a min or buffer is configured. - **Default value**: 600 seconds - **Minimum value**: 120 seconds - **Max value**: 900 seconds ### Session Preparation Timeout This value specifies how long Frame will wait for session initialization to complete before automatically closing the session. This includes the time waiting for a user to log into their Windows domain in domain-joined Frame accounts. Admins can configure this value between 15 and 60 minutes (in 15 minute increments). - **Default value**: 15 minutes - **Minimum value**: 15 minutes - **Max value**: 60 minutes ## Network The "Network" section of the Session Settings page is where you can set network and QoS settings for your users. Some organizations manage groups of users in remote areas which have limited bandwidth, high latency, and often encounter varying network conditions. The Frame Remoting Protocol responds to such circumstances by rapidly adjusting the visual properties, frame rate, image quality, and other key aspects to maintain a consistent user experience. Each of the variables listed below applies to a different aspect of the session's QoS settings:YUV444 is not supported on mobile web browsers.
End users accessing a YUV444-enabled session will notice HQ in the status bar| Argument | Type | Syntax | Details |
|---|---|---|---|
| Enable Sound on First Interaction | Terminal | `enableSoundOnFirstInteraction` | Automatically enables sound in the session upon first user interaction (mouse click or move) for embedded scenarios. |
| Disable Onboarding Dialog | Terminal | `disableOnboardDialog` | Disables the initial welcome message for new users. |
| Enable Mouse Modes | Terminal | `*features*mouseModes*isEnabled*=true` | Enables Frame Terminal to display to the user the Mouse Mode selection icon for standard, relative, and touchpad mouse modes. |
| Frame App Update Indicator | Terminal | `appAutoUpdateNotification` | Use this argument to show or not show the update indicator in Frame App. Value of 'always' will display indicator whenever user is using a version that is not the newest. Value of 'old' will display the indicator if user's Frame App is a version more than 1 year old. |
| Adjust Upload Chunk Size | Terminal | `channelFileChunkSizeBytes` | Use this argument to adjust the FRP8 upload chunk size when uploading files from Frame Terminal to the workload VM. Default value is 4096 bytes. |
| Disable Bandwidth Indicator | Terminal | `disableBandwidth` | Use this argument to disable the Network Bandwidth Indicator on the Frame Terminal Status Bar. |
| Disable Local Timezone | Terminal | `disableClockSync` | Use this argument to prevent the timezone in the user's endpoint from being used within the workload VM at the startup of a Frame session. |
| Disable Network Latency Indicator | Terminal | `disableLatency` | Use this argument to hide the Network Latency Indicator on the Frame Terminal Status Bar. |
| Enable Autofocus | Terminal | `enableAutoFocus` | Use this argument to automatically set keyboard focus to the Frame session without requiring initial mouse input within the Frame session window. |
| Force Lossless Video Quality | Terminal | `forceLosslessVideoQuality` | Use this argument to enable Lossless encoding (requires YUV444 to be enabled). |
| Force Display Resolution | Terminal | `forceResolution= | Use this argument to require Frame Terminal to display in a preset resolution (width: 1024/1280/1920, height: 768/1024/1080). |
| Hide Status Bar on Full Screen | Terminal | `hideStatusBarOnFullscreen` | Use this argument to hide the Frame Terminal Status Bar when Frame Terminal is in full-screen mode. |
| Set Max Session Timeout Warning | Terminal | `lastMinutesWarningTimeout= | Use this argument to specify the number of minutes left in a session before the max session timeout warning is displayed. |
| Use TCP by Default for FRP8 | Terminal | `preferredIceCandidateProtocol=tcp` | Force FRP8 to always use TCP instead of the default UDP protocol. |
| Refresh Stream on Packet Loss | Terminal | `refreshStreamOnPacketsLoss= | Automatically refresh video stream when packet loss threshold is exceeded. n=packets lost, t=timeframe(ms), b=backoff factor. |
| Enable Automatic Audio Playback | Terminal | `unmuteAudio` | Enable automatic audio playback in supported browsers without requiring users to unmute audio in the Frame Terminal Bar. |
| Scan Input Media Device Once | Terminal | `scanInputMediaDeviceOnce` | Limits camera and microphone scanning to once per session, improving compatibility with features like Apple's Continuity Camera. |
| Set Disk Attach Timeout | Server | `-diskattachtimeoutms | Sets profile disk/personal drive attach timeout value. Default is 90000 ms (90 sec). |
| Force CPU Encoding | Server | `-encode | Force CPU encoding if GPU driver isn't working correctly. Use '`-encode ffcpu`' or '`-encode dxgigpu`'. |
| Set Frame Session Label | Server | `-frame-session-label= | Set custom value accessible from `FRAME_SESSION_LABEL` environment or registry. |
| Set Key Frame Frequency | Server | `-gopsize | Set key frame frequency for video refresh. Default: 240 for FRP7, infinite for FRP8. |
| Set Link Handler | Server | `-linkhandler | Designates which browser is used to launch URLs within the Frame environment. |
| Set Logoff Timeout | Server | `-logofftimeoutms | Set Windows user logoff operation timeout. Default is 10000 ms. |
| Refresh Stream on Packet Loss | Server | `-refreshStreamOnPacketLossPercent | Send periodic key frames when packet loss exceeds specified percentage. |
| Set Trailing Display Frames | Server | `-trailingFramesNumber <#>` | Override default trailing display frames (2 for CPU, 8 for GPU encoding). |
| Set Upload Folder Path | Server | `-uploadto | Designate custom upload folder path. Default: `C:\\Users\\ |
Users may have to close their existing session and start a new session in order to see any newly applied session settings.
## Frequently Asked QuestionsHow does YUV444 improve the end user experience? What are the limitations?
If the user is working with 2D or 3D design, YUV444 may provide sharper text and shapes. If the text or shapes appear blurry when using the standard YUV420, enable YUV444 and see if there are any visual improvements. This feature requires up to 50% more bandwidth for video streaming. More detailed information, as well as some test images that illustrate the differences, can be found online in articles like [this one](https://www.rtings.com/tv/learn/chroma-subsampling).My end user's bandwidth is limited. How can I have the best possible end user experience with limited bandwidth?
Frame dynamically adjusts bandwidth based on streamed content and network conditions to consume the lowest bandwidth while maintaining the best possible user experience. If you need to set a bandwidth limit for a user connection, administrators can adjust the ["Max Bandwidth"](#network-qos-settings-defined) slider in session settings.What settings should be adjusted to best support conferencing applications like Zoom, Microsoft Teams, and Skype?
Administrators wishing to support video conferencing applications in Frame must first have FRP8 enabled for their Frame account. Once FRP8 has been configured, admins can simply enable the “Camera” and “Microphone” options in Session Settings. Accounts using FRP7 can still enable the microphone feature for voice calls. These applications perform best with low-latency network connections. The end user will need to allow certain permissions in the browser, which is discussed in further detail in our [Session Features End User Guide](https://docs.difr.com/books/desktop-users-guide/page/session-features).Under what circumstances can I enable lossless video?
Lossless quality encoding requires up to 40x more bandwidth than “normal” video streaming, as well as the Chrome browser (version 100+) or Frame App on the endpoint device. Administrators will need to add the ``forceLosslessVideoQuality` Advanced Terminal Argument in session settings in order to use this feature.It is still possible to use multiple applications within Application Mode. The behavior is still more refined and less flexible than multitasking in Desktop Mode.
To be able to use Application mode, you must first create and configure an Application Launchpad. As Frame offers two different Launchpad types, so do we also offer two different types of session modes (Application and Desktop mode). Desktop mode is, as suggested, a mode where a full OS Desktop experience is desired (Along with all of the multitasking features and interfaces). Launchpad and Session modes might seem similar at first, but there are important distinctions between the two. ## Application Mode vs. Launchpads While both Application Mode and Frame's Launchpads focus on delivering a curated and enjoyable experience, they are different in terms of their operational scope. Launchpads are client-side interfaces that have no impact on the remote environment. They focus on providing a tailored user experience at the browser or FrameApp level. Launchpads help you navigate the Frame feature set as an end-user with a user experience based on the desired workflow and Session Mode (Application or Desktop). In contrast, Application Mode alters the remote Windows and Linux environments to mimic the experience of using a native web application. The objective of Application Mode is to blur the distinction between a remote legacy application and a native web application, resulting in a seamless, immersive experience for the user. Through Frame's Application Mode, we aim to make remote application use simpler, more intuitive, and more efficient. As we continue to enhance this mode, our goal is to make your workflow smoother and more productive. If you wish to dig further into what Launchpads can do (and more about what they are), refer to the [Launchpad overview](https://docs.difr.com/books/platform-administrators-guide/page/launchpads) page in our docs. ## Enhanced Security In addition to its core features, Application Mode bolsters the security of your remote environment. This includes disabling many default Windows file explorer behaviors, such as right-click context menus and non-client area behaviors, ensuring that user interaction is confined to the application's parameters. By doing so, Frame deters activities outside the intended application experience. These behaviors are not present by default in Desktop Mode (Exclusive to Application Mode). ## Custom Taskbar and Start Menu As mentioned earlier, Application Mode removes the traditional Windows taskbar and Start Menu. The latest version of Application Mode (App Mode 2.0) adds a few features which also include a custom, Frame-branded taskbar and Start Menu. These are designed to simplify task management and provide an uncluttered, user-friendly interface. Their configuration is also flexible, meaning you can adjust and personalize your workspace. ## Taskbar Override Configuration To take things further with the new taskbar and start menu, you can customize the taskbar programmatically through a JSON configuration file. This JSON file provides the settings for overriding the default behavior of the custom taskbar and start menu. The flexibility of the customization is currently set on specifying which apps should appear in the menu, the order of those applications, and also a folder/subfolder hierarchy for all applications. This override process outlines and controls the structure and content of the taskbar. With this file, you can organize your taskbar to align with your work style, improving your overall efficiency. You can find this JSON file in the `C:\ProgramData\Nutanix\Frame\Config` directory. The filename is `server_launchpad_override.json`.The Config directory does not exist by default, so make sure you create the directory before attempting to create the server\_launchpad\_override.json if you are attempting this override with a script.
An example of what this file could look like is the following: ```json { "name": "root", "order": 0, "applications": [ { "name": "Frame Explorer", "path": "C:\\Program Files\\Frame\\FrameExplorer\\FrameExplorer.exe", "icon_url": "https://next-cpanel-dev.s3.amazonaws.com/images/icons/frame_explorer.png", "order": 0 }, { "name": "Notepad", "path": "C:\\Windows\\system32\\notepad.exe", "icon_url": "https://next-cpanel-dev.s3.amazonaws.com/images/icons/notepad.png", "order": 2 } ], "folders": [ { "name": "Folder between two applications", "order": 1, "applications": [ { "name": "Command prompt", "order": 0, "path": "C:\\Windows\\System32\\cmd.exe", "working_directory": "C:\\" }, { "name": "Browser", "order": 2, "path": "C:\\Program Files (x86)\\Google\\Chrome\\Application\\chrome.exe" }, { "name": "Dizzion Website", "order": 3, "path": "C:\\Program Files (x86)\\Google\\Chrome\\Application\\chrome.exe", "arguments": "https://www.dizzion.com/", "icon_url": "https://staging-cpa-6ae2ad7f7ca734e5abe8.s3.us-east-1.amazonaws.com/images/icons/ce69f714bad94c83ac40f5fb9648308e.png" } ] } ] } ```The "name": "root property, and "order": 0, property at the root level of the JSON file are both required. You must have these in the file for this to work properly. This is basically specifying the “root folder” of the entire hierarchy (Top-most level of the hierarchy).
Every Application and Folder item that is specified in the corresponding arrays absolutely require both the `order` and name fields.
As you can see in the JSON file above, there are two properties in the JSON file that are relevant to the proper customization of the taskbar and start menu: “applications” and “folders”. Both of these properties are arrays that allow you to add as many items as you would like (Folders allows for as many sub-folders and sub-applications as you would like as well). For an application object, here is a list of fields that can (or must) be specified: #### Required fields ***path*** (string) - This is an absolute path to the application's executable file (.exe, .sh, etc). #### Optional fields ***arguments*** (string) - If provided, these arguments will be used as the application’s starting arguments. This can be left empty.. ***working\_directory*** (string) - If provided it will be used as working directory when starting the application. ***icon\_url*** (string) - This is a URL from which to load the application’s icon. If not provided, Frame's service will attempt to use the corresponding Operating System API to fetch the icon associated with the provided executable's path.Unlike applications, all folders use the default OS folder icon.
# Frame Remoting Protocol Frame Remoting Protocol (FRP) defines the communication between an end user's device with a browser or [Frame App](https://docs.difr.com/books/platform-administrators-guide/page/introduction-to-frame-app) and the remote virtual machine running the [Frame Guest Agent (FGA)](https://docs.difr.com/books/platform-administrators-guide/page/frame-guest-agent-fga). ## Frame Remoting Protocol (FRP) 8 Frame Remoting Protocol 8 (FRP8) is the latest remoting protocol for, based on [WebRTC](https://webrtc.org/). FRP8, by default, uses UDP as its transport layer. FRP8 provides customers with an extensive list of new features that were previously unavailable with FRP7. Once FRP8 is enabled for a Frame Account, the following features/enhancements become available: - Improved audio/video synchronization which better adapts to poor network conditions (packet loss, network jitter) by utilizing UDP instead of TCP for transport - Webcam support - High-quality microphone redirection from the endpoint device to the session. - Generic USB Redirection support in Frame App for Windows (requires Frame Virtual USB Driver to be installed on Frame Sandbox/workload VMs) allows local USB devices to be passed into the Frame session using an USB Filter Driver included with Frame App for Windows. - App Mode 2.0 for Application Launchpads, which delivers a more intuitive user experience by providing a Windows desktop with default lockdowns to the Desktop, Start Menu, Taskbar, Notification Area/System Tray, etc. ### Features Each new feature of FRP8 is documented below. Administrators may wish to provide their end users with the Session Features End User Guide to understand how they can use these features in a session. #### Webcam Support and Microphone Enhancement FRP8 sessions utilize WebRTC technology, which enables Frame to efficiently capture audio/video data from the endpoint device and stream it to the VM in real time. WebRTC provides a seamless webcam and microphone experience to those using applications such as Zoom, Microsoft Teams, Slack, Google Meet, Cisco Webex, or any other audio/video telephony solutions running natively within a Frame session.**Attention** User experience with audio and video-conferencing solutions within a Frame session depends significantly on the networking conditions (bandwidth, latency, packet loss, network jitter, packet shaping, QoS, etc.) between the user and the Frame VM and from the Frame VM to the Internet. POC testing at scale is strongly recommended to ensure satisfactory user experience.
### Prerequisites Use of FRP8 requires the following prerequisites: - Networking configuration, as described in our [Network Requirements documentation](https://docs.difr.com/link/53#bkmrk-page-title) for FRP8 and your specific deployment model. - Use of Frame Guest Agent 8.1 or greater, as discussed in our [Frame Guest Agent 8 documentation](https://docs.difr.com/books/platform-administrators-guide/page/frame-guest-agent-fga) in all Frame-managed workload VMs (Sandbox, Utility Server, test/production instances). - [OS firewall](https://docs.difr.com/link/139#bkmrk-os-firewall) (e.g., Windows Firewall or third-party firewall) configuration changes to support the required TCP/UDP ports. - Streaming Gateway Appliance (SGA) 4 or greater (version 3 is being deprecated soon), if required, as discussed in our [Streaming Gateway Appliance documentation](https://docs.difr.com/books/platform-administrators-guide/chapter/streaming-gateway-appliance). #### Configuration Once the prerequisites have been met for FRP8, Administrators can enable FRP8 in Session Settings (Dashboard > Settings > Session).If the Frame Account was created in \*\*public cloud using Frame-managed networking\*\* and the FRP8-required ports are not enabled, you will need to first enable the ports and then enable use of FRP8. FRP8 cannot be enabled until the required ports have been opened, as shown in the image above.
**Enabling FRP8 on a Frame account using Frame-managed networking results in the following:** - For Frame accounts using public cloud infrastructure: - Inbound protocols/ports udp/4503-4509 and tcp/4503-4509 on the workload VPC/VNET and udp/3478 on the SGA VPC/VNET (if SGA is auto-deployed during account creation) are enabled through security group updates. - FRP 8.0 protocol is enabled for Frame sessions. For Frame accounts using customer-managed networking (AHV or public cloud), the Frame administrator is responsible for ensuring the required FRP8 network requirements are satisfied before FRP8 is enabled in Session Settings. # Advanced Session Features Advanced Displays, Integrations, PWA, LaunchLink, USB, ClipBoard, Keyboard Profiles, Mouse Modes, Multi-Language Config, Banners, Scripting # Advanced Displays Frame supports multiple monitors and 4k displays. This guide outlines the considerations, requirements, and steps to enable these features. ## 4k Display Support ### Considerations Administrators serving Frame sessions to end users with 4k displays can enable 4k support easily. Frame recommends considering the following before doing so: - Customers using CPU-only instances with 1-2 vCPU(s) should test to ensure the instance is able to support 4k rendering in addition to the apps/services running on the VM. - Administrators may need to increase the number of vCPUs for users accessing Frame with more than one 4k display. Reference the table below to understand infrastructure requirements for supporting 4k instances:| Instance Configuration | 4k Support |
|---|---|
| GPU-enabled | Fully supported |
| 1-2 vCPU(s) | Not Recommended, Admin should test |
| 3+ vCPUs | Supported, Admin should test |
Frame App supports the Frame multi-monitor feature automatically. If an end user has more than one monitor attached to their device, Frame App prompts the user if they want to use all of their monitors. Frame Administrators do not have to enable explicitly multi-monitor support for Frame App users.
### Enhanced Multi-monitor Support Users accessing Frame from Chrome or Chromium-based Edge browser can use the Enhanced Multi-monitor experience with automatic physical monitor layout detection.The Enhanced Multi-monitor feature is only available to users accessing Frame from Chrome or Chromium-based Edge version 100 or greater.
When using Auto Layout or Add Monitor in a browser session, the customer administrator or user must add `https://use.difr.com` as one of the **Allowed to send pop-ups and use redirects** sites, under **Settings** > **Privacy and security** > **Site Settings** > **Pop-ups and redirects** of their Chrome or Chromium-based Edge browser. This is discussed further in the [Google Chrome Help article](https://support.google.com/chrome/answer/95472#zippy=%2Callow-pop-ups-and-redirects-from-a-site). Refer to our [Display Options documentation](https://docs.difr.com/books/desktop-users-guide/page/introduction#bkmrk-display-requirements) in our User Guide for details on how to use the Multi-monitor feature. # Advanced Integrations Access to Frame apps and desktops can be integrated several different ways within: - Websites - Internal portals or services - Operating systems - and custom workflows This section talks about integration tools that can be leveraged for custom integrations. The Advanced Integrations panel can be found under a Launchpad's settings menu in the Dashboard of an account. This panel allows administrators to choose: - Specific settings - An application or desktop - An identity provider - and instance type the administrator would like to use together. Combining these components results in copyable links that can be easily used, shared, or deployed just about anywhere that accepts hyperlinks.A single onboarded application or desktop can be used with multiple instance types. However, each instance type will have its own PWA link.
Step 3. Copy the PWA link for your app or desktop by clicking the **Copy PWA link** button.  That's it! You could test the links in a new tab to check for an install prompt and/or share it with a colleague or end user. Now that you have a PWA link, you've a few options for installation! #### Manual PWA installation To manually install a PWA (ideal for testing or smaller team sizes), open a PWA link on a device you would like to install it on. Once the page is loaded, look at Chrome's "omnibar" for a circular plus icon. Click it, then click **install**. Manual installation of PWAs is optional. Users can simply use the PWA link to launch the a session from within their browser (the option to install is still available).
### Automatically install PWA Links with Managed Chrome PWA links can be automatically deployed via Chrome to devices managed by administrative policies. There are two ways to manage Chrome: - Cloud-managed (Google Workspace) - Policies with on-premises tools**Be Careful** To ensure a great experience for your users, be sure your auth (identity provider and roles/permissions) and infrastructure capacity are properly configured before a large scale deployment of apps to your users.
#### Deployment with Google Workspace (formerly G Suite) deployment-with-google 1. Workspace Admins need to log in to their Admin console and navigate to **Device Management** > **Chrome** > **Apps & Extensions**.  2. Click on the **Add** button at the bottom right of the page, and select **Add by URL** from the context menu. Paste your pre-configured Frame PWA link in the URL field and select “**Open website in Separate Window**, then click **save**. 3. Your PWA application should appear on signed-in Chrome devices within a few moments. 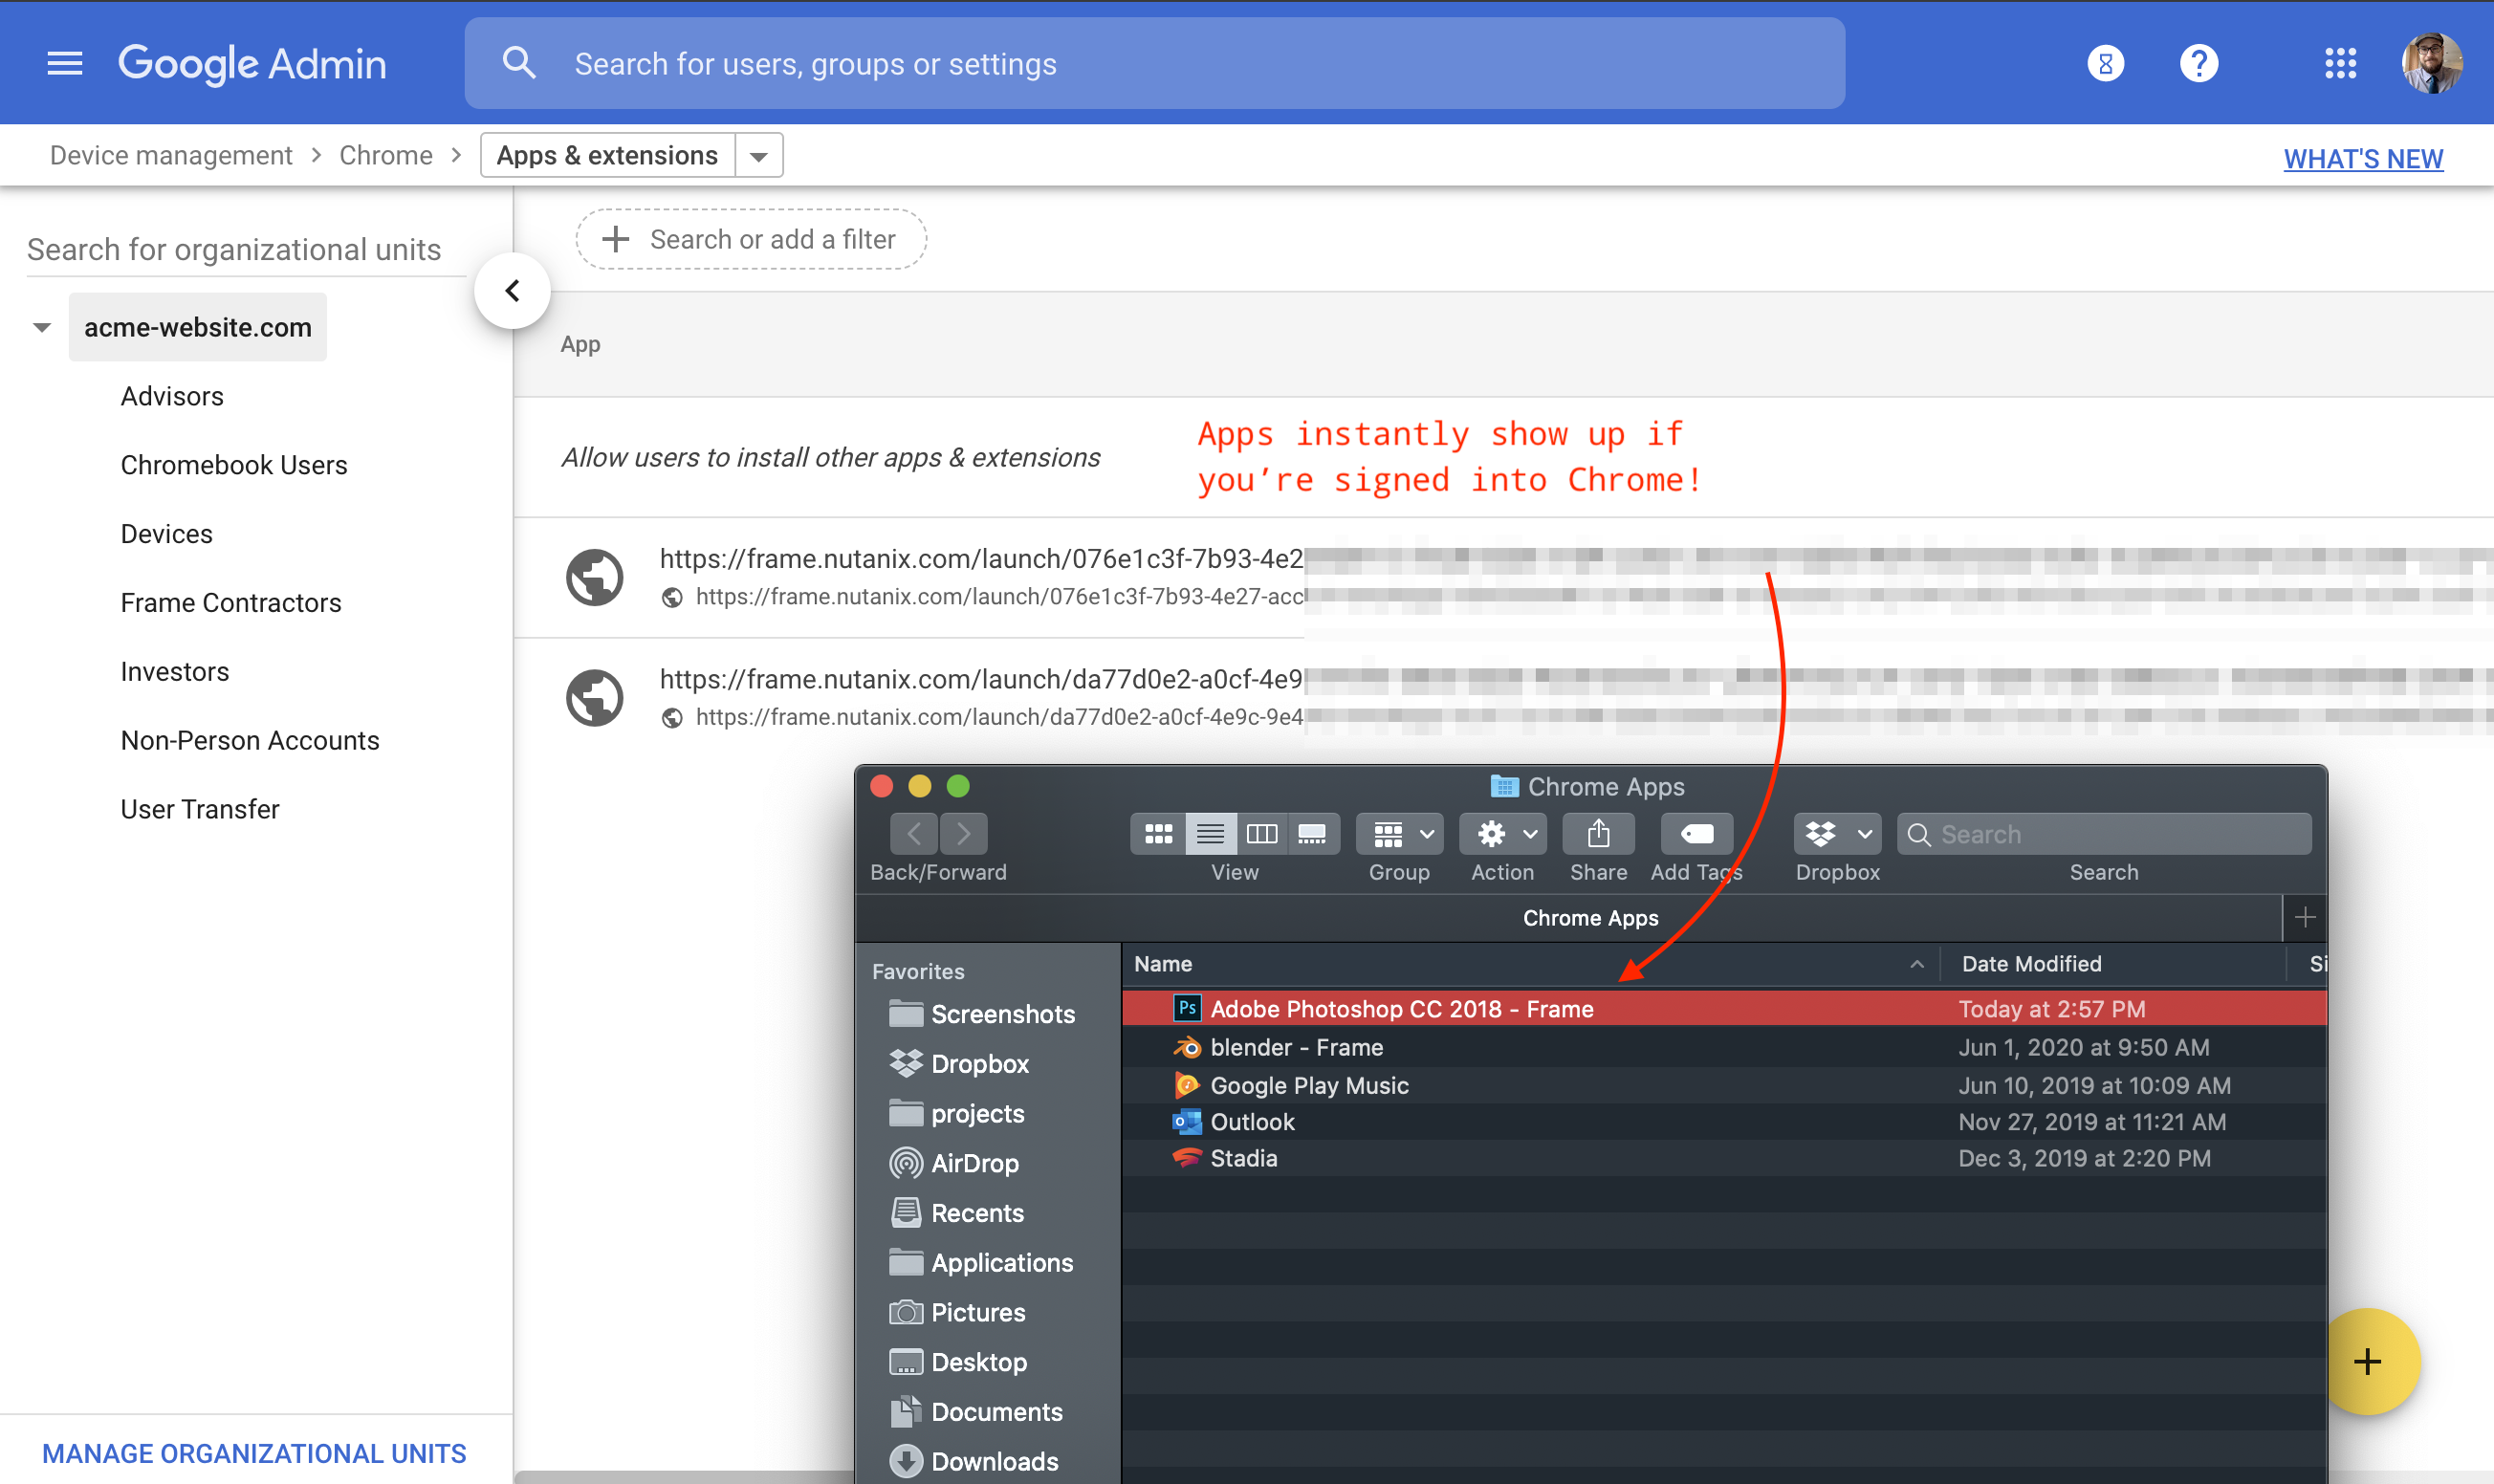. For more information, please read Google's documentation for [Adding Apps by URL](https://support.google.com/chrome/a/answer/6177447?hl=en). #### Deployment with On-premises policies Deploying PWA links with policies (Group Policies or otherwise) is pretty straight-forward. Please read Google's documentation on how to [Automatically install web apps](https://support.google.com/chrome/a/answer/9367354?hl=en). ### Uninstalling PWAs PWAs are easy to uninstall. Users can simply uninstall them from the options menu at the top-right corner of the application. If you'd like to uninstall applications that were installed via Admin policies, simply remove the policy and give a small amount of time for the policy change to be reflected on connected devices – apps should be removed promptly. ### Troubleshooting PWAs #### When my users visit a PWA link, there's no option to install This can happen for a few different reasons. **Troubleshooting tips:** - Make sure your browser is fully up-to-date. - Make sure your Browser and OS support PWAs. At the the time of writing, Firefox doesn't support Desktop PWAs but does Mozilla supports them on mobile. - Make sure your **application's icon is at least 144x144px**, though 512x512 is recommended. Modern apps are typically fine but older apps might need a fresh coat of paint. Admins can upload custom app icons in the Dashboard. - Try refreshing the page. Sometimes certain PWA assets take a while to download and the installation prompt isn't triggered. #### Will my Frame PWA applications work when offline? No. Frame requires an internet connection to work. #### PWAs on mobile devices While PWAs are cross-platform by nature, please be aware that some users may encounter different experiences with their apps due to smaller screen size and different input methods. Please be sure to test your apps on prospective devices/operating systems/browsers before recommending them to your users. ## Launch Links ### What are Launch links? Launch links are an easy way for you to provide your users with a direct link to a specific app or desktop. When a user visits a Launch link, your chosen identity provider handles authentication. Once authenticated, loading these links will immediately start a Frame session for that user.  You can easily copy a Launch Link from the Advanced Integrations panel after configuring your desired identity provider and instance type.  ### Add a link to your website Launch links are easy to tie to any website using standard HTML. For example: ```html A custom button ``` ### Okta Chiclets Already using Okta with Frame? Great! Launch links can be added as Okta Chiclets with the help of Okta's [**Bookmark App**](https://support.okta.com/help/s/article/How-do-you-create-a-bookmark-app?language=en_US). To get started, follow the steps below. 1. As an Okta Admin, let's add a new application.  2. Search for **Bookmark App** and select it. 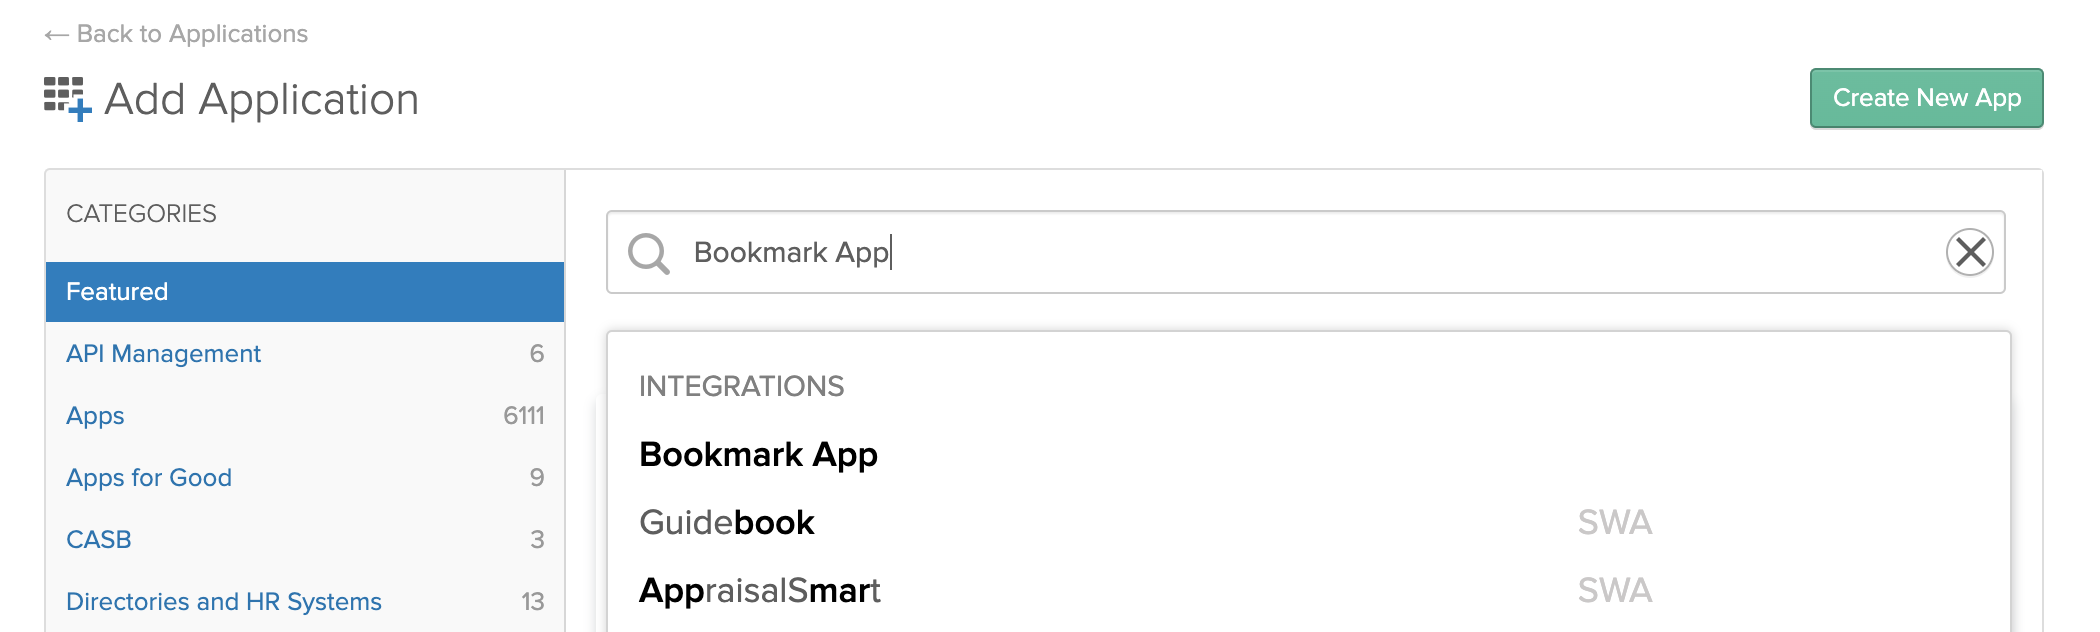 3. Click on **Add**. Begin by adding the name of your Application into the *Application label* field. 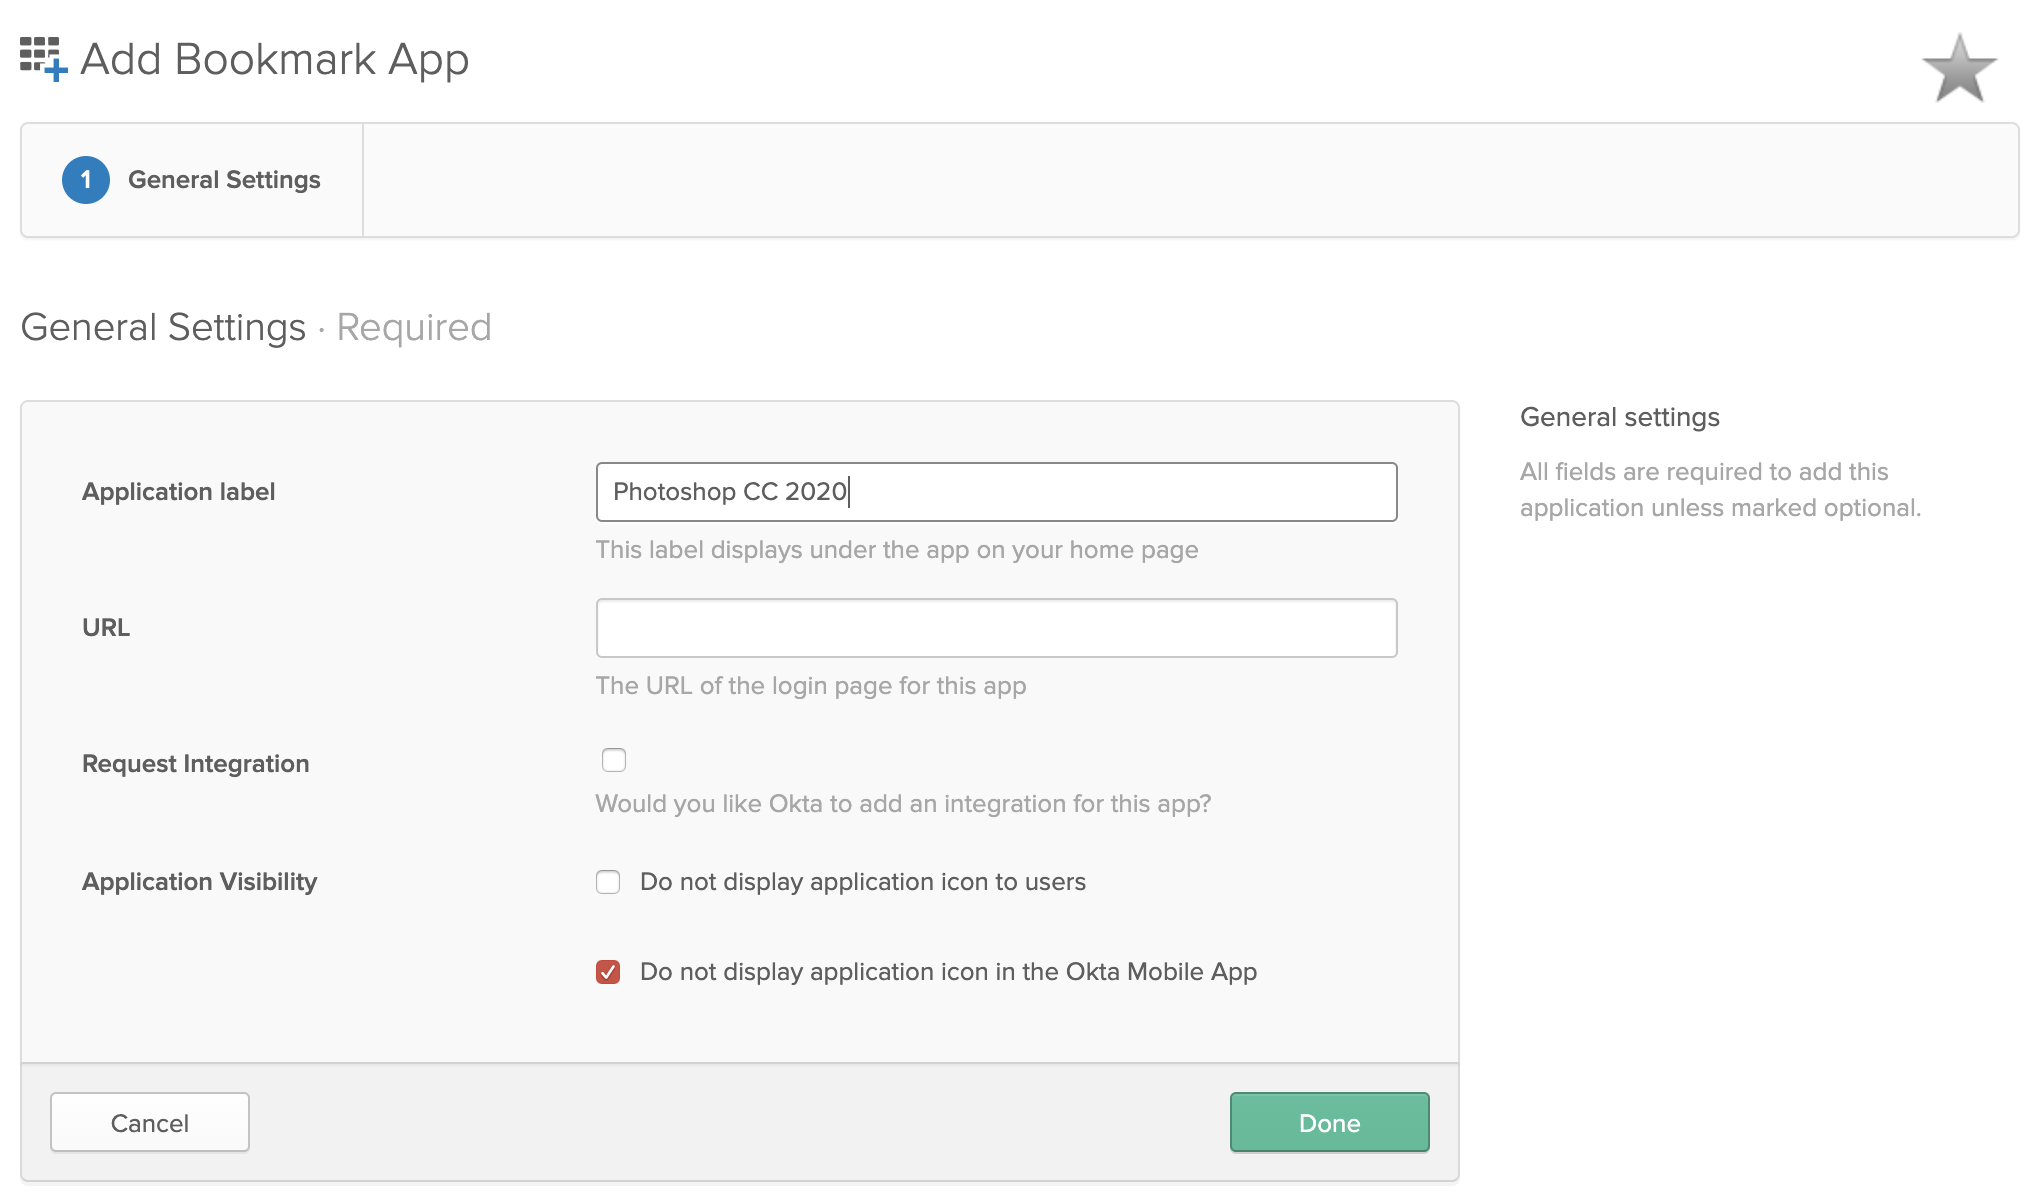 4. Paste your **Launch link** (copied from Frame's Advanced Integrations dialog) into the URL field (be sure you've selected the right Okta identity provider before copying the link). Apply application visibility settings and click **Done**. 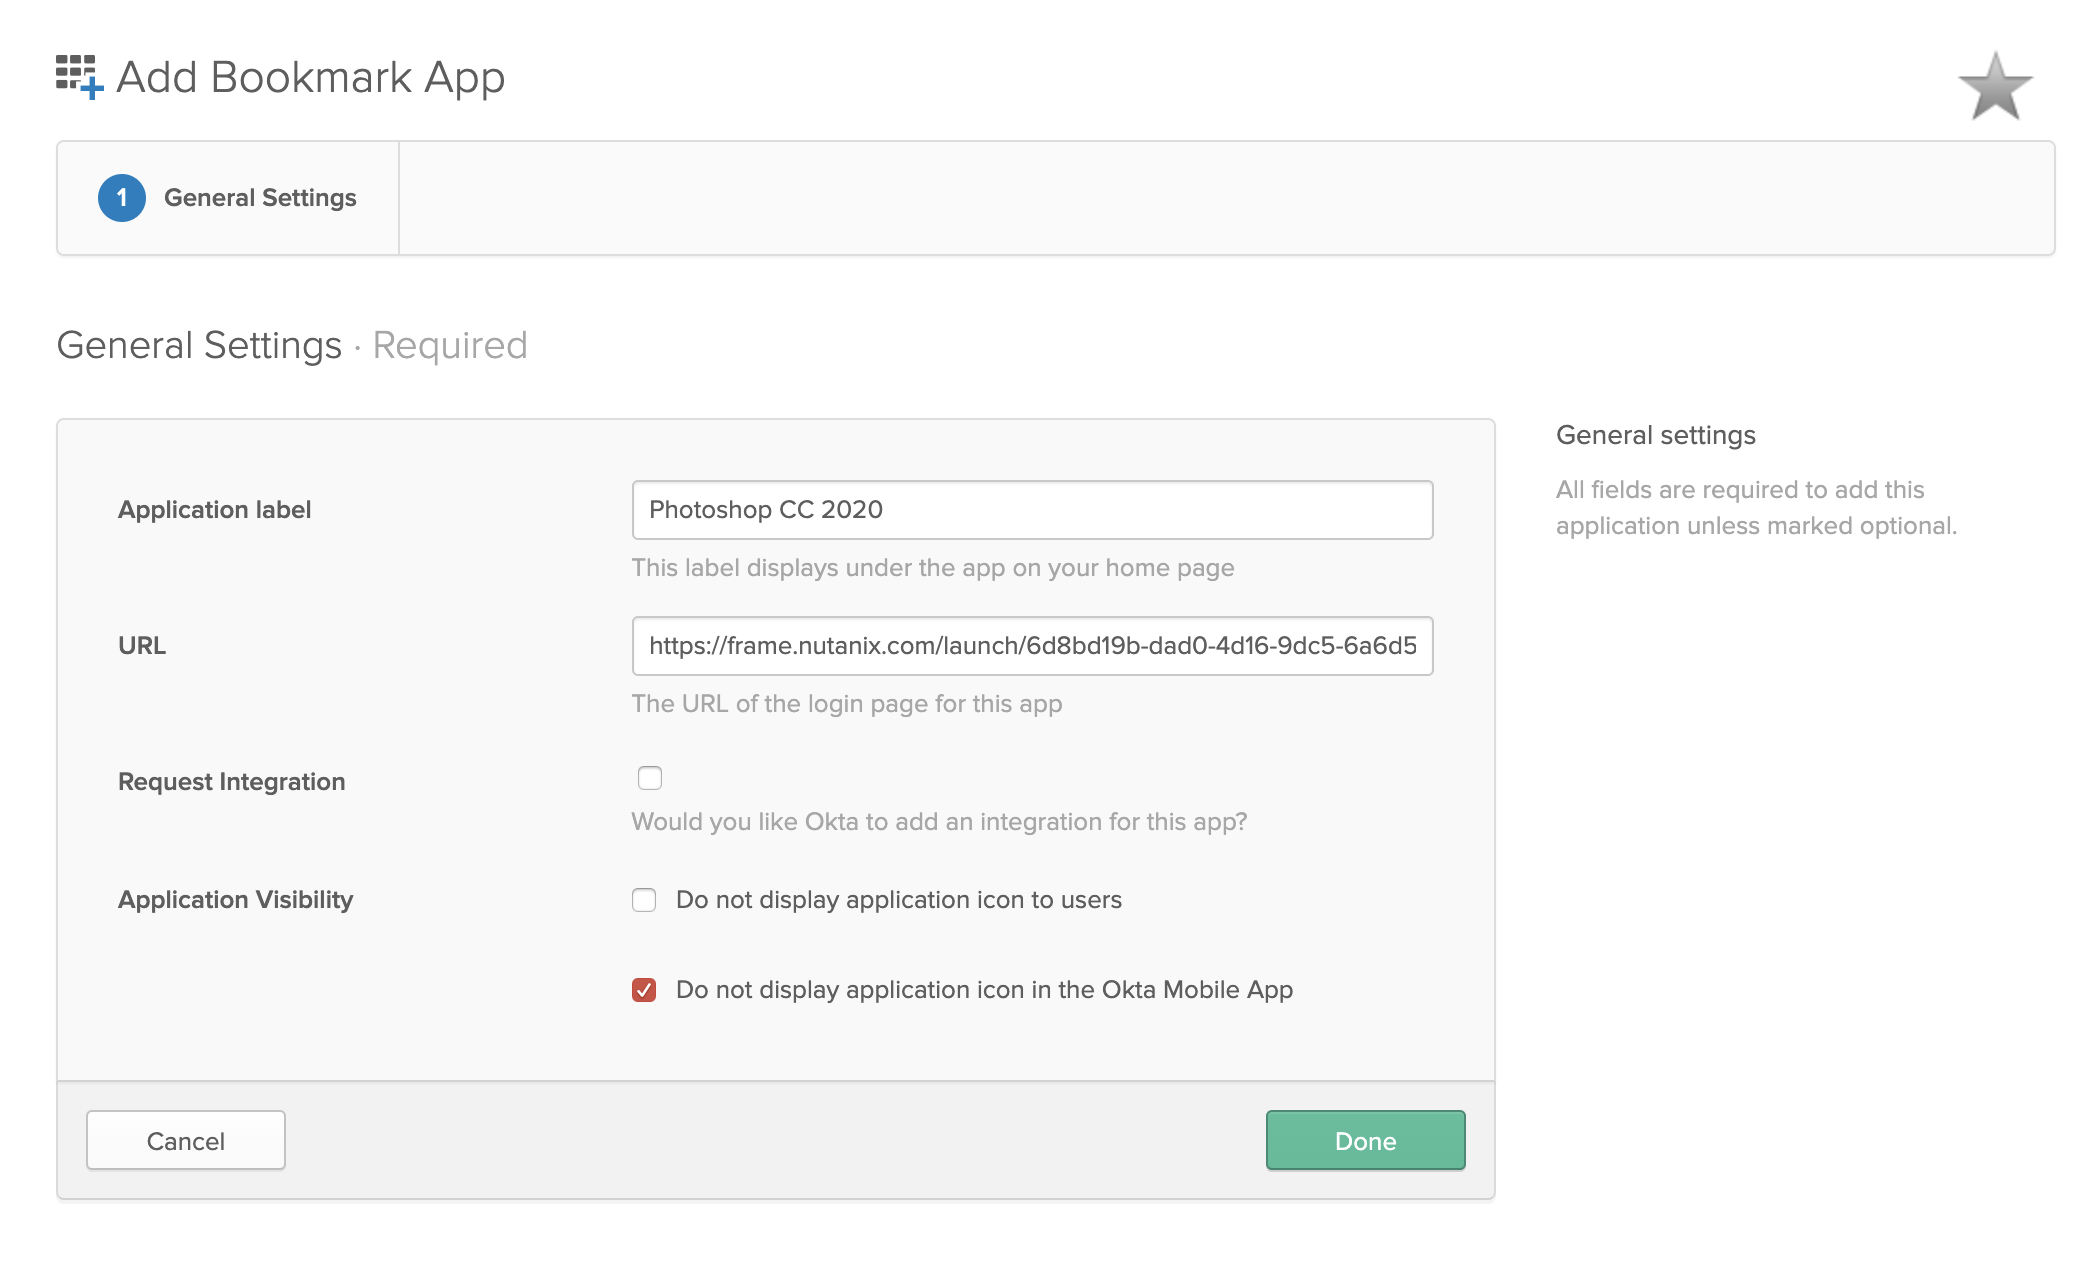As with PWA links above, a single onboarded application or desktop can be used with multiple instance types. However, each instance type will have its own Launch link.
5. Click on your newly added Bookmark. Click the icon at the top left to update it for a better user experience.  1. Repeat these steps to add as many Launch links as you'd like for your users. 2. Finally, assign your Frame-powered Bookmark app(s) to your users/groups.  ## Passing Data into Session For customers who wish to pass data from the browser into the Frame session upon the user clicking on the onboarded application or desktop, these customers can add the `userData` name and corresponding value in the URL query string of the PWA or Launch URL. This mechanism can be used to pass user session context from a website into the workload VM for use by a custom script or application running within the workload VM. An example of a Launch URL with the `userData` name-value pair in the query string would be: ```html A custom button ```If the userData value is a binary value, then it must be converted to a base64-encoded value before adding it to the query string. Once the userData value is passed into the remote VM, a script can base64-decode the value for further use.
Since the userData value is embedded in the URL and could be modified by the end user, the custom script or application within the workload VM should validate the userData value before using it.
Details on how to obtain the `userData` value within the remote VM is discussed the section on [Retrieve userData from the remote system](https://docs.difr.com/link/176#bkmrk-retrieve-userdata-fr). ## Additional Query Parameters Both Launch links and PWA links support a handful of URL search query parameters that allow you to customize the behavior of the links. ### Supported Query Params - **`qlo`** - **true/false**. Forces a log out after a session closes. - **`start`** - **true/false**. If true, the page will load and and wait for a user to start the session themselves. When a PWA is installed, this value is set to **true**. - **`appName`** - Lets you customize the name of the application. Must be encoded as a URL-friendly search query *URI Component*. - **`iconUrl`** - URI-Encoded URL of an icon/image you'd like front-and-center of the Launch PWA/Launch link. - **`idp`** - Set when the URL is initially copied, but you can set it to your IdP of choice by its **integration name**. **Desktop Launch Link example:** ```bash https://use.difr.com/?terminalConfigId=$terminalConfigId&appId=desktop&appName=Acme%20Workspace&iconUrl=$UriEncodedIconUrl&start=true&qlo=true&idp=My-SAML-Provider ``` **Desktop PWA Example:** ```bash https://use.difr.com/?terminalConfigId=$terminalConfigId&appId=desktop&appName=Acme%20Workspace&iconUrl=$UriEncodedIconUrl&start=true&qlo=true&idp=My-SAML-Provider ``` # USB Human Interface Device Support This guide is intended for administrators wishing to integrate the use of USB Human Interface Device (HID) devices within their end user experience. Frame now supports up to 10 USB HID input devices, such as 3D mice, game controllers, and joysticks, connected to the local endpoint, in addition to mouse and keyboard.**Considerations:** - Frame Terminal running in a supported web browser only supports USB HID on Linux and macOS Chrome browser. - Frame App fully supports USB HID on Linux, macOS, and Windows endpoints.
## Requirements For end users to use USB HID, the administrator must verify that the Frame Virtual USB driver has been installed on the Sandbox and published. The Frame Virtual USB driver is included in the Frame Guest Agent Installer and can also be downloaded using the Frame Agent Setup Tool (FAST). Both the FGA and FAST installers are available for download from our [Downloads page](https://files.difr.com/). ## Frame Virtual USB Driver ### Verification Start by verifying you do have the Virtual USB driver installed in your Sandbox: 1. Power on the Sandbox if it is not already running. 2. Once you're in the Sandbox, verify that the Virtual USB driver has been installed by navigating to the Device Manager for your Sandbox. There will be a device named "Frame virtual devices". Selecting the Virtual USB Hub and examining the Driver Details will confirm that the Frame Virtual USB driver has been installed and operating correctly.Since the USB Redirection setting is in Session Settings, Frame Administrators can enable the USB Redirection policy at the Sandbox or for a specific Launchpad, instead of enabling the USB HID feature at the Frame account level.
## End User Configuration Depending on the combination of ways to access Frame, additional configuration may be required. The sections below detail additional setup instructions for your end users. ### Chrome on macOS or Linux For users on macOS or Linux endpoints, they must use Chrome on macOS or Linux-based operating systems in order to use USB Human Interface Devices. End users should follow the steps below to complete configuration of USB HID support. Chrome users must enable the “Experimental Web Platform features” within the Chrome browser, as Google still considers USB HID and WebUSB support to be an experimental feature. 1. In a new Chrome browser tab, enter the following in the address bar: ```powershell chrome://flags/#enable-experimental-web-platform-features ``` 2. At the top of the page you will see the "Experimental Web Platform features" option. Use the drop-down menu to enable this feature.The user running Frame application must be part of "plugdev" group.
## Troubleshooting - **Your device is not listed:**: If you find that your USB device is not showing up as an option in the device list, Frame is not recognizing your device. We recommend [creating a support case](https://docs.difr.com/books/dizzion-support/page/contact-support) for further evaluation. - **Tooltip message “Not supported”**: Server does not support USB functionality. Either the Frame Guest Agent needs to be updated or the virtual USB driver needs to be installed. Note that driver may be installed, but Frame Guest Agent may need to be upgraded to the newer version of driver in order for the USB functionality to work properly. - **Tooltip message “Cannot obtain devices from host”**: The application is having trouble accessing USB devices on the host machine (the machine where the application is installed and running). - **Error message “Cannot plug in device”**: You may see this message after clicking on a device in the USB device list. This means that the Frame platform was unable to communicate with the USB device. We recommend creating a support case for further evaluation. - **Error message "Cannot open connection to device: Access denied"**: When you click on your USB device in the list to "plug in" to your remote session, Frame could not open a connection to the device because the operating system is blocking the connection. - If Frame App is running on Linux, verify that the udev rules are applied to the local Linux endpoint. If udev rules are valid for Linux or the application is running on Windows or macOS, the operating system on your local endpoint is blocking the connection and will require further investigation. ### Testing your USB Device You can open up a browser within your Frame session and visit an online resource such as https://gamepad-tester.com/ to test your USB HID devices. While we have tested and validated many brands and types of USB HID devices, there may be USB devices that do not work yet with Frame. If you would like to submit feedback, please [create a support case](https://docs.difr.com/books/dizzion-support/page/official-dizzion-support-guide). # Clipboard Integration The Clipboard Integration feature allows users to copy and paste content between their local device and their Frame session. This feature can be enabled by a Frame administrator in the Account or Launchpad Session Settings. ## Overview Clipboard Integration in Frame enhances user productivity by providing seamless content transfer between local and remote environments. This feature is designed to support various use cases and accommodate different browser capabilities. Clipboard Integration in Frame offers two main functionalities: 1. **Clipboard Sync:** Automatically syncs clipboard content between local and Frame environments. 2. **Clipboard Manual Sync:** Provides a manual method for clipboard operations when automatic sync is not supported. ## Clipboard Sync The Clipboard Sync feature automatically syncs clipboard content between your local device and Frame session, allowing copy and paste functionality. However, this feature has some limitations depending on the browser and content type. #### Supported Content Types - **Rich Text:** Applications that use HTML format support rich text clipboard operations. Some applications (e.g., office applications) may support this, but others, such as certain RTF editors, may not. - **Images:** Only PNG images are supported for clipboard operations. Other image formats are not supported at this time. ### Limitations - Copying content from a Word document that includes images and rich text is **supported**, but only if the application supports HTML format for clipboard operations. - Clipboard Sync only works when clipboard sync is enabled by the user or administrator. - The clipboard size limit is 10MB. Content larger than this will not be transferred. - Bidirectional sync requires the use of `Ctrl+C` / `Ctrl+V` (Windows) or `Cmd+C` / `Cmd+V` (Mac). Rich text will not copy via mouse right-clicking alone. - Copy-pasting from certain rich text editors may not work if they do not support HTML-based clipboard formats.To use Ctrl+C and Ctrl+V (Cmd+C and Cmd+V) for macOS) for copying rich text or files **within** your Frame session, Clipboard Sync **must be disabled**. When Clipboard Sync is enabled, you can still copy/paste rich text or files within the session by right-clicking and using the context menu.
## Clipboard Manual Sync clipboard-manual-sync For browsers that don't support Clipboard Sync, Frame provides a manual sync option: 1. Click the clipboard icon in Frame Session controls. 2. Use the dialog box to copy/paste text between your local machine and Frame session.The operating systems in the tabs correlate with the user's \*\*endpoint operating system.\*\* For instance, if your users are accessing Frame/Frame App from Windows and macOS machines, you will want to specify your custom keyboard mapping under both the "Windows" and "macOS" tabs.
Default Keyboard ProfilesYou can edit your default keyboard profile for your account as desired; however, the default keyboard cannot be deleted from the account. If you would like to reset the default profile back to its original state, simply click on the adjacent kebab menu and select "Reset."
It is important to note that some key combinations will not work in Frame Terminal or Frame App simply because they are intercepted by the endpoint's operating system (OS) or browser.
For instance, CTRL + ALT + DEL on a Windows-based endpoint would not be passed into a Frame session because that key combination would be intercepted by the Windows OS. Similarly, CMD + P would be intercepted by the Safari browser on macOS as a print command and would not be passed into Frame browser-based session. For this reason, administrators should use the operating system tabs to apply their custom key mappings for **one or more of the four supported endpoint operating systems** their end users might use. 1. Start by adding/editing your keyboard profile (as shown in the sections above). Once you have opened the keyboard profile window, select the desired operating system tab and then click on the blue “Add New Keyboard Mapping” link. We will use macOS in this example.Any changes made to keyboard profiles will take effect after the next session start for end users. Administrators are not required to publish their Sandbox to see changes propagate to end user sessions.
## Edit a Keyboard Mapping 1. To edit a keyboard mapping, simply click on the component of the mapping you wish to change (the client shortcut or the remote shortcut/action) and modify as desired.Additional LanguagesNirSoft provides instructions and zip files for additional languages on their website. Dutch, French, German, Greek, Japanese, Portuguese, and many other languages are available for testing.
2. KeyboardStateView will display every key that you press in the application's UI, even when the application is not in focus. If you want to view the state of all keys, simply turn off the 'Show Only Keys Pressed In Last seconds' option under the "Options" menu. You can use this tool to provide more specific information to your Frame support personnel when creating a support case. # Mouse Modes Since Frame is accessible from any device with a modern web browser, we've set up multiple mouse modes to navigate a Frame session. While our standard mouse configuration works for most use cases, there are some scenarios where a different mouse mode could be helpful. We'll outline different mouse modes and their corresponding use cases below. ## Enable Mouse Mode Selection 1. Navigate to the "Settings" page in your Dashboard to enable the mouse mode selection option. Click on the "Session" tab and scroll down to the "Advanced options" dialog. Enter the following string in the "Advanced Terminal Arguments" field: ```powershell *features*mouseModes*isEnabled*=true ```Note about Keyboard Layouts and Certain Keyboard ShortcutsCertain keyboard shortcuts can conflict with the native Windows keyboard shortcut that switches the current keyboard layout. For example, on macOS device, you can use a keyboard shortcut CMD + SHIFT + 3 to take a screenshot. The key combination to do this sends ALT + SHIFT to the Frame session and will switch the system's keyboard layout to another keyboard layout that is available Conflicting shortcuts for OS X that may switch the keyboard layout include: - Screenshot tool: CMD + SHIFT + 3 - Screenshot snip tool: CMD + SHIFT + 4 - Go to next tab: CMD + SHIFT + - Go to previous tab: CMD + SHIFT +
## Using a Single Language The most common configuration would be to prepare your account's Sandbox with a default display language and a default keyboard layout other than US English. You only need to change these settings once within the Sandbox desktop environment to permanently apply the changes to your account. After these adjustments are made and published, all production sessions will use the updated display language and keyboard layout. ## Changing the Default Display Language The default display language setting can be configured in the "Language" section of the control panel on your Sandbox.The above explanation assumes that you have already installed all language keyboards/packs that you require for your applications on the OS.
## Change the Default Keyboard Layout The default keyboard layout setting can be configured in the "Typing" section of the control panel on your Sandbox.The above explanation assumes that you have already installed all language keyboards/packs that you require for your applications on the OS.
# Banners and Classification Labeling ## Custom Terminal Banner Terminal banners display custom messages across the top of a user's Frame session. Banners can be used as a reminder to the user that they are using a special type of environment. This feature is often used for high security environments such as government, medical, and finance organizations. Administrators can specify the color and text of the banner for their own classification purposes. 1. To enable this feature within your Frame Account, navigate to the **General** tab listed under the **Settings** section of your Dashboard.Custom banner definitions are \*\*not\*\* dynamically inherited from higher levels to lower levels of the Frame platform hierarchy. If you wish to leverage a custom banner at a lower level of the platform hierarchy, be sure to configure the custom banner first in the parent entity before creating the child entity.
# Scripting Frame Guest Agent (FGA) gives customers the ability to tailor the behavior of their workload VMs (e.g., Sandbox, shadow, production, utility server, etc.) to execute scripts at different event-points of a VM and/or user session. These events are defined as “lifecycle hooks.” Once a Frame account is created, the Frame administrator can place custom scripts (PowerShell for Windows, Bash scripts for Linux) in the Sandbox and then publish the Sandbox to make them available to the workload VMs. ### Custom Script LocationIn the context of scripts, spaces are not valid characters. For example `script1.ps1` is a valid script name, while `script 1.ps1` is \*not\* valid.
FGA scripts must be placed into a specific directory. The FGA Users Scripts directory for **Windows** VMs is: `C:\ProgramData\Nutanix\Frame\FGA\Scripts\User` Example valid script paths for **Windows**: - `C:\ProgramData\Nutanix\Frame\FGA\Scripts\User\powershell\my_custom_script.ps1` - `C:\ProgramData\Nutanix\Frame\FGA\Scripts\User\my_custom_script.ps1` - `C:\ProgramData\Nutanix\Frame\FGA\Scripts\User\a\b\c\d\my_custom_script.ps1` For **Linux** VMs, the FGA Users Scripts directory is: `/opt/nutanix/frame/fga/scripts/user` Example valid script paths for **Linux**: - `/opt/nutanix/frame/fga/scripts/user/powershell/my_custom_script.sh` - `/opt/nutanix/frame/fga/scripts/user/my_custom_script.sh` - `/opt/nutanix/frame/fga/scripts/user/a/b/c/d/my_custom_script.sh` ### Script Invocation Invoking or executing custom scripts requires a definition.yml file (case sensitive) to be present in the FGA User Scripts directory. For example, this path for Windows would be `C:\ProgramData\Nutanix\Frame\FGA\Scripts\User\definition.yml`. FGA reads this file at each lifecycle hook and will invoke scripts as defined in this file. ### Definition.yml The `definition.yml` file describes detailed script context and execution information: - Script **groups** -- a convenient way to group multiple scripts based on their context. - Lifecycle hooks or **run-policies** -- phases in Frame's lifecycle of VMs and Sessions. - Script **paths** and filenames -- only use relative paths (from the FGA Users Script directory) or filenames. Look out for typos! - **Pool-types** -- specifies which type of Frame VMs you'd like the scripts to execute on (Sandbox, Production, etc.) - **Error policies** -- specifies the behavior FGA should follow if an error is encountered: [continue or abort](#error-policy). Below is an example of a definition.yml file. ```yaml groups: - desc: Scripts on first boot name: first-boot timeout: 30 run-policy: first-boot pool-type: - sandbox - production scripts: - desc: My script A path: A.ps1 error-policy: continue timeout: 10 - desc: My script B path: B.ps1 error-policy: continue timeout: 10 - desc: Scripts on each boot name: every-boot timeout: 30 run-policy: every-boot pool-type: - sandbox - production scripts: - desc: My script C path: C.ps1 error-policy: continue timeout: 10 - desc: My script D path: D.ps1 error-policy: continue timeout: 10 - desc: Scripts before session is started name: pre-session timeout: 30 run-policy: pre-session pool-type: - sandbox - production scripts: - desc: My script before sessions is started path: before-session.ps1 error-policy: continue timeout: 20 - desc: Scripts after session is closed name: post-session timeout: 30 run-policy: post-session pool-type: - sandbox - production scripts: - desc: My script after sessions is closed path: after-session.ps1 error-policy: continue timeout: 20 ``` ## Script Execution Order Order in the definition.yml file is important. When executing the scripts, FGA iterates through the definition.yml file and executes scripts in order from top to bottom. This also applies to Script Groups. If you provide two script groups of the same type (pre-session, post-session, etc), the group that is higher in the YAML file will get executed before any groups that are lower in the file. In the following definition.yml example, Group 3 will get executed before Group 1 (since Group 3 is higher in the file). Also, `before-session-3.ps1` will get executed prior to `before-session-2.ps1` for the same reason: ```yaml groups: - desc: Group 3 - Scripts before session is started name: Group 3 Pre-session timeout: 30 run-policy: pre-session pool-type: - production scripts: - desc: The 3 pre-session script path: before-session-3.ps1 error-policy: continue timeout: 20 - desc: The 2 pre-session script path: before-session-2.ps1 error-policy: continue timeout: 20 - desc: Group 1 - Scripts after session is closed name: Group 1 pre-session timeout: 30 run-policy: pre-session pool-type: - production scripts: - desc: My script after sessions is closed path: after-session.ps1 error-policy: continue timeout: 20 ```**Important!** Each script will need to be fully completed before the next script is executed. (Sequential execution vs. parallel execution)
## Frame Lifecycle Hooks The following table outlines various Frame Lifecycle Hooks, used as values for run-policy in a definition.yml script group. Each lifecycle hook is optional. ### VM Lifecycle Hooks| Hook Name | Description | Applicable pool groups | User Context |
|---|---|---|---|
| `pre-generalization` | Executed before Domain-Join generalization process (which includes sysprep) is started. | shadow, persistent\_desktop\_shadow | **Frame** user |
| `post-generalization` | Executed after Domain-Join generalization process (which includes sysprep) is finished. | shadow, persistent\_desktop\_shadow | **Frame** user |
| `first-boot` | Executed only on the very first boot of the virtual machine, after it is created. This hook is available for all instance types, allowing scripts to make stateful changes right after instances are provisioned/created. For domain joined instances and enterprise profiles, the local user `frameuser` needs to have elevated privileges. | shadow, production, persistent\_desktop\_shadow, persistent\_desktop\_production | **Frame** user |
| `every-boot` | Executed upon every system/OS boot. This hook can be used to update the image before non-persistence is enabled (on shadow/production instances). | shadow, production, sandbox, utility | **Frame** user |
| Hook Name | Description | Applicable pool groups | User Context |
|---|---|---|---|
| `pre-session` | Executed right before a user session is started. **User Context info:** For example, if the workload VM is joined to the domain and the user authenticates to the Windows domain, then the scripts would run in the domain user context. Pre-session scripts are executed after the Windows login screen and before the onboarded application or desktop is displayed. Pre-session scripts never run in SYSTEM context. | sandbox, production, persistent\_desktop\_production, utility | **Currently logged in user** |
| `on-idle` | Executed when session goes to idle state (workload stops streaming). | sandbox, production, persistent\_desktop\_production, utility | **Currently logged in user** |
| `on-active` | Executed when session goes from idle to active state (workload resumes streaming). | sandbox, production, persistent\_desktop\_production, utility | **Currently logged in user** |
| `post-session` | Executed immediately after a session is closed. This occurs after the session has stopped streaming and before both the Windows logoff process and the profile disk unmount process. | sandbox, production, persistent\_desktop\_production, utility | **Currently logged in user** |
Newly published VMs that have been placed in the production pool will still be marked as `shadow` until they are rebooted.
#### scripts > Specifies the list of scripts that needs to be executed.**Did you know?** A “pool” in Frame's context is a grouping of VMs/instances associated with a Frame account.
### Script Item Properties #### desc > Description of the script. #### path > Script file location, relative to base user scripts directory. #### error-policy > Defines FGA strategies when script fails. > > Follow these three simple steps to get started creating scripts and customizing the VMs on first boot (or every boot) and your Frame sessions. > > **Error-policy values** > > - `continue` - FGA to proceed on even if the script fails. > - `abort` - FGA to abort the task if script fails; **use with caution.** > - For Session Lifecycle hooks, this will immediately end the session for the end-user. > - For VM Lifecycle hooks, this can prevent publishes from completing, or spinning up new instances when the pool's capacity is expanded #### timeout{#script-timeouts} > Integer value in seconds. Defines the maximum amount of time for the script to run. If the execution time of the script exceeds the timeout value, FGA will kill the running script. **Be sure that your script's combined timeouts are less than or equal to the group's timeout duration.** ## Getting Started Follow these three simple steps to get started creating scripts and customizing the VMs on first boot (or every boot) and your Frame sessions. ### 1. Create a Simple Script Create a new PowerShell file (hello-world.ps1) in the FGA Scripts User directory. ```powershell # Writing a simple text file with warm greeting. $timestamp = Get-Date -Format "dddd MM/dd/yyyy HH:mm K" "$timestamp - Hello, World!" | Out-File "C:\ProgramData\Nutanix\Frame\Logs\sandbox_greeting.txt" -Append ``` ### 2. Your *definition.yml* Next, you need to communicate to FGA about this script via a `definition.yml` file to specify which Frame Session Lifecycle hook will trigger this script, timeout settings, the pool type(s), etc. ```yaml groups: - desc: Simple script example name: A very simple pre-session script. timeout: 10 run-policy: pre-session pool-type: - sandbox scripts: - desc: Frame Hello World Example script! path: hello-world.ps1 error-policy: continue timeout: 10 ``` The `definition.yml` file specifies that we have one script group that only executes during the pre-session Lifecycle Hook. We also specify that this group should only execute on the sandbox instance *pool*. Next, we specify a single script called `hello-world.ps1`. This script can run for a maximum of 10 seconds before reaching either timeout value, causing FGA to quit waiting and continue on. ### 3. Testing and Debugging Finally, double-check to make sure the files are saved, named correctly, and are located in the correct locations. Next, quit your sandbox session. Now we're ready to test! Testing our script is simple. When starting a new Sandbox Session, you should see a file populated at `C:/sandbox_greeting.txt`, showing our execution timestamp and our greeting. ## Logging and Troubleshooting Logging can be incredibly useful for debugging. However, if you're using non-persistent desktops and trying to debug scripts in production, any logging you do on the VM is wiped out after the session. ### Logging tips for various environments 1. **Sandbox and Persistent Desktops**: Create any text file somewhere on C: with the output of your logs. 2. **Non-persistent Shadow and Production VMs**: External logging service, either on the public internet (like Loggly, Splunk, etc.) or perhaps a service running on an accessible Utility Server. ### Troubleshooting Tips - Be mindful of about [group](#group-timeouts) and [script](#script-timeouts) timeouts, how they're different, and that your values don't overlap. - Always take backups before scripting. - If your scripts reference any file paths, be sure to use absolute filepaths, even for files residing in the FGA User Scripts folder. - If possible, test by executing the Powershell code in the Sandbox using PowerShell ISE. - If your scripts contain any sensitive information or credentials, be sure to write a cleanup pre-session script that can execute after your credentials are used and *delete the sensitive script/files* before users are connected to a Session. - Use identifying elements from Frame environment variables to help understand who and when (if needed). - You can set and get environment variables or registry entries to help communicate between scripts and lifecycle hooks. - Avoid using `error-policy: abort` for sandbox scripts, as failing scripts can make the Sandbox inaccessible, requiring a restoration from a backup or termination (and recreation) of the Sandbox. - If your scripts need to run with Elevated Privilege in Windows 10, make sure that the below registry key value is set to `0`. Otherwise, your scripts will fail due to Microsoft Windows User Account Controls (UAC) preventing the script from executing in an elevated context. - Key: `SOFTWARE\Microsoft\Windows\CurrentVersion\Policies\System` - Value: "EnableLUA" - Type: `REG_DWORD` ### Environment Variables FGA populates environment variables via registry entries to `HKCU/Environment`. These values are dynamically set for each Frame session and are useful when used with logging.| Env Variable | Description |
|---|---|
| `FRAME_VENDOR_ID` | A unique identifier tied to the Frame Account the VM is associated with. |
| `FRAME_VENDOR_NAME` | The name of the instance's Account. |
| `FRAME_USER_EMAIL` | The current session user's email address. |
| `FRAME_SESSION_ID` | The unique Session ID associated with the current session. Useful for debugging and support purposes. |
| `FRAME_SESSION_INFO` | Provides additional session information represented within a JSON object: `colorspace` (`YUV420` or `YUV444`), `protocol` (`FRP7` or `FRP8`), and `connectionType` (`tcp` or `udp`) |
| `FRAME_SESSION_LABEL` | Custom value set in Session Settings through the [Advanced Server Argument](https://docs.difr.com/platform/session/session-settings#advanced-arguments) `-frame-session-label` |
| `FRAME_SESSION_TOKEN` | Unique token specific to the session. This token can be used to query user assertion/claims data, or base64 decoded to access various user and authentication-related data. |
| `FRAME_VENDOR_EMAIL` | Contrary to the name, this value is the unique GUID associated to the Frame account the VM belongs to. |
| `FRAME_MAX_SESSION_DURATION` | The maximum amount of time (in seconds) the user can be in the session. This value is set in the Account, Launchpad, Sandbox, and Utility Server session settings. |
| `FRAME_SESSION_START_TIME` | The date/time when the session started. |
| `FRAME_POOL_GROUP_TYPE` | Type of pool group the session is currently connected to (`sandbox`, `production`, `test`, `utility`). |
| `FRAME_POOL_NAME` | Name of instance pool the session is currently connected to as defined within *Dashboard* > *Capacity* |
| `FRAME_INSTANCE_TYPE` | The instance type name of the current instance. |
| `FRAME_IMAGE_FAMILY` | Image Family Name that the instance is based off of. |
| `FRAME_DATACENTER` | Name of the datacenter where the instance is located. |
| `FRAME_CLOUD_PROVIDER` | Name of the infrastructure provider (`ahv`, `azure`, `gcp`, `amazon`). |
As this tool was written for Windows, it only supports `.ps1` scripts.
### Import and Validation of the Definition.yml File Importing the definition.yml file can be accomplished in two ways: - **Automatically**: When launched the tool will search for a definition.yml file in `C:\ProgramData\Nutanix\Frame\FGA\Scripts\User` - **Manually**: By using the import section from toolbar menu: Configuration>ImportThe file will not be imported until any errors are resolved.
If the tool cannot find a definition.yml file at startup, it will display a prompt; you can still continue using the tool. All changes will be saved afterwards into a new definition.yml file. ### Edit the Definition.yml File All available Frame Lifecycle hooks ([see above](#-frame-lifecycle-hooks) for hook definitions) are displayed to the left of the tool window. To begin, select one of the hooks. By default, "first-fga-boot" is selected. Next to the name of the hook are two numbers. The first number represents the number of pool-type groups, the second represents the total number of scripts assigned to that hook. To attach your scripts to the selected hook, drag scripts files from File Explorer into the drop area at the top of the screen.Another way to import the scripts is to directly drag their file onto the existing pool-type group.
Next, a prompt will ask you to specify the pool-type groups for your scripts. Check the box next to each desired pool and click “Next” when all desired options are checked.  ### Changing Script Order To change the order of the scripts, simply drag a script to desired position in the pool-type group.Scripts can only be moved within the current group, not to another.
### Rearranging the Pool-Type Groups Order of the pool-types can be also changed. Each of the pool-type group "box" can be dragged over the other group. ### Export the Definition.yml File After making your changes, you can save your file by clicking “File” and then “Save”, or even export it to a new file from **Configuration > Export**.  ## Advanced Scripting ### Update Script (Windows only) If found, FGA will execute an “update” script right after a VM boots, but *before FGA User scripts are executed*. This allows Frame administrators to create custom update scripts to automated or dynamic maintenance operations on their custom scripts and files before user scripts defined in definition.yml are executed. The update script must be in the following path: `C:\ProgramData\Nutanix\Frame\FGA\Scripts\User\update.ps1` Updating the user scripts might include completely new packages of scripts or just a new definition.yml file. The following are best practices when it comes to updating your custom scripts using the Update script feature. 1. Make sure your updated scripts and/or definition.yml are packaged in a bundle. 2. Make sure your workload VMs are able to access and download that bundle. 3. Create an update script that downloads the package and checks if there is a need for the update to be applied. - If not, the "update" script should just exit. - If yes, the "update" script should perform the update (it can delete existing definition.yml and all script files and then recreate definition.yml file and/or scripts). 4. Place the update script content inside the update.ps1 (for Windows) and update.sh (for Linux). When the VM gets into boot phase, FGA is going to search for the "update" script. If it does not find the script, FGA will read the definition.yml file and run the scripts as they are defined in the definition.yml file. If the FGA finds the "update" script, FGA will execute the script first. Once the script is executed, FGA will proceed to execute the custom scripts following the definition.yml file. If the update script on Windows OS takes more than 10 minutes to execute, FGA will timeout and continue with its startup workflow. ## Example Scripts Below are some example use cases where a custom script and associated definition.yml file can customize the end user experience. ### Mount a Network Volume **Scenario**: A Frame administrator would like to mount an existing read-only file share once a user starts a Frame session in either the Sandbox (Frame administrator) or a production workload VM (user). The following simple PowerShell script "mount-read-only-volume.ps1" is placed in the scripts folder to be executed: ```batch echo off net use * /delete /Y net use K: \\10.0.0.5\Fileshare /user:username password ``` The corresponding **definition.yml** file: ```yaml groups: - desc: Scripts before session is started in either Sandbox or production workload VMs name: pre-session timeout: 30 run-policy: pre-session pool-type: - sandbox - production scripts: - desc: Pre-session script to mount a read-only volume path: mount-read-only-volume.ps1 error-policy: continue timeout: 20 ``` ### Exclusion/Inclusion Rules for Enterprise Profiles **Scenario**: A Frame administrator wishes to exclude specific folders from persisting and/or include specific folders to persist in users' enterprise profiles. The following PowerShell script “exclude-include-folders.ps1” is placed in the scripts folder to be executed: ```powershell # Exclude four folders in the %USERPROFILE% Add-ProfileDiskExclusion -SourcePath $env:USERPROFILE\Downloads -TargetPath C:\_Profile Add-ProfileDiskExclusion -SourcePath $env:USERPROFILE\Music -TargetPath C:\_Profile Add-ProfileDiskExclusion -SourcePath $env:LOCALAPPDATA\Autodesk -TargetPath C:\_Profile Add-ProfileDiskExclusion -SourcePath $env:LOCALAPPDATA\Spotify -TargetPath C:\_Profile # Include two separate folders C:\MyData and C:\MoreData to the user's enterprise profile. Add-ProfileDiskInclusion -SourcePath C:\MyData Add-ProfileDiskInclusion -SourcePath C:\MoreData ``` The corresponding definition.yml file specifies that this PowerShell script should only be executed in the context of production workload VMs where the user's enterprise profile volume is used (in a non-persistent Frame account): ```yaml groups: - desc: Scripts before session is started in production workload VMs name: pre-session timeout: 30 run-policy: pre-session pool-type: - production scripts: - desc: Pre-session script to include/exclude folders from the user's enterprise profile path: exclude-include-folders.ps1 error-policy: continue timeout: 20 ``` ### Autohide the Windows Task Bar in App Mode 2.0 **Scenario**: A Frame administrator wants to have the Windows Task Bar automatically hidden when using an Application Launchpad with App Mode 2.0. The Windows registry key that controls this behavior is at `HKEY_CURRENT_USER\Software\Microsoft\Windows\CurrentVersion\Explorer\StuckRects3`. The following PowerShell script is placed in the scripts folder to be executed: ```powershell $p='HKCU:SOFTWARE\Microsoft\Windows\CurrentVersion\Explorer\StuckRects3'; $v=(Get-ItemProperty -Path $p).Settings; $v[8]=1; Set-ItemProperty -Path $p -Name Settings -Value $v; Stop-Process -f -ProcessName explorer ``` The corresponding definition.yml file specifies that this PowerShell script should only be executed in the context of production workload VMs: ```yaml groups: - desc: Scripts before session is started in production workload VMs name: pre-session timeout: 30 run-policy: pre-session pool-type: - production scripts: - desc: Pre-session script to autohide the Windows Task Bar path: autohide-taskbar.ps1 error-policy: continue timeout: 20 ``` If you wish to show the Windows Task Bar, then the PowerShell script can be used: ```powershell $p='HKCU:SOFTWARE\Microsoft\Windows\CurrentVersion\Explorer\StuckRects3'; $v=(Get-ItemProperty -Path $p).Settings; $v[8]=2; Set-ItemProperty -Path $p -Name Settings -Value $v; Stop-Process -f -ProcessName explorer ``` ### Add Applications dynamically to the Frame Taskbar in App Mode 2.0 **Scenario**: A Frame administrator needs to dynamically add an application shortcut/launch link to the Frame Taskbar in App Mode 2.0. App Mode 2.0 allows you to dynamically modify the Frame Taskbar to any configuration you need (in real time). The following PowerShell script should be placed in the scripts folder to be executed. This is designed as a pre-session script that modifies the Frame Taskbar configuration before the session starts. The script will override any of the default Frame Taskbar configuration and show Notepad only (update-taskbar.ps1):Notice that any URI path requires two backslashes in the path (Within the JSON file only)
```powershell $jsonFilePath = 'C:\ProgramData\Nutanix\Frame\Config\server_launchpad_override.json' $jsonOverrideContent = @" { "name": "root", "order": 0, "applications": [ { "name": "Frame", "path": "C:\\Windows\\System32\\notepad.exe", "icon_url": "", "order": 0, "arguments": "" } ], "folders": [] } "@ Set-Content -Path $jsonFilePath -Value $jsonOverrideContent ``` The corresponding definition.yml file specifies that this PowerShell script should only be executed in the context of production workload VMs: ```yaml groups: - desc: Scripts before session is started in production workload VMs name: pre-session timeout: 30 run-policy: pre-session pool-type: - production scripts: - desc: Pre-session script to add Notepad into the Frame Taskbar icon/shortcut list path: update-taskbar.ps1 error-policy: continue timeout: 20 ``` ## Playing in the Sandbox In this example, we'll create a few more scripts, each set to execute at common session lifecycle hooks.Before continuing with any changes to your sandbox, please make a backup first! Sandbox scripts, if improperly configured, can cause undesired behaviors and in some cases can cause the sandbox to become unresponsive, requiring restoration from a backup or a fresh sandbox.
To get started, grab your shovel and connect to your Sandbox. Then, open up your favorite text editor and create the following **five** files in the **FGA User Scripts Directory**. **Pre-session script: pre-session.ps1** To test this, the scripts will create or append to a single log file created at `.\logs\sandbox_bucket.txt` with a timestamp and message from the script. ```powershell $RootPath = "C:\ProgramData\Nutanix\Frame\FGA\Scripts\User" If (!(test-path "$RootPath\logs")){ New-Item -Path "$RootPath\logs" -Type Directory } $timestamp = Get-Date -Format "dddd MM/dd/yyyy HH:mm K" "$timestamp - Hello from pre-session.ps1" | Out-File "$RootPath\logs\sandbox_bucket.txt" -Append ``` **Session Disconnect script: on-idle.ps1** ```powershell $RootPath = "C:\ProgramData\Nutanix\Frame\FGA\Scripts\User" If (!(test-path "$RootPath\logs")){ New-Item -Path "$RootPath\logs" -Type Directory } $timestamp = Get-Date -Format "dddd MM/dd/yyyy HH:mm K" "$timestamp - Hello from on-idle.ps1" | Out-File "$RootPath\logs\sandbox_bucket.txt" -Append ``` **Session Resume script: on-active.ps1** ```powershell $RootPath = "C:\ProgramData\Nutanix\Frame\FGA\Scripts\User" If (!(test-path "$RootPath\logs")){ New-Item -Path "$RootPath\logs" -Type Directory } $timestamp = Get-Date -Format "dddd MM/dd/yyyy HH:mm K" "$timestamp - Hello from on-active.ps1" | Out-File "$RootPath\logs\sandbox_bucket.txt" -Append ``` **Post-session script: post-session.ps1** ```powershell $RootPath = "C:\ProgramData\Nutanix\Frame\FGA\Scripts\User" If (!(test-path "$RootPath\logs")){ New-Item -Path "$RootPath\logs" -Type Directory } $timestamp = Get-Date -Format "dddd MM/dd/yyyy HH:mm K" "$timestamp - Hello from post-session.ps1" | Out-File "$RootPath\logs\sandbox_bucket.txt" -Append ``` Let's walk through each line in these files. - **Line 1**: This line declares the root path as a variable variable. We could also use `Set-Location`. - **Line 2**: Creates the log folder inside of the root path if it doesn't exist. - **Line 3**: Gets a timestamp in a readable format (based on the Sandbox's local time). - **Line 4**: Writes our timestamp and hello message to the specified "sandbox\_bucket" txt file. **Defining our scripts: definition.yml** We'll create four different script *groups* (one for each lifecycle hook). These scripts will only execute on the Sandbox; each will have a total of 5 seconds to execute (timeout); and if these scripts fail for any reason, FGA will continue with the next lifecycle procedures. ```yaml groups: - desc: Pre-session script name: Pre-session script group timeout: 5 run-policy: pre-session pool-type: - sandbox scripts: - desc: Example sandbox pre-session script. path: pre-session.ps1 error-policy: continue timeout: 5 - desc: On-idle disconnect script name: On-idle script group timeout: 5 run-policy: on-idle pool-type: - sandbox scripts: - desc: Example sandbox on-idle script. path: on-idle.ps1 error-policy: continue timeout: 5 - desc: On-active resume script name: On-active script group timeout: 5 run-policy: on-active pool-type: - sandbox scripts: - desc: Example sandbox on-active script. path: on-active.ps1 error-policy: continue timeout: 5 - desc: Post-session script name: Post-session script group timeout: 5 run-policy: post-session pool-type: - sandbox scripts: - desc: Example sandbox post-session script. path: post-session.ps1 error-policy: continue timeout: 5 ```Notice that we're only setting `- sandbox` for each \*\*pool-type\*\*. Publishing this Sandbox configured like this would ensure that these scripts will not execute on any other VM on this account (Shadow, non-persistent Production, Persistent VM instances).
### Testing our Sandbox scripts You made it this far, you have your scripts and definition.yml file in place on the Sandbox, great! Let's test. Before we do, **changes to the definition.yml are active in real-time**. The Frame Guest Agent (FGA) does a fresh read of the definition.yml at each Session lifecycle hook. This means that if you are in your Sandbox session right now, we can test the disconnect and resume scripts by disconnecting from your Sandbox using the Gear menu at the bottom left corner of the Frame Session. Next, resume the session -- we should see two new log entries in our `/logs/sandbox_bucket.txt` files. Let's test all four lifecycle hooks. 1. This time, **quit the session** via the Gear menu. Wait for the session to fully close. 2. Once you can, **start a new session**. 3. **Disconnect** from the Gear Menu. This will fire our disconnect or "on-idle" script. 4. **Resume the Session**. This will trigger our resume or "on-active" script. 5. **Close the session**. 6. Finally, **start one more session** to verify our `sandbox_bucket.txt` file contains messages and timestamps in order. That's it! If you run into any problems, here are a few basic troubleshooting steps before contacting Support: 1. Please ensure that your files are in the correct paths. 2. Please ensure that the file names match in the directory as well as in the definition.yml file. 3. Test your PowerShell scripts manually from the Sandbox.**Cleanup** Once you're done with testing these scripts and scenarios, all you need to do is remove the scripts from the definition.yml, delete the files, or customize them to your liking!
## Onboarding Applications via CLI Onboarding Windows applications to a Sandbox can be automated. If the applications are present on the Sandbox, we have a command-line utility that can be used to onboard a single application, multiple applications, or multiple apps defined in a file. Introducing ShellHandler! Find and run `ShellHandler.exe` located in `C:\Program Files\Nutanix\Frame\Server\`. Using the command-line arguments listed below, you can onboard applications in a number of ways: ### ShellHandler Arguments| <div style={ {width: "150px"} }>Command-line Argument | Description |
|---|---|
| `onboard` | Instructs the ShellHandler that we're onboarding an application or more. onboard must be the first argument and proceeded next by one of the three following onboard options. **Example:** `ShellHandler.exe onboard -i C:\MyApp.exe -s` |
| `--item` or `-i` | Onboard a single application item by filepath. **Example:** `ShellHandler.exe onboard --item C:\MyApp.exe -s` |
| `--list` or `-l` | Onboard multiple applications via a list of application filepaths. **Example:** `ShellHandler.exe onboard --list "C:\MyApp1.exe, C:\MyApp2.exe, C:\MyApp3.exe" -s` |
| `--file` or `-f` | Onboard multiple applications via a file containing a list of application filepaths. **C:\\ExampleAppList.txt:** C:\\MyApp1.exe C:\\MyApp2.exe C:\\Program Files\\TestApp\\HelloWorld.exe **Example:** `ShellHandler.exe onboard --file C:\ExampleAppList.txt -s` |
| `--silent` or `-s` | If present, application(s) filepaths will be onboarded without any user prompt. **Example:** `ShellHandler.exe onboard -i C:\MyApp.exe --silent` |
| **User Type** | **Required Peripherals** | **Recommended Approach** | **Additional Details** |
| **Standard Office User** | • Standard keyboards and mice • Webcams • Headsets/microphones • Basic document scanners | **Frame in browser** | • Provides standard peripheral support through browser APIs • Ideal for common office peripherals • Simplest deployment option • No additional software required |
| **CAD/AEC Professional** | • 3D mice/Space mice • Drawing tablets • Hardware security keys/dongles • Professional-grade input devices | **Frame App 7 with Generic USB enabled** | • Required for specialized input devices and security dongles • Ensures compatibility with professional design peripherals • Supports high-precision input requirements • Enables advanced device features |
| **Financial Services Professional** | • Smart card readers • Security tokens • Signature pads • Multi-card readers • Document scanners | **Frame App 7 with Generic USB enabled** | • Required for secure authentication devices • Ensures compliance with financial security requirements • Supports specialized financial hardware • Enables secure peripheral access |
| **Operating System** | **Chrome/Edge** | **Firefox** | **Safari** |
| Windows | Full peripheral support | Basic peripheral support\* | Not supported |
| macOS | Full peripheral support | Basic peripheral support\* | Basic peripheral support\* |
| Linux | Full peripheral support | Basic peripheral support\* | Not supported |
| iOS/Android | Limited support\*\* | Limited support\*\* | Limited support\*\* |
| **Argument** | **Type** | **Description** |
| -serialReadIntervalTimeout | int | Maximum read time in milliseconds between two bytes |
| -serialReadTotalTimeoutMultiplier | int | Read multiplier |
| -serialReadTotalTimeoutConstant | int | Total read time in milliseconds |
| -serialWriteTotalTimeoutConstant | int | Total write time in milliseconds |
| -serialWriteTotalTimeoutMultiplier | int | Write multiplier |
| **Argument** | **Type** | **Description** |
| serialPortDataBits | int | Default 8 |
| serialPortStopBits | int | Default 1 |
| serialPortParity | string | Default ‘none’ |
**Caution!** Availability Notice Suspend/Resume is not universally available across all instance types. Supported instance types vary by cloud provider (AWS, Azure, GCP). Refer to the **[Cloud Provider-specific Requirements section](https://docs.difr.com/books/platform-administrators-guide/chapter/cloud-providers-daas-only)** for more details.
## Requirements In order to use the Suspend/Resume feature, the following requirements must be satisfied: - A [Persistent Desktop](https://docs.difr.com/books/platform-administrators-guide/page/persistent-desktops-administration) or **Default, non-persistent** Frame Account using AWS, Azure, or GCP. - CPU-only instances. GPU-backed instances are currently not supported by any of the infrastructure providers. - Only available on Windows operating systems. - Ensure sufficient free disk space, equal to or greater than the instance's RAM, to store session data during suspension. - Frame Administrators must have [sufficient permissions](https://docs.difr.com/books/platform-administrators-guide/page/authorization) to use Suspend/Resume through the Frame Account Dashboard. ### Cloud Provider-specific Requirements In addition to the Frame requirements mentioned above, each public cloud provider has its own requirements. You are expected to review and understand your cloud provider’s specific requirements. **AWS offers Hibernation for most instance types, *except for EC2 instance types that have more than 16 GB of RAM or any EC2 instance type that is GPU-enabled.* Please review the following:** - [Prerequisites for Amazon EC2 Instance Hibernation](https://docs.aws.amazon.com/AWSEC2/latest/UserGuide/hibernating-prerequisites.html) - [Hibernate your Amazon EC2 Instance](https://docs.aws.amazon.com/AWSEC2/latest/UserGuide/Hibernate.html) **Azure offers Hibernation for limited instance types. Please review the following:** - [Overview](https://learn.microsoft.com/en-us/azure/virtual-machines/hibernate-resume) - [Supported VM Sizes](https://learn.microsoft.com/en-us/azure/virtual-machines/hibernate-resume#supported-vm-sizes) **Google Cloud Platform offers Suspend functionality across most instance types. One important limitation of GCP is that *if a machine is suspended for more than 60 days it will be terminated.*** - [Suspend or Resume](https://cloud.google.com/compute/docs/instances/suspend-resume-instance) ## Functionality & User Experience ### How Suspend/Resume Works Suspend/Resume allows users to pause their session and continue from the same point later. This feature works the same for both Persistent and Default, Non-Persistent accounts and can be initiated in two ways: #### Timers (Automatic Suspension) - **User Inactivity Timeout:** If a user is inactive for a set period, the system disconnects the session and starts the Idle Timeout countdown. Once the countdown expires, the session is automatically suspended. #### User and Administrator Actions (Manual Suspension) - **User Actions:** Users can manually suspend their session by using the Frame status bar controls. To resume a session, they return to the Launchpad and select Resume. - **Administrator Actions:** Admins can suspend or resume sessions from the "VMs" page in the Frame Account Dashboard. ## User Experience Once the feature is enabled, users can easily suspend their session from the Frame Terminal or resume a session from Launchpad. ## Administration While the functionality and end-user experience remain the same, the configuration and administration steps differ based on the frame account type. # Persistent ## Suspend/Resume Administration The administrator can control the timeouts that will suspend a persistent desktop VM and they can also manually suspend or resume a session on a persistent desktop VM.Enabling Suspend/Resume requires specific configurations. **Please review the [Requirements and Considerations](https://docs.difr.com/books/platform-administrators-guide/page/suspend-and-resume#bkmrk-requirements) before proceeding** to avoid unexpected issues.
### Time-based Suspend Within the Frame Account Dashboard, navigate to **Settings > Session Settings**. Under **Time Limits**, you can adjust the two values: - **User Inactivity Timeout**: Upon reaching this timeout value, the session will become disconnected. - **Idle Timeout**: Upon reaching this timeout value after a session is disconnected, the session will automatically be suspended.Important!
Enabling Suspend/Resume requires specific configurations. Please review the Requirements and Considerations before proceeding to avoid unexpected issues.Reminder
As mentioned in the "Additional Considerations" section above: - The **Max Capacity** for Instance Pools with this feature enable will **likely need to be adjusted**. Max Capacity should be equal to the number of unique users that use the pool on a monthly basis. - Customers with **Per VM subscription entitlements** enabling this feature **may require an increase in entitlements and/or result in overage**.| Argument | Details |
|---|---|
| `/i` | Normal install |
| `/norestart` | Do not restart the device after the installation completes. |
| `/qn` | No UI during the installation process |
| `/quiet` | No user interaction required |
Frame App for Linux is only supported on Ubuntu and Ubuntu-based thin client OS that are Frame Ready validated (e.g. IGEL OS, Stratodesk NoTouch OS, Zeetim ZeeOS, and 10ZiG PeakOS)
1. On your Linux endpoint, open a terminal window and navigate to the location where you have downloaded Frame App. Take note of the version number of Frame App. 2. Run sudo apt install plus the file name/location, as shown below. 3. Once installed, you should be able to access Frame App from your App Launcher.  #### Updates Once installed, Frame App will automatically check for updates every time you launch it. You will be prompted to update your version of Frame App if any newer versions are available. To check your version of Frame App, simply click on the **Frame** menu and select **About**.  # Configuring Frame App Frame App behavior can be configured on startup of the application (Command Line Arguments) and through configuration files/Windows registry keys. If you are installing Frame App on Windows endpoints and would like to configure the silent installation process, you can find additional documentation [here](https://docs.difr.com/books/platform-administrators-guide/page/configuring-frame-app). ## Command Line Arguments Command line arguments or “launch arguments” are parameters that are automatically passed to a program (via command line) to modify its behavior. Some organizations may choose to use these modifiers to better fit their use case. We will start by providing a list of the available command line arguments and then explain how to configure them based on your operating system. To launch Frame App with certain command line arguments, start by opening command prompt/terminal on your local machine. Specify the file path for Frame App (include the executable). Append your command line argument(s) after file path. You may launch Frame App with the specified parameters. Use the table below to understand command line argument options and their syntax. ### Frame App 7 #### Launch Frame App with arguments following the pattern: ```bash # Starting in "/usr/bin/" # Single argument ./frame --arg=value # OR # Multiple Arguments ./frame --arg1 --arg2=value ```| Command Line Argument | Description and Syntax Example |
|---|---|
| `--startup-url` | Designates the startup URL, as you would on the "Preferences" page of Frame App. ---
Single Argument Example:
```
./frame --startup-url="https://use.difr.com/"
```
|
| `--check-for-updates-on-startup` | Frame App will check for updates on startup when this argument is set to **ON**. ---
Single Argument Example:
```
./frame --check-for-updates-on-startup=on
```
|
| `--clear-cache-on-startup` | Frame App will automatically clear the local cache on startup when argument is set to **ON**. ---
Single Argument Example:
```
./frame --clear-cache-on-startup=on
```
|
| `--enable-camera` | Frame App will launch with camera functionality enabled when this argument is set to **ON**. ---
Single Argument Example:
```
./frame --enable-camera=on
```
|
| `--enable-microphone` | Frame App will launch with microphone functionality enabled when this argument is set to **ON**. ---
Single Argument Example:
```
./frame --enable-microphone=on
```
|
| `--full-screen` | Instructs Frame App to launch in full screen when this argument is set to **ON**. ---
Single Argument Example:
```
./frame --full-screen=on
```
|
| `--start-session-in-full-screen` | Instructs Frame App to start a session in full screen when this argument is set to **ON**. ---
Single Argument Example:
```
./frame --start-session-in-full-screen=on
```
|
| `--help` | Provides a help menu. This command must be called on the precise application executable. ---
Single Argument Example:
```
/usr/bin/frame --help
```
|
| `--version` | Shows Frame App version. ---
Single Argument Example:
```
./frame --version
```
|
| `--hide-menu-bar=on` | Hide Menu Bar. Useful in kiosk mode scenarios. ---
Single Argument Example:
```
./frame --hide-menu-bar=on
```
|
| `--hide-toggle-fullscreen=on` | Hide toggle-fullscreen option from the View menu. Also used for kiosk mode scenarios. ---
Single Argument Example:
```
./frame --hide-toggle-fullscreen=on
```
|
| `--use-experimental-gpu-flags=on` | Enable Hardware Acceleration. Mainly used on IGEL client devices. ---
Single Argument Example:
```
./frame --use-experimental-gpu-flags=on
```
|
| Command Line Arguments | Description and Syntax Example |
|---|---|
| `displays-auto-arrange` | Frame App will launch with virtual displays configured to match your local environment. *Example:* `./Frame --displays-auto-arrange` |
| `kiosk` | Instructs Frame App to launch in full screen, also known as “Kiosk mode.” *Example:* `./Frame --kiosk` |
| `url` | Designates the startup URL, as you would on the “Preferences” page of Frame App. *Example:* `./Frame --url=console.nutanix.com` |
| `x11-window` | Switch from GTK (default) to X11 Windows. This argument should be used with HP ThinPro OS clients. *Example:* `./Frame --x11-window` |
| Command Line Argument | Description and Syntax Example |
|---|---|
| `--startup-url` | Designates the startup URL, as you would on the "Preferences" page of Frame App. ---
Single Argument Example:
```
./Frame --startup-url="https://use.difr.com/"
```
|
| `--check-for-updates-on-startup` | Frame App will check for updates on startup when this argument is set to **ON**. ---
Single Argument Example:
```
./Frame --check-for-updates-on-startup=on
```
|
| `--clear-cache-on-startup` | Frame App will automatically clear the local cache on startup when argument is set to **ON**. ---
Single Argument Example:
```
./Frame --clear-cache-on-startup=on
```
|
| `--enable-camera` | Frame App will launch with camera functionality enabled when this argument is set to **ON**. ---
Single Argument Example:
```
./Frame --enable-camera=on
```
|
| `--enable-microphone` | Frame App will launch with microphone functionality enabled when this argument is set to **ON**. ---
Single Argument Example:
```
./Frame --enable-microphone=on
```
|
| `--full-screen` | Instructs Frame App to launch in full screen when this argument is set to **ON**. ---
Single Argument Example:
```
./Frame --full-screen=on
```
|
| `--start-session-in-full-screen` | Instructs Frame App to start a session in full screen when this argument is set to **ON**. ---
Single Argument Example:
```
./Frame --start-session-in-full-screen=on
```
|
| `--help` | Provides a help menu. This command must be called on the precise application executable. ---
Single Argument Example:
```
/Applications/Frame.app/Contents/MacOS/Frame --help
```
|
| `--version` | Shows Frame App version. ---
Single Argument Example:
```
./Frame --version
```
|
| `--hide-menu-bar=on` | Hide Menu Bar. Useful in kiosk mode scenarios. ---
Single Argument Example:
```
./Frame --hide-menu-bar=on
```
|
| `--hide-toggle-fullscreen=on` | Hide toggle-fullscreen option from the View menu. Also used for kiosk mode scenarios. ---
Single Argument Example:
```
./Frame --hide-toggle-fullscreen=on
```
|
| `--use-experimental-gpu-flags=on` | Enable Hardware Acceleration. Mainly used on IGEL client devices. ---
Single Argument Example:
```
./Frame --use-experimental-gpu-flags=on
```
|
| Command Line Argument | Description and Syntax Example |
|---|---|
| `--startup-url` | Designates the startup URL, as you would on the “Preferences” page of Frame App. ---
Single Argument Example:
```
& ./Frame.exe -- --startup-url="https://console.nutanix.com/"
```
|
| `--check-for-updates-on-startup` | Frame App will check for updates on startup when this argument is set to **ON**. ---
Single Argument Example:
```
& ./Frame.exe -- --check-for-updates-on-startup=on
```
|
| `--clear-cache-on-startup` | Frame App will automatically clear the local cache on startup when argument is set to **ON**. ---
Single Argument Example:
```
& ./Frame.exe -- --clear-cache-on-startup=on
```
|
| `--enable-camera` | Frame App will launch with camera functionality enabled when this argument is set to **ON**. ---
Single Argument Example:
```
& ./Frame.exe -- --enable-camera=on
```
|
| `--enable-microphone` | Frame App will launch with microphone functionality enabled when this argument is set to **ON**. ---
Single Argument Example:
```
& ./Frame.exe -- --enable-microphone=on
```
|
| `--full-screen` | Instructs Frame App to launch in full screen when this argument is set to **ON**. ---
Single Argument Example:
```
& ./Frame.exe -- --full-screen=on
```
|
| `--start-session-in-full-screen` | Instructs Frame App to start a session in full screen when this argument is set to **ON**. ---
Single Argument Example:
```
& ./Frame.exe -- --start-session-in-full-screen=on
```
|
| `--help` | Provides a help menu. This command must be called on the precise application executable. ---
Single Argument Example:
```
C:\Program Files\Frame\app-7.5.0\Frame.exe -- --help
```
|
| `--version` | Shows Frame App version. Requires `| Write-Output` modifier. ---
Single Argument Example:
```
& ./Frame.exe -- --version | Write-Output
```
|
| `--hide-menu-bar=on` | Hide Menu Bar. Useful in kiosk mode scenarios. ---
Single Argument Example:
```
& ./Frame.exe -- --hide-menu-bar=on
```
|
| `--hide-toggle-fullscreen=on` | Hide toggle-fullscreen option from the View menu. Also used for kiosk mode scenarios. ---
Single Argument Example:
```
& ./Frame.exe -- --hide-toggle-fullscreen=on
```
|
| `--use-experimental-gpu-flags=on` | Enable Hardware Acceleration. Mainly used on IGEL client devices. ---
Single Argument Example:
```
& ./Frame.exe -- --use-experimental-gpu-flags=on
```
|
| Key Name | Description | Value(s) |
|---|---|---|
| `STARTUP_URL` | Designates the startup Uniform Resource Location (URL). Default Value: `https://console.nutanix.com/` | URL |
| `CHECK_FOR_UPDATES_ON_STARTUP` | Frame App will check for updates on startup when this argument is set to **ON**. If there is an update available, Frame App will ask the user if they wish to download and install the update. Default Value: `ON` | `ON` or `OFF` |
| `CLEAR_CACHE_ON_STARTUP` | Frame App will automatically clear local cache on startup when this argument is set to **ON**. Default Value: `ON` | `ON` or `OFF` |
| `ENABLE_CAMERA` | Frame App will launch with camera functionality enabled when this argument is set to **ON**. Default Value: `ON` | `ON` or `OFF` |
| `ENABLE_MICROPHONE` | Frame App will launch with microphone functionality enabled when this argument is set to **ON**. Default Value: `ON` | `ON` or `OFF` |
| `FULL_SCREEN` | Instructs Frame App to launch in full screen when this argument is set to **ON**. Default Value: `OFF` | `ON` or `OFF` |
| `START_SESSION_IN_FULL_SCREEN` | Instructs Frame App to start a session in full screen when this argument is set to **ON**. Default Value: `OFF` | `ON` or `OFF` |
The removal of the local cache will not remove the Startup URL value as this is stored either in the Preferences database or in the registry (for Windows).
## Log Location Frame App writes its logs to the following locations. Replace `username` with the name of your user. #### Frame App 7.X Linux ```bash /home/$USER/.config/Frame/Logs ``` #### Frame App 7.X MacOS ```bash /Users/$USER/Library/Application Support/Frame/Logs ``` #### Frame App 7.X Windows ```bash C:\Users\$USER\AppData\Roaming\Frame\Logs ``` # IGEL Frame provides a convenient Custom Partition for IGEL OS bundled with UMS Profiles for easy and secure integration with IGEL OS and management with IGEL's UMS. The included UMS Profiles allow admins to quickly and easily deploy Frame App tailored for your users and use-case(s). ## Version Requirements - Frame App 7.4.x+ is compatible with IGEL OS 12 - IGEL UMS 11 or higher ## Frame App Custom Partition You can bundle Frame App into an IGEL Custom Partition for use with IGEL OS 12 following the instructions below. *Building the custom partition bundle currently requires Ubuntu 18.04 with IGEL OS 11*. ### Frame App IGEL Bundling instructions For Ubuntu 18.04 1. Download the latest [Frame App for Linux (Debian)](https://files.difr.com/) to your `~/Downloads` directory. 2. Download and unzip `Frame.zip` from [https://github.com/IGEL-Community/IGEL-Custom-Partitions/raw/master/CP\_Packages/Apps/Frame.zip](https://github.com/IGEL-Community/IGEL-Custom-Partitions/blob/master/CP_Packages/Apps/Frame.zip). 3. Using a terminal, navigate to the unzipped directory to `/target/build/` and execute `build-frame-cp.sh` 4. Copy `frame.ini` and `frame.tar.bz2` from `/target/` to a new Frame folder in the UMS "ums\_filetransfer" path depending on your OS: - UMS upload path on Linux: `/opt/IGEL/RemoteManager/rmguiserver/webapps/ums_filetransfer/Frame/` - UMS upload path on Windows: `C:/Program Files/IGEL/RemoteManager/rmguiserver/webapps/ums_filetransfer/Frame/` 5. Import Frame's Custom Profile(s) from `/igel/*` 6. Edit the profile and set up *Firmware Customization -> Custom Partition -> Download* with your UMS server info and credentials. 7. Setup env variables as instructed in the guides below. Building the bundle will provide you with a zip file relative to the version of Frame App that was bundled. This bundle also includes Frame-provided UMS Profiles that you can quickly import and begin using with your Frame Custom Partition.The UMS Profiles provided by Frame serve as starting points for your implementation. However, they don't limit your options for customization. Frame is highly extensible, allowing for extensive customization of various aspects including authentication, Role-Based Access Control (RBAC), and user interface (UI). Advanced customizations can be achieved through: - Orchestrating Secure Anonymous Tokens for fine-grained control over authentication flows and RBAC - Leveraging the Session API to manage how, when, and where customers interact with your Frame resources
These tools enable you to tailor the Frame experience to your specific needs, going beyond the default configurations provided in the UMS Profiles. ## Frame-Provided Profiles Frame-provided UMS Profiles offer various configuration options to customize and optimize your IGEL environment. These profiles range from basic Frame App desktop integration to specialized kiosk modes supporting SAML2 and Secure Anonymous Tokens (SAT) authentication. ## Testing New Versions of Frame App When a new version of Frame App comes out, admins should test the new version of Frame App on a small subset of devices before rolling it out to the rest of their users. In order to configure multiple versions of Frame App in your UMS, you need to follow a few steps below to add a custom installation path of a test Frame App Custom Partition.When building the custom partition for Frame App 7.x+, make sure to use the `build-frame-cp.sh` script.
1. Create a new folder in your UMS file transfer server, something like `Frame-Test`. This would result in a folder at the following path: `/IGEL/RemoteManager/rmguiserver/webapps/ums_filetransfer/Frame-Test/` 2. Once that's complete, import or create a copy of an existing profile and edit it. Navigate to **Firmware Customization > Custom Partition > Download** and edit the download URL to reference the same path. For our example: `https://[YOUR_UMS_SERVER]:8443/ums_filetransfer/Frame-Test/frame.inf` 3. That's it! Assign the profile to your devices and they should download the new partition accordingly.Multiple versions of Frame App are not currently available on the same IGEL device. Admins must assign only one Frame App Custom Partition to a device at a time.
## Troubleshooting As of now, there are no specific common issues reported for Frame App 7 on IGEL OS. However, we are continuously monitoring user feedback and will update this section with any relevant troubleshooting information as it becomes available. If you encounter any issues, please [contact our support team](https://docs.difr.com/books/dizzion-support/page/contact-support) for assistance. # Frame-Provided IGEL Profiles ## Profile Options Frame-provided UMS Profiles offer various configuration options to customize and optimize your IGEL environment. These profiles range from basic Frame App desktop integration to specialized kiosk modes supporting SAML2 and Secure Anonymous Tokens (SAT) authentication. [Click here](https://docs.difr.com/books/platform-administrators-guide/page/frame-provided-igel-profiles#bkmrk-import-a-frame-app-p) to skip ahead to instructions on how to import Frame App into UMS 12. ### Basic Frame App Profile Bundle location: `igel/frame-app-basic-profile.xml`   This "basic" UMS Profile simply enables a Frame App icon on the IGEL Desktop. Admins can customize the default settings and launch parameters by adding command line arguments in your UMS by editing the Frame App Basic Profile Settings: **Firmware Customization > Custom Application > Frame > Settings**.When configuring the profile, you need to specify the Frame App version in the command field, use `/custom/frame/frame- sat-kiosk-launcher.sh v7`
Please refer to our [Linux command-line arguments for Frame App](https://docs.difr.com/link/161#bkmrk-frame-app-7) for more information. ### Frame SAML2 Kiosk Mode Profile Bundle location: `igel/frame-saml2-kiosk-profile.xml` This profile is designed to support a specific end user workflow and assumes a particular Frame configuration.  #### SAML2 Kiosk Mode User Experience The SAML2 Kiosk Mode provides a seamless and secure user experience, integrating Frame App with third-party identity providers. Here's what users can expect: ```mermaid graph TD Start([Start]) --> A[Frame App Launch] A -->|Clear cache| B[Present Kiosk Mode Interface] B --> C[Show Identity Provider Login] C --> D{Authentication Successful?} D -->|Yes| E{Launch Link Configuration} E -->|Desktop| F[Full-screen Desktop Session] E -->|Application| G[Full-screen Application Session] F --> H{User Action} G --> H H -->|Disconnect or Inactivity timeout| I[Show Resume Option] I -->|Within timeout| F I -->|Timeout expires| C H -->|End Session| J[Close Session] J -->|Configure Frame to redirect to IdP| C C -->|New user| C classDef default fill:#f9f,stroke:#333,stroke-width:2px; classDef decision fill:#ccf,stroke:#333,stroke-width:2px; class D,E,H decision; ``` 1. Upon launch, Frame App clears its cache to ensure a fresh session and secure authentication. 2. Users are presented with a full-screen Kiosk Mode interface, supporting multiple monitors. The login screen of the configured third-party identity provider appears, prompting for credentials. 3. After successful authentication, Frame App directs users to either a desktop or specific application, based on the Launch Link configuration. 4. The Frame session begins in full-screen mode, providing an immersive remote desktop experience. 5. If users disconnect, either manually or due to inactivity, they have the option to resume their session within the account's or Launchpad's [configured idle timeout](https://docs.difr.com/books/platform-administrators-guide/page/session-settings#bkmrk-idle-timeout). 6. When users end their session (by quitting or shutting down the Windows instance), they are logged out and returned to the identity provider's login screen, ready for the next user. This workflow ensures a secure, stateless experience for shared devices while maintaining ease of use for end-users. #### SAML2 + Kiosk Mode Requirements To set up the SAML2 Kiosk Mode, ensure you have the following: - A *Published* Launchpad - A configured identity provider with associated roles/permissions allowing access to the desired Frame Account - A Frame Launch Link with the additional ["Quit and log out"](https://docs.difr.com/books/platform-administrators-guide/page/advanced-integrations) URL parameter: `&qlo=1` - (Optional) Frame account production workload VMs joined to a Windows domain, if desired Additionally, you need to configure the IGEL UMS Custom Profile: 1. Navigate to: > System > Firmware Customization > Environment Variables > Predefined 2. Add the following environment variable: - `FRAME_LAUNCH_URL`: This is your Launch Link, obtained from the Account's *Dashboard > Launchpad > Advanced Integrations*. You'll find a configurable dialog with Launch Links there.While we recommend using Launch Links for Kiosk scenarios, you can also use a standard Launchpad URL for the FRAME\_LAUNCH\_URL value if needed.
This configuration ensures that your SAML2 Kiosk Mode is properly set up and integrated with your Frame Account and IGEL environment. #### SAML2 + Kiosk Mode Configuration 1. Import the SAML2 kiosk launcher profile template (with .ipm extension) into your UMS12. 2. After importing, update the template values with your specific configuration. 3. Follow the existing steps for setting up the environment variables. ### Frame SAT Kiosk Mode Profile Bundle location: `igel/frame-sat-kiosk-profile.xml` The Frame SAT Kiosk Custom Profile is designed to support a specific end user workflow relying on Frame's [Secure Anonymous Tokens (SAT)](https://docs.difr.com/books/platform-administrators-guide/page/secure-anonymous-tokens) for authentication. This flow also assumes a particular Frame configuration to support the kiosk experience as defined below.   #### SAT Kiosk Mode User Experience With the SAT Kiosk Mode user experience, end users will not authenticate to a SAML2-based identity provider (this script uses the Frame Secure Anonymous Token (SAT) functionality for session authentication). ```mermaid graph TD 1[1. Launch Frame App in kiosk mode] 2[2. Clear user cache] 3[3. Authenticate using SAT] 4[4. Direct to desktop or application] 5[5. Start remote desktop in full-screen] 6[6. Session ends] 7[7. Restart Frame App with new SAT token] 1 --> 2 2 --> 3 3 --> 4 4 --> 5 5 --> 6 6 --> 7 7 -.-> 1 ``` 1. Frame App will launch in "kiosk mode" (full screen). 2. User cache is cleared prior to start and exit of Frame App to ensure no user preference settings have persisted since the prior use of Frame App. 3. End users are authenticated using Frame Secure Anonymous Token (SAT) functionality. 4. Frame App directs the end user directly to the desktop or application (depending on the [Launch Link](https://docs.difr.com/books/platform-administrators-guide/page/advanced-integrations#bkmrk-what-are-launch-link) configuration). 5. When a Frame session starts, the remote desktop will be in full-screen mode. 6. Upon session disconnect or closure, Frame App will restarts with a new SAT token.**NOTE:** Disconnect behavior is configurable from [Session Settings](https://docs.difr.com/books/platform-administrators-guide/page/session-settings).
#### SAT + Kiosk Configuration Requirements - A *Published* Launchpad. - API Provider configured at the Organization entity. - Secure Anonymous Token Provider at the Account entity level granting a role of Launchpad User for a specific Launchpad in a Frame account (under the Organization entity). - Frame [Launch Link](https://docs.difr.com/books/platform-administrators-guide/page/advanced-integrations#bkmrk-what-are-launch-link) is used, rather than a Launchpad URL to support automatic start of the user's session and to simplify the UX. - *Optional:* The Frame account production workload VMs can be joined to a Windows domain, if desired. - The Environment Variables listed below: #### Environment Variables The following environment variables must be configured in the IGEL Custom Profile for this profile to work. 1. **Edit your IGEL UMS Custom Profile and go to**: > System > Firmware Customization > Environment Variables > Predefined 2. **Set the following environment variables:**| Environment Variable | Description |
|---|---|
| `FRAME_CLIENT_ID` | Obtained from the API provider when a set of API credentials are created. |
| `FRAME_CLIENT_SECRET` | Obtained from the API provider when a set of API credentials are created. |
| `FRAME_SAT_URL` | URL obtainable from the Playground. For example: https://api.console.nutanix.com/v1/accounts/XXXXXXXX-XXXX-XXXX-XXXX-31d09e2881cd/secure-anonymous/secure-anon-XXXXXXXX-XXXX-XXXX-XXXX-c5e2dc93df1e/tokens. |
| `FRAME_ACCOUNT_ID` | Sign in to [Frane Console](https://console.nutanix.com) as an Admin. Locate your account, click the three-dot menu, and select "update" to view the Account's entity settings. Next, copy the Account UUID from the browser's URL bar. For example: `https://console.nutanix.com/frame/account/YOUR-FRAME-ACCOUNT-UUID-HERE/basic-info` or use the [Admin API to List Accounts](https://docs.difr.com/dev-hub/admin-api/account). |
| `FRAME_EMAIL_DOMAIN` | Email domain name used to create the anonymous user email addresses that will be visible in the Session Trail. Example: frame.igel.mycompany.com |
| `FRAME_LAUNCH_URL` | Obtained from an Account's Dashboard > Launchpad > Advanced Integrations to get a configurable dialog with Launch Links. While we recommend Launch Links for Kiosk scenarios, the value of FRAME\_LAUNCH\_URL could instead be a standard Launchpad URL. |
| `FRAME_TERMINAL_CONFIG_ID` | Obtainable from the Launch Link URL. |
| `FRAME_LOGOUT_URL` | Optional. Allows configuration of the "logout" behavior by specifying a URL. Useful when using a Frame Launch Link with additional "Quit and log out" url parameter: &qlo=1. |
| Error / Exit Code | Type | Description | Frame Component | FRP Version |
|---|---|---|---|---|
| 4000 | Info | User initiated close to the session. This occurs mostly through choosing "Close Session" in the gear menu. | Server | FRP 7/8 |
| 4001 | Error | An unknown critical error occurred on the server. | Server | FRP 7/8 |
| 4002 | Error | Connection rejected due to Unmatched Server and Terminal session configuration detected. Either the wrong data was sent from the Terminal, or the data was corrupted. | Server | FRP 7/8 |
| 4003 | Error | Server Send Buffer Overflow. | Server | FRP 7/8 |
| 4004 | Error | An unknown critical error occurred on the server. | Server | FRP 7/8 |
| 4005 | Error | Similar to 4004. An unknown critical error occurred on the server. | Server | FRP 7/8 |
| 4006 | Info | The end user is already in another session. This could be due to two tabs open on the same machine, or two machines sharing the same token owner (Identified email address). | Server | FRP 7/8 |
| 4008 | Info | Max session timeout reached. This setting is set in the "Session Settings" section of an account or in the "Session Settings" section of a launchpad's settings (Override the account settings). | Server | FRP 7/8 |
| 4009 | Info | IDLE Connection timeout. This occurs when a disconnected session has not been reconnected within the allotted time specified in "Settings Settings" for an account or launchpad. | Server | FRP 7/8 |
| 4011 | Error | Error occurred in the video stream of an active session. Please attempt to reconnect and contact Frame support if you continue to have problems. | Server | FRP 7/8 |
| 4015 | Info | The end user or a script shut down the VM (Windows and Linux). | Server | FRP 7/8 |
| 4018 | Info | The end user or a script logged off from the VM (Windows and Linux). | Server | FRP 7/8 |
| 4019 | Info | The VM from which the session is running has been externally shutdown, or the session was closed remotely. This can occur from an Admin API, manual session close in the account dashboard, or through an expected Frame automation. | Server | FRP 7/8 |
| 4022 | Error | On a domain-joined instance, the end user's profile failed to mount. | Server | FRP 7/8 |
| 4023 | Error | The server closed the connection due to too many registered receive timeouts. | Server | FRP 7/8 |
| 4024 | Error | The server registered an error in the `receive` thread. | Server | FRP 7/8 |
| 4025 | Error | The server registered an error in the `send` thread. | Server | FRP 7/8 |
| 4026 | Error | An unknown error occured in the FRP8 connection. | Server | FRP 8 |
| 4027 | Error | The virtual display is not in the correct state during session start (Virtual display failed, or is not ready) | Server | FRP 7/8 |
| 4028 | Error | The session connection to the secondary monitor/display closed when not responding to a change request. | Server | FRP 7/8 |
| 4029 | Error | The session connection closed unexpectedly. | Server | FRP 7/8 |
| 4101 | Error | Terminal failed to connect to the server within the window of the allotted connection time (Connection Timeout). | Terminal | FRP 7/8 |
| 4102 | Error | The connection between terminal and server appears to have been severed by the network connection. | Terminal | FRP 7/8 |
| 4103 | Info | Terminal is attempting to reconnect after a disconnect | Terminal | FRP 7/8 |
| 4106 | Error | Terminal failed to reconnect to a server after a disconnect | Terminal | FRP 7/8 |
| 4107 | Error | Signaling Peer Timeout. The signaling server did not get the server peer ID within the allotted time. | Terminal | FRP 8 |
| 4108 | Error | The WebRTC ICE connection has been disconnected. | Terminal | FRP 8 |
| 5006 | Error | The WebRTC ICE connection failed due to network issues or a misconfiguration. | Variable | FRP 8 |
| 5007 | Error | The WebRTC negotiation process timed out. | Variable | FRP 8 |
| 5008 | Error | The WebRTC peer connection failed to connect. | Variable | FRP 8 |
| 5009 | Error | The STUN server could not be reached within the allotted time. | Variable | FRP 8 |
| 5010 | Error | The TURN server could not be reached within the allotted time. | Variable | FRP 8 |
| 5019 | Error | FRP8 could not connect to either the STUN or TURN server. | Variable | FRP 8 |
The RDP Debug mode lasts until the VM is powered down or rebooted. If you log out of an RDP debug session, but don't power down or reboot the VM, you can start a new RDP session using the same RDP information.
# Security Security Basics, Proxy Server Support, HIPAA Compliance, Frame Data Residency, # Security Basics # Security Basics Sometimes users reside behind corporate networks that have strict network access policies. Connection issues can arise if certain domains are being blocked. To avoid this, administrators ensure that the [Network Configuration Requirements](https://docs.difr.com/books/platform-administrators-guide/page/requirements) for their deployment architecture are met. ## Anti-virus Software on Frame Frame images do not include anti-virus or anti-spyware tools. Administrators are responsible for installing and configuring their own choice of AV/AS tools. For non-persistent Frame accounts, systems are stateless. As long as administrators are diligent about their work in the Sandbox servers, “exposed” production systems that are infected will be reverted on reboot. In the case where Frame provides the initial base image (public cloud infrastructure only), Frame ensures that all base images are scanned before customers use them to create their Frame accounts. While many anti-virus software packages will work on Frame, due to the large number of anti-virus packages, and the possible complexity of configuration, interoperability is not guaranteed. Anti-virus software that prevents components of the Frame service from executing may cause loss of functionality within a Frame session, up to and including a complete inability to connect to sessions. Prior to installing an anti-virus package, a backup of your account's Sandbox should be taken in the event that issues occur. Since most Frame customers use stateless systems, all anti-virus database updates will download each time a production instance is started. This can be avoided either by maintaining the Sandbox image (updating the Sandbox and publishing to production instances regularly) or using [Persistent Desktops](https://docs.difr.com/books/platform-administrators-guide/page/account-types#persistent-desktop-accounts-overview). ### Exclusion Rules Any anti-virus software used on Frame-managed workloads must be configured to allow the following directories and associated sub-directories: - `C:\\ProgramData\\Nutanix\\Frame\\` > Contains libraries and utilities for Frame Service, Server, and logs (FGA 8.x). - `C:\\Program Files\\Nutanix\\Frame\\` > Contains Frame Service executables which provide communication to the Frame Platform for orchestration (FGA 8.x). - `C:\\Program Files\\OFS\\` > Contains Frame file system driver and control application. - `C:\\OFS\\` > Contains Frame file system driver components. If you intend to use Enterprise Profiles, please allow the following folders and files: **Folders:** - `C:\\Program Files\\ProfileUnity\\` and all subfolders - `C:\\Windows\\Temp\\ProfileUnity\\` - `C:\\FADIA-T\\` - `C:\\ProfileDiskMounts\\` **Files:** - `C:\\Windows\\System32\\drivers\\Cbfltfs3.sys` - `C:\\Windows\\System32\\drivers\\Cbfltfs4.sys` - `C:\\Windows\\System32\\drivers\\Cbreg.sys` - `C:\\Windows\\System32\\drivers\\cbfsfilter2017.sys` - `C:\\Windows\\System32\\drivers\\cbfsregistry2017.sys` - `C:\\Windows\\System32\\drivers\\cbregistry20.sys` - `C:\\Windows\\System32\\OFS_x64.dll` - `C:\\Windows\\System32\\drivers\\OFS.sys`Please ensure that anti-virus "Tamper protection" is disabled during the publishing process.
During a Sandbox publish, Frame will clone the Sandbox disk image to create production workload VMs. If the Frame account is configured for domain-joined instances, then the Sandbox disk image is cloned and the cloned Sandbox disk image is used to create a new VM ("Generalized Sandbox VM"). This Generalized Sandbox VM is powered on and generalized using sysprep before creating the domain-joined production workload VMs. Consult with your anti-virus solution provider to determine if your anti-virus solution must be configured to account for either of the two Frame publishing workflows.
## SSL Break and Inspect Frame Remoting Protocol (FRP) is an H.264-based bi-directional communication protocol between the end user and the workload VM. This communication consists audio/video streamed from the workload VM to the user's endpoint and keyboard/mouse/peripheral input from the end user's endpoint to the workload VM. With FRP 7.0, the protocol uses Secure WebSocket (WSS) over Transport Layer Security (TLS). With FRP 8.0, the protocol builds on WebRTC, a real-time communication protocol using UDP and Datagram Transport Layer Security (DTLS). Customers can use out-of-band monitoring solutions to monitor these FRP streams; however, inline or in-band solutions that break and inspect FRP traffic are not supported as they either prevent FRP from functioning or introduce latency that degrades the end user experience. From the end user's perspective, SSL break/inspect can result in sluggish desktop behavior, the display video skipping frames, and abrupt disconnects of the video stream while in session. From a security perspective, the FRP streams does not add an inherent risk as it is a video/audio stream from workload to endpoint. If clipboard synchronization, file upload/downloads, microphone input, and remote printing are disabled for the users' Frame sessions, then the only data being sent to the user endpoint is the audio/video display of the desktop and keyboard/mouse events from the user to the workload VM. Breaking and inspecting the traffic will only reveal raw data streams (H.264 encoded display pixels) and keyboard/mouse events. Frame orchestration and brokering management communication between Frame Guest Agent (FGA) on the workloads and Frame Platform as well as from Prism Central/Element to Frame Platform originates within the customer's private network from the workloads and Cloud Connector Appliance (CCA) VMs as HTTPS requests, switching over to Secure WebSocket over TCP or WebRTC over UDP for bidirectional communication. FGA on the workload VMs and CCAs can be configured to support outbound HTTPS/Secure WebSocket proxy servers. # Outbound Proxy Server Support Frame Guest Agent (FGA) and Cloud Connector Appliance (CCA) have native support for outbound proxy server if a proxy server is required from a VM inside a private network to communicate to the Internet. The outbound proxy server must support both HTTPS and Secure WebSocket (WSS) traffic. This Frame proxy server configuration is independent of the proxy server configuration of the operating system. ## Frame Guest Agent Windows administrators must explicitly set the FGA proxy settings and have those settings persist in the test and production pool VMs. The approach to setting these FGA proxy settings will depend on the Frame account type and configuration: 1. For non-domain-joined, non-persistent Frame accounts, the FGA proxy settings can be updated in the Sandbox and then published to the test and production pools. 2. For domain-joined, non-persistent Frame accounts or with persistent desktop Frame accounts, administrators must persist these FGA proxy settings using a [post-generalization script](https://docs.difr.com/books/platform-administrators-guide/page/scripting#post-generalization) or via domain GPOs (for domain-joined Frame accounts). For these two Frame account configurations, Frame executes a Microsoft Sysprep during the publish process to prepare the test and production pool VMs. The FGA proxy configuration does not affect the Windows OS, user, or third-party application proxy settings. ### Configuration 1. Back up your Sandbox before making any changes to the FGA proxy settings. 2. Using the **FrameProxyHelper tool** which is available in `C:\\ProgramData\\Nutanix\\Frame\\Tools`, configure all required fields and verify the configuration by clicking the "Start test" button. The images below show a successful proxy test.For AHV, we recommend this proxy server configuration be done in the Windows template images. If sysprep removes the proxy server settings, you will have to connect into the Sandbox using RDP, after the Frame account is created, to update the FGA's proxy server settings.
### Troubleshooting To remove the Frame Guest Agent proxy server configuration to troubleshoot, restore your Sandbox backup or go to the Sandbox and (using regedit) delete the contents of: ``` HKLM\\Software\\Nutanix\\Frame\\Fga\\ProxySettings\\ ``` ## Cloud Connector Appliance The AHV administrator can configure each CCA VM to use an outbound proxy server. Step-by-step instructions for enabling outbound proxy server support are discussed in the [Configuring your CCA VM](https://docs.difr.com/books/platform-administrators-guide/page/ahv#configuring-your-cca-vm) instructions. # HIPAA Compliance HIPAA and the later adoption of the HITECH Act established through the Department of Health and Human Services is a set of Privacy and Security Rules governing the handling of Protected Health Information (PHI). Under these rules, "Covered Entities"\[^1\] are required to meet certain security and data requirements in order to keep PHI safe.\[^2\] Covered Entities who utilize third-party entities (such as a Service Provider) who will "create, receive, maintain or transmit" PHI in providing a function, activity, or service on behalf of that Covered Entity are defined as a "Business Associate." In most cases, any Business Associate must enter into a Business Associate Agreement (BAA) with the Covered Entity. Security and privacy for our customers is one of the key tenants of our Frame Desktop as a Service (DaaS) platform. Our security and compliance team, in coordination with Frame Legal, has determined the necessary deployment models, responsibilities, and actions a Covered Entity or Business Associate of Frame must follow in order for Frame to execute BAAs. The architectural design requirements for Frame described below are required for Frame to enter into a BAA. ## Deployment Requirements - Covered Entities may use Frame-supported public cloud platforms or on-premises Nutanix infrastructure. Public cloud Frame deployments must utilize the Bring Your Own (BYO) infrastructure capability. - Covered Entities must leverage the full Private Networking configuration option when deploying Frame. Any ingress into the Frame-managed workload VMs and egress from the workload VMs must be controlled through the customers' security appliances. - If applicable, Frame deployments may use Enterprise Profiles. - Covered Entities must bring their own SAML2-based identity provider (IdP). These entities may not use my.nutanix.com or the Frame IdP as identity providers. - User authorization to PHI must be enforced by the Covered Entity's applications. These entities may not rely solely on Frame's Role-based Access Control (RBAC) to determine which users have access to PHI. - Frame Support access must be disabled at the Frame Customer entity level by the Covered Entity. Frame Support personnel will then be restricted from accessing any of the accounts, their configurations, activity logs/reports, virtualized desktops/applications, or data within the Covered Entity's Frame-managed infrastructure. - Application icons and background images may not contain any protected health information. - Covered Entities may not use the Persistent Desktop feature or Frame Utility Servers to store PHI.Note on ePHI Data Storage and Processing: Covered Entities may not store or process ePHI on Frame-owned or managed infrastructure.
## Customer Requirements As with all cloud services, there is a shared responsibility between cloud service providers and end customers. To support HIPAA requirements, customers (Covered Entities) are responsible for the following: - Policy controls and HIPAA compliance of their environment and workloads. - Utilize Frame's Bring Your Own (BYO) infrastructure capabilities with either: - On-premises Nutanix AHV infrastructure or - A public IaaS provider cloud account (Covered Entity must enter into a Business Associate Agreement with their IaaS provider) - Monitor their DaaS workloads and supporting network infrastructure. - Ensure the security of their own DaaS workload configurations. - Security and monitoring of their own IaaS provider configurations. - Implement user authentication and authorization *prior* to enabling user access to HIPAA data/PHI via Frame. - Configure Frame workloads and supporting infrastructure to meet availability requirements. - Implement all technical and administrative controls necessary to govern access to ePHI data. - Collect and retain audit logs for ePHI access. - Restrict cloud credentials provided to Frame to ensure Frame does not have access to ePHI data. - Enter into a Business Associate Agreement (BAA) with Frame. ## BAA Scope Frame will only enter BAAs scoped to our cloud service and supporting infrastructure. The scope of these Business Associate Agreements will not include the customer DaaS workload environments. Covered Entities are responsible for independently entering into a BAA with their cloud or data center service providers that host their DaaS workloads. Please reference the links below for more information about BAAs with currently supported cloud providers: - [Amazon Web Services (AWS)](https://aws.amazon.com/blogs/security/accept-a-baa-with-aws-for-all-accounts-in-your-organization/) - [Microsoft Azure](https://www.microsoft.com/en-us/trustcenter/Compliance/hipaa) - [Google Cloud Platform (GCP)](https://cloud.google.com/security/compliance/hipaa/) \[^1\]: A "Covered Entity" is a "Health Care Plan, Health Care Provider, or Healthcare Clearing House". Please note that Business Associates may also have downstream Business Associates who would need to comply with these requirements, (e.g., AWS as the platform hosting a SaaS application). Refer to [https://www.hhs.gov/hipaa/for-professionals/privacy/laws-regulations/index.html](https://www.hhs.gov/hipaa/for-professionals/privacy/laws-regulations/index.html) for the definition of protected health information. # Frame Data Residency Frame, a cloud-based Desktop as a Service (DaaS) and Platform as a Service (PaaS), enables customers to deliver virtualized applications and desktops hosted in either public and/or private clouds to end users. End users only need an HTML5 browser on a connected device. Frame operates and maintains the Frame Platform which provides customers with automated cloud resource orchestration, user session brokering, and environment administration. With a distributed system such as Frame, customers must understand how their data, particularly customer data and personal information is collected, processed, transmitted, stored, and safeguarded. Data residency defines the physical location(s) of an organization's data, usually for regulatory reasons. This document outlines what Frame-specific operational data, customer data, and customer-provided personal information is generated, collected, and transmitted. This document also describes the data safeguarding measures Frame and customers must implement to ensure the data is secured. ## What Data is Stored Where? The figure below is a visual representation of the different domains where data is accessed and transmitted during a Frame session. 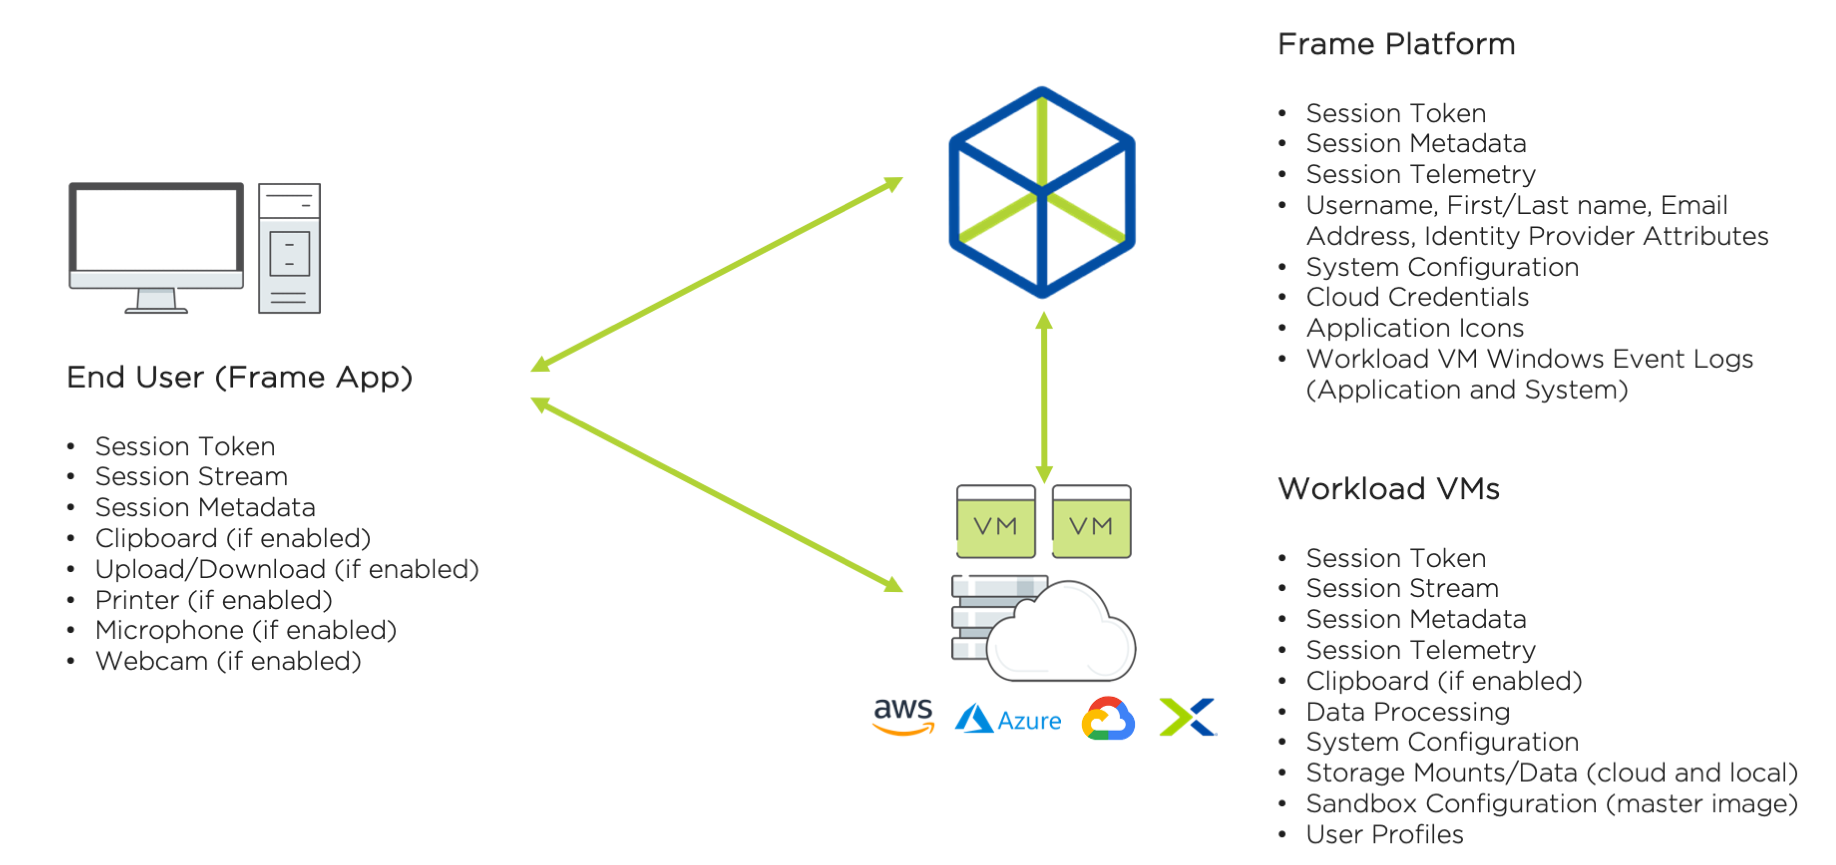 This section defines the data generated, received, transmitted, and/or stored on the end user's device. - **Authentication Token**: A security token, generated by the Frame identity service, granted to a user once the user is authenticated based on the validity of the SAML2 or OAuth2 assertion. The security token is valid up to the Authentication token expiration value configured in the Frame SAML2 authentication provider configuration. If the user is inactive for the configured amount of time, Frame Console will logout the user. If the user is active within the console (e.g., clicks on hyperlinks, moves the mouse/cursor, scrolls, or presses keys), the token will be renewed just before the token expires. If the user is in a Frame session, the token is automatically renewed so the user is not disconnected while in session. For customers using SAML2 identity providers, roles (authorization) assigned to the user are based on the SAML claim(s) that are provided by the customer's identity provider. - **Session Token**: A Frame session security token, generated by Frame Platform and provided to the user's browser, after an authenticated and authorized user has started a session. The session token is presented by the user browser to Frame Platform, Streaming Gateway Appliance (if deployed as a reverse proxy server), and the assigned workload VM. The user is only allowed to access the protected resource once the user's session token is validated by the Frame Control Plane. The session token can only be used with the assigned workload VM and is valid up to the max session duration time configured within the Dashboard. - **Session Stream**: Session Stream is the video stream of the display(s) and audio, encoded in the Frame Remoting Protocol, an H.264-based video stream, sent from the workload virtual machine (VM) to the user's browser. Any keyboard/mouse events, input audio (if microphone is enabled), and input video (if webcam is enabled) is sent from the user to the workload VM. The Frame Remoting Protocol (FRP) 7 uses Secure WebSocket (tcp/443, TLS) and FRP8 uses WebRTC (udp/3478 or udp/4503-4509, DTLS) to communicate between end user and workload VM. - **Session Metadata**: Session metadata refers to the generation of details in the end user's device that are collected by Frame Platform when various operations are performed during a Frame session. The data can be used to identify users, session start times and durations, instance type used, session type (desktop or published applications), published applications used, as well as other operational details. Below are the data inputs that represent the session metadata: - **User device and workload VM IP addresses**: Identifies the Internet Protocol (IP) address of the user's device and the workload VMs accessed by the user during a Frame session. Both IP addresses may be private (private networking) or public. - **User identifier**: This description identifies the user in the session. This identifier is in the form of an email address. Depending on the customer, this user identifier may be an actual or fictitious email address, provided by the customer's identity provider or Frame Secure Anonymous Token feature. - **Session ID**: The numeric identifier of a specific virtual Frame session. - **Session Type**: Desktop or Application - **Published application launched**: This describes the application(s) in-use by the user. - **Clipboard**: End users have the ability to copy and paste bidirectionally between the user's device and the workload VM or unidirectionally, if the administrator enables the feature in Session Settings for a Frame Account. - **Upload/Download**: End users have the ability to upload and/or download files between the user's device and the workload VM, if the administrator enables the feature in Session Settings for a Frame Account. - **Printer**: End users have the ability to print on printers locally accessed by the user's device, if the administrator enables the feature in Session Settings for a Frame Account. - **Microphone**: The end user can send input audio from the microphone on their endpoint to the workload VM, if the administrator enables the feature in Session Settings for a Frame Account. - **Webcam**: The end user can send input video from the webcam on their endpoint to the workload VM, if the administrator enables the feature in Session Settings for a Frame Account. ## Frame Platform Data For all Frame (Commercial) deployments, both US domestic and international, Frame Platform data is stored in the AWS US East region. For Government Cloud (FedRAMP), Frame Platform data is stored in AWS GovCloud (US West 1). In addition to the data types transmitted to/from the end user described in the above section, the following data is received, transmitted, generated, and/or stored by Frame Platform as part of the service. - **User identity and attributes**: Depending on the customer's choice of identity provider and what personal information the identity provider passes to Frame Platform, Frame Platform will store user identity and attributes for authorization and activity logging, Common parameters provided as part of any user authentication event are: - First name and last name - Email address - Associated groupsSome customers can choose to anonymize user identities during user authentication events by providing fictitious first name, last name, and email addresses to Frame Platform. However, that may result in anonymous activity logs or require customers to correlate Frame activity logs with their own system logs.
- **System Configuration**: Frame Platform also stores system configurations for each customer in order for customers to be able to customize their environments and user session behavior. These configuration options include: - **Role-based access control (RBAC) settings**: Allows the customer to grant access to features and functionality based on the user's role within Frame Platform once the user has authenticated to Frame via a customer-selected identity provider. - **Capacity settings**: Provides the customer with the ability to specify the number of virtual machines for a given instance type and the power management schedule of these virtual machines. 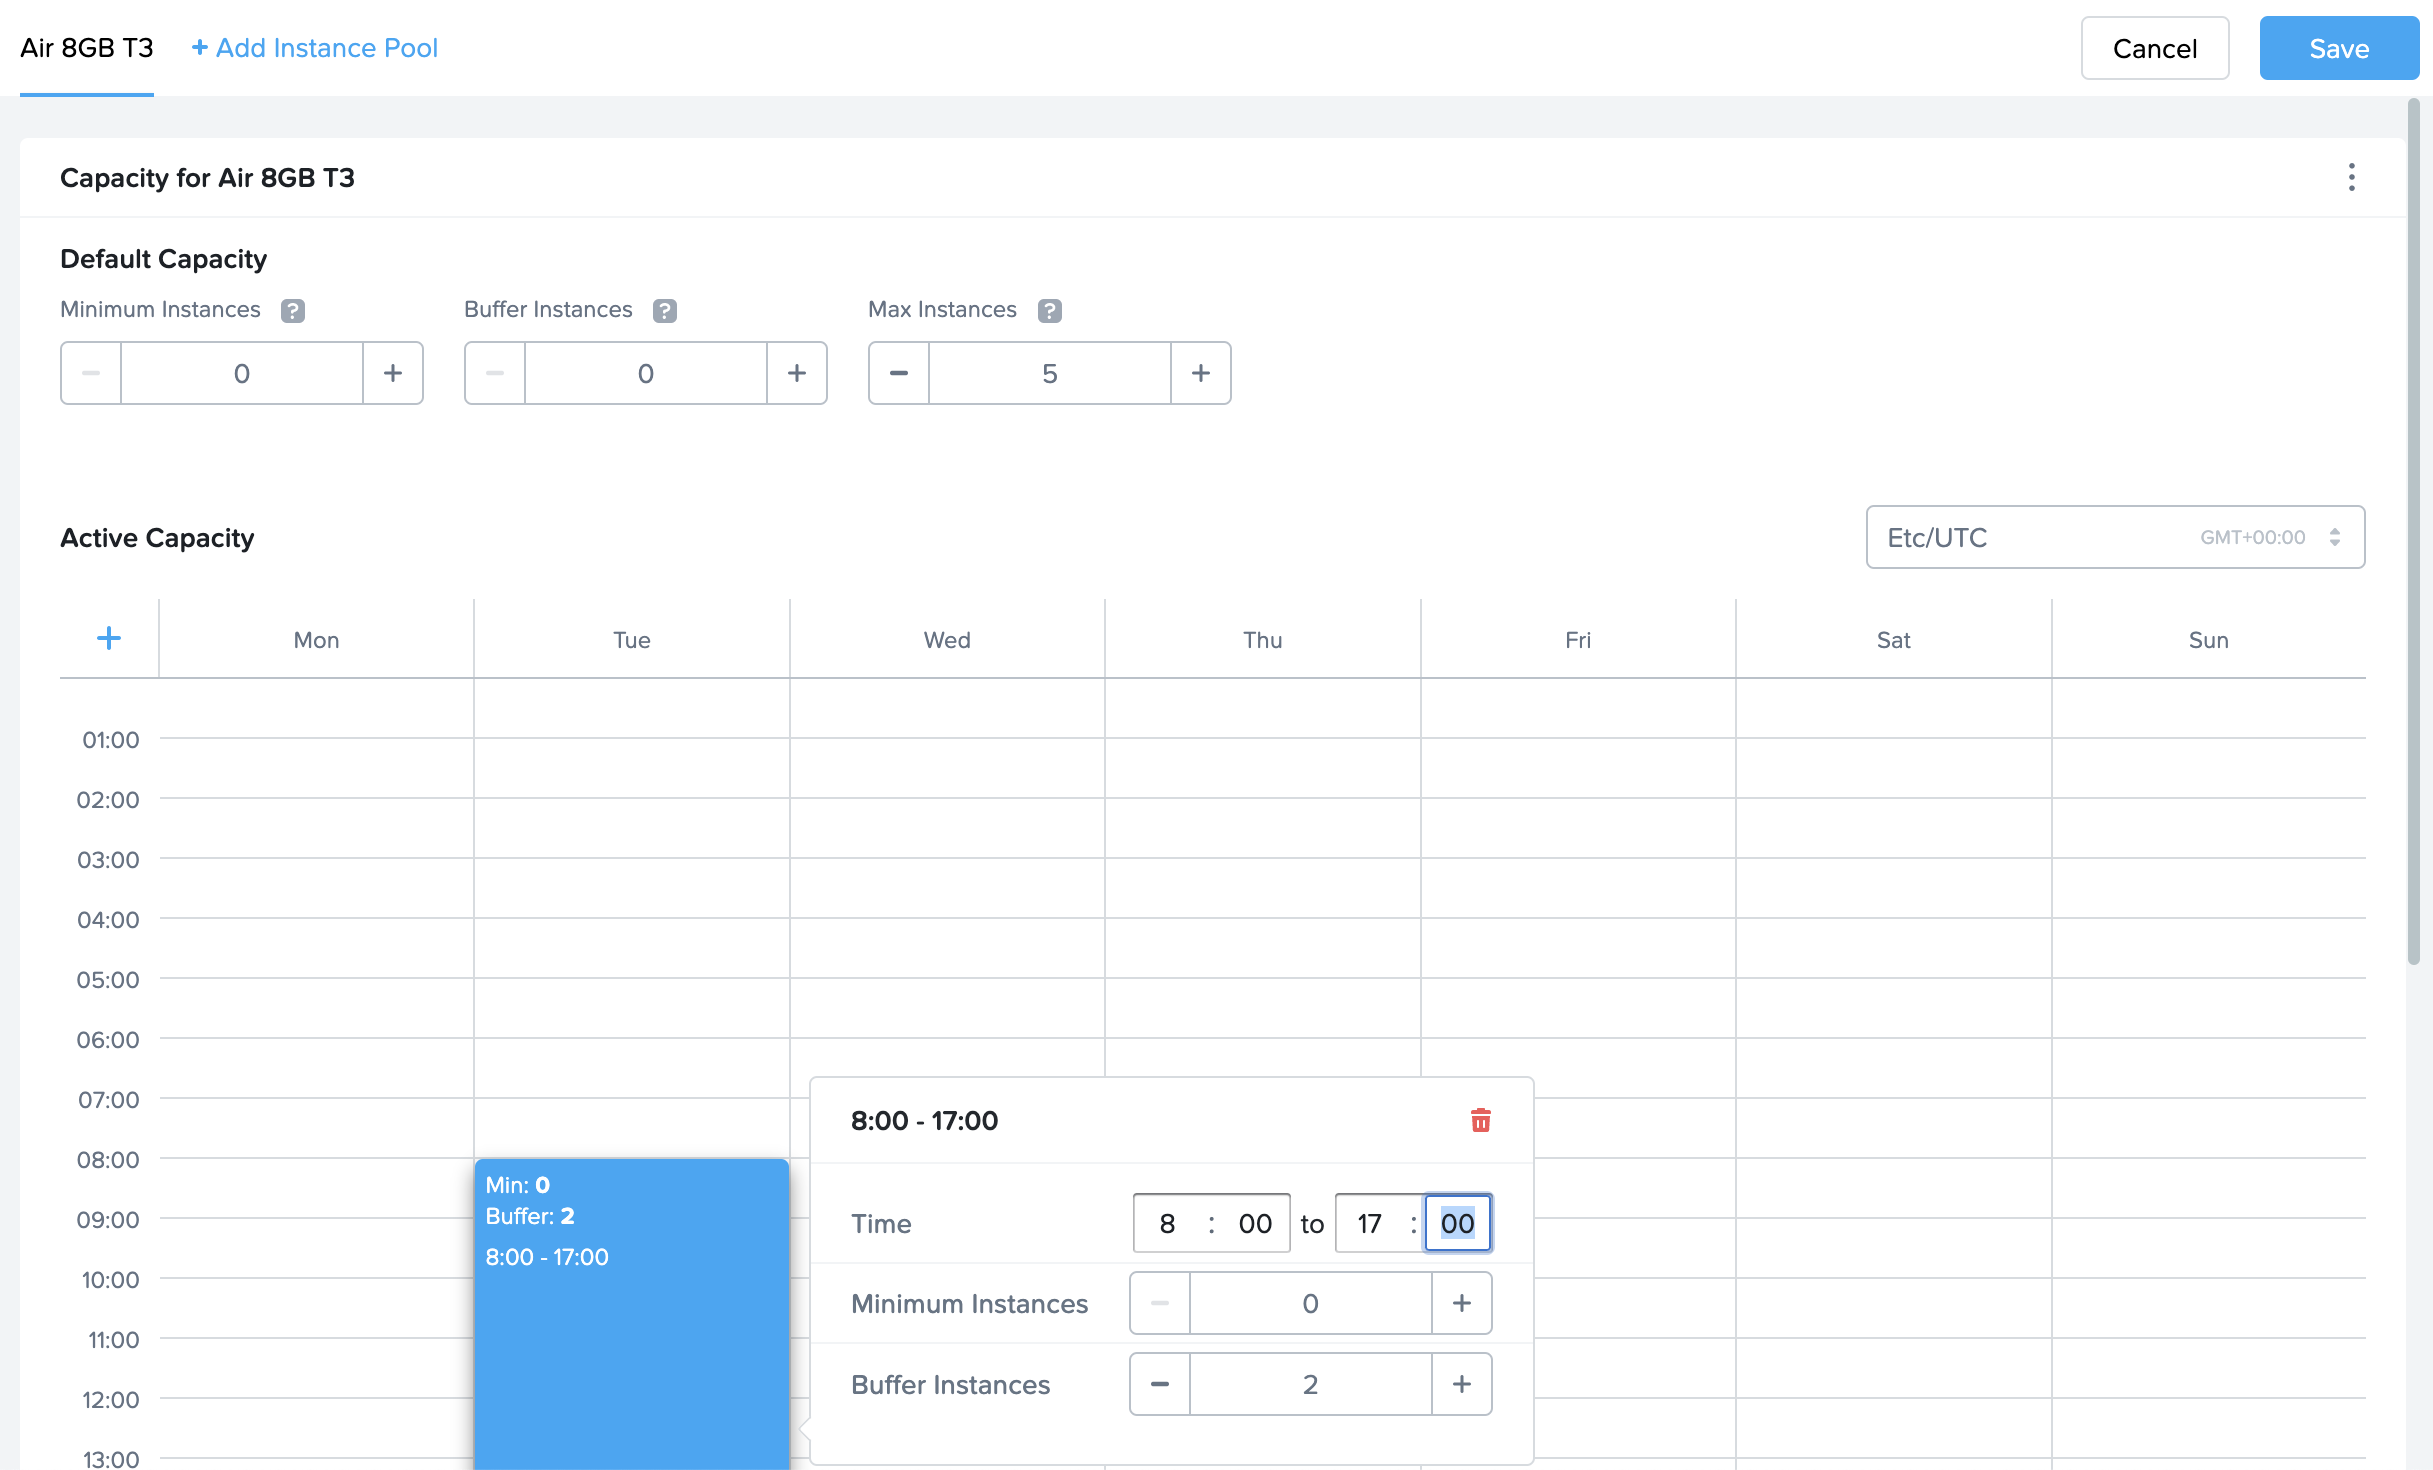 - **Session settings**: Enables user features, session timeout policies, and Quality of Service settings at the account level or on specific Launchpads.[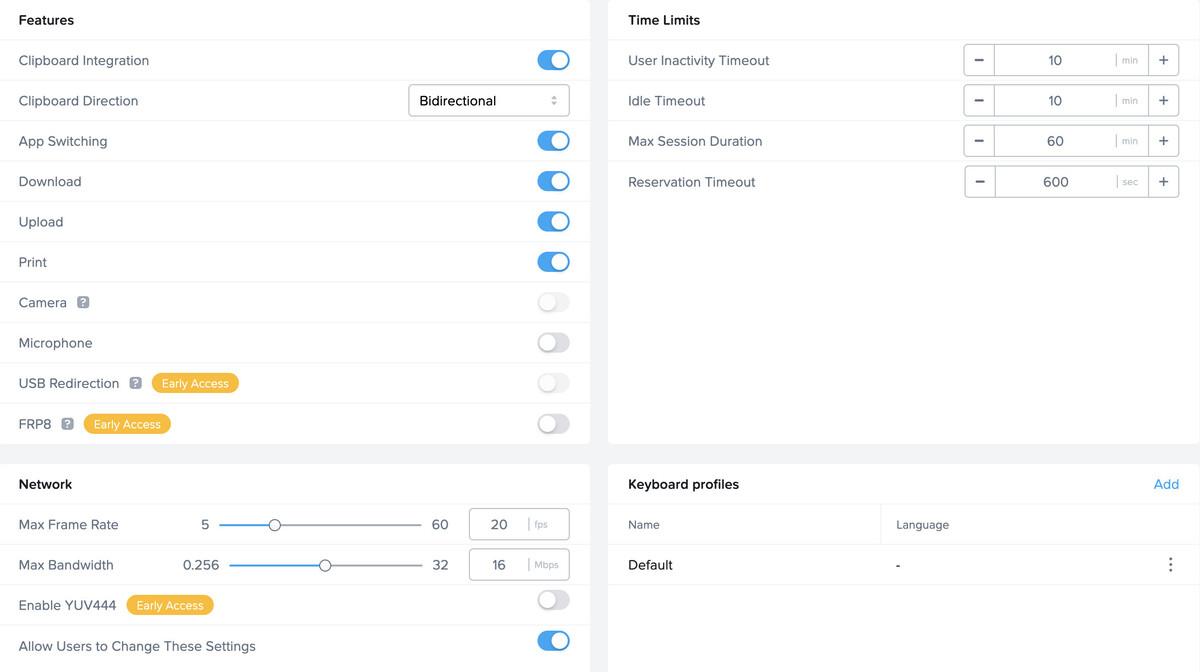](https://docs.difr.com/uploads/images/gallery/2026-01/data-r3-1.jpg) - **Cloud/data center configurations**: Determines the public cloud regions or Nutanix AHV clusters that will be used to provision Frame accounts.[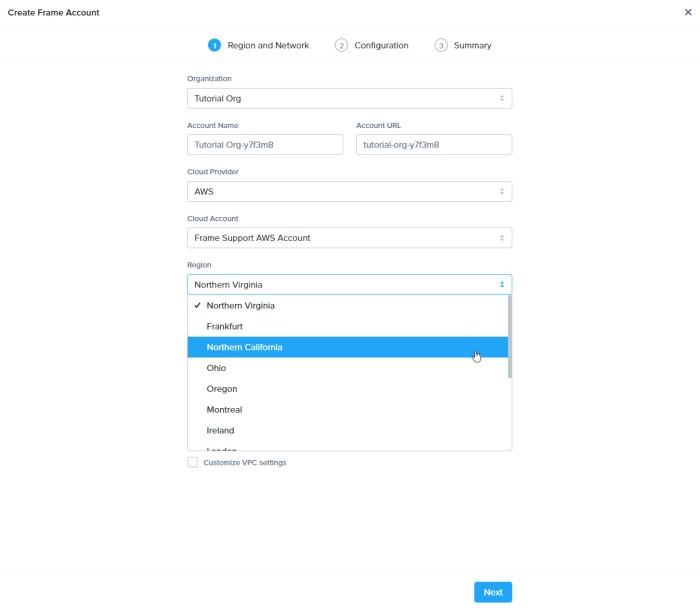](https://docs.difr.com/uploads/images/gallery/2026-01/data-r4-1.jpg) - **Cloud Credentials**: Holds the information required for interacting with the public IaaS API gateways. For AWS, it is an IAM role created by the customer using a Frame-supplied Cloud Formation template. In the case of Azure, it is an Azure Active Directory app registration. For Google, it is a Google Project ID. - **Onboarded Application Information**: Stores information about the onboarded applications (i.e., published applications). Specifically, the application icon, application executable path, working directory, and command line arguments. - **Windows Events**: The Frame Guest Agent will parse and send specific Windows Logs (Application and System) to the Frame Logging endpoint to assist Customer Support and Customer Success with troubleshooting workload issues. This data is retained for 21 days. Customers may opt out by [contacting Support](https://docs.difr.com/books/dizzion-support/page/contact-support) if they prefer these Windows Logs to not be collected. ``` By default, the event sources are: + _Windows Logs > Application:_ + _MsiInstaller_ + _Application Error_ + _Windows Error_ + _RestartManager_ + _FrameLogonScript_ + _FrameTaskbar_ + _.Net Runtime_ + _User Profile Service_ + _Windows Logs > System:_ + _Service Control Manager_ + _User32_ + _WindowsUpdateClient_ + _Applications and Services Logs > Microsoft > Windows:_ + _User Device Registration_ + _AAD_ + _HelloForBusiness_ ``` ## Workload VM Data - **Session Token**: described in the [prior section](#what-data-is-stored-where) - **Session Stream**: described in the [prior section](#what-data-is-stored-where) - **Session Metadata**: described in the [prior section](#what-data-is-stored-where) - **Session Telemetry**: Session telemetry refers to the measurement of session characteristics between the end user's browser and the Frame workload VM (e.g., bandwidth, latency) and the reporting of workload VM performance metrics (e.g., CPU, memory). This data is collected by Frame Platform and used to evaluate session performance and quality of the experience for the user. The two key metrics are: - **Bandwidth**: Refers to the real-time data transmission capacity of the network between the user and the workload VM. When a user is in a Frame session, the real-time bandwidth is displayed on the left of the Frame status bar. 5 indicator dots next to the Frame gear menu icon give a visual representation of the user's current bandwidth measurement: - *Red dots*: 1 to 2 Mbps - *Yellow dots*: 2 to 4 Mbps - *Green dots*: 4 to 8+ Mbps - **Latency**: Refers to the delay before a transfer of data begins following an instruction for its transfer. This is the time it takes for a single packet of data to go from the user's browser to the workload VM. - **Clipboard**: described in the [prior section](#what-data-is-stored-where) - **Upload/Download**: described in the [prior section](#what-data-is-stored-where) - **Data Processing**: All applications installed by the customer or its users execute on the workload VMs. The customer has the option of offloading the processing of data to other compute infrastructure (e.g., rendering engines, machine learning servers, application servers) controlled, managed, and/or selected by the customer. - **Storage Mounts/Data**: Any data generated by these applications remains within the workload VM until the user saves the data in persistent storage (profile disk, personal drive, file server, cloud storage). The customer determines what persistent storage options the end user may use (and where the persistent storage is located). - **Sandbox Configuration (template image)**: Each Frame account has one Sandbox, a VM that manages the master image for the account. Customer administrators use the Sandbox to install and update their applications and manage the operating system. When the administrator publishes the Sandbox, a snapshot of the Sandbox image is backed up and cloned to create the production VMs of the Frame account. The Sandbox VM is persistent. Any applications or files stored in the Sandbox image will be included in the production VM images. - **User Profiles**: For non-persistent Frame accounts, customer administrators can enable the Frame Enterprise Profile feature in order for user application profiles and user folders (e.g., Documents, Desktop, Downloads, etc.) to be redirected to user profile disks. This profile disk is mounted when a user enters a Frame session and unmounted when a user closes their Frame session. User profile disks are stored as part of the Frame account. The user can backup and restore their own user profile disk. - **Personal Drives**: Customer administrators can configure a Frame account to provision and manage a personal drive for each user. User personal drives are stored as part of the Frame account. The user can backup and restore personal drives. ## Safeguarding Data Cloud services is a shared-responsibility model. Frame and customers each have a shared responsibility to ensure the data is protected. Frame is responsible for the security of Frame Platform. Customers are responsible for the security of the users' endpoints, their infrastructure they bring to Frame, including the workload VMs, and any use of application and storage services they provide to their users. ## Confidentiality In general, Frame stores all data at rest in an encrypted form using the underlying infrastructure's storage encryption capabilities, including the safeguarding of the storage encryption/decryption keys. The encrypted data includes data stored within Frame Platform as well all data stored in the workload VM disks, profile disks, and personal drives. All communications between the system components are encrypted using TLS 1.2 (HTTPS and Secure WebSocket) and DTLS (FRP8, WebRTC). ### Authentication Frame supports the ability for customers to integrate their own enterprise SAML2 or OAuth2 identity provider with their Frame customer (or an organization) entity. Customers may integrate as many identity providers as they wish at the customer or organization entity levels. ### Authorization Frame provides customers who integrate an enterprise SAML2 or OAuth2 identity provider the ability to define authorization rules which grants users (or groups of users) the specified privileges to access or perform operations on specific protected resources.