| Policy | Location | Required Value | Explanation |
|---|---|---|---|
| [Interactive logon: Don't display last signed-in](https://learn.microsoft.com/en-us/windows/security/threat-protection/security-policy-settings/interactive-logon-do-not-display-last-user-name) | Computer Configuration\\Windows Settings\\Security Settings\\Local Policies\\Security Options | Enabled | Auto-login is required for the Frame session to be able to start. |
| [Interactive logon: Message title for users attempting to log on](https://learn.microsoft.com/en-us/windows/security/threat-protection/security-policy-settings/interactive-logon-message-title-for-users-attempting-to-log-on) | Computer Configuration\\Windows Settings\\Security Settings\\Local Policies\\Security Options | Not defined | Frame session will not start if the title is defined. |
| [Interactive logon: Message text for users attempting to log on](https://learn.microsoft.com/en-us/windows/security/threat-protection/security-policy-settings/interactive-logon-message-text-for-users-attempting-to-log-on) | Computer Configuration\\Windows Settings\\Security Settings\\Local Policies\\Security Options | Not defined | Frame session will not start if the message is defined. |
| [Password protect the screen saver](https://learn.microsoft.com/en-us/troubleshoot/windows-client/group-policy/disable-screen-saver-passwords) | User Configuration\Administrative Templates\Control Panel\Personalization | Disable | Frame session will not start or resume if the screen saver requires a password. |
Do not:Remove the `Frame` user from the local Windows Administrators group. - Modify the `Frame` user permissions in `Computer Configuration\\Preferences\\Control Panel Settings\\Local Users and Groups`. - Change the `Frame` user password.Remove the `FrameUser` user (if the Enterprise Profile feature is to be used in a non- domain-joined pool of workload VMs). - Change the `FrameUser` user password (if the Enterprise Profile feature is to be used in a non-domain-joined pool of workload VMs). - Modify the local user password policy or implement a stronger password policy.
Otherwise, you will not be able to access the workload VMs using Frame Remoting Protocol. Changing these passwords on a workload VM can cause the Frame session to fail to start. If a password management solution such as Microsoft Local Administrator Password Solution (LAPS) is used, the two Frame-specific users must be excluded. ## Frame-specific Local Linux User Frame adds one local Linux users to each Linux workload VM: - `frame` - a local Linux user. The same warnings from the local Windows user `Frame` listed above apply for the local Linux user `frame`. ## Local Frame User Password Policy The `Frame` (Linux and Windows) and `FrameUser` (Windows only) password is rotated automatically by Frame for each Frame session. These passwords have the following characteristics: - Randomly generated - 25 characters long - Contains 4 uppercase characters - Contains 4 lowercase characters - Contains 4 numeric digits - Contains 8 special characters (`!`, `@`, `#`, `$`, `%`, `^`, `&`, `*`, `(`, `)`, `,`, `.`, `?`, `:`, `{`, `}`, `|`, `<`, `>`, `_`) # Install and Onboard Apps In general, if you are planning to only deliver virtual desktops to your users, then onboarding applications is not required – simply install your desired applications to the Sandbox. If you wish to make individual applications available to your users via an Application Launchpad, you will need to install and onboard each application. Onboarding an application for your users registers the application with the Frame control plane and prepares it to be shared as an individual application without the desktop being visible. Once you have installed or updated your applications for either Desktop or Application Launchpad, you must [publish](https://docs.difr.com/link/101#bkmrk-page-title) your Sandbox to make the applications available to your users. This guide will show Frame administrators the basics of installing, onboarding (if required), and deleting applications for their users.The onboarding process only applies to executables (.exe files), scripts which launch executables, and shortcuts that point to executable files.
1. Go to the **Sandbox** page of your account's *Dashboard*. Click **Power On** to boot your Sandbox if needed . When the Sandbox is available, click **Start Session**. [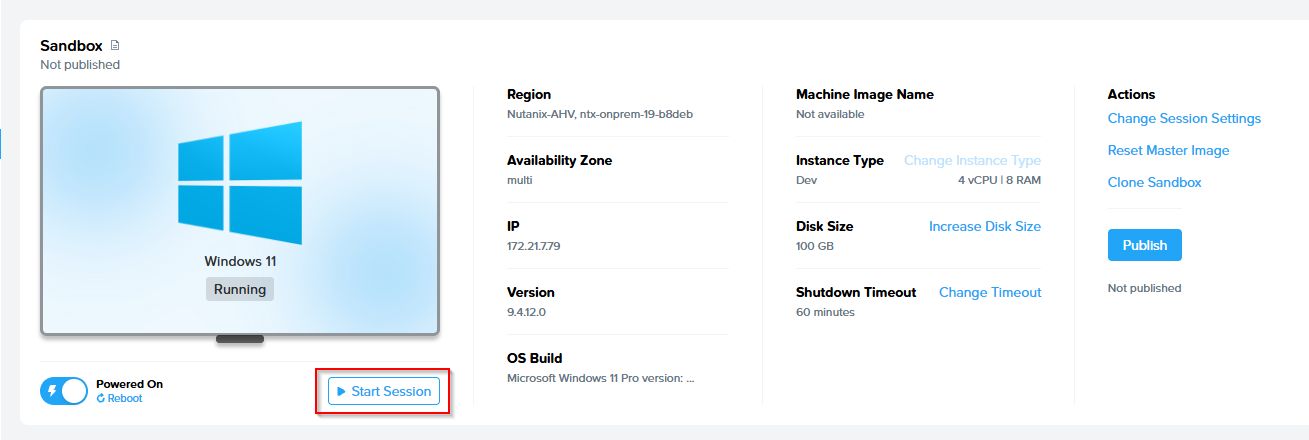](https://docs.difr.com/uploads/images/gallery/2025-12/0t3image.png) 2. If your installer is available online, you can download it directly using the browser in your Sandbox (Chrome) – this will be the fastest method for large installers. If your installer is not available online, and you have it on your local machine, you can upload it to your Frame session from your local machine. Additionally, you can opt to connect your cloud storage account to your Frame account, which would enable you to see the files in a virtual drive in your Sandbox. You can connect your cloud storage accounts from the admin menu in the upper right corner (to the right of the Sandbox image) or from within your Sandbox session by clicking on the icons at the bottom right corner of your desktop session. 3. If you downloaded your installer using the browser in the Sandbox, simply launch the setup file from the "Downloads" folder. If you used a cloud storage account, navigate to "Computer" and open the appropriate drive (e.g., X: drive for Box). If you uploaded your installer from your local machine, you can access it by going into the "Uploads" folder.**Caution** Copy your setup file(s) from the original drive to the C: drive, and then run the installation of your app as you would on a PC from the local **C: drive**.
To manually onboard an application, simply right-click on the application in the program menu or directly on the application's .exe file in its install folder (e.g. in the "Program Files (x86)" or "Program Files" folder) and select "Onboard to Frame."
5. Test your application from within the Sandbox to make sure everything is functioning as expected (for instance, if you need to enter a license code/load a license file, do so now). If you onboarded the application, you can disconnect from your Sandbox session by selecting **Disconnect** from the gear menu. You will see your newly onboarded application as an application icon in your Dashboard next to your other onboarded apps. Set custom application properties by hovering over your icon and selecting the gear icon. 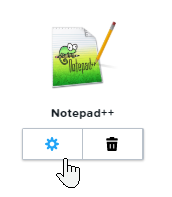 ## Delete Onboarded Applications If you wish to remove a particular application from your users' Launchpad, you can do so easily from the account Dashboard by following the steps below: 1. Navigate to the Dashboard. On the *Sandbox* page of the *Dashboard*, look for the **Applications** section near your Sandbox. Hover over the application you would like to get rid of – you should see a gear icon and trash can icon, like this: 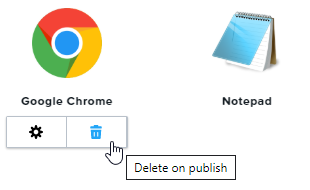 2. Click on the trash symbol to schedule the deletion of the application on the next publish. This means that your users will still see the application in their Application Launchpad until the next time you publish. ## Uninstall an Application If your application has been installed on the Sandbox and you want to ensure that your users are no longer able to access the application (especially if they are using a Desktop Launchpad), you must uninstall the application from your Sandbox. 1. To uninstall applications, launch your Sandbox, click on the Windows Start button and select "Installed apps" [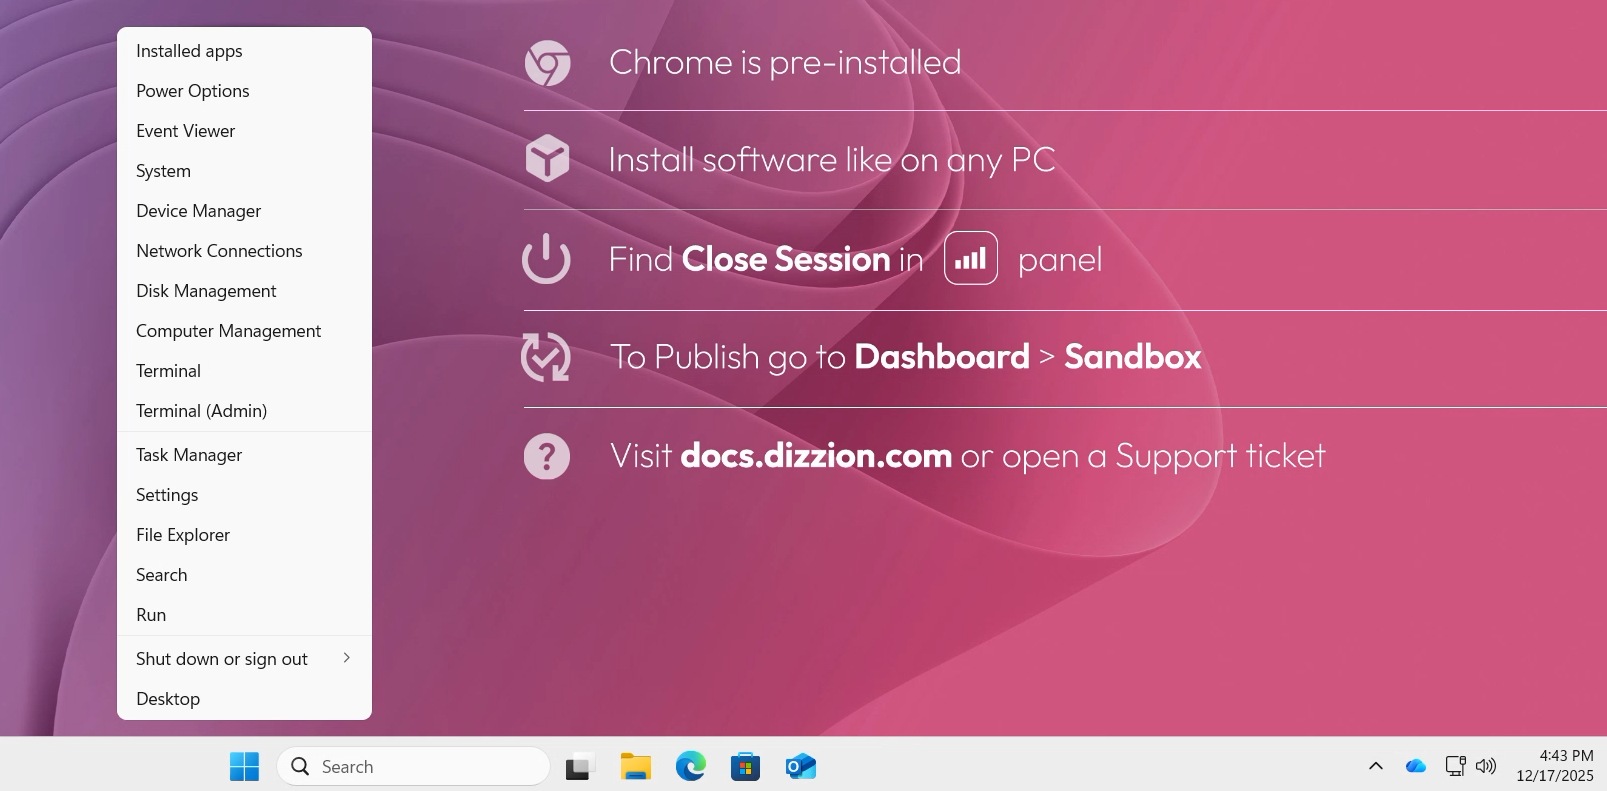](https://docs.difr.com/uploads/images/gallery/2025-12/OX2image.png) 2. A new window will pop up, from there you can see a list of all installed Applications, and can select which one should be removed. [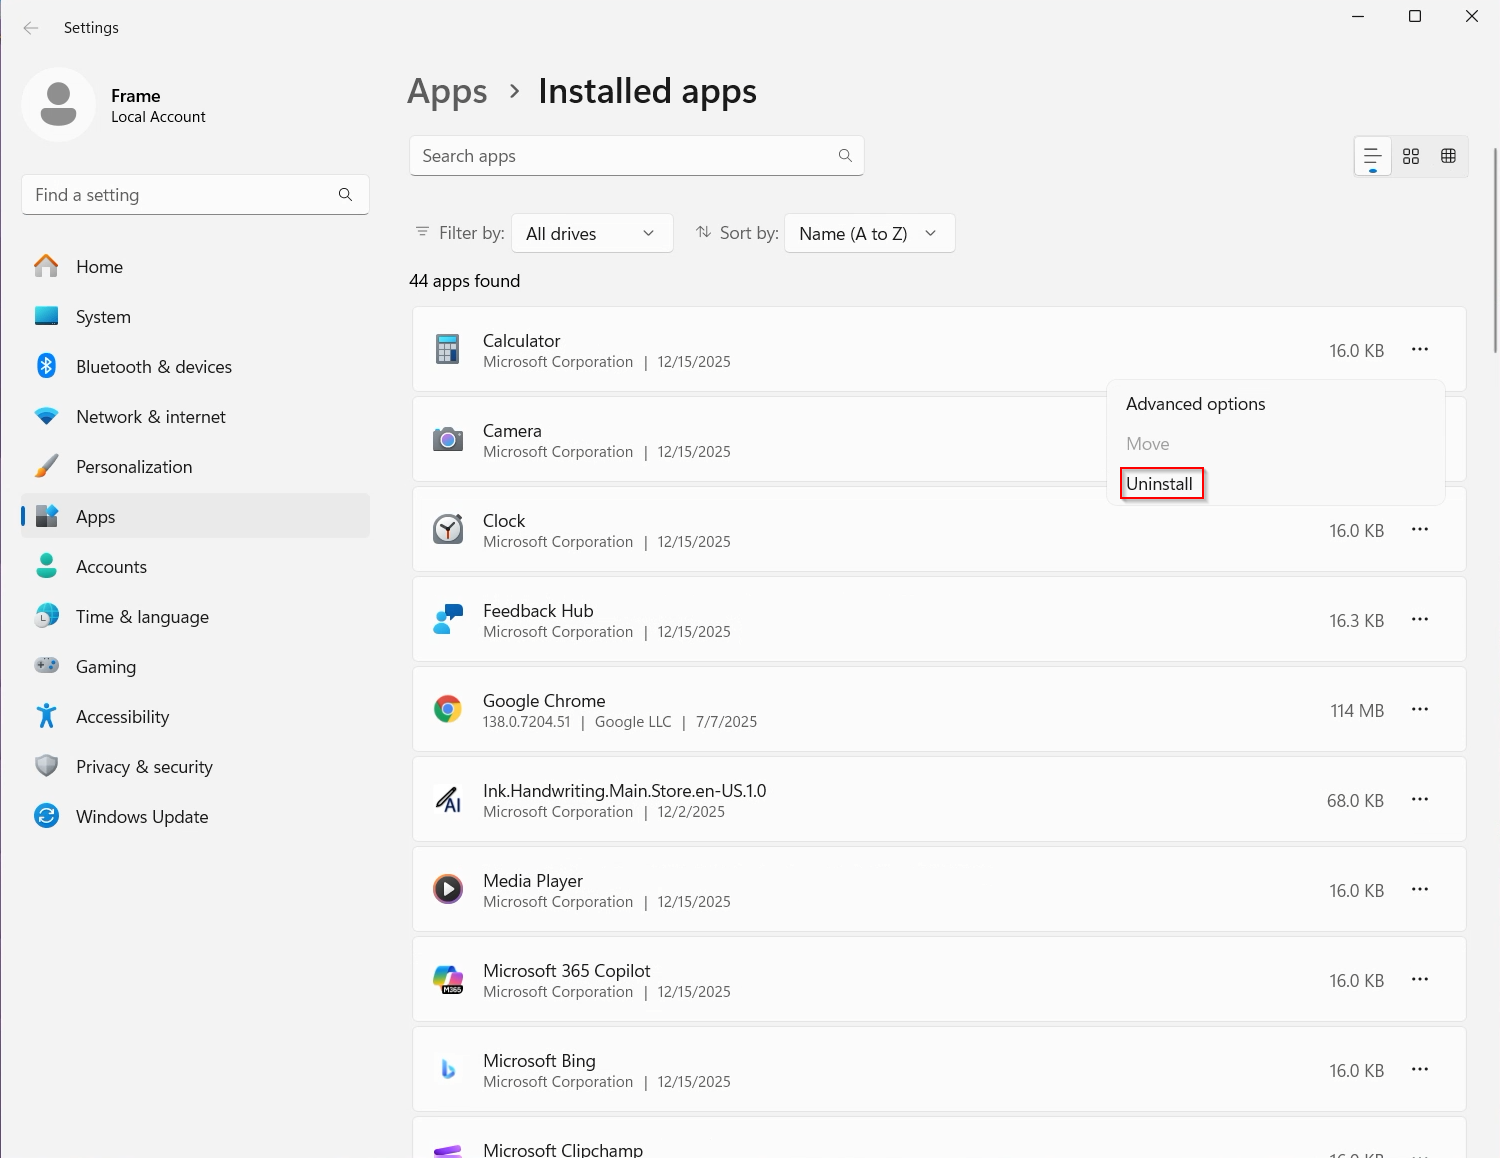](https://docs.difr.com/uploads/images/gallery/2025-12/w9Jimage.png) Publish your Sandbox to ensure the application binaries are no longer in the production VMs.If your users are using an Application Launchpad and you did not delete the onboarded application in the Sandbox page before publishing, your users will see an error when they try to access the application from their Application Launchpad.
# Publishing Once you have installed one or more applications, tested them in the Sandbox, set up a [Desktop Launchpad](https://docs.difr.com/books/platform-administrators-guide/page/launchpads#desktop-launchpad) or [Application Launchpad](https://docs.difr.com/books/platform-administrators-guide/page/launchpads#application-launchpad), and [defined your production capacity](https://docs.difr.com/books/platform-administrators-guide/page/capacity), you're ready to publish. There are three types of publishing: - **Publish**: A standard publish will always create the **max** number of instances specified in the account's Capacity settings for each configured Instance Pool before the existing instances are terminated. - **Quick Publish**: Quick publish allows administrators to specify how many production instances (less than or equal to Default Capacity **max**) are created on publish and powered on for each Instance Pool before any existing instances are terminated. Frame will then continue to create the remaining new VMs for each Instance Pool up to the Max Instances setting. This results in a quicker publish; however, it can result in a temporary reduction in the number of instances for each Instance Pool. - **Test Publish**: This feature allows you to test Launchpad functionality and Sandbox changes in your Frame account before committing your changes to your production environment.**Publishing requires capacity** Before publishing, you will need to set your [production capacity](https://docs.difr.com/books/platform-administrators-guide/page/capacity). Setting your production capacity specifies the amount of VMs you would like to publish your Sandbox image to. If you are not familiar with this, you can read more about system capacity and elastic instance management in our documentation [here](https://docs.difr.com/books/platform-administrators-guide/page/capacity).If there are no instance types with a max set to at least 1, **publishing will be disabled**.
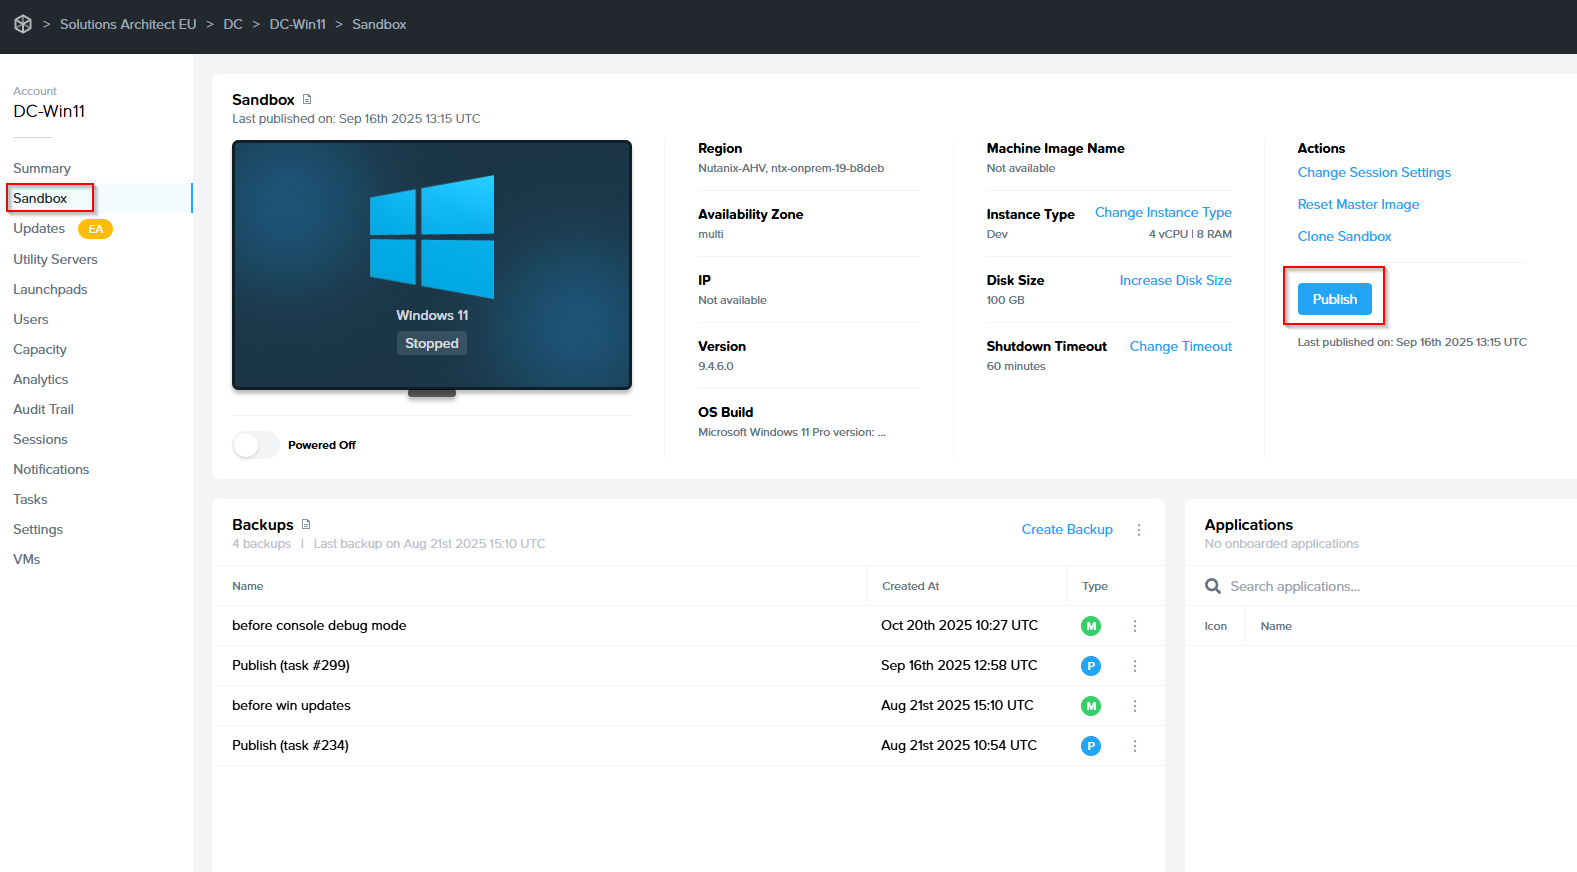
## Fundamentals A **Publish** pushes any changes and configurations made to the Sandbox image to the production (or test) instances and, in turn, to the end users accessing your Frame-managed workload VMs. [](https://docs.difr.com/uploads/images/gallery/2025-10/Xv0image.png) ### Initiating a Publish Once your Sandbox is configured as desired and you're ready to publish, follow the steps below: 1. Navigate to the **Sandbox** page of your account Dashboard and ensure your Sandbox is powered on. 2. Click **Publish** in the top right corner of the Sandbox panel. A confirmation dialog will appear.You may cancel a publish up \*\*until the time Frame Platform begins creating production or test instances\*\* (depending on whether you invoked a Publish, Quick Publish, or a Test Publish, respectively).
#### From Sandbox To cancel an ongoing Publish from the Sandbox, once your Sandbox is in the Publishing state, go to the Sandbox page and under the kebab menu, the **Cancel Publish** option can be selected:**Reminder By default, all AHV-based accounts use the quick publish function**. The default number of production instances created on publish is 10. If you wish to override this number, follow the instructions below.
1. From your account Dashboard, navigate to the **Settings** page. Under the *General* tab, **enable quick publish** as shown below.If the min value in your capacity settings is set to less than the quick publish value specified, the quick value publish settings are ignored and a regular publish is performed.
That's it! You have successfully enabled quick publish for your Frame account. Any publish operations initiated from this point forward will be Quick Publishes. ### Test Publish **Test Publishing** gives administrators the ability to test their updated Sandbox image in a “Test Instance Pool” which is **separate from their production instances**. This gives administrators the option to alter the instances in an isolated environment, completely identical to production, without concern of interrupting access to the normal production instances. Test publishes can easily be rolled back via the restoration of a backup, or promoted to the active published configuration, depending on the results. [](https://docs.difr.com/uploads/images/gallery/2025-10/ISZimage.png) Before a test publish, you will need to set your [test capacity](https://docs.difr.com/books/platform-administrators-guide/page/capacity#add-test-pool). Setting your test capacity specifies the amount of VMs you would like to publish your Sandbox image to. If you are not familiar with this, you can read more about system capacity and elastic instance management in our documentation [here](https://docs.difr.com/books/platform-administrators-guide/page/capacity#add-test-pool). 1\. In your Frame Account Dashboard under the **Settings** tab, **Enable Test Publish**. Click the **Save** button to apply the change. [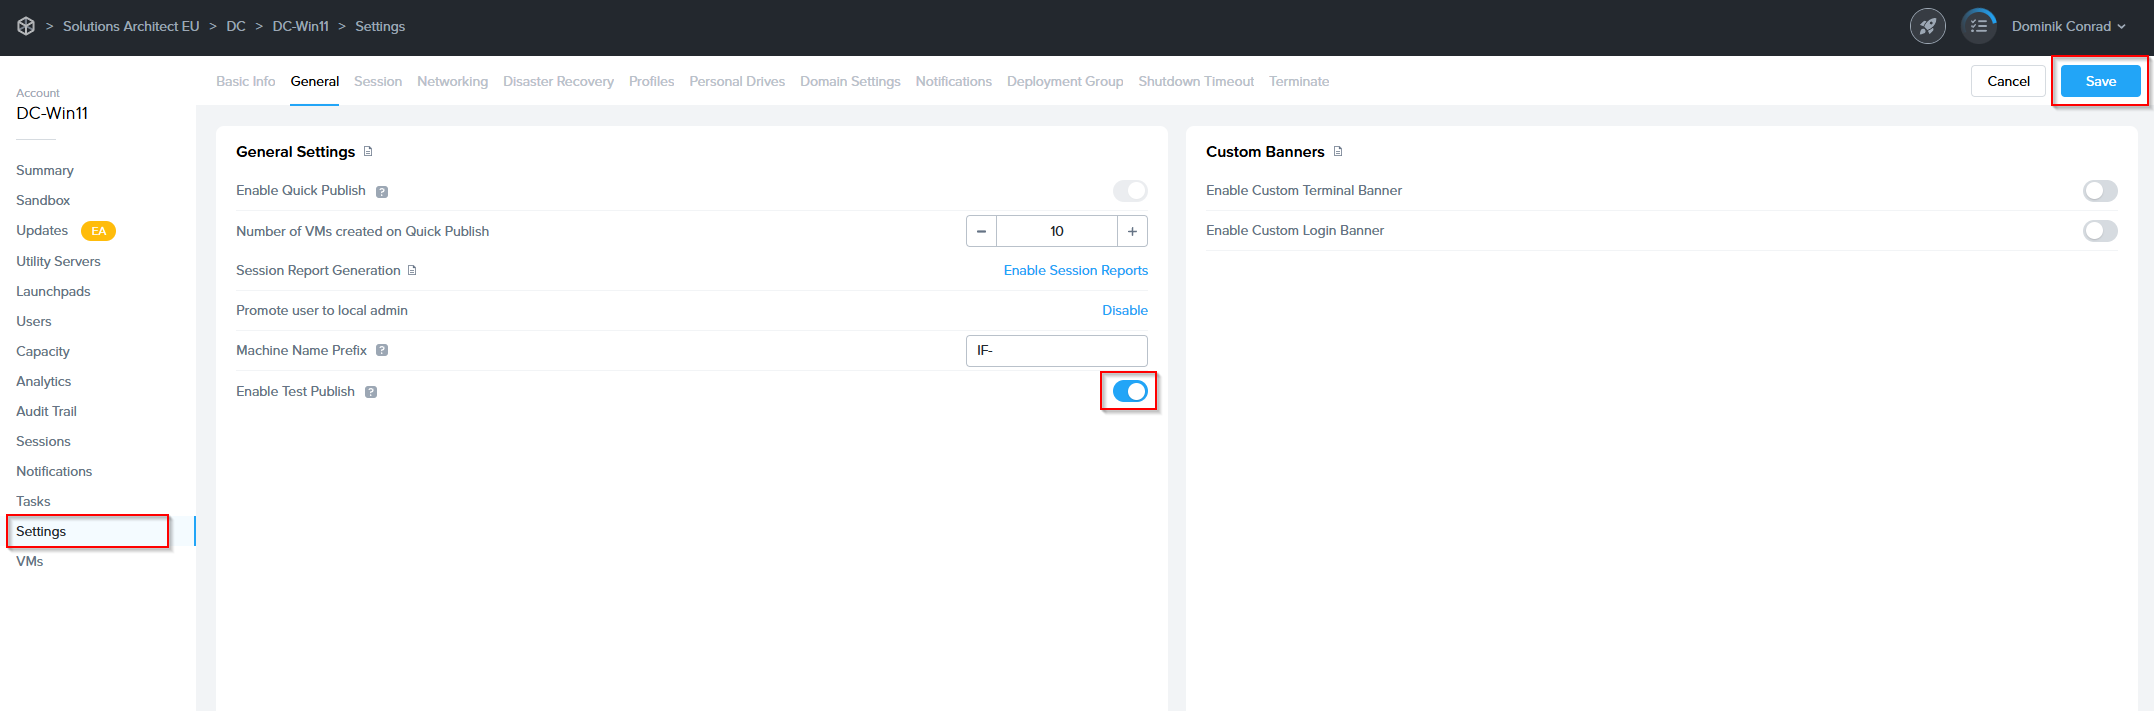](https://docs.difr.com/uploads/images/gallery/2025-10/wYWimage.png) 2\. A prompt will appear, notifying you that the Test Publishing feature **cannot be disabled once enabled** on an account. Click **Confirm****Warning** This change cannot be undone once enabled for your account.
[](https://docs.difr.com/uploads/images/gallery/2025-10/Ff5image.png) 3\. Next, verify you have at least one Test Pool under [Capacity](https://docs.difr.com/link/114#bkmrk-add-test-pool-1). 4\. When you wish to perform a test publish, navigate to the **Sandbox** page of the Dashboard and click the **Publish** button in the Sandbox panel.**Caution** Frame strongly recommends creating a backup of your Sandbox before Test Publishing. In the event you wish to discard all changes to the test environment and return to the original Sandbox configuration, you will be able to restore your backup.
[](https://docs.difr.com/uploads/images/gallery/2025-10/92Aimage.png) 5\. The Publish dialog will appear, providing a dropdown menu to select your desired publish option. Select **Test Publish** and then click the **Test Publish button** to initiate provision of the test publish instances. [](https://docs.difr.com/uploads/images/gallery/2025-10/VBjimage.png) Lastly, you will want to create some Test Launchpads for your Test Instances. This will allow admins to test sessions and determine whether to promote the test publish to production users or not. Once the test publish is complete, you will want to **test the changes from a Test Launchpad**. Do that now by navigating to a test Launchpad and launching a session. Manually verify the changes while in the session. - **If everything is ok**, it's time to **promote** our test publish! Move on to the next step. - **If there are any issues**, go back to your Sandbox and make necessary changes and initiate another Test Publish for further testing. 6\. Next, we'll **promote** our Test Publish. To begin, click the **Publish button** in the top right corner of the Sandbox panel once again. This time, our confirmation dialog will provide a **Promote** option. Select and click the **Promote button**. [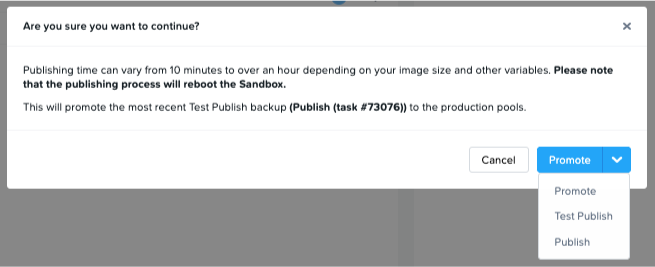](https://docs.difr.com/uploads/images/gallery/2025-10/GDRimage.png) Once the promoted Publish is complete, your users should be able to access production instances with all of your changes applied.**Note** Promotion of a Test Publish does not create a new Sandbox backup.
# Updates The **Updates** page listed in the **Account Dashboard** is designed to keep administrators informed about available updates for their virtual machines (VMs), as well as to configure this feature. This section ensures that your VMs remain up to date with the latest operating system updates, enhancing **security, performance, and functionality**. Displayed only at the **Account level**, this page provides update details specific to the VMs tied to that account. [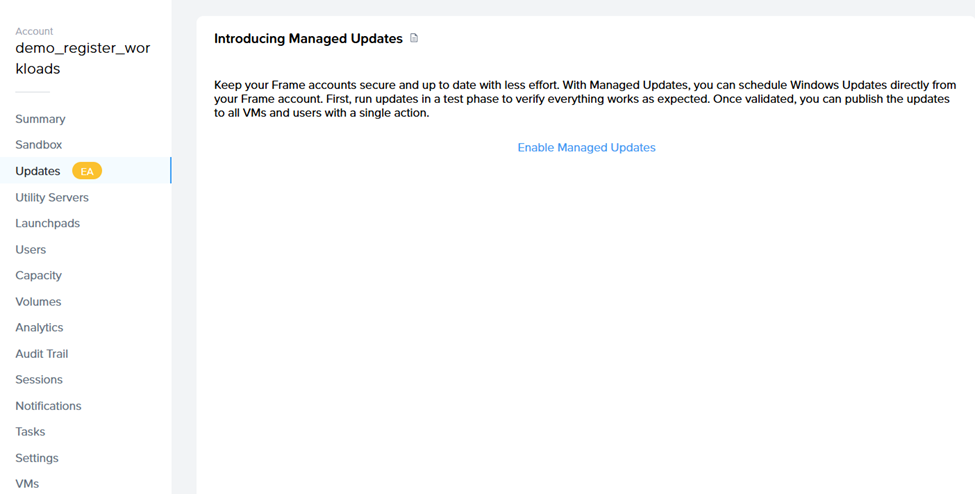](https://docs.difr.com/uploads/images/gallery/2025-10/image-1760698172386.png) **Navigation:** `Account Dashboard > Updates` --- ## VM Types The VM types and their updates displayed on the **Updates** page depend on the account environment. ### Non-persistent Accounts When updates are available, the following VM types will be shown: - Sandbox VMs - Utility Servers - VMs in test and production pools ### Persistent Accounts In persistent desktop account environments, the following VM types will be shown when updates are available: - Sandbox VMs - Utility Servers - Workload VMs --- ## Managed Updates Administrators can manage updates directly from the list and follow the provided instructions for installation. It is recommended to **schedule updates during maintenance windows** to minimize impact on users and operations. For more comprehensive information on managing OS updates, refer to our blog: [Dizzion Managed OS Updates & Windows Patching](https://www.dizzion.com/post/dizzion-managed-os-updates-windows-patching) --- # Managed Updates – Guide for Non-persistent Accounts**IMPORTANT NOTE:** Enabling the Managed Updates feature for non-persistent Dizzion DaaS accounts requires creating additional VM(s), so please be aware of this before enabling the feature.
### Step 1 Go to the **Updates (EA)** page and click **Enable Managed Updates**. [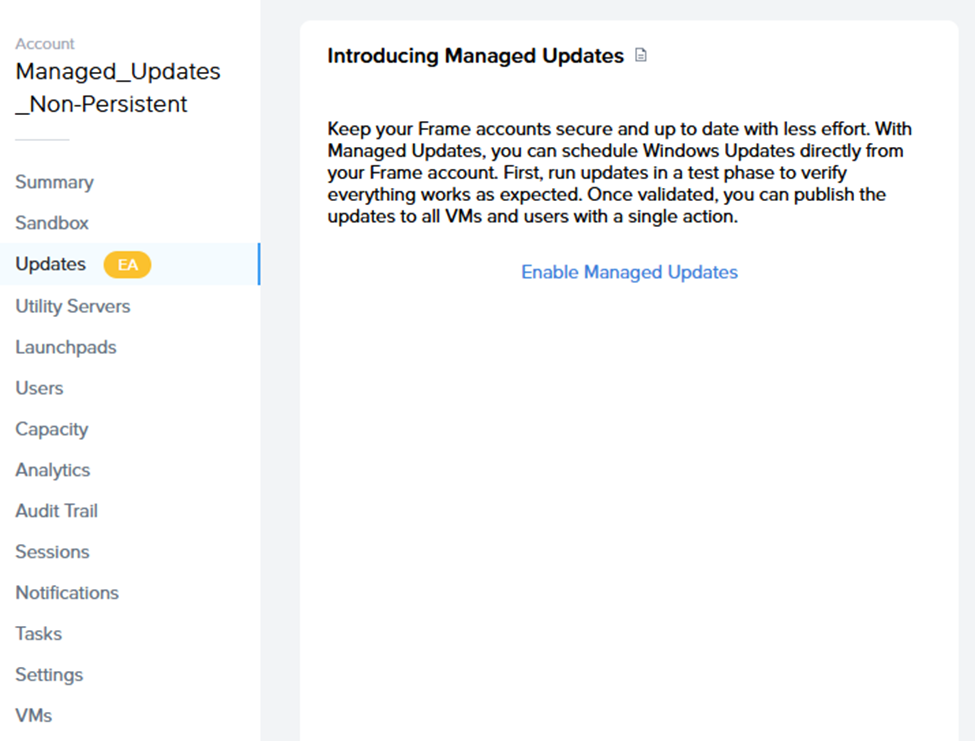](https://docs.difr.com/uploads/images/gallery/2025-10/image-1760698200551.png)**Note:** Managed Updates are per-account settings.
### Step 2 Ensure all requirements are set in the **Updates (EA)** page: [](https://docs.difr.com/uploads/images/gallery/2025-10/image-1760698252780.png) - Enable **Test Publish**. - Create a **Test Pool**. - Set the Test Pool’s capacity to at least **1**. ### Step 3 Configure **Update Settings**: ### Schedule maintenance time As this feature covers only Windows Updates released on Microsoft Patch Tuesday, please make sure to set the correct time and date when the update tasks will execute.**IMPORTANT:** While update tasks are running, no actions can be performed on the Sandbox (publishing, power on, start session, etc.).
### User Acceptance Window **Logic:** Once updates are installed, Frame automatically publishes those changes to the **Test Pool** (hence the requirement for Test Publish and Test Pool setup). This provides administrators with a **buffer of up to 3 weeks** to log in to a VM from the Test Pool, verify functionality, and either: - **a)** Accept the test manually in the **Updates** page, or - **b)** Wait for the **User Acceptance Window** to expire — after which Frame automatically publishes the changes to Production Pool(s).**Note:** Define this process internally.
### Emails for VM Update Notifications – set the email address to receive update process notifications. [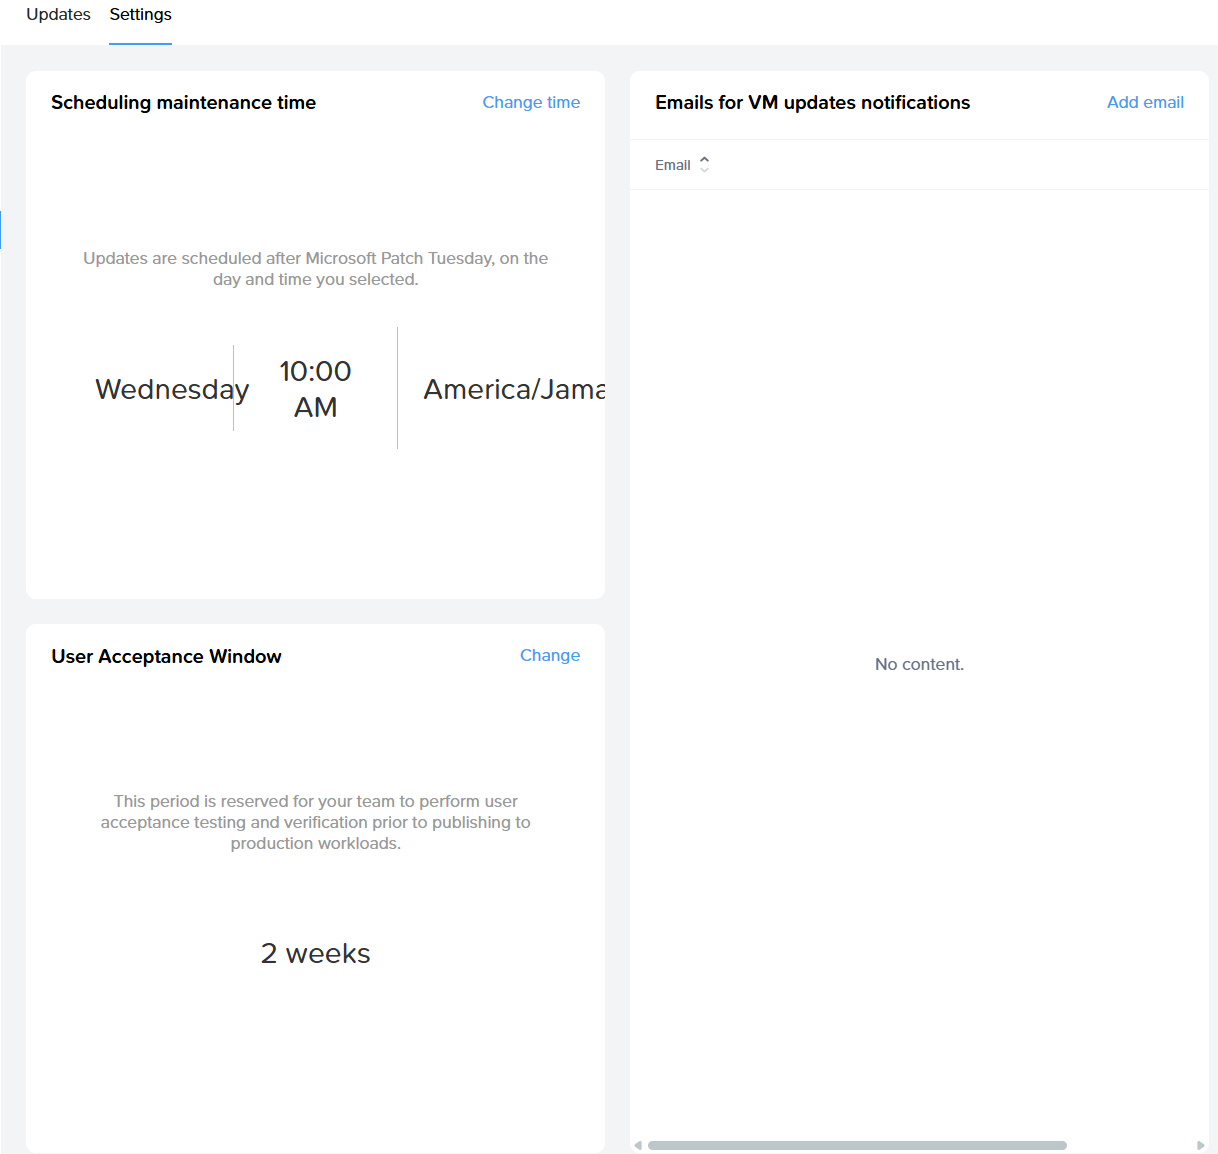](https://docs.difr.com/uploads/images/gallery/2025-10/image-1760698757345.png) ### Task List During Maintenance Window When the maintenance window starts, the system triggers the **Managed Updates – Phase 1 task**, which includes: - Backup Sandbox - Power on Sandbox - Identify available Windows updates and update internal records - Execute updates on Sandbox - Roll back if updates fail - Run test publish - Notify admin Progress can be tracked in the task progress list. After completion, you should accept the changes. **Task #2** will begin after the User Acceptance Window expires. **Managed Updates Phase 2 Tasks:** - Run Production Publish - Execute Windows Updates on Utility Servers (same process as Sandbox, without publish) --- # Managed Updates – Guide for Persistent Accounts ### Step 1 Go to the **Updates (EA)** page and click **Enable Managed Updates**. [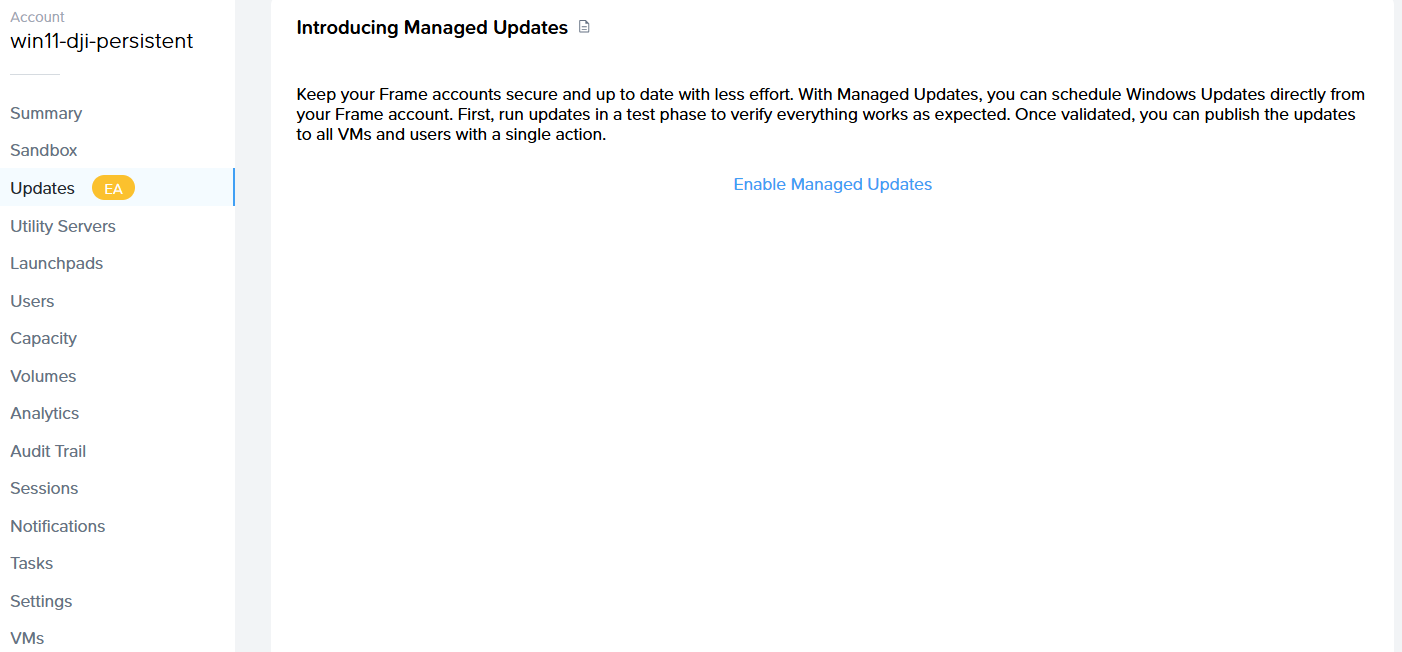](https://docs.difr.com/uploads/images/gallery/2025-10/d3Timage.png)**Note:** Managed Updates are per-account settings.
### Step 2 Configure **Update Settings**: - ### Schedule maintenance time - As this feature covers only Windows Updates released on Microsoft Patch Tuesday, please set the correct time and date for task execution.**IMPORTANT:** While update tasks are running, no actions can be performed on the Sandbox (publishing, power on, start session, etc.).
### User Acceptance VMs & Window - **User Acceptance VMs** – select which VMs will be part of User Acceptance. After the initial Sandbox update and publish, these VMs automatically receive the updates for validation. - **User Acceptance Window Logic:** Once updates are installed and published to the selected User Acceptance VMs, administrators have **up to 3 weeks** to log in, verify stability, and then either: - **a)** Accept the test in the **Updates** page, or - **b)** Wait for the User Acceptance Window to expire — after which Frame automatically publishes changes to all Production VMs. ### Emails for VM Update Notifications – set the email address to receive notifications about the update process. [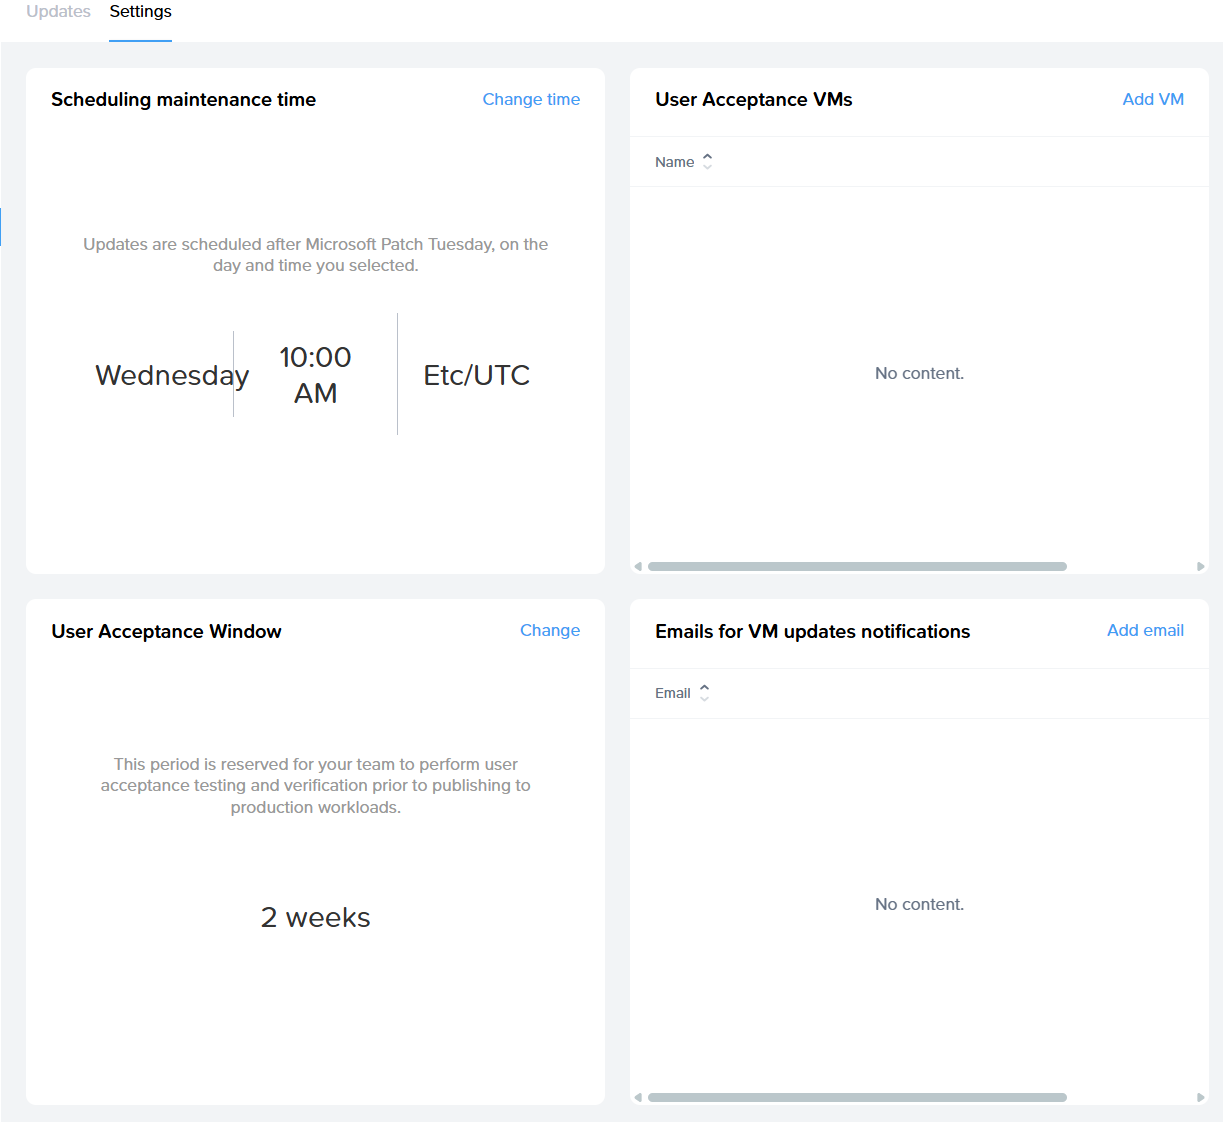](https://docs.difr.com/uploads/images/gallery/2025-10/image-1760698697337.png) ### Task List During Maintenance Window When the maintenance window starts, the system triggers the **Managed Updates – Phase 1 task**, which includes: - Backup Sandbox - Power on Sandbox - Identify available Windows updates and update internal records - Execute updates on Sandbox - Roll back if updates fail - Execute updates on User Acceptance VMs - Notify admin Progress can be monitored in the task progress list. After completion, the customer should accept the changes. **Task #2** will then start. **Managed Updates - Phase 2 tasks:** - Run Production Publish - Execute Windows Updates on Utility Servers (same process as Sandbox, without publish) - Execute Windows Updates on remaining VMs not included in the User Acceptance list