# Entra ID Integration
Entra ID with Azure, Nutanix AHV, Entra ID Joined Devices
# Nutanix AHV
Frame supports Entra joined devices on AHV for Windows 10/11 operating systems in persistent desktop Frame Accounts.
## Prerequisites
- Bring Your Own (BYO) Azure subscription
- Entra ID Tenant
- New or existing Windows 10/11 persistent desktop Frame Account
## Setup
1. Navigate to the persistent desktop Frame Account **Dashboard** within your AHV cluster in *Frame Console*.
2. Go to the **Settings** page, click on **Domain Settings** and select **Entra ID**. Then, click the **Save** button.
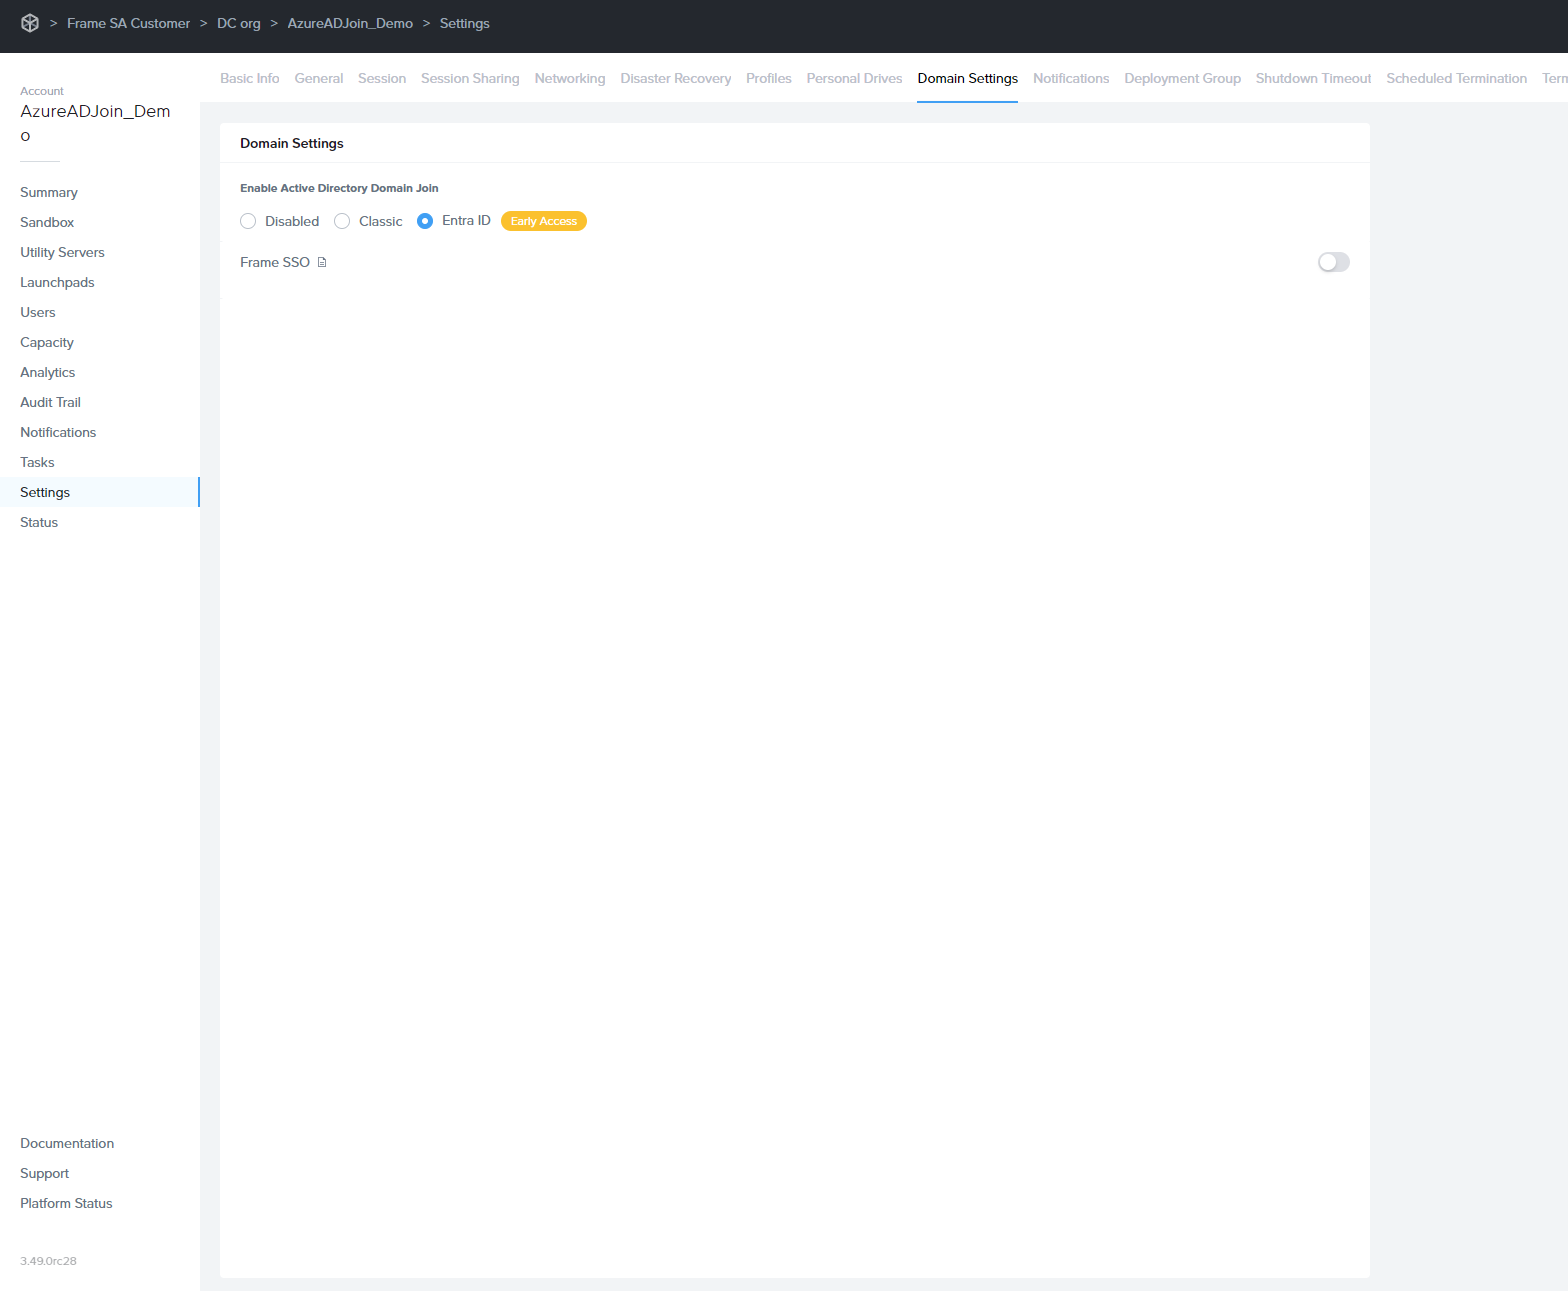
The Entra joined device feature requires users to login with their Entra ID user account.
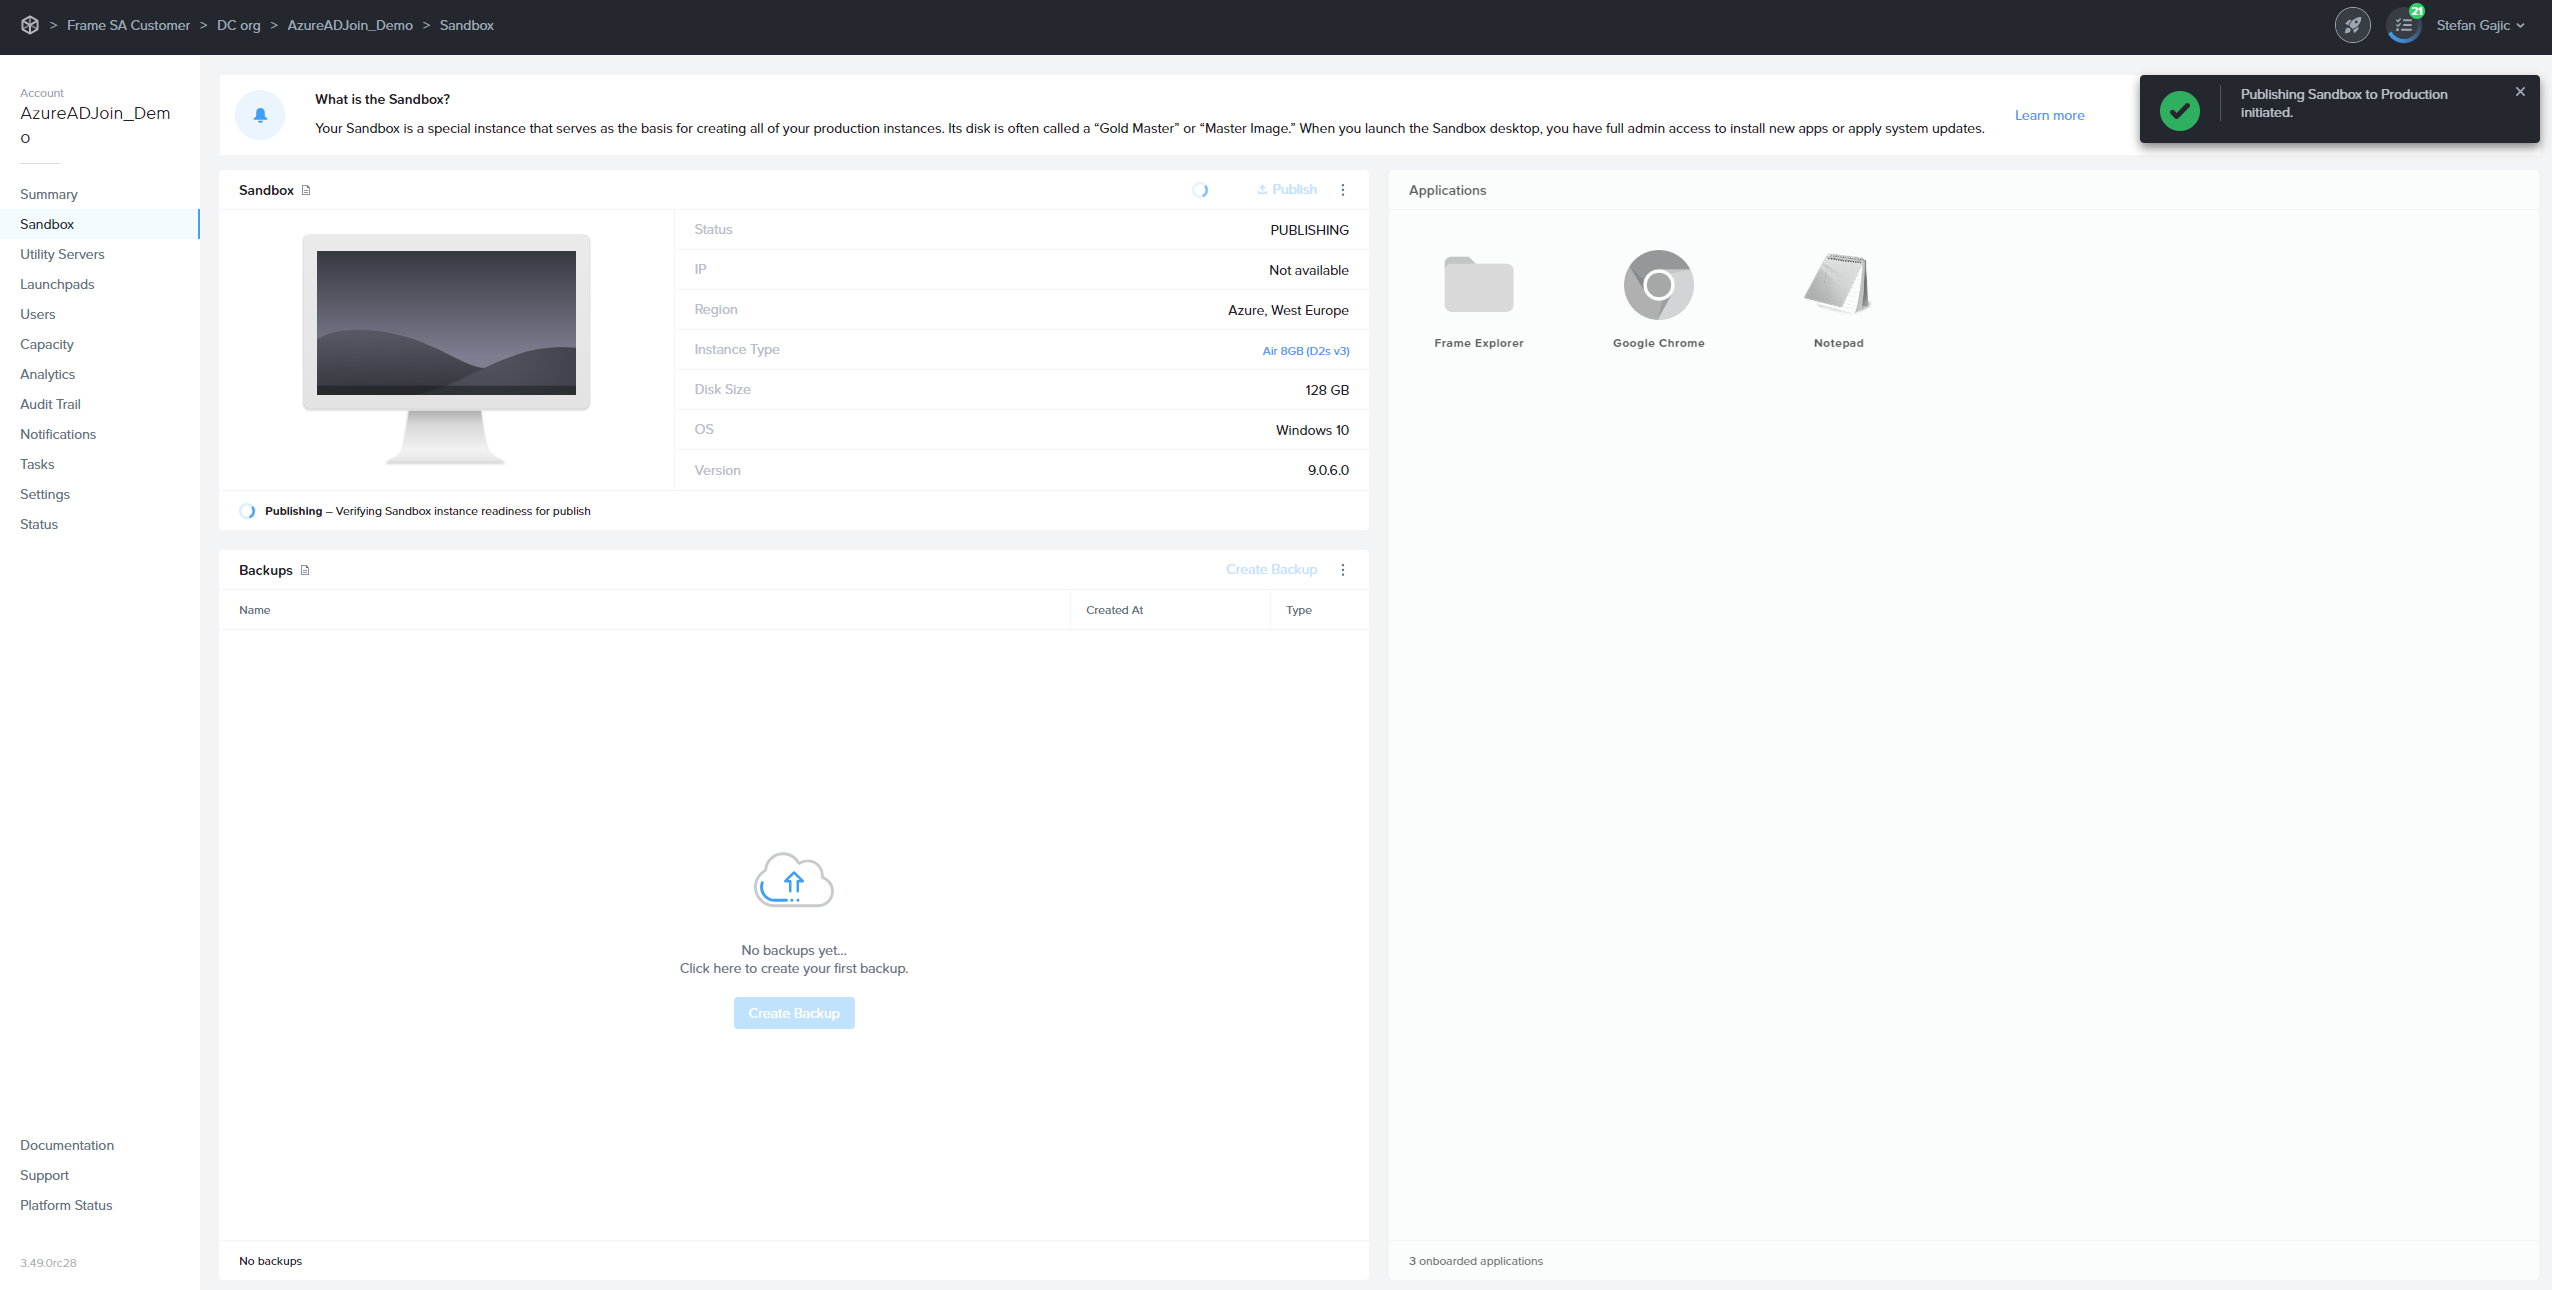
3. Navigate to the **Sandbox** page, and *Publish* the *Sandbox*.
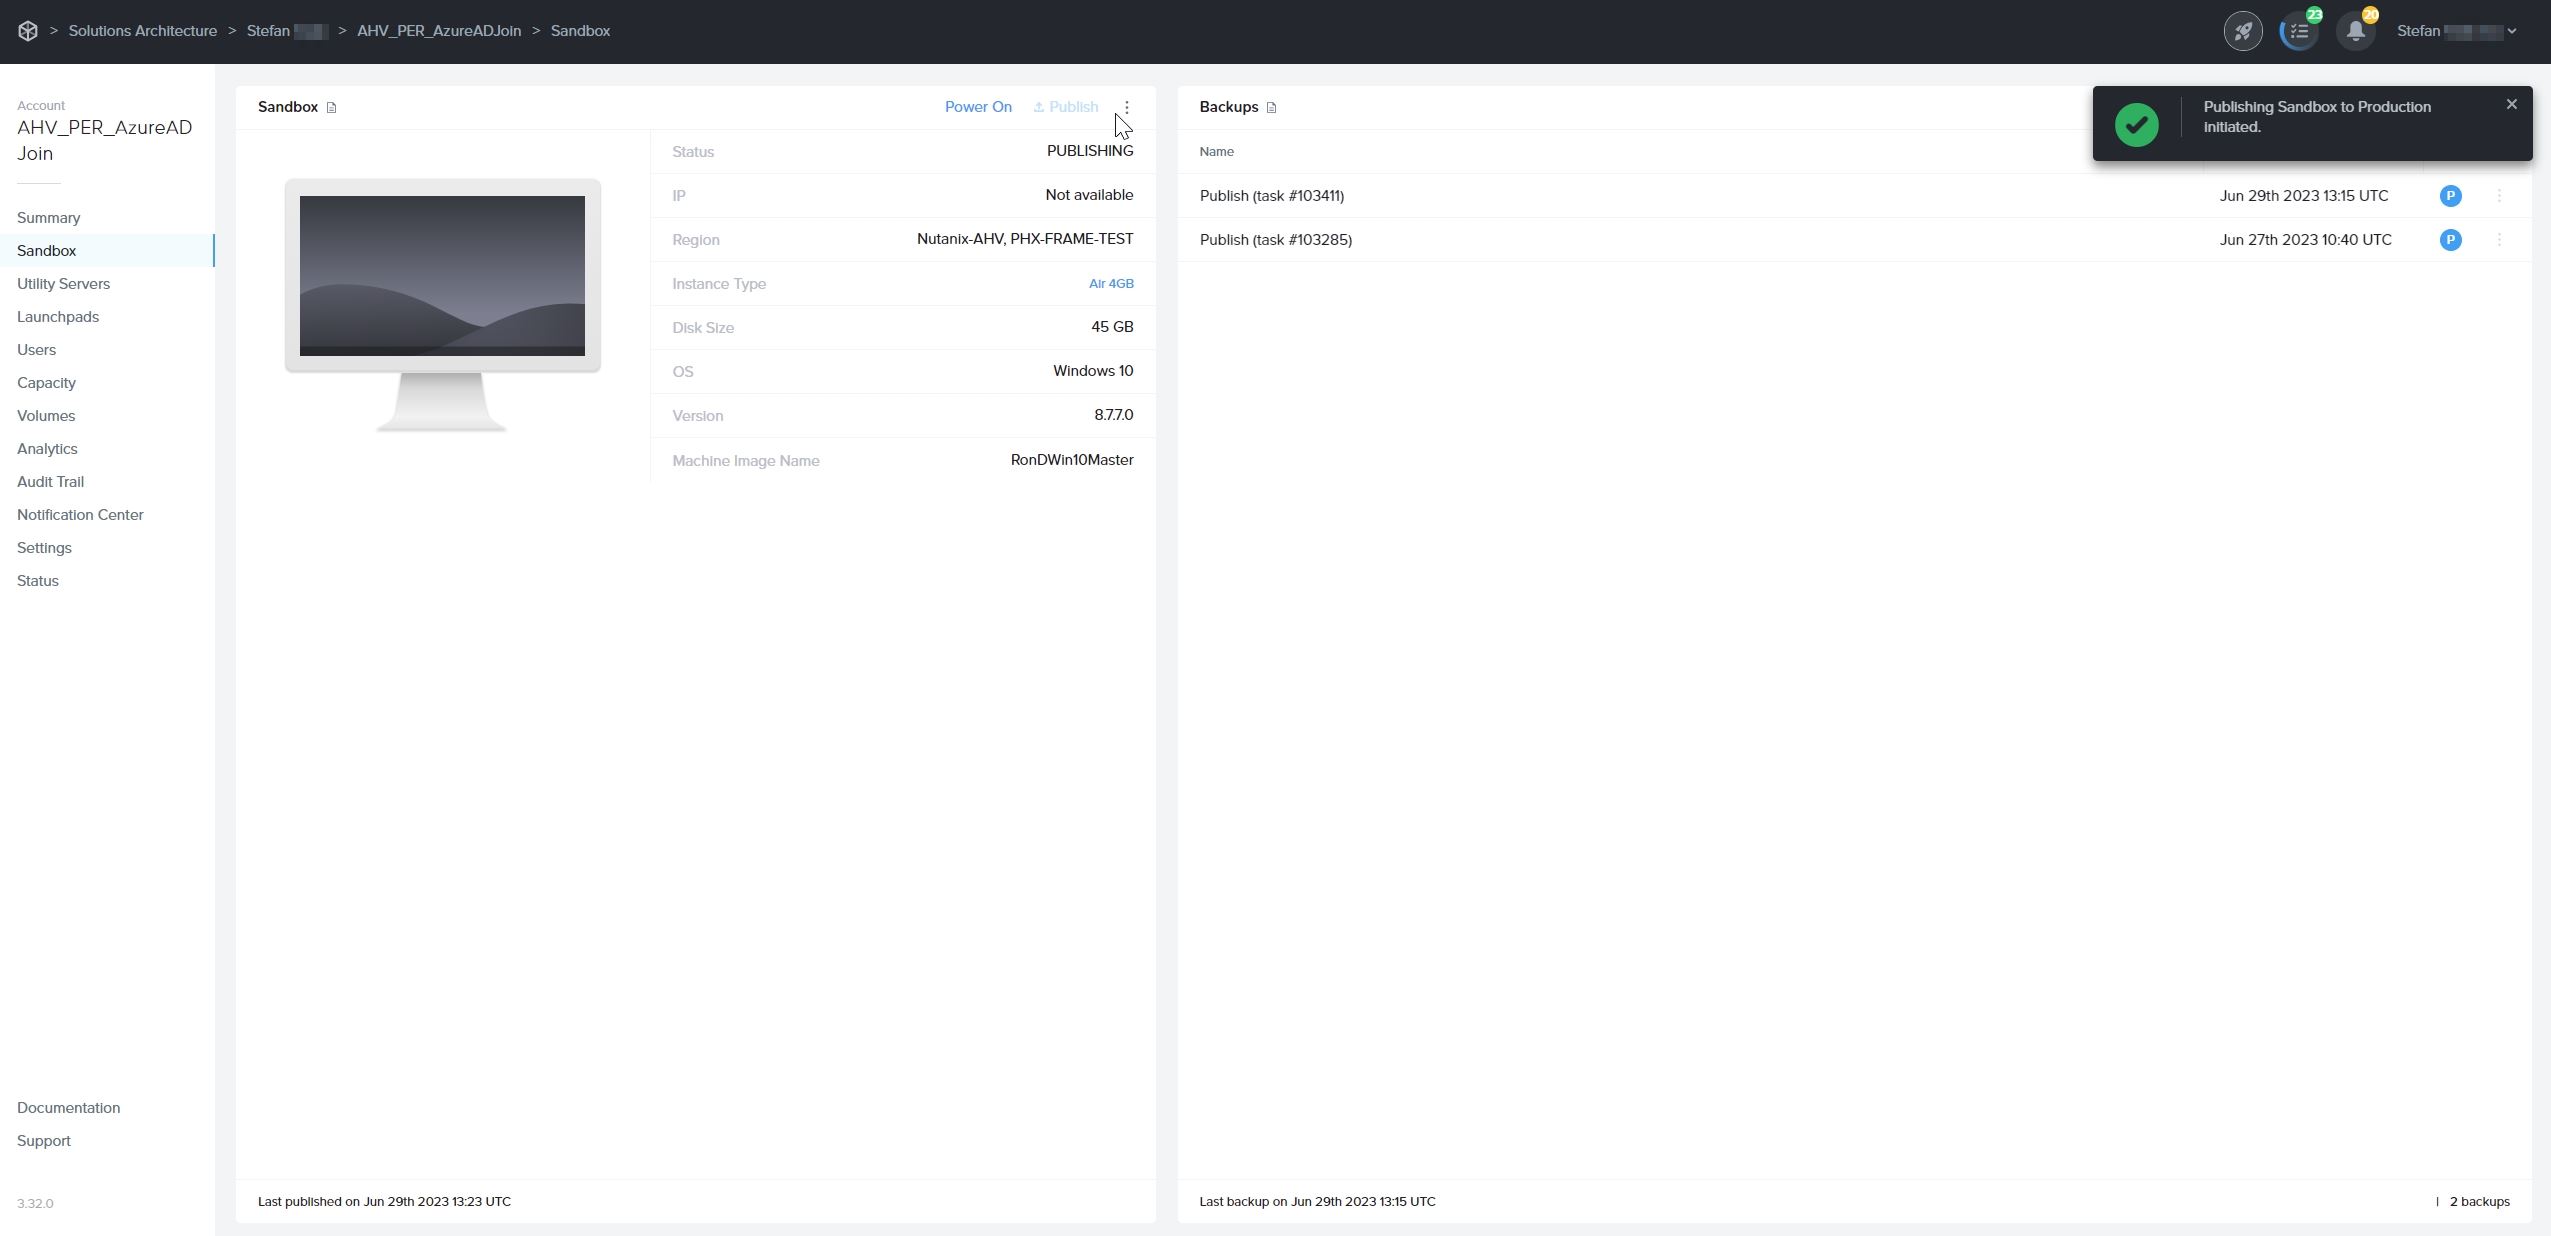
Only test and production pool VMs will be Entra device joined. *Sandbox* and *Utility server(s)* will not be Entra device joined. If you wish to join your *Utility server(s)* to your Entra ID tenant, they must be joined manually.
**Do not** join the *Sandbox* to Entra ID as this action can lead to sysprep failures during the publish process.
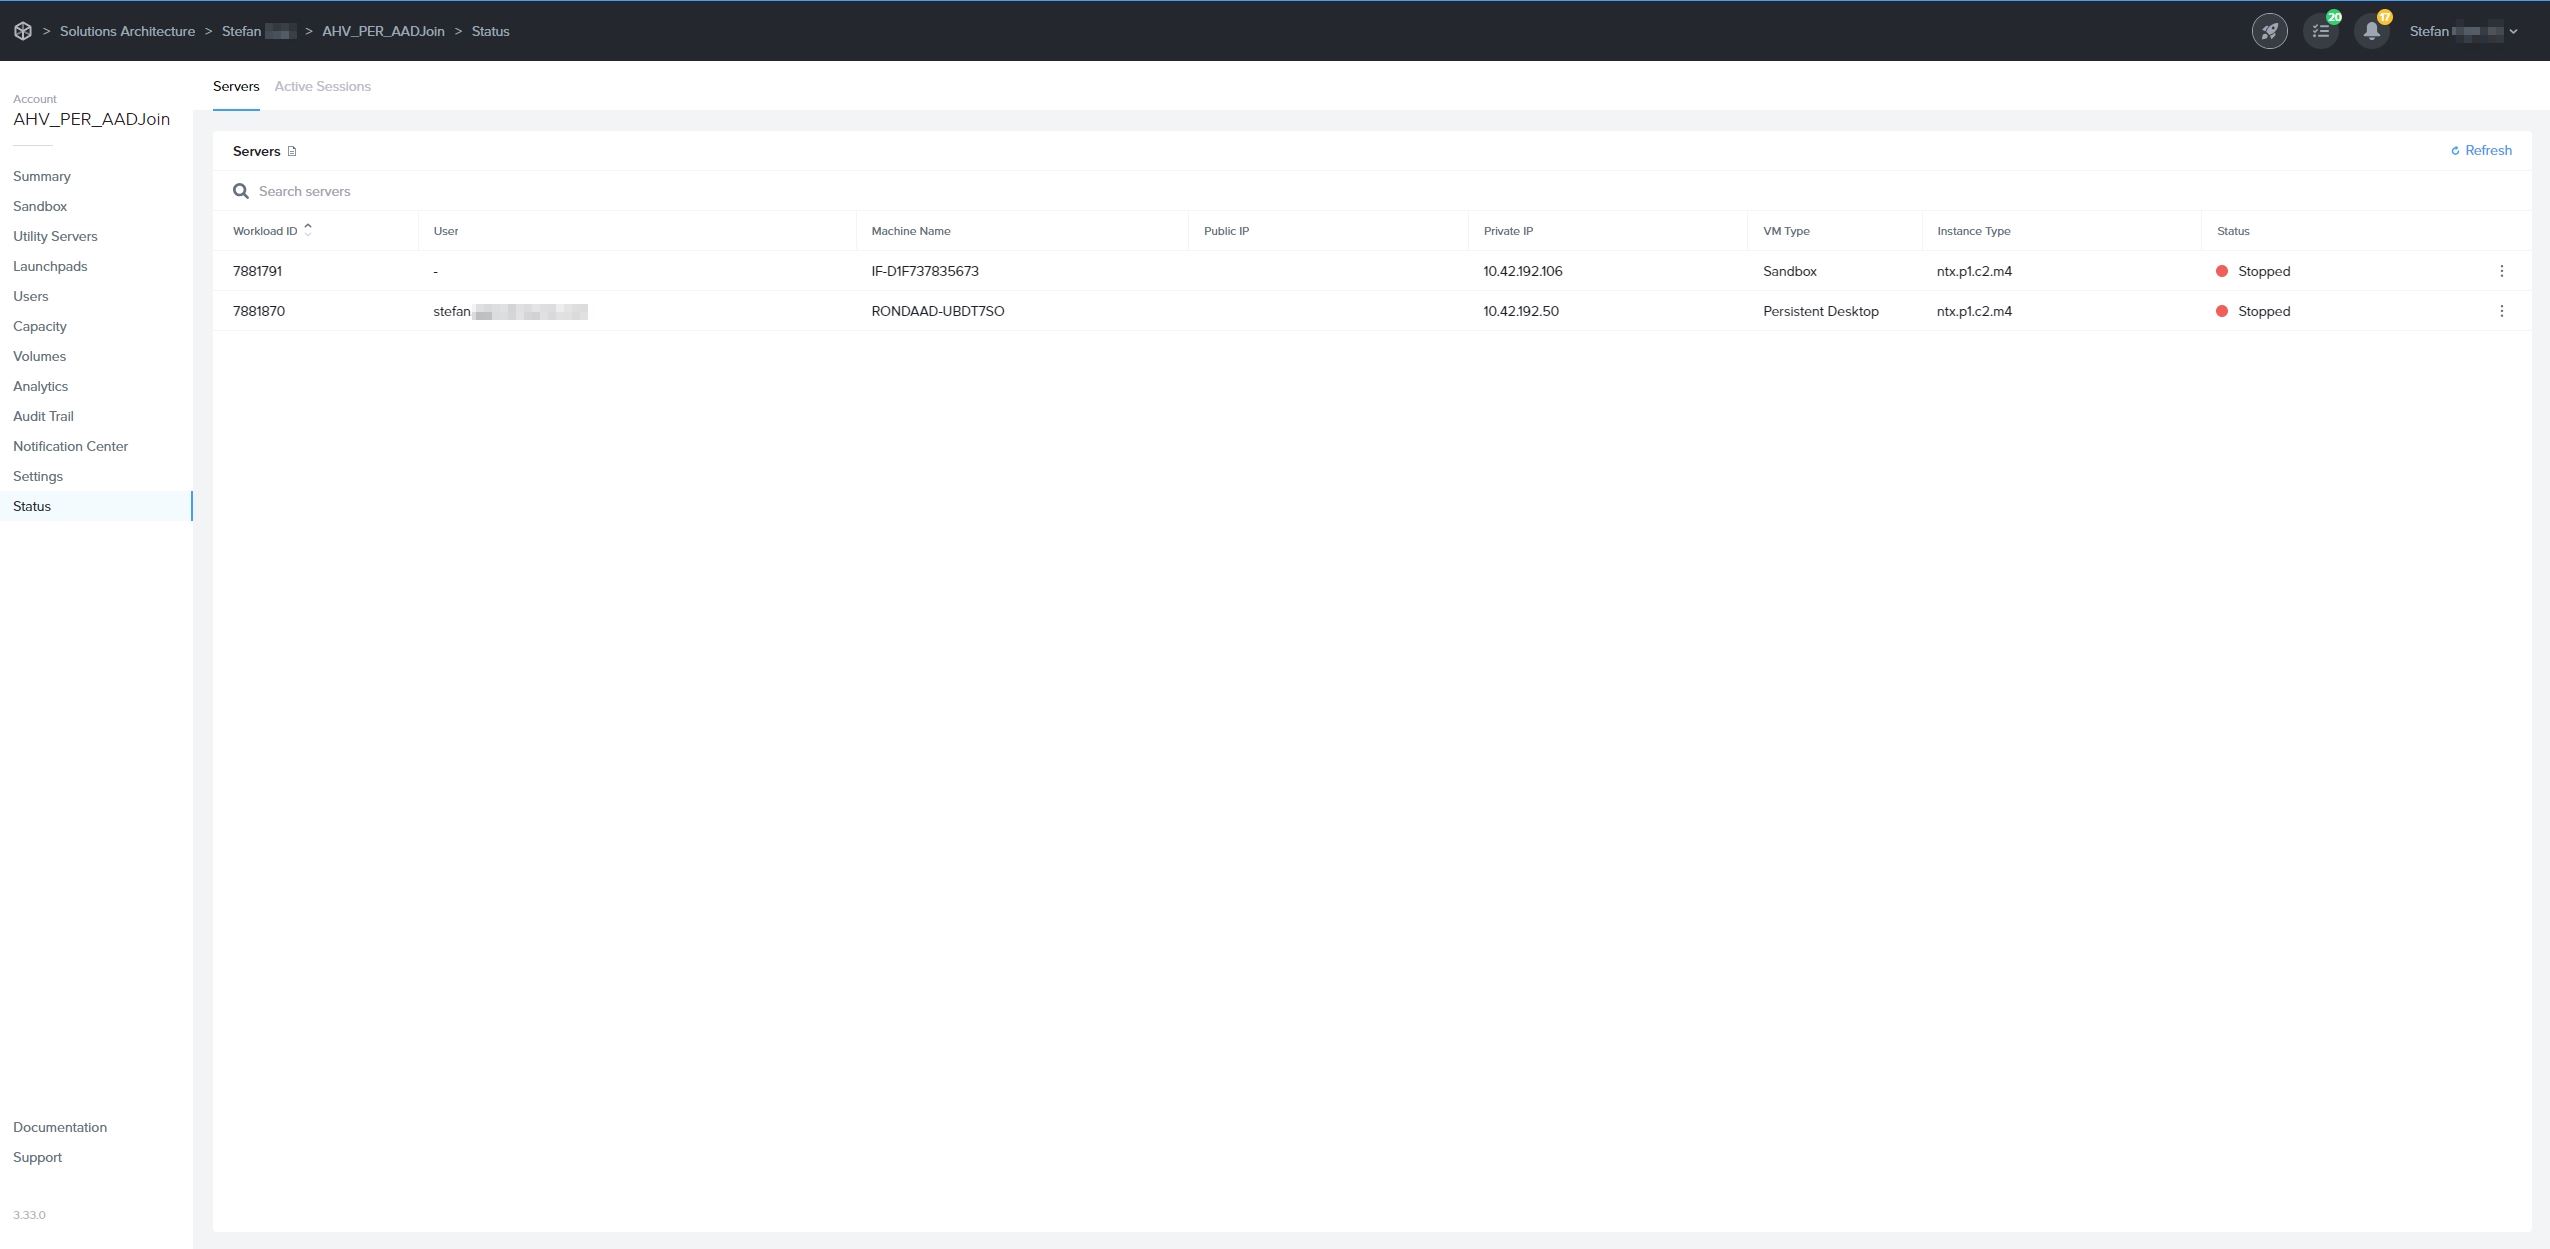
4. After a successful publish, navigate to the **Status** page to check the status of your VMs. You will notice that Entra joined devices have a [prefix](https://docs.difr.com/platform/admin/domain/entra#windows-hostname-prefix) in their hostnames.
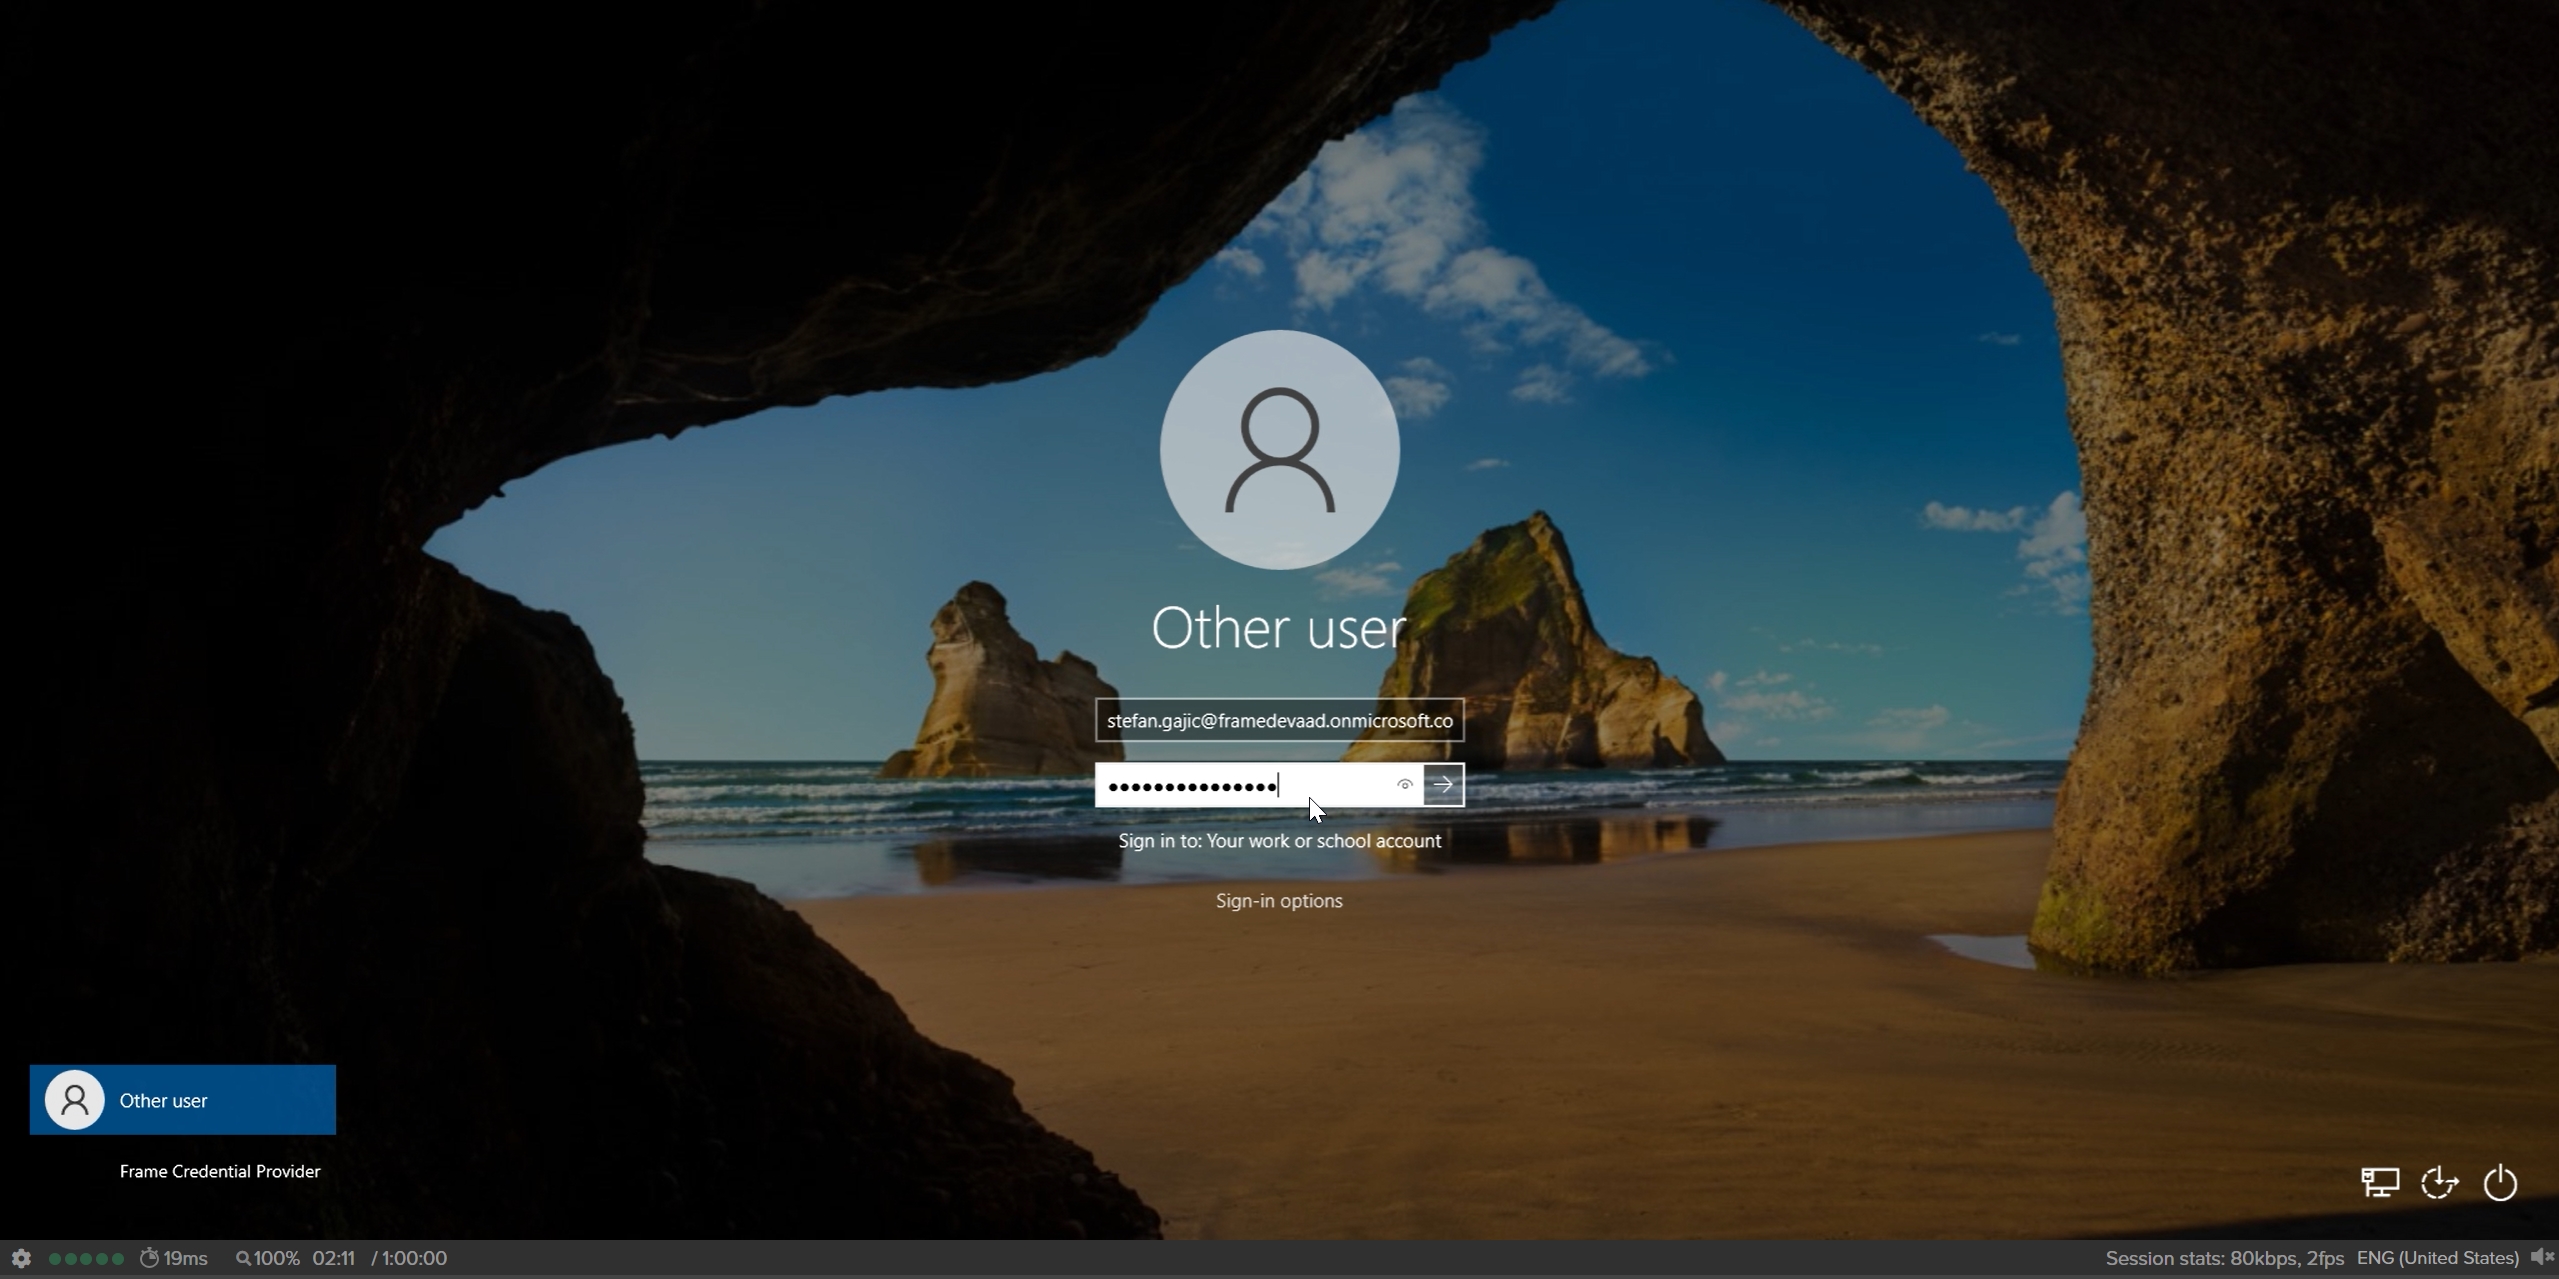
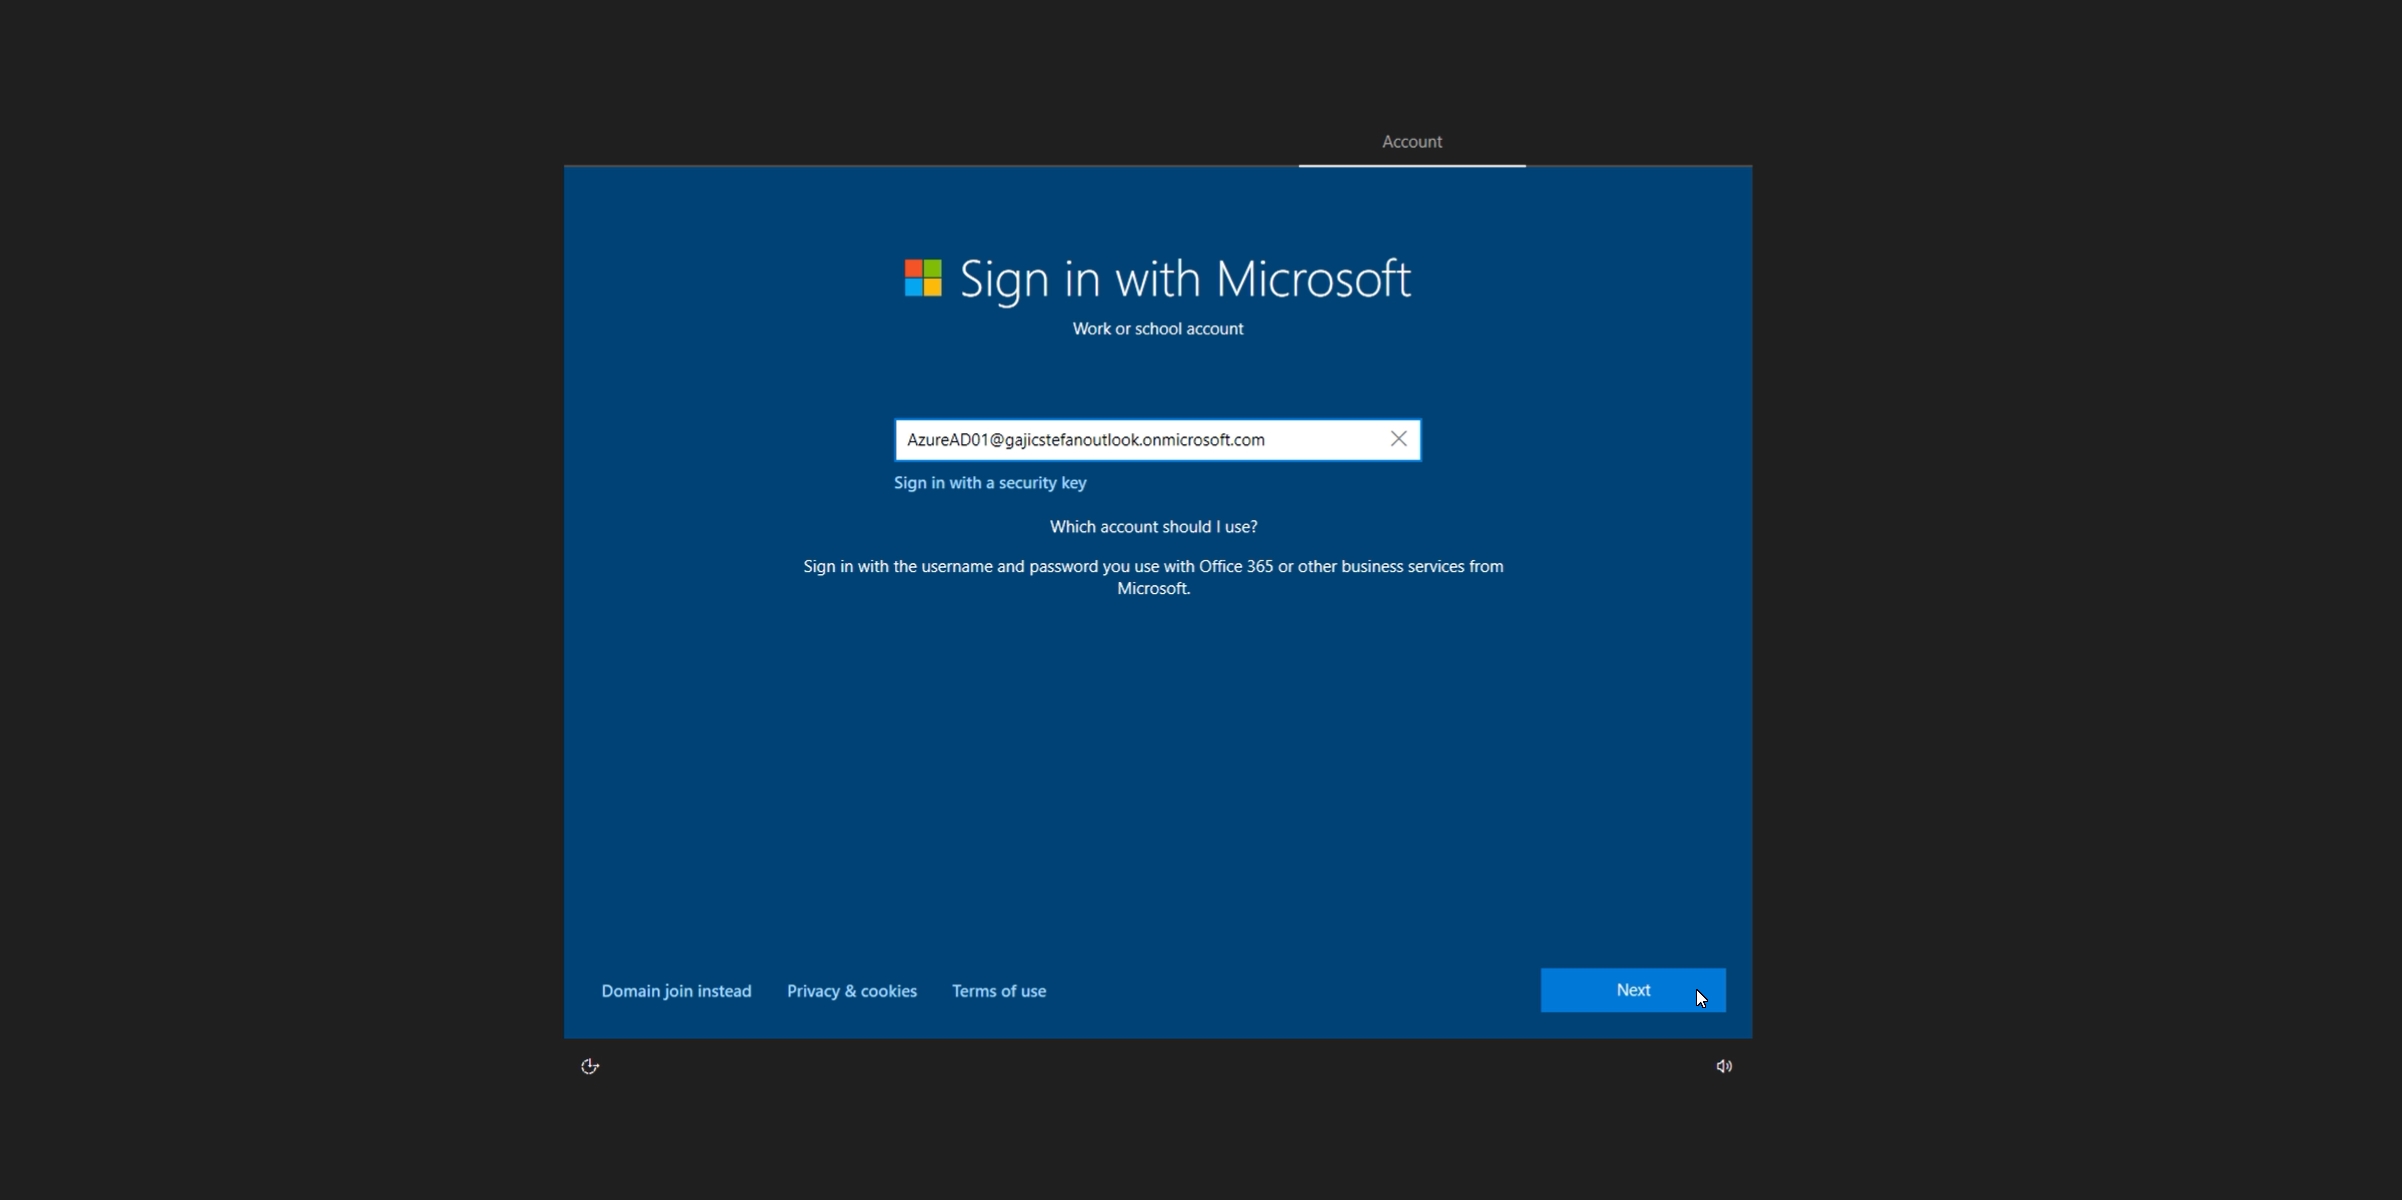
5. When end users log into their assigned VM, they will be asked to enter their Entra ID credentials as shown below:
## Windows Hostname Prefix
The Windows hostnames for Entra joined devices on AHV will be generated once the VMs are provisioned, by concatenating a prefix of 4 characters, a string "AAD-", and a 7 alphanumeric string, following the procedure described in [Microsoft's official documentation](https://learn.microsoft.com/en-us/windows-hardware/customize/desktop/unattend/microsoft-windows-shell-setup-computername).
The prefix will be the first 4 characters of the filename of the master image used to create the Frame Account *Sandbox*.
## Windows 10/11 OOBE
The first time a user accesses their Entra joined persistent desktop on AHV, the user will go through the Microsoft Windows Out of the Box Experience (OOBE). The experience will depend on whether the persistent desktop is Windows 10 or 11 Enterprise Edition or Professional Edition.
If you have a use case where you need to reassign an Entra joined persistent desktop to another user, confirm that your Entra ID policies will grant the new user local Windows administrator privileges (if this is required).
### Enterprise Edition
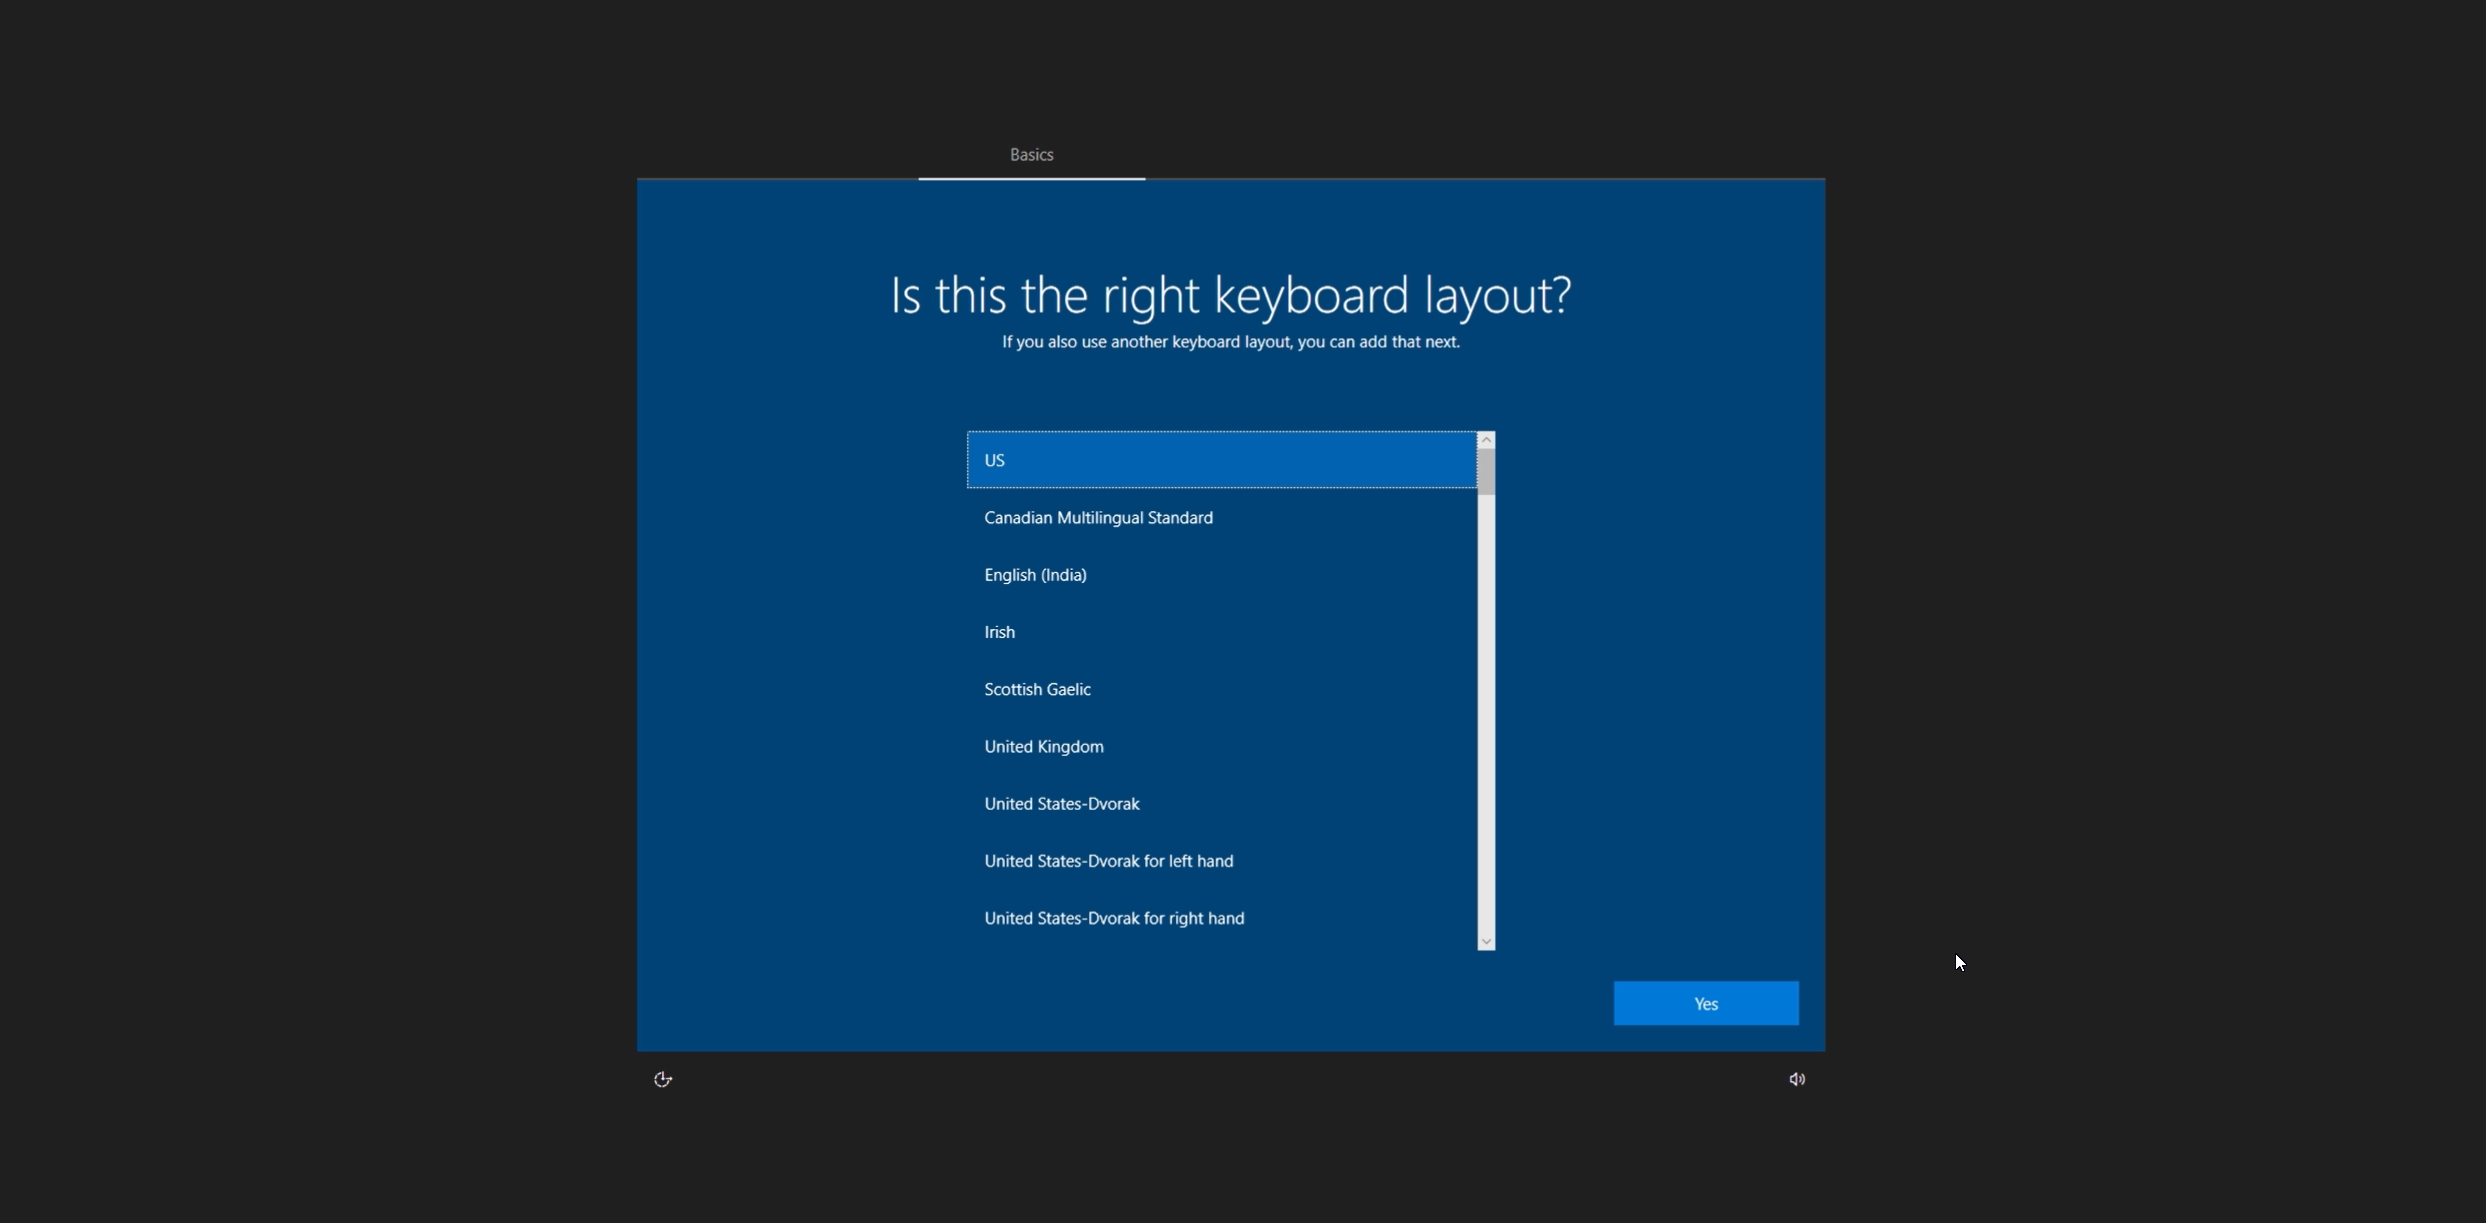
1. Upon accessing their persistent desktop for the first time, the user will be prompted to choose a region.

2. Next, select a keyboard layout.
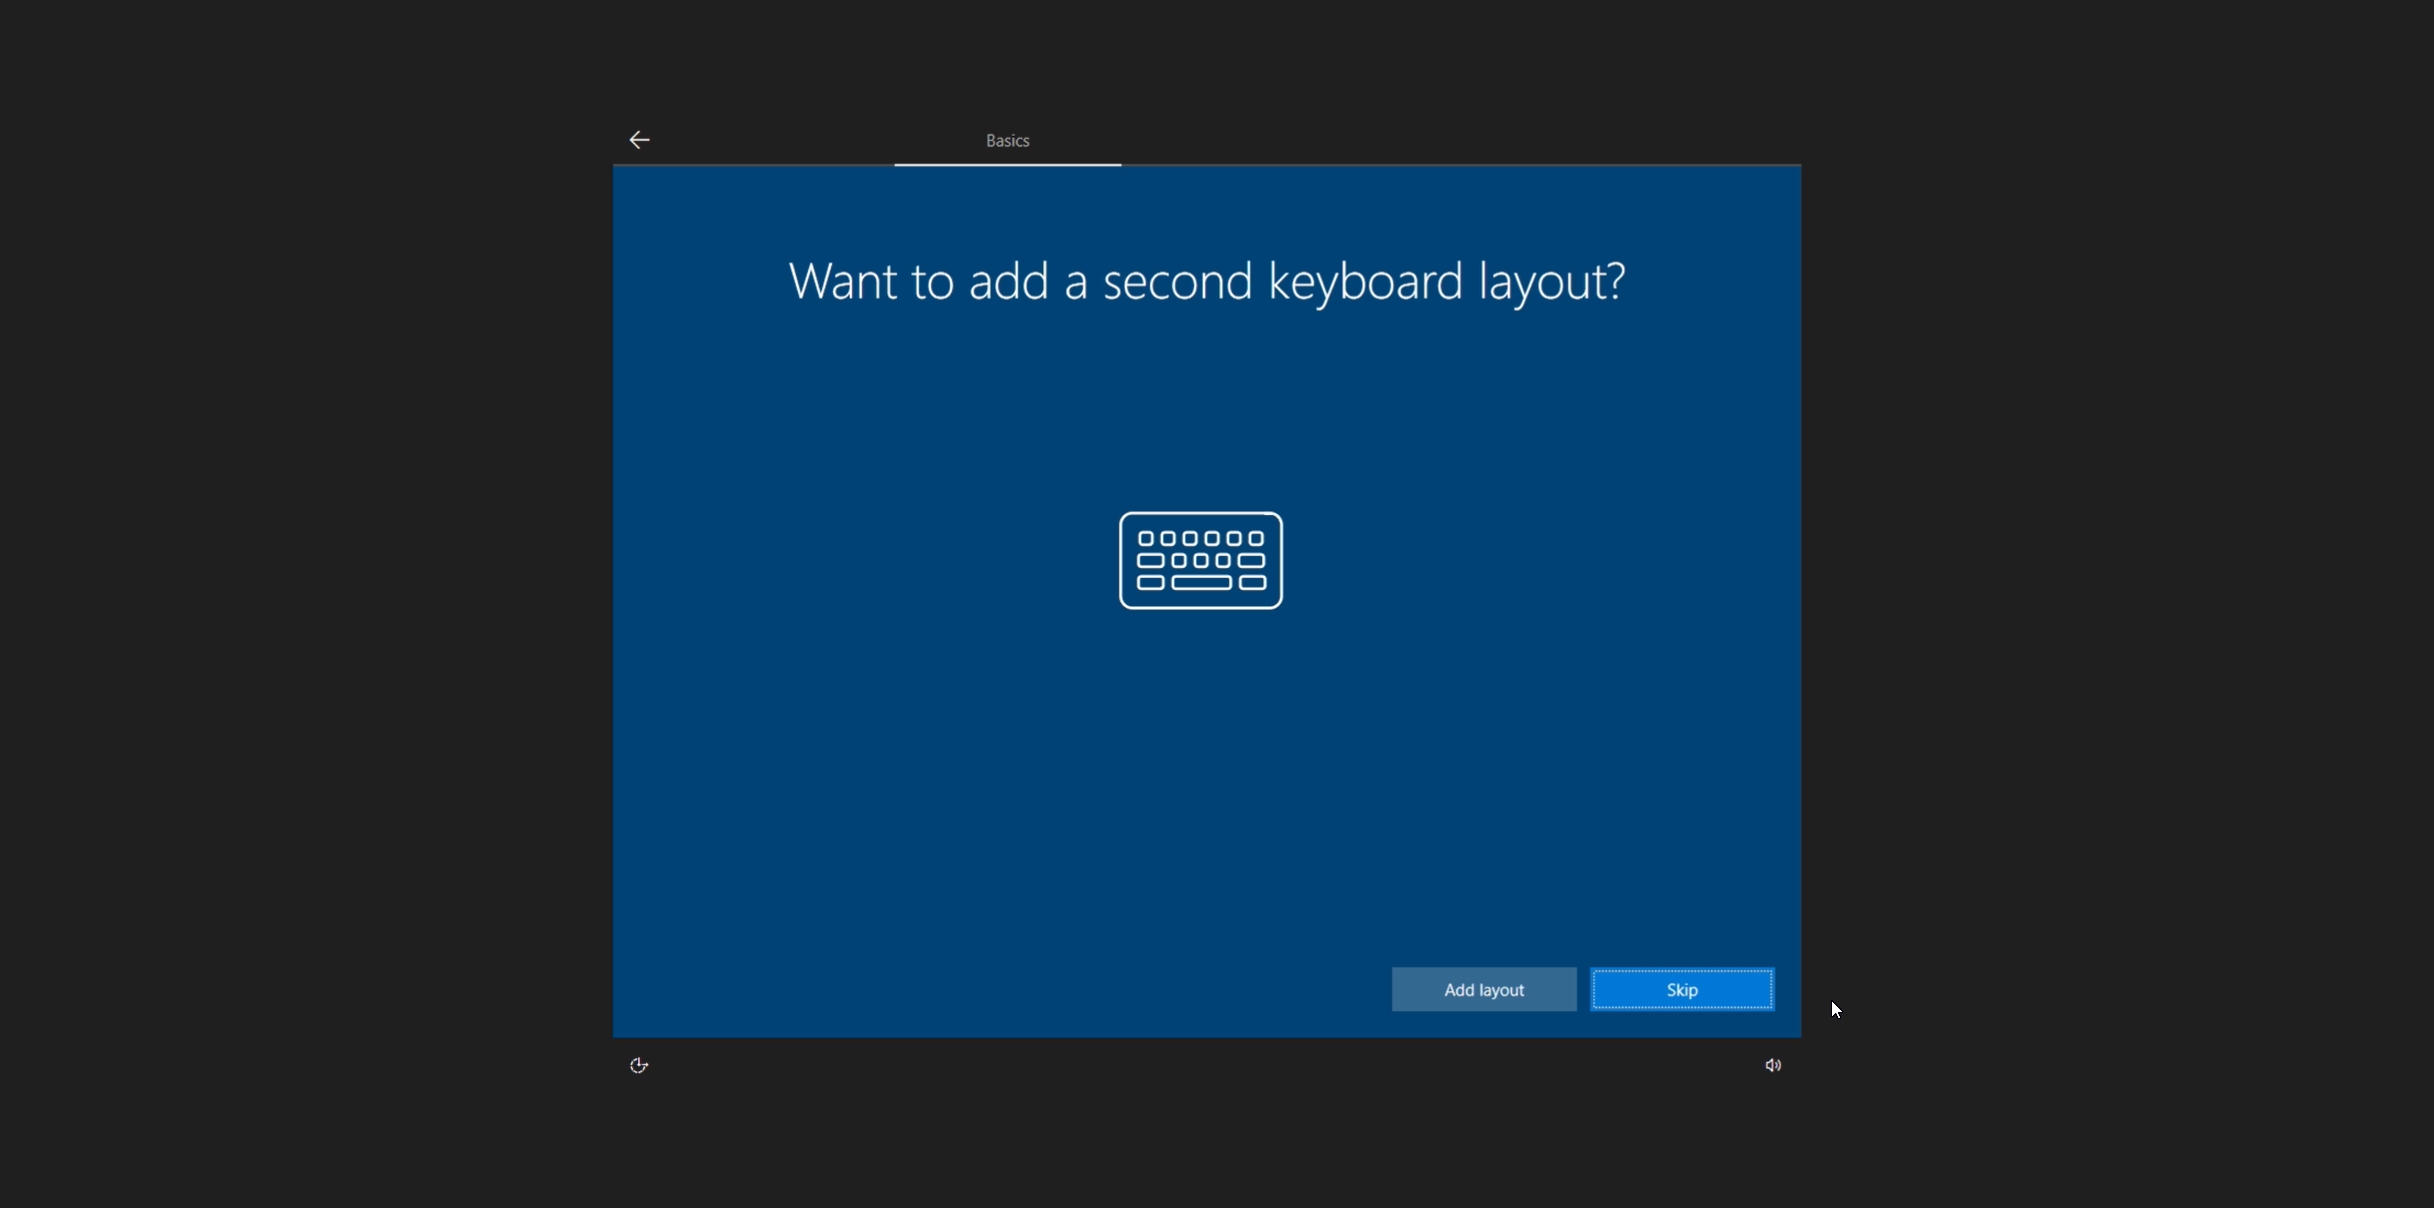
3. Optionally add a second keyboard layout.
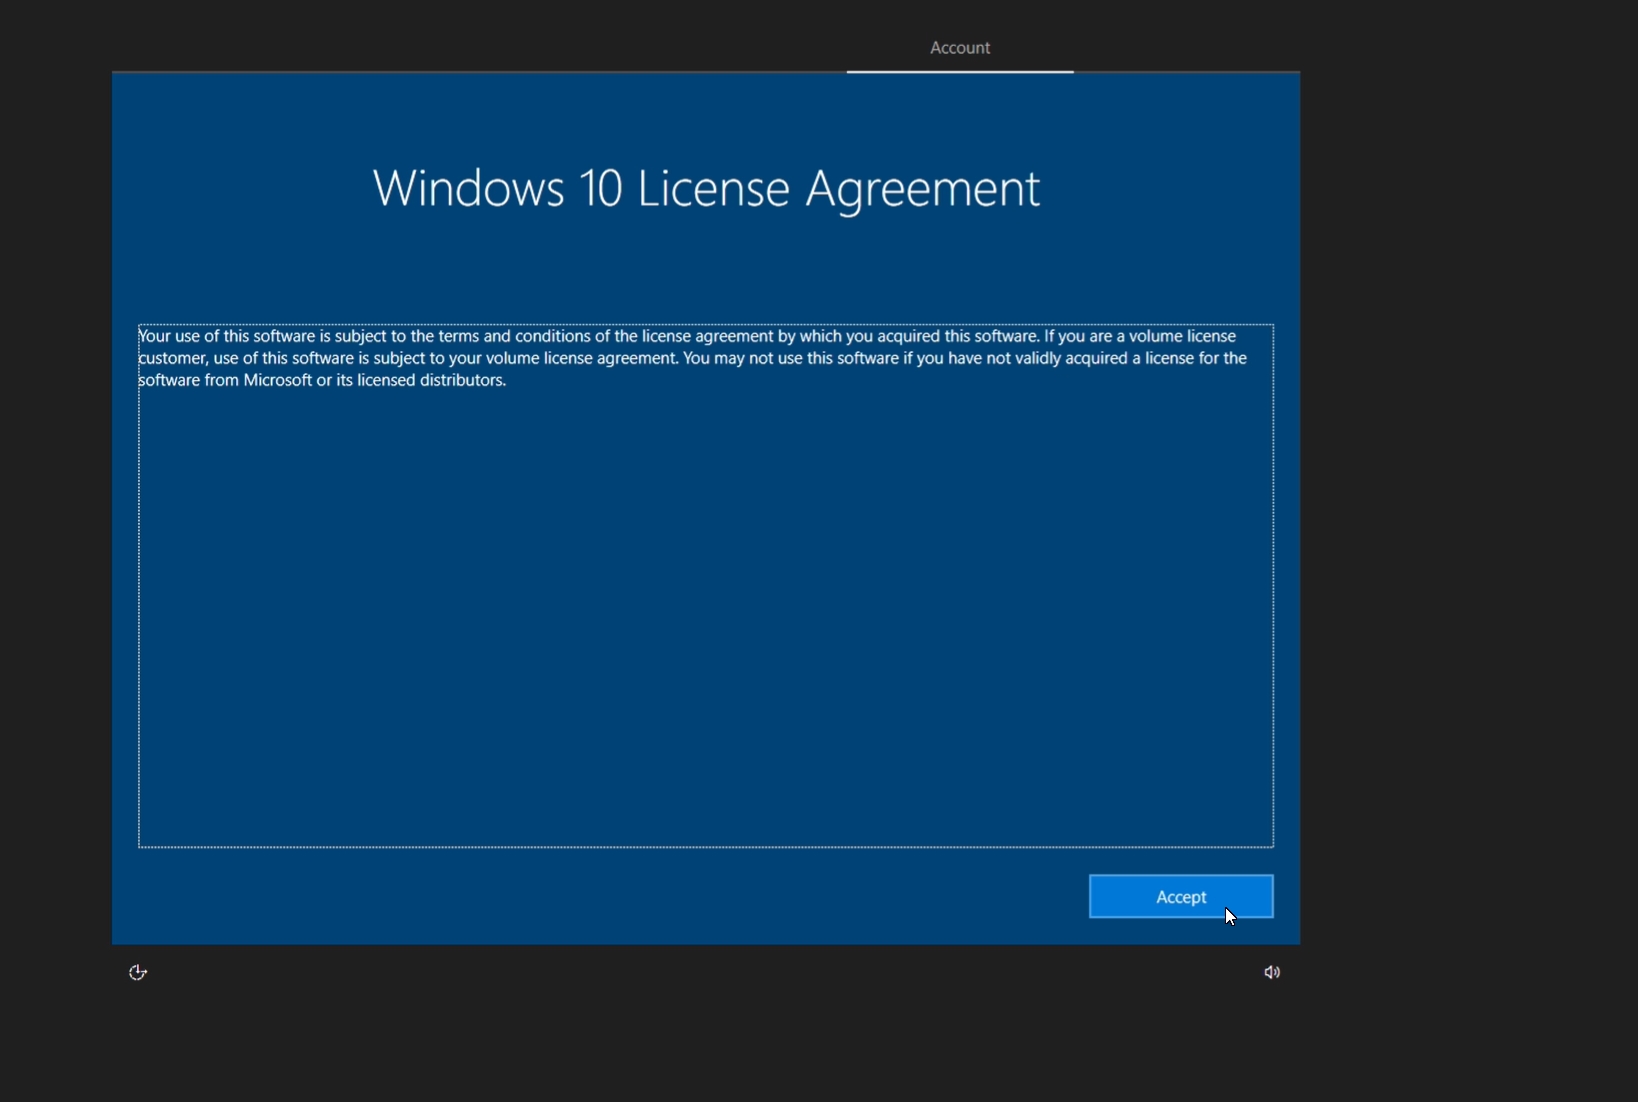
4. Review and accept the OS license agreement. By accepting the agreement, the user agrees to comply with its terms.
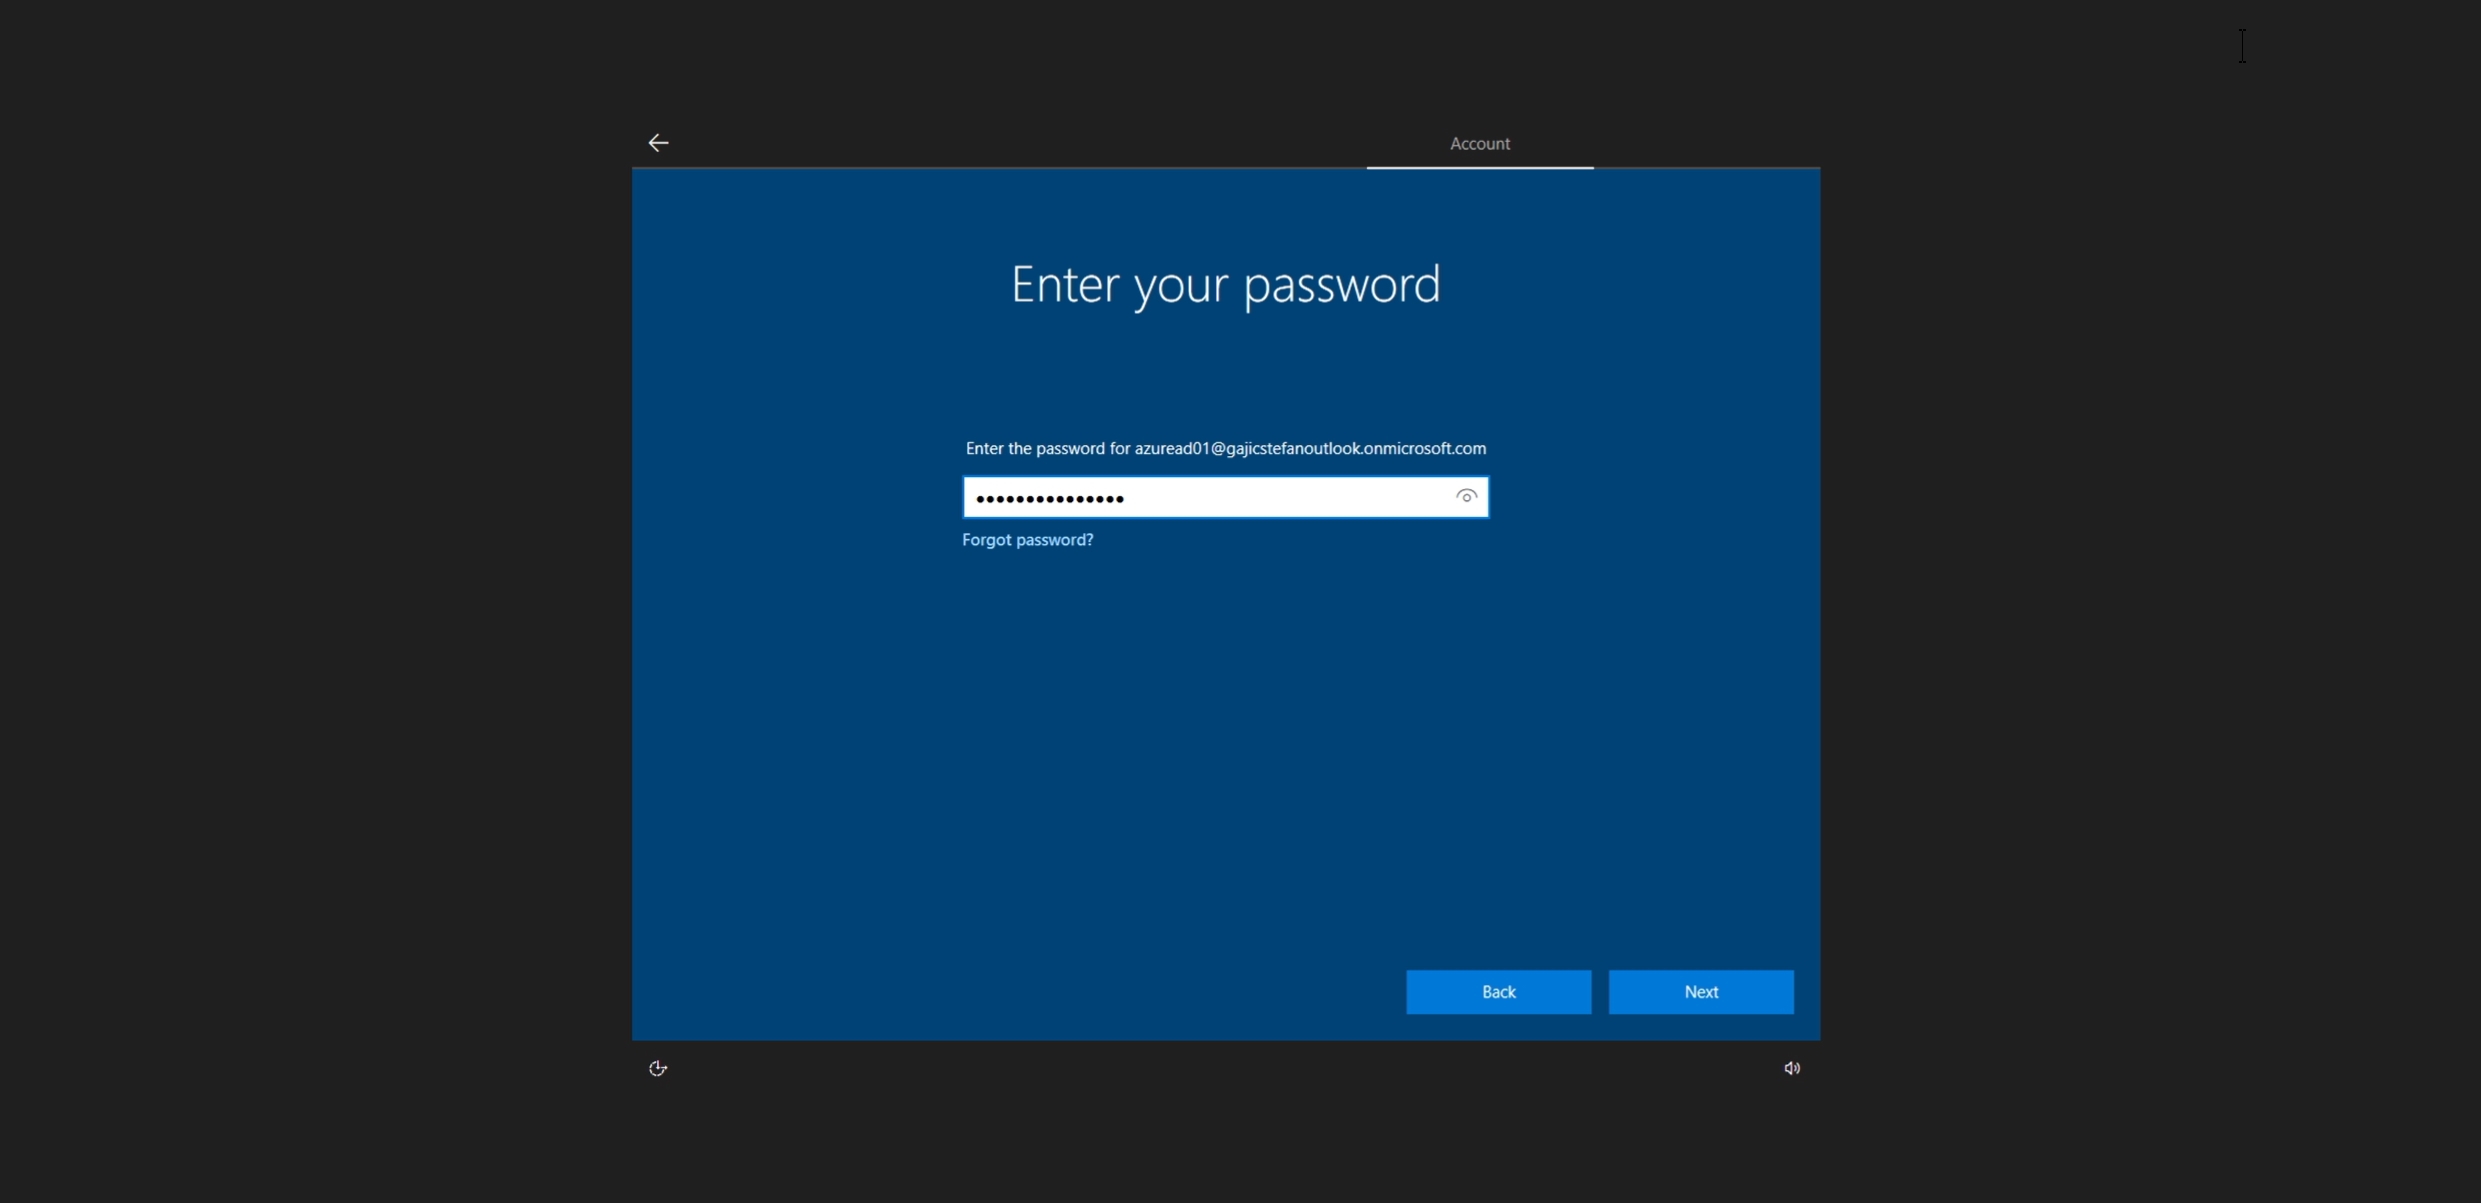
5. Next, the user will need to set up their user account by entering their Entra ID username.
6. On the next page, they'll be prompted to enter their Entra ID password.
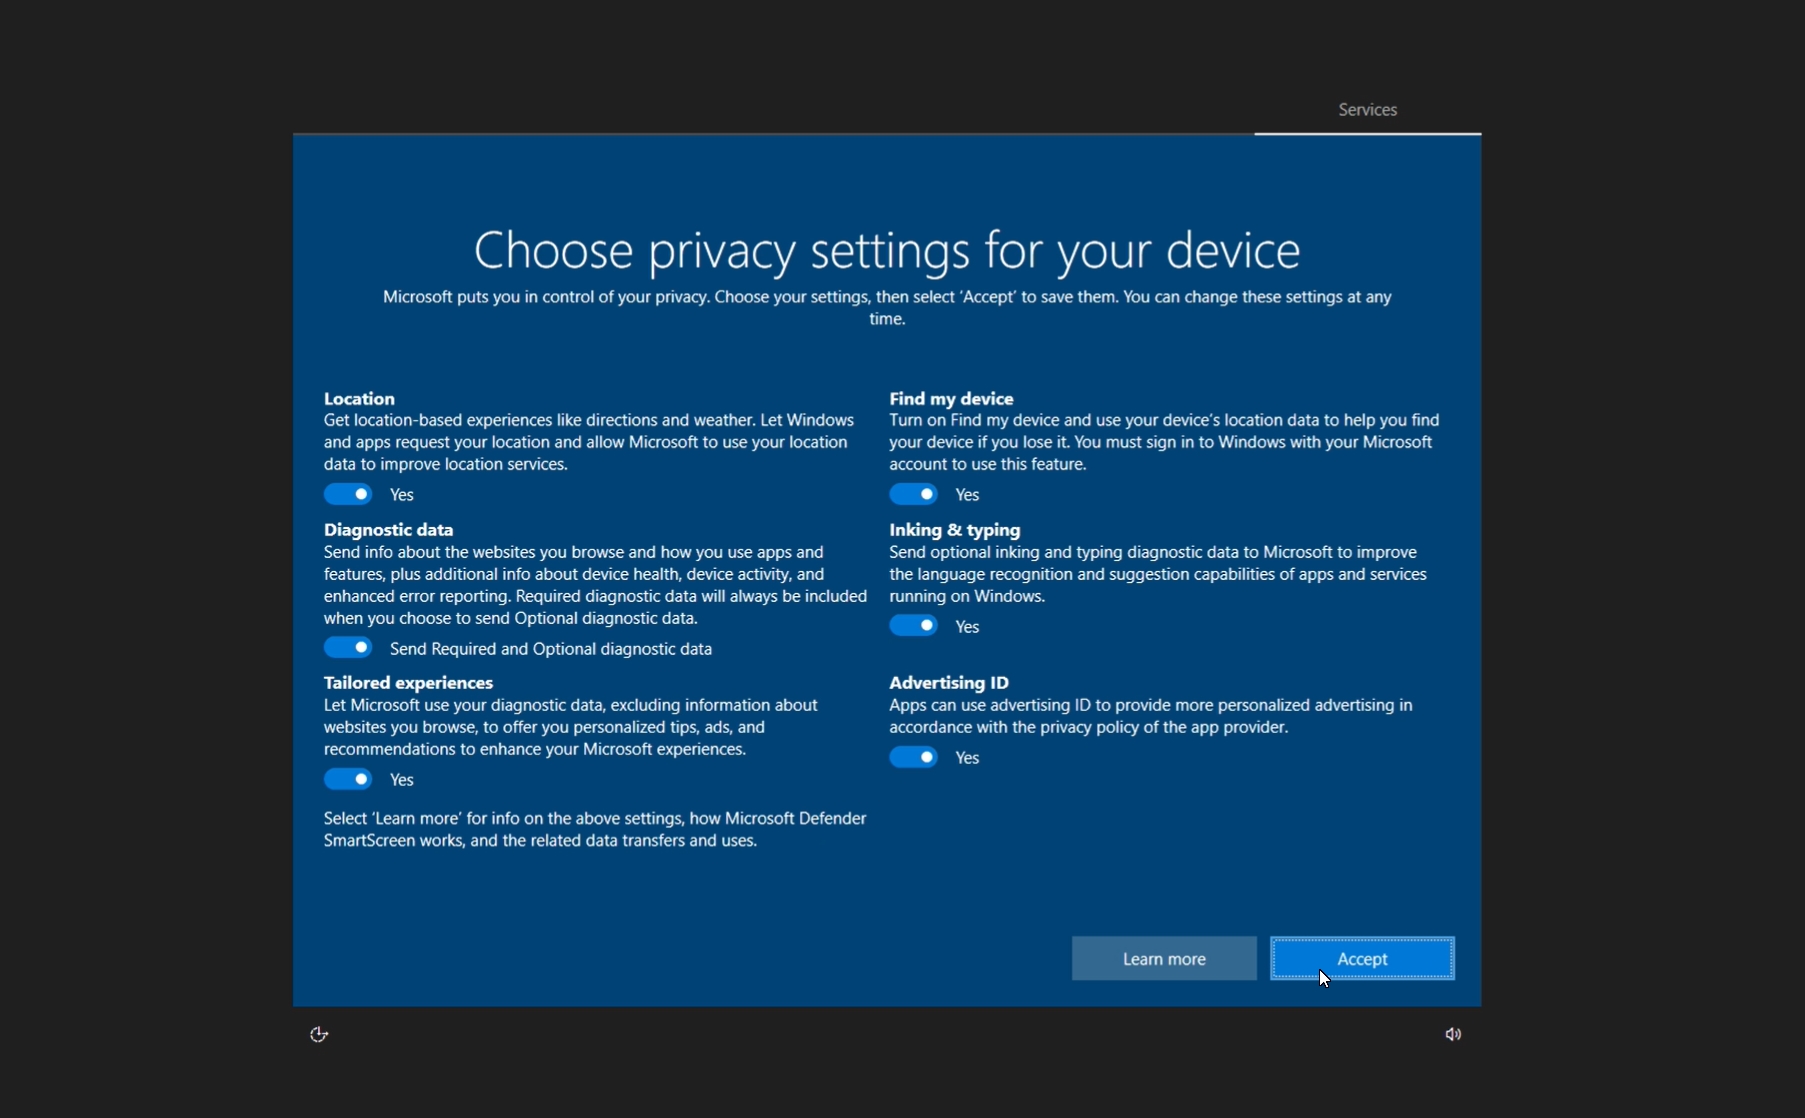
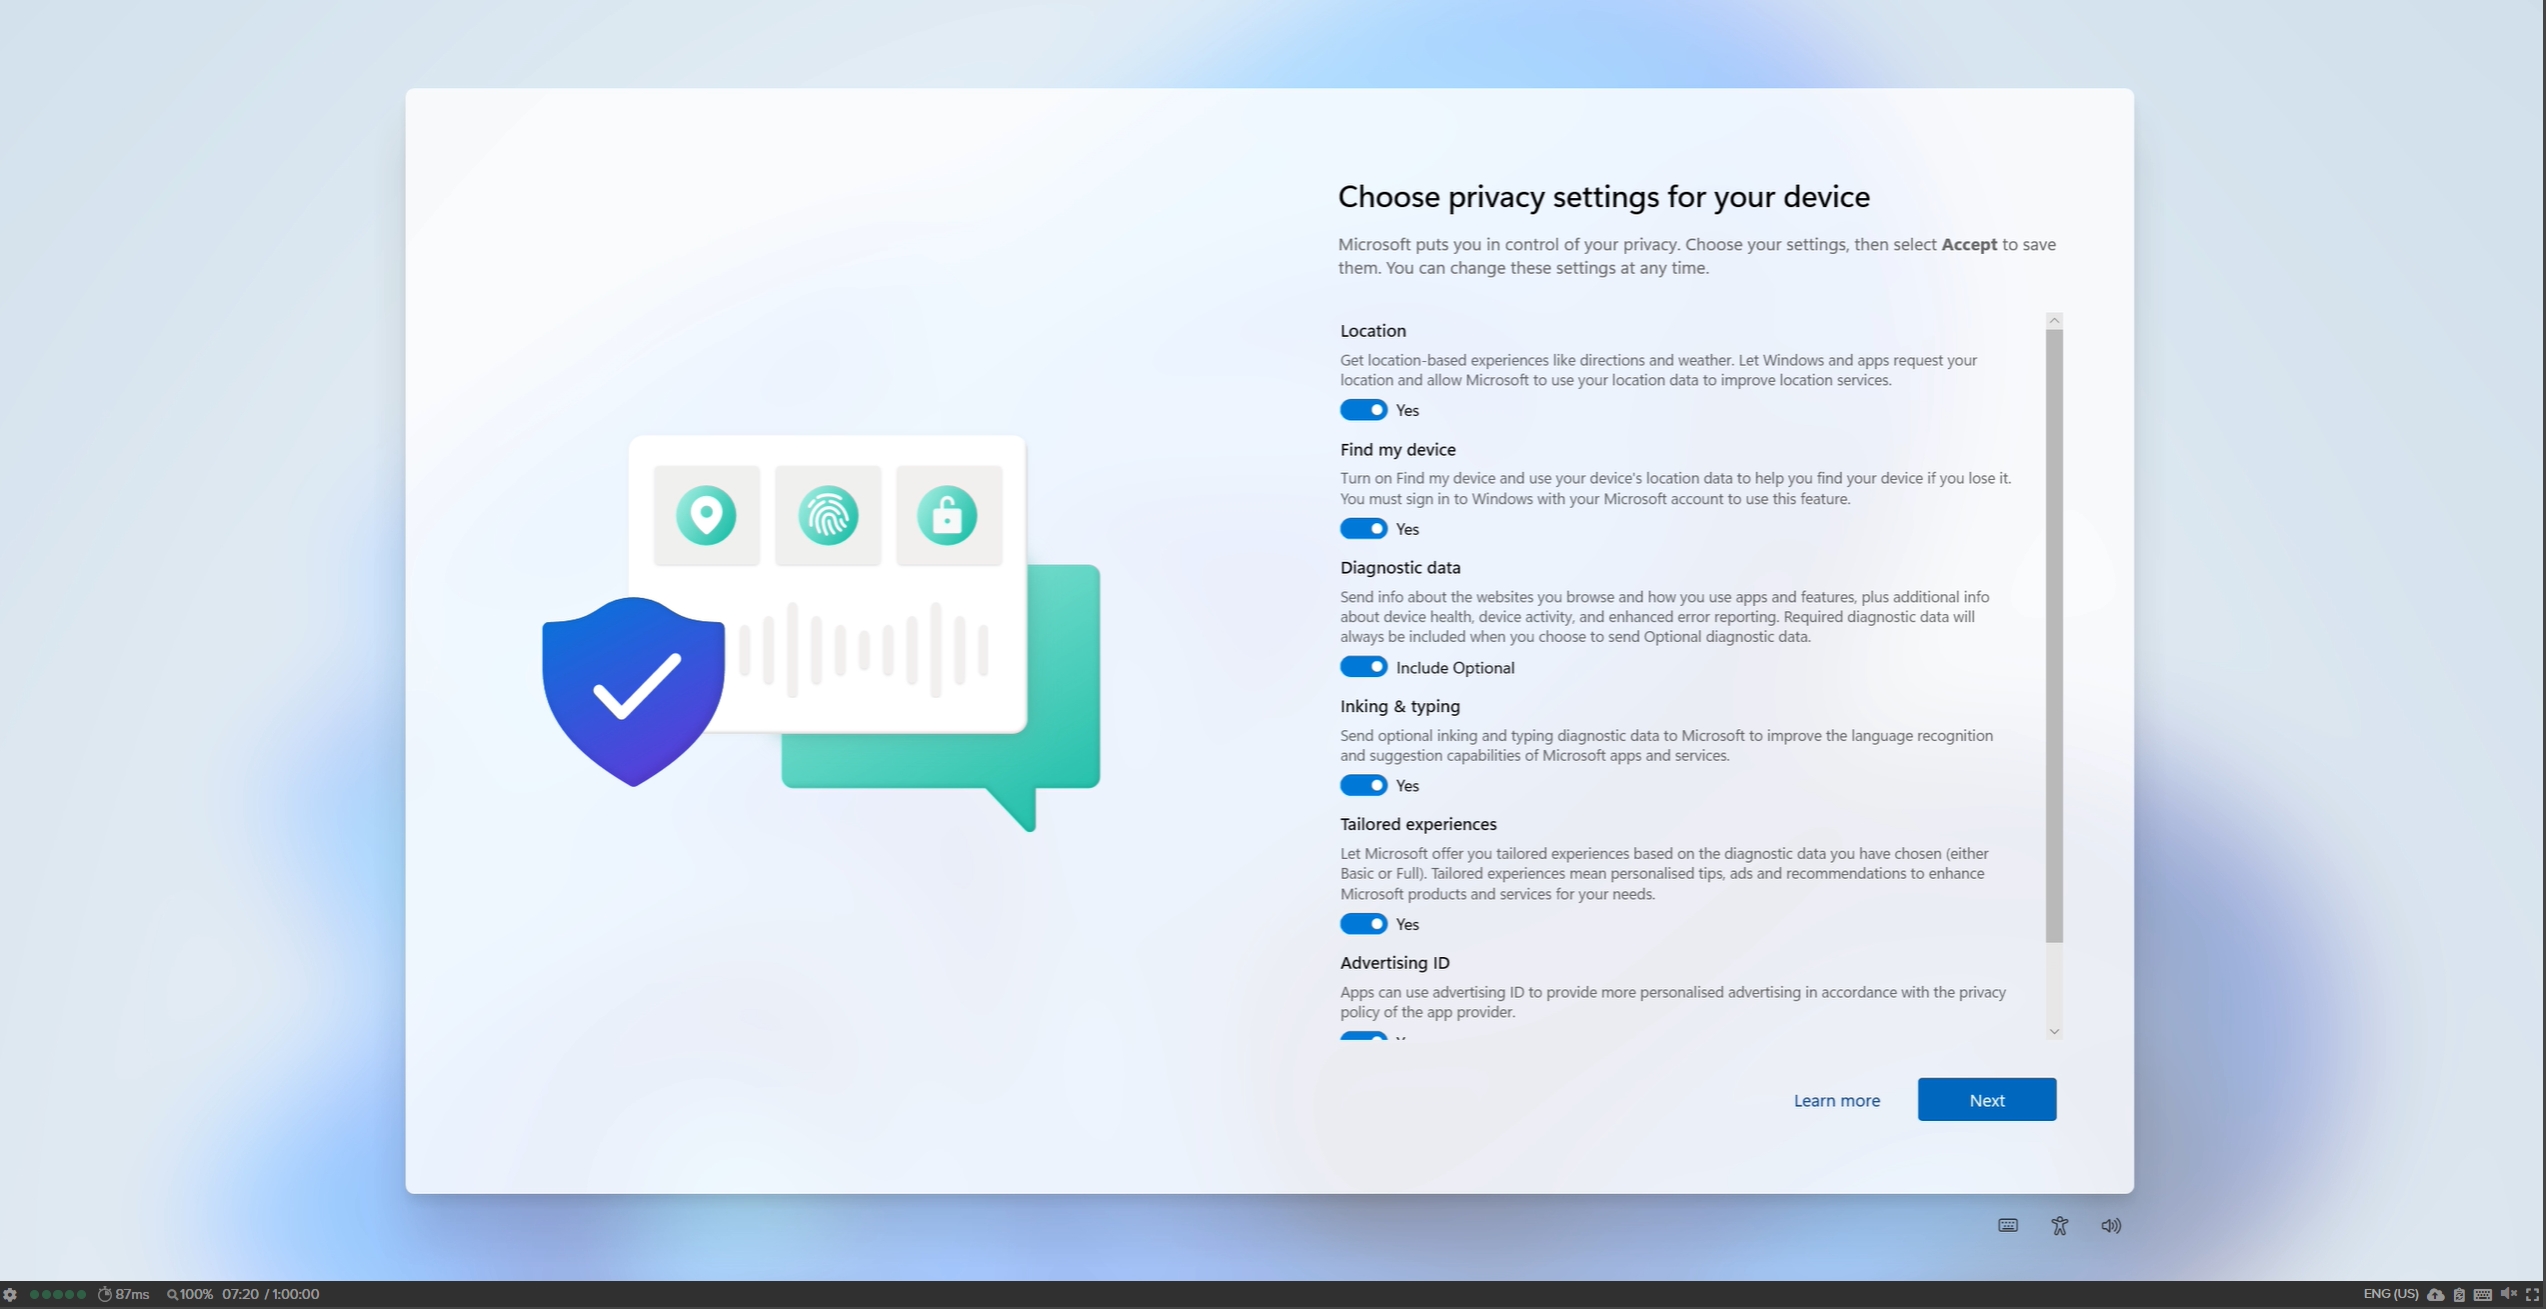
7. Choose their privacy settings.
8. Once OOBE process is completed, the user will be logged into their Entra joined virtual machine.
### Professional Edition
1. Upon accessing their persistent desktop for the first time, the user will be prompted to choose a region.

2. Next, select a keyboard layout.

3. Optionally add a second keyboard layout.

4. Review and accept the OS license agreement. By accepting the agreement, the user agrees to comply with its terms.

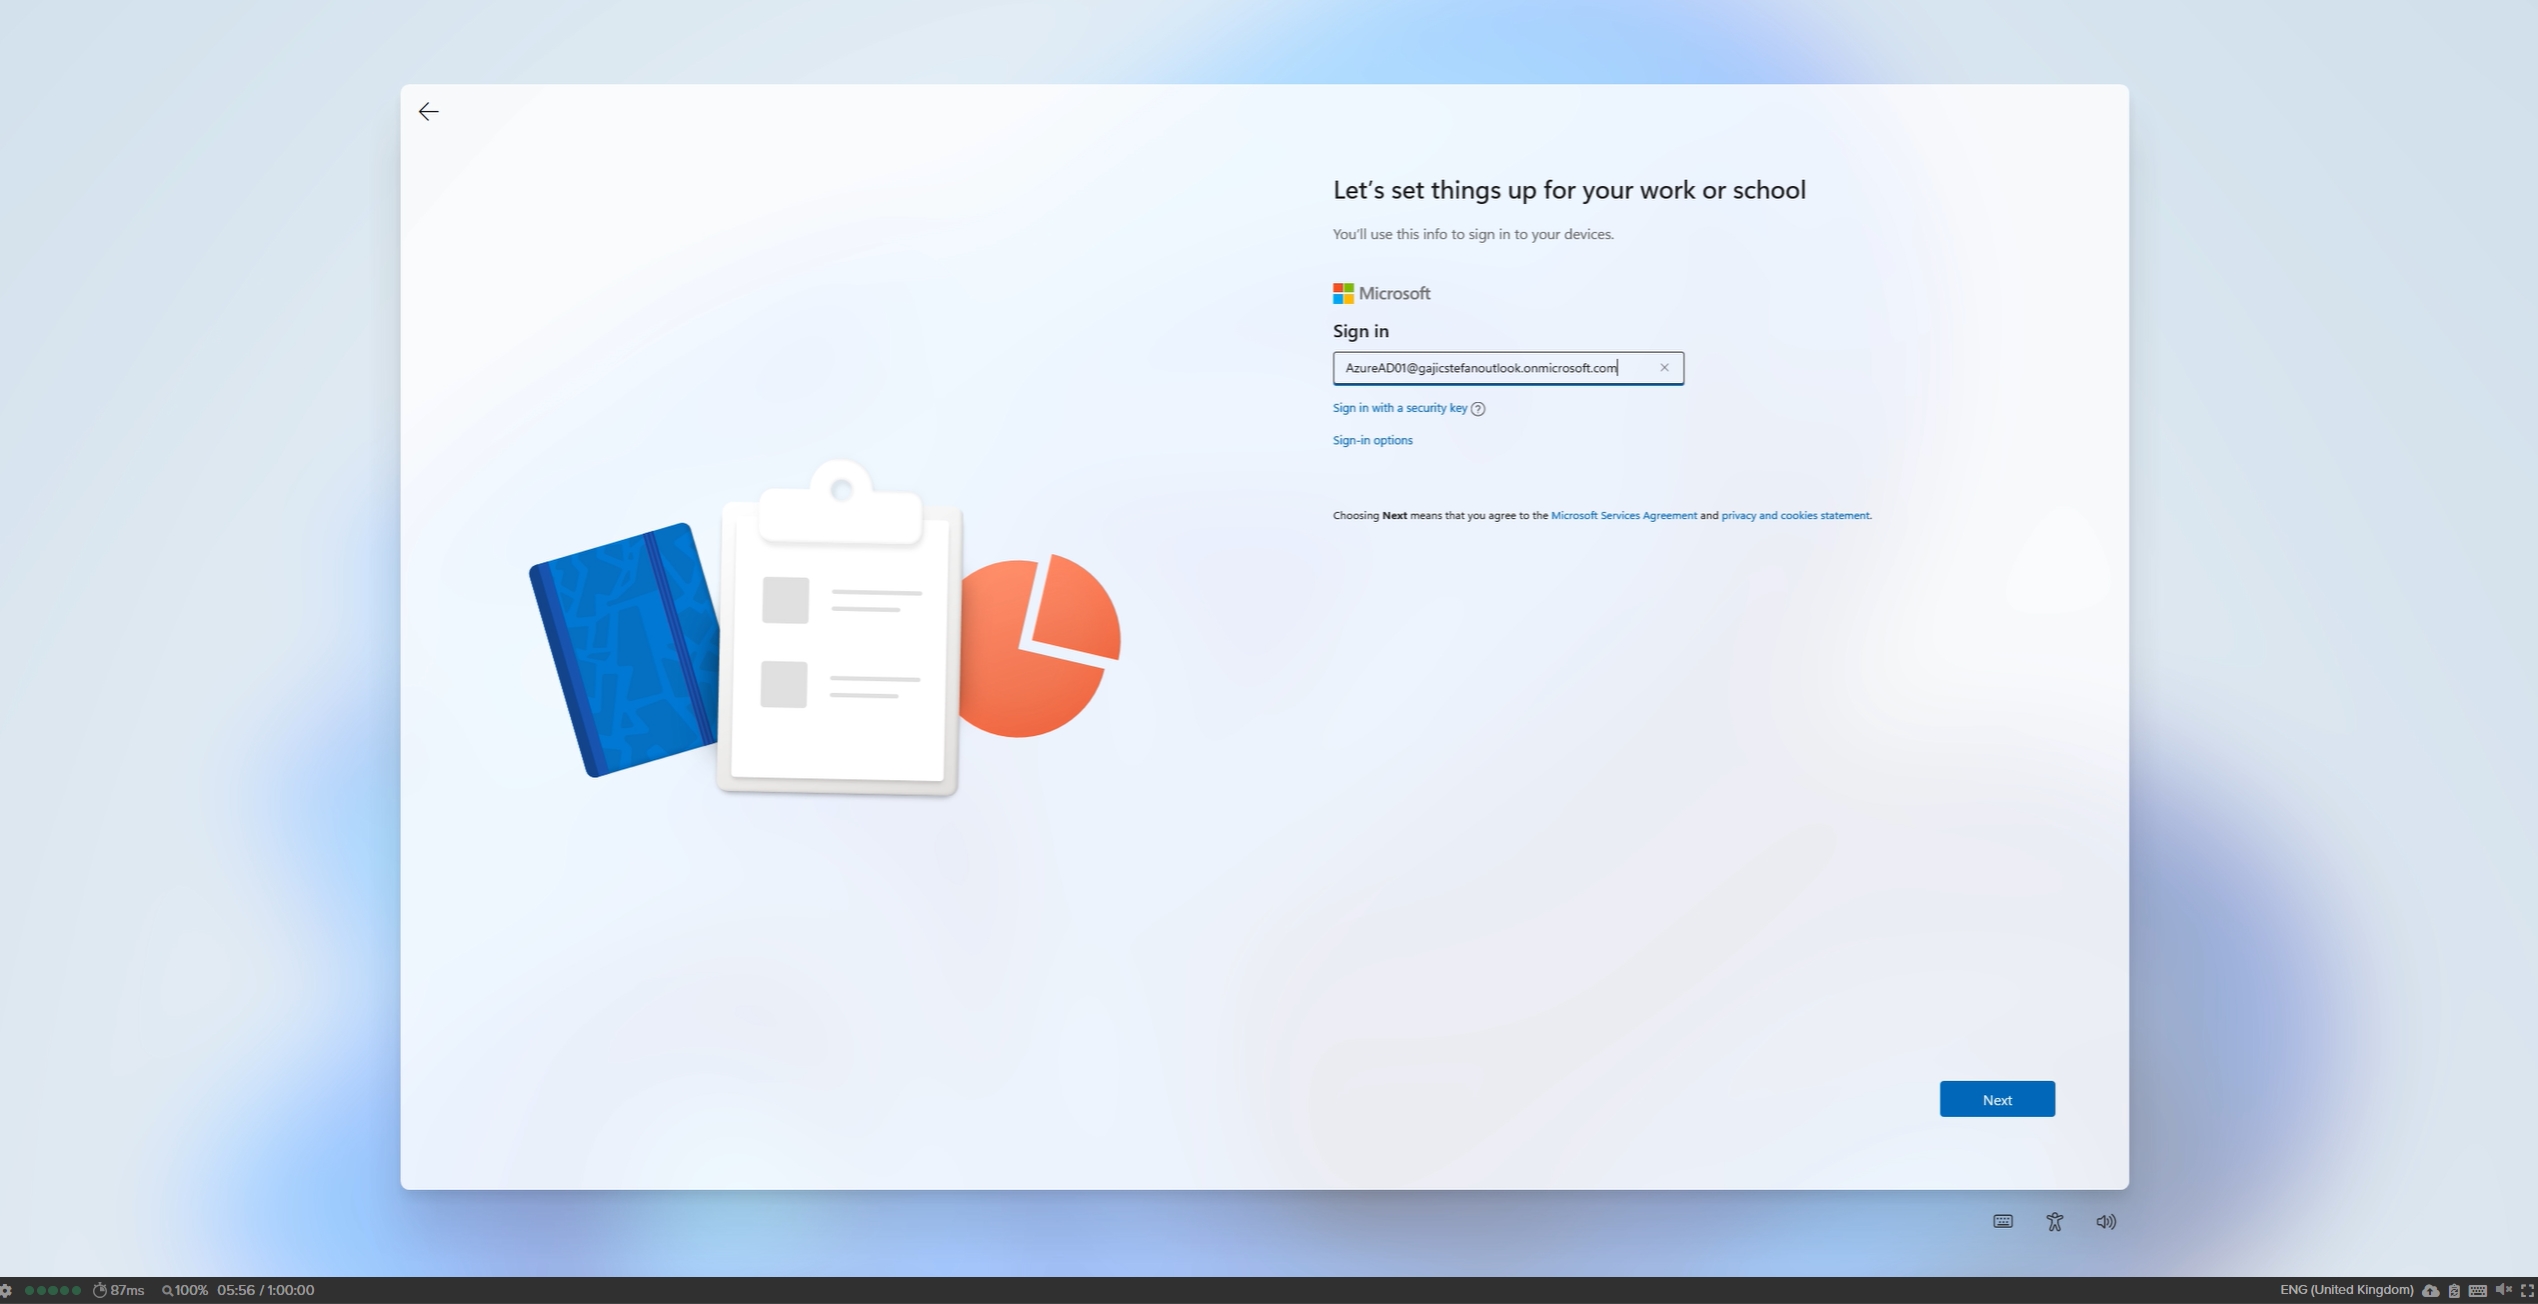
5. Set up their user account by selecting "Set up for Work or School".

6. Next, the user will need to set up their user account by entering their Entra ID username.
7. On the next page, they'll be prompted to enter their Entra ID password.

8. Lastly, the user will be asked to select their desired privacy settings.
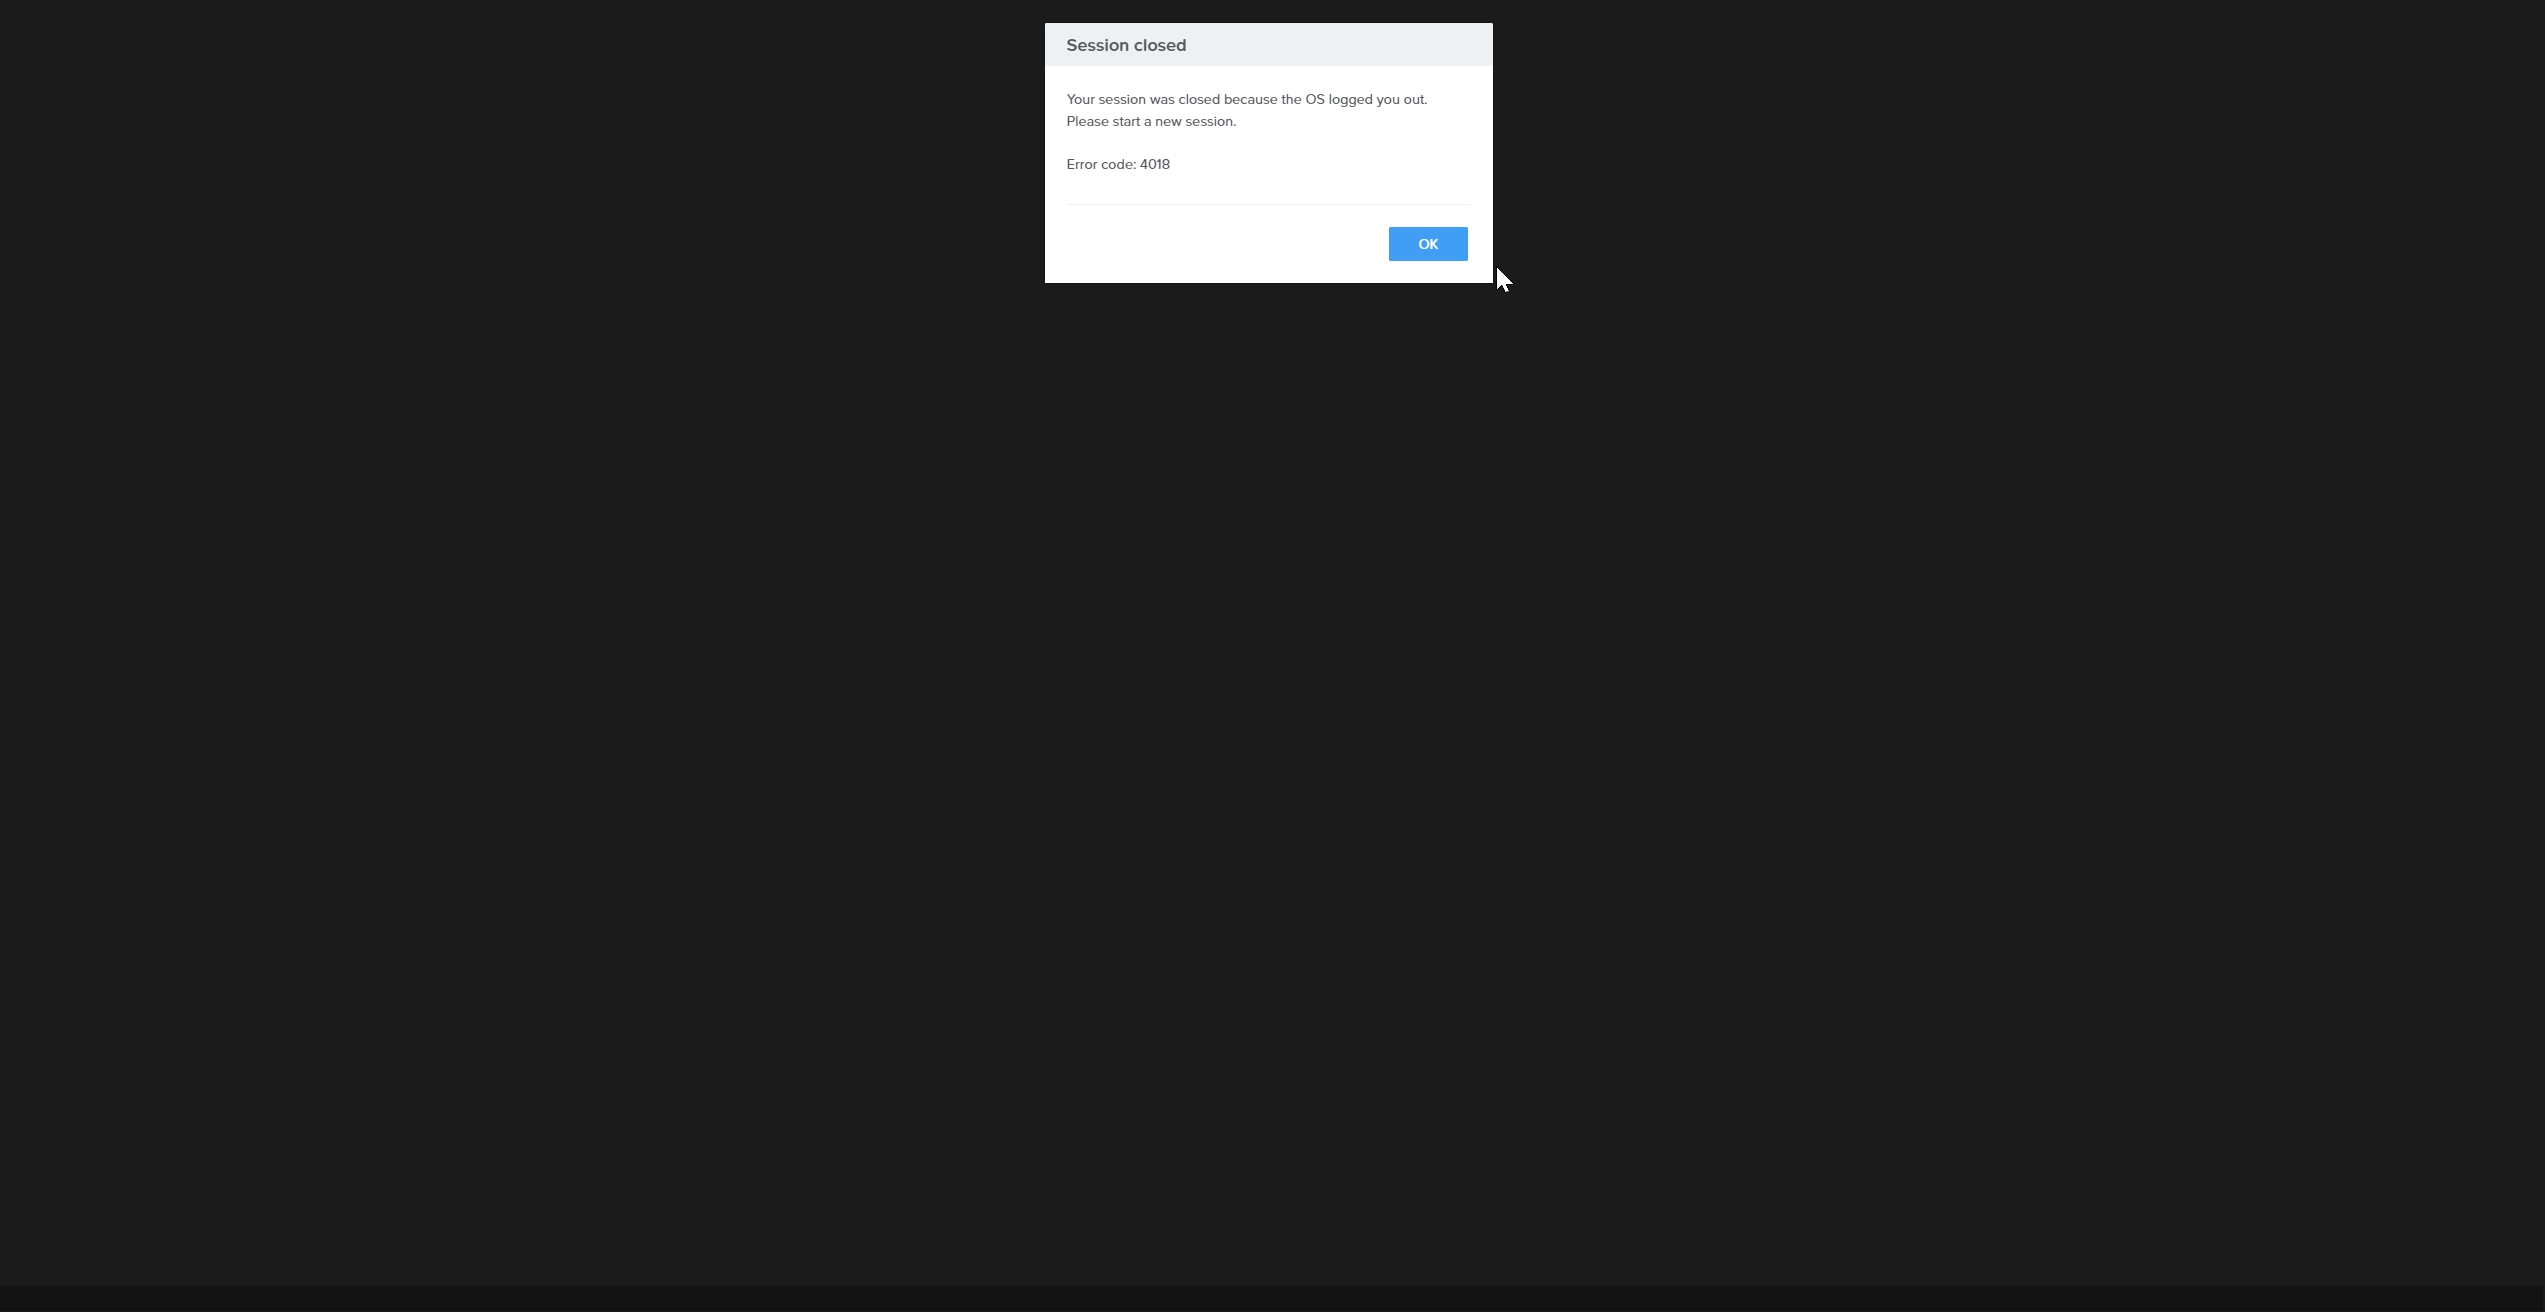
9. After saving their privacy settings, the user may be logged out of their Frame session. If this happens, they simply need to start a new session.
10. Once the OOBE process is complete, the user will be logged into their Entra joined virtual machine.
# Azure
Frame supports Entra joined devices
Early Access
on Azure for both Windows 10/11 and Windows Server 2019/2022 operating systems in non-persistent and persistent desktop Frame Accounts.
Prerequisites
Bring Your Own (BYO) Azure subscription
Entra ID Tenant
New or existing Windows 10/11 or Windows Server 2019/2022 non-persistent or persistent desktop Frame Account
Setup
Navigate to the non-persistent or persistent desktop Frame Account Dashboard within your AHV cluster in Frame Console.
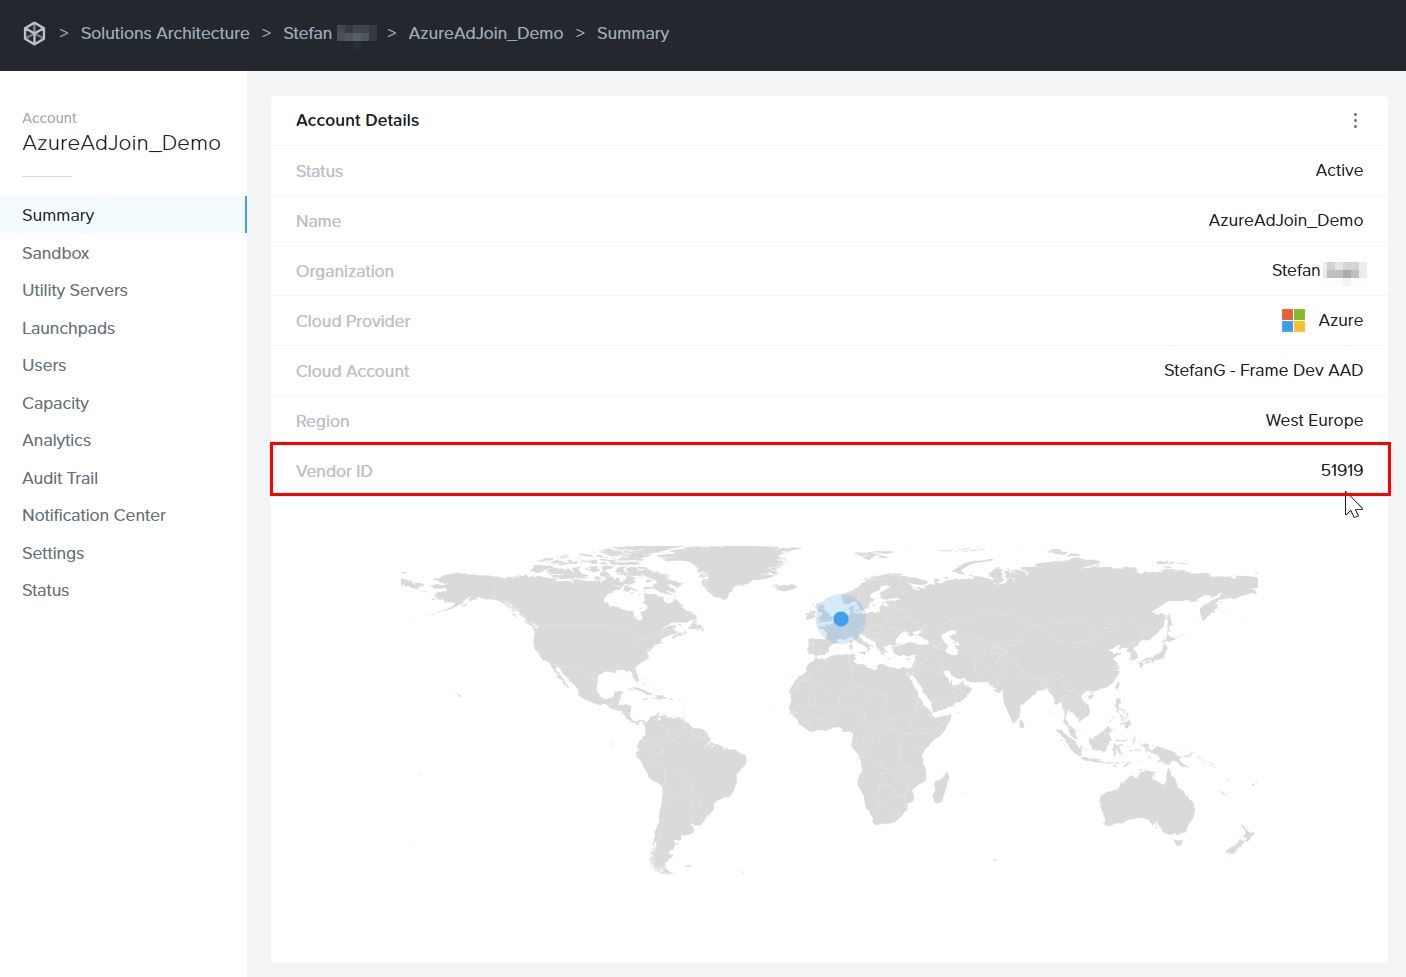
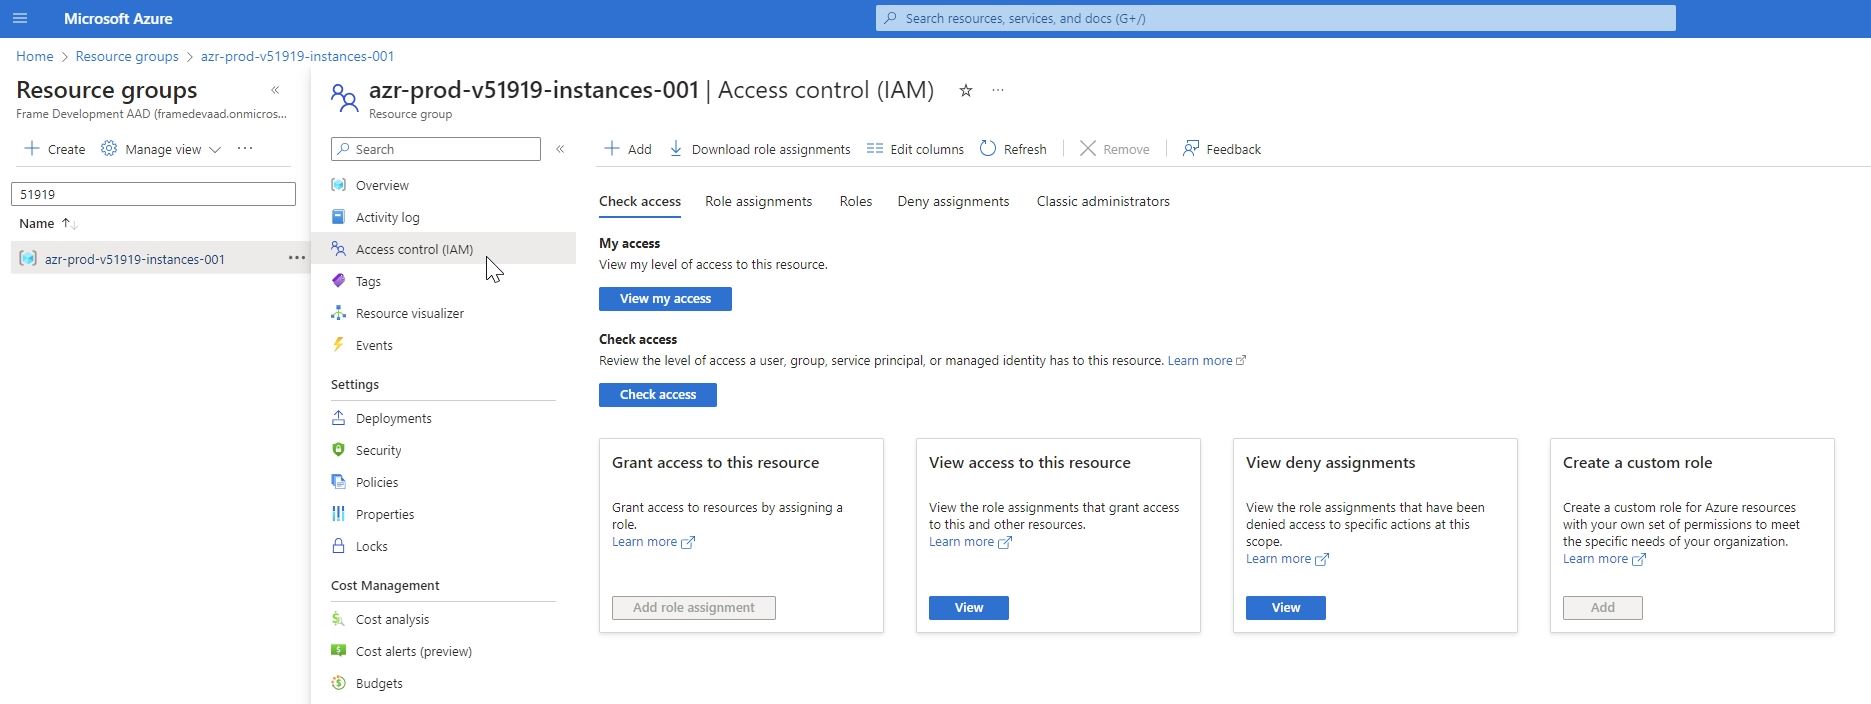
On the Summary page, you can locate the Vendor ID of your Frame Account. That number will be part of the Azure Resource Group (RG) name that is visible in the Azure Portal.
Next, navigate to your Azure Portal. Locate that resource group, go to Access Control (IAM), and grant access by assigning the Azure “Virtual Machine Administrator Login” or “Virtual Machine User Login” role to the user(s) or group of users for whom you want to provide administrator or user access to VMs. Details are further explained in official Microsoft documentation. You can also choose to set up role-based access control (RBAC) at the Azure subscription level so all the permissions are inherited down to RGs. Then, when new Frame Accounts are created, you will not need to manually assign the role to the newly created resource group.
The Azure "Virtual Machine Administrator Login" role refers to the login credentials and privileges granted to an individual who has administrative control and authority over virtual machines, allowing them to manage and configure various aspects of virtual machine environments.The Azure "Virtual Machine User Login" role pertains to the login credentials and permissions given to a user who can access and utilize virtual machines within a virtualized environment, typically with limited administrative capabilities, focusing more on regular usage and application-specific tasks within the virtual machine.
In the Frame Console, navigate to the Settings page, click on Domain Settings and select Entra ID. Then, click the Save button.
The Entra joined device feature requires users to login with their Entra ID user account.
Next, navigate to the Sandbox page, and Publish the Sandbox.
Only test and production pool VMs will be Entra device joined. Sandbox and Utility server(s) will not be Entra device joined. If you wish to join your Utility server(s) to your Entra ID tenant, they must be joined manually.
Do not join the Sandbox to Entra ID as this action can lead to sysprep failures during the publish process.
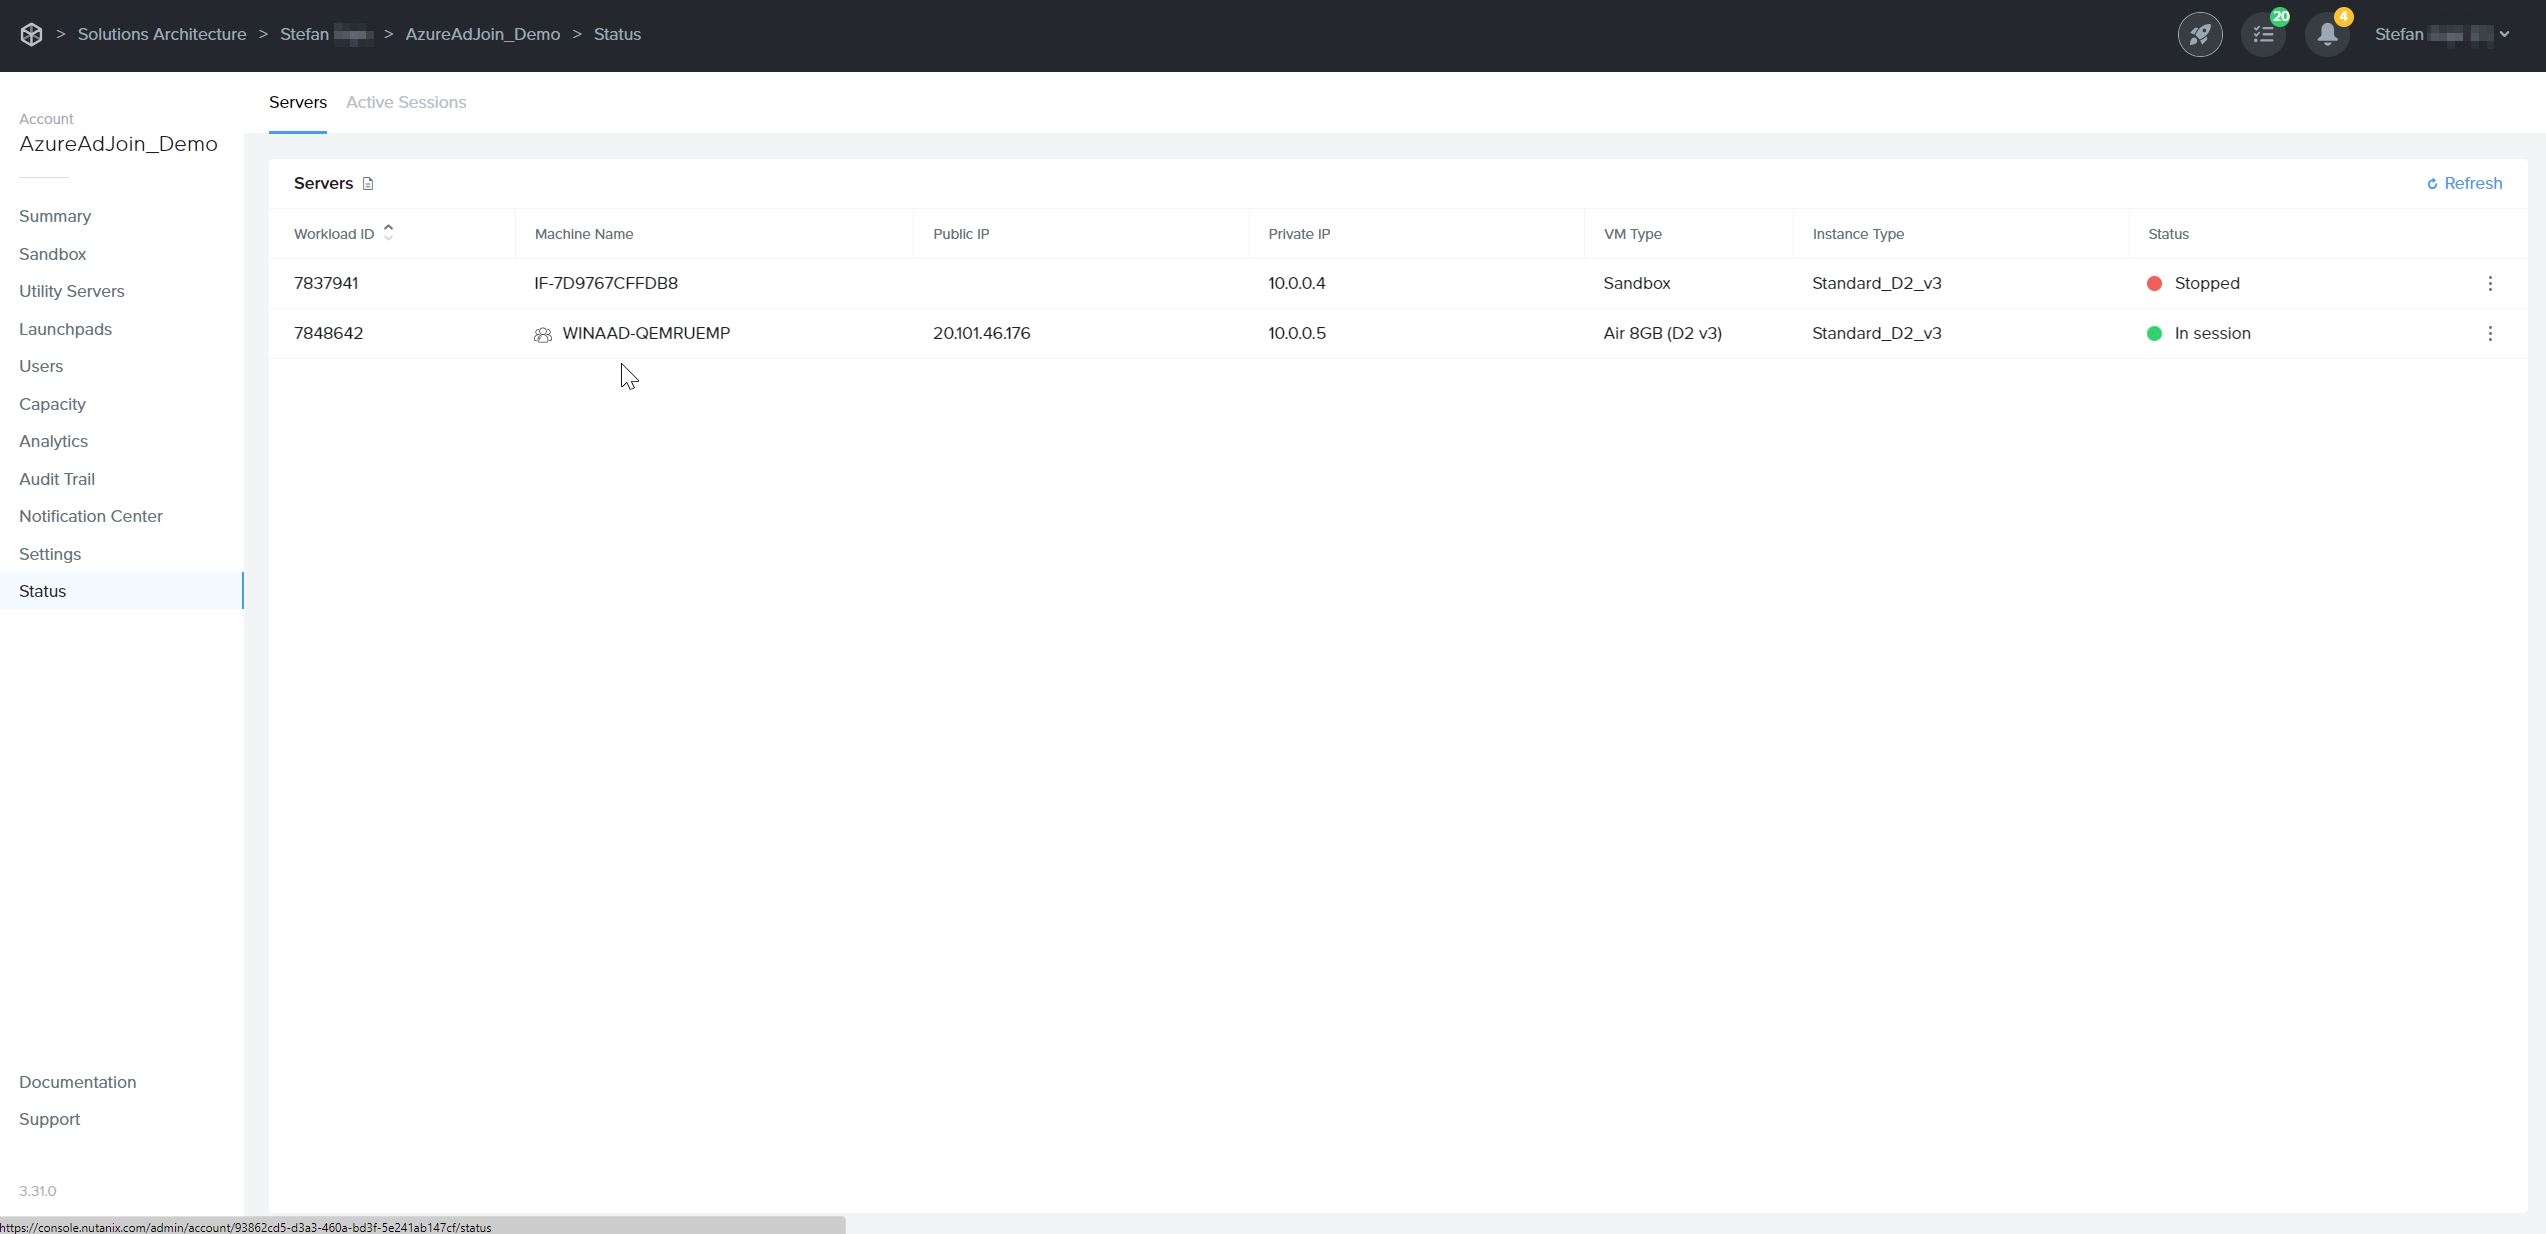
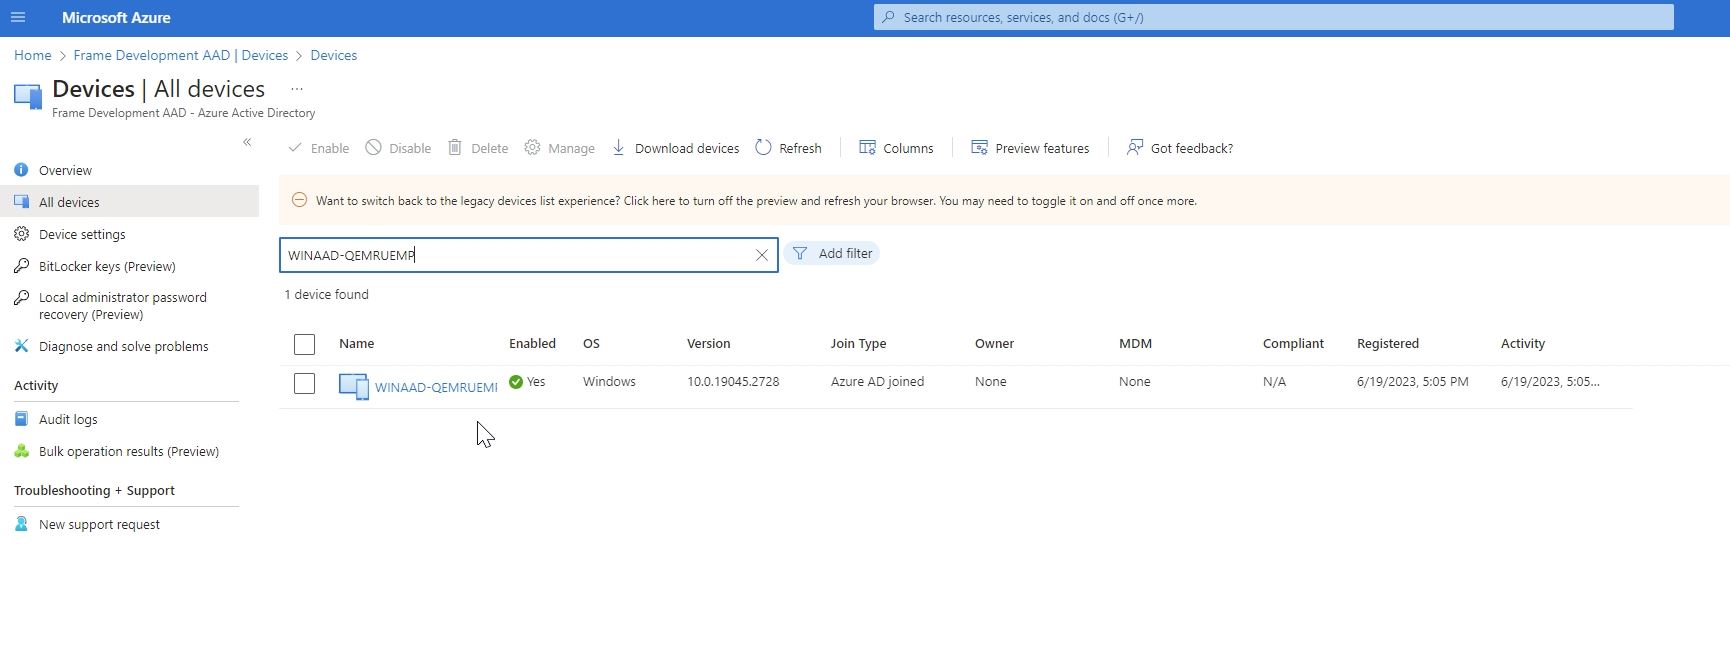
After a successful publish, navigate to the Status page to check the status of your VMs. You will notice that Entra joined devices have a prefix in their hostnames.
You can also login into Azure Portal and search for these Entra joined devices.
When end users log into their assigned VM, they will be asked to enter their Entra ID credentials as shown below:
Windows Hostname Prefix
The Windows hostnames for Entra joined devices on Azure will be generated once the VMs are provisioned, by concatenating the prefix WINAAD- with an 8 alphanumeric string, following the procedure described in Microsoft documentation.
The prefix will be the first 4 characters of the filename of the master image used to create the Frame Account Sandbox.
# Entra ID Joined Devices
[Microsoft Entra ID-joined devices](https://learn.microsoft.com/en-us/entra/identity/devices/concept-directory-join) are devices that have been joined directly to Microsoft Entra ID (formerly known as Azure Active Directory) without the need for an on-premises Active Directory (AD) environment. This option is primarily designed for Windows 10 and Windows 11 devices.
With Entra joined devices, users can sign in to their virtual machines using their Entra ID credentials, providing a seamless and consistent authentication experience across devices and cloud-based resources. It eliminates the dependency on on-premises AD infrastructure for authentication.
It is important to note that Entra joined devices are not a replacement for traditional domain-joined devices in all scenarios. Organizations with complex on-premises Windows infrastructure, specific group policy requirements, or the need for on-premises resource access may still prefer using Active Directory domain-joined devices. Frame does support the [Microsoft Entra hybrid joined device model](https://learn.microsoft.com/en-us/entra/identity/devices/concept-hybrid-join) combining both Entra joined devices and on-premises Active Directory domain-joined devices. Refer to our [official solution guide](https://docs.difr.com/books/platform-administrators-guide/page/azure) for further details.
Customers choose to use Entra joined devices for several reasons:
- Simplified device management: Entra joined devices can be managed centrally through Entra ID, allowing for streamlined device management and configuration without the need for on-premises infrastructure.
- Cloud-centric approach: Organizations that rely heavily on cloud services and want to leverage Entra ID's capabilities can benefit from Entra joined devices. It aligns well with a cloud-first strategy and enables tighter integration with Azure services.
- Enhanced security and access controls: Entra ID provides advanced security features, such as conditional access policies and multi-factor authentication, which can be applied to Entra joined devices. This helps enforce strong security measures for accessing corporate resources.
- Seamless access to cloud resources: Entra joined devices enable users to seamlessly access cloud-based applications and services integrated with Entra ID, such as Microsoft 365 and other SaaS applications, using their Entra ID credentials.
## Supported Infrastructures and Operating Systems
Frame supports Entra joined devices
Early Access
for infrastructure configurations listed in the table below:
Infrastructure
OS Options
Account Type
Additional Details
Azure
Windows 10 or 11, Windows Server 2019 or 2022
Non-persistent and persistent
A native Azure Virtual Machine Extension is automatically installed and used to join the Azure VMs to Entra ID during the publishing process.
AHV, AWS, GCP, IBM
Windows 10 or 11
Persistent
End users must go through the Microsoft Windows Out of Box Experience (OOBE) procedure to join their assigned persistent desktop to Entra ID.
## Prerequisites
Before you begin, ensure you have the following:
- **Entra ID Tenant**:
- A dedicated instance of Entra ID representing your organization's identity and access management in Azure.
- For AHV users, set the option under `Entra ID > Devices > Device settings > Users may join devices to Entra ID` to either `All Users` or specific user groups allowed to join VMs to Entra ID.
- **Operating Systems**:
- Windows 10 and Windows 11: Professional, Enterprise, and Education editions only. (Home Edition does not support Entra joined devices.)
- Windows Server 2019 and 2022: For Azure only.
- **Internet Connectivity**:
- Devices intended to join Entra ID must have internet connectivity to communicate with Entra ID and complete the join process.
- **Access to Frame**:
- Access to your Frame Customer, Organization, or Account entity as a Customer, Organization, or Account Administrator role.
- **Frame Account**:
- A Frame account created using your BYO Cloud Account (with required role) or on your AHV cluster.
## Setup
The setup and configuration of Entra joined devices will differ, depending on the infrastructure. Select the appropriate infrastructure for further details.
## Frame SSO Support
The Frame SSO feature can be be used for Entra joined devices, in addition to classic domain-joined instances. Refer to the [Frame SSO documentation](https://docs.difr.com/books/platform-administrators-guide/page/frame-single-sign-on) for details on how to enable and use Frame SSO.
## Intune Mobile Device Management
Microsoft allows customers to manage their end-users' devices, including workload VMs, using the [Microsoft Intune Mobile Device Management](https://learn.microsoft.com/en-us/mem/intune/fundamentals/what-is-intune) service. Since Microsoft recommends Intune be enabled only for persistent machines, Frame support for Intune is allowed only for Azure persistent desktop Frame Accounts.
AHV customers using persistent desktop Frame Accounts can still set up Intune in Microsoft Azure to manage end users' workload VMs.
## Windows Hello for Business (WH4B)
Windows Hello for Business (WH4B) is a secure Windows 10/11 authentication method that enables users to sign in to their corporate devices and applications using biometrics or PIN, eliminating the need for passwords. It enhances security and simplifies the login experience for users. By default, many customers with Entra ID Premium Subscription will have WH4B enabled by default.
In order to set up PIN (as an example of one WH4B sign in option), please note that you need to enable User Account Control (UAC), which is disabled by default on Frame workload VMs. To enable UAC, login to your `Sandbox` and in prior to publishing, execute the PowerShell command as a Windows administrator:
```powershell
Set-ItemProperty -Path "HKLM:\SOFTWARE\Microsoft\Windows\CurrentVersion\policies\system" -Name "EnableLUA" -Value 1 -Type DWORD
```
If all prerequisites for using WH4B are satisfied (e.g., using Gen2 instance types with vTPM chip), your end-users will be able to set up a PIN for access to their Frame desktop. As a best practice, WH4B should only be set up with persistent desktop Frame Accounts.