# Billing and Management

Billing, Frame Guest Agent, Deployment Groups, Maintenance Mode, Terminate an Entity

# Billing

## Overview

The Billing page in the Frame Admin Console provides Customer Administrators with a detailed view of their subscription and entitlement information. This feature improves transparency and allows you to self-serve your billing inquiries without needing to contact support.

![Billing Page](https://docs.difr.com/uploads/images/gallery/2025-10/billing-portal.png)

To access your billing details, simply log in to the Frame Admin Console and select **Billing** from left-hand menu, under your Customer entity.

<p class="callout info"> Only users with Customer Administrator privileges will be able to view this section.</p>

## Subscription Details

Each subscription row includes the following fields:

- **Subscription ID:** Unique identifier for the subscription (e.g., CN100130-1)
- **Billing Model:** Indicates whether the subscription is Pre-Paid or Pay-Go
- **Sales Channel:** Displays the sales channel, if applicable (e.g., CDW)
- **Term (Months):** Total length of the subscription agreement
- **Renewal Date:** The date the subscription will automatically renew
- **Status:** Current status of the subscription (e.g., Active, In Progress, Inactive)

Clicking on a subscription expands the row to display the associated entitlements.

## Entitlement Details

Each entitlement includes:

- **Line Number:** Numbered identifier for each product line
- **Product Name:** The name or SKU of the subscribed product
- **Quantity:** The number of units purchased
- **Service Type:** Category of service
- **Consumption Model:** Billing unit type (e.g., Per User, Per VM)
- **Start Date:** When entitlement usage begins
- **End Date:** When entitlement usage ends

## Troubleshooting

If you have any questions about your billing details, contact our billing team at billing@dizzion.com.

For technical support accessing the Billing page or navigating the Frame Admin Console, please [submit a support ticket](https://docs.difr.com/books/dizzion-support), and our team will be happy to assist you.

# Frame Guest Agent (FGA)

## Overview

Frame Guest Agent (FGA) is a collection of Frame-specific services that manage VM configuration and functionality. FGA provides the following services:

- Communication between the VM and Frame backplane.
- VM configuration, orchestration, and session management.
- Session customization and scripting (stateful/stateless sessions, scripting, etc.)
- Verification, migration, and upgrade orchestration.
- Collection of server diagnostics and a variety of logs.
- [Frame Remoting Protocol (FRP)](https://docs.difr.com/books/platform-administrators-guide/page/frame-remoting-protocol) which is responsible for the capture, encoding, and streaming of virtual applications/desktops to end user devices.

### Network

The required ports/protocols for Frame Guest Agent 8 (using FRP7 or FRP8) are documented in the [Networking Requirements](https://docs.difr.com/books/platform-administrators-guide/page/networking#bkmrk-requirements) based on your Frame account's deployment model.

### OS Firewall

If your configuration relies on an OS-level firewall (e.g., Windows Firewall with Advanced Security or a third-party firewall) on a Sandbox, Utility Server, and/or persistent desktops, you will need to update firewall configurations on those workload VMs. For non-persistent Frame accounts, update the Windows Firewall on the Sandbox VM and publish, or use a GPO.

For example, using Windows Firewall with Advanced Security, Frame administrators would enable an inbound rule `UDP ports 4503-4509` (either via GPO or directly within the workload VMs) for FRP8.

1. Go to Windows Firewall with Advanced Security
2. Select “Inbound Rules”
3. Right click &gt; “New Rule…”
4. Port &gt; UDP &gt; Specific local ports: `4503-4509` &gt; Allow the connection &gt; Check all, Domain, Private, Public &gt; Enter a name &gt; Finish

<p class="callout info"> Refer to the \[Networking Requirements\](/platform/networking/requirements) for the complete list of inbound and outbound protocols/ports your OS firewall must allow for your workload VMs, specific to your deployment model, to work with your end users and Frame Platform using FRP7 and/or FRP8.</p>

## Windows Updates

For non-persistent Frame accounts, Frame requires Windows updates to be applied in the Sandbox. Frame admins can then publish those updates to their test or production pools. During the provisioning of test or production workload VMs (triggered by a publish or the increase in the max Default Capacity), the Frame Guest Agent will disable Windows Update Services in the newly-provisioned non-persistent workload VMs.

Frame does not disable Windows Update Services in Sandbox, Utility server, or persistent desktop VMs.

## Windows OS Performance Counters

Frame administrators can monitor the behavior of Frame Agent in Windows OS workload VMs through a set of performance counters, as described in the following table. Admins can use Windows Reliability and Performance Monitor (perfmon) or third-party monitoring tools to capture and report on these counters.

<table id="bkmrk-name-description-frp"><thead><tr><th>Name</th><th>Description</th><th>FRP Version</th><th>Value Range</th></tr></thead><tbody><tr><td>AverageFrameQP-DisplayX</td><td>Average Quantization Parameter (QP) value for the specific display. Lower values result in lower compression and higher image quality.</td><td>FRP8</td><td>0 - 51</td></tr><tr><td>CaptureFrameRate-DisplayX</td><td>Real-time video capture rate (fps) of captured video on the Frame workload VM for the specific display.</td><td>FRP8</td><td>&gt;0</td></tr><tr><td>EncoderFramerate-DisplayX</td><td>Real-time video encoding rate (fps) of captured video on the Frame workload VM for the specific display.</td><td>FRP8</td><td>&gt;0</td></tr><tr><td>EstimatedBandwidth-DisplayX</td><td>Estimated real-time bandwidth (kbps) required to send encoded data (audio and video) from Frame workload VM via Frame Remoting Protocol for the specific display.</td><td>FRP8</td><td>&gt;0</td></tr><tr><td>Framerate-DisplayX</td><td>Real-time rate (fps) that encoded video is being sent via Frame Remoting Protocol for the specific display.</td><td>FRP8</td><td>0 - 60 fps</td></tr><tr><td>Height-DisplayX</td><td>Current height (pixels) of specific display.</td><td>FRP8</td><td>&gt;0</td></tr><tr><td>MaxAudioBitrate-DisplayX</td><td>Max audio bitrate (kbps) that can be achieved during the session for the specific display.</td><td>FRP8</td><td>0 - 128 kbps</td></tr><tr><td>NumberOfActiveDisplays</td><td>Number of active displays within the session (1-4).</td><td>FRP8</td><td>1 - 4</td></tr><tr><td>PixelRatio-DisplayX</td><td>Current pixel ratio (ratio between available logical pixels in the session versus available physical pixels on the end-user device) for the specific display.</td><td>FRP8</td><td>1 - 3</td></tr><tr><td>VideoCapture-DisplayX</td><td>Video capture method used by the session for specific display</td><td>FRP8</td><td>1 = DXGI   
2 = GDI   
4 = X11   
6 = NvFBC   
7 = DXGI GPU</td></tr><tr><td>VideoCodec-DisplayX</td><td>Video codec used by the session for specific display.</td><td>FRP8</td><td>0 = H.264   
1 = MPEG2   
2 = MPEG1   
3 = VP9</td></tr><tr><td>VideoEncoder-DisplayX</td><td>Video encoder used by the session for specific display.</td><td>FRP8</td><td>1 = x264   
3 = NVENC   
4 = FFMPEG (CPU)</td></tr><tr><td>Width-DisplayX</td><td>Current width (pixels) of specific display.</td><td>FRP8</td><td>&gt;0</td></tr></tbody></table>

## Troubleshooting

Frame Guest Agent logs can be found in the `C:\ProgramData\Nutanix\Frame` directory within the session.

<figure id="bkmrk-">![FGA Logs Location](https://docs.difr.com/uploads/images/gallery/2025-10/fga-logs.png)

</figure>After [filing a support ticket](https://docs.difr.com/books/dizzion-support/page/contact-support), you may be asked by Frame support personnel to provide these logs, if available.

# Deployment Groups

"Deployment Groups" determine when a Frame Account (Sandbox, Test/Production Pools, Persistent Desktops, and/or Utility Servers) will receive the latest version of the Frame Guest Agent (FGA), Frame Server, and any associated drivers or components. Deployment groups can be configured at the account level by navigating to the **Settings** page in the account Dashboard and clicking on the **Deployment group** tab.

<figure id="bkmrk-">[![image.png](https://docs.difr.com/uploads/images/gallery/2026-01/scaled-1680-/SD6image.png)](https://docs.difr.com/uploads/images/gallery/2026-01/SD6image.png)

</figure>Accounts are placed in the **Standard** deployment group by default. Customers who wish to receive the latest FGA version in advance for testing and validation purposes can choose to place their Account(s) in the **Early Adopter** deployment group. Early Adopter accounts typically receive the newest Frame Server release 2 to 6 business days before Standard deployment group accounts.

# Maintenance Mode

## Overview

Frame Administrators can enable Maintenance mode to prevent their users from starting production sessions within the Frame Account. This feature is useful when an administrator is making configuration changes (e.g., networking, adding/upgrading an SGA, changing the Windows domain settings, etc.) that are expected to prevent or limit users from starting or continuing with their Frame sessions.

Frame Administrators can access the Frame Account Sandbox and Utility servers, regardless of whether the Frame Account is set to maintenance mode.

## Enable Maintenance Mode

To enable maintenance mode on an account:

1. Navigate to the Summary page of your Frame Account Dashboard.

<figure id="bkmrk-">[![image.png](https://docs.difr.com/uploads/images/gallery/2026-01/scaled-1680-/jJ8image.png)](https://docs.difr.com/uploads/images/gallery/2026-01/jJ8image.png)

</figure>2. Click the kebab button to the left of the “Account Details” header.
3. Click the “Start maintenance” menu item.

<figure id="bkmrk-%C2%A0">[![image.png](https://docs.difr.com/uploads/images/gallery/2026-01/scaled-1680-/RfVimage.png)](https://docs.difr.com/uploads/images/gallery/2026-01/RfVimage.png)

</figure>4. This will open the Maintenance mode window. Click the toggle to enable and enter a custom message that will be [displayed to Launchpad users](https://docs.difr.com/link/30#bkmrk-page-title). Click “Start” when you are ready.

<figure id="bkmrk--1">![Start maintenance mode](https://docs.difr.com/uploads/images/gallery/2025-10/maintenance-mode3.png)

</figure>5. The account is now in Maintenance mode and a “In Maintenance” banner has been added to the Summary tab of the Frame Console.

<figure id="bkmrk--2">[![image.png](https://docs.difr.com/uploads/images/gallery/2026-01/scaled-1680-/aadimage.png)](https://docs.difr.com/uploads/images/gallery/2026-01/aadimage.png)

</figure>## Exit Maintenance Mode

To exit Maintenance mode, go back to the Summary page of your Frame Account Dashboard, click on the kebab button, and select **Exit maintenance**. Then click on **Exit** to allow your users to start production sessions.

<p class="callout info"> If you exit Maintenance mode, any custom maintenance message will be deleted.</p>

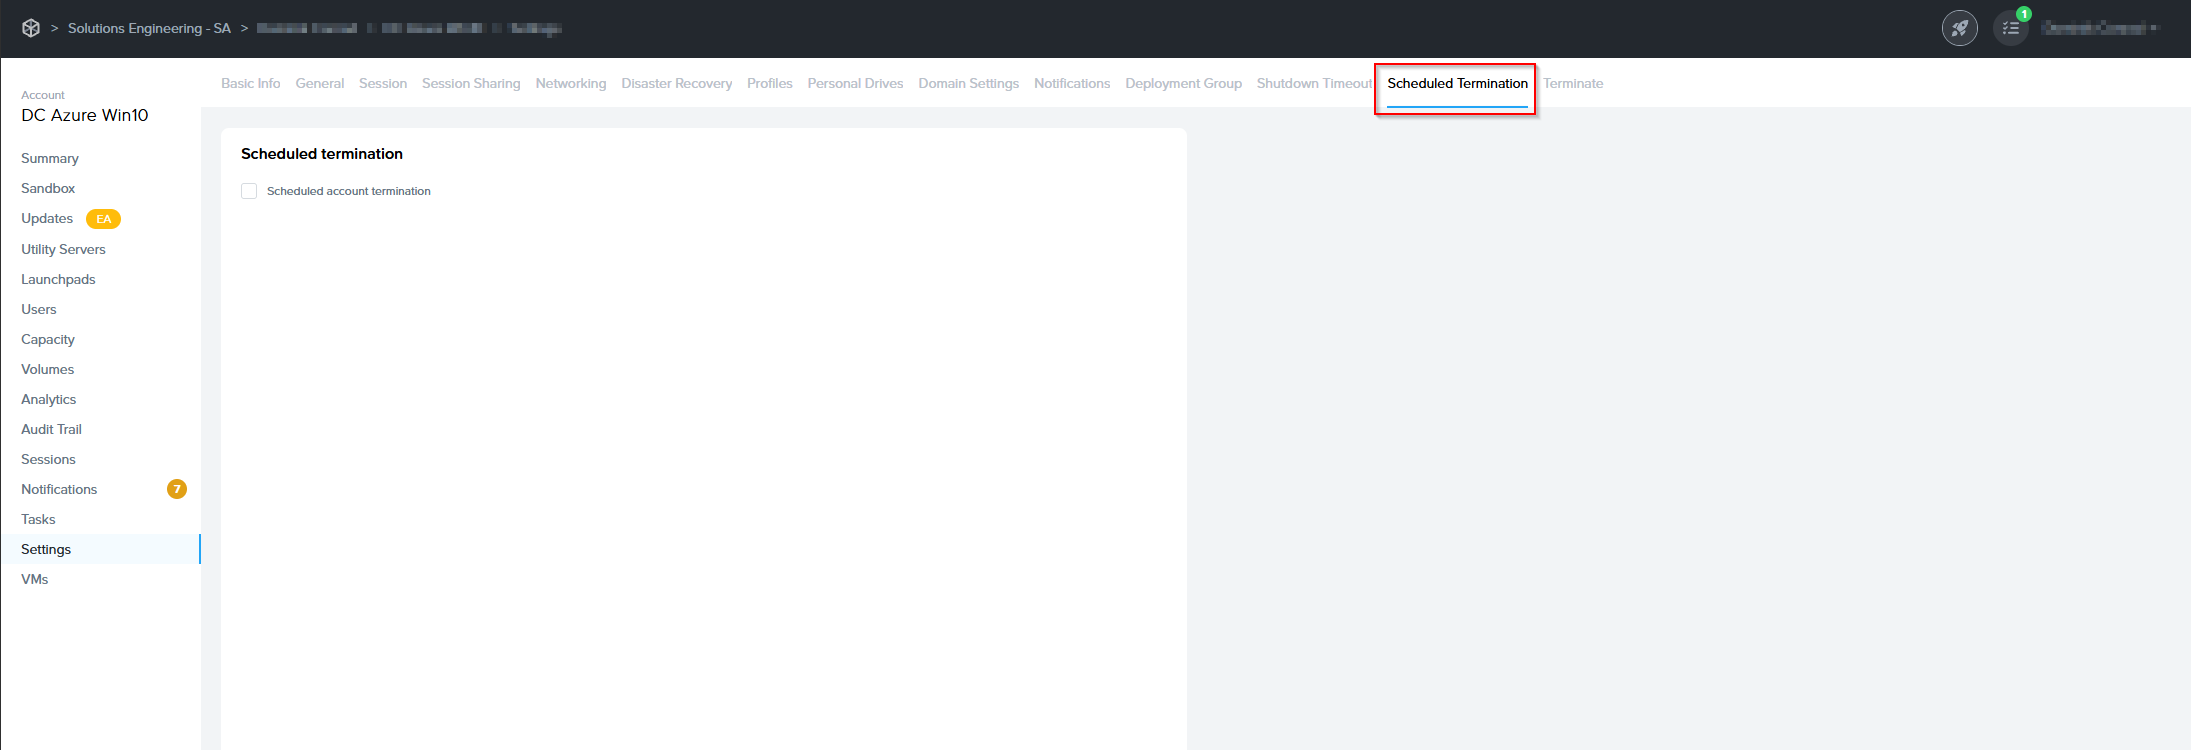
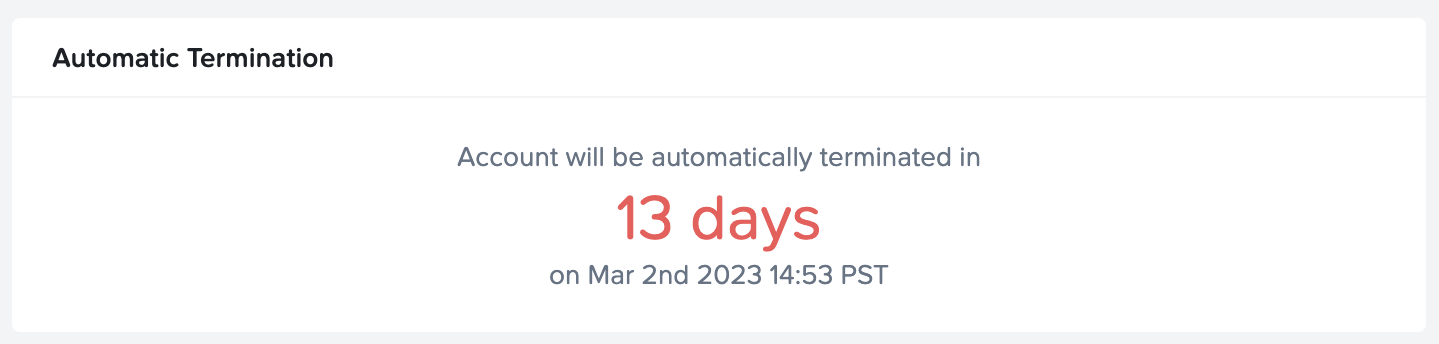
## Update Maintenance Message

To update the Maintenance message, go back to the Summary page of your Frame Account Dashboard, click on the kebab button, and select **Update maintenance message**. You can then update the maintenance banner text.

If you did not customize the message before, you can click on the toggle and enter your custom message.

Be sure to **Save** your custom maintenance banner text when you are done.

## User Experience

When Maintenance mode is enabled, Launchpad users will see the following message banner when they reach their Launchpad and will not be able to start a Frame session.

<figure id="bkmrk-%C2%A0-1">  
[![image.png](https://docs.difr.com/uploads/images/gallery/2026-01/scaled-1680-/Vlwimage.png)](https://docs.difr.com/uploads/images/gallery/2026-01/Vlwimage.png)

</figure>

# Terminate an Entity

If you no longer need an Account, Organization or Customer, you can terminate the entity.

<div class="callout info">
  <p>
    <strong>Note:</strong> Before you terminate an Account, Organization or Customer entity, we strongly recommend taking the following steps to clean up any infrastructure and third-party dependencies associated with the entity you wish to terminate in Frame Console:
  </p>

  <ul>
    <li>Reduce the Default Capacity max value to 0 for all Accounts you wish to terminate or all Accounts associated with an Organization you wish to terminate.</li>
    <li>Delete any Sandbox/Utility server backups.</li>
    <li>Delete any Enterprise Profile/Personal Drives and their backups.</li>
    <li>
      If Frame accounts were created using Frame-managed networking, customers using BYO infrastructure should delete any cloud resources (such as a VPN Gateway, a VPC/VNET peer, manually created and attached volumes, or manually created VMs) associated with the Frame Account VPCs/VNETs from their BYO infrastructure console <strong>before</strong> terminating their Frame Account/Organization/Customer entity.
    </li>
    <li>Remove any identity providers registered on the Account or Organization entity to be terminated.</li>
    <li>Remove any BYO infrastructure registered on the Organization entity you wish to terminate (after all Accounts in that Organization are terminated).</li>
    <li>Make sure to break federation between your cloud accounts and Frame</li>
  </ul>

  <p><strong>Entity termination is an irreversible action.</strong></p>
</div>


## Terminate via Frame Admin Console

You terminate a Frame Account/Organization/Customer entity, as follows:

1. Navigate to the entity you wish to terminate in the [Admin Console](https://docs.difr.com/link/93#bkmrk-page-title).
2. Select the Account/Organization or Customer which you wish to terminate
3. Navigate to "Setting"
4. Click **Terminate** in the upper row.
5. A dialog box will appear prompting you to confirm your decision by typing the name of the entity into the field provided and clicking **Terminate** once again.

<figure id="bkmrk-">

[![image.png](https://docs.difr.com/uploads/images/gallery/2026-01/scaled-1680-/XaGimage.png)](https://docs.difr.com/uploads/images/gallery/2026-01/XaGimage.png)

</figure>Frame will now begin terminating the entity. Once the entity is terminated, you will see the task marked as **Done** in the Notification Center.


<figure id="bkmrk--1"></figure>## Scheduled Account Termination

Customers who want a Frame Account to be terminated automatically on a specific date/time can enable the Scheduled Termination feature. When the configured date and time passes, Frame will terminate the account. Administrators can disable the Scheduled Termination feature and change the Scheduled Termination date/time.

### Enable Scheduled Termination

1. From the Frame Account Dashboard, go to Settings page.

<figure>
  <img src="https://docs.difr.com/uploads/images/gallery/2026-01/ngZimage.png">
</figure>

2. Click on the **Scheduled Termination** tab.

<figure>
  <img src="https://docs.difr.com/uploads/images/gallery/2026-01/bxuimage.png">
</figure>

3. Click the checkbox next to **Scheduled account termination**.

<figure>
  <img src="https://docs.difr.com/uploads/images/gallery/2026-01/Teyimage.png">
</figure>

4. Specify the date, time, and timezone when Frame will terminate the Frame Account. Be sure to click on the **Save** button in the upper right corner of the page to save your settings.

Once you have enabled Scheduled Termination, you will see a banner at the top of your Dashboard stating the Frame Account has been configured for Scheduled Termination.

<figure>
  <img src="https://docs.difr.com/uploads/images/gallery/2025-10/scheduled-termination-banner.png">
</figure>

In the Dashboard > Summary page, the number of days remaining before the account is terminated and the date/time when the account is terminated are shown.

<figure>
  <img src="https://docs.difr.com/uploads/images/gallery/2025-10/scheduled-termination-summary.png">
</figure>

### Disable Scheduled Termination

To disable Scheduled Termination:

1. From the Frame Account Dashboard, go to Settings page.

<figure>
  <img src="https://docs.difr.com/uploads/images/gallery/2026-01/ngZimage.png">
</figure>

2. Click on the **Scheduled Termination** tab.

<figure>
  <img src="https://docs.difr.com/uploads/images/gallery/2026-01/Teyimage.png">
</figure>

3. Click the checkbox next to **Scheduled account termination** to disable the feature.

<figure>
  <img src="https://docs.difr.com/uploads/images/gallery/2026-01/Teyimage.png">
</figure>

4. Click on the **Save** button in the upper right corner of the page to save your settings.