# User Experience
Navigating Frame, Session Features
# Introduction
Frame may be a very robust and intricate platform, but being an end user is easy! The Getting Started Guide will outline important details for end users such as minimum system requirements, supported browser versions, and a glossary of common Frame terms to help you get comfortable with the jargon. We'll also show you how to access your Frame account.
## Glossary of Frame Terms for End Users
#### Launchpad
**Launchpad** refers to the end-user-facing part of the Frame interface where users can go to launch and manipulate applications. End users can be given access to multiple **Launchpads** depending on the needs of their organization. For instance, one **Launchpad** may contain applications for word editing while another **Launchpad** houses only billing-specific apps. Administrators can configure multiple **Launchpad** interfaces to show what application sets specific end users see and what features are exposed to them. If enabled, end users can switch between **Launchpads** by clicking on the rectangular **Launchpad** list icon at the top of their screen. **Launchpads** are accessible via URL and may look something like this:
```
https://use.difr.com/customer-name/organization-name/account-name1/launchpad/desktop
```
---
#### Session
A Frame **session** refers to the connection between a user's browser and an instance/virtual machine. A **session** is created the moment a user requests a desktop or application in a Launchpad and ends as soon as the connection is closed. Once a session is closed for a non-persistent VM, the VM is rebooted and made available for the next user.
---
#### Instance
This is a commonly used industry term for a virtual machine which includes a complete operating system as well as installed applications. The **instance** may also be referred to as the “VM” (virtual machine), the “system,” or the “workload.” With public cloud and on-premises hyper-converged infrastructure, multiple **instances** run on a single physical server. However, each **instance** operates independently of each other. An **instance** can come in a variety of types, with specifications that are like those for PCs and servers (e.g., defined by the number of CPUs, amount of RAM, and the number of GPUs). Frame supports many different **instance** types. Frame has named these **instance types** (e.g., “Air 4GB”, “Air 8GB”, “Pro 16GB”) to help differentiate them based on their specifications. Each Frame **instance** type name maps to an infrastructure provider-specific name.
---
#### Pool
Your administrator configures a **pool** of available instances for their group of end users based on the expected workload and activity. In an organization, for example, the billing department may start sessions from a **pool** of Air 4GB instance types while the graphic design department pulls from a **pool** of Pro 16GB instance types. The administrator can set the amount of available instances in the pool, including how many of those instances are buffered or “warmed up” and how many of each type are available to their end users at a given time.
---
#### Authenticate
**Authenticating** is how you prove your identity to access your Frame account. Your account administrator will decide how you **authenticate** to the platform. You may simply **authenticate** directly through the Frame platform with a user name and password or you may use a third-party SAML2 **authentication** method such as Okta.
---
#### Cloud Storage
**Cloud storage** refers to services such as Dropbox, Google Drive, Box, and Microsoft OneDrive which allow you to save your files on their public clouds as a service.
---
#### Disconnect and Close Sessions
When an end user exits a session, there are two options:
- **Disconnect** from the session but keep it active, in which case the user can return to the session.
- **Close Session** to completely end the session.
This distinction is important, so please read on:
- **“Disconnect”** is like disconnecting your monitor cable from a running PC. In this case, if the system is set up with an “idle timeout” setting, the session will continue running and the user can connect back within the set time to resume their session.
- **“Close Session”** is equal to what you do at the end of a day with a PC: you save all of your work and then power off the system. In Frame's case, closing a production session will end the session completely. For most situations, your instance will be returned to the pool of production instances – making it available for someone else to use. For persistent desktop users, your persistent desktop can now be powered off safely.
## System Requirements
### Browser Requirements
The Frame Platform has been developed to deliver an application's graphical user interface through any HTML5/WebGL compatible browser. This includes support for the latest versions of Chrome, Firefox, Safari, and Edge on various desktops and mobile devices. While Frame may work on other HTML-capable browsers, Frame officially supports the latest version of the following browsers and operating systems. For the best performance and most feature-rich experience, it is recommended to use **Google Chrome** whenever possible.
| **Browser** | **Supported OS** |
| ------------------------- | --------------------------------------------- |
| Google Chrome | Windows, macOS, ChromeOS, Linux, iOS, Android |
| Mozilla Firefox | Windows, macOS, ChromeOS, Linux |
| Apple Safari | macOS, iOS |
| Microsoft Edge (Chromium) | Windows |
Internet Explorer and Opera browsers are not supported by the Frame platform.
Note
Mobile Browser Support
The Frame platform is officially supported on mobile versions of Chrome, Microsoft Edge, and Safari at this time. Desktop mode is not supported on mobile browsers at this time.
### Frame App Requirements
| **Operating System** | **Supported Versions** |
| ----------------------------------------------------------- | ------------------------------------------------------------------------------------------------------------------------------------------- |
| Frame App for Windows 10 | Windows 10 Home, Windows 10 Pro, Windows 10 Enterprise, Windows 10 IoT Enterprise |
| Frame App for Windows 11 | Windows 11 Home, Windows 11 Pro, Windows 11 Enterprise, Windows 11 IoT Enterprise |
| Frame App for macOS | macOS Monterey (12.0+), macOS Big Sur (11.0+) |
| Frame App for Linux | Ubuntu 18.04, Ubuntu 20.04, and latest supported versions of IGEL OS, Stratodesk NoTouch OS, 10ZiG RepurpOS, 10ZiG PeakOS, and ZeeTim ZeeOS |
### Device Requirements
#### General
The device used to access Frame (also known as the endpoint device) will be dependent on your use-case requirements. The table below describes the optimal, recommended, and minimum hardware configurations required for running Frame in a browser or with Frame App.
| **Configuration** | **Optimal** | **Recommended** | **Minimum** |
| ------------------ | ----------------- | ----------------- | ----------------- |
| **_CPU_** | Quad Core 3.0 GHz | Dual Core 2.4 GHz | Dual Core 1.5 GHz |
| **_Memory_** | 8 GB | 4 GB | 4 GB |
| **_Discrete GPU_** | Yes | No | No |
Please note that use cases requiring 4K resolution, multiple monitors, high-fidelity multi-media, 3D rendering, video conferencing, etc., a discrete GPU on the endpoint device may be required to achieve the desired user experience.
Since Linux operating systems do not offer GPU offloading support, Linux-based endpoint devices should have at least a quad core CPU.
#### Accessibility Features
Operation of the Frame software interface requires input via a standard text keyboard and computer mouse or touch screen. However, accessibility peripherals that can replace a standard keyboard/mouse/touchpad and enable text and positional input through alternative means can be supported for both administrators and end users of the platform. Accessibility peripherals for end-users must be recognized by their local device as a standard HID (Human Interface Device) peripheral.
### Display Requirements
Frame supports the following display resolutions and number of displays based on the instance type used for the workload VM.
| **Instance Type** | **Maximum Display Resolution** | **Maximum Number of Displays** |
| ----------------- | ------------------------------ | ------------------------------ |
| CPU-only | 2560 x 1600 | 4 |
| GPU | 4096 x 2160 | 4 |
### Network Requirements
The following requirements must be met in order for the end user to access a Frame session:
> 1. Support for HTTPS (TLS) connections on port 443 to the Frame Platform
> 2. Support for HTTPS (TLS) and Secure WebSockets through all firewalls to the Frame-managed workload VM
>
> 3. Support for UDP (DTLS) to the Frame-managed workload VM (FRP8)
Since the virtualized application window or desktop is streamed to the end user's browser over the network, a user needs to have sufficient network bandwidth between their browser and the Frame-managed workload VM running the virtualized applications and/or desktop. The following table provides high-level guidance on average bandwidth consumption per Frame session based on the applications to be used, VM instance type (CPU only or GPU-backed), display resolution, and frame rate.
| **Average Bandwidth (Mbps)** | **Applications** | **VM instance type** | **Display resolution** | **Frame rate** |
| :--------------------------: | ------------------------------------------ | -------------------- | ---------------------- | -------------- |
| 1 | Office productivity applications | CPU-only | up to 1920 x 1080 | up to 20 fps |
| 5 | CAD applications | GPU | up to 1920 x 1080 | up to 60 fps |
| 10 | Video editing/animation/sustained playback | GPU | up to 1920 x 1080 | up to 60 fps |
| 20 | Video editing/animation/sustained playback | GPU | up to 3840 x 2160 | up to 60 fps |
In addition to the bandwidth requirements, the best user experience is with network latencies under 100 ms. Network latencies over 250 ms are not recommended. Also, jitter (change in latency) should be kept at a minimum as significant changes in both available bandwidth and latency can result a very poor user experience.
## Frame App
While Frame was designed to be accessed from an HTML5-enabled browser, some end users may access their Frame environment from Frame App. Frame App provides additional features to organizations that aren't available through a modern web browser. If you are accessing your account from Frame App, we will cover some of the basics here. If you are accessing your account from your web browser, you can move on to the [next section](#accessing-your-account).
To launch Frame App from your local machine, simply click on the icon:
Using Frame App is simple, and there are only a few differences from using Frame in a web browser.
### Menu Options
Frame
| Option | Description |
|--------|-------------|
| **About** | Displays the current version information of Frame App. |
| **Preferences** | Opens the preferences window where your administrator configures startup URL and other settings for Frame App. |
| **Quit** | Closes the application window. If you're in an active session, selecting this option will disconnect your session. You can still access your session by relaunching Frame App. |
Edit
| Option | Description |
|--------|-------------|
| *Various standard options* | Provides standard editing functions for text fields within the Frame App. |
View
| Option | Description |
|--------|-------------|
| **Reload** | Refreshes the current page, similar to the refresh button in a web browser. |
| **Back** | Navigates to the previous page in your browsing history. |
| **Forward** | Navigates to the next page if you've used the Back function. |
| **Toggle Full Screen** | Enables or disables full-screen mode for the Frame App window. |
| **Show Certificate** | Displays the server SSL public key certificate information. |
| **Show WebRTC Internals** | Opens a diagnostic window that provides technical information about WebRTC connections. |
| **Show Media Internals** | Shows detailed information about media components and processing. |
| **Show GPU Internals** | Displays detailed information about graphics hardware acceleration status and driver configurations. |
| **Show USB Internals** | Displays information about USB device connections and status. |
| **Show Developer Tools** | Opens developer console for advanced users. |
History
| Option | Description |
|--------|-------------|
| **Back** | Navigates to the previous page, similar to back button in web browsers. |
| **Forward** | Navigates to the next page, similar to forward button in web browsers. |
| **Reload** | Refreshes the current page, equivalent to the "refresh" button in a web browser. |
### Tips for Using Frame App
- The Frame Console window provides access to all menu options and settings.
- For optimal performance, use the Toggle Full Screen option when working in applications.
- If you experience connection issues, try using the Reload option before contacting support.
- The various "Show Internals" options are primarily for troubleshooting and may be requested by support staff.
Frame App Release Notes
Interested in reading about the latest changes to Frame App? Use the links below to learn more:
https://support.dizzion.com/hc/en-us/categories/39016314427405-Announcements
The section below will outline how you can log in to your Frame account.
## Accessing your Account
It's finally time to sign in to your Frame account. Depending on how your administrator has configured your account, there are two methods you can use to set up and access your account:
### Method 1: Through a Third-party IdP
Many organizations choose to leverage a third-party identity provider (IdP) to control their users' access to various tools and platforms. There is no need to set up your account credentials since your organization can simply provide Frame access to you through the third-party IdP. Frame integrates with most SAML2 identity providers, which means you may access your Frame account in a variety of ways. Accessing Frame through your IdP is simple, we will outline the different methods below.
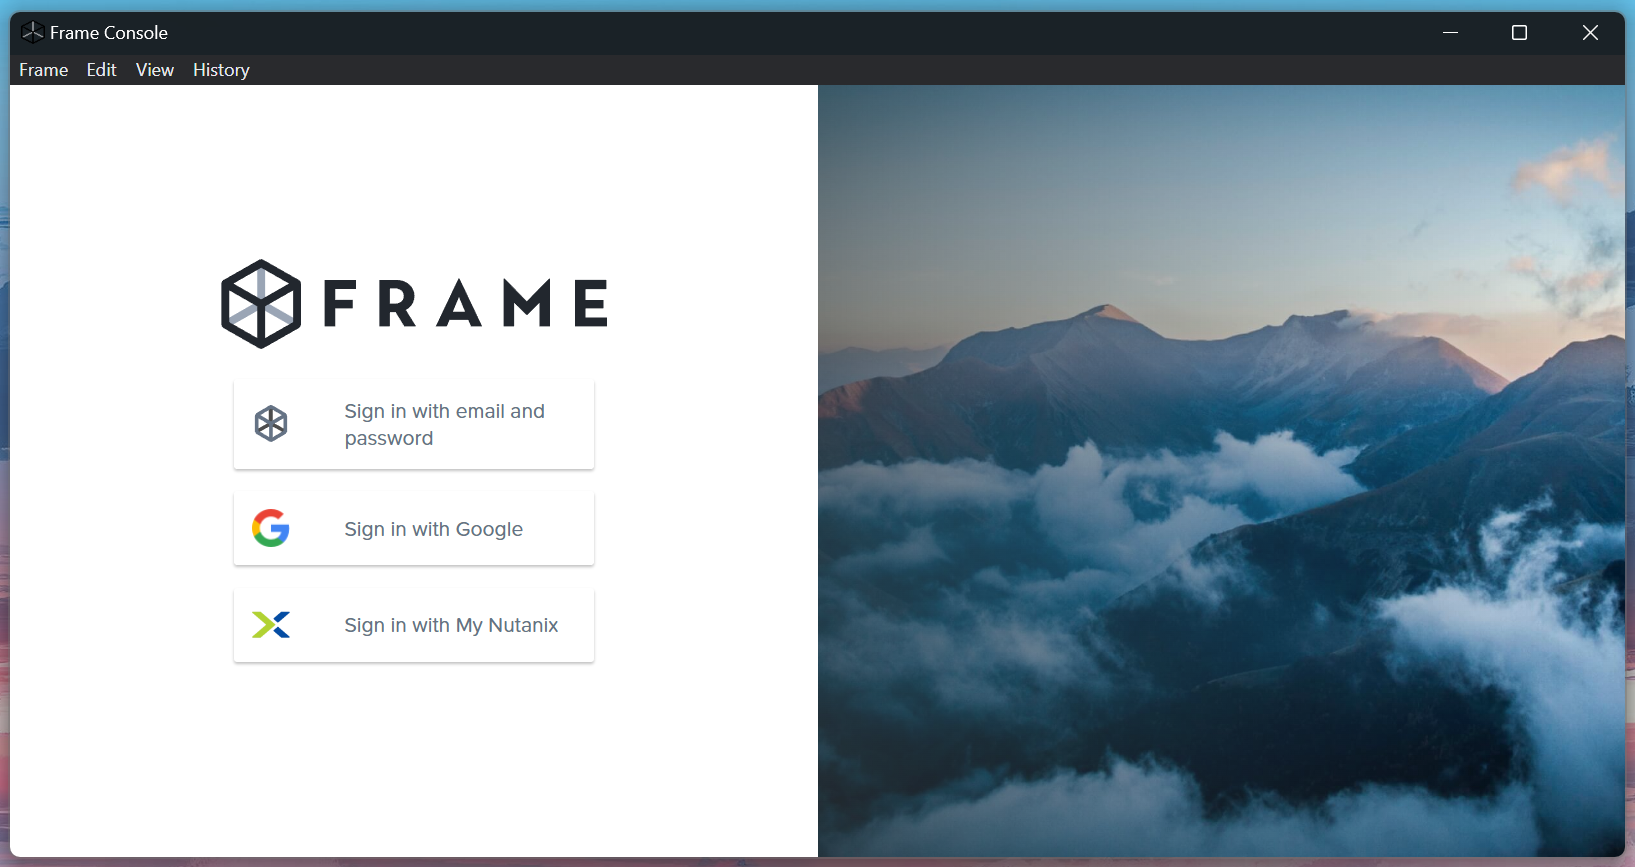
#### Sign In
If your administrator has configured the Frame account to authenticate users through your organization's SAML2 provider, they will typically provide you with a login URL which should look something like this:
```html
https://use.difr.com/customer-name/organization-name/
```
If you are not already authenticated with your IdP, your sign on screen may look something like this:
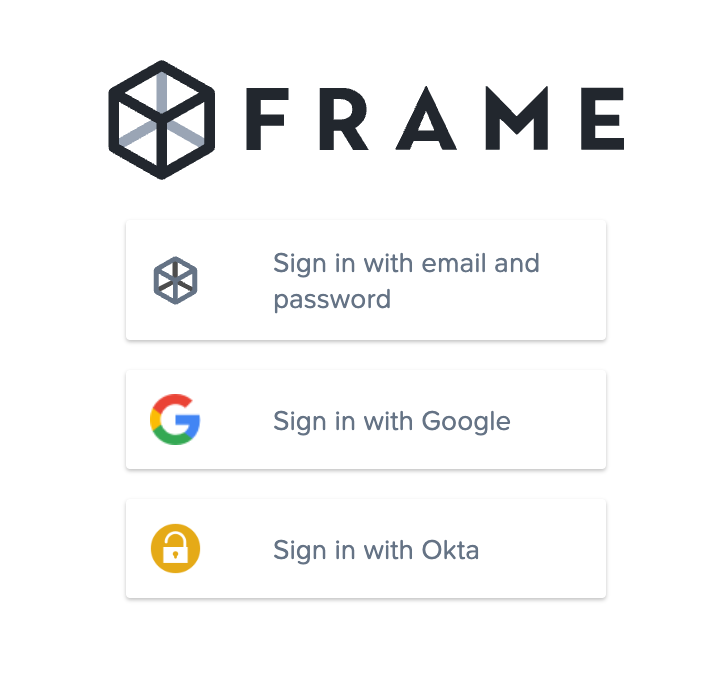
Notice the “Sign in with Okta” button with the yellow lock symbol
In this example, Okta is the identity provider. Your administrator may use another provider such as Microsoft Azure AD, Microsoft ADFS, Google Suite, or others. Click on the “Sign in with \\_\\_\\_\\_” button to authenticate to the platform. You will be redirected to your identity provider's login page where you'll be prompted to enter your IdP credentials. Once you log in, you will automatically be taken to the Frame platform.
#### URL Authentication
Your administrator may have optimized your Frame login URL to authenticate through your IdP. If so, the URL they provide you may look something like this:
```html
https://use.difr.com/customer-name/organization-name/
```
#### Launch Frame from IdP
Identity providers often supply end users with a landing page where they can select from their available applications and launch them, pre-authenticated. As an end user, you may see Frame as an option. Using Okta as an example, you may be able to select your Frame “chiclet” from the Okta “My Apps” page. In this case, starting Frame is as simple as clicking on the button. Many IdPs provide a similar interface to their end users.
#### Password Management
If you are signing in using your organization's third-party identity provider and forget your password or need to change your password, you need to perform those tasks in your organization's identity provider.
### Method 2: Sign In with Frame IdP
If your admin has opted to use the built-in Frame Basic Authentication feature, you will set your own credentials to access your account. The first thing you will need to do is check your email to see if you have received your invitation.

You've been invited! Open the email and click the blue button to proceed.

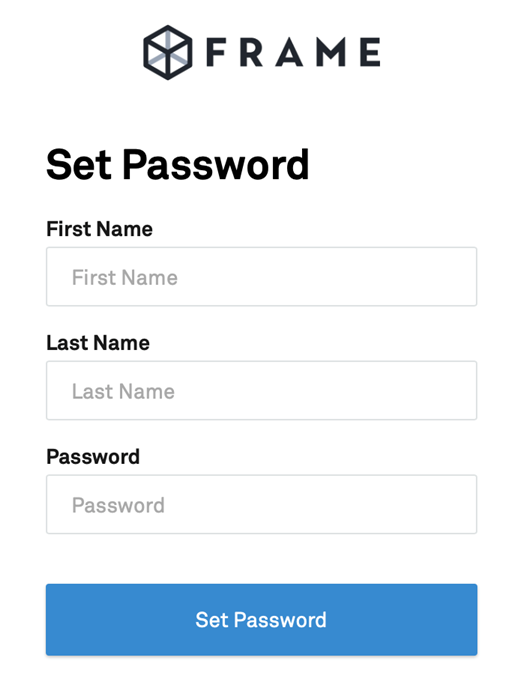
Fill in your user details and click “Set Password.”
Once you've set your user name and password, click “Proceed to Login.” You'll be asked to log in with your new credentials.
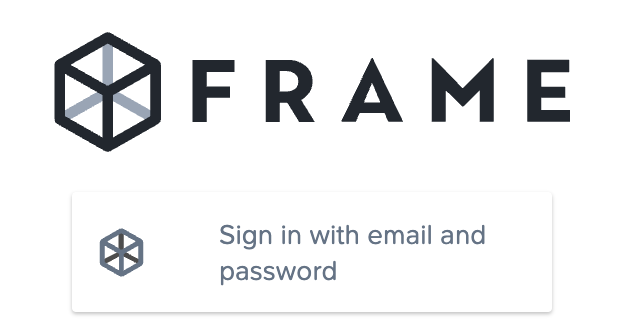
From this point forward, you can log in to your Frame platform account by going to **https://frame.nutanix.com/** and clicking “Sign in with email/password.”
#### Password Management
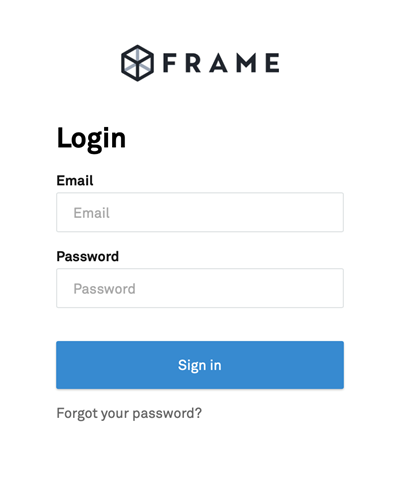
If you are signing in using Frame Basic Authentication and you have forgotten your password, simply click on the “Forgot your password?” link and follow the prompts to receive an email with reset password instructions.
The email will contain a hyperink that you use to reset your password.
To change your password, provided you have already logged in using your Frame Basic Authentication credentials, go to your [User Profile](/books/desktop-users-guide/page/navigating-frame#user-profile). Under the [General](/books/desktop-users-guide/page/navigating-frame#general) tab, you can enter your current and new password.
Now that you have successfully logged into Frame, click **Next** below to learn how to [Navigate Frame](/books/desktop-users-guide/page/navigating-frame)!
# Navigating Frame
It is time to move on to the main event: Navigating your Frame account. While there are many variables you can encounter with your Frame account, there are some universal basics that need to be understood first. In this guide we will review how you may access your session, basic session characteristics, basic account management, how to understand session performance, and much more.
Use the table of contents listed on the right side of this guide to navigate through different sections of this guide. ➡️
## Launch your Session
As we defined it in the glossary of the previous guide, the Launchpad refers to the end-user-facing part of the Frame interface where users can go to launch and manipulate applications. There are a couple of different ways your administrator may have given you to access your Frame environment. After signing in, you will likely be taken to your Application or Desktop Launchpad.
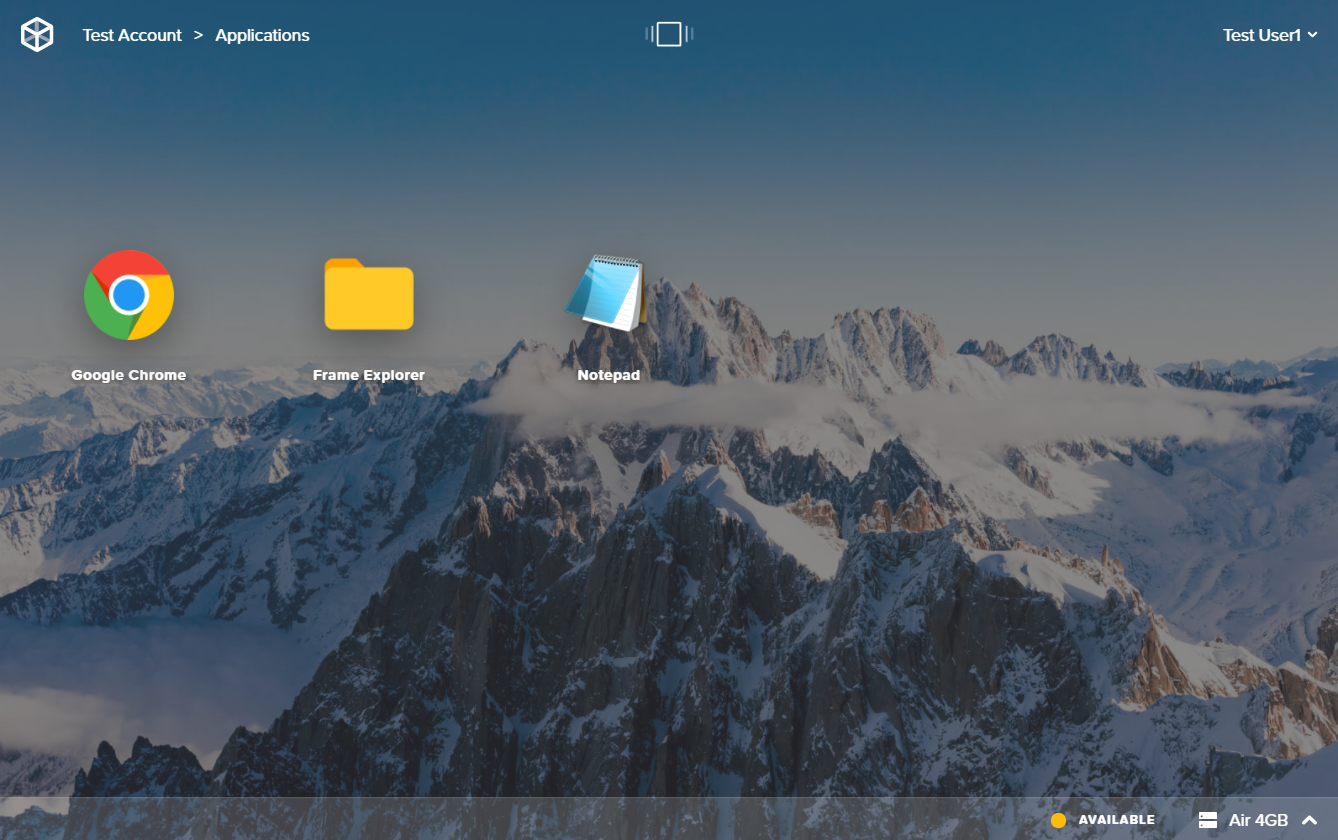
An Application Launchpad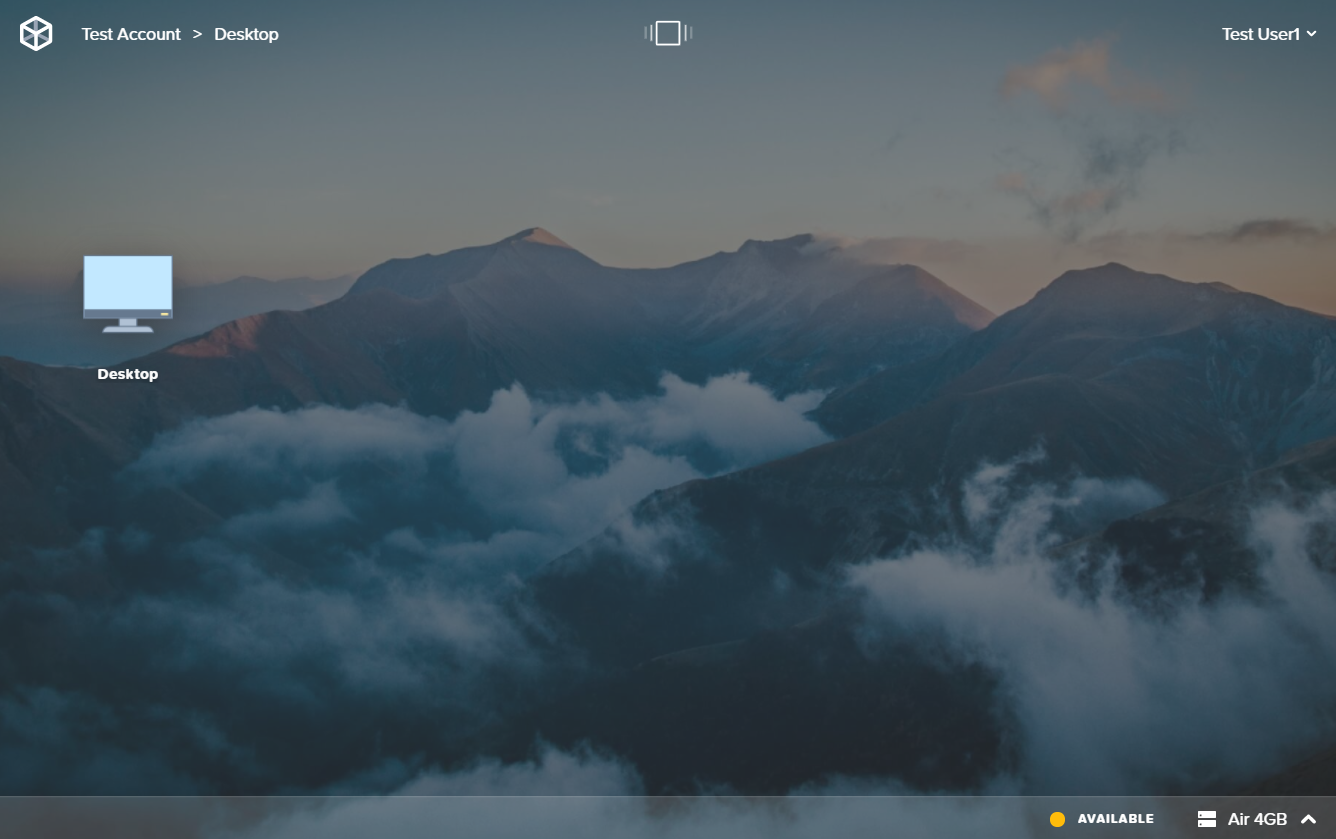
A Desktop LaunchpadTo start a session, simply click on the application you would like to launch. If your Launchpad shows only the "Desktop" icon, you will launch the entire desktop environment and can access all of your apps within the session. If you see individual applications, simply click on the app you would like to run. Application Launchpads only allow end users to run the application selected from the Launchpad. For Application Launchpad users, closing the application window within the Frame session will **disconnect** you and take you back to your Launchpad. When a session is disconnected, it will still be running and accessible from the Launchpad.
### System Indicators
The system status indicator is located in the bottom right corner of your Launchpad. The indicator color and status lets you know the state of your session:
**Status Indicator Color**
**Meaning**
Green
Green indicates that a virtual machine is powered on and available. Your Frame session will start in seconds, as the resources are already available.
Yellow
Yellow indicates that a virtual machine is available, but will take a couple of minutes to power on for you to use.
Red
Red indicates that there are no virtual machines available for you to use. If you cannot access a virtual machine, you will need to contact your account administrator.
### Multiple Launchpads
Your administrator may have provided you with access to multiple Launchpads. Switching between Launchpads is simple. Click on the Launchpad icon in the top center of your browser window.
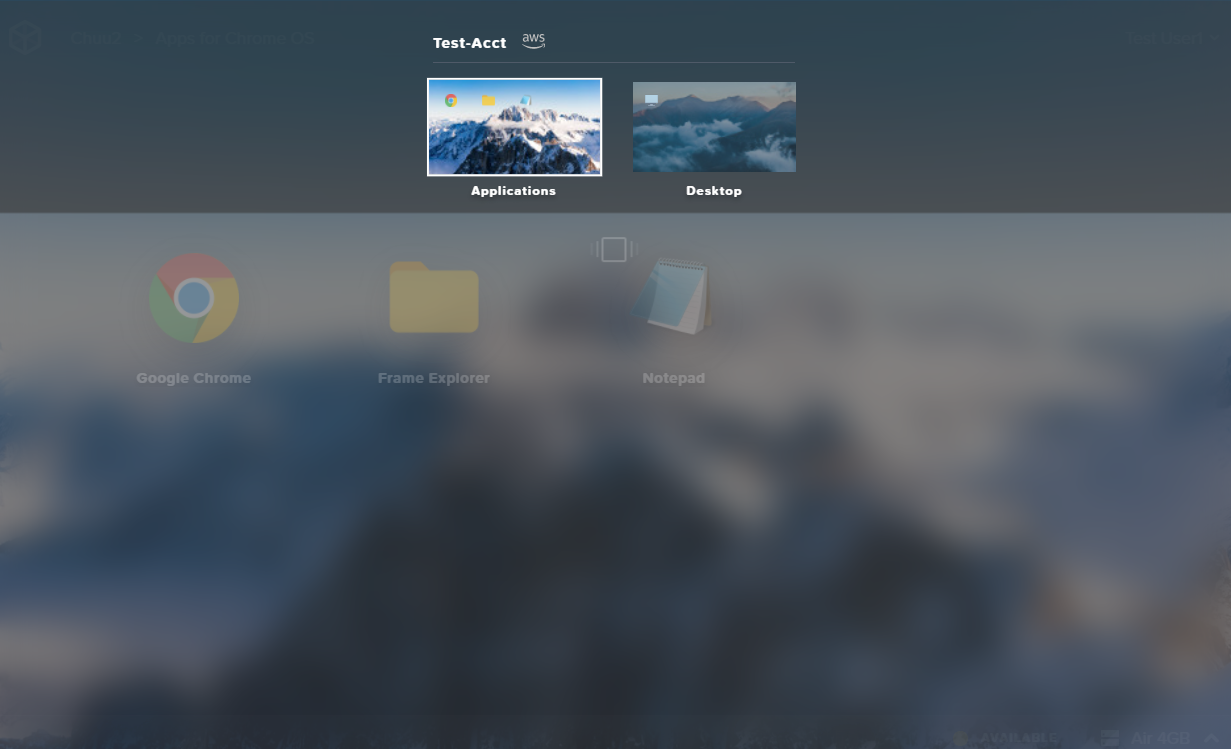
Your Launchpad selector displays the account name, IaaS provider, and Launchpad name for each Launchpad.You can verify you are using the correct Launchpad by referencing the breadcrumbs in the upper left corner of your window.

As shown here, we're using the "Applications" Launchpad of our test account.### Switch your System Type
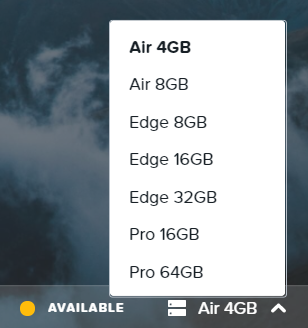
If your administrator has granted you access to more than one system (instance) type, you can switch system types based on the needs of your application. For example, you may normally work on text-based applications like Word and Excel, but occasionally need access to 3D design apps like Autodesk Maya. Text-based applications will do well with an Air 4GB instance type; however, if you need to access to a GPU to run a graphically-intensive app, you can switch to a Pro 16GB system with 4 CPU cores and an NVIDIA GRID GPU.
To switch your system type from your Launchpad, click on the arrow next to your current system type in the bottom right portion of your screen.
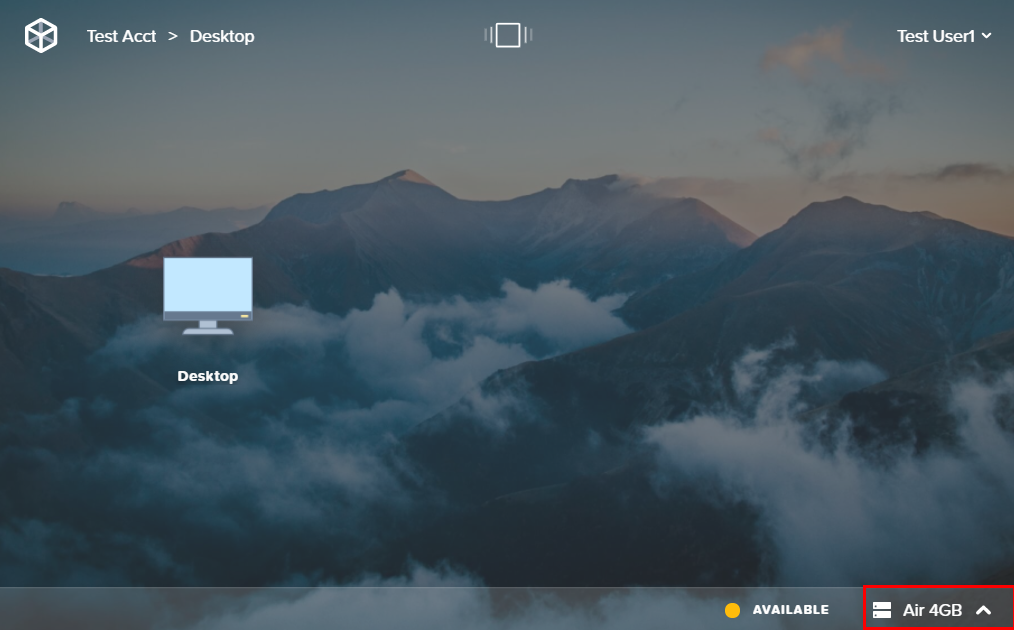
A list of available system types will appear, select the desired system type.
Whether you are launching to a desktop environment or launching an app, your session will start with the most recently selected system type.
If your Launchpad appears “grayed out” (see below) and the system status is listed as “unavailable” after switching, your administrator may not have set up capacity for that system type. Contact your administrator if you feel this is an error.

## Session Basics
In this section, we will outline how to perform basic actions and how to interpret the UI elements in your session. You will likely see some additional details not covered here. Don't worry! The next guide will go into more detail about some of the session settings and features that your administrator may have enabled for your account. For now, we'll start with the basics.
### Start your Session
As mentioned in the section above, launching a session is as simple as clicking on an icon on your Launchpad. Once you have selected your application/desktop session, your session will launch in a couple of minutes or a couple of seconds, depending on your [system status](https://docs.difr.com/link/31#bkmrk-system-indicators).
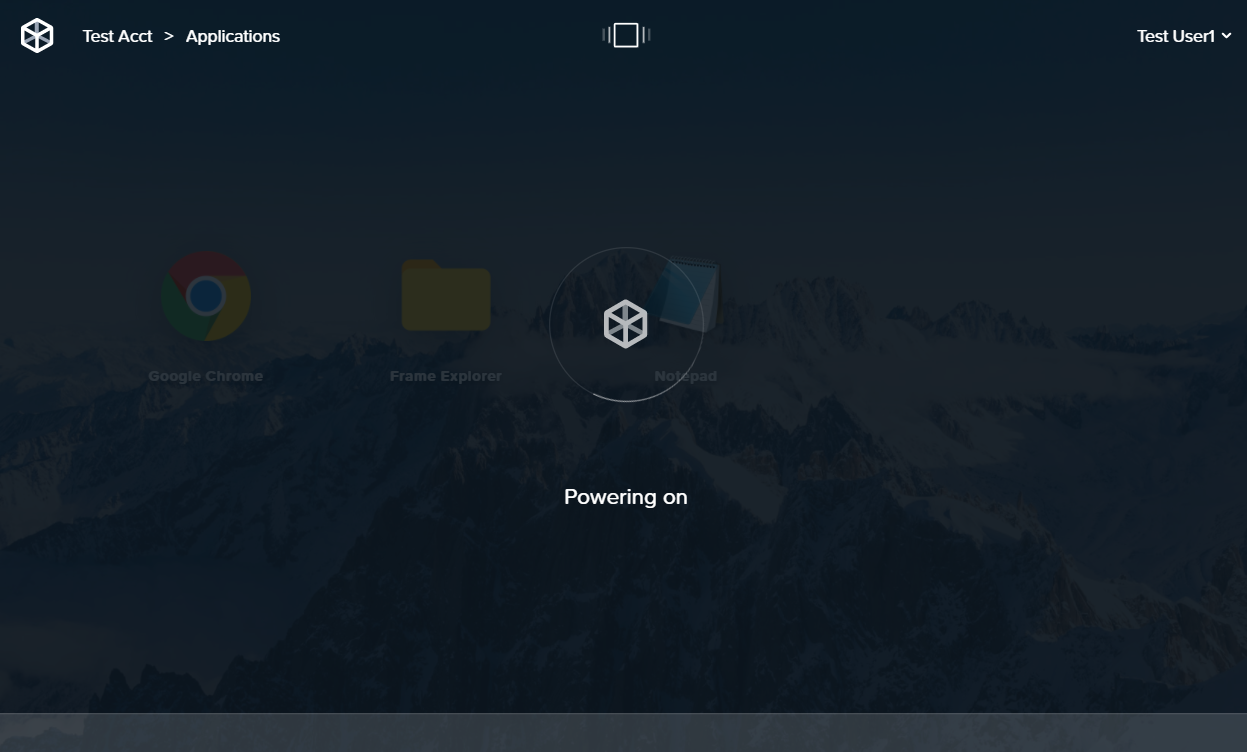
Our session is "powering on" which means that backend resources are powering on to create a session for us.{" "}For this example, we launched Chrome from our Application Launchpad. After a minute or two, we can now use Chrome in our Frame session.
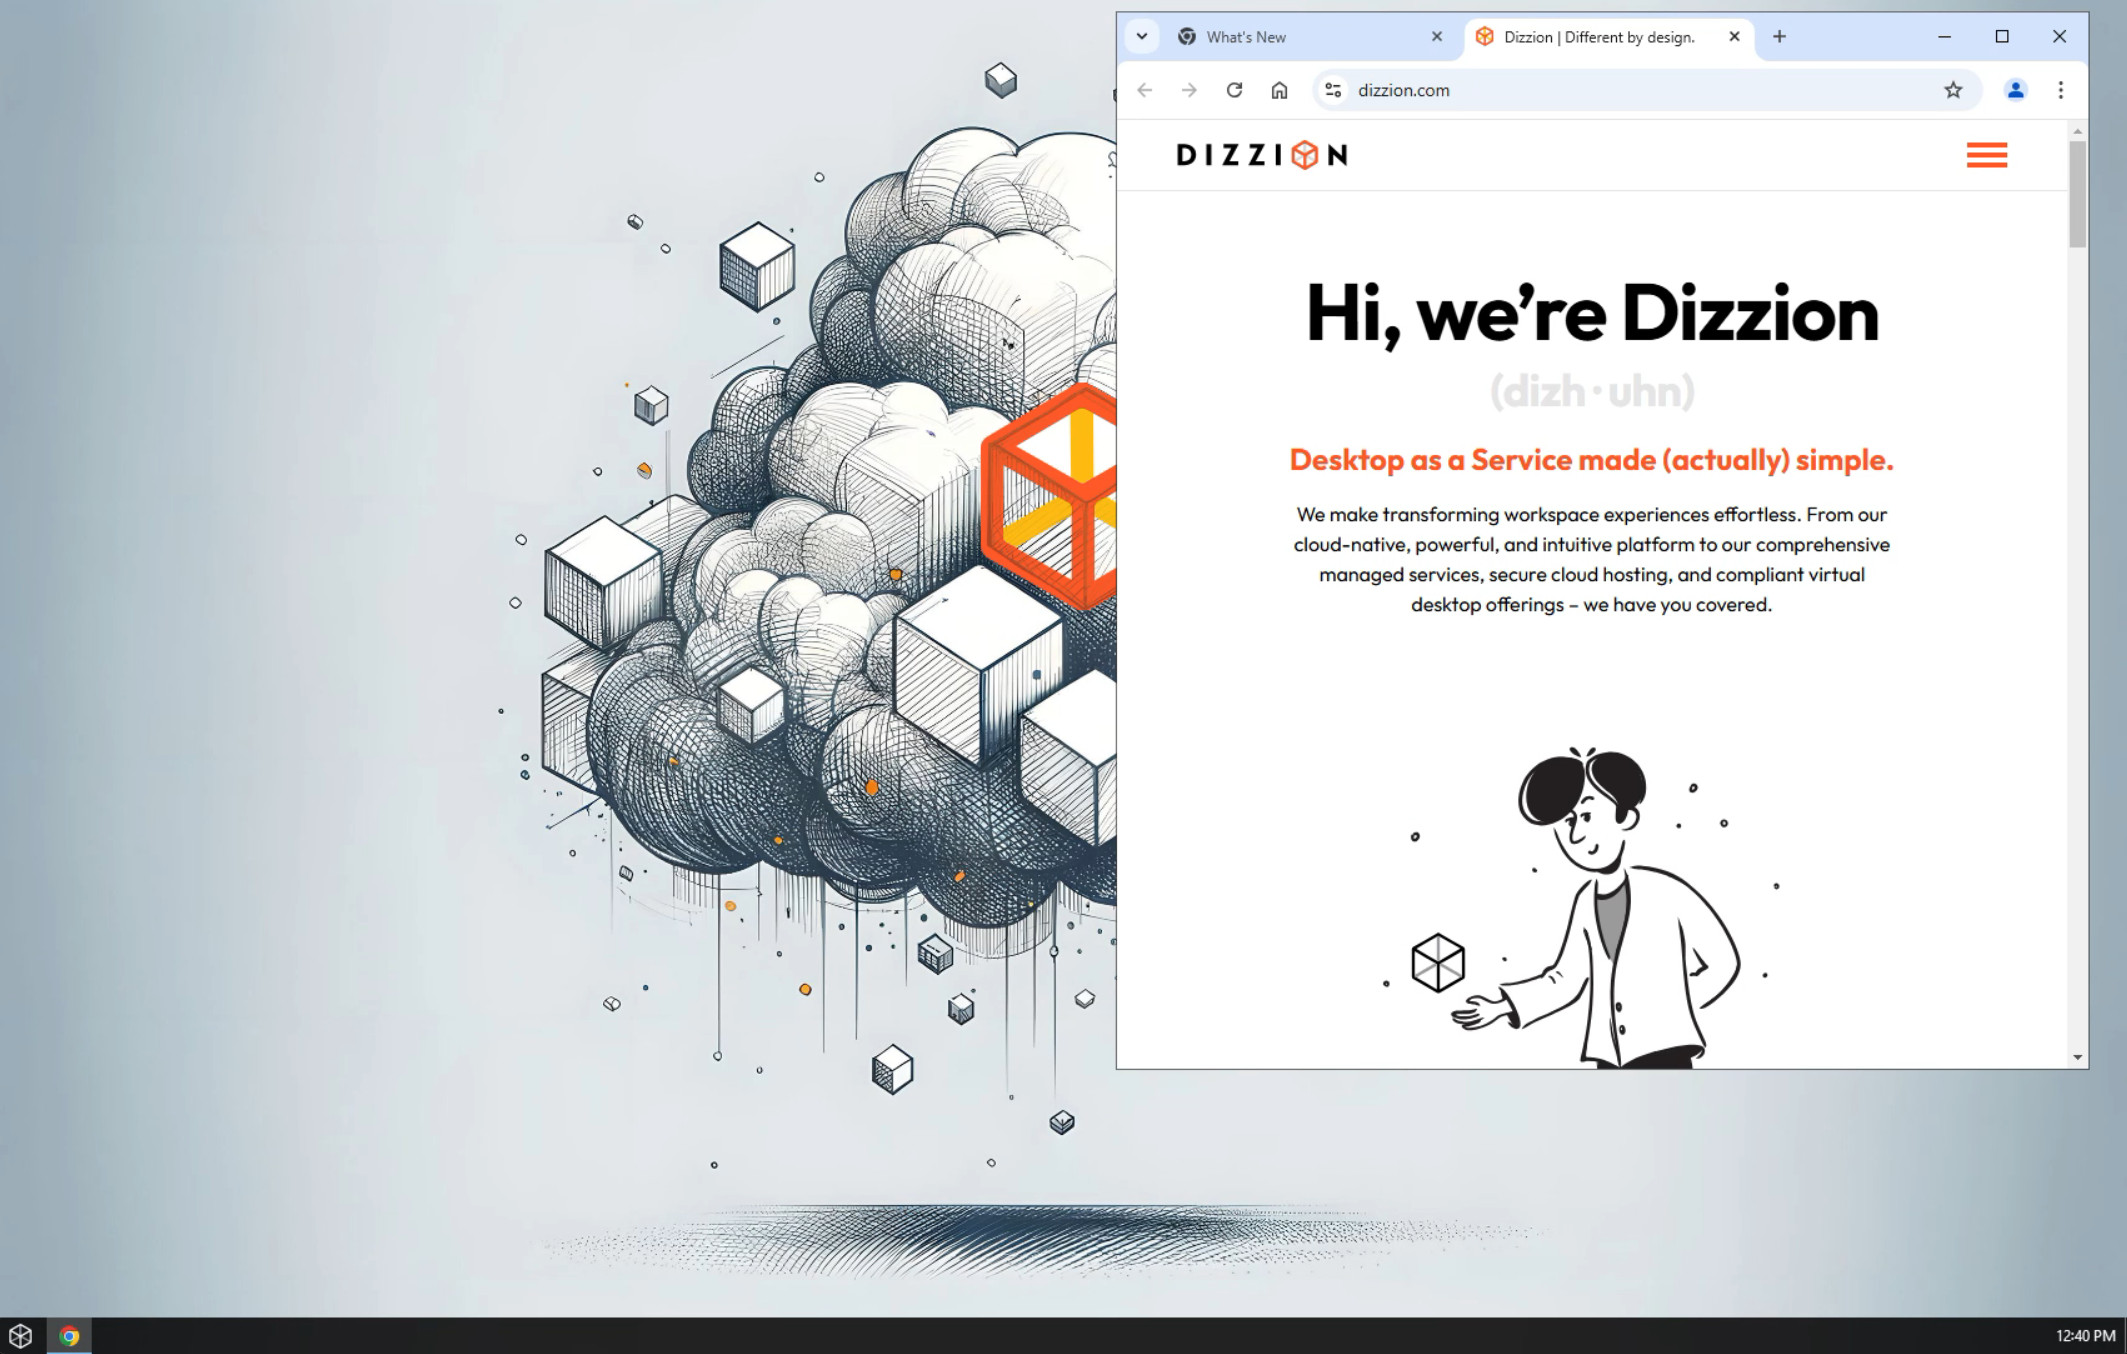
A browser within a browser window!### Frame Start Menu
Put simply, end users may open any applications that are available to them from the Frame Start Menu.
[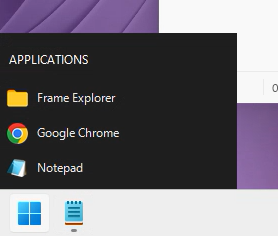](https://docs.difr.com/uploads/images/gallery/2026-01/pwSimage.png)
### Frame Menu
End users can adjust their Frame session (or "terminal") settings by clicking the latency meter in the top center portion of the window.
[](https://docs.difr.com/uploads/images/gallery/2026-01/5DUimage.png)
Takes you back to your Launchpad but leaves the session running in the background. Similar to turning off your monitor while your computer continues running.
Launches a new window within your session where you can manipulate streaming variables and other session configuration options. Refer to [Terminal Settings](https://docs.difr.com/books/desktop-users-guide/page/session-features#terminal-settings) for further details.
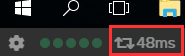
Toggles the display of session statistics. Shows current bitrate in the bottom right corner of the status bar, with additional details available when clicked. More details listed [below](#session-stats).
Toggles the Frame session to display in fullscreen mode, utilizing your entire monitor.
### Session Stats
Session stats provide an abundance of useful information to help you navigate and use your session. Here are the default icons you will see on your Frame Status bar and how to interpret them.

Stat
Description
Latency
Displays how many milliseconds (ms) of time it takes for a packet of data to travel from your browser to the virtual machine. Lower values (like the 84 ms shown) indicate better responsiveness of your session inputs.
Window Scaling
Reflects the percentage of the window that the session display area is utilizing. 100% indicates the Frame session is using the full allocated display area.
Bandwidth
Displays the current data transfer rate (3 kbps shown) of your session. Lower values indicate less network usage, which may be suitable for static content, while higher values occur during video playback or graphically intensive applications.
Frame Rate
Shows how many frames per second (fps) are being displayed in your session. Higher values provide smoother visual experience, while 0 fps may indicate the display is static or there are connection issues.
Session Time
Displays the elapsed time of your current session (37:40 shown). This helps track how long you've been connected to your Frame session.
Show more
Expands the stats panel to display additional detailed session statistics.
See some icons on your Frame Menu that are missing here? We'll cover the additional Frame features that may be enabled for your account in the next guide.
### Terminal Shortcuts
Terminal shortcuts can be used in the session to perform various actions via your keyboard.
Windows key combo
Mac key combo
Action
Alt + R
Option + R
Displays resolution menu
Alt + S
Option + S
Displays settings menu
Alt + Q
Option + Q
Brings up dialog to disconnect session
Alt + C
Option + C
Brings up dialog to quit session
Alt + ~
Option + ~
Toggles active application windows within the session
### End your Session
#### Disconnect and Resume Session
Using the "Disconnect" option will keep the instance running in the background and return you back to your Launchpad. You can resume your session at any time as long as it is within your "idle timeout" window. The idle timeout setting refers to the amount of time (in minutes) that a session will remain active after an authenticated user disconnects from the session. The default duration for this setting is 10 minutes, although your administrator may have specified a different value.
If you are accessing your session from an application Launchpad, closing the application within the session will disconnect you. The instance will remain active in case you decide you would like to launch another application from your Launchpad.
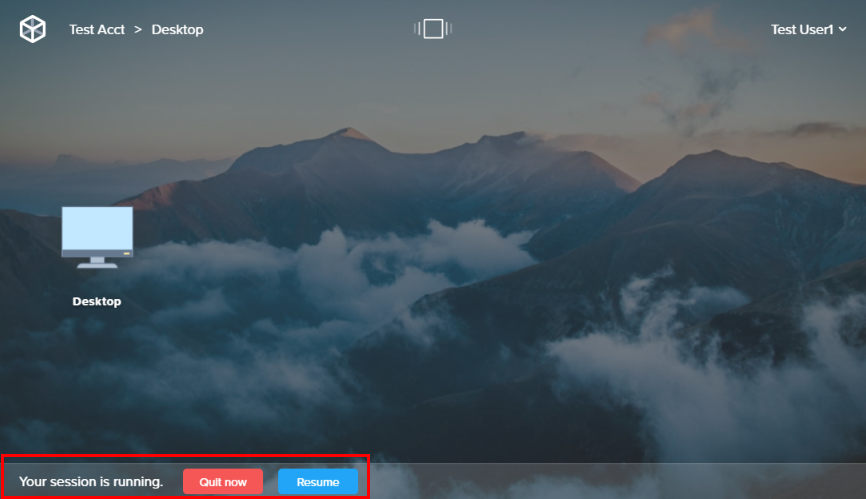
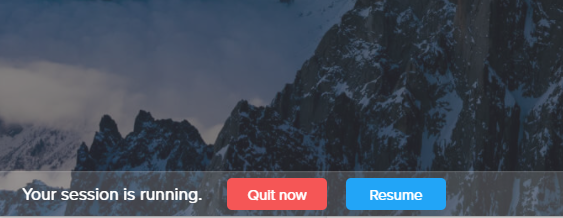
Select "Quit now" or "Resume"You can resume your session by clicking the "Resume" button at the bottom of your Launchpad.
If you close your browser window or quit Frame App while you're in a session, your session will continue to run. You can resume the session by following the instructions listed above. If you would like to completely close the session, please see the section below.
#### Close Session
“Close session” will end your session. This is the equivalent to using the “Shut Down” option in Windows. Any unsaved data will be deleted and the instance will be returned to a “known good state” or the same state it was in when you first started the session.
When you're ready, click on the Gear menu in the bottom left corner of your window:
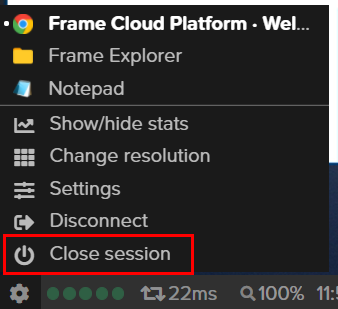
Note
**Power Down**
As a best practice, **do not use the Windows Power Down or Reboot options**. Use the gear menu as described above, the Frame platform will handle the power cycling of your virtual machine.
#### Reconnect to a Session
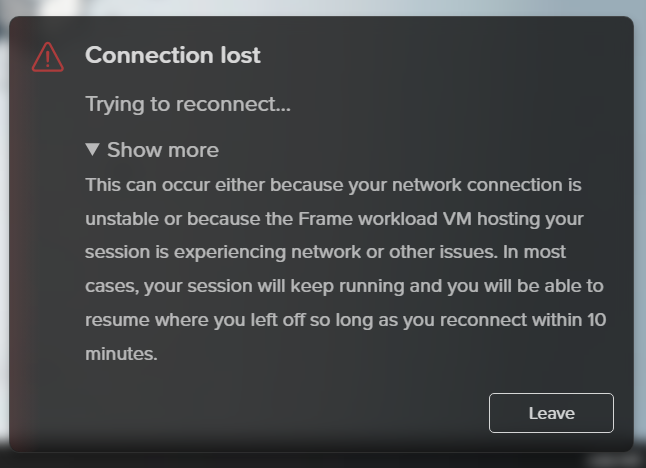
If you're disconnected from your Frame session due to network issues, you'll see a blurred image of your last session state with a yellow status box. The system will automatically attempt to reconnect.
Three possible scenarios:
- **Attempting reconnection**: Shows "Trying to reconnect..." with a "Leave" option
- **Reconnection failed**: Shows "Unable to reconnect..." with both "Reconnect" and "Leave" options
- **Network offline**: Shows "Unable to reconnect, it seems that you are offline..." with only a "Leave" option
Clicking "Leave" returns you to the Launchpad where a "Resume" button will be available once your connection returns (if the VM is still running). For faster reconnection when network issues resolve, use the "Reconnect" button instead of waiting for automatic attempts.
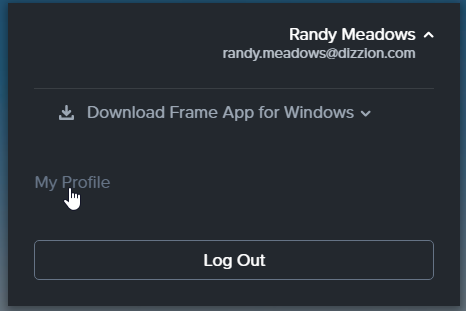
## My Profile
The user profile section consists of multiple components that allow you to view and manage your account preferences, storage provider options, and Personal Drive backups (if enabled). This page can be found by clicking on your user name in the upper right corner of your Launchpad and clicking “My Profile.”
### General
View and edit your account information including name, password, and email. This section displays your Frame account details and lists the Frame environments where you have access.
Customize your Frame experience with these options:
- **Desktop Auto Launch**: When enabled, skips the Launchpad and sends you directly to your desktop session.
- **Time Display**: Choose between UTC or your local browser time zone for all timestamps in the platform.
Hover over the Launchpad name under "Roles" for additional access details.

Hover over the Launchpad name under "Roles" for more details.### Preferences
The next tab down is the “Preferences” tab where you can toggle certain account preferences.

- **Desktop Auto Launch**: If enabled, the Desktop Auto Launch feature sends users directly into their desktop session, skipping the Launchpad completely. This eliminates the requirement for the user to have to click on the sole “Desktop” icon of their desktop-only Launchpad.
- **Time Display**: Date/time will be displayed in UTC or the local time zone of your browser, except for administrators viewing Frame Console Analytics.
### Persistent Desktop Backups
If your administrator has enabled the ability for you to manage your own persistent desktop backups, you will see the “Persistent Desktop backups” page in your profile. On this page, you will see any backups created by your account administrator, as well as any backups you have created. From this page, you can filter your backups by name, creation date/time, and backup type.
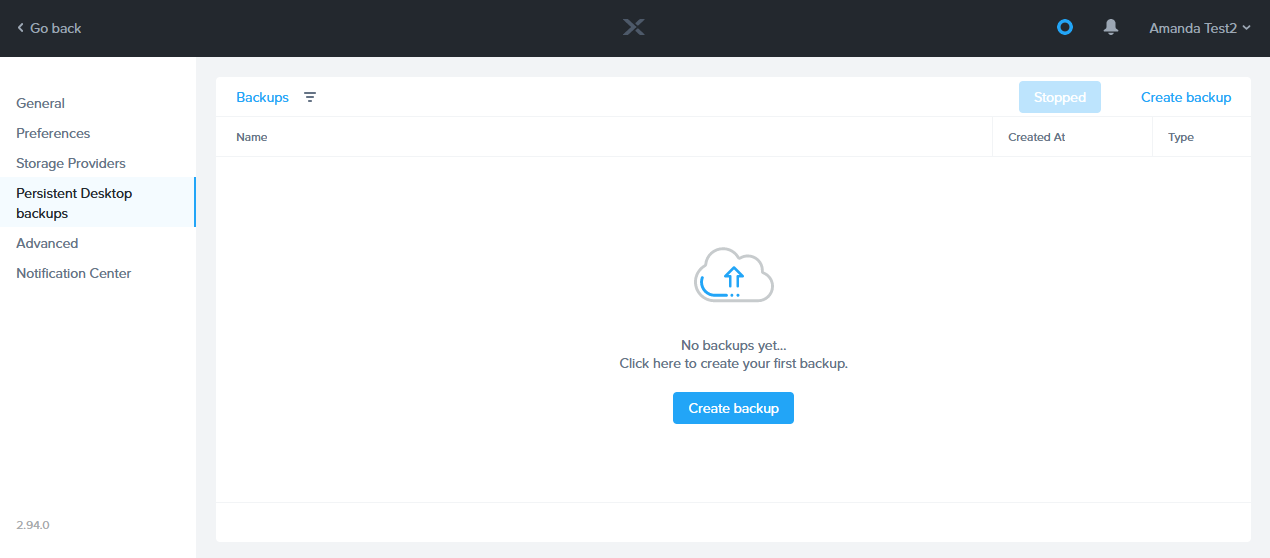
To create a manual backup, simply click on the blue "Create backup" link in the upper right corner of the page. A new window will appear prompting you to enter a name for your backup. Once you have named your backup, click "Create" in the bottom right corner of the window.

You must ensure that your instance is in a “stopped” state before creating a backup. The ability to backup will be disabled until you click the “Stop Server” button in the upper right corner next to “Create backup.”
You will see a warning informing you that your Persistent Desktop will be powered off for a few minutes. Click “Confirm” to proceed.
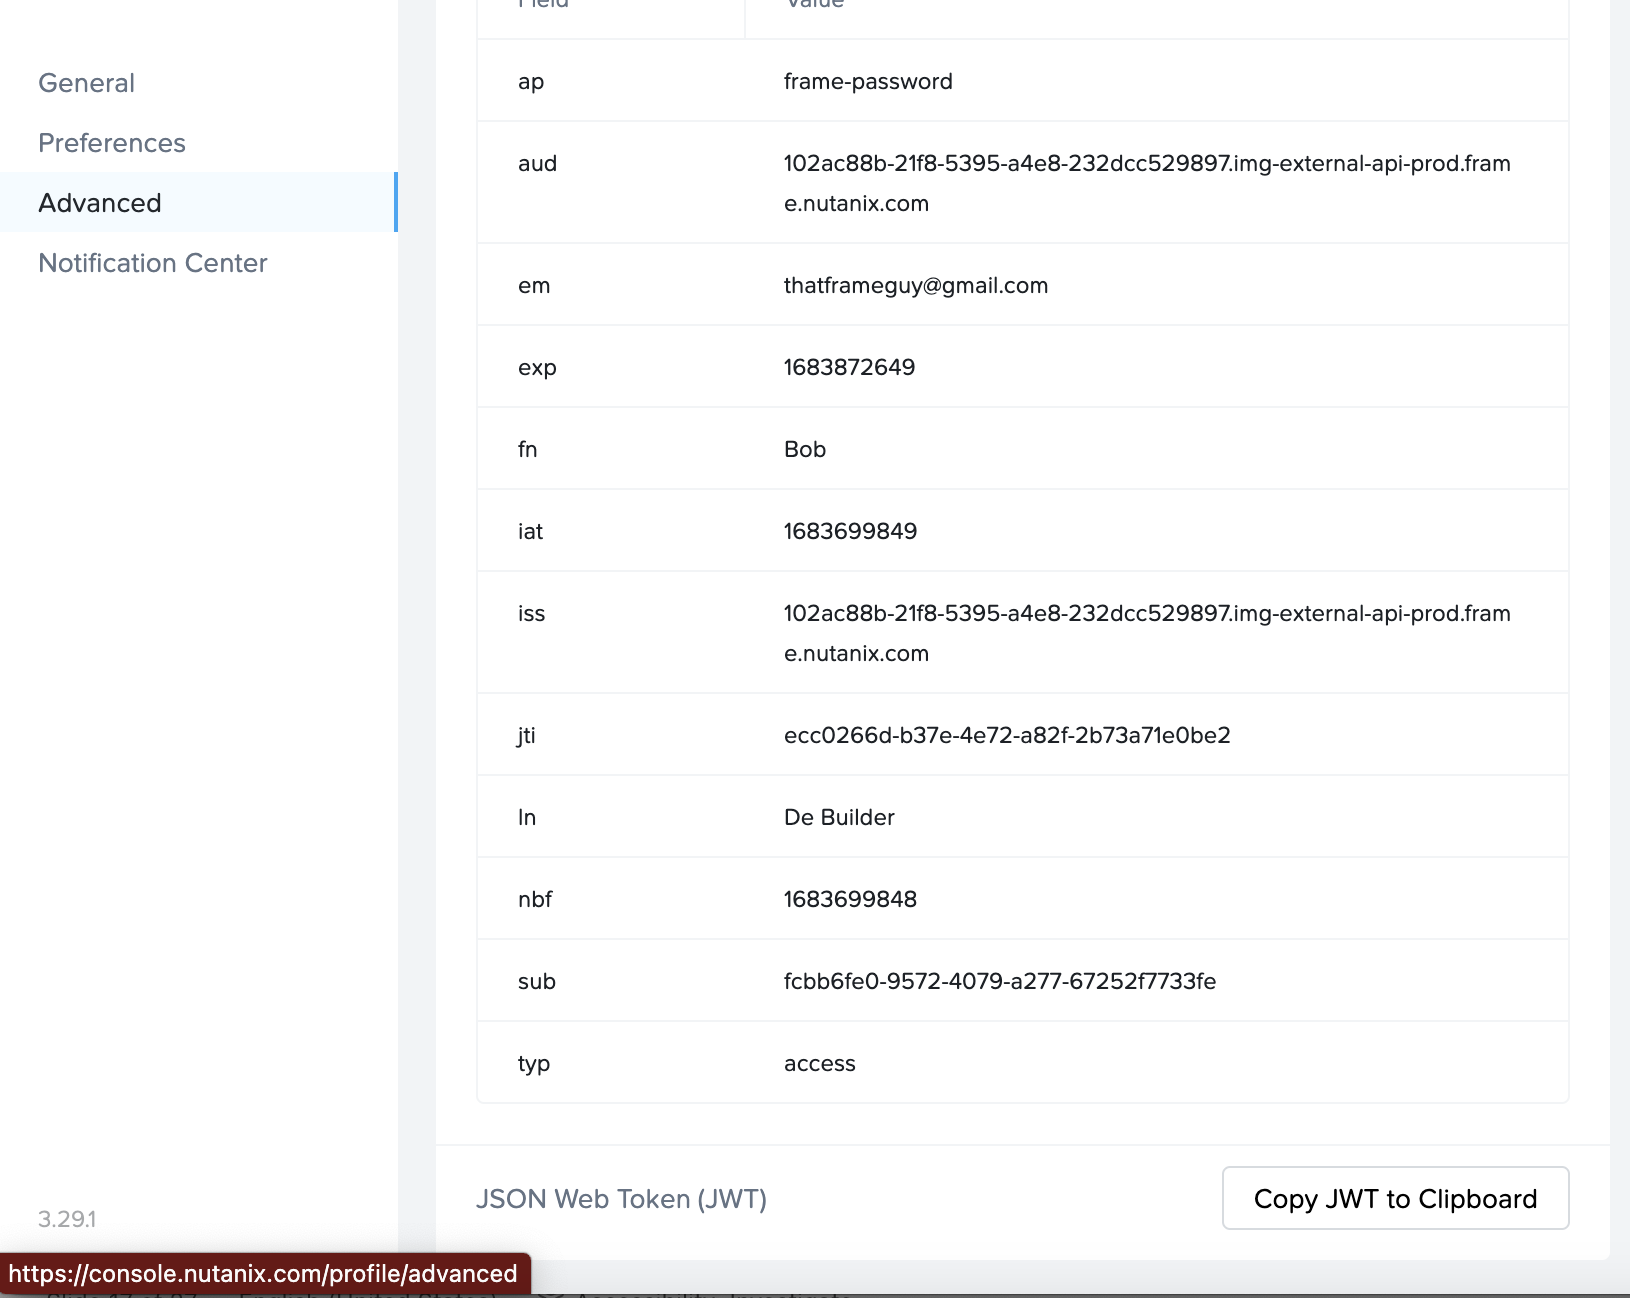
### Advanced
The "Advanced" tab provides detailed information about your authentication assertions. Your administrator may ask you to access this page for debugging or assessing validation problems with your account.
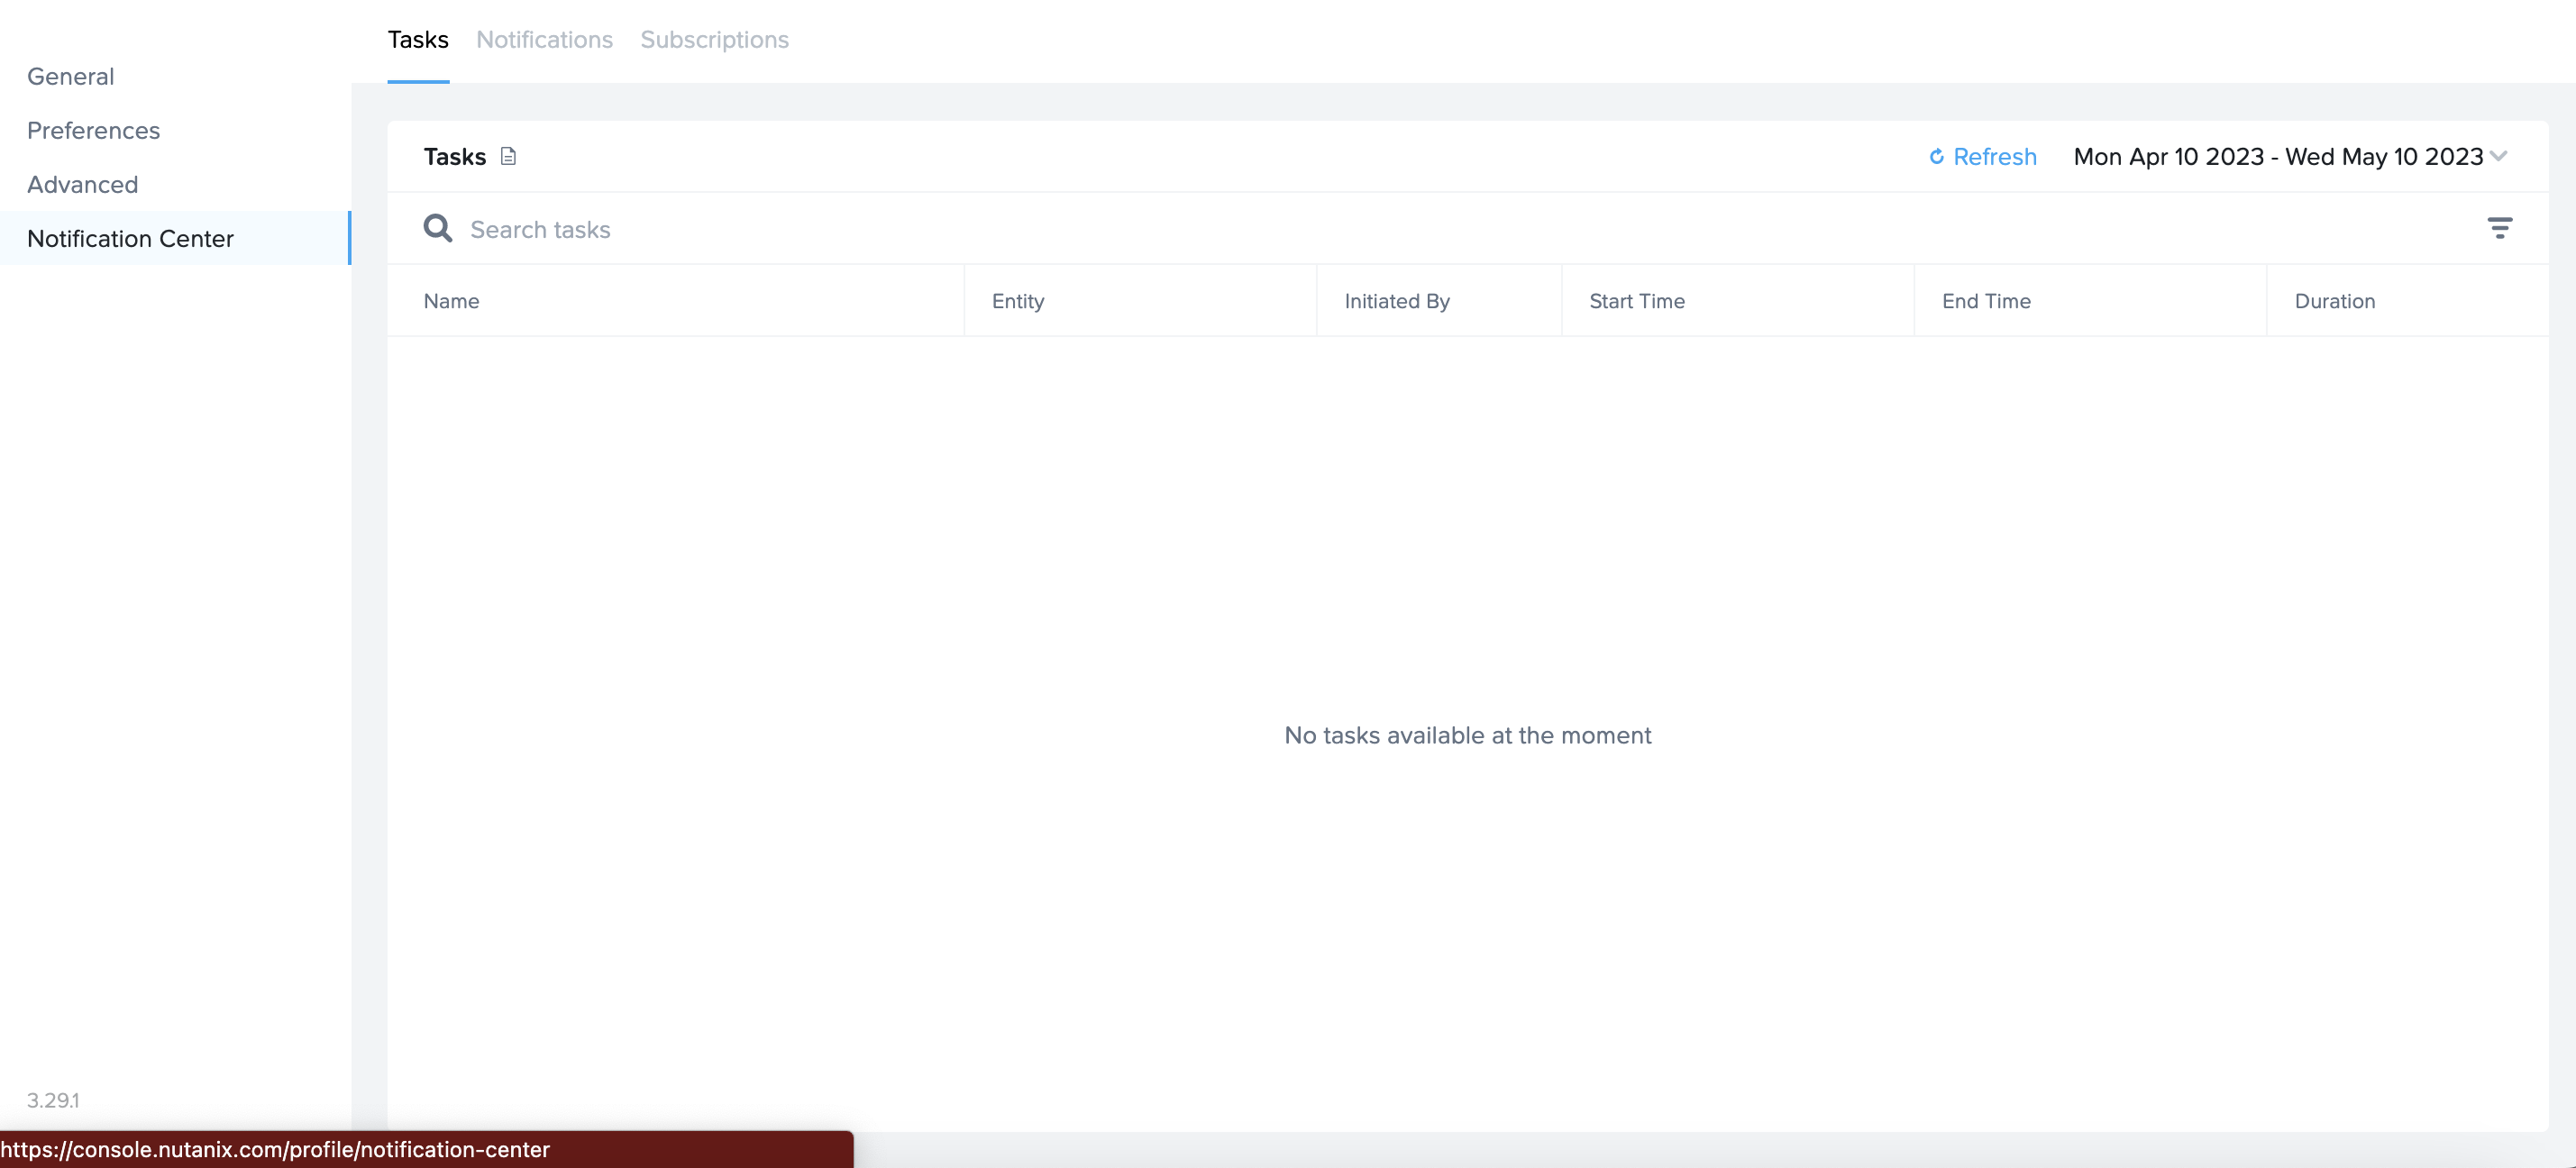
### Notification Center
Lastly, the “Notification Center” tab allows you to check on and subscribe to account activities. If you are an administrator for any of your accounts and would like to know more, you can check out our Notification Center documentation for more information.
### Administrator Menu
When a user has been granted account admin rights, the user will see a list of accounts they have access to in the drop-down menu.
Admin users can switch between Frame accounts by selecting an account from the drop-down menu. Alternatively, admin users can use the search field to type the name of the account to switch to. This is useful when users have access to multiple accounts.

The check icon indicates the account currently being accessed.
The rocket icon next to an account indicates the user has access to one ore more Launchpads tied to that account.
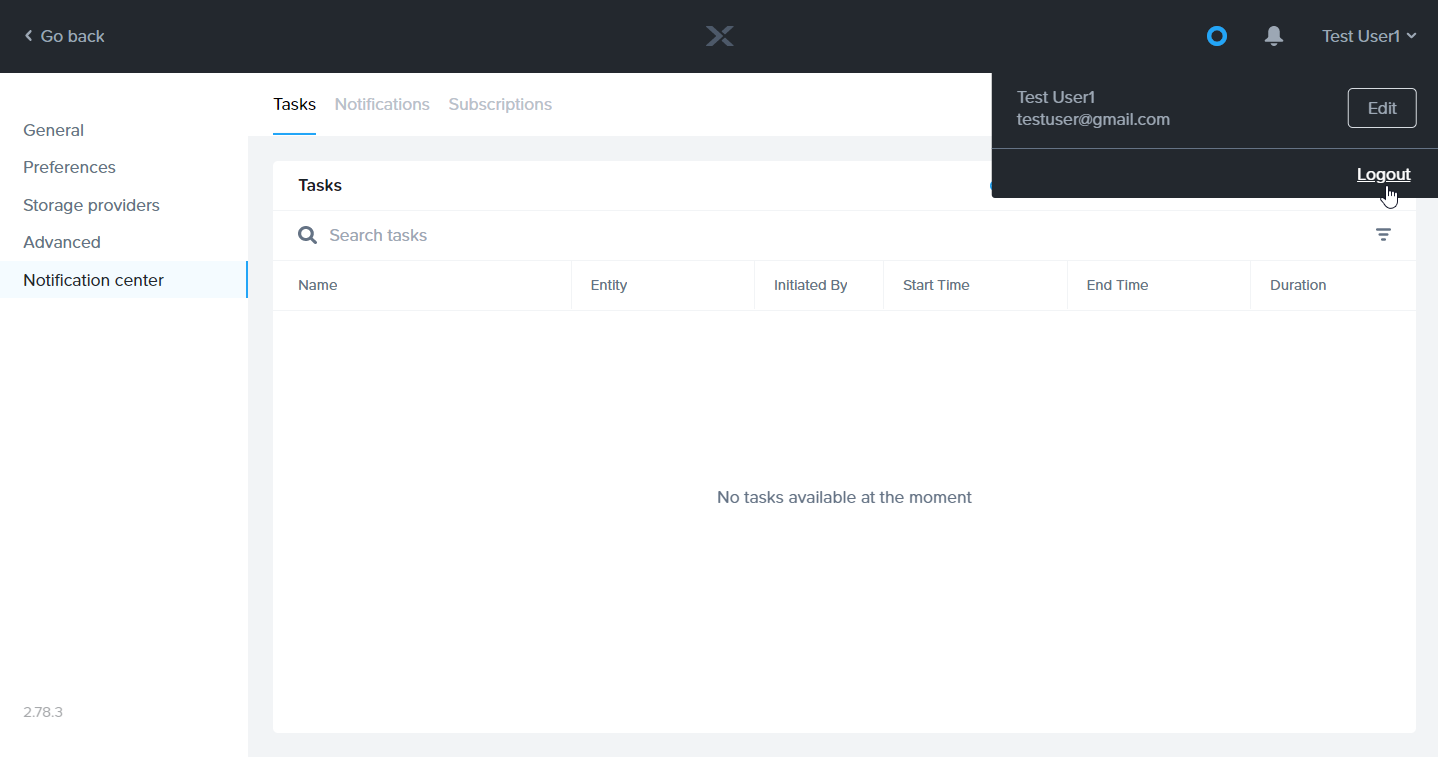
### Logout
If you would like to log out of your Frame account, simply click on your name in the upper right corner of the page and select “Logout.”
## End User Troubleshooting
### General
As an end user, you will likely need to reach out to your organization's IT help desk for any issues you may run into with your Frame account. If you are presented with an "Oops!" error, please copy the "Event ID" provided to you in the dialog:
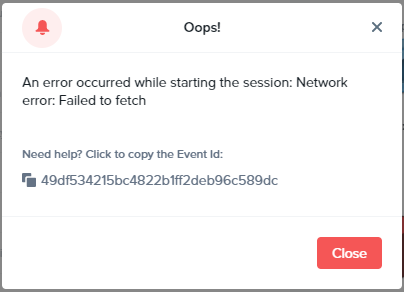
To ensure the highest efficiency, please report the time the issue occurred and the Event ID to your organization's IT help desk representative along with the description of the problem.
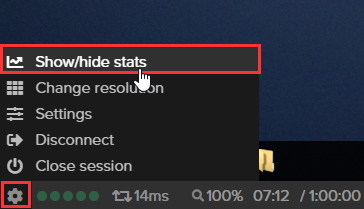
You may also help your IT help desk by providing them with your “Session ID.” Simply click on the gear menu in the bottom left corner of the session and select “Show/hide stats” as shown below:
Next, click the "Session stats" text on the right side of the status bar. Your session stats will display as shown below:
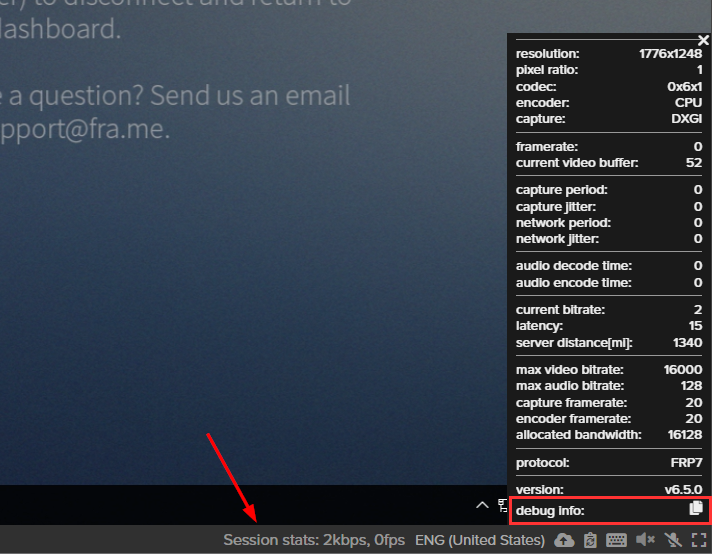
At the bottom of the stats window, click the copy/paste icon adjacent to “debug info.” Your Session ID will be the first line of information in the debug info when you paste it.
### Network
If you notice network performance issues in your Frame sessions, the Frame Support team recommends evaluating a few things before creating a support case. While connected to a session, there are a couple of data points that can help diagnose connection issues: the bandwidth indicator and network latency data.
#### Bandwidth Indicator
The Bandwidth Indicator (5 dots next to the gear menu of the Frame status bar) represents how much bandwidth is being used by your connection to the Frame session. Network bandwidth is the volume of data per unit of time that an internet connection can handle. For Frame, your “downstream” bandwidth is most important, especially if you are working with apps that have a lot of graphical motion and changes and/or you are using a large monitor with a high resolution (which results in more data needing to be streamed). Upstream bandwidth, however, also affects performance - and while it does not need to be as much as your downstream bandwidth, being as close to a “balanced” connection as possible is best. In general, we recommend a downstream bandwidth of at least 3 Mbps and at least 1 Mbps up.
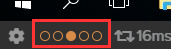
If your connection's bandwidth is adequate, you should see four or five green dots. If the bandwidth is less than desirable, the dots will reflect this with fewer dots and turn orange, and ultimately red (one dot, which is a very poor connection). The dots translate to Mbps per below:
- **1 dot**: < 1 Mbps
- **2 dots**: 1 - 2 Mbps
- **3 dots**: 2 - 4 Mbps
- **4 dots**: 4 - 8 Mbps
- **5 dots**: > 8 Mbps
You can initiate a new bandwidth measurement any time by clicking on the Bandwidth Indicator.
If you would like to see your local network's bandwidth, you can visit [SpeedTest.net](https://www.speedtest.net/) to see what you have to work with.
#### Network Latency
The Network Latency indicator shows how many milliseconds of time it takes for a packet of data to travel one way from one point to another.
In our case, this affects the responsiveness of your session to your inputs. For example, when you click your mouse - that information is sent to our remote servers, the movement is interpreted, and the change in the screen is sent back to you. Lower is better; if you experience high latency, there may be something affecting the routing of the packets to the server. Here are a few possible issues you may consider:
- **Network congestion**: Network congestion can happen on under-powered shared Wi-Fi connections or networks that are shared by too many users at a time (schools, coffee shops, airports, etc.). Network congestion can also be caused by excessive data usage (i.e. large file uploads/downloads or multiple users streaming videos at once).
- **Poor network routing**: On occasion, ISPs or networks will have rules that cause the physical route of the data to travel farther than desired which can result in excess network latency.
#### Connectivity Issues
If you find that you are unable to connect to a Frame session at all, we recommend you visit [WebSocketsTest.com](http://websocketstest.com/) to ensure that your network and browser supports HTML5 WebSockets. Your browser and network *must* pass each test in order to be compatible with the Frame service.
If you continue to have issues, please reach out to us by creating a support case.
Ready to learn about some of the optional features that may be enabled for your Frame account? Continue on to the next guide to see what neat things you can do!
# Session Features
So far, you've learned about the minimum requirements for Frame in our [Getting Started Guide](https://docs.difr.com/introduction) and the basic functions of your Frame account/session in our [Navigating your Frame Account](https://docs.difr.com/books/desktop-users-guide/page/navigating-frame) Guide. Now it's time to move on to the final guide all about session features. This guide will provide you with detailed information about different session features that may or may not be enabled for your account by your administrator. While most end users access their Frame account from a browser, we have also included additional information for those accessing Frame from Frame App.
This guide is intended to explain optional features which may or may not be enabled for your Frame account.
## Supported Peripheral Devices
### Frame in a Browser
Frame supports using many common peripheral devices, including the verified devices listed below. The Google Chrome browser is the preferred client browser for all integrations. Most of the same functionality is available on other modern browsers like Mozilla FireFox and Microsoft Edge. If a desired device is not listed, please reach out to Frame Support. Frame remoting technology provides unique integrations for distinct devices based on use case. Check out our End User System Requirements documentation to read more about supported browsers on Frame.
Device Type
Windows PC (HTML5)
Mac (HTML5)
iOS/Android (HTML5)
Linux (HTML5)
Storage Device (PenDrive, USB Hard Disk) \*
✓
✓
-
✓
Audio Out (Speakers, headsets)
✓
✓
✓
✓
Audio In (Microphone)
✓
✓
-
✓
Standard Generic Keyboard
✓
✓
N/A
✓
Symbol HID Barcode Scanner
✓
✓
N/A
✓
Mouse
✓
✓
N/A
✓
Multi-touch Screen
✓
N/A
✓
-
Microsoft Surface Pen
✓
N/A
N/A
N/A
Printer
✓
✓
N/A
✓
Yubikey
✓
✓
N/A
✓
CAC/PIV Smart Card Readers (requires Frame App) Early Access
✓
-
-
-
Microsoft Windows Image Acquisition (WIA) Scanners (requires Frame App for Windows) Early Access
✓
-
-
-
Wacom Intuos Pen Touch Device (Chrome only) Early Access
✓
✓
N/A
-
\* = Files in USB storage devices on the local endpoint must be manually uploaded into the Frame session following the workflow described in the Accessing Files section of this document.
### USB Support
When enabled for your account, using your generic USB device is as simple as plugging the device into your local computer while in a Frame session.
#### USB HID Support
Frame supports up to 10 USB HID devices (3D mice, gamepads, and joysticks) connected to your local computer, in addition to your mouse and keyboard. If USB HID support has been enabled for your account, you may need to follow the instructions below to finish your configuration. If you are accessing Frame via a web browser, you must use Chrome on MacOS or Linux-based operating systems. End users should follow the steps below to complete the configuration of USB HID support when accessing Frame from Chrome on MacOS or a Linux-based operating system. Chrome users must enable the “Experimental Web Platform features” within the Chrome browser, as Google still considers USB HID and WebUSB support to be an experimental feature.
End users accessing Frame from Frame App are not required to make any additional configuration changes and should be able to use the feature immediately (if enabled for their account).
1. In a new Chrome browser tab, enter the following in the address bar:
```
chrome://flags/#enable-experimental-web-platform-features
```
2. At the top of the page you will see the "Experimental Web Platform features" option. Use the drop-down menu to enable this feature.

3. Click the "Relaunch" button once it appears at the bottom of the page to apply your changes.

2. To plug in a USB device from the list to the Frame session, click on the desired USB device name. When the device is plugged in, a confirmation sound will play and the device will be visible in the OS (just like if you had physically connected it to the computer).
3. If the device you want to use has not previously been registered, select the "Add HID device" option from the menu. A new window will appear and display a list of the recognized HID options attached to your local machine.
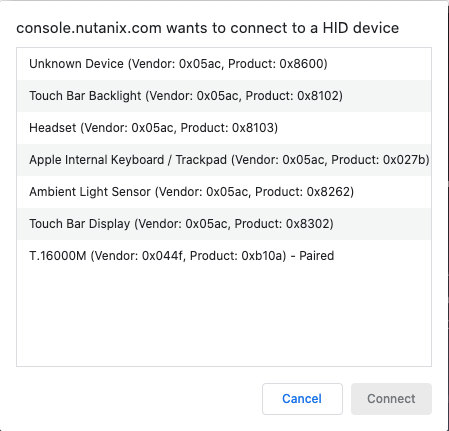
## Input Options
If your administrator has enabled multiple keyboard input languages for your environment, switching between languages is very simple. If your Frame environment includes the Windows taskbar, you can use the [native Windows language bar](https://support.microsoft.com/en-us/office/switch-between-languages-using-the-language-bar-1c2242c0-fe15-4bc3-99bc-535de6f4f258).
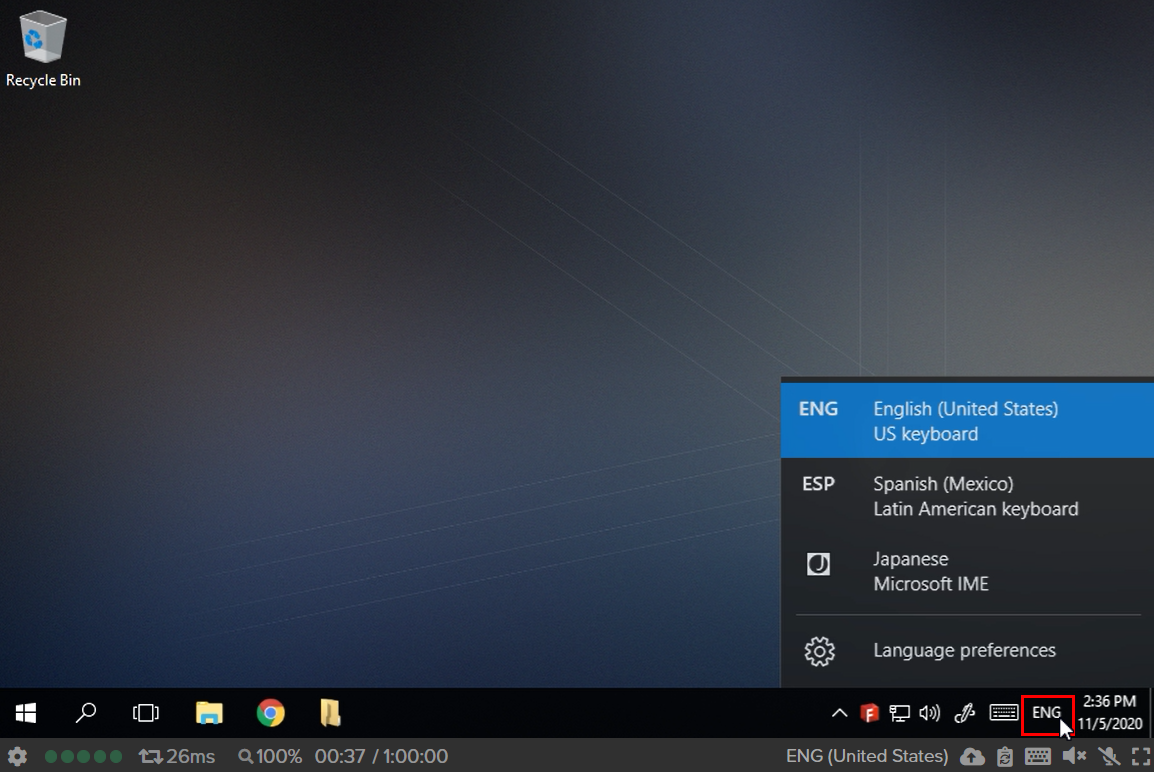
Click on the language icon in the bottom right corner of your window.
Your Frame environment may not include the Windows taskbar, in which case you will want to use the language icon located on the far right side of your Frame status bar.

Select your desired language from the list that appears.
### Mouse Modes
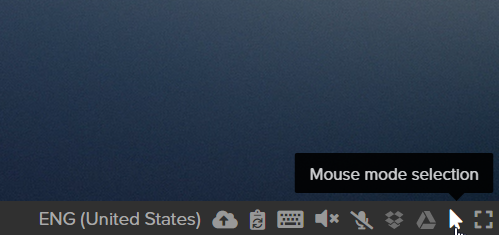
A new dialog box will appear, select the mouse mode you wish you use.
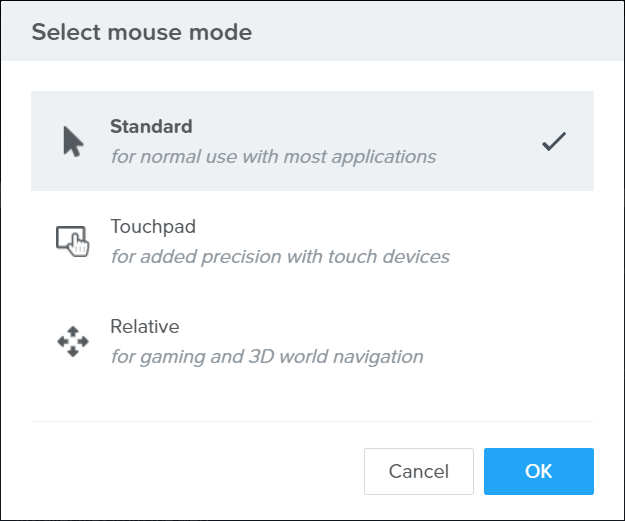
#### Standard
Touchpad mode was created to provide extra precision when accessing a Frame session on touch-enabled devices. With Touchpad mode, you'll see a special gray cursor that you can move by pressing anywhere on the screen and dragging.
To left-click, tap once anywhere on the screen with the cursor placed in the area you'd like to click. To right-click, tap with two fingers anywhere on the screen. The cursor will show which button-click you're performing. For instance, a left-click in Touchpad mode looks like this:

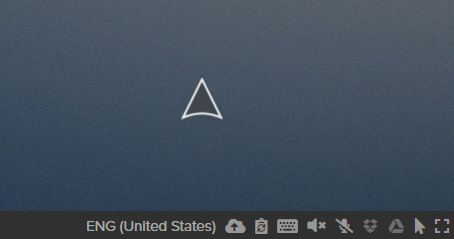
Relative mouse mode is intended for gaming and 3D world navigation. You'll want to first launch the application you're going to use, and then switch to relative mouse mode when you need to navigate a 3D environment. Once enabled, your cursor will disappear and you will be able to navigate your app like you would with any first-person point-of-view game.
To exit relative mouse mode, simply hit ESC on your keyboard.
## Audio Options
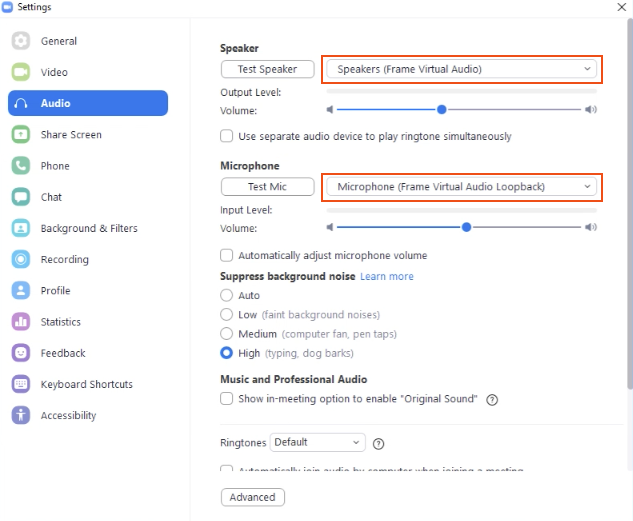
**Frame Virtual Audio**: Frame recognizes this device as the speaker. This audio device outputs all application and system sounds to the client computer's audio out.
**Frame Virtual Audio Loopback**: Frame recognizes this device as the microphone.
It is sometimes necessary to specify which audio devices you wish to use in an application. In those cases always ensure that Frame Virtual Audio is the output/speaker and Frame Virtual Audio Loopback is set as the input/microphone. See the below image for an example using Zoom.
If you are using an application which requires audio output from your speakers, you can enable sound output in your session by clicking on the speaker icon on the bottom right corner of your Frame status bar.
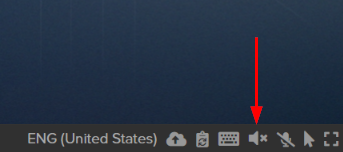
If you are using an application which requires audio input from your microphone, you can enable microphone input in your session by clicking on the microphone icon on the bottom right corner of your Frame status bar.
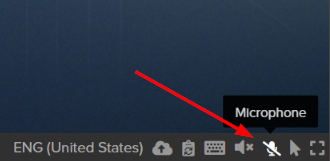
#### Microphone
This list displays all microphones connected to your endpoint device.

## Webcam Support
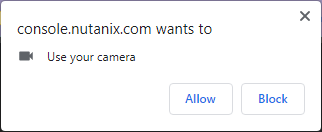
To enable webcam within your Frame session, simply click on the webcam icon. The first time you enable this feature, your browser will request you enable camera permissions for console.nutanix.com:
If you are accessing your webcam from an application (e.g., Zoom, Google Duo, Skype), you may see your webcam device show up as "Nutanix Frame Virtual Cam."

## Display Options
Multi-display configurations are useful for a variety of end user workflows. Frame's multi-monitor feature allows users to connect up to 4 displays at a time. End users may configure the display order as desired while in the session. This feature is supported by Frame App and the browser-based Frame Terminal.
### Using Multi-monitor
To use the multi-monitor feature, click on the Frame Gear Menu and then select **Manage Displays**.

Terminal > Gear MenuA new window will appear showing the display you are currently using. To add a new display, click the **Add** button to add a display. Alternatively, you can click **Auto Layout** button and let Frame Terminal create displays on up to 4 physically-connected monitors.
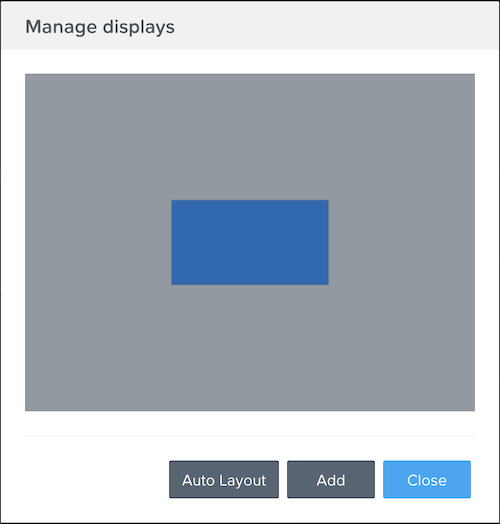
Terminal > Gear Menu > Manage displaysWith Enhanced Multi-monitor support, the user's browser will prompt the user to allow Frame Terminal to manage the windows on all displays before the second monitor can be created. The user only has to grant this approval the first time the second monitor is added in a Frame session.

Allow Manage WindowsSimply click on a display from the "Manage displays" window to verify your display order. The display you click on will be highlighted with a red outline in the browser window. [](https://docs.difr.com/uploads/images/gallery/2025-10/mm-7.png)
To remove a display, go to Manage Displays from the Frame Gear Menu and click the **X** (Close Window) in the top right corner of the display you wish to remove. Any applications will automatically be moved back to the main display.
If you are accessing your Frame account from Frame App, you will automatically be prompted to connect and configure your displays if multiple displays are detected.
### Multi-monitor Limitations
- Multi-monitor is not supported with Mozilla Firefox.
### Display Resolution
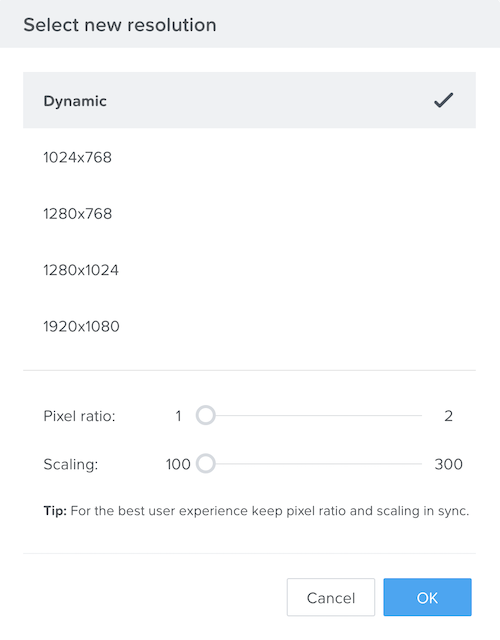
- **Dynamic**: Adjusts the resolution based on the size of your browser window (default setting).
- **Fixed**: Forces the display to a specific horizontal x vertical pixel resolution, regardless of the size of your browser window.
- **Pixel ratio**: Sets the remote Windows display resolution to the pixel ratio X your local display resolution.
- **Scaling**: Adjust this parameter value (100% to 300%) in order to change the Windows System > Display > "Change the size of text, apps, and other items" value to scale up for better readability for each monitor you are using.
### Terminal Settings
If your administrator enables the ability for users to change their own stream settings, you will see the following tab in Terminal Settings.
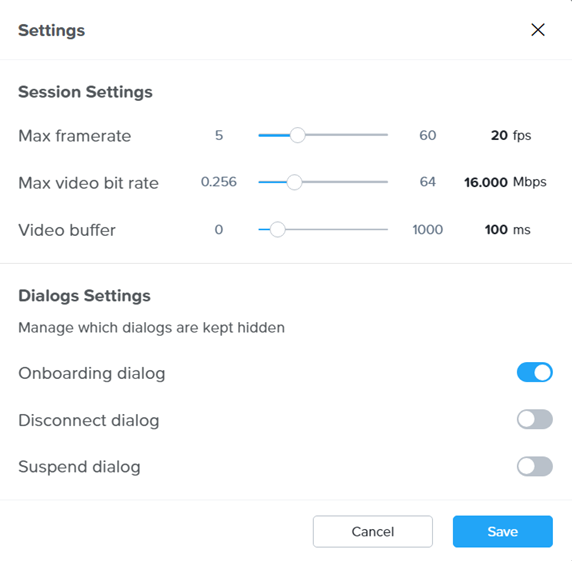
- **Max frame rate (fps)**: Sets the maximum frame rate for your session. The frame rate is defined as the number of frames displayed per second. Increasing the frame rate will increase the required bandwidth between your device and your [instance](https://docs.difr.com/books/platform-administrators-guide/page/vms) (remote virtual machine).
- **Max video bit rate (Mbps)**: Sets the maximum video bit rate (bandwidth) for your session. Increasing the frame rate will increase the required bandwidth between your device and your instance.
- **Video buffer (ms)**: Buffers the video stream from your instance in your browser or Frame App to improve the smoothness of video stream over a low quality network. However, depending on the amount of video buffering you add, you may notice delays in the display changing when you move your mouse, click on your mouse buttons, or type on your keyboard.
## Storage Options
### Personal Drives
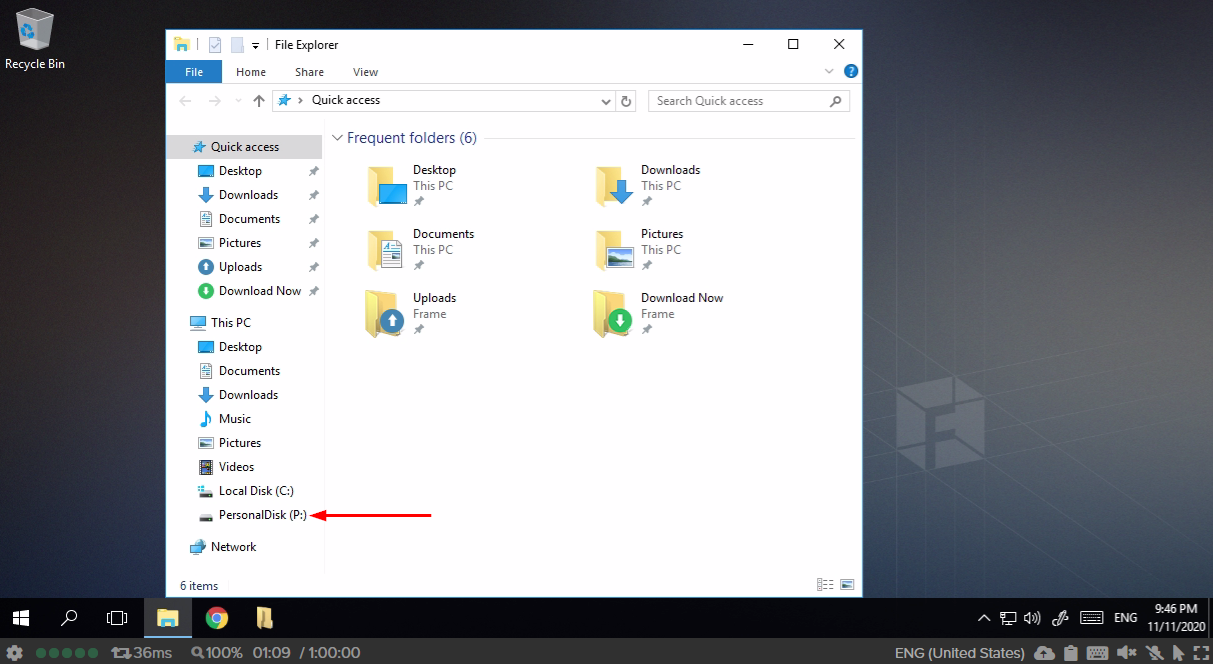
Your Personal Drive is tied to your Frame account and can be used from the session just like a regular storage drive on your local computer. Simply navigate to your file explorer in your Frame session and look for the "PersonalDisk (P:)" drive.
As an end user, you are automatically granted the permissions to manage your own Personal Drive backups. You can do this from your profile page.
### Network Share Drives
As the title of this section suggests, a network share drive is a shared volume which can be accessed by multiple Frame account end users. This drive is configured and managed by the administrator of the account. It appears simply as an additional volume in your file explorer and can be accessed just like any other drive (from your file explorer or while browsing files in an application).
## Accessing Files
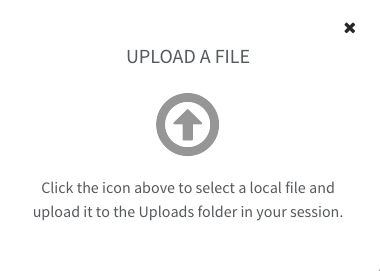
With most browsers you can simply drag and drop a file from your local desktop onto your Frame session's browser window to initiate an upload. Alternatively, you can click on the file upload icon and the following pop-up will explain what to do next:
- Once the file has been uploaded, you can access it directly in your application by using the app's file manager or navigating to the "Uploads" folder in the Favorites section.
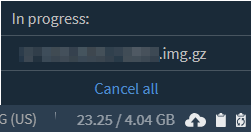
- If needed, you can cancel the file upload by clicking on the progress indicator. A small dialog will appear with the option to "cancel" or "cancel all."
- You can drag any files from your local Frame session to the "Download Now" folder to download it to your local machine. Your browser window will show the file being downloaded to your local computer automatically.
#### Limitations
As mentioned in the section above, cloud storage drives, network share drives, and Personal Drives all appears as mounted drives in your Frame session. Accessing your files from a mounted drive is simple. Start by opening your file explorer, then navigate to the desired drive. You may also access this drive from within an application.
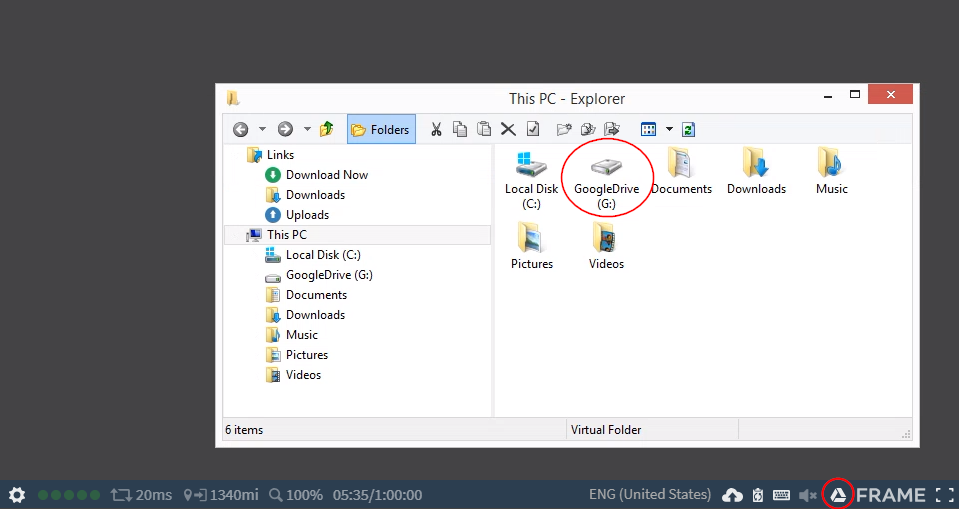
Since there are a few variations of the Google Drive integration, you may or may not have to enter your account credentials every time you log on to your session (depending on your account configuration).
## Clipboard Integrations
First, click on the clipboard icon located on the right side of your Frame status bar.

As you may already know, you can also copy text from your local computer to your Frame session using the opposite method. Once you have copied your desired text from your local machine, go back to your session and click on the clipboard icon. Paste the text into the box on the *left*. The dialog will display a "Pasted!" message if the text was pasted successfully.
### Clipboard Sync
You can enable/disable clipboard sync in your session by clicking on the icon in the lower right corner.

- Depending on your account configuration, some administrators may only allow you to copy/paste in *one direction.* For example, an administrator may only allow their end users to paste from local to remote, but not from remote to their local environment.
- In order to use Ctrl + C and Ctrl + V to copy files within your Frame session you must have clipboard sync *disabled.* You can still copy/paste files by right-clicking and selecting the desired action from the context menu.
- Due to browser limitations, clipboard sync only transfers plain text between your local environment and your Frame session. Any text formatting will be stripped between environments.
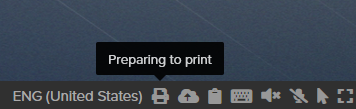
## Printing from your Session
When you click "Print," the virtual printer will automatically create a .PDF file and prepare to push it to your local browser. A printer icon and notification will appear at the bottom of your screen: